

I've decided to document my exploits into making my own DIY acoustic panels in the hope that it helps other people who hate DIY as much as I do!
I wanted to take August off so that I could finish the studio and the rest of the new place but I had such a busy month. The 'busyness' continues so I have no option other than to squeeze finishing off things, in between repairs, service and mod' building.
I only have the lounge, two cloakrooms and the hallway to do but with people wanting to record here, I urgently need to finish off the studio part of the new house.
Everything's in place, wired up and working great. I just love the sound of well, everything! 🙂 I do however, have to acoustically treat three rooms; the mic room, the keyboard room and the control room.
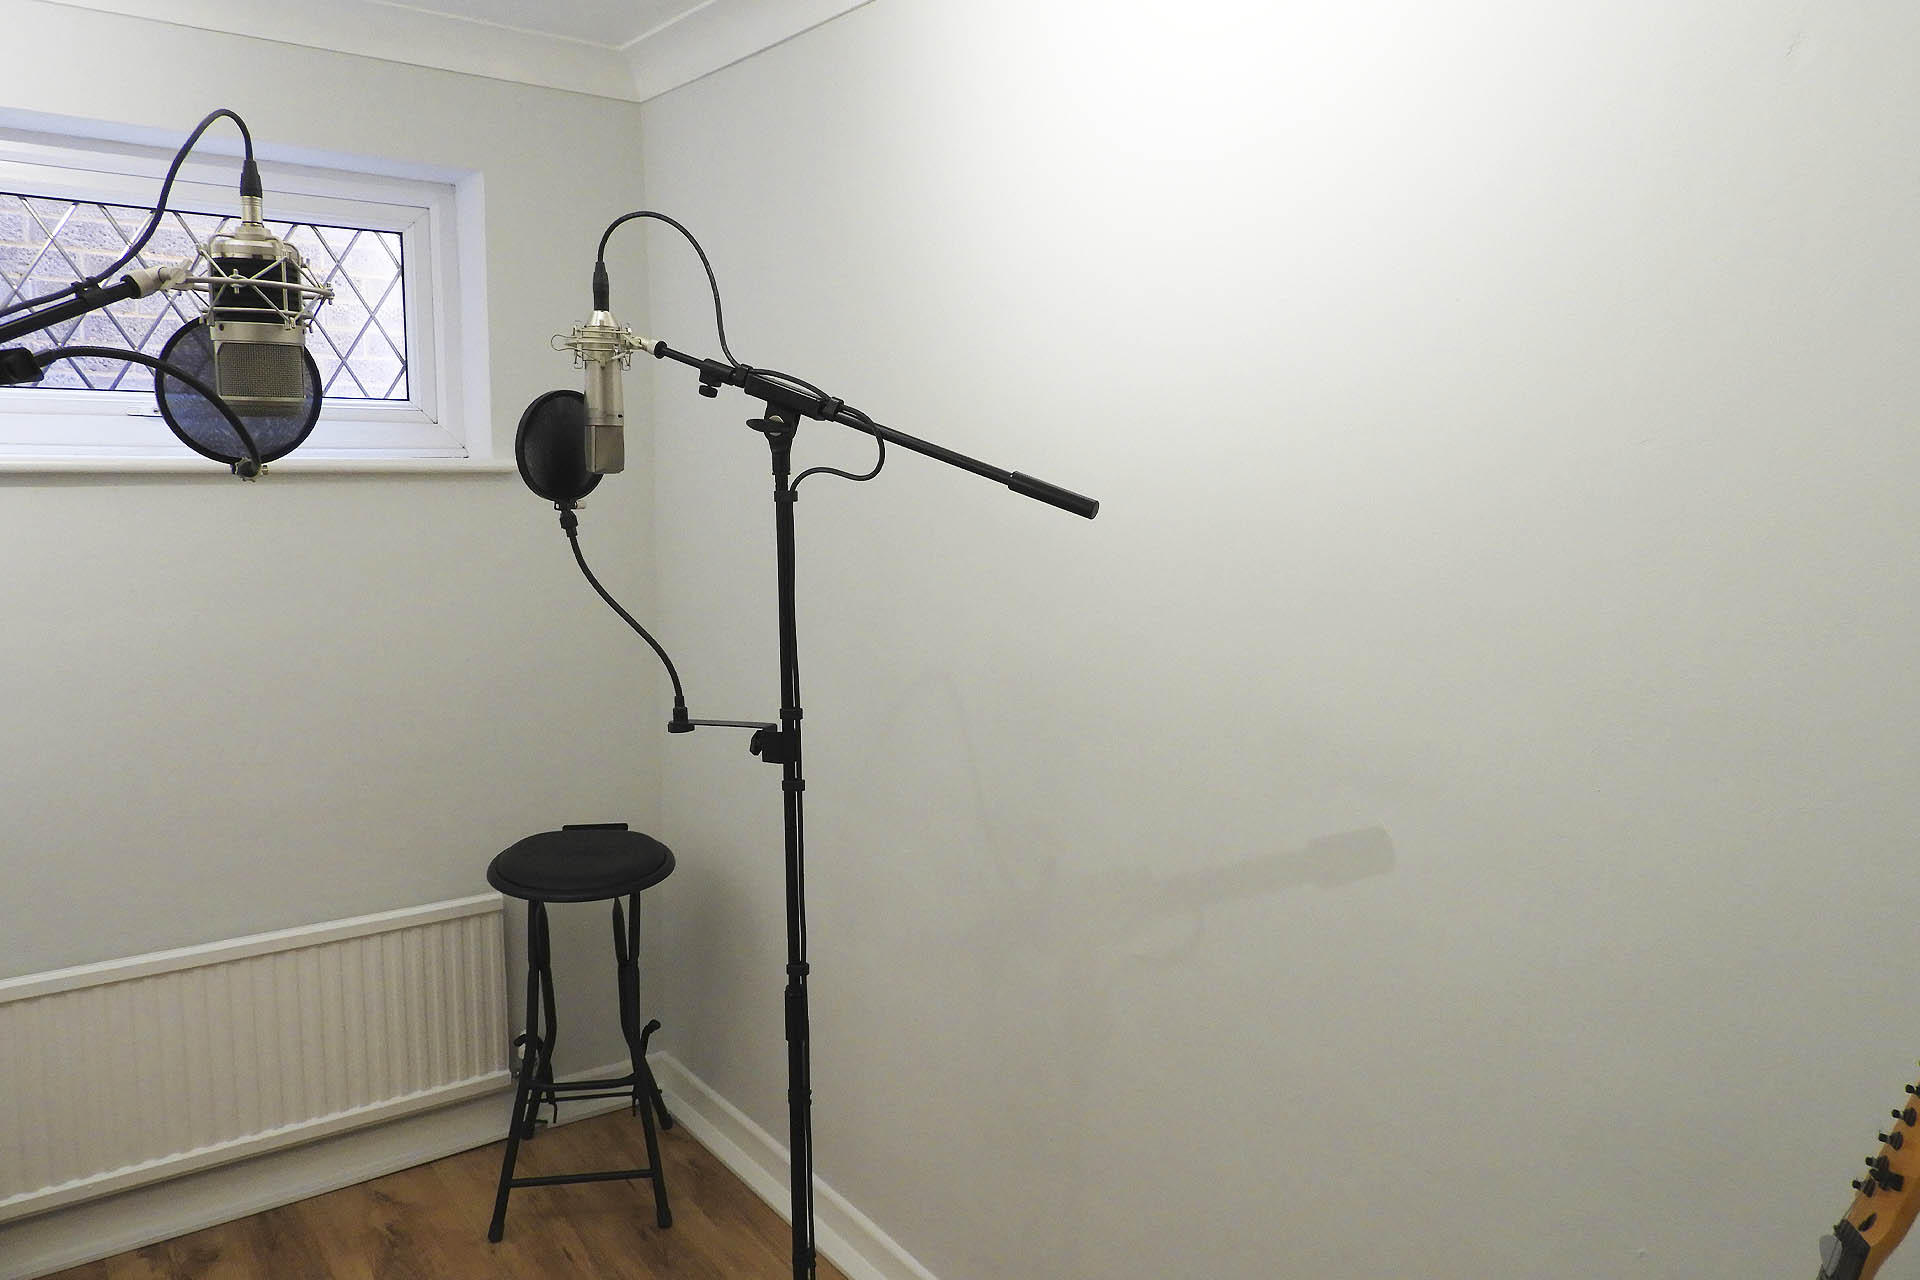
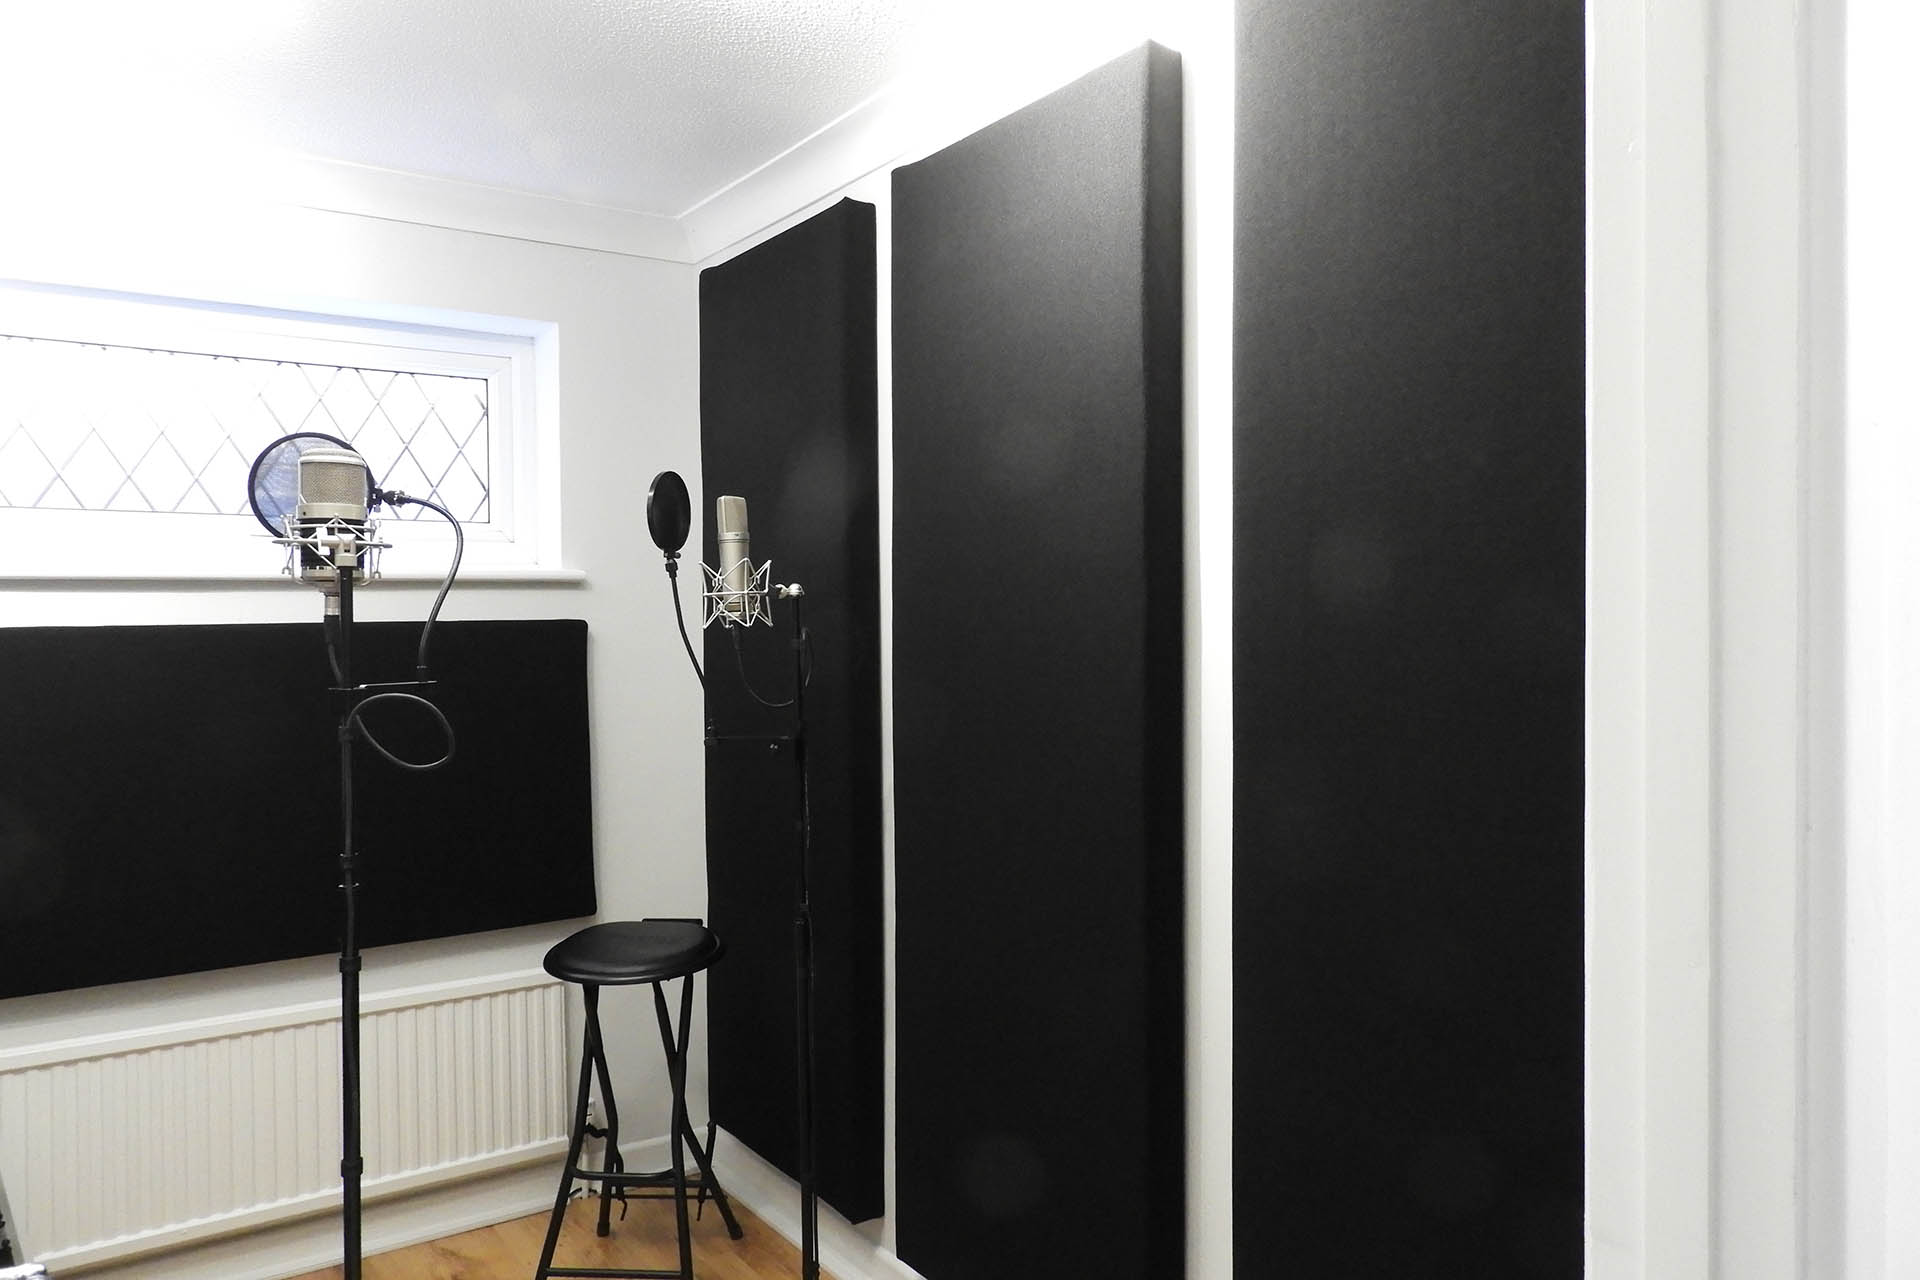
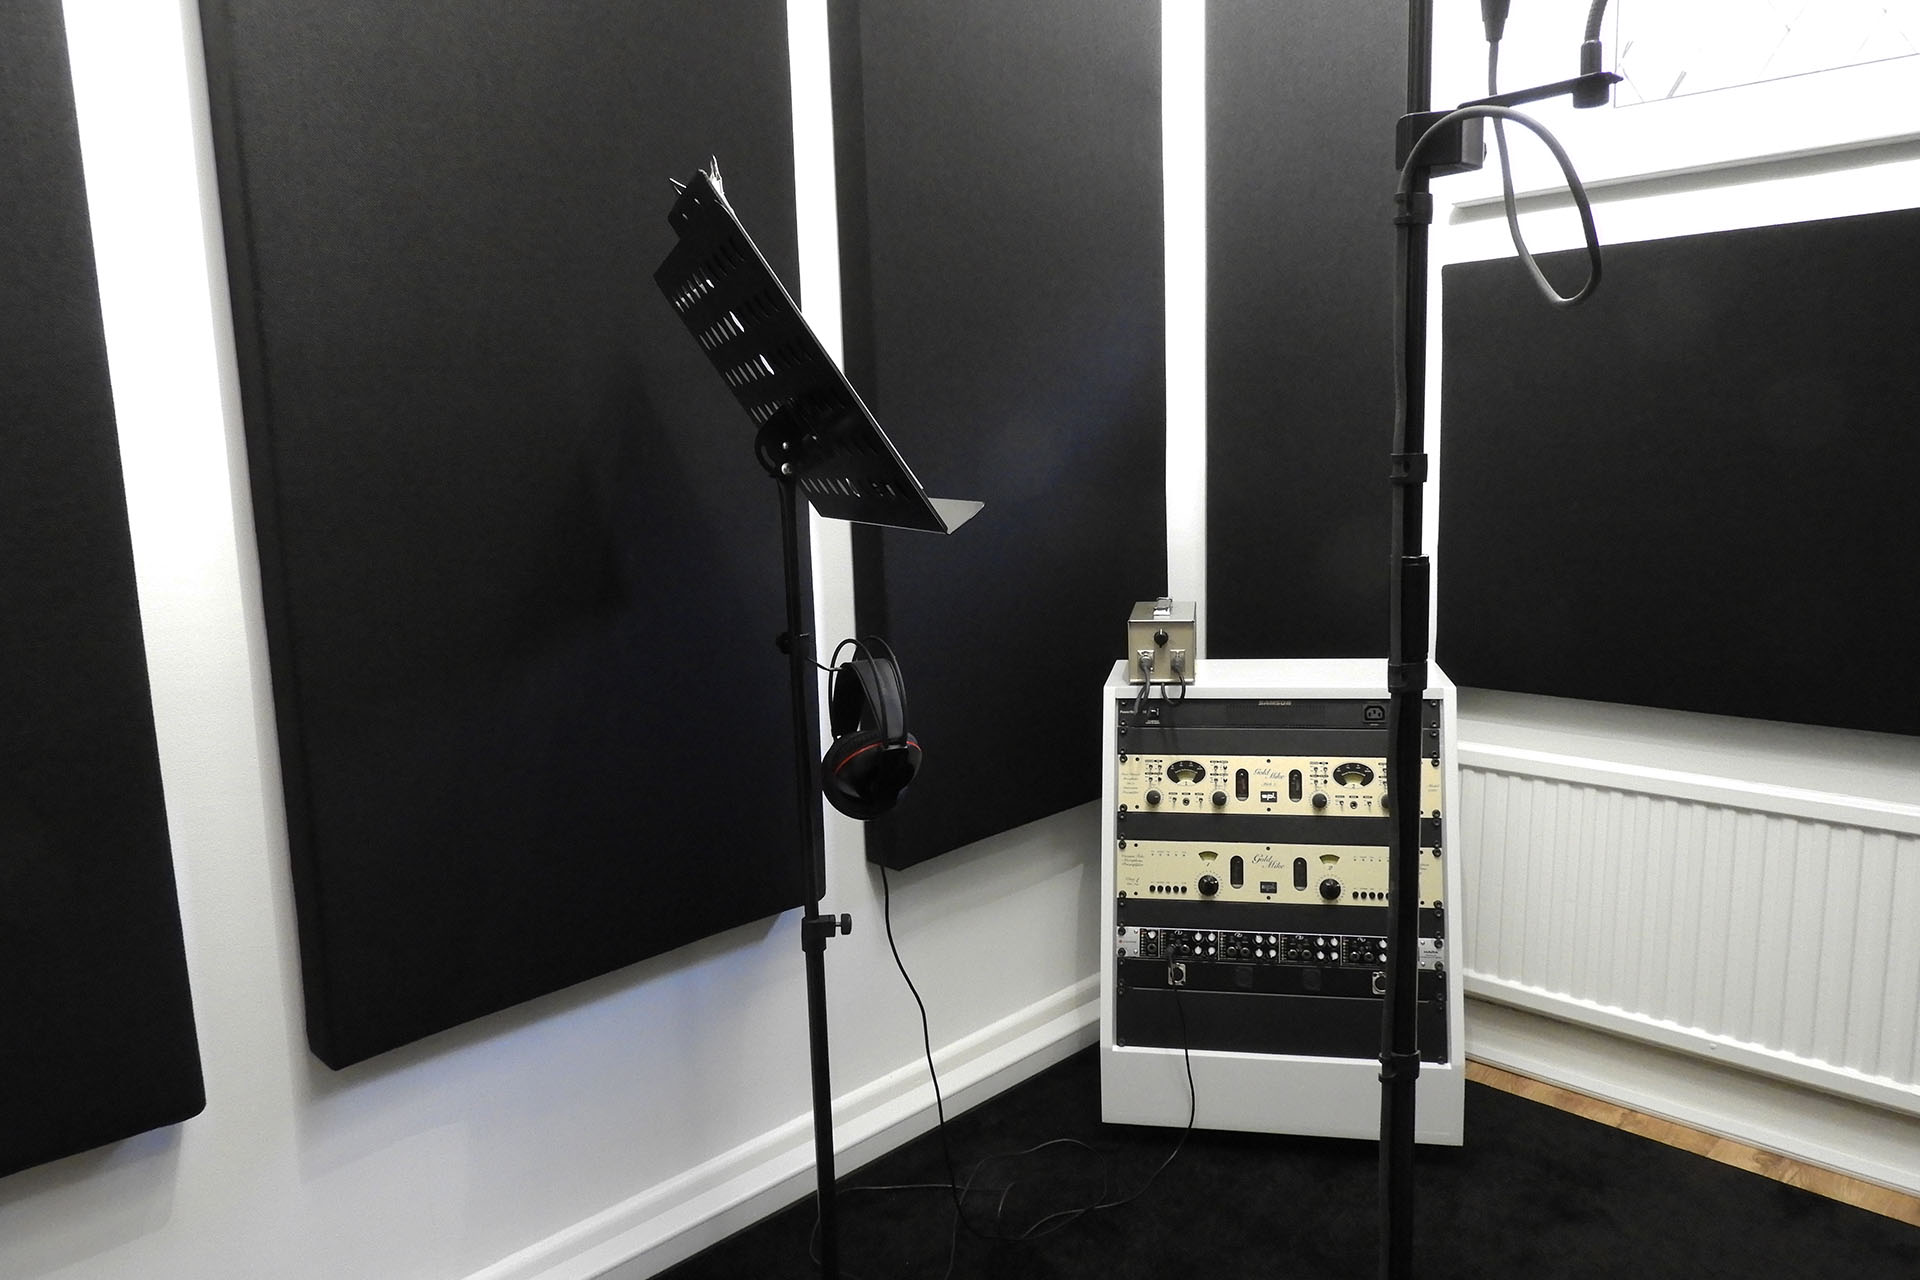
My intention is to mount three 2m x 0.7m panels on the wall pictured above and three 1.7m x 0.7 meters on the wall opposite. After doing some tests and experimenting, I know I'm going to need some smaller in-fill panels . There's also a 'spring' sound coming off that wooden floor. Anyway, I'm going to get the main six panels in place and take things from there.
I was going to do the 'lazy' thing and just glue foam tiles to the walls but I've always been envious of studios with those lovely looking acoustic panels. The new place looks fantastic and I feel that I should at least try to do it justice when it comes to acoustic treatment. Hence, I decided to do something stupid and build my own acoustic panels.
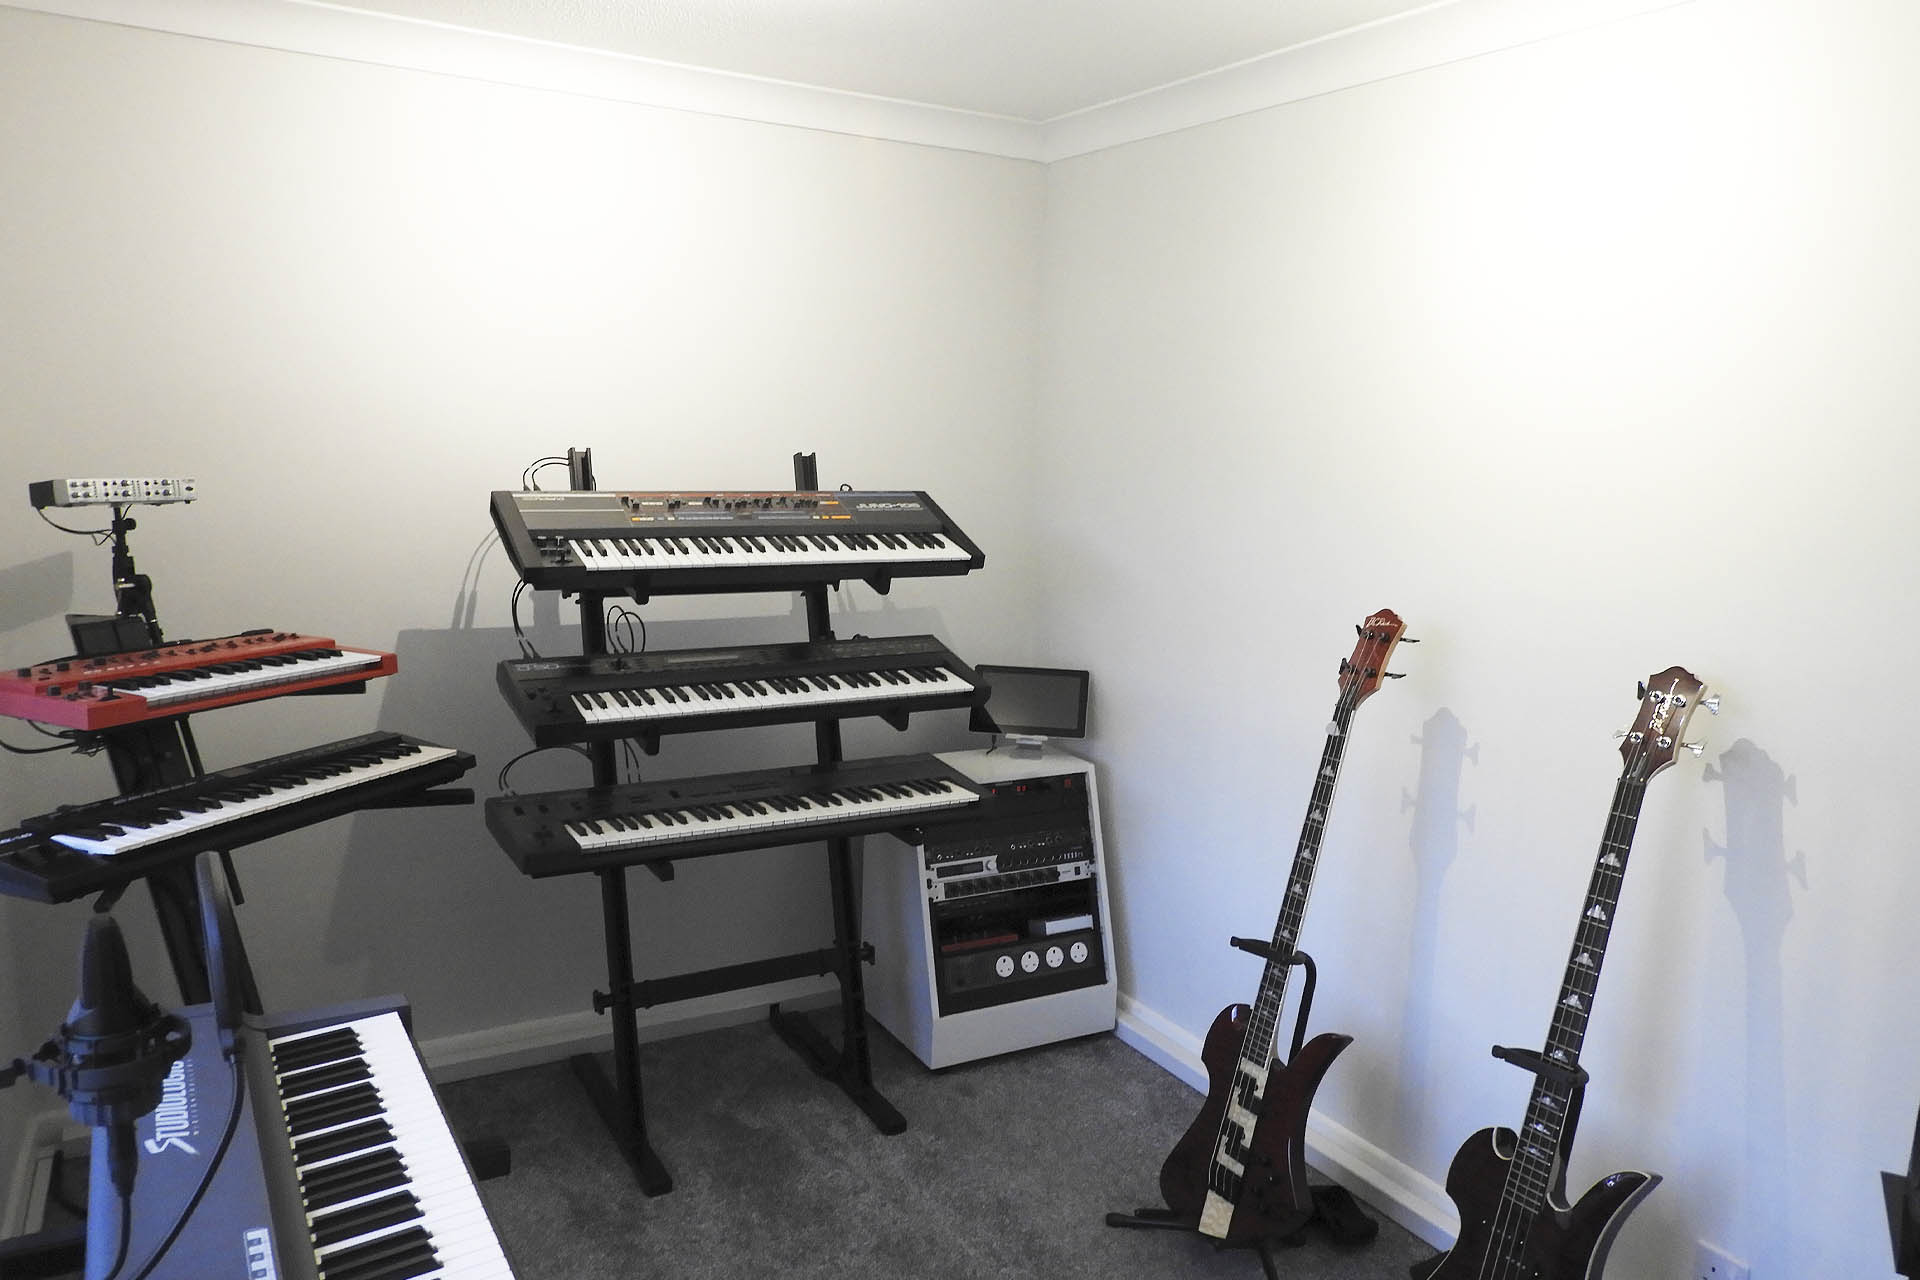
The wall behind the basses is going to get either three vertically mounted panels or two horizontally mounted panels. Once they're in place, I'll need to see if the area above the keyboards will need treatment. I think it might. 🙁
You'll recall from previous (DIY) posts, that I have a severe aversion to DIY but as has also been mentioned in those posts, "sometimes a man's got to do what a man's got to do..." Well, I didn't put it quite like that.
So, as you do now-a-days, I went on-line and found this excellent You Tube video which described in sufficient detail, how to make your own DIY acoustic panels. I thought it was great and it seemed that at last I'd found a resource which suggested that a DIY phobic like me, could actually do this. I studied it carefully and ended up implementing a few tweaks of my own. To prevent the cross pieces from twisting for example, I glued them as well as screwing them.
After deciding on placement, I measured up the three rooms and settled on two panel sizes; 2m x 0.7m and 1.7m x 0.7m. As suggested in the video, I'll be using Camira Cara acoustic cloth which is quite substantial so the final dimensions of the panels will be slightly larger than the frame sizes.
The reason I've got two different panel lengths, is that the 1.7m panels will offer a good gap on walls which have power outlets just above the skirting boards.
I started this post today and here's my first frame of twelve. This frame is for one of the 2m panels. Oh boy! What am I doing?
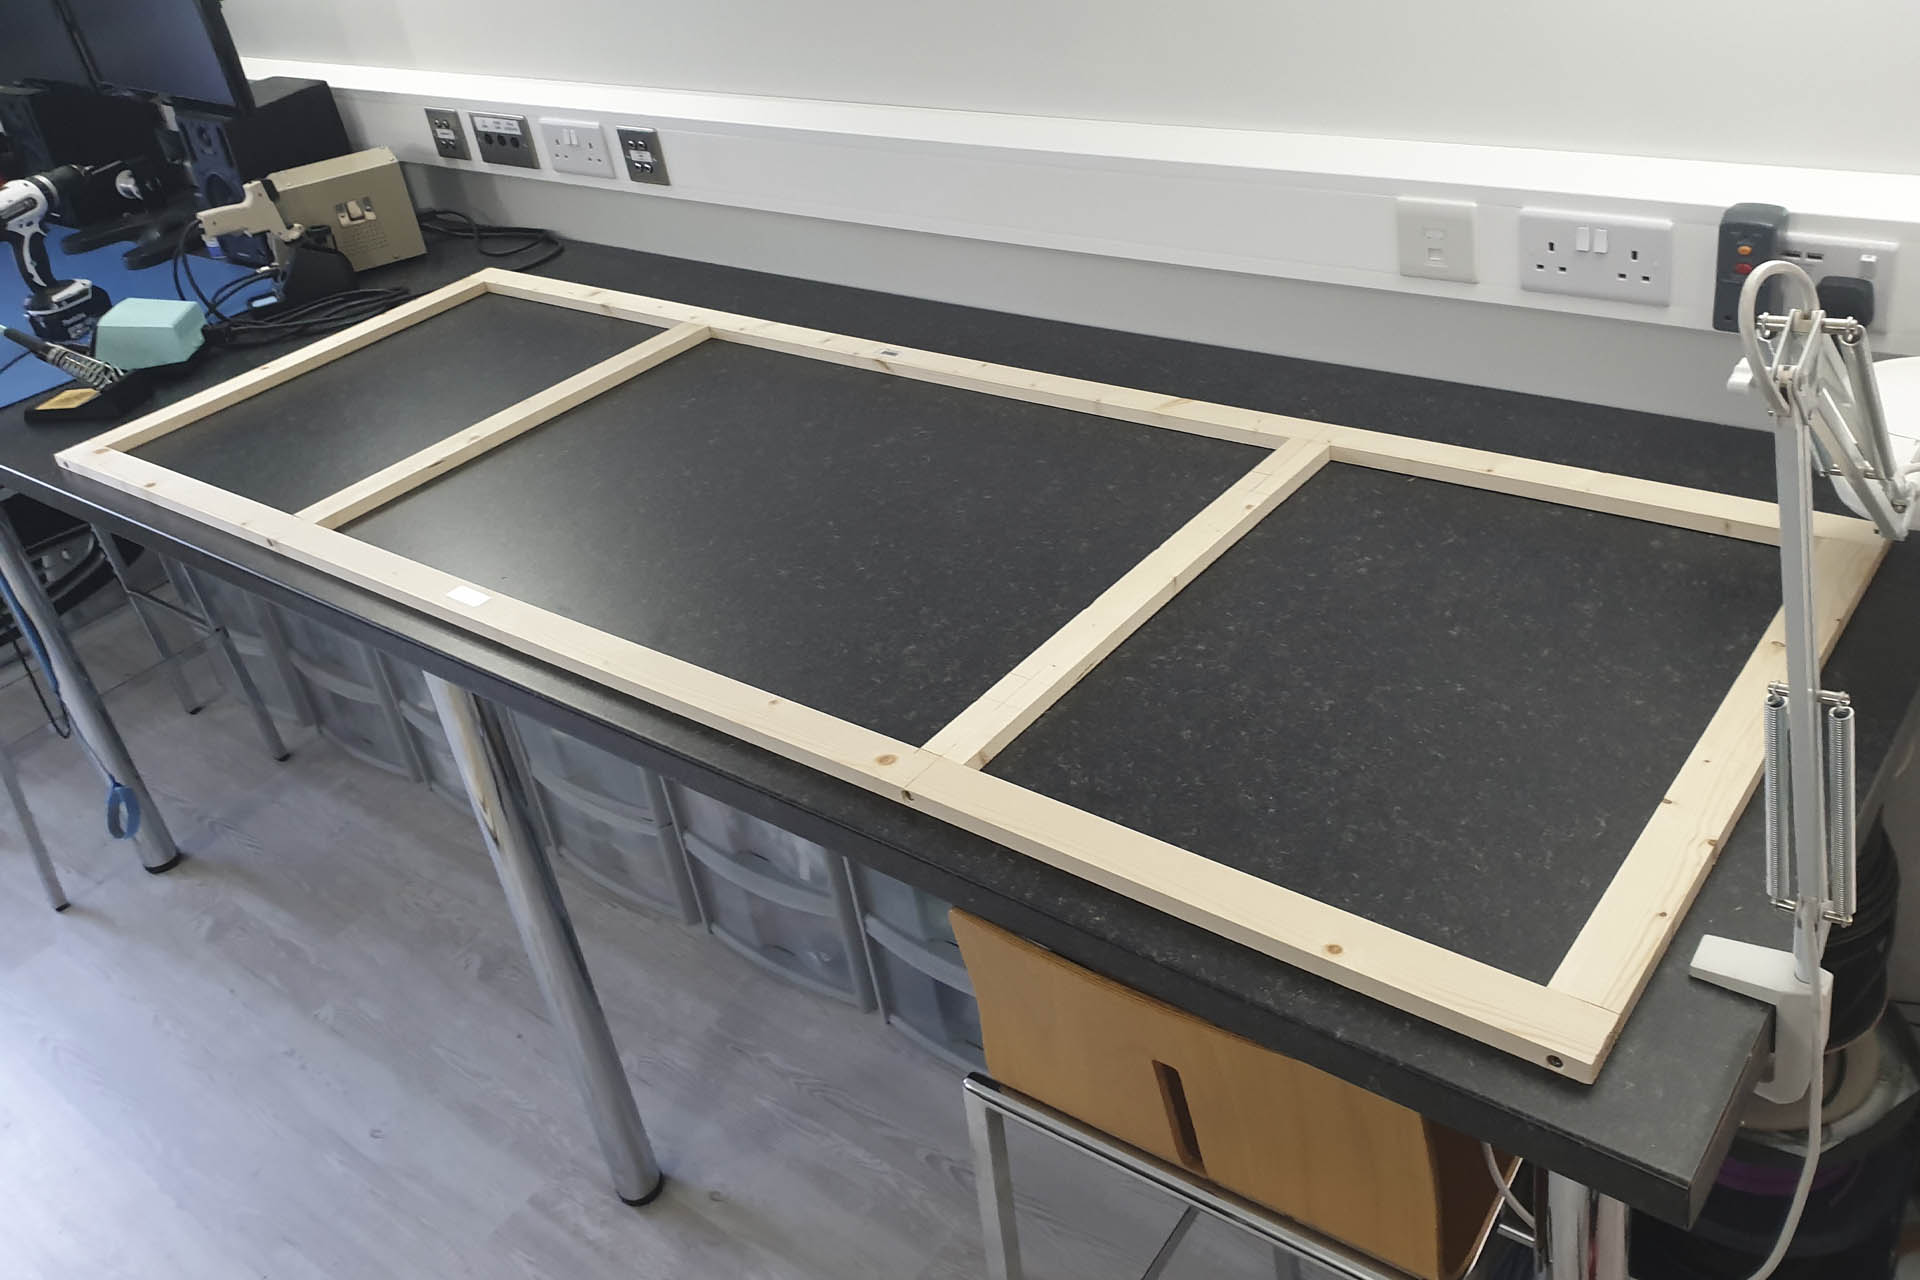
The wood is 44mm wide so I used M5 x 70mm countersunk wood screws and pre-drilled with a 2.5mm x 160mm drill-bit. Of course I didn't drill all the way to 160mm but that length seemed to be a standard size.
A WORD OF CAUTION... That's a long, thin and BRITLE piece of metal, so be careful! The reason I used a long drill bit like this, is because it has to go through 44mm of wood and then some more into the other piece of wood. There's no point in pre-drilling if you don't remove the wood so you need to extract the drill bit a couple of times when you're doing this but PLEASE take it easy. Don't push the drill bit. Let it find its own path.
The panels should of course, be at the same level when hung and I wasn't sure how I could guarantee that, implementing the picture wire and eyelets in between the upright struts method, as featured in the video. Varying tensions of the wires would surely mean that some panels would 'sag' more than others. I'm guessing that if I use longer eyelets, I can screw them further into the wood to increase the tension of the picture wire. Hmm... I guess I should get to the end of this and find out how much one of my bigger panels weighs. I can then suss out appropriate fixing hardware.
Anyway, if things go according to plan (yeah, right), I'll be adding to this post over the next few days. If your interested in making your own DIY acoustic panels, please stay tuned. I'm in the UK and have bought all the materials locally.
UPDATE - 16th September 2022
Originally I was going to cut all the wood for my DIY acoustic panels, make all the frames in one go, staple the backing on all twelve panels, etc, etc. Keen to see results as soon as possible, I then decided that I'd make these panels in batches of three. Unfortunately, there's been a hold-up with the foam and I have a few days wait, so I might as well go back to plan A.
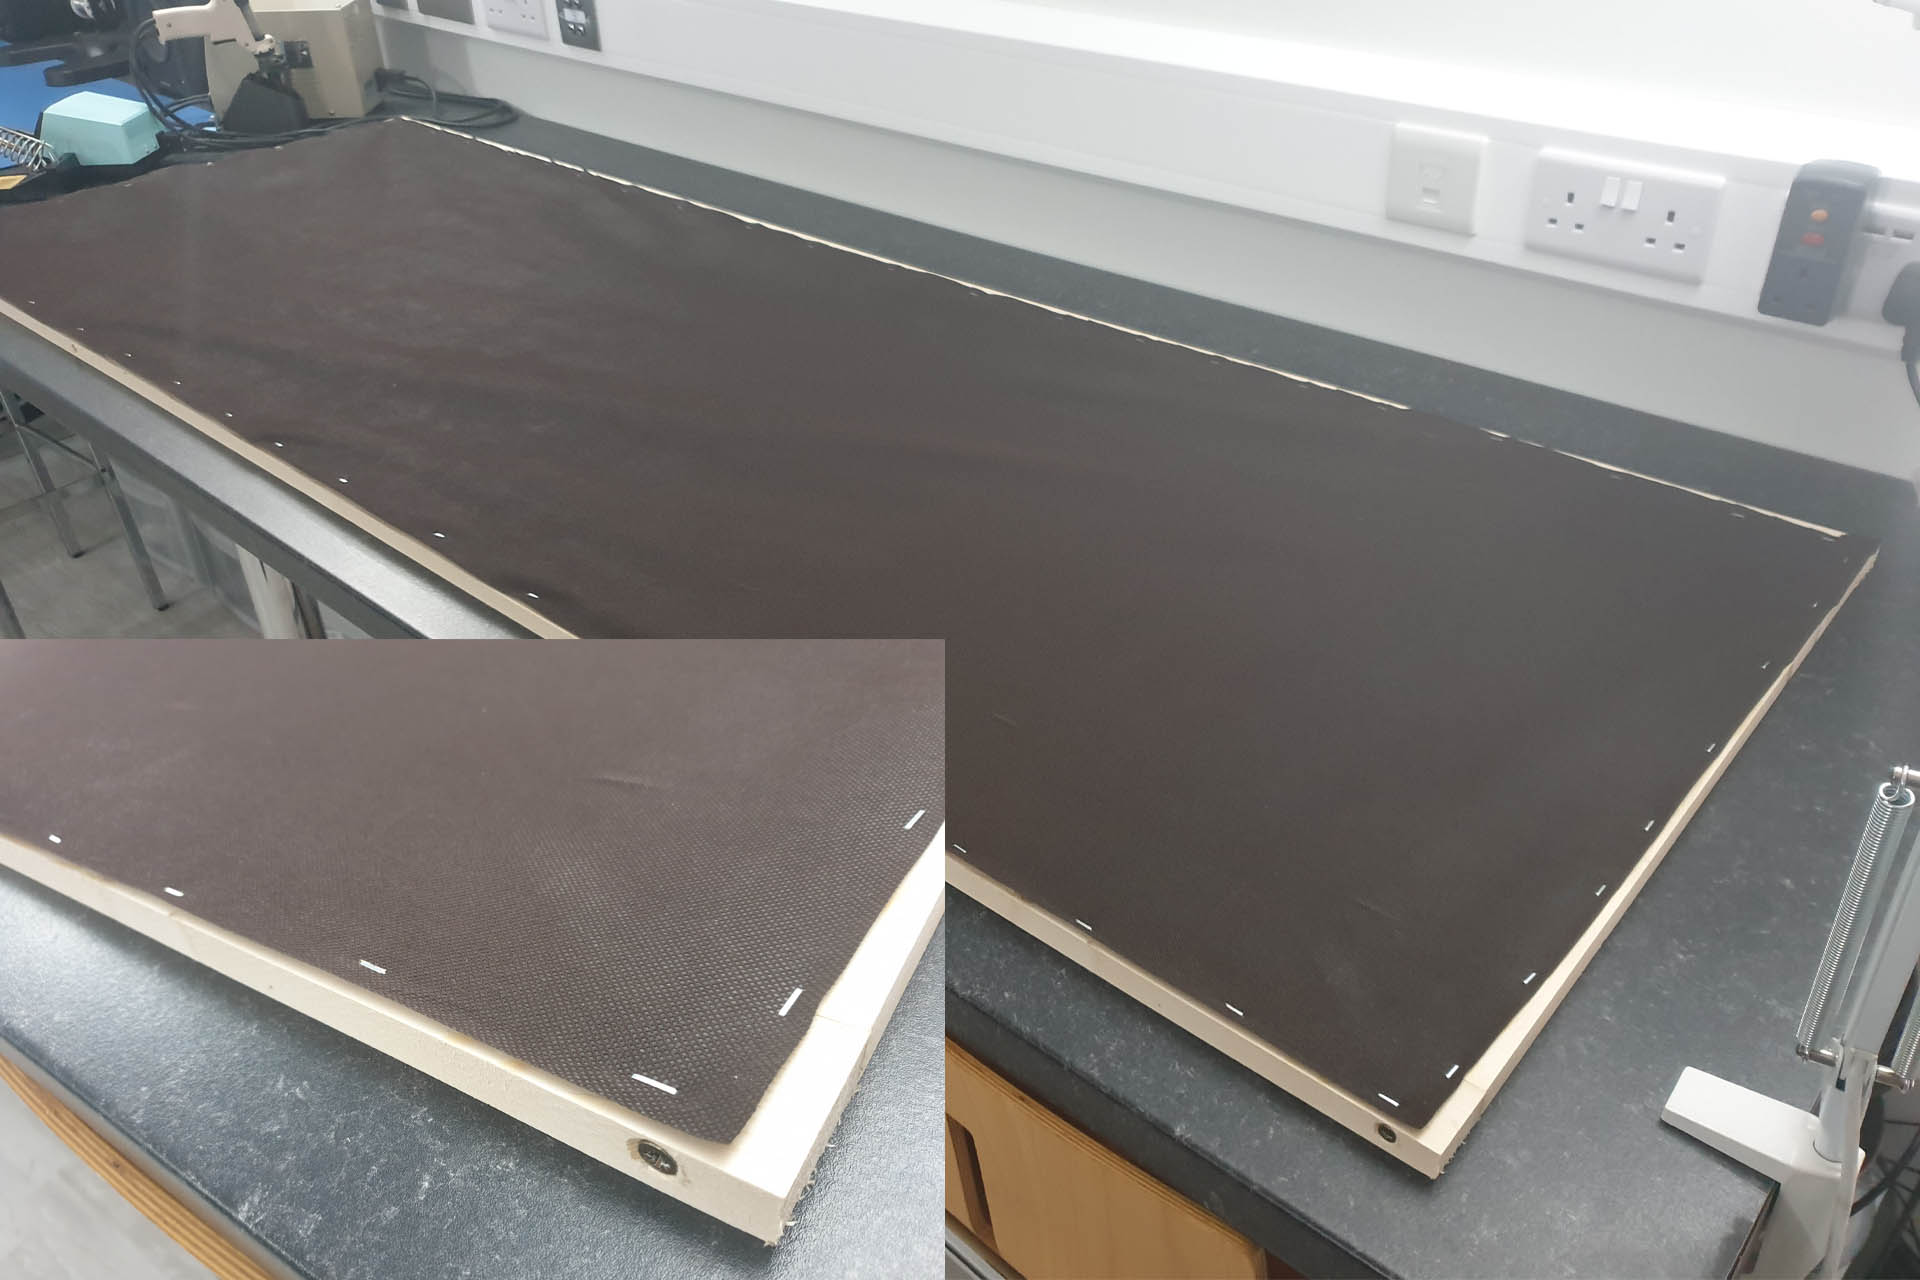
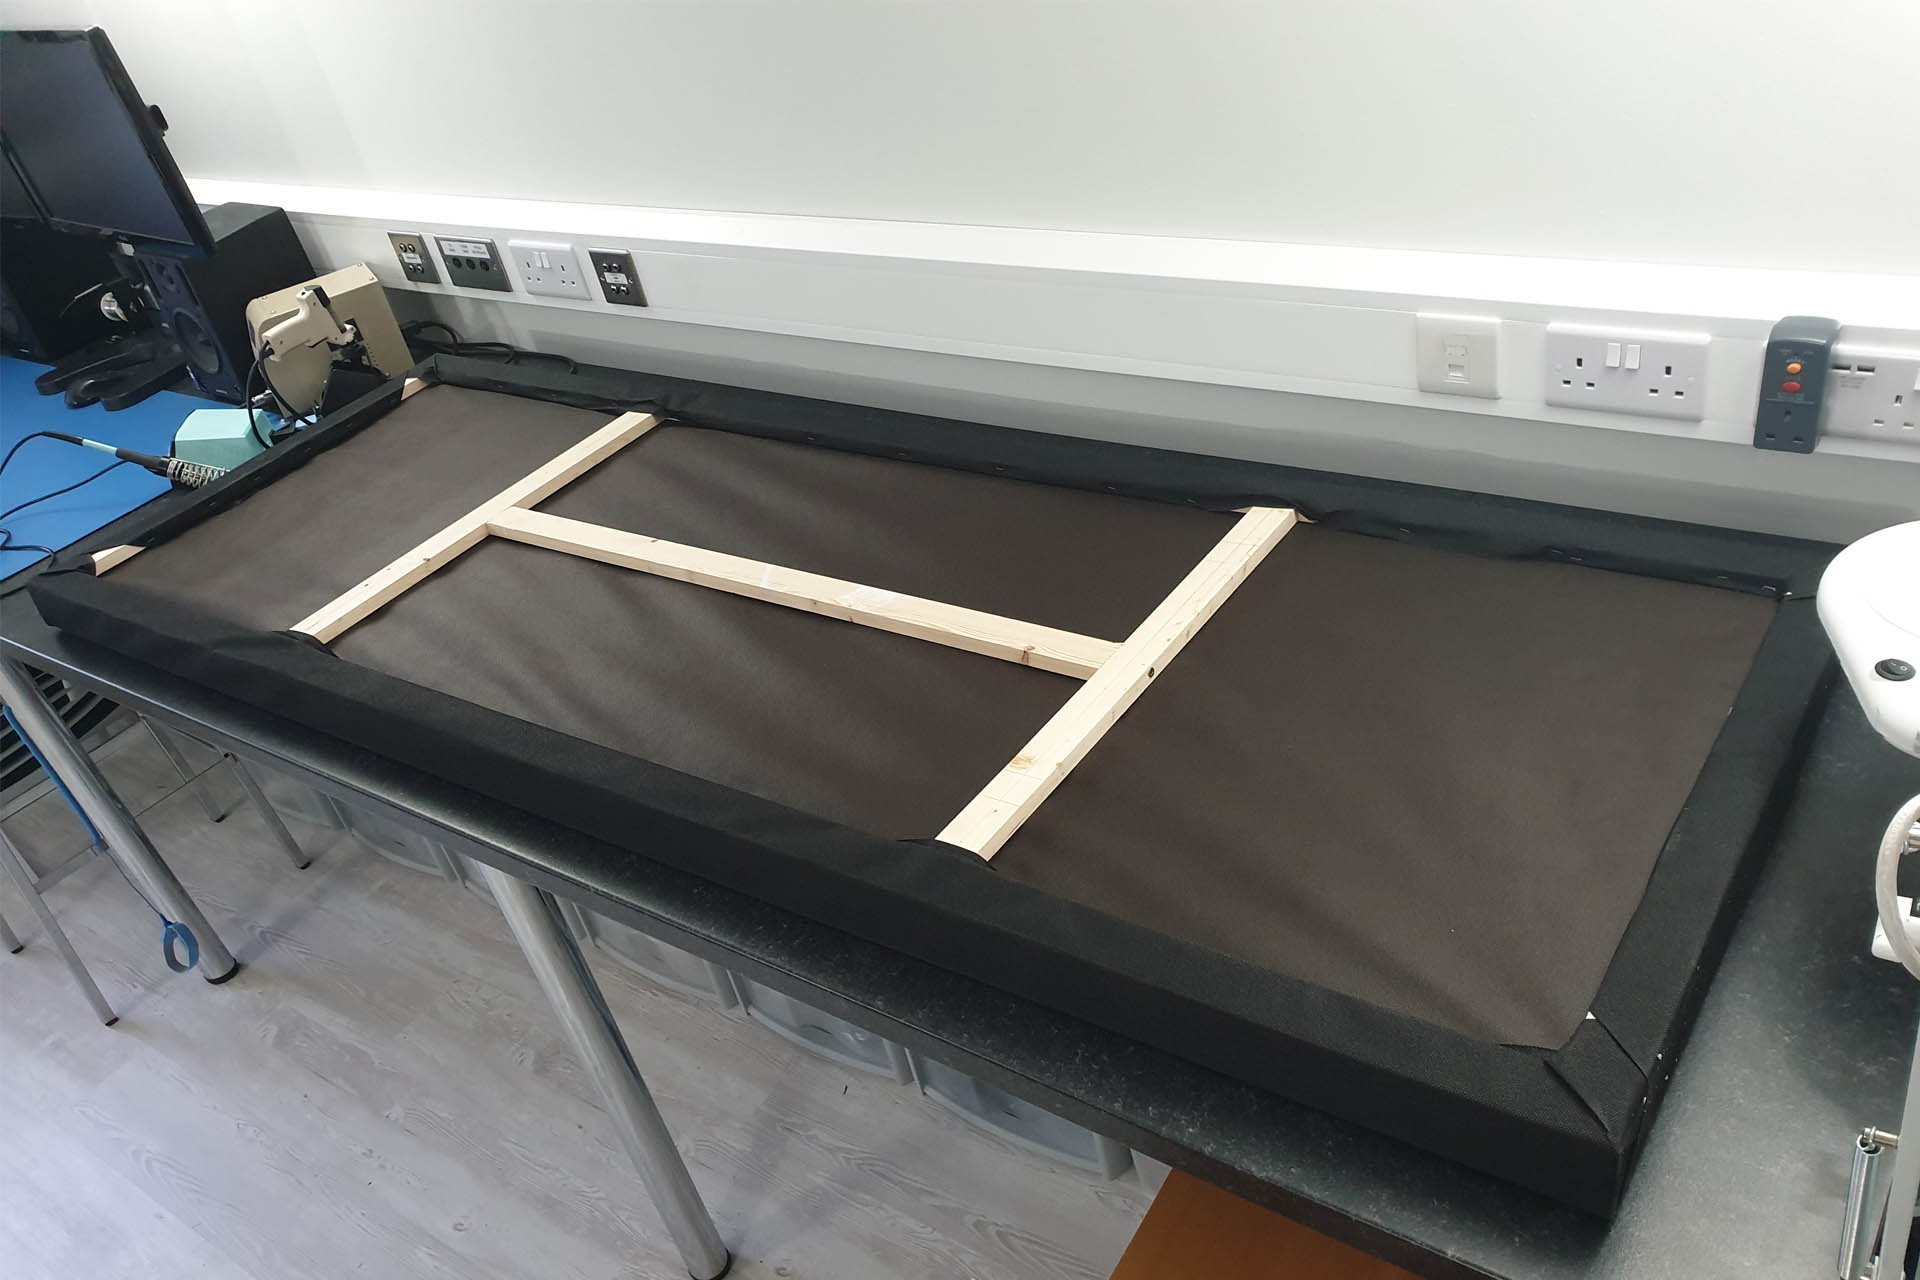
Having said all that, I thought I'd suss out stapling the weed membrane on to the frames so pictured below is a frame with just ordinary weed membrane stapled on to what's going to be the inside of one of the 2m panels. Keeping the membrane as taught as possible whilst stapling was a little challenging.
NOTE: I said 'ordinary weed membrane' but it's not as simple as that! There are several types of membrane which can be put into one of two categories; a very plasticky type and another that's more like a fabric textile. The former while cheaper, is more difficult to work with, frays quite a bit and I doubt that it has any suitable acoustic qualities. After trimming, you'll have a lot of plastic bits to clean up. The slightly more expensive fabric type (that's shown in the video) is easy to work with and gives a super smart finish.
Hey, I haven't finished yet! You then need to look at the 'gsm' specification or 'grams per square meter' which should be between 80 and 90. You can get membrane which is like 50 gsm but you can pull it apart in your hands which is useless.
The first reel of membrane I bought was Gardman WeedStop Performance 75617. This was the last roll that the local Hillier Garden Centre had so I then went to B & Q and bought a 30m reel of Verve Performance Weed Control Fabric.
At this stage, I'm reluctant to buy the hardboard for the external perimeter as I want to lie the foam on top of a panel to check the overall height and hence, the height that the hardboard should be. The foam supplier is short of 40mm foam in the density I've bought and has offered me 50mm instead, for the same price. The thickness of the wooden frame is 17mm, so the hardboard will theoretically be either 57mm or 67mm (theoretically). Another wait. Grr...
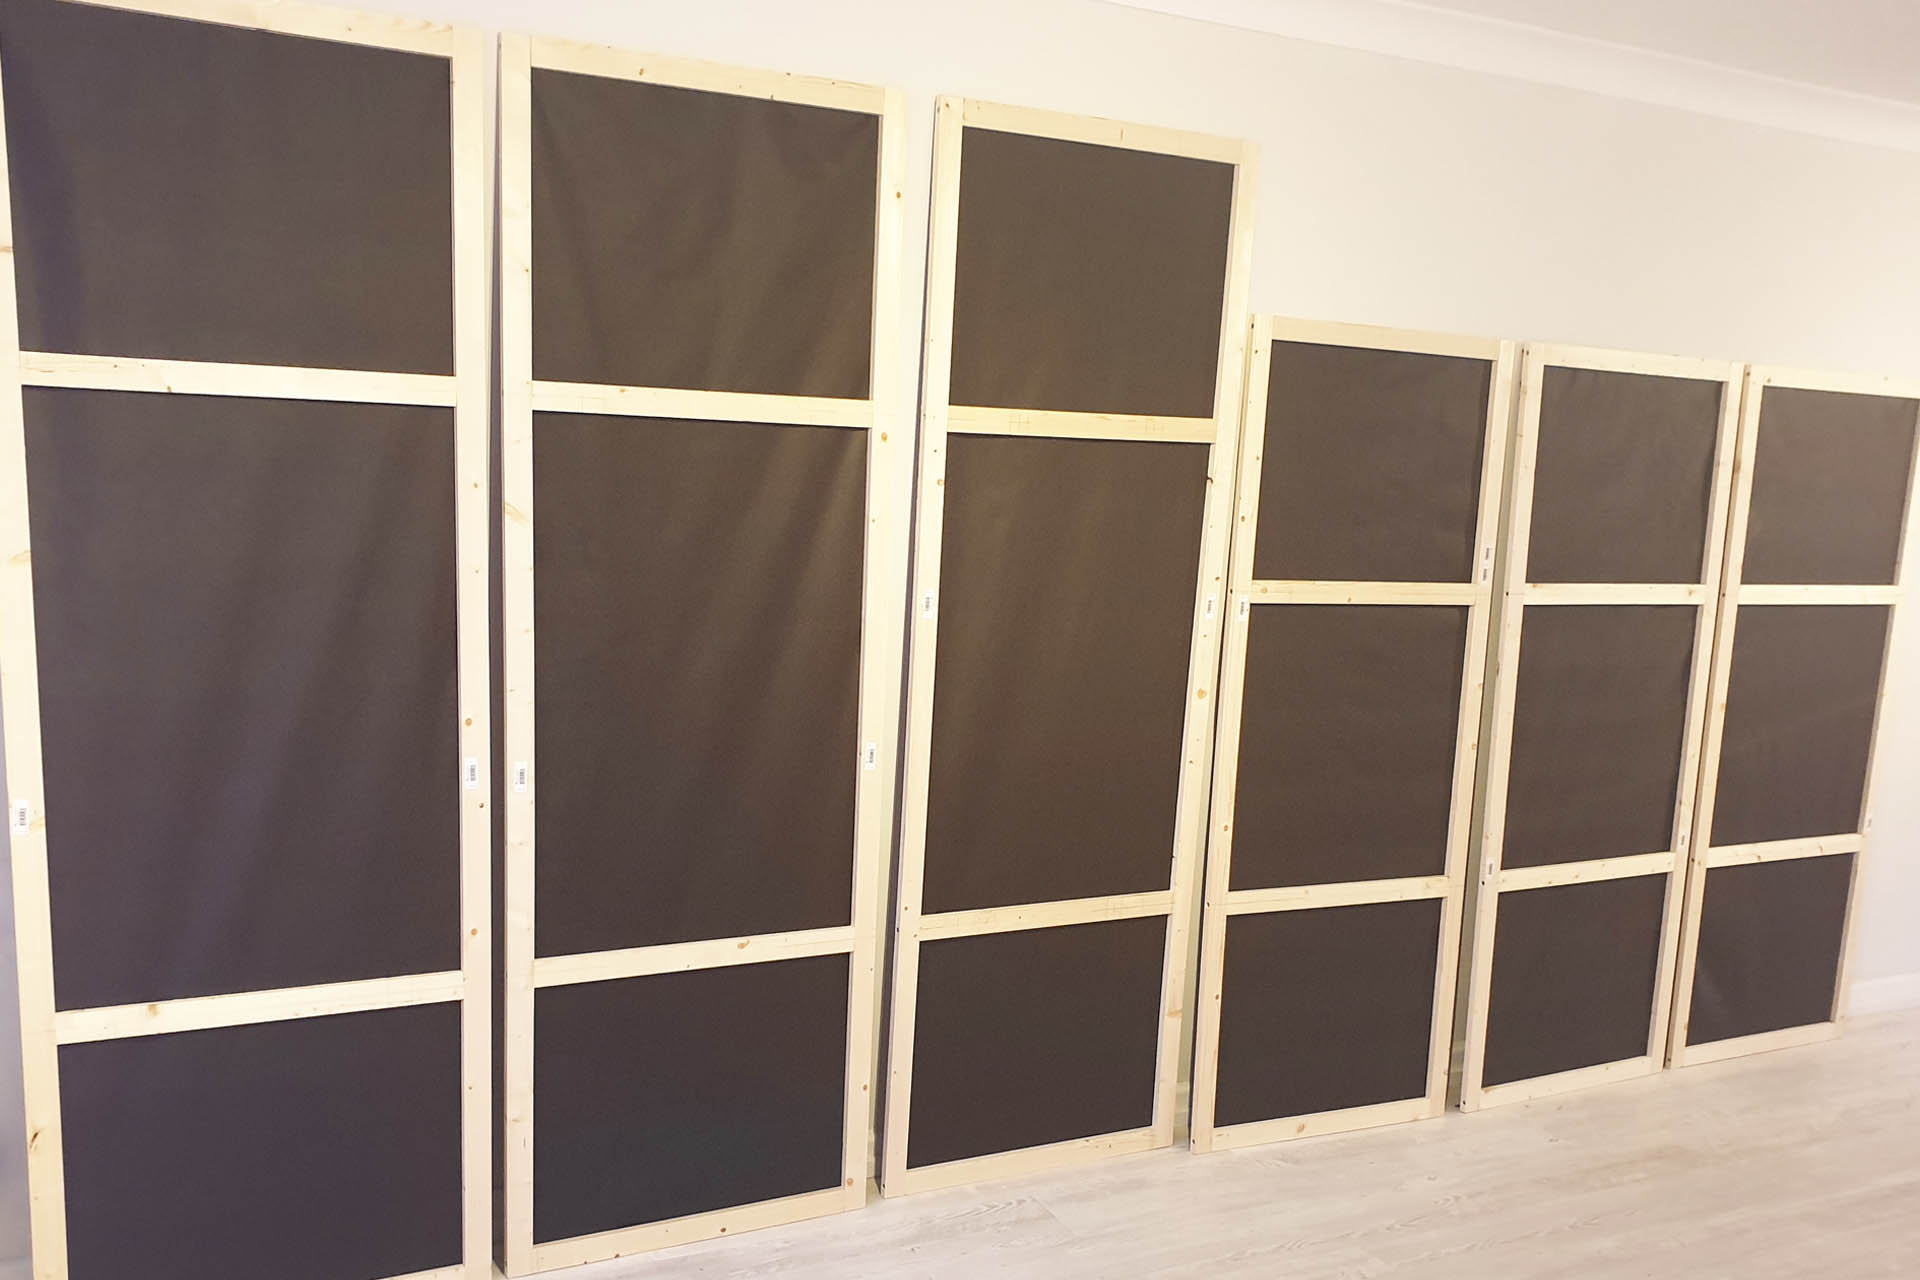
I've now made the frames for the six main panels for the mic. room; three 2m x 0.7m and three 1.7m x 0.7m.
At the end of the day, I contacted the foam supplier and told them that I've decided to go with their offer of the thicker 50mm foam. I've still got a few days wait before it arrives. Time to get on with a few repairs, I guess.
UPDATE - 22nd September 2022
Six days, yes SIX days since my last post and the foam has finally arrived. It's a lot heavier than I expected!
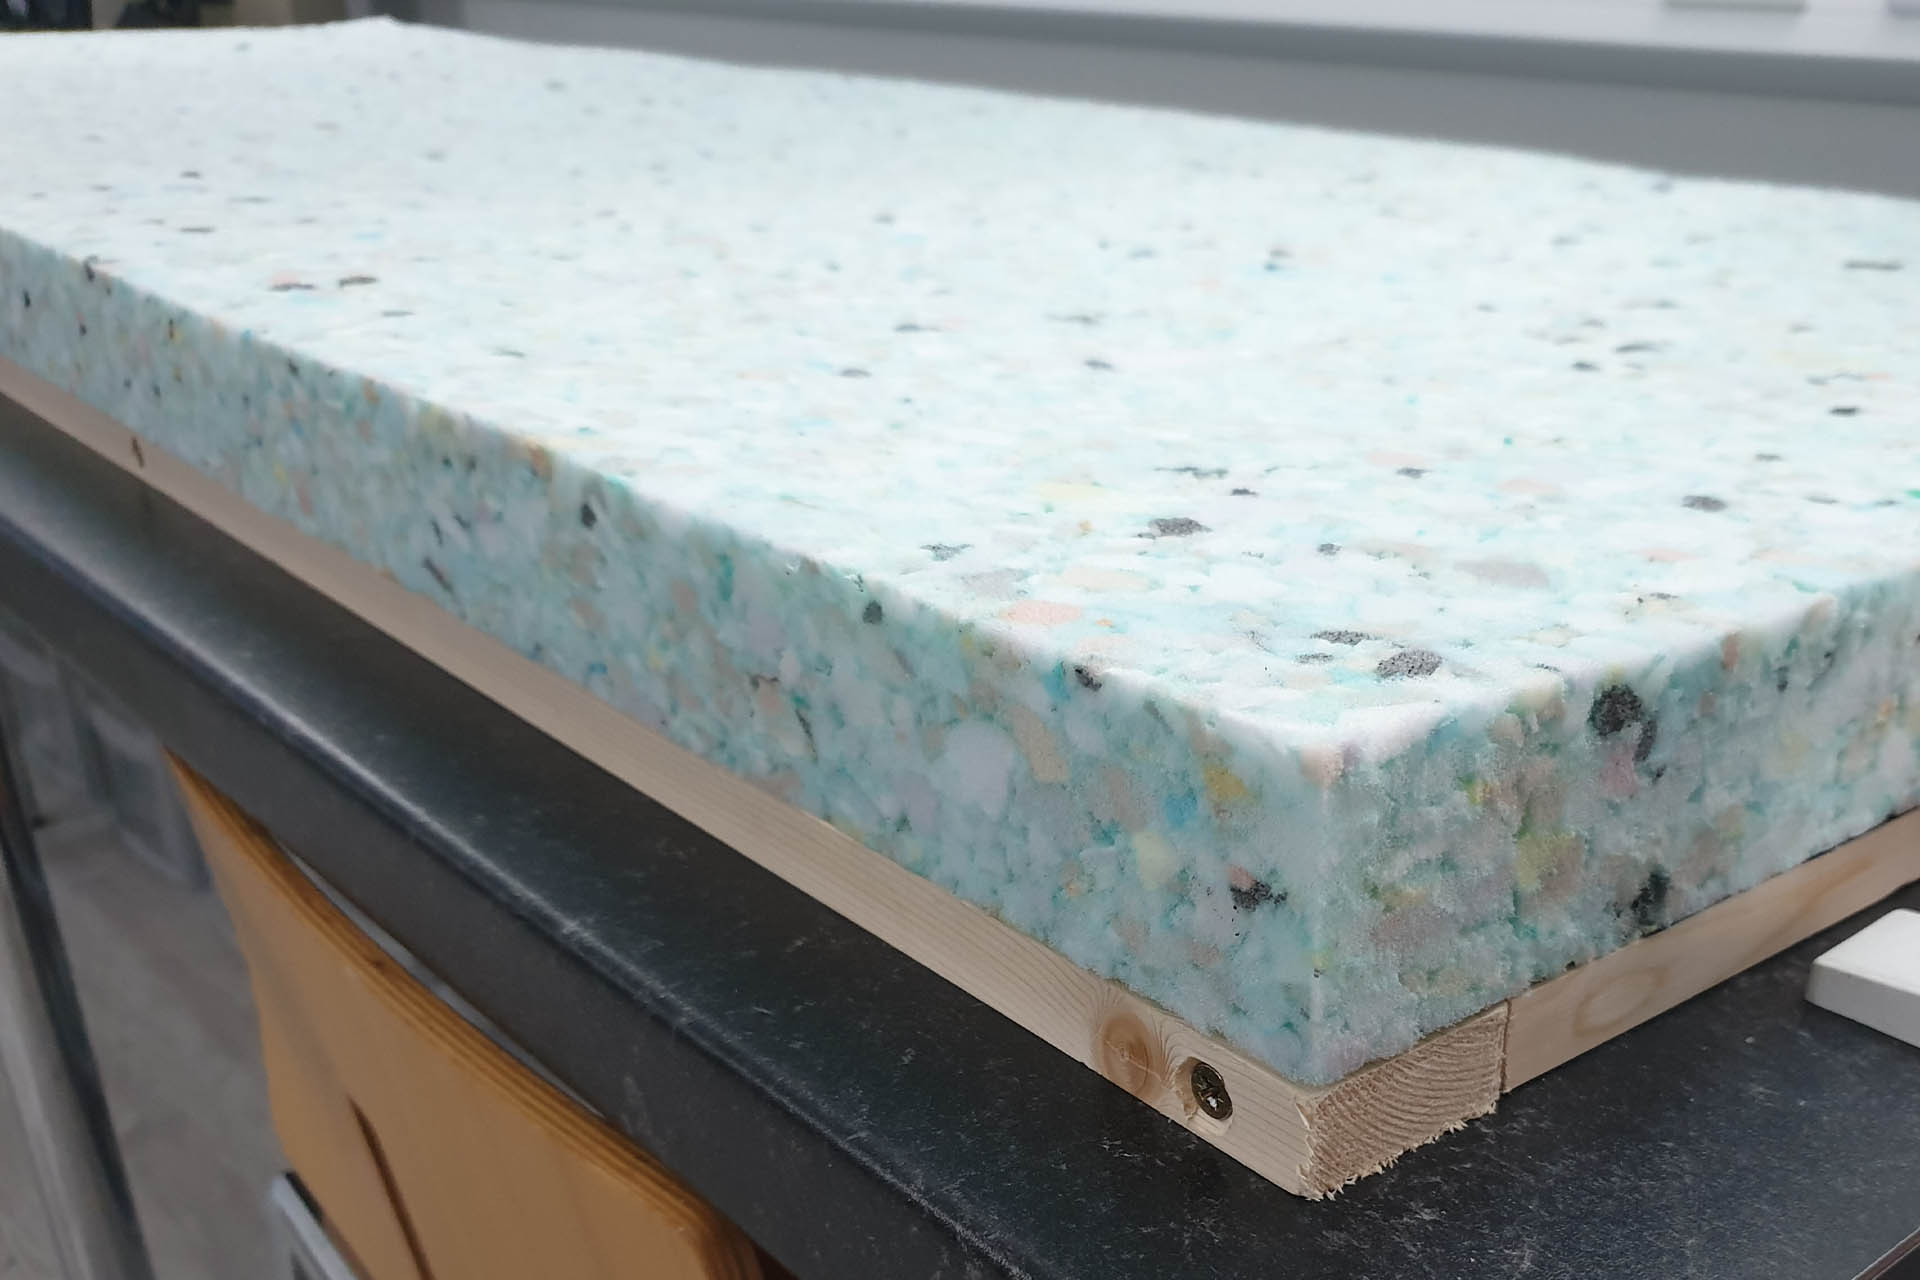
Remember earlier that I mentioned I'll wait until I can place a foam slab on to a panel frame so that I can determine the correct height of the hardboard? Well, the theoretical height with 50mm foam and 17mm planed wood is obviously 67mm. 2mm can easily be absorbed so I'm going to get the hardboard cut at 65mm.
Selco cut as many 65mm strips as they could, out of a single 2.4m x 1.2m sheet of 3.2mm standard hardboard and I trimmed them down to size when I got back to the studio.
I should mention that I had to hammer some of the staples in as the staple gun didn't always punch them all the way in. Both the staple gun and the 14mm staples were made by Stanley which is a name I've always trusted. I don't think this is a particularly difficult job so I was quite disappointed, to be honest.
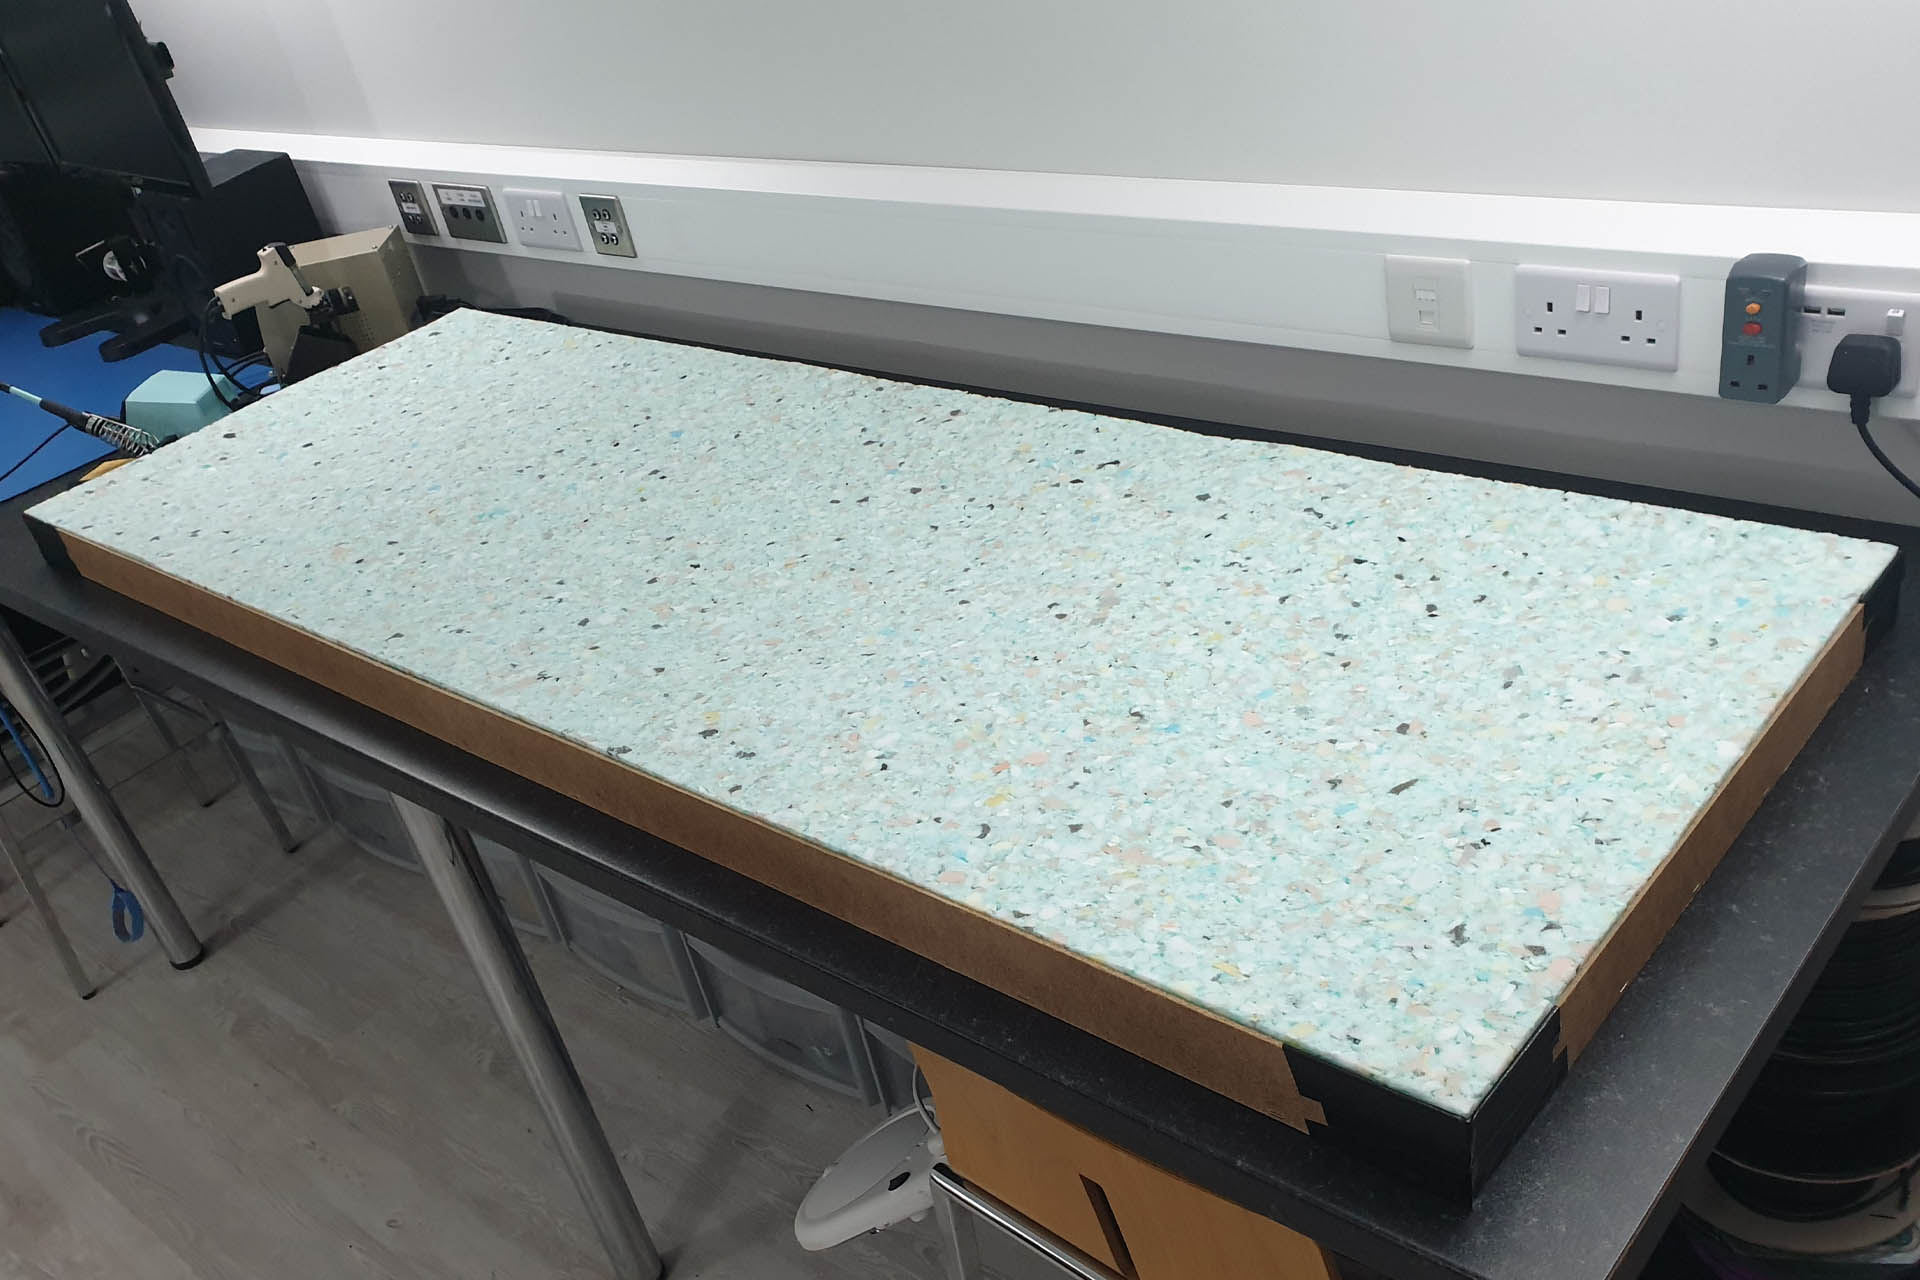
Although the least dense available from the retailer, the foam I'm using is actually very dense for the job in hand. It's quite difficult to see in the above image but the foam sags in between the centre cross struts. This kind of pissed me off but then I realised that the panel won't be lying like this. It'll be mounted vertically on one of its edges. When I took the panel off the workbench and stood it up, the foam was fine (phew).
A WORD OF CAUTION... The foam stinks! I attached the hardboard perimeters to the three 2m panels quiet quickly and then called it a day. When I came back the next morning, the downstairs of the house stank. I opened all the boxes in which the foam was packed, took out the foam and left it to air for a few days. If the smell doesn't disperse, I might try an odour-killer. I'll keep you posted.
Now I need to get some more membrane prior to the front layer of acoustic material going on.
HEADSUP - I've quoted the hardboard as being 65mm high. The guy who cut it, actually did so nearer 60mm. This worked out better because it gave a slight bevel to the edges of the panels. I only realised and hence appreciated this, when I got my second lot of hardboard cut for the acoustic panels destined for my keyboard room. These were cut at exactly 65mm and aren't as nice as the first lot I got done.
UPDATE - 23rd September 2022
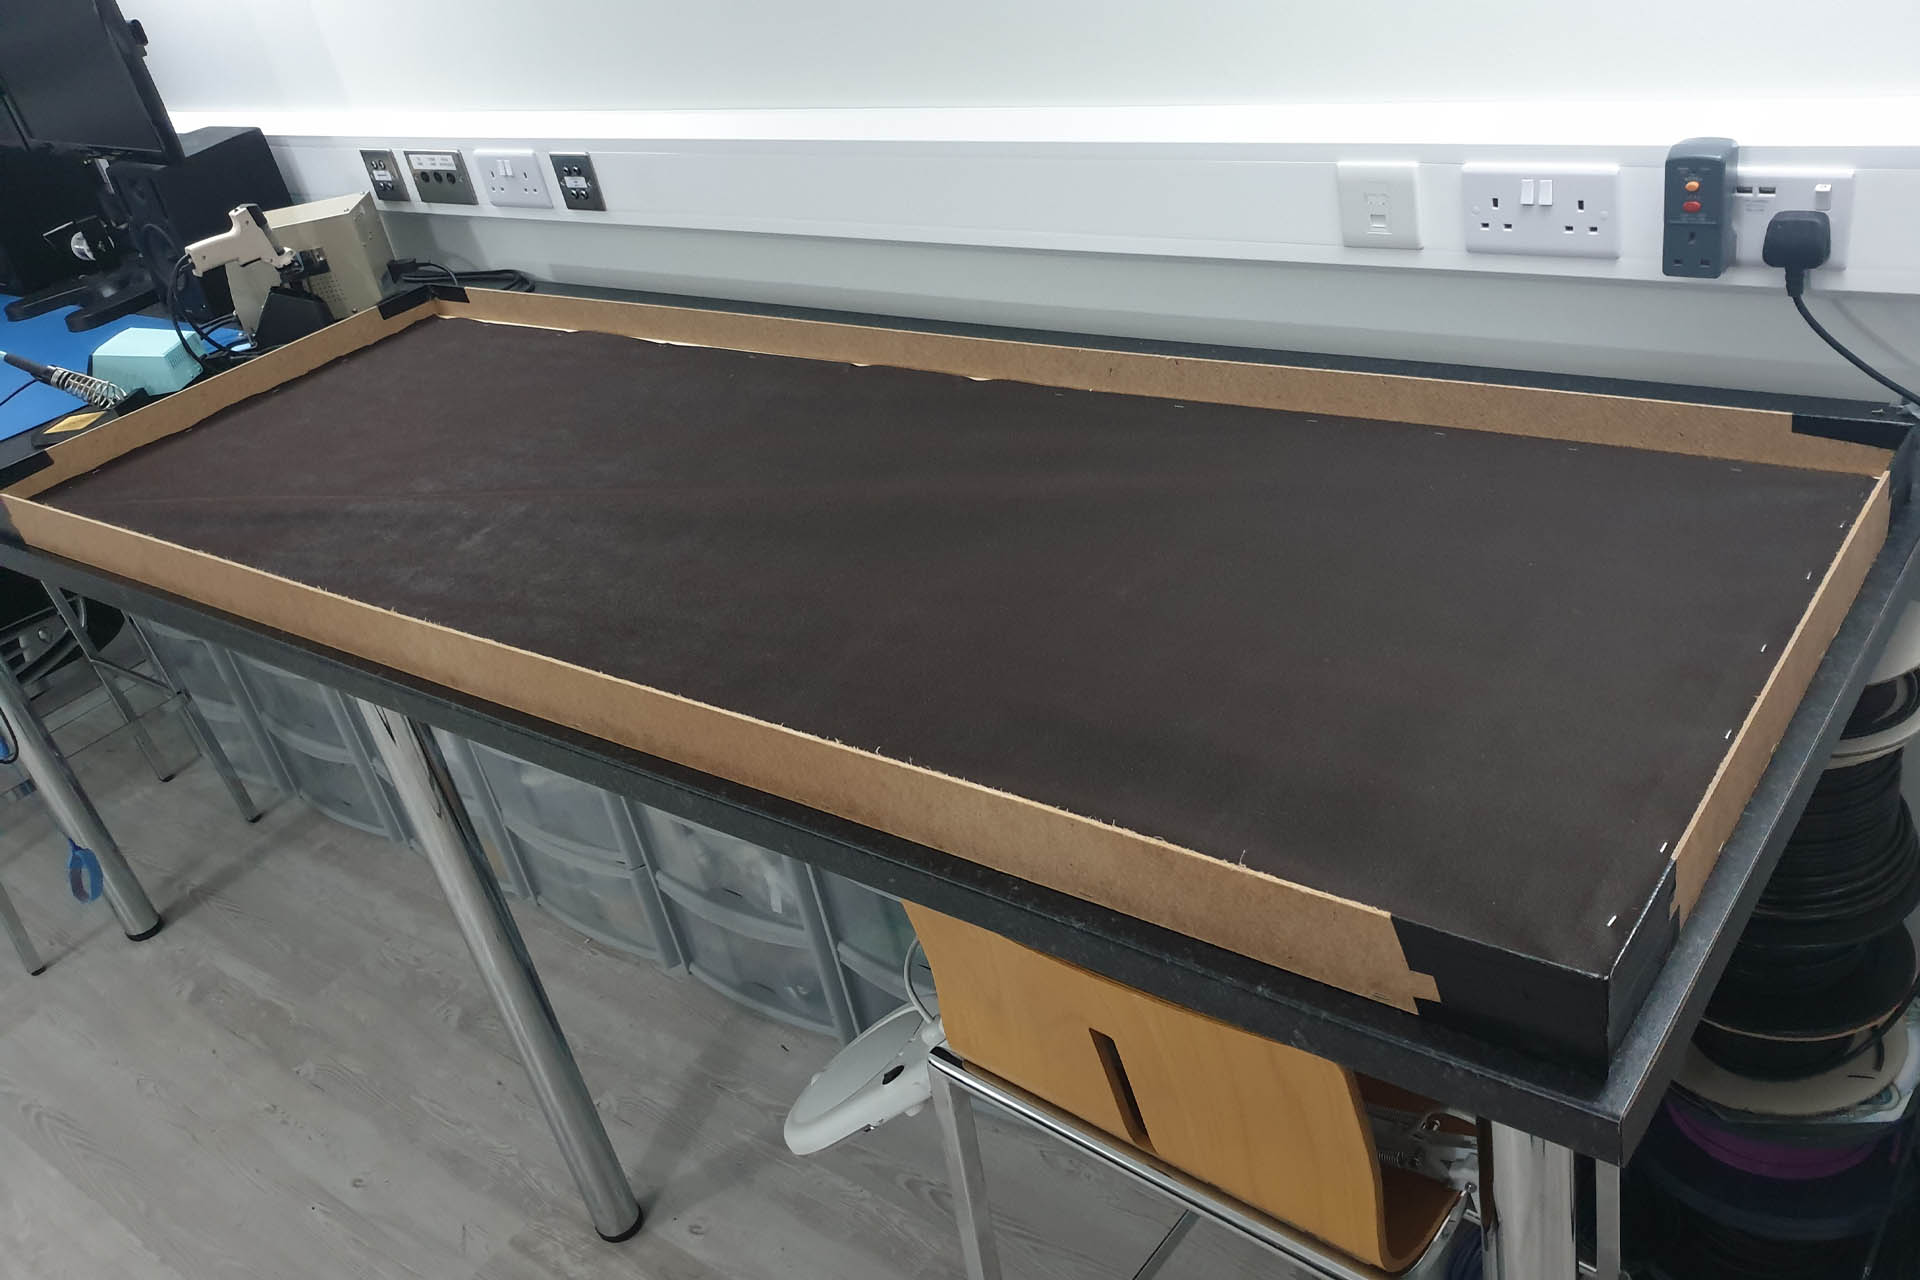
I couldn't find Gardman WeedStop Perfromance anywhere locally so I bought 30m of Verve 80 gsm from B & Q. Here's one of the large panels with the front membrane covering.
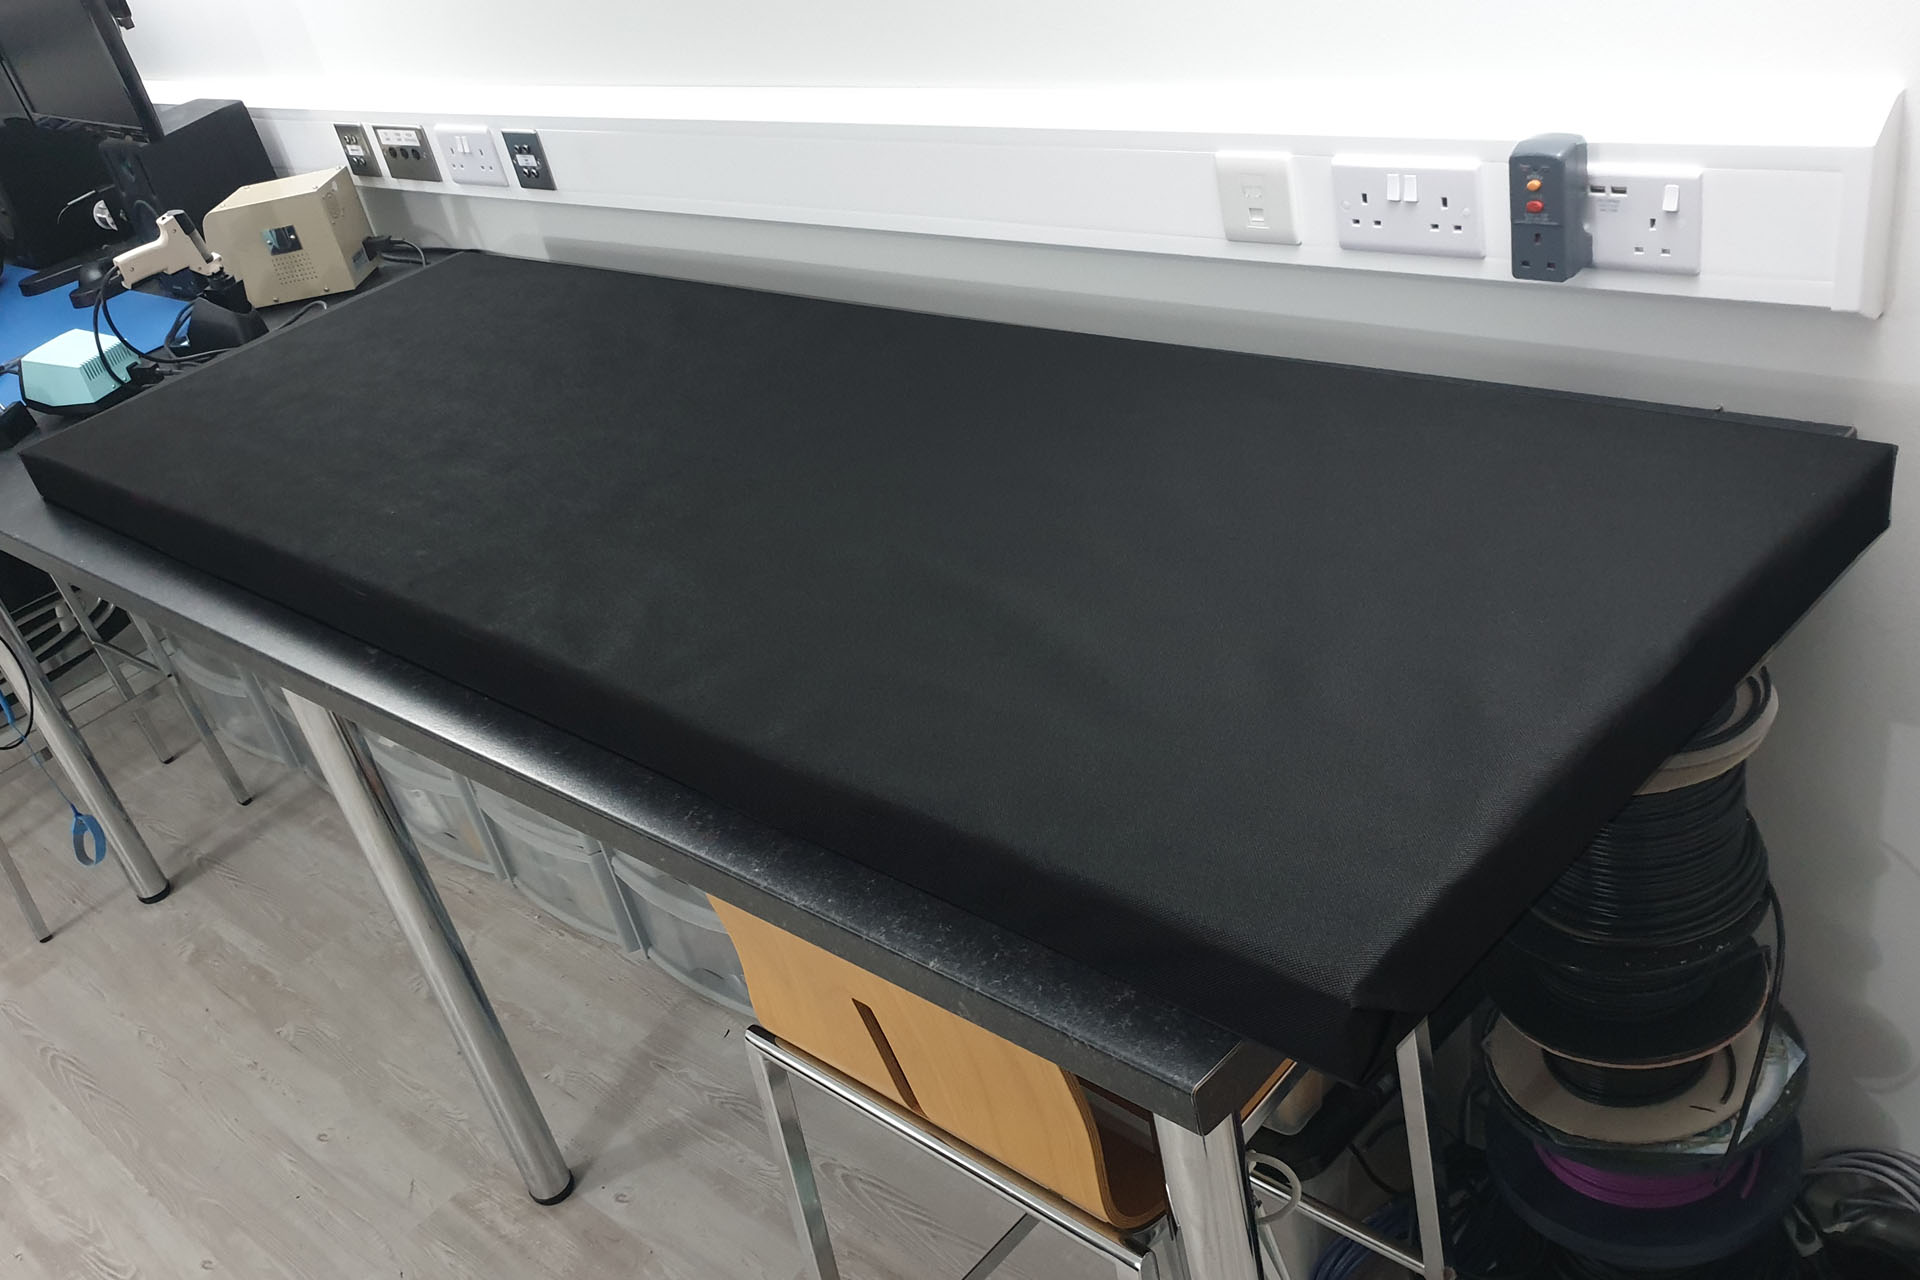
You want to do the neatest job you can but remember that this layer doesn't have to be cosmetically perfect! The Camira Cara acoustic cloth is going over the front membrane. In fact, putting this on is great practice for applying the final layer. On the other hand, Camira Cara acoustic cloth is very expensive so if you're not too fussy about looks, a little practice getting this bit right and you could get away with just the membrane covering. Perhaps try applying a second layer? Of course, colour options aren't as diverse and with the weed membranes I've specified, you'll be stuck with either dark brown or black. 🙁
I have to say that this weed membrane is great to work with. I covered all six panels quickly and couldn't wait to get an average weight of the three larger 2m panels. Oh dear! These things are coming in at like just over 8kg, much more than I anticipated and I still have the acoustic cloth to go on. I mentioned earlier that once I established weight, I could begin looking for fixing hardware which is what I'll be doing over the weekend.
MISTAKE... So it just occurred to me; my panels are 70cm wide and 7cm thick. The Camira Cara cloth is 1.7m wide. Hmm... I won't be able to cut the width of the cloth in half as 85cm (half of 1.7m) isn't going to stretch over the width of a panel and over the sides to leave enough to tuck in around the back. Oh BUM!!!! Even if the panels were 60cm wide, that would only leave 5.5cm on each side, to go around the back. The wood is only 4.4cm wide, leaving a centimetre to play with but it's still too close for comfort, especially for a DIY phobic like me. 🙁
See you soon...
UPDATE - 25th September 2022
I bought some Febreze Fabric Freshener today and I have to say that the awful smell of the foam doesn't seem so bad after applying this stuff. I'll buy another couple of bottles and see how it goes.
Also, remember I said that the weight of the foam was making a 'dip' in the middle of the panels in between the cross braces but after standing a panel upright on its end, the foam falls forward slightly so I didn't think it would be a problem? Well, it was really, really bugging me (like some things do) so I've put in a centre piece of wood on the back of each panel frame so that the foam now sits flat.
UPDATE - 29th September 2022 - CAN'T SEE THE WOOD FOR THE TREES
While I'm waiting for the Camira Cara cloth to arrive, I've been giving some thought to how I'm going to hang these panels.
My wife Julie isn't musical at all and doesn't know much about the detail of what I do but... she's a great listener and brilliant for bouncing ideas off. The other day I showed her what I'd been up to and while describing the issue of hanging the panels, it came to me...
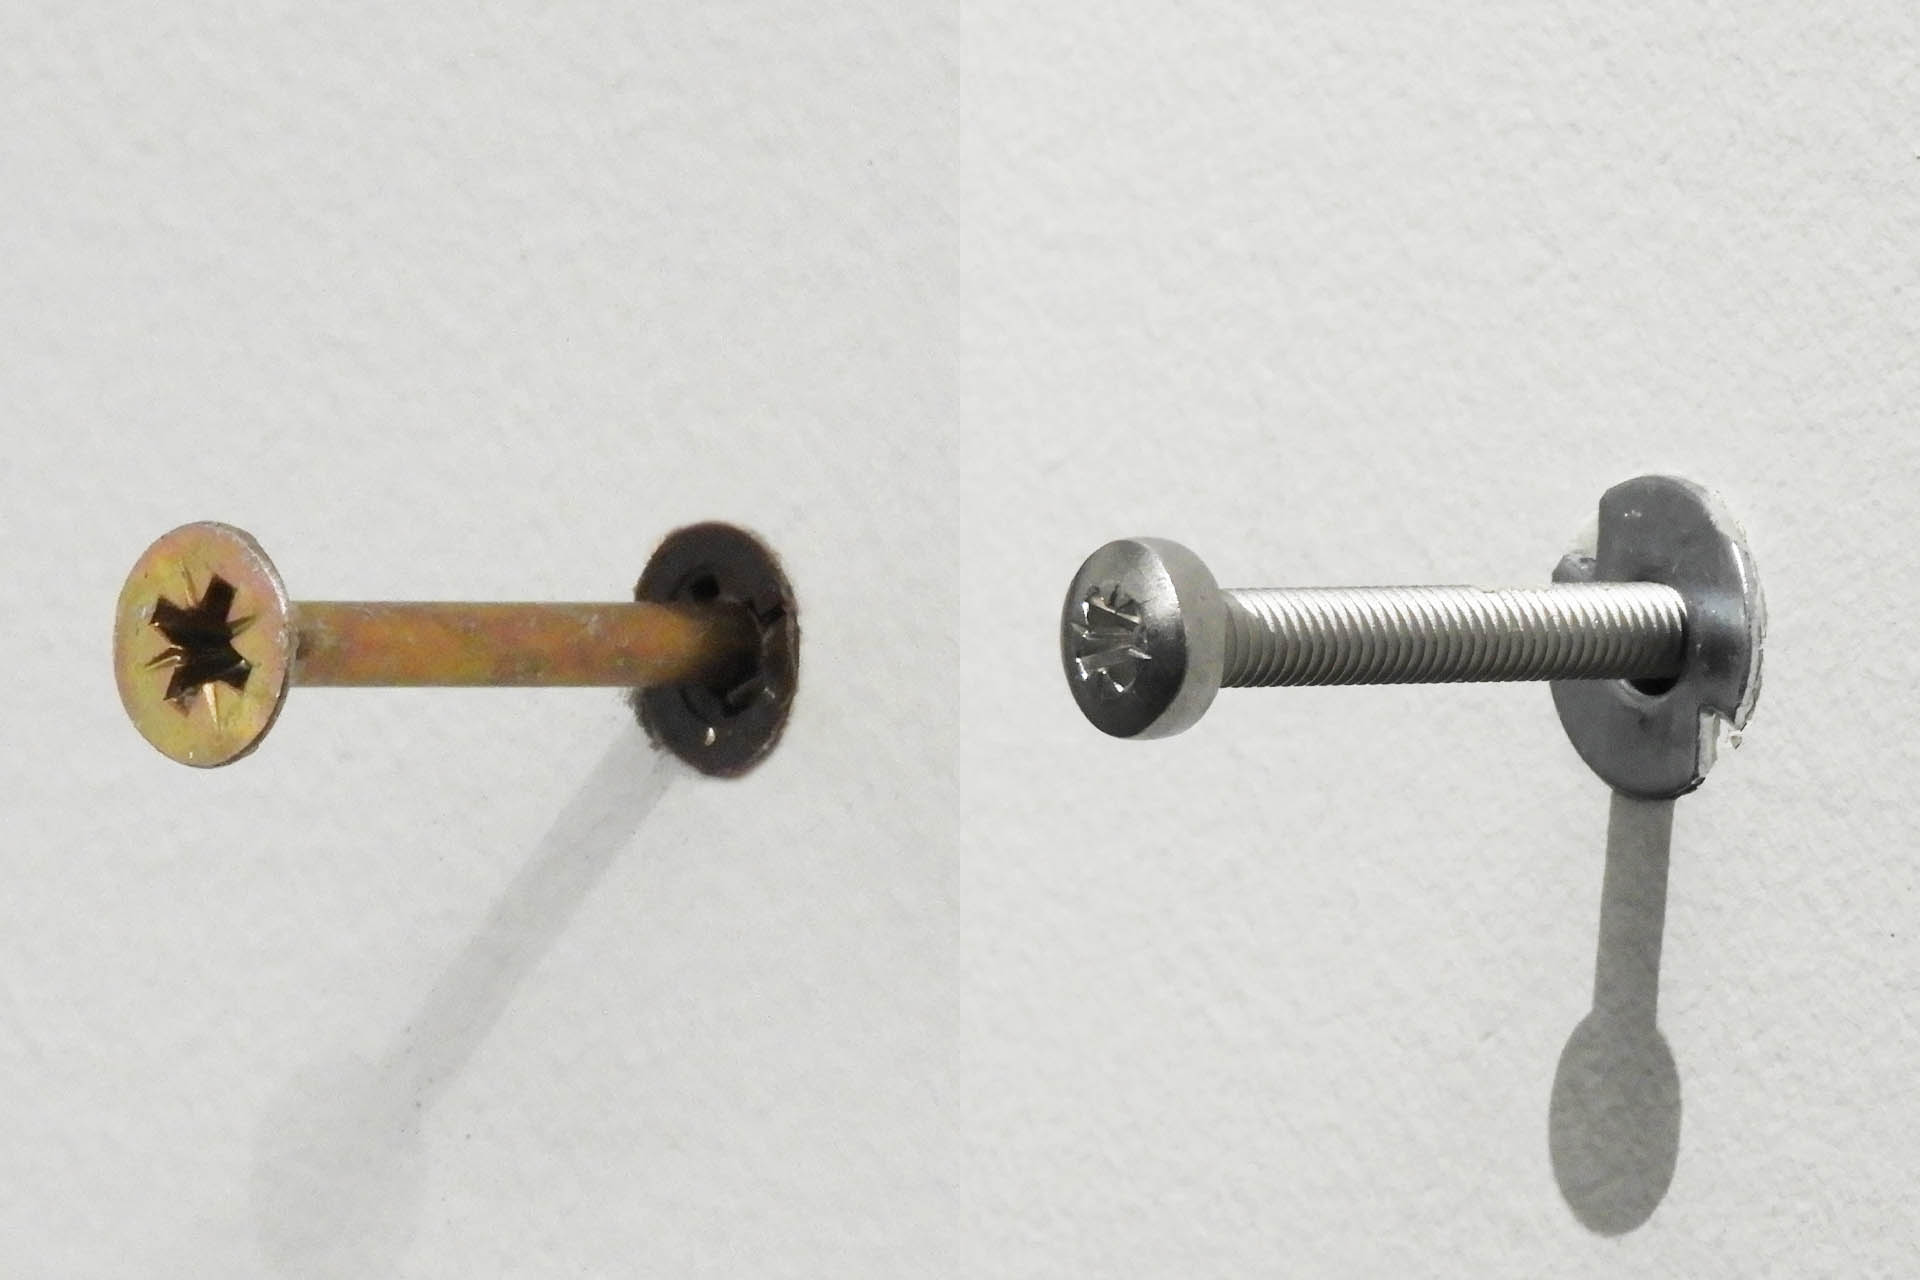
Remember those cross braces on the back of the panels? Well, they're very straight, 530cm and dead parallel to the shortest edge. If I just fix two screws per panel into the walls, then I might be able to simply hang the panels on the screws. Any height differences would be easy to fix. With a little packing on those cross braces, I can quickly and simply adjust the height of a panel, or straighten it if it doesn't quite look square. With this method, the panels can also be nudged horizontally so as to ensure an even gap between them. The solution to hanging my DIY acoustic panels was right in front of me all the time.
It didn't take long to measure up, drill a few holes and try out my idea. Oh god, I'm lying!!!!! One aspect of DIY that I really, really hate is dust and it took me ages to move gear that I could move, out of the room and cover gear that I couldn't.
Anyway, in the brick wall, I used rawl plugs and in the stud wall, I used heavy-duty hollow wall bolts, the kind that require a setting tool. All screws were M5 x 80mm, providing a good length of screw in the wall with between 20mm and 25mm sticking out, on which to hang the panels.
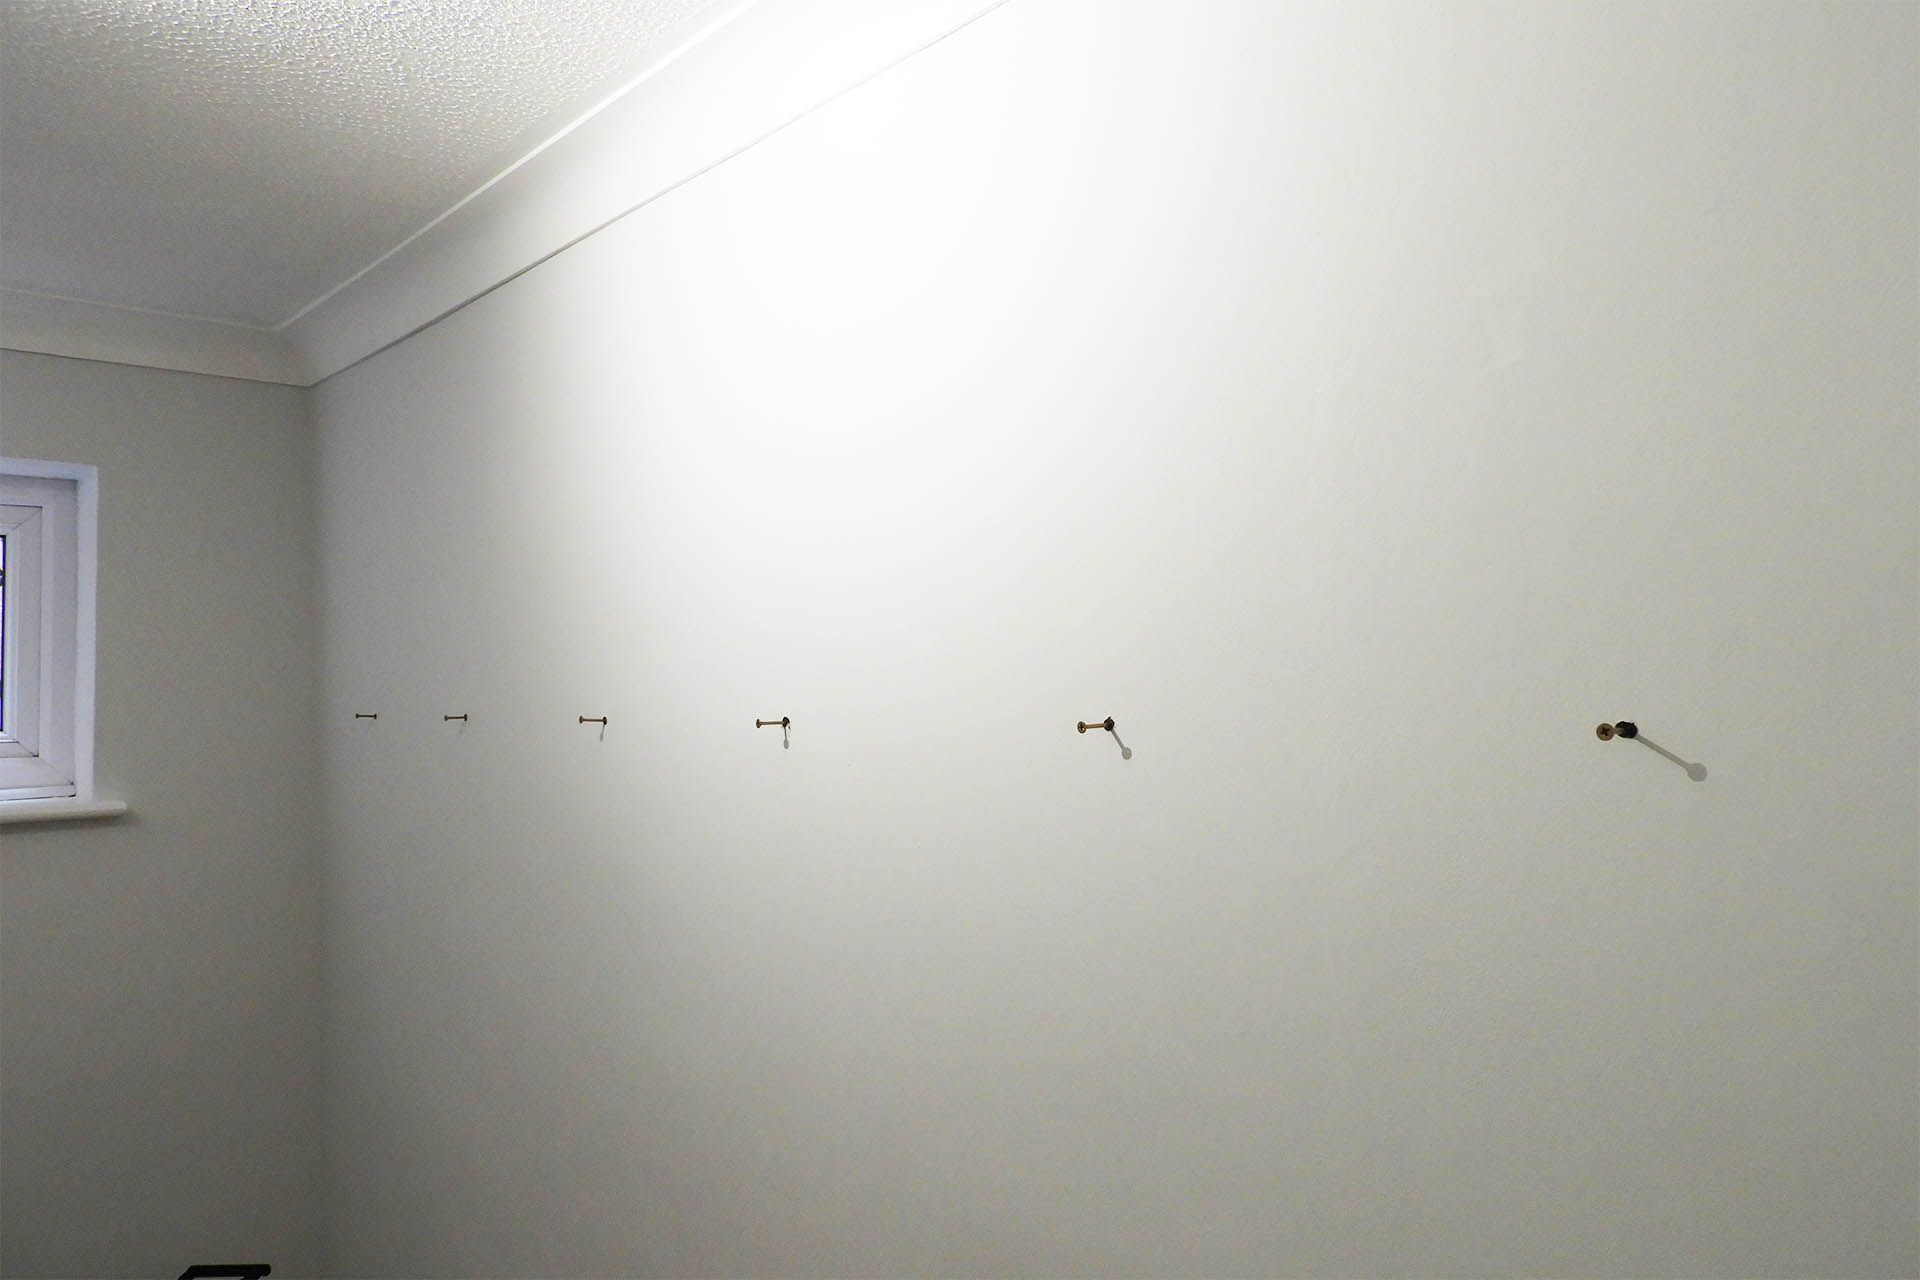
Two screws per panel is not only secure but offers an excellent degree of flexibility. The cross braces on the panel frames are 53cm down from the shortest edge. The screws are mounted 62.5cm from the bottom of the coving. This leaves about 7cm clear, at the top and bottom of the 2m panels.
So, although the panels are waiting for a final layer of acoustic cloth, they're in good enough a state to hang and allow me to conduct further tests of the mic. room's acoustics.
It's one thing clapping your hands and listening but really a microphone needs to be switched on and headphones worn.
I'm still getting that springy type of reflection and putting some rugs down on to the floor confirms that it's not just the walls that need treatment. Once I've got the walls under control, I'll need to look at that floor. In fact, I already have some ideas.

Although faint, I'm now left with a very tight bounce in the high-mids. When I say 'tight', I mean that the delay of the reflections is extremely short, more akin to a flanger with the modulation turned off, than anything else. This is actually quite common in smaller spaces with hard opposing walls. Anyway, I have an idea where this is coming from and a little foam propped up against certain parts of the window wall and the door wall (opposite), quickly kill it. I now have an almost quiet room and more importantly, I know for sure that I'm going to have to make four or five smaller in-fill panels. 50mm foam would be excessive for these so I'll be using 30mm foam.
HEADSUP - It would be quite expensive to buy all the foam in all the pre-cut sizes that you might need. Although I had an idea, I didn't yet know the exact dimensions of the in-fill panels I was going to end up making so inevitably, foam will need to be cut! 🙁
The factory (foam supplier) uses a bandsaw. I can't imagine too many producers, audio engineers or musicians having one of those lying around. The next best thing (when you think about it) would be an electric knife and indeed an old Kenwood thing we had in the kitchen which never gets used, was just perfect. With virtually no foam dust, the electric knife cuts through foam beautifully and if you're patient, you can get a lovely smooth and more importantly, straight edge.
If you don't have one, consider splashing out. You can pick one up for reasonable money... and it might come in useful at Christmas!
If you're on a tight budget, then I recommend a bread knife. Start cutting the foam as if you were scoring it but with a nice, easy sawing motion.
UPDATE - 12th October 2022
It's almost a month since I started this project and I'm a little disappointed that it's all taking so long. On the other hand, there's been a lot of annoying waiting for stuff like foam and acoustic cloth, to arrive.
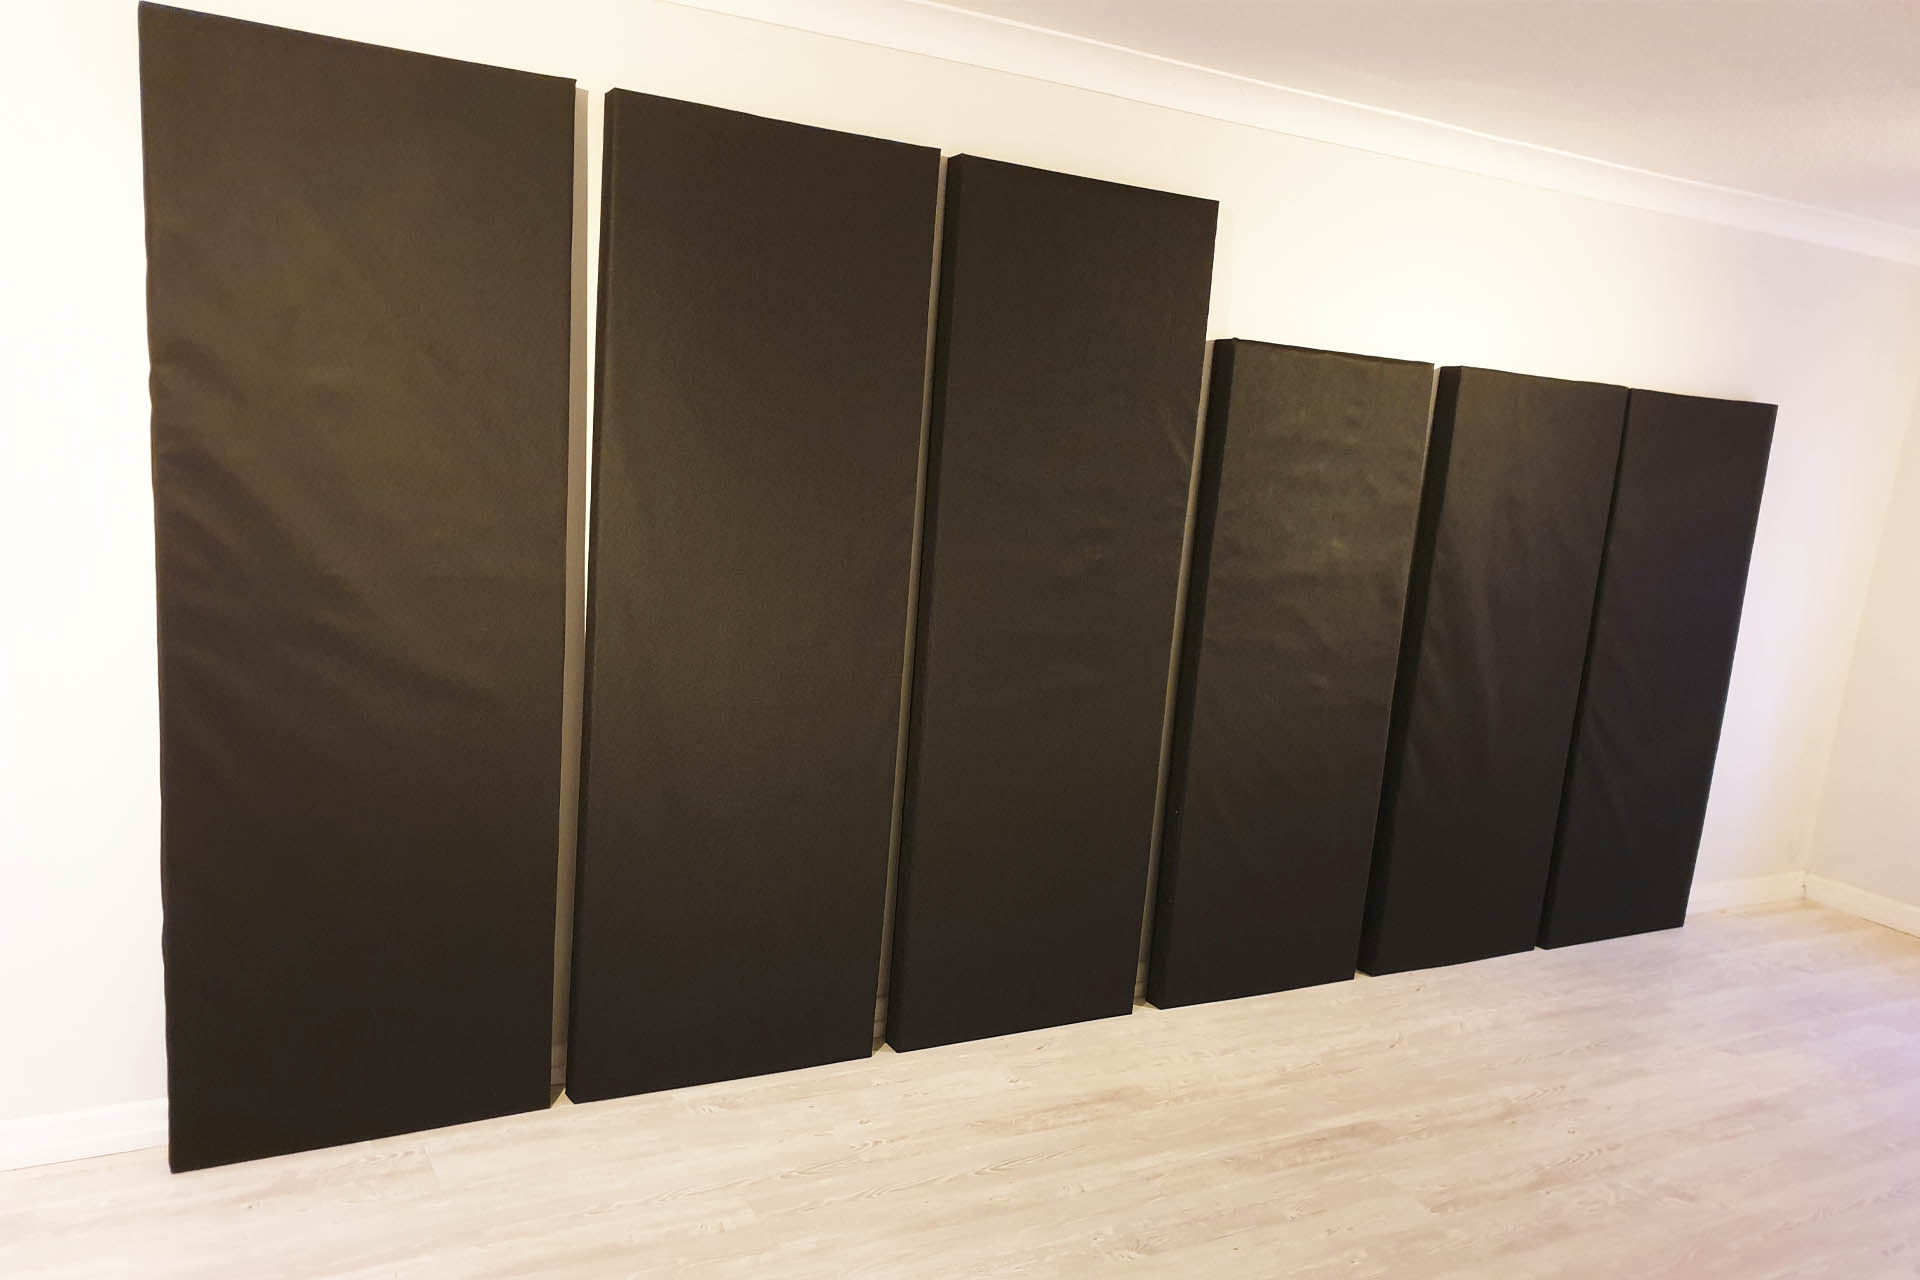
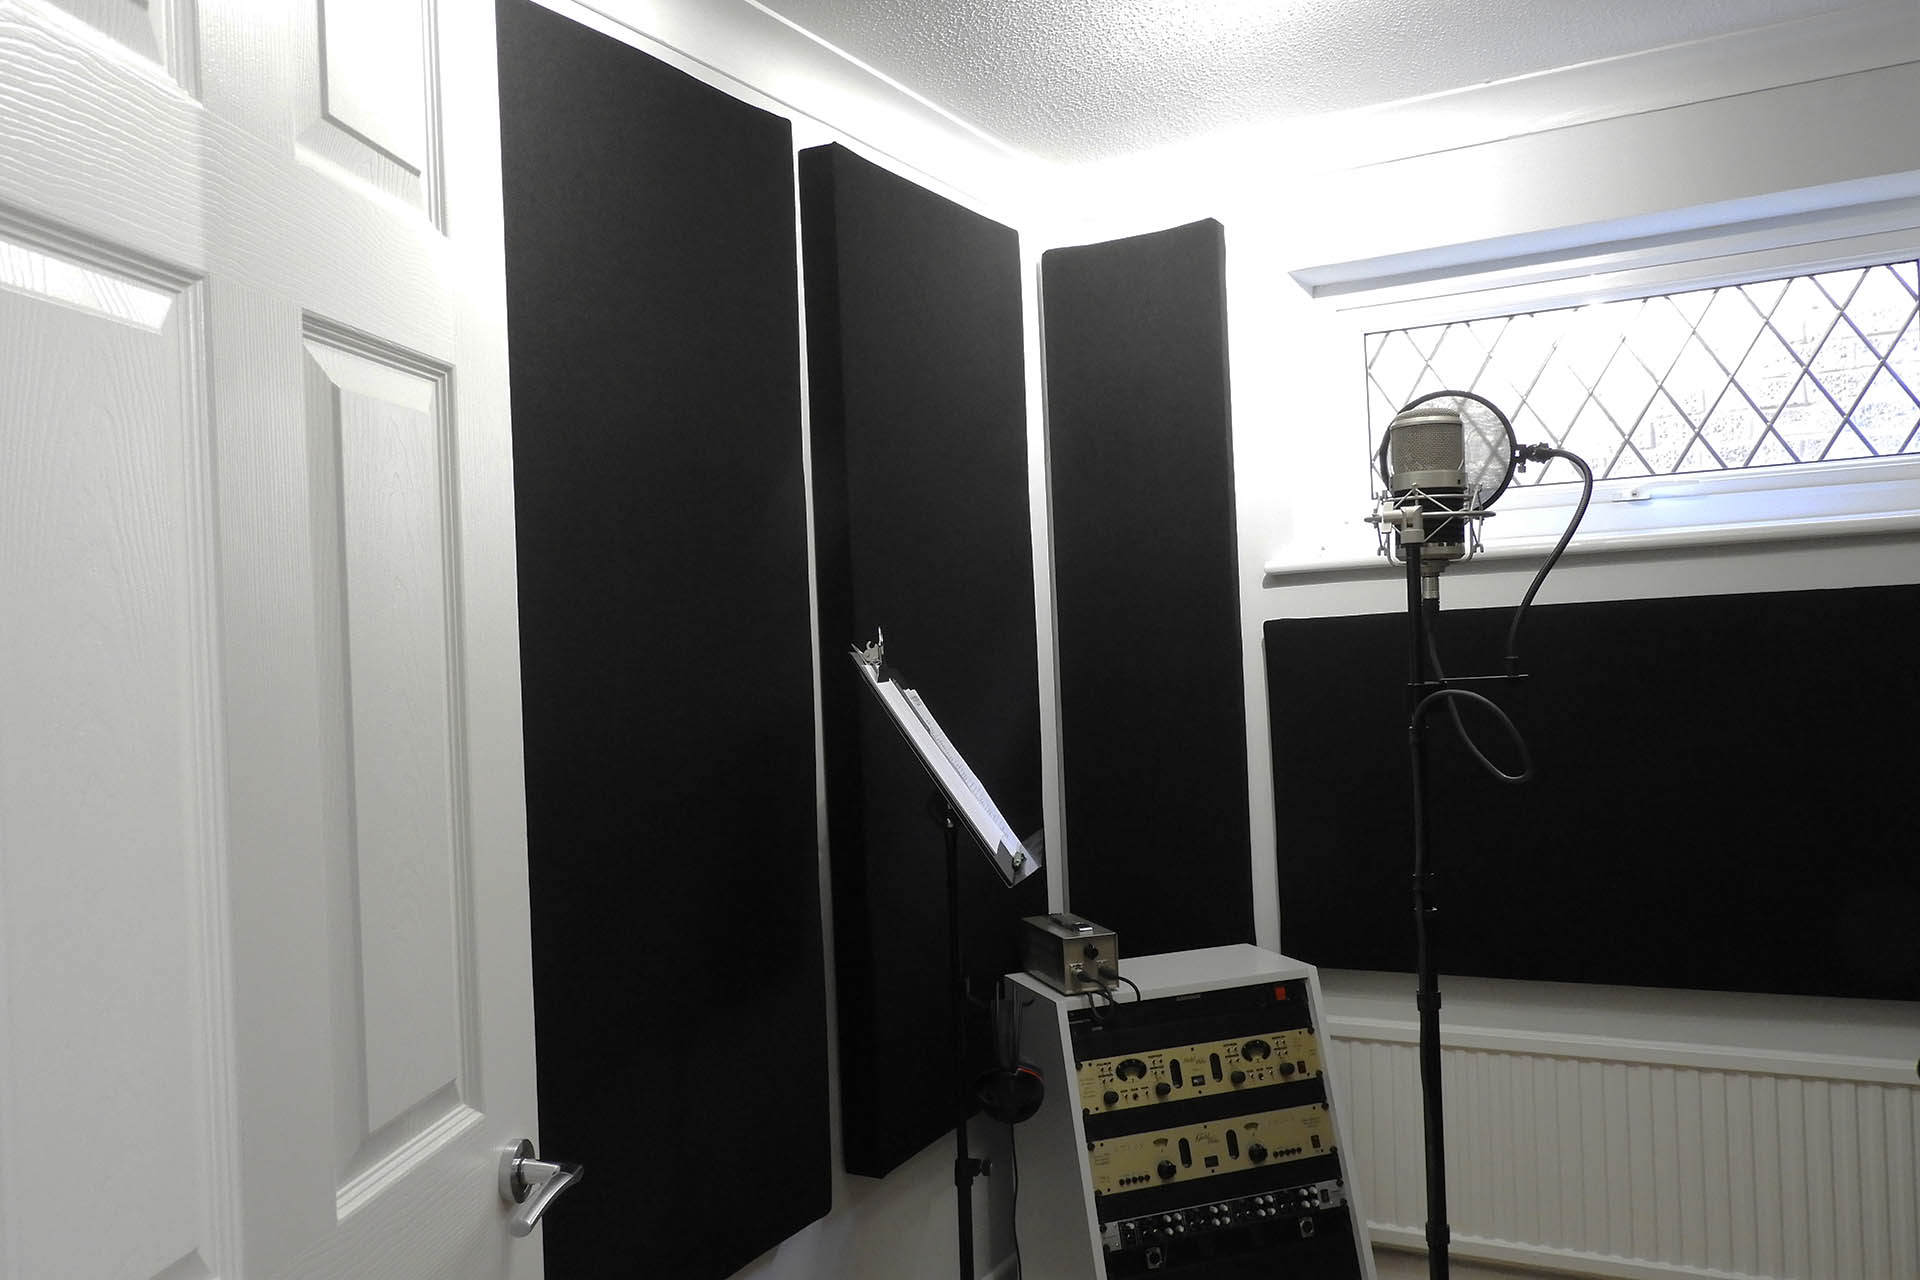
Anyway, the Camira Cara turned up and the fully covered DIY acoustic panels do actually look really good. Comparing the picture below with the previous picture, you can blatantly see that the acoustic cloth finishes the panels nicely and for example, doesn't have the same sagginess as the membrane.
With a little time on my hands, I made five smaller in-fill panels which were 45mm (with 30mm foam) high and not 70mm (with 50mm foam) high as the ones I've already made. And guess what... yep, I had to wait for the 30mm foam to turn up. Oh boy!
UPDATE - 18th October 2022
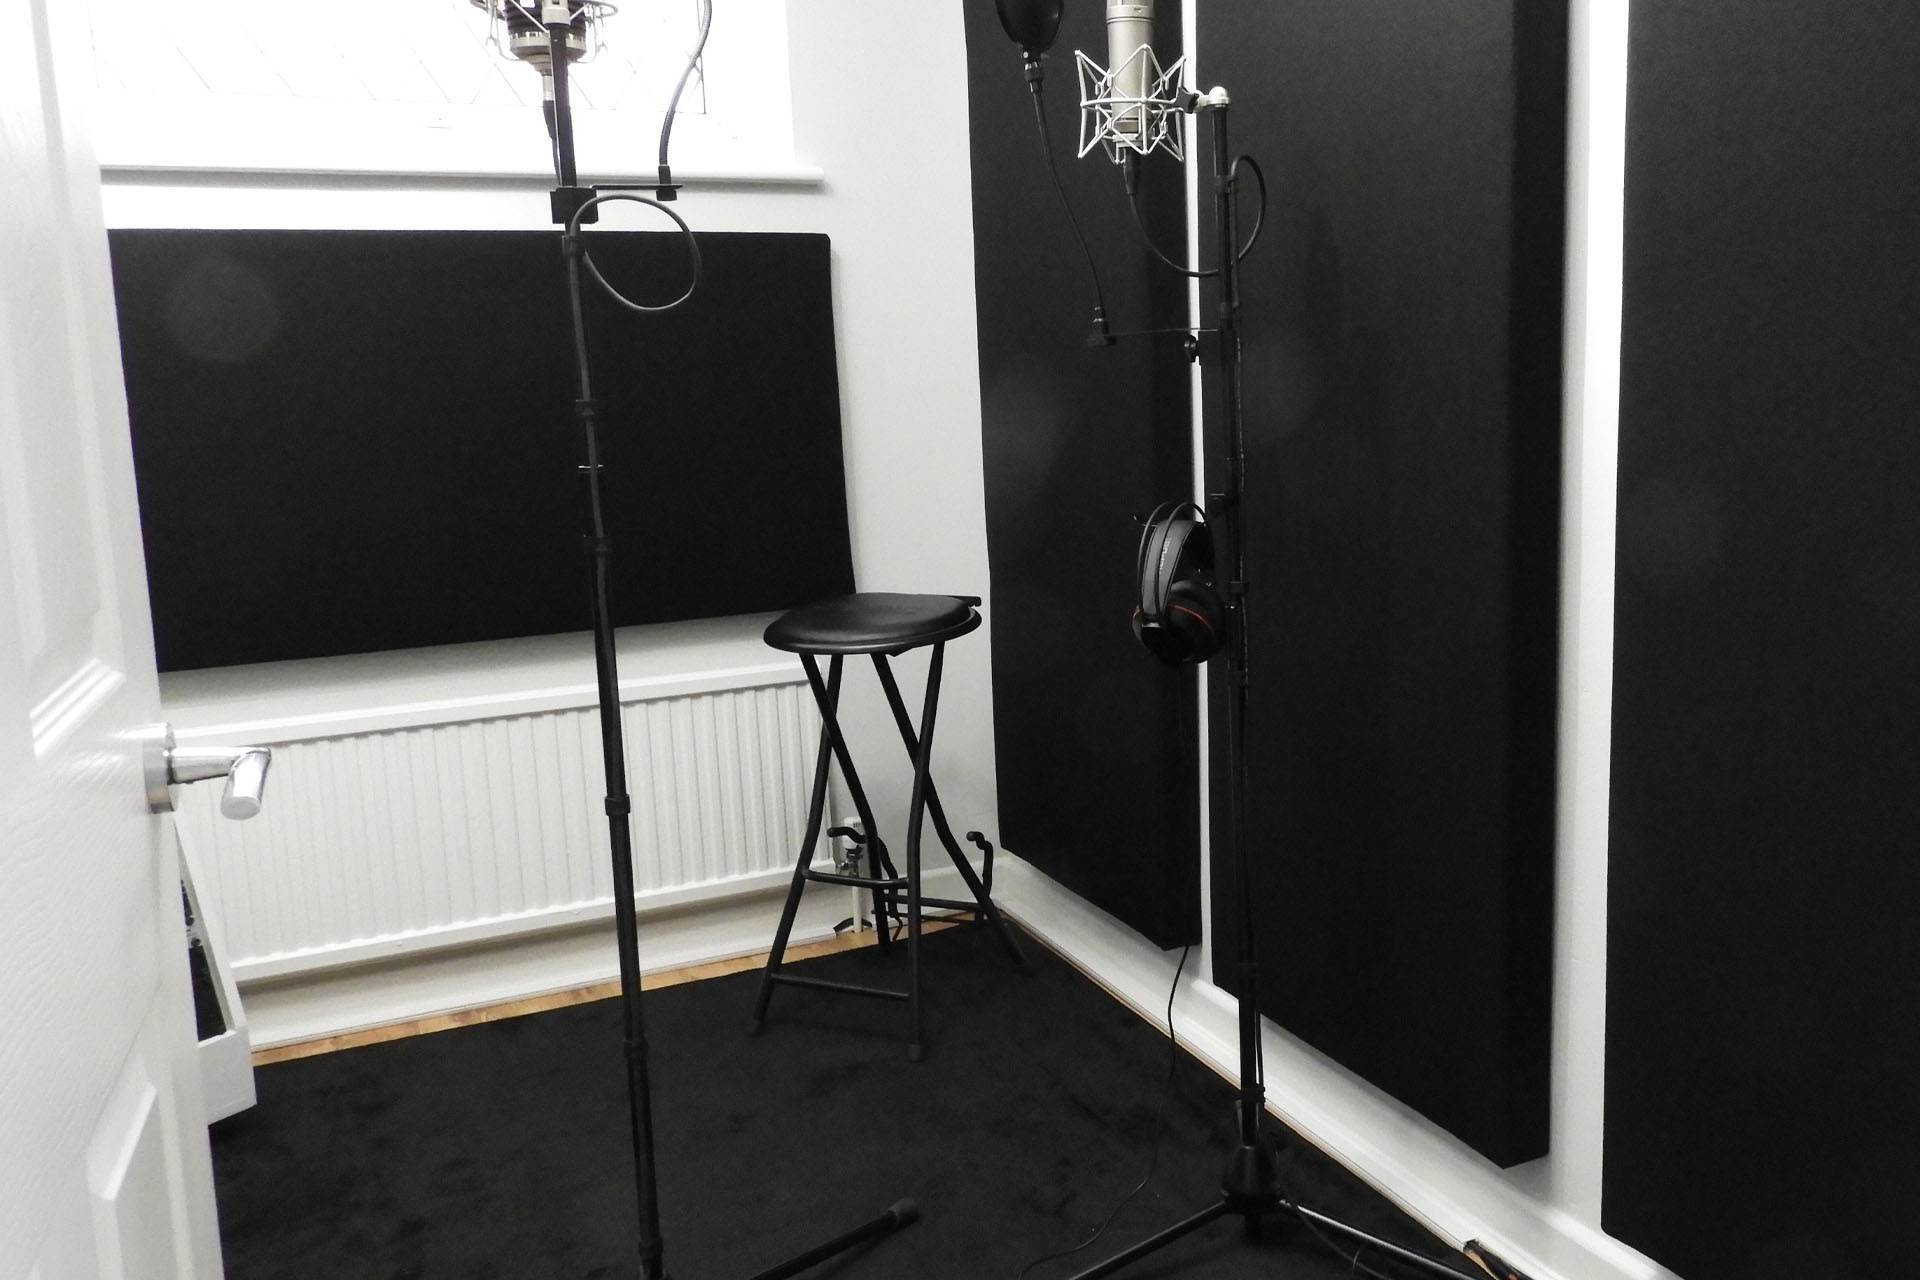
So all the panels, including my in-fills, are up in the mic. room. My lovely rug arrived from Germany today and... I'm still getting a slight 'doing'.
I put some hard foam in front of the radiator. I put some hard foam over the window. I even covered the small bit of wooden floor that was still exposed. SERIOUSLY?!?!?!?
Then I turned towards the left wall and clapped. Then I turned towards the right wall and clapped. The bounce was only noticeable when facing the door. Then I covered the door and... GONE!
That surprised me but hey. Tomorrow I'm popping up to Studio Spares and buying three 600mm x 600mm, 25mm think panels that I'll glue on to the mic. room side of the door.
CONCLUSIONS
Firstly, I'd like to thank Michael for his excellent and very inspiring video. As I mentioned at the beginning of this post, I wouldn't have even attempted this if I hadn't stumbled across his video.
Now then, if I'm honest, buying some really nice acoustic foam tiles would have been much cheaper and I could have finished my mic. room in a day and my keyboard room and control room in another day but... you have to compare like with like and I've already mentioned how proper acoustic panels just look soooo much nicer than foam tiles!
Buying panels, let alone custom sized panels, would have cost quite a bit and making them yourself, is definitely cheaper. On the other hand, I'm more than a month down the line and while I've now made the panels for my keyboard room as well as my mic. room, I still have three or four panels to make for my control room. IT'S A LOT OF WORK, especially for a DIY phoebe!!!!!
Originally, I was going to use 40mm foam for my main panels. The supplier couldn't fulfil my order and sent me 50mm foam instead. My in-fill panels used 30mm foam. Now then, think about this carefully because if I was doing this again, I would consider doing everything with 30mm or even 25mm foam. The reason is that my environments are relatively small and apart from being more expensive, 40mm or 50mm foam is simply over-the-top! Having said that, I actually found the thicker panels easier to finish off with the acoustic cloth.
Whatever job you're doing, having the right tools helps a lot. Having a good sized area to work in, REALLY helps. One point to note, is that the way these panels come together, means that small mistakes can easily be covered up. You learn quickly! There's no way I'm going to be making a load of fancy garden furniture soon (or ever) but I'm pretty pleased with what I've achieved.
I would have liked to box the panels into wooden frames but with one of my walls being a stud wall, I was a bit worried about weight. Remember that the foam I bought was actually quite heavy. In fact, even on the breezeblock and brick walls, I'd have been reluctant to push my hanging system, which ended up being really simple. Having said that, if you stick to the standard 1200mm x 600mm panel size, weight might not be an issue and the wooden frames do look cool.
Acoustic treatment is very chicken 'n' egg; you can only begin to analyse a space, once it's got stuff in it. Indeed, I thoroughly recommend that once your studio is built and your equipment is in, spend some time getting used to it all. Don't rush in, thinking that acoustic treatment requires you to cover every single little bit of wall space. Experiment with slabs of foam, towels, or anything else that's acoustically absorbent, before you start committing to building DIY acoustic panels. Oh and don't forget floors, windows and doors. Radiators can also be a source of unwanted acoustic reflections and it should come as no surprise when I describe reflections off radiators as sounding distinctively metallic!

A GENERAL RULE OF THUMB - Of course, sound is omnidirectional. What comes off a sound source like a singer's mouth, goes everywhere. You should be mindful however, when directing a sound source towards a reflective surface.
In my mic. room for example, my main microphone although in the middle of the room, is positioned such that the singer faces the door. While working on this project, the door was open most of the time and I didn't twig until things were almost there, that the last bit of bounce, was indeed coming off the bloody door which would of course, be normally closed when recording.
Some believe that the best recording environment should be 100% non-reflective but that's definitely NOT the case.
Back in 1985 when I built my very first studio, inexperience led me to overtreat it. I didn't have as much room as I've had in subsequent premises so everything kind of happened in my control room, which was basically the entire downstairs of the house. I had inadvertently created a super anechoic environment which sounded crap!
My really expensive DynAudio monitors sounded dull. They had to be turned up a lot more than they should have been and whatever equalisation I applied, top-end just seemed to disappear as it it was soaked up in the treatment. The stereo 'sweet spot' was very specific. Any movement from that point and everything just fell apart. It soon became apparent that I would have to spend a lot of time, money and effort ripping it all apart and starting again. After having burnt my fingers big time, I took great care with subsequent studio builds which all ended up sounding fantastic.
UNEXPECTED BENEFIT - Well, not quite unexpected although I was surprised at the degree with which light was affected by the added 'black' of the panels.
Personally, I'm not a fan of warm light, especially in a professional, working environment, although I fully appreciate that it has its place. All lighting in my studio is bright, daylight light and all walls are painted with 'swansdown' grey emulsion. While I figured that adding a lot of black would darken things, the net effect was interesting.
Lighting is totally subjective and I have to say that in my opinion, the addition of the black panels has softened the feel of my mic. room and my keyboard room in a (subjectively) positive way, making them kind of atmospheric and less clinical and laboratory-like. There's still ample light to see written and printed material clearly and read settings on equipment but it's just well, softer. I'm sorry but I just don't know how else to describe the change and it's extremely difficult to photograph before and after with any degree that would adequately demonstrate the difference.
If your concerned about light, then think carefully about the colour of acoustic cloth that you're going to cover your panels with.
So anyway, was it worth building my own DIY acoustic panels? YES!!!! It all looks and sounds awesome. 🙂