My Pleiades easy MIDI for the Simmons SDS7 was initially designed to address a common problem with this legendary instrument.

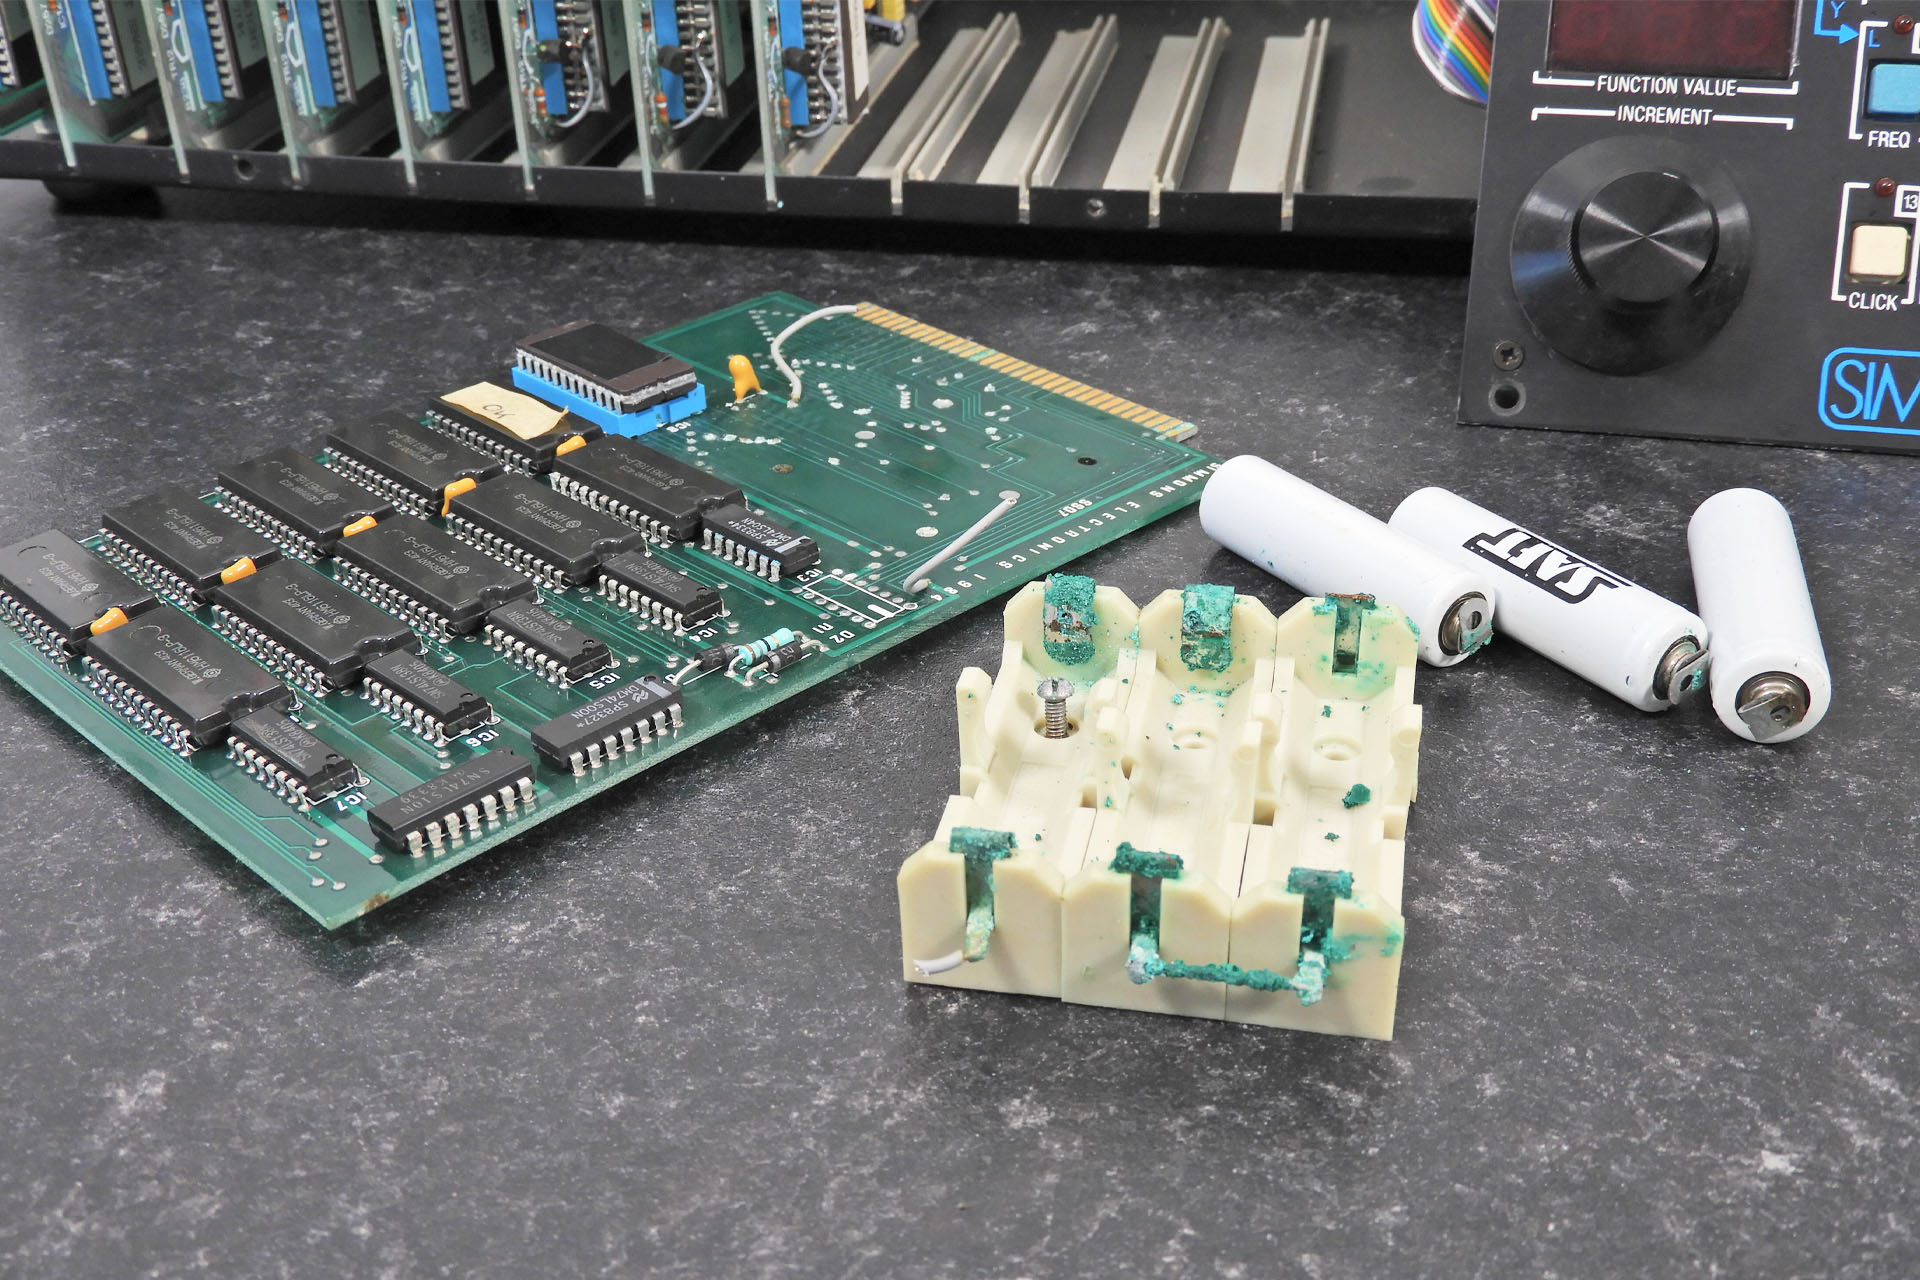
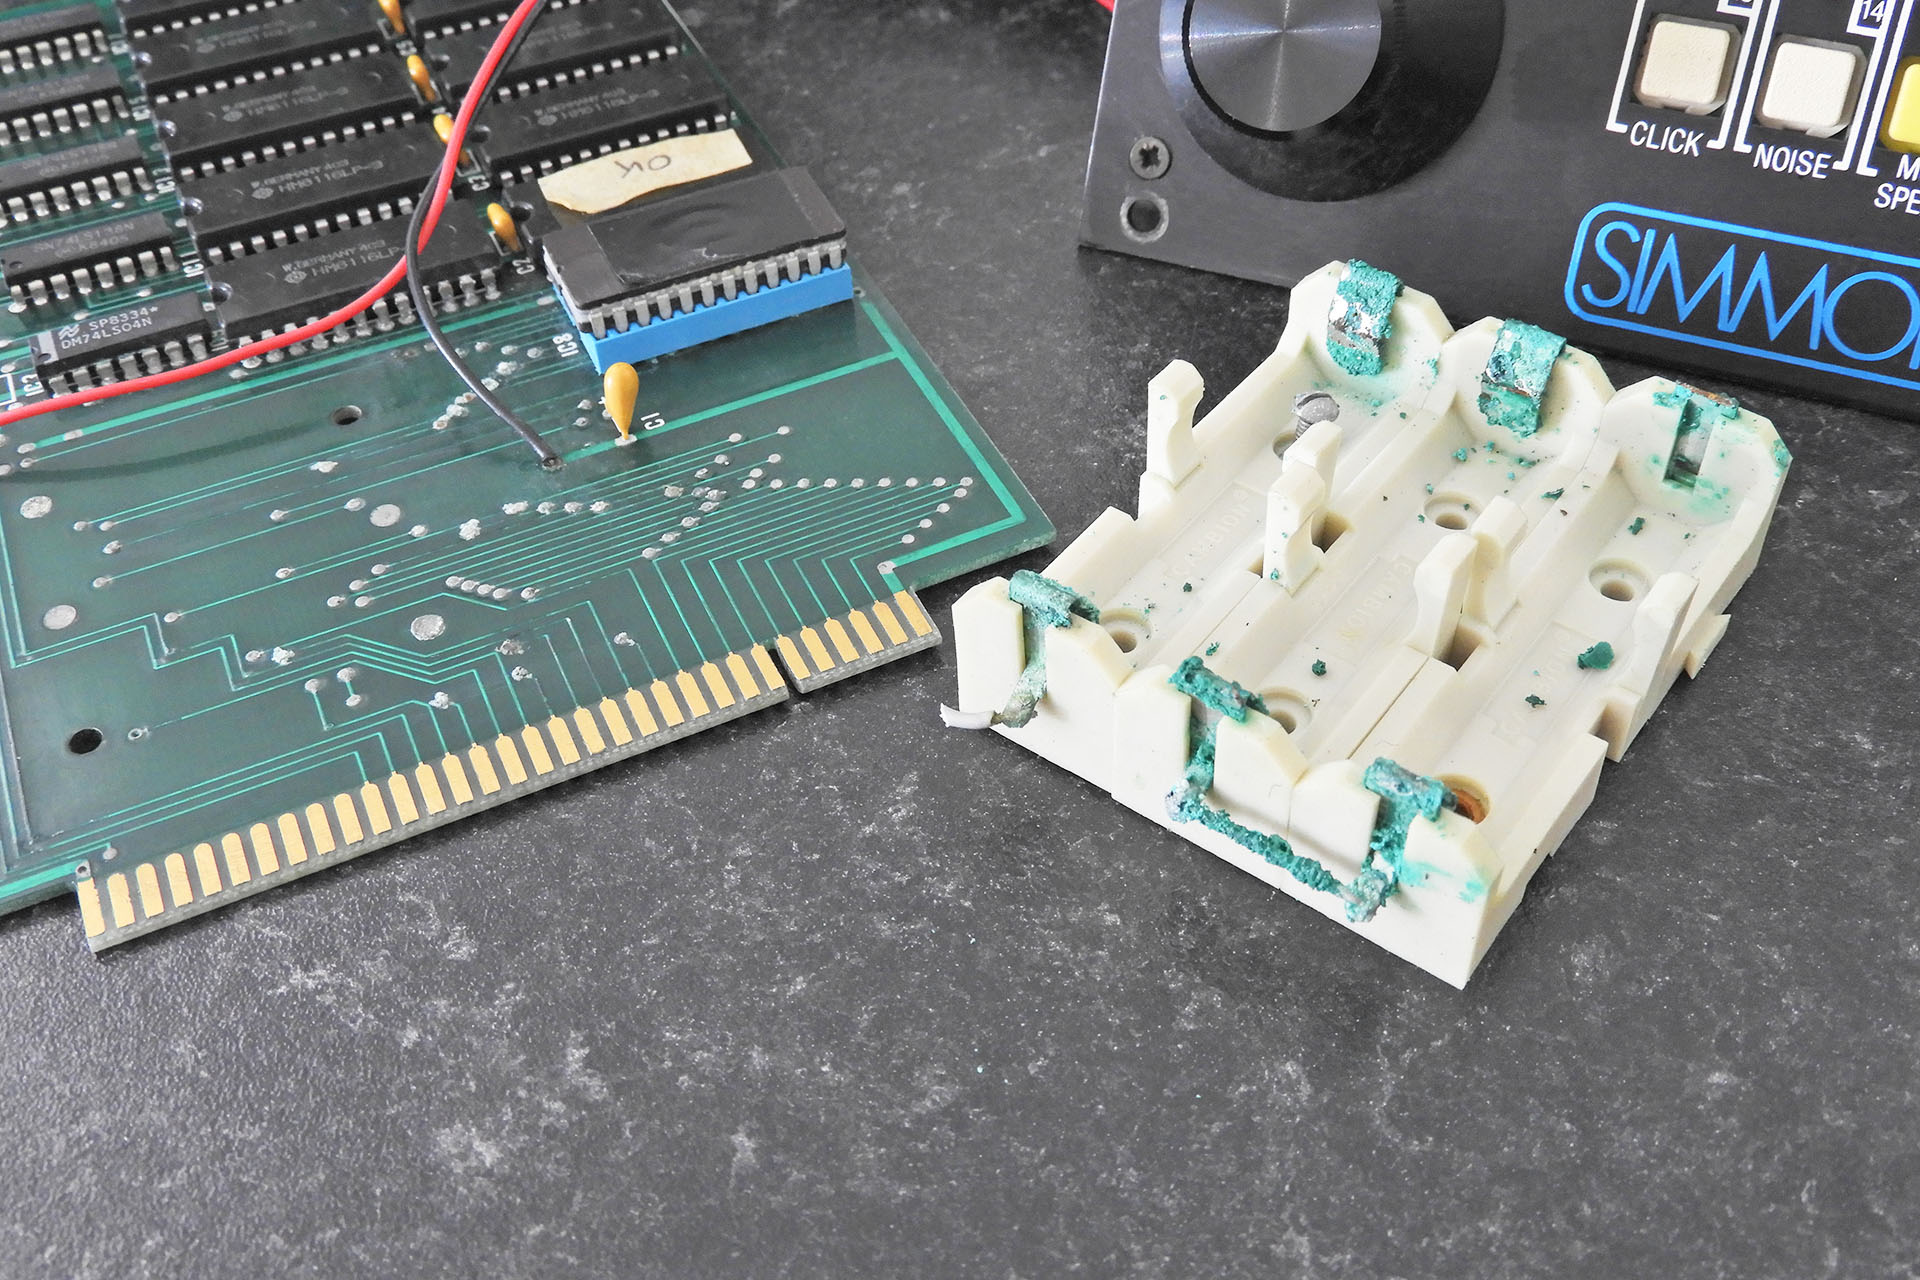
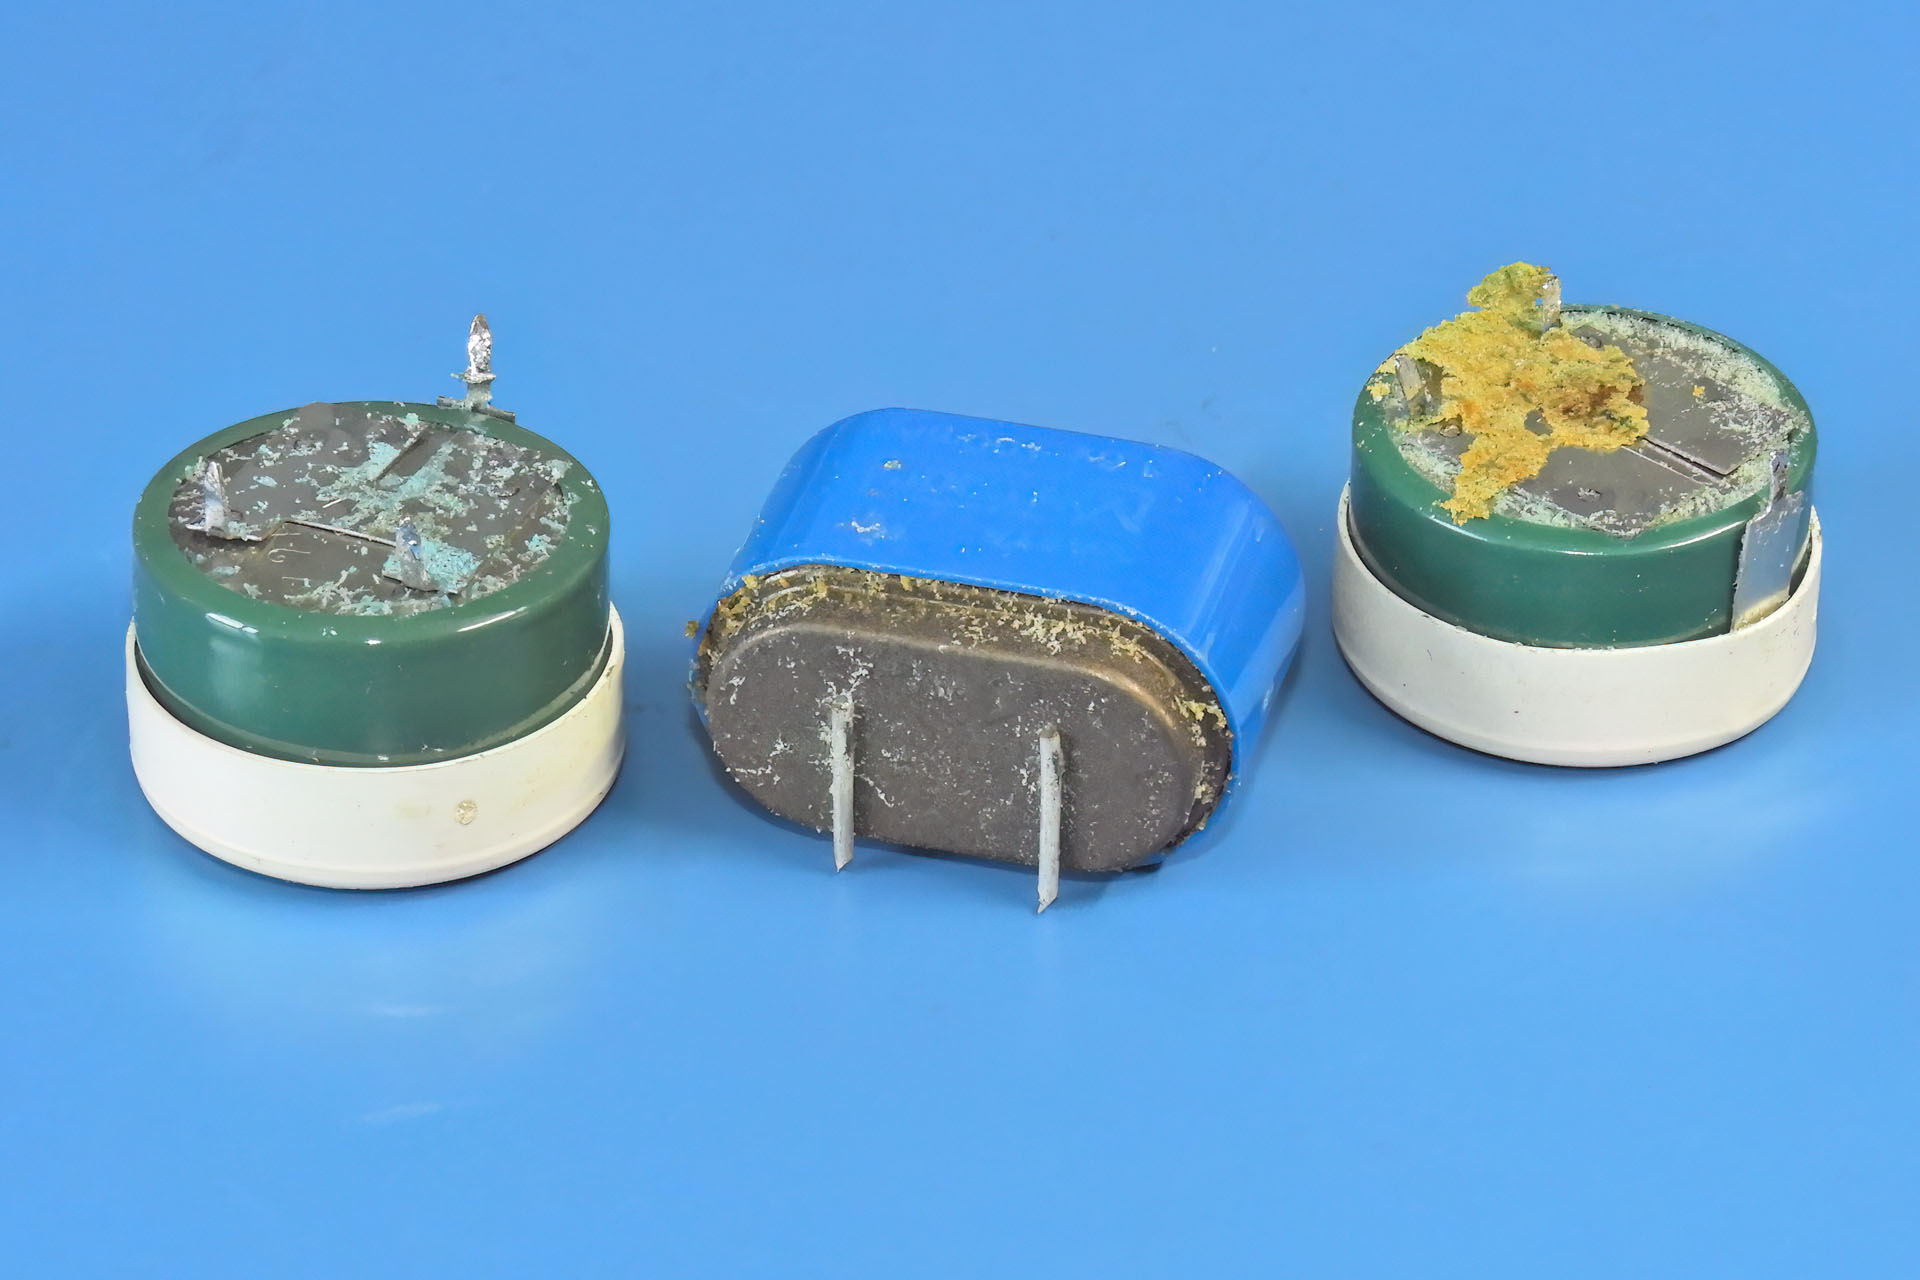
Like so many instruments of its time, the Simmons SDS7 memory was maintained by a Ni-Cd battery. This type of battery requires regular charging. Unfortunately, if not regularly charged and left for a couple of years, these batteries leak and can cause irreparable damage. It saddens me deeply that there are far fewer Simmons SD7s in the world, simply due to the fact that they got forgotten about and bad batteries did their thing.

A 2-in-1 solution, as well as making lithium battery conversion simple and straight-forward, Pleiades also provides a convenient platform for anyone considering a Simmons SDS7 MIDI conversion.

Making provisions for a piggyback mounting of a third-party board isn't a particularly big deal. The real secret of how Pleiades makes Simmons SDS7 MIDI conversion so easy however, is a tiny snap-in board, that well, snaps in where SDS7's sequencer signals come on to the back plane. Fortunately, this connection is easily accessible. Connection between the daughterboard and the Pleiades main board is via a 26-way IDC cable. Power and MIDI also come on to the Pleiades daughterboard so everything's really easy.

BUT THERE'S A CATCH...
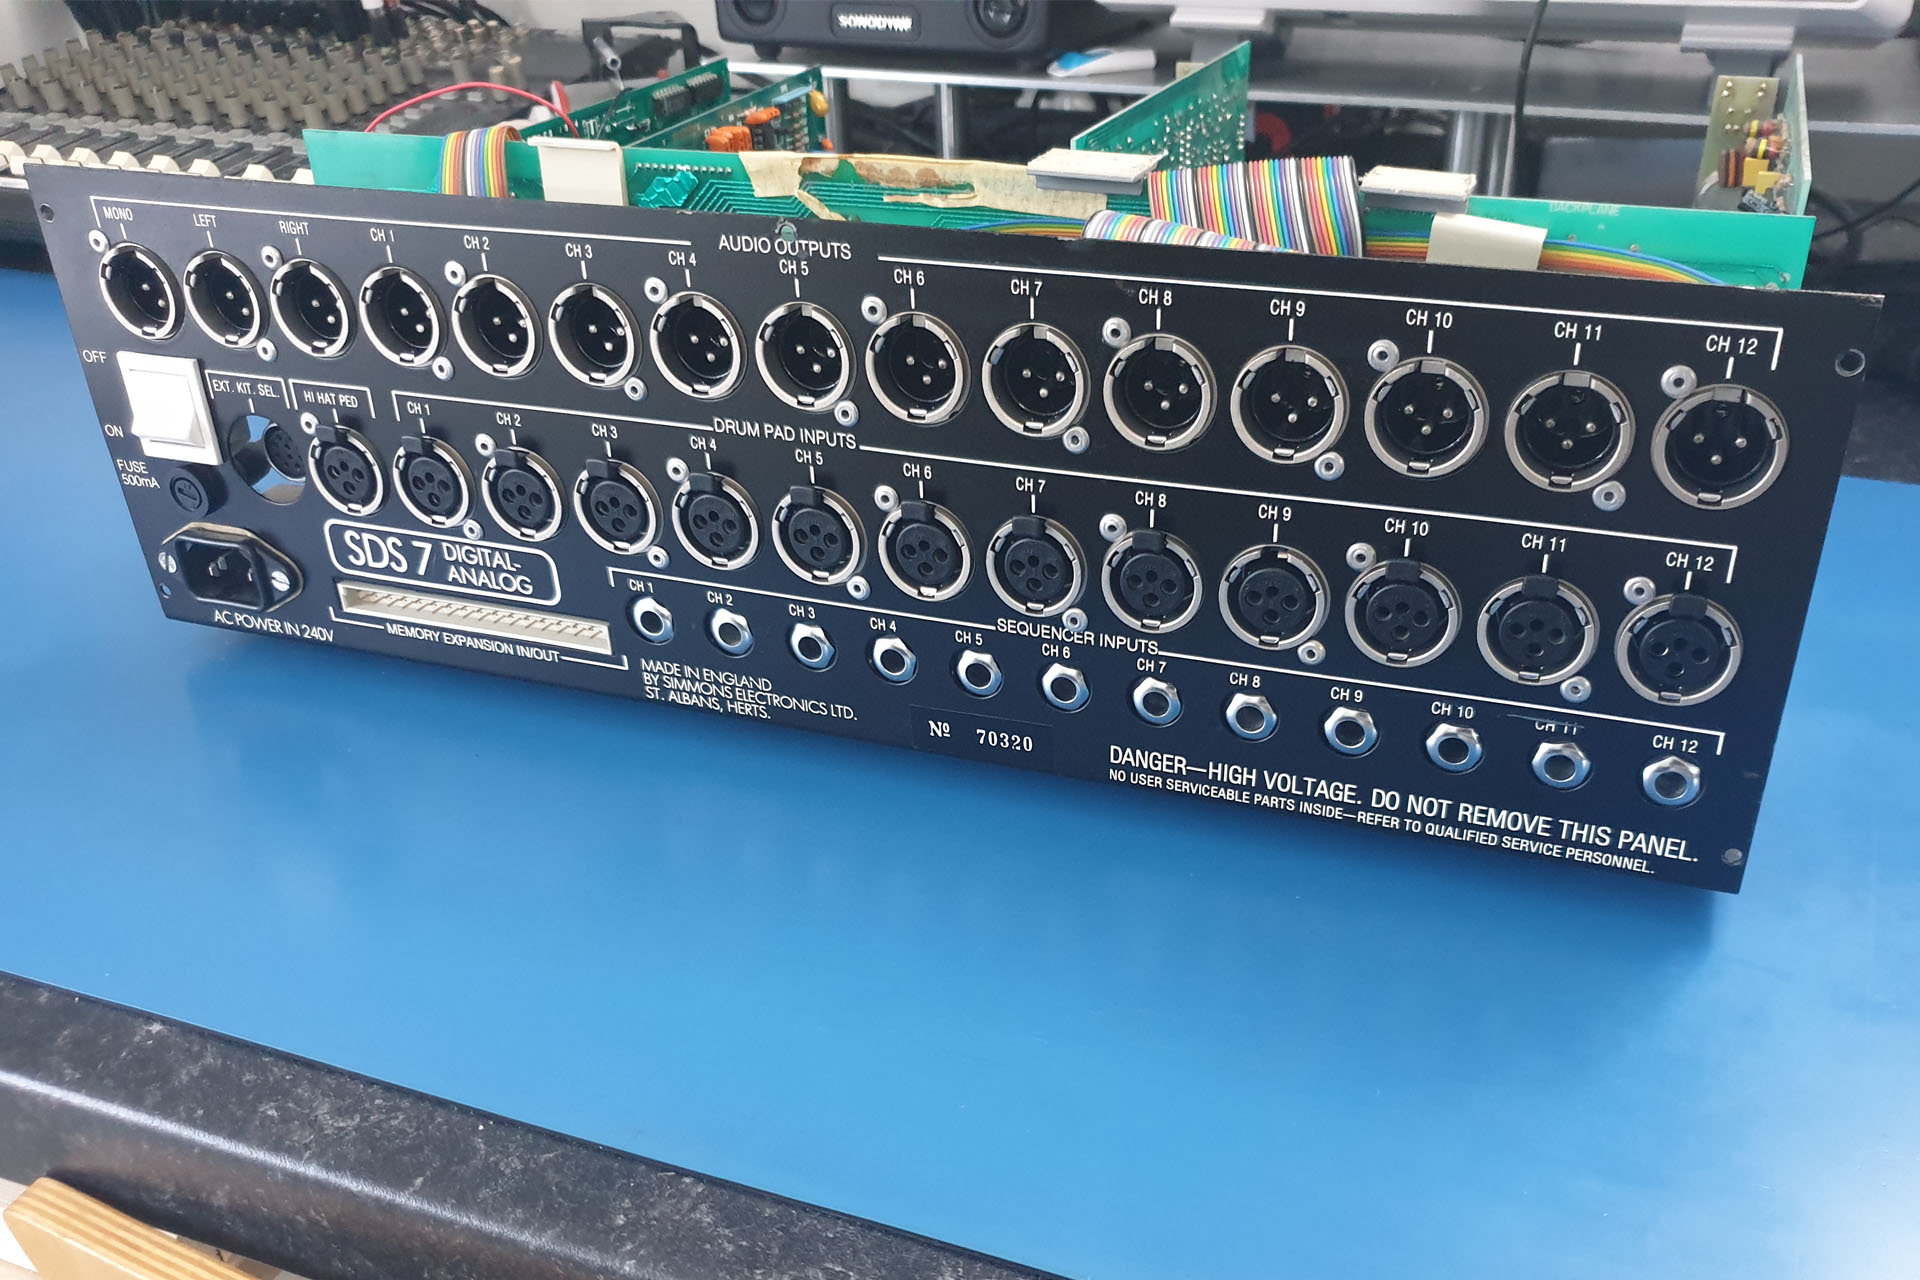
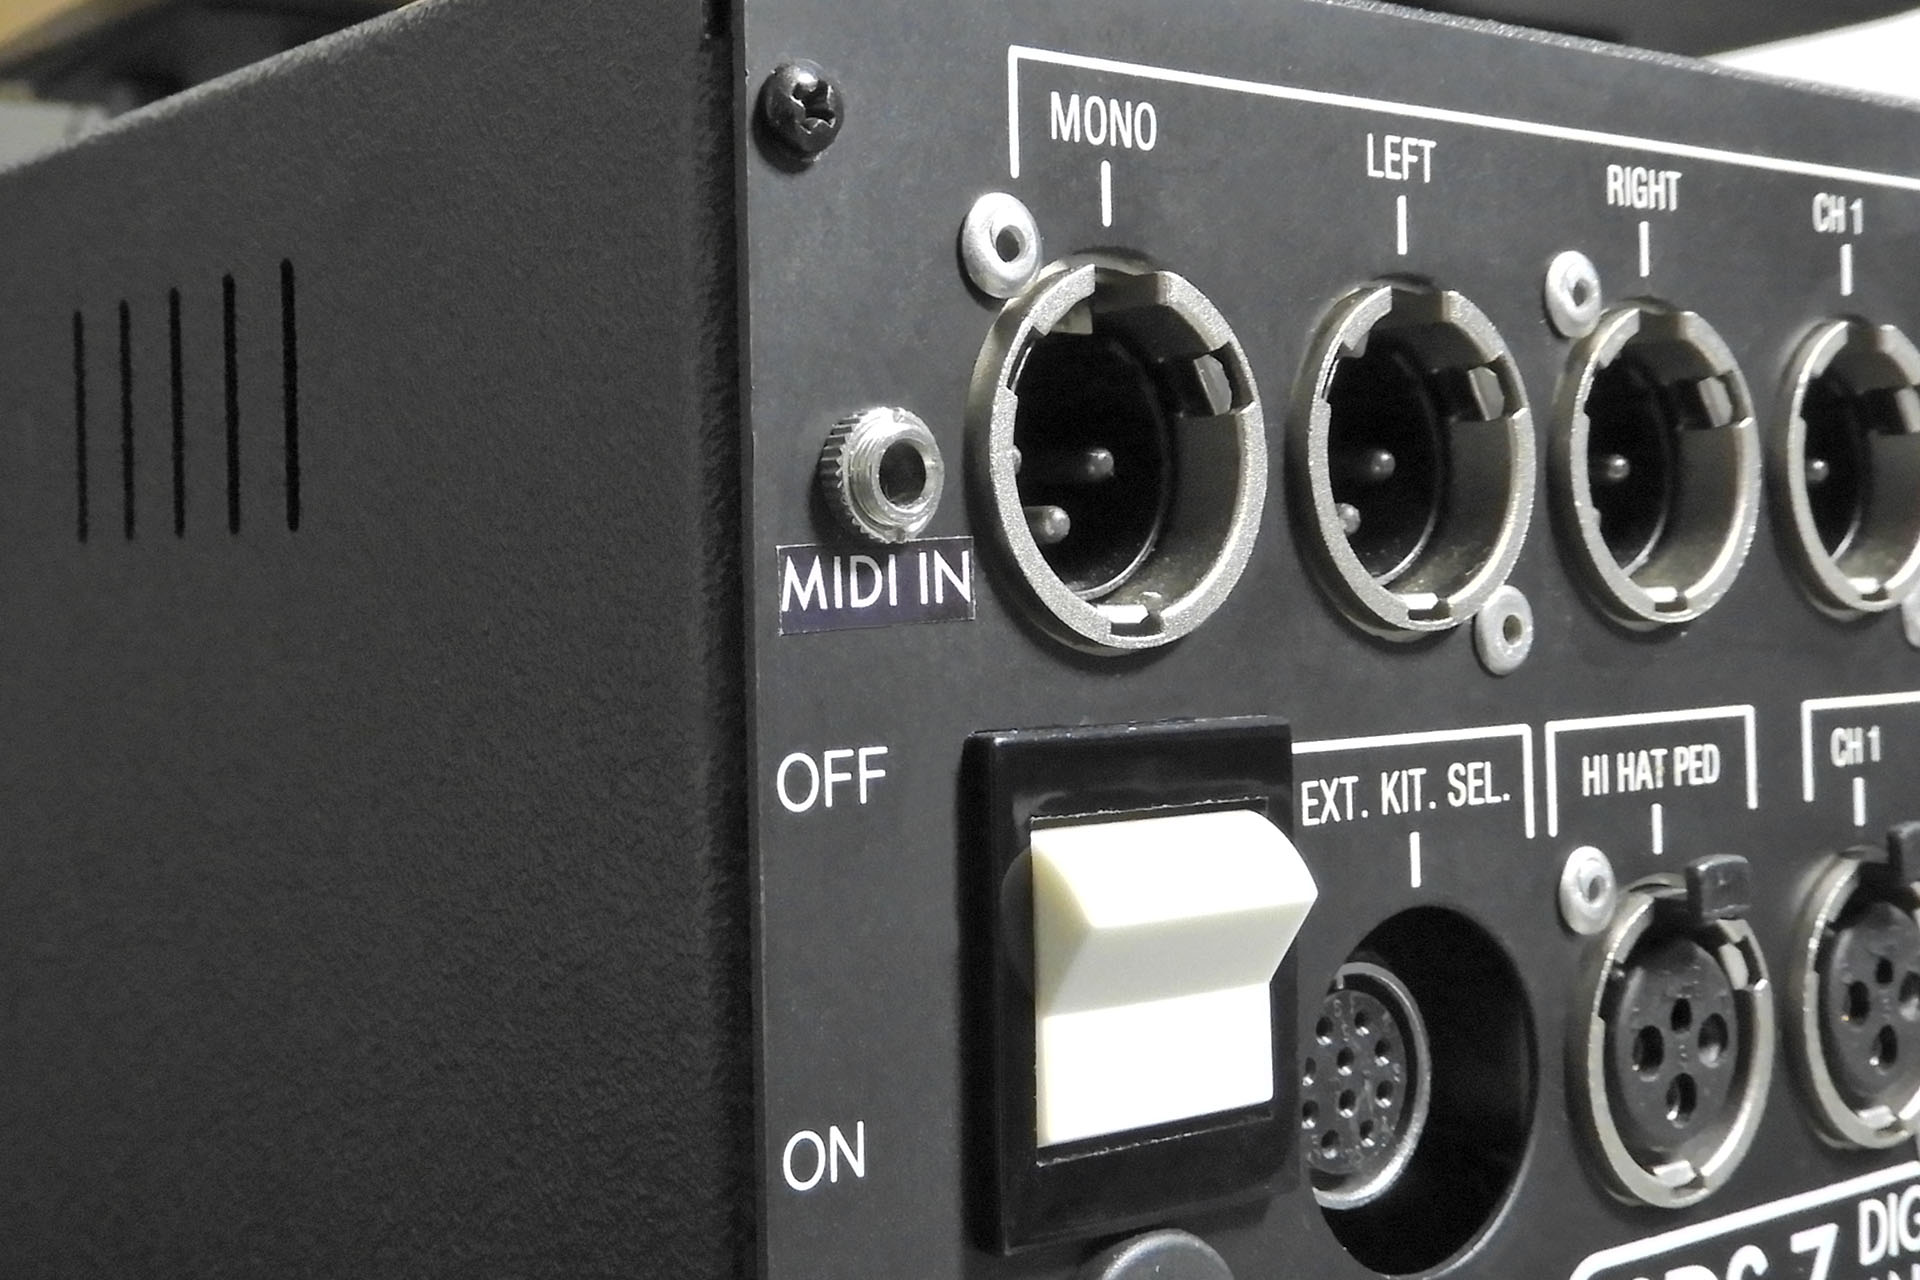
SDS7's sequencer input jacks short to ground when no plugs are connected. The idea was to keep things under control and a short to ground on unused inputs reduces the likelihood of anything unwanted appearing and thus, going through the system. More than forty years on however, this now becomes a problem when we want to MIDI up a SDS7 internally. Why? Well, the trigger part of the MIDI to trigger process is injected via SDS7's sequencer inputs. If they're shorted to ground, then they're not going to work!
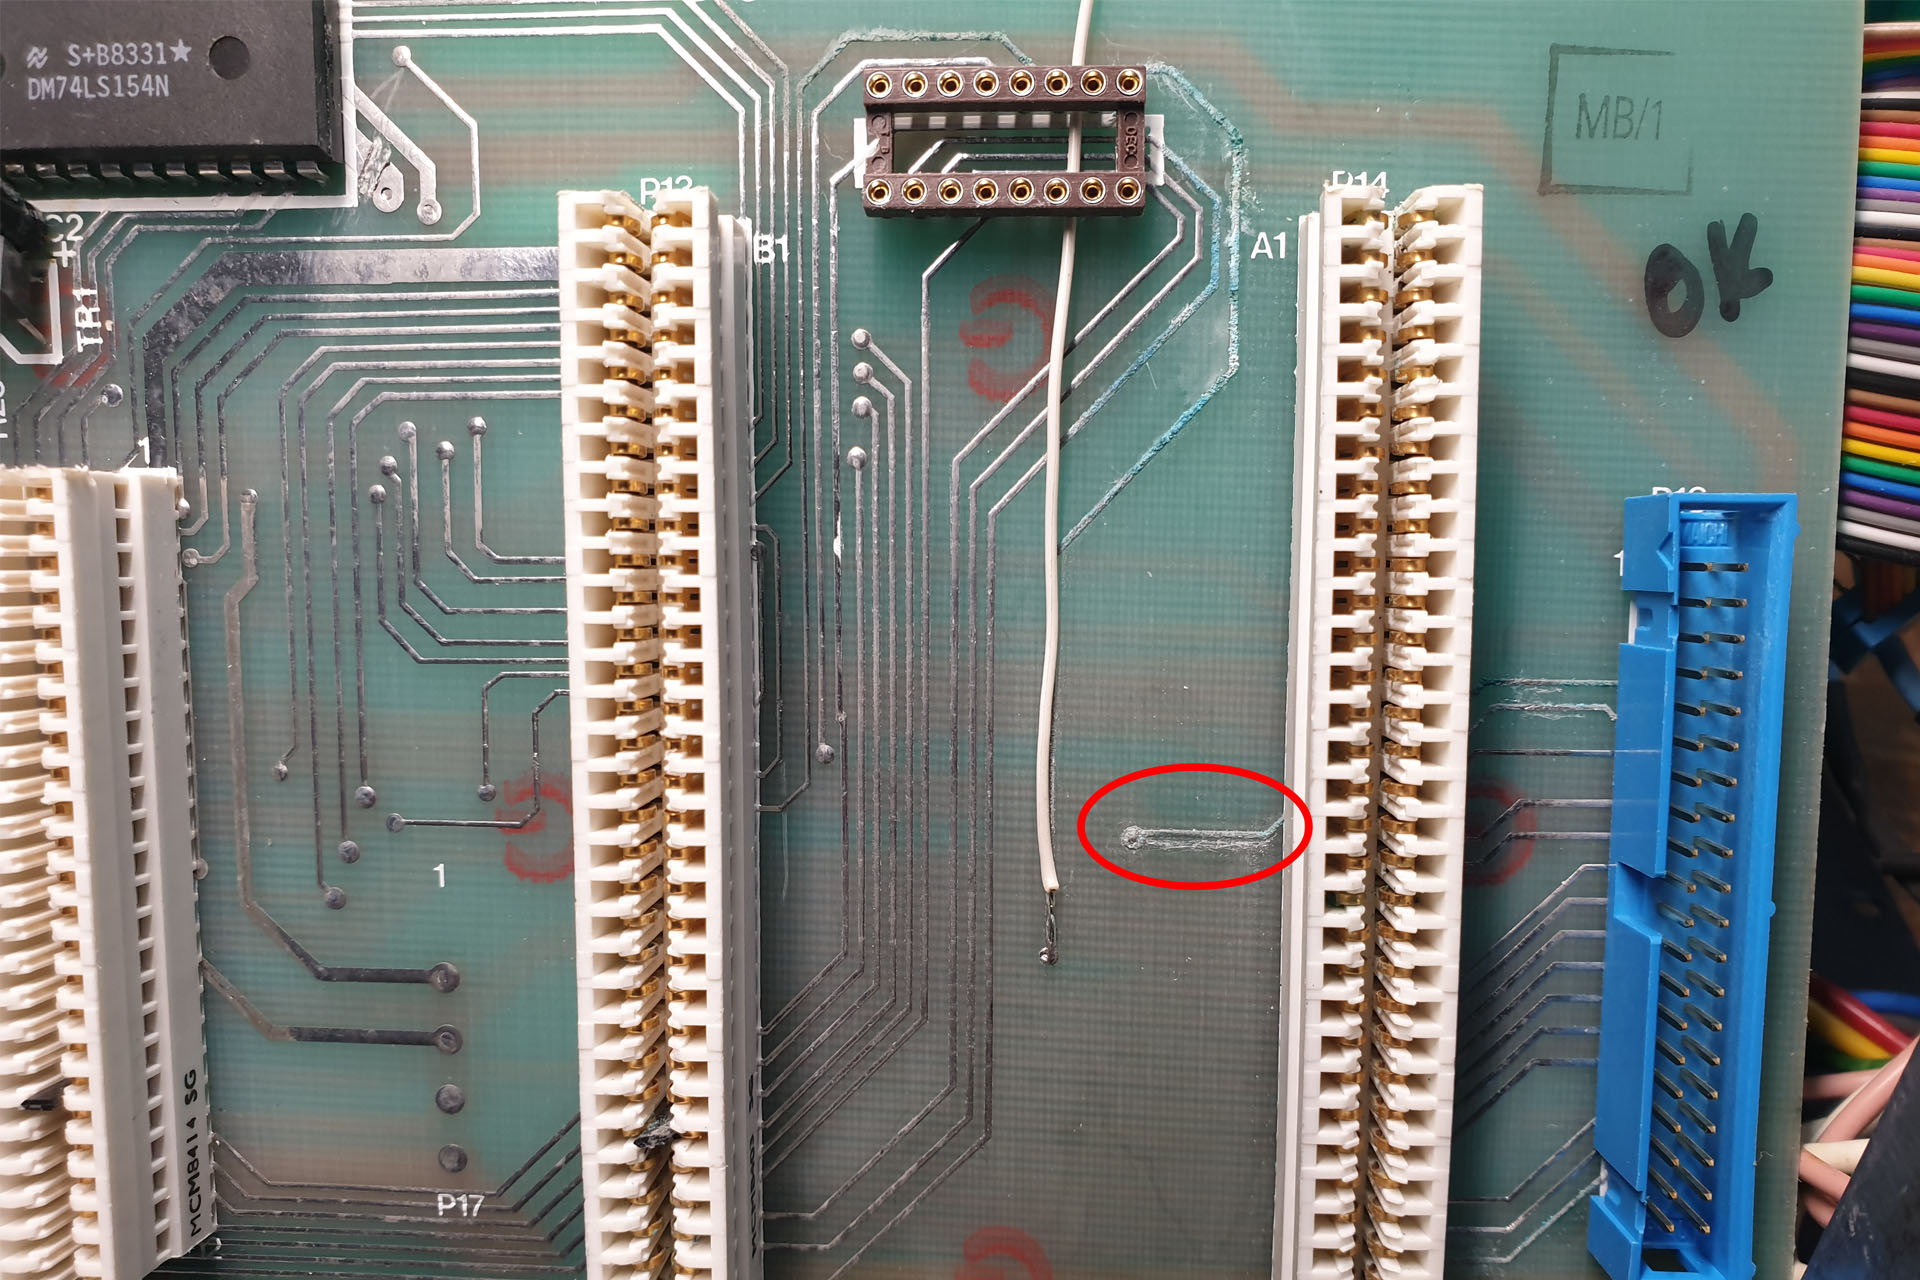
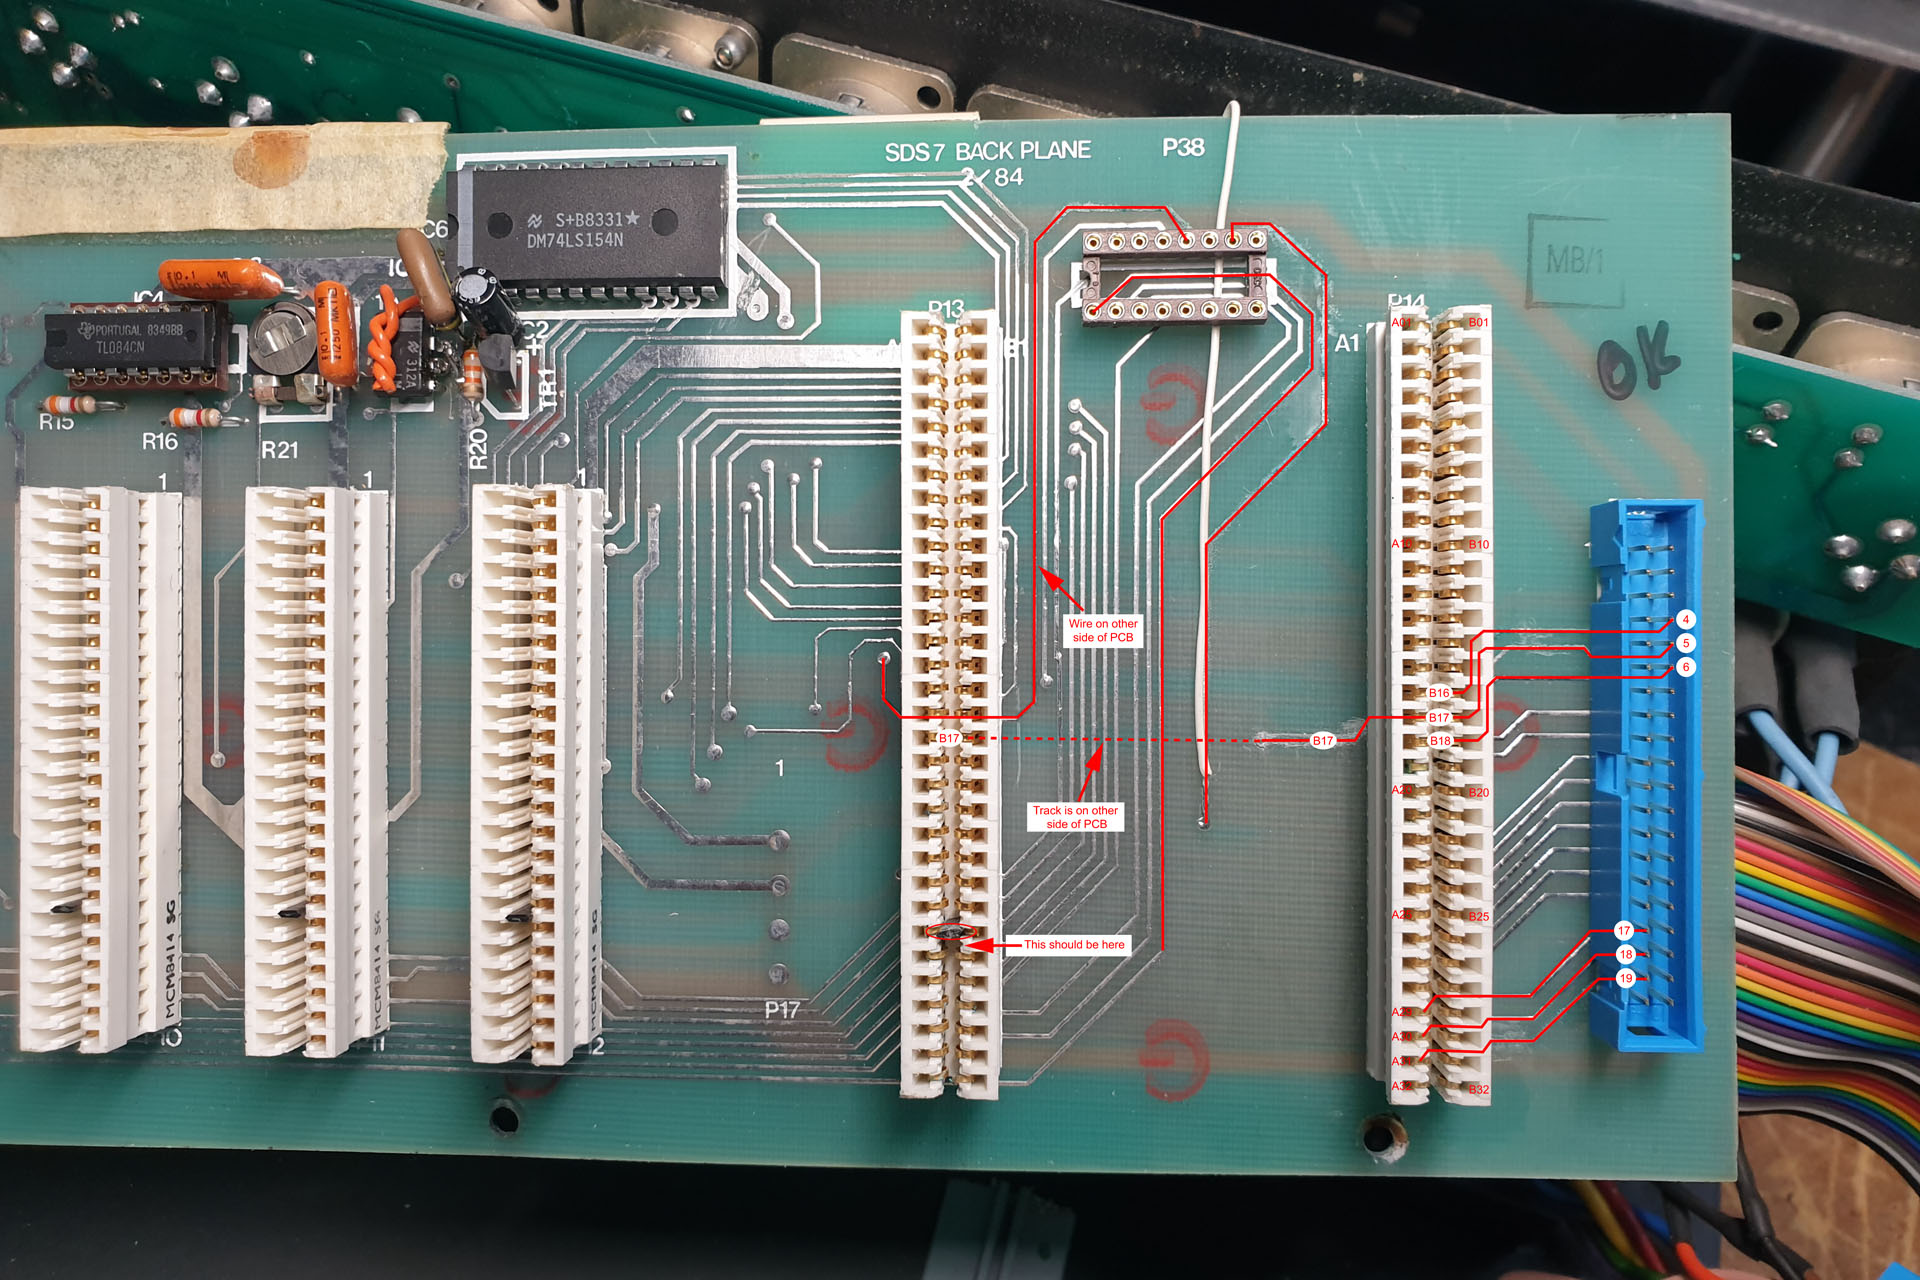
The twelve sequencer lines join the back plane (the main PCB that runs the width of the SDS7 and into which all cards connect), via a 14-pin IDC header and socket. The socket is located between the CPU and memory boards. The Pleiades snap-in plugs into this socket after the header has been removed. "Simple but brilliant Mr. Bond" but it does mean that when using Pleiades and uniPulse, the IDC cable needs to be completely removed as it's quite redundant. Plugging it into the socket on the Pleiades daughterboard will connect the shorted sequencer jacks to the trigger outputs of the uniPulse and so no triggers from the uniPulse will reach their intended targets.

Occupying a spare voice module slot (preferably slot 12) in your SDS7, all you need to do is remove the SDS7's main front panel to access Pleiades. This makes battery monitoring and changing simple. Pleiades also has switches and an LED which, if you have uniPulse installed, provide full access to some cool uniPulse functions.

Like all my upgrades and modifications, Pleiades doesn't require any holes to be drilled into your SDS7. You won't have to cut any PCBs or carry out any 'hacks' that will permanently change your SDS7. In fact, Pleiades can be easily removed thereby returning your Simmons SDS7 to factory. MIDI access for example, is via the pad trigger input of the voice module that's occupied by the Pleiades board. A XLR to 5-way DIN cable is included with the Pleiades kit. As I said... no holes need to be drilled! Cool, eh? 🙂
You'll have noticed that Pleiades has two AA battery holders. This configuration is designed to make future battery changing possible WITHOUT having to back up your SDS7 memory or having your SDS7 powered on.

After several months of testing, it would seem that my original calculations may have been correct and that a single Li-SOCl2 3.6V AA battery would retain the SDS7's memory for close to 150 years! Of course, the battery itself would not last that long but the point I'm making is that you'll only need a single battery in Pleiades to keep your SD7 happy.

Changing your battery regularly, say every five years or so, will naturally mean that your SDS7 memory will be intact when that time comes. So simply dropping in your new battery into the unoccupied battery holder and then removing the old battery is all you'll have to do. Now, isn't that just so easy?!?!?
Additionally, each battery holder has its own (independent) diode / resistor protection circuitry. This arrangement ensures that the new battery won't rush-charge your old battery while you perform the swap. And YES, it also means that should be really (REALLY) want to use two batteries, then the same will apply; independent protection diode / resistor networks will mean that any micro voltage differences between the two batteries won't make one battery inadvertently charge the other.

Excluding the Tubbutec uniPulse, Pleiades is supplied with everything you need for a smooth install and a fully illustrated and detailed installation manual is available after purchase.

IMPORTANT: If you require a Tubbutec uniPulse, please order here, specifying that you require the Pleiades Simmons SDS7 kit.
!!!! WARNING !!!!
There's a post that's been on the Internet for a while in which some guy slaps a lithium battery into his SDS7, wires it up to the memory board and claims that it works. PLEASE DO NOT DO THIS.
When powered up, the SDS7 will try to charge the battery. This will not be good and could even lead to a fire. Pleiades has been designed to do the job properly. Yes, it requires a small modification to the memory board but Pleiades won't destroy your SDS7 and definitely won't catch fire.
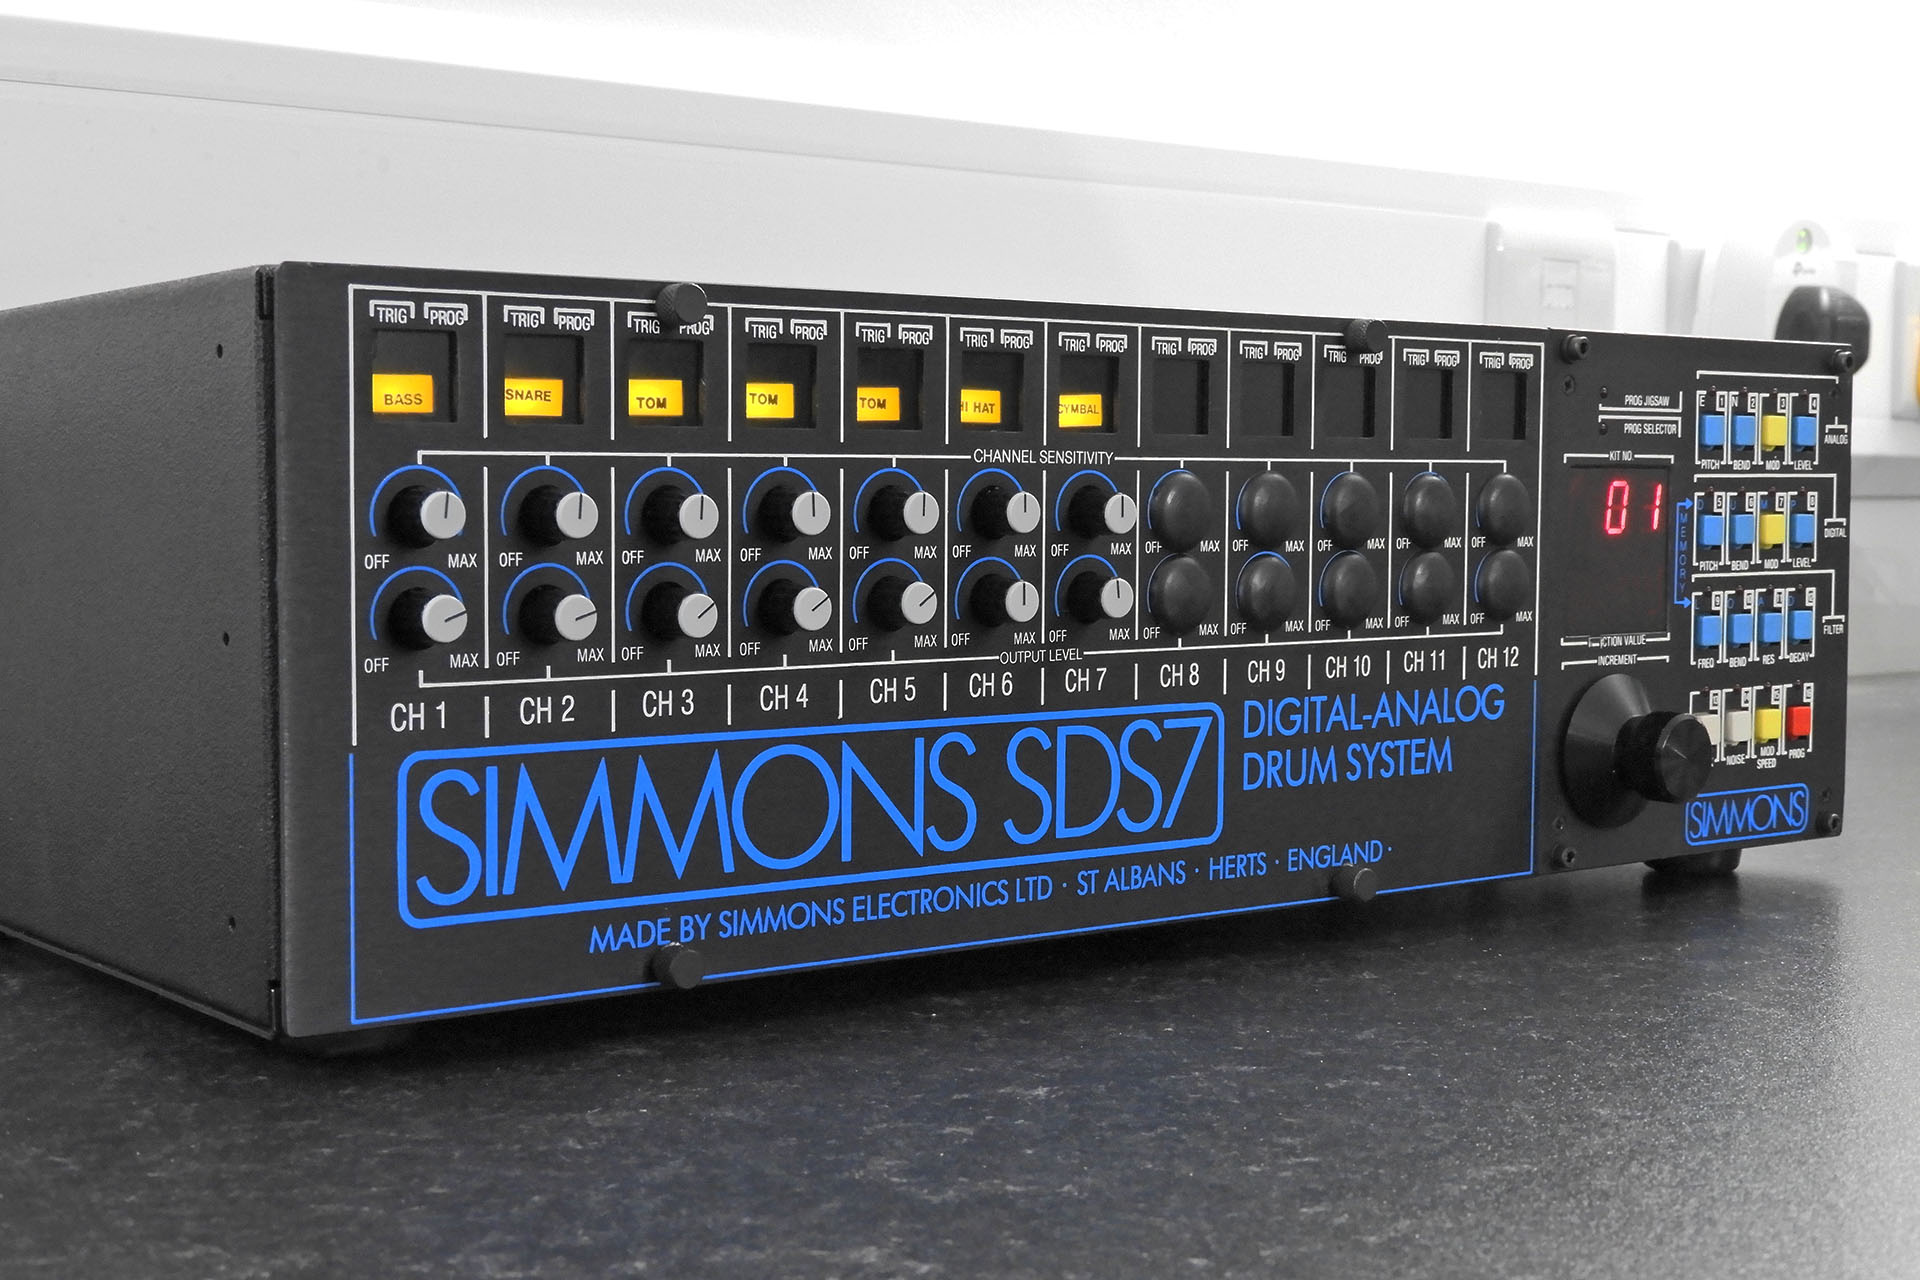
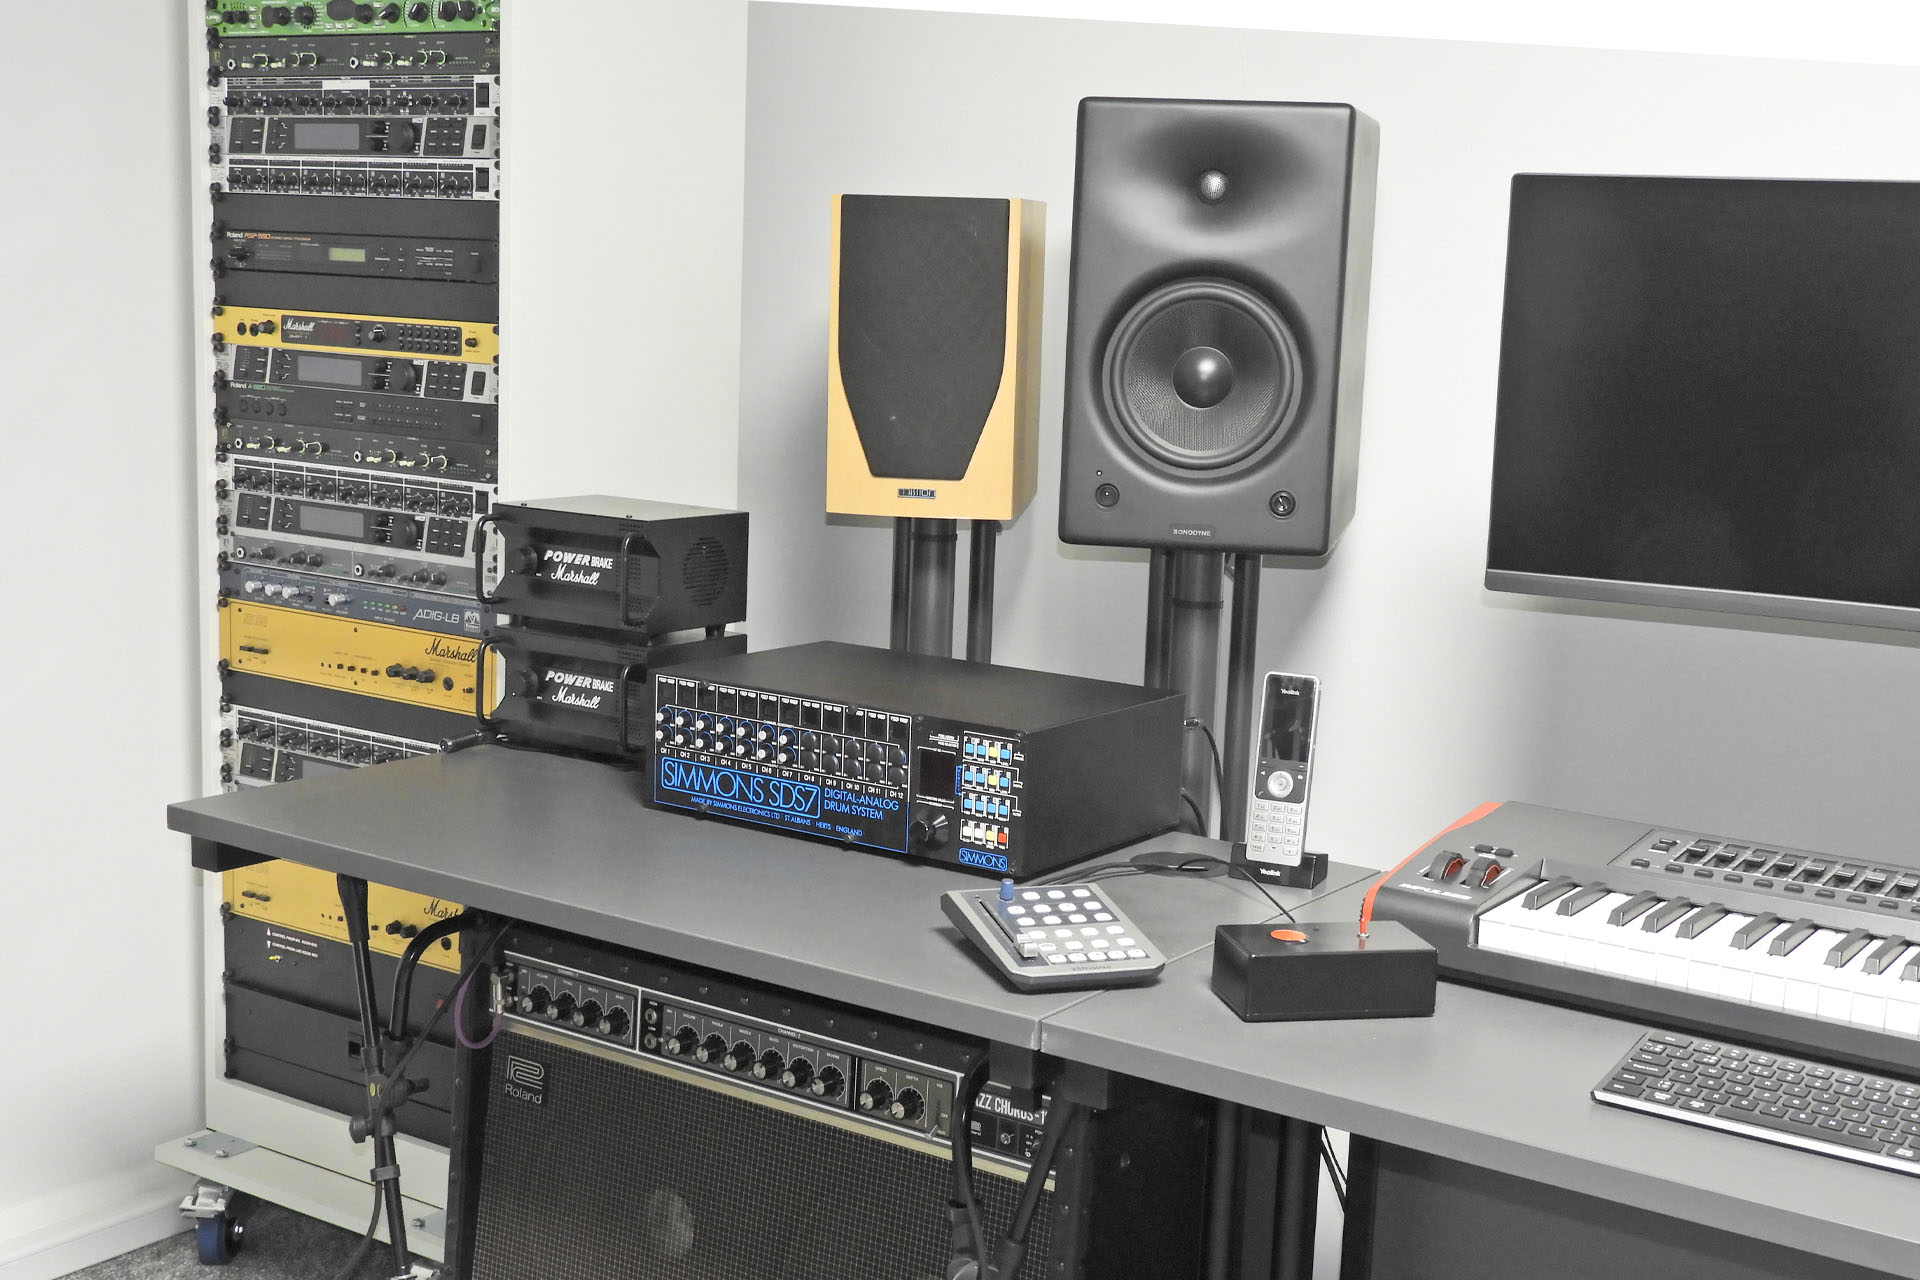
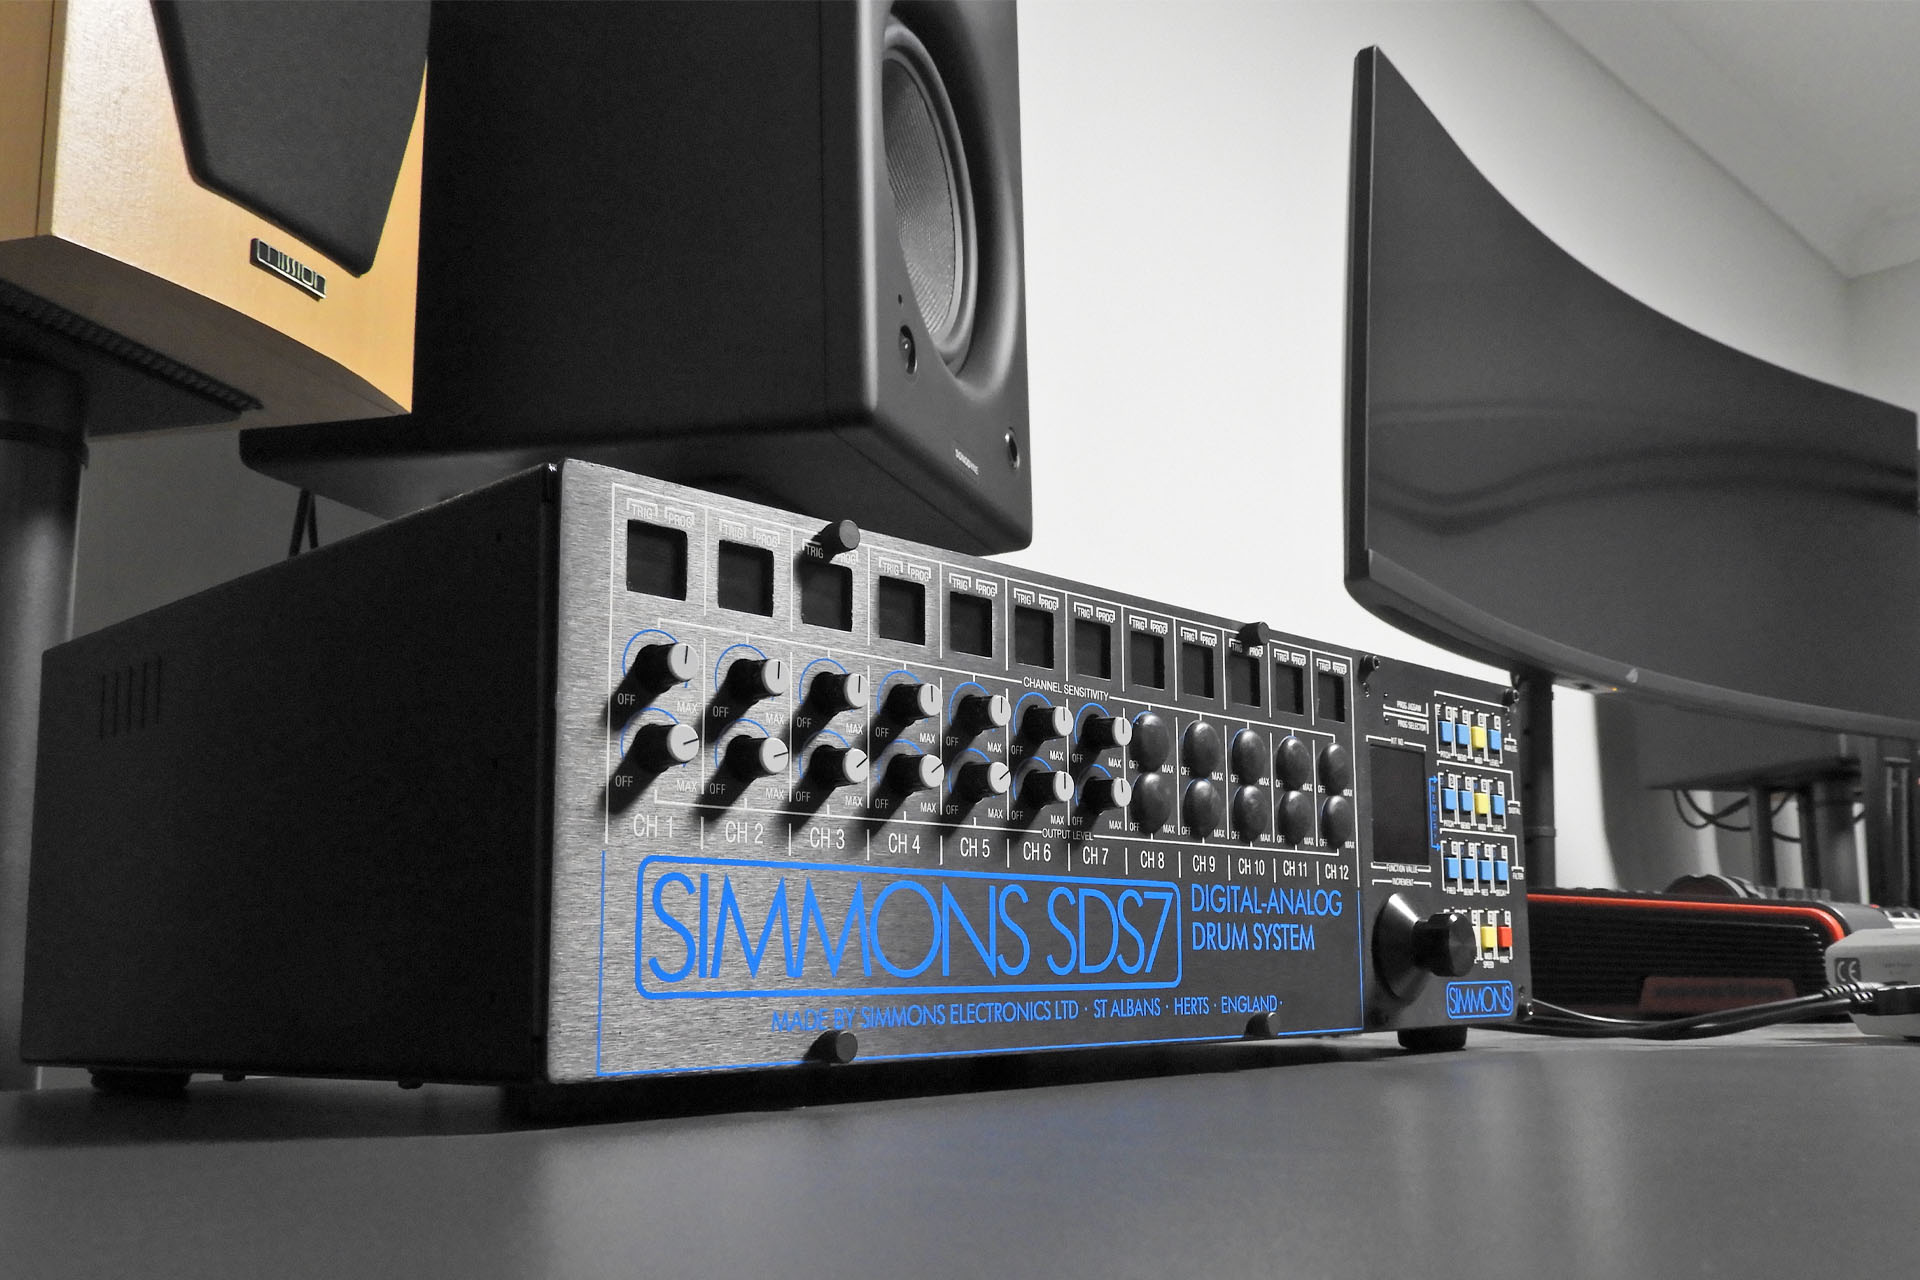
I joined Simmons a couple of years after the SDS7 was launched but next to the SDX, it's always been my favourite kit. I know that many favour the iconic SDSV analogue drum system but the SDS7 was just so much more 'me' at the time.
The SDS7 I bought while working for the company was sold to fund the purchase of my first SDX. It was a decision I always regretted but last December, a SDS7 came up on a well-known second-hand music gear site and I just had to have it. You can read all about that here.
 And finally, my Pleiades lithium battery conversion for the Simmons SDS7 would have taken much longer to develop and might not have even happened at all, if it wasn't for the help, support and encouragement that I received from my Simmons Technical Network friends and colleagues and my good friend, Guy Wilkinson. THANK YOU Ed Rose, aka The Simmons Guy, Michael Buchner and Patrice Jacquot.
Guy, many thanks for cracking on with and contributing so much to the Advanced Memory Expansion Pack (AMEP) for the Simmons SDS7.
![]() Pleiades features extensive uniPulse integration and being a firm believer in partnerships, I'm very proud to mention the special relationship between Tobias of Tubbutec and myself. I see too many people now-a-days thinking that they can do everything themselves... and failing!
Pleiades features extensive uniPulse integration and being a firm believer in partnerships, I'm very proud to mention the special relationship between Tobias of Tubbutec and myself. I see too many people now-a-days thinking that they can do everything themselves... and failing!
I first got to know Tobias while developing SDSM, my uniPulse adapter for the Simmons SDSV. Both Ed Rose and I had a couple of ideas for uniPulse and Tobias kindly updated the uniPulse firmware, implementing those ideas. AWSOME!
Pleiades is built to order and handmade in Hemel Hempstead, Hertfordshire, United Kingdom, only a few miles from St. Albans where Simmons used to based and where I used to work.
Pleiades easy MIDI for the Simmons SDS7 is available to purchase here:
UPDATE - 20th March 2025
The SDS7 memory comprises ten 6116 SRAM chips. These have a minimum memory retention voltage of only 2V so it would seem logical to assume that, so long as the back-up battery voltage is greater than 2V, SDS7's memory will be just fine.
In theory, that's true but there's something else going on...
IC1 (awkwardly located on the power supply PCB) is a CD4011 quad 2-input NAND gate. Used to buffer, invert and interface the Power-On-Reset (POR) circuitry, it's a crucial component in starting up and shutting down SDS7. It's permanently kept alive so just like the memory, when SDS7 is powered off, this device switches over to battery power.

Unfortunately, the CD4011 has a minimum operating voltage of 3V which means that the memory back-up battery has to be above this value. If it's not, then IC1 won't function, the result being that SDS7 won't boot properly, if at all. As mentioned, so long as the battery voltage is above 2V, your SDS7's memory should in theory, remain intact. In practice however, this is NOT the case and without an adequate 'chip enable' (CE) voltage applied to the 6116s, the memory will corrupt.
Of course I considered replacing IC1 but there's no pin-for-pin equivalent to the CD4011 which has a minimum operating voltage of 2V. The SN74HC00N will operate down to 2V but unfortunately gates B and D are oppositely orientated to those on the CD4011. 😡
Developed at the same time as Pleiades, Dark Matter ended up being more than just a replacement power supply for the Simmons SDS7. I took the opportunity to address the short-comings of the original SDS7 POR circuit and so completely revised the design. Not wanting to stress out my test SDS7 by presenting it with something totally alien, my revised POR circuit included a SN74HC14AN which is actually a hex Schmitt trigger inverter. The 74HC14 has a crucial benefit over the original CD4011. Yes, you guessed it, this device has a minimum operating voltage of 2V. Exactly what I was looking for.
So, that's great if you buy Dark Matter. Hey, Dark Matter was even designed to seamlessly integrate with Pleiades. The Dark Matter installation however, is very involved and won't be for everyone so I searched for an alternative solution and quickly came up with something I've called 'RESET7'.
UPDATE - 7th May 2025

REST-7 is now available and is offered as an option extra when you buy Pleiades.