


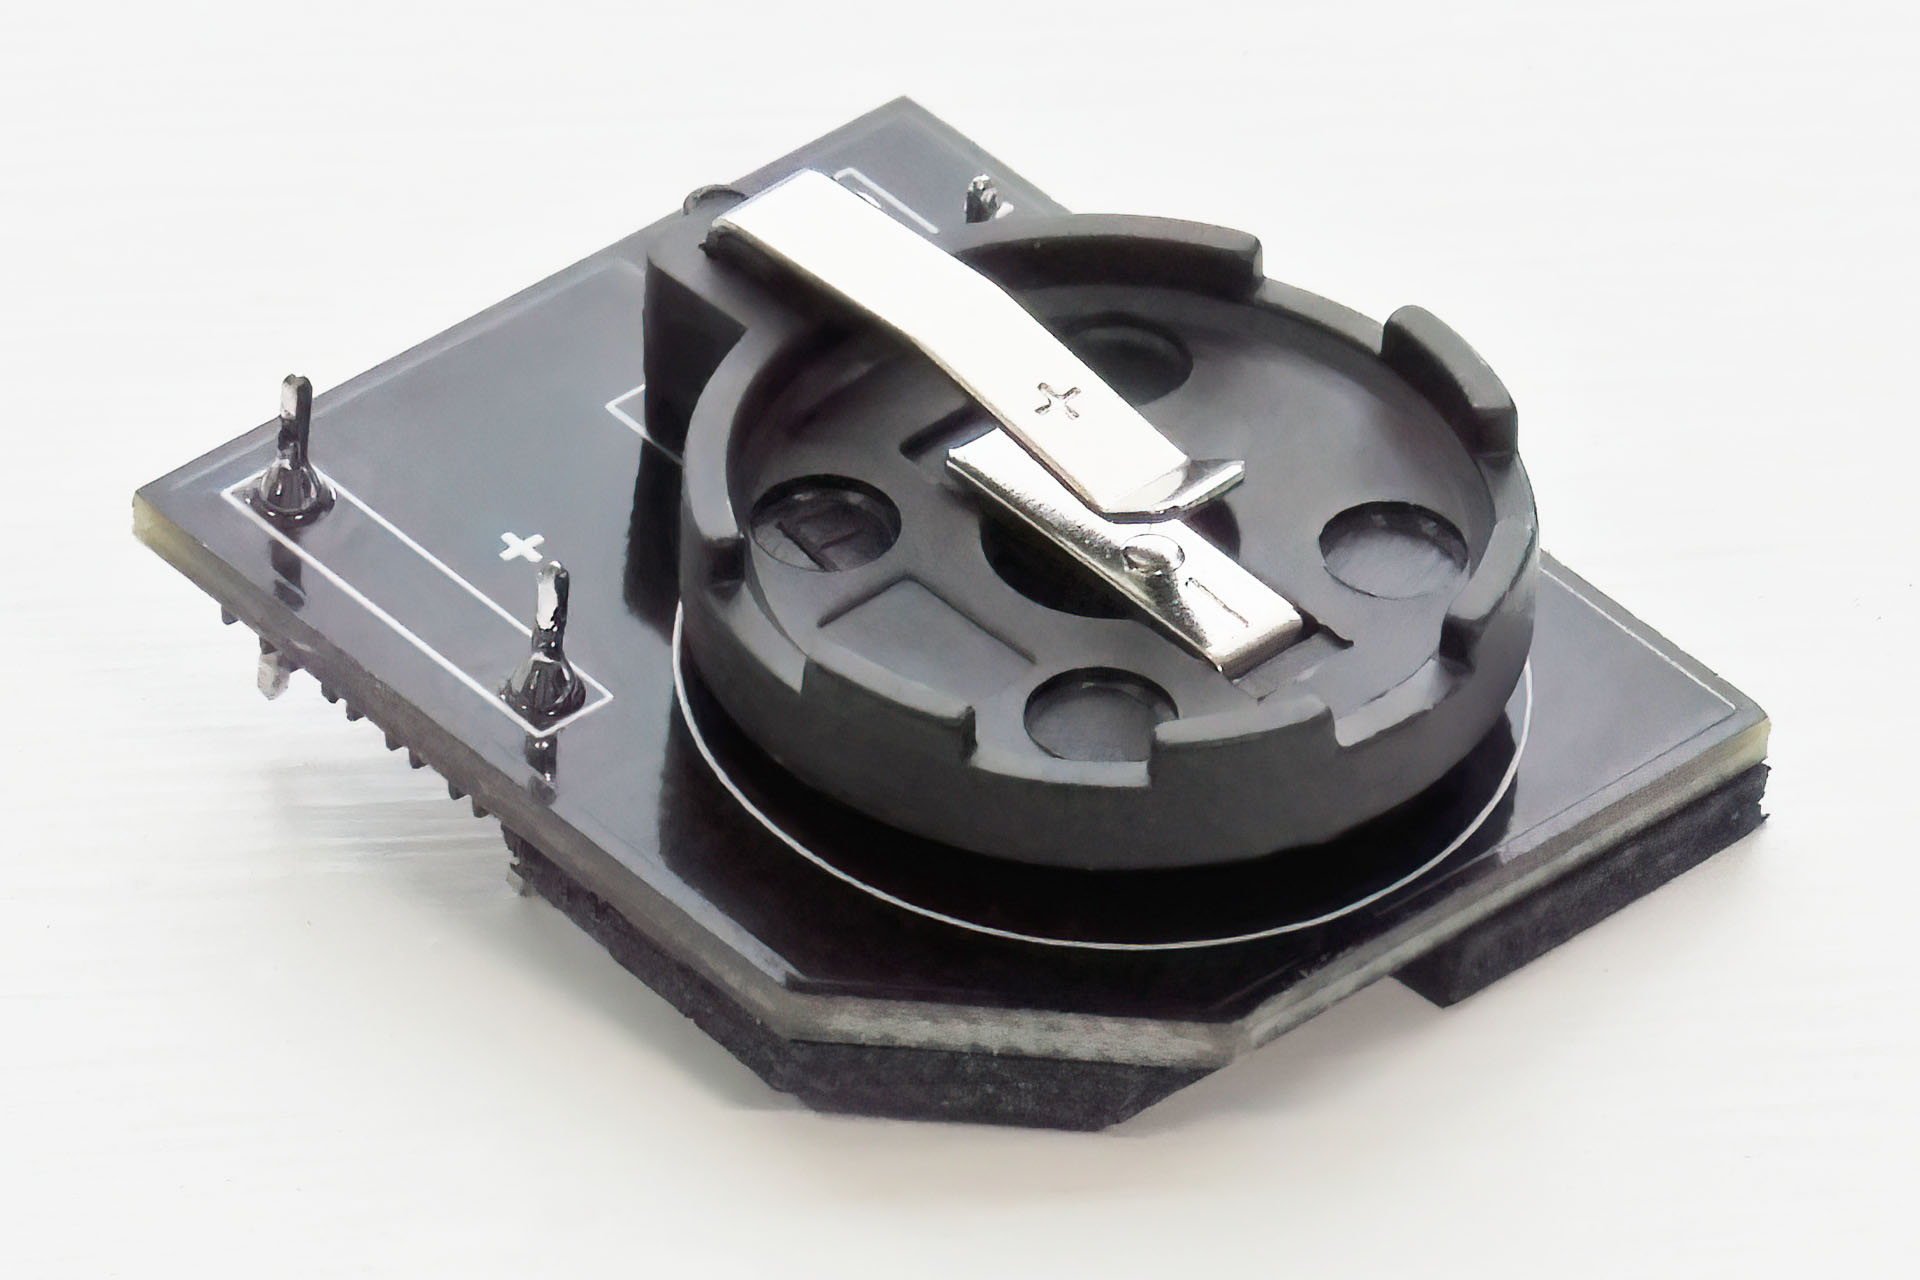
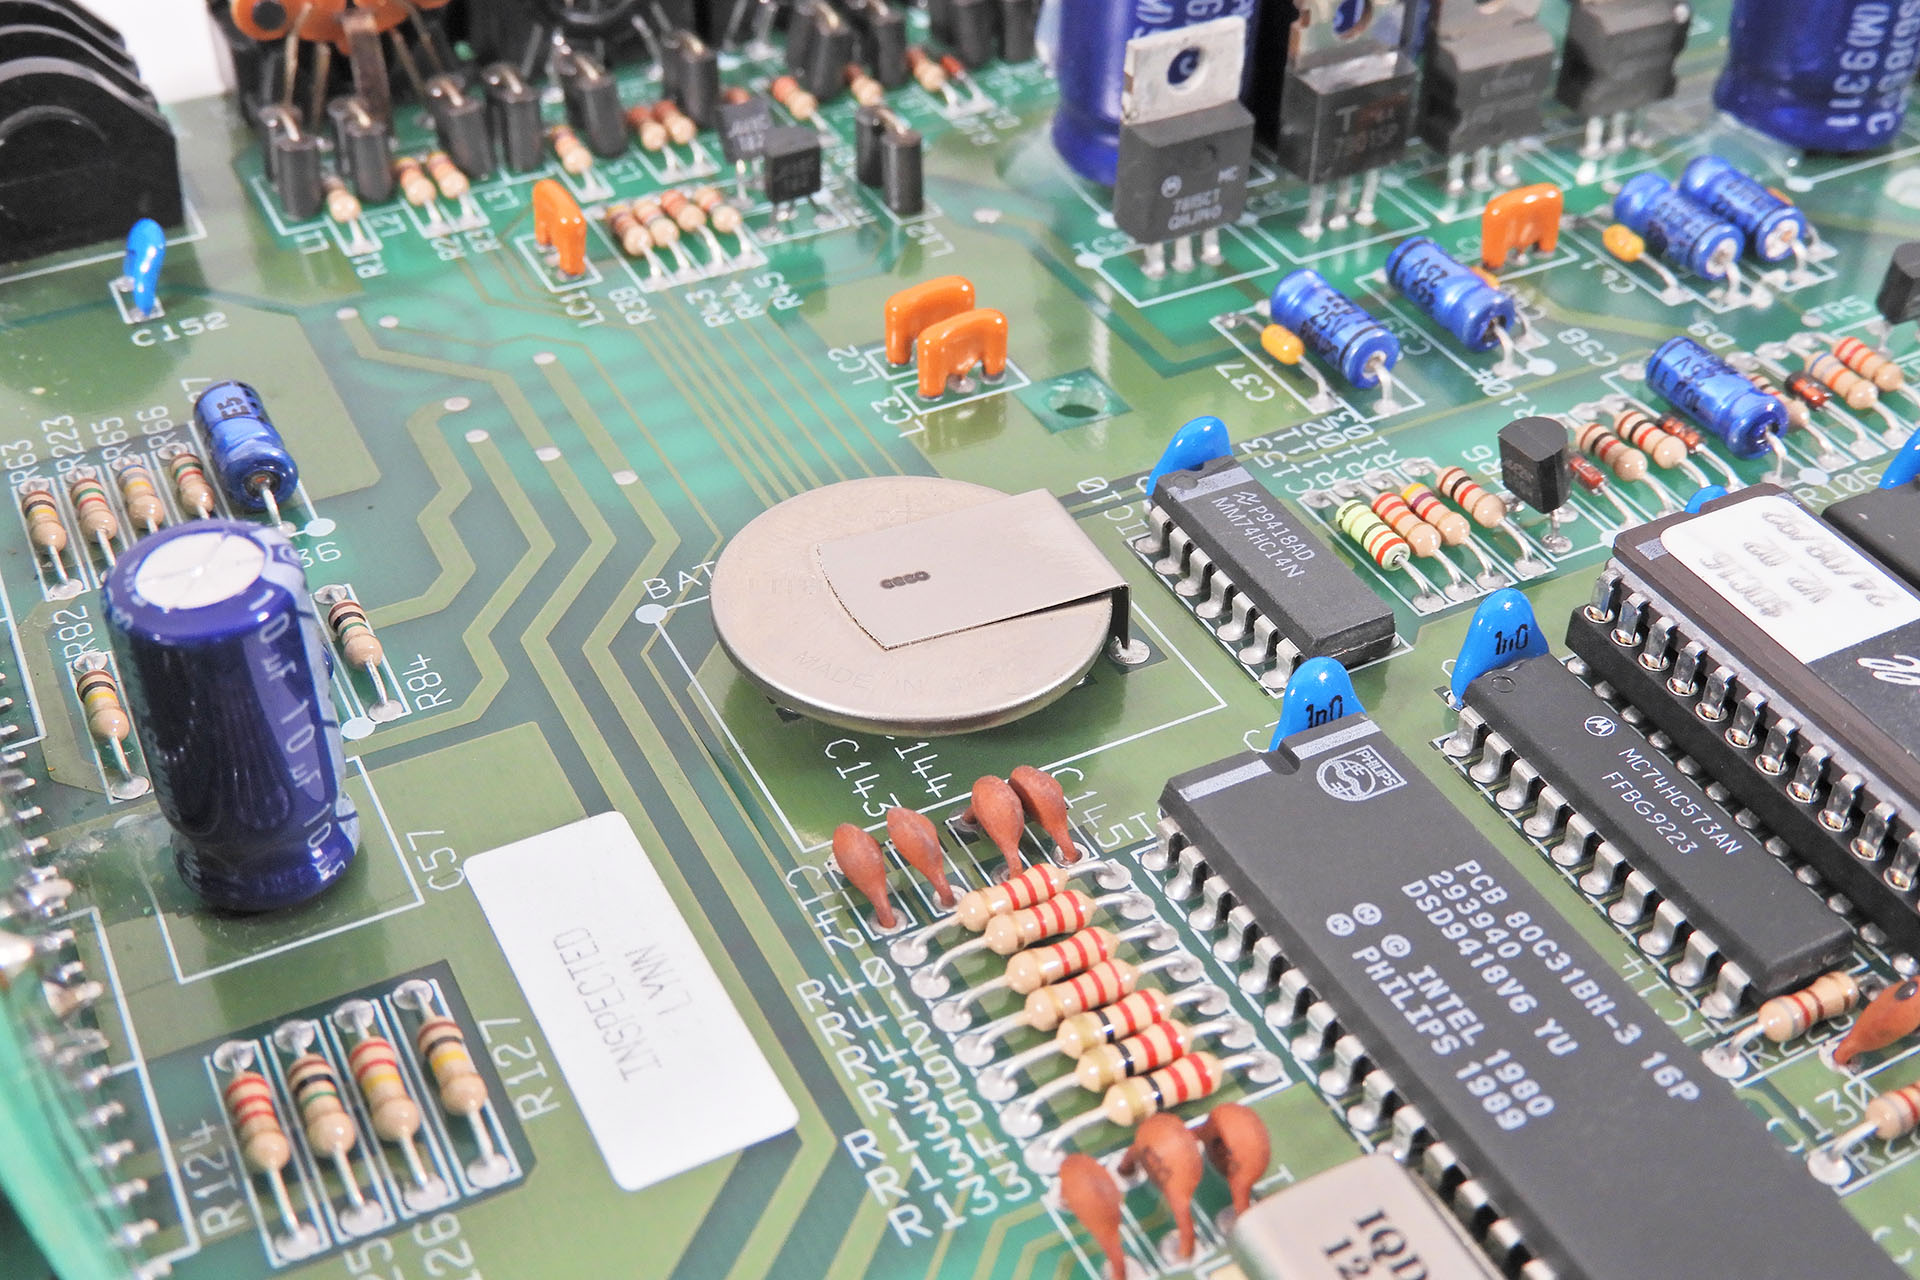
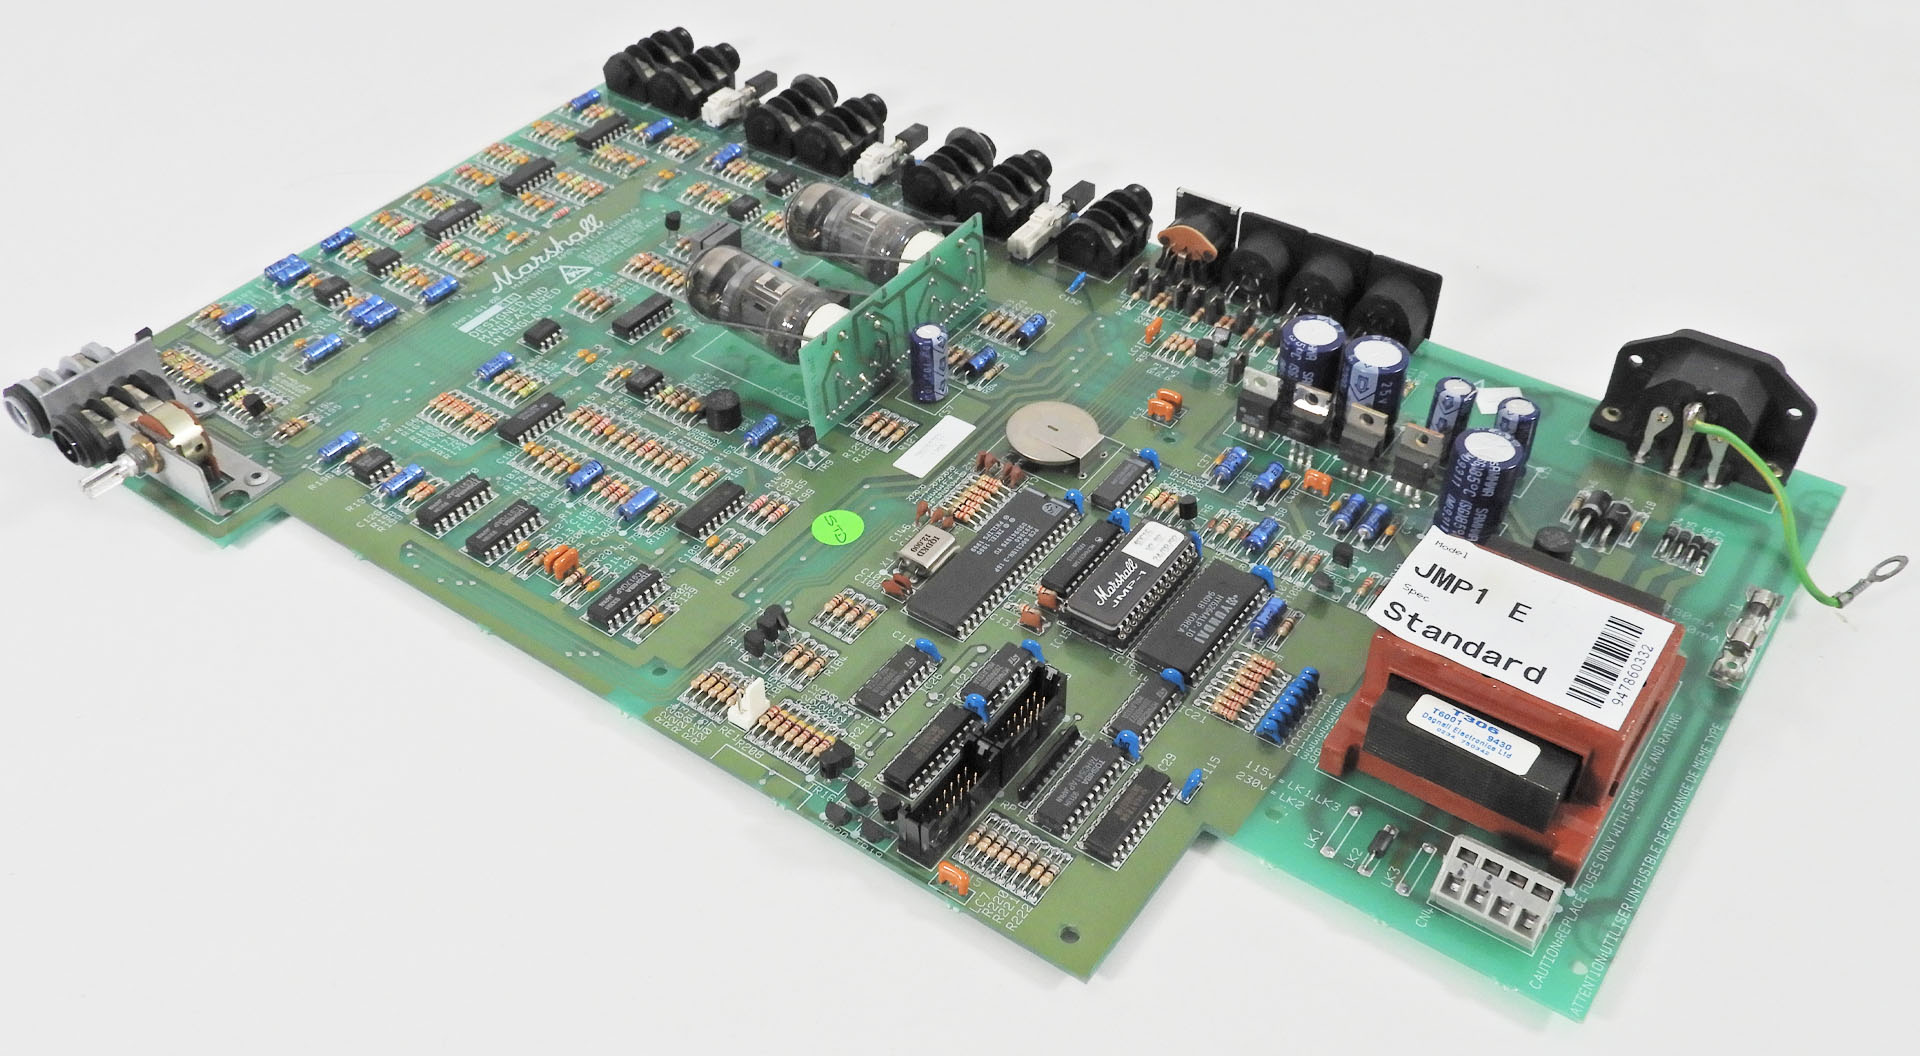
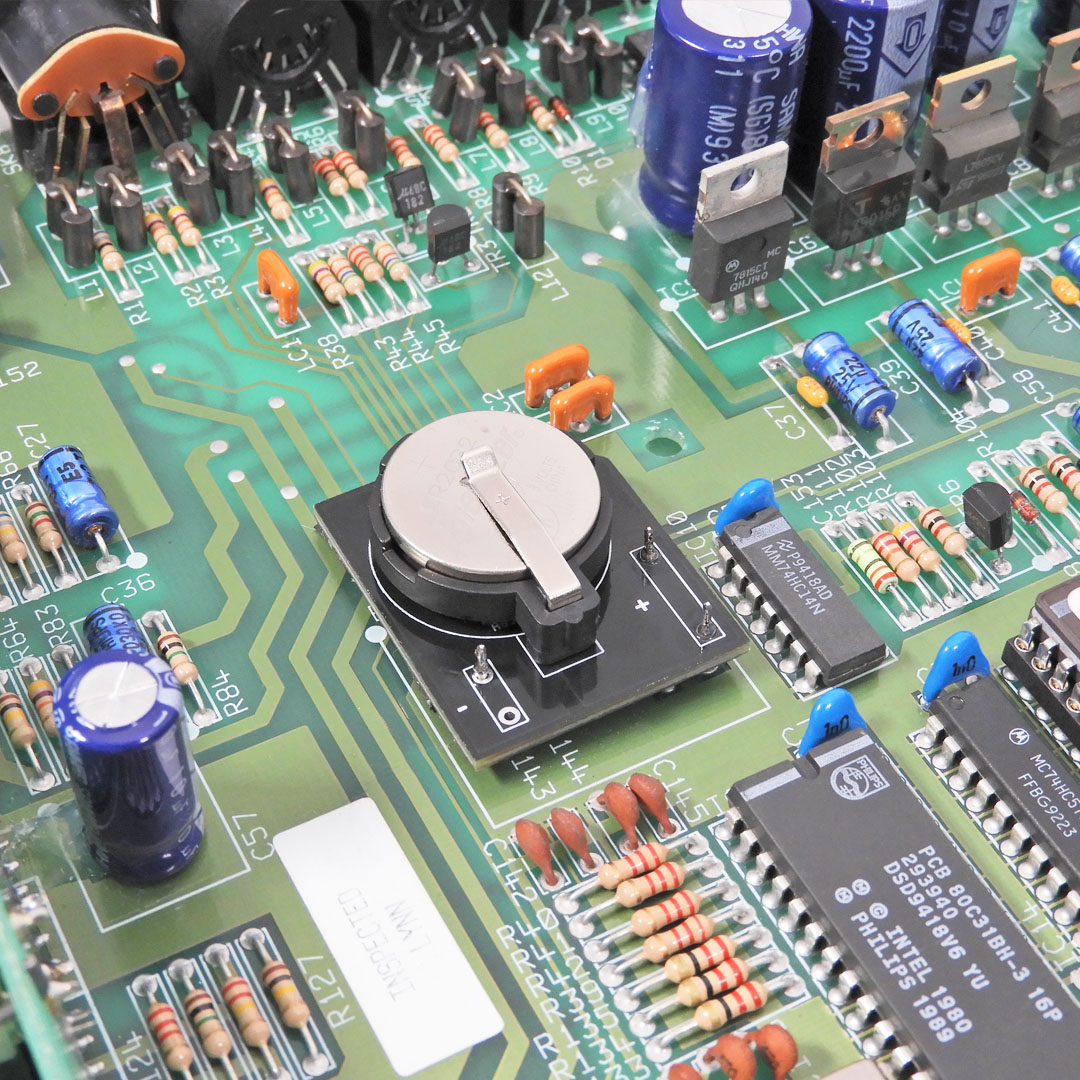
I often receive e-mails requesting I look into various aspects of this legendary MIDI valve pre-amp. One request I receive a lot, has led me to develop a CR2032 adapter for the Marshall JMP-1. This replaces the factory soldered battery, with a clip CR2032 holder allowing for the battery to easily be replaced.
While readily available several decades ago, CR2032 batteries with solder tags have dropped out of fashion and even if you can find one, there's a good chance that it won't be exactly the same as the one that fits in your gear. As I often say "the nice thing about standards is that there are so many to chose from".
My little CR2032 adapter for the Marshall JMP-1 takes care of that, well at least in the JMP-1. 🙂 It's not rocket science but can make life a little easier.
Unfortunately the main PCB has to be removed to fit this adapter and that's not an easy job. It's a process which requires time, patience and of course, the right tools but which is detailed in the installation manual, available after purchase. In fact, the installation manual goes into so much detail, it's ended up being the most comprehensive manual I've written for something so incredibly small!
To prevent tilting during battery swap-out, the underneath of the adapter has a 2mm rubber pad which keeps it very flat and secure.
UPDATE - 9th February 2024
With so many bits 'n' pieces available for the JMP-1 and always thinking of new stuff to make for our favourite MIDI valve pre-map, I decided to make a category just for the Marshall JMP-1 in my on-line store. You can check it out here.
Marshall JMP-1 Service
Marshall JMP-1 Needs Attention
Eclipse Marshall JMP-1 Data Encoder Fix
Marshall JMP-1 Nuts, Knobs and Bezels
PML-TX01 replacement transformer for the Marshall JMP-1
CR2031 battery adapter for Marshall JMP-1
RE-JMP-1 replacement rack-ear reinforcement brackets
Screw Kit for the Marshall JMP-1
Oracle Battery Eliminator for the Marshall JMP-1
MARSHALL JMP-1 FACTORY RESET PROCEDURE
IF YOUR JMP-1'S BATTERY ISN'T DEAD BUT YOU STILL WANT TO SWAP IT OUT, THEN PLEASE DO REMEMBER ONE THING BEFORE REMOVING IT: If you have your own edited presets in your JMP-1, you MUST back them up prior to removing the battery, otherwise they'll be lost.
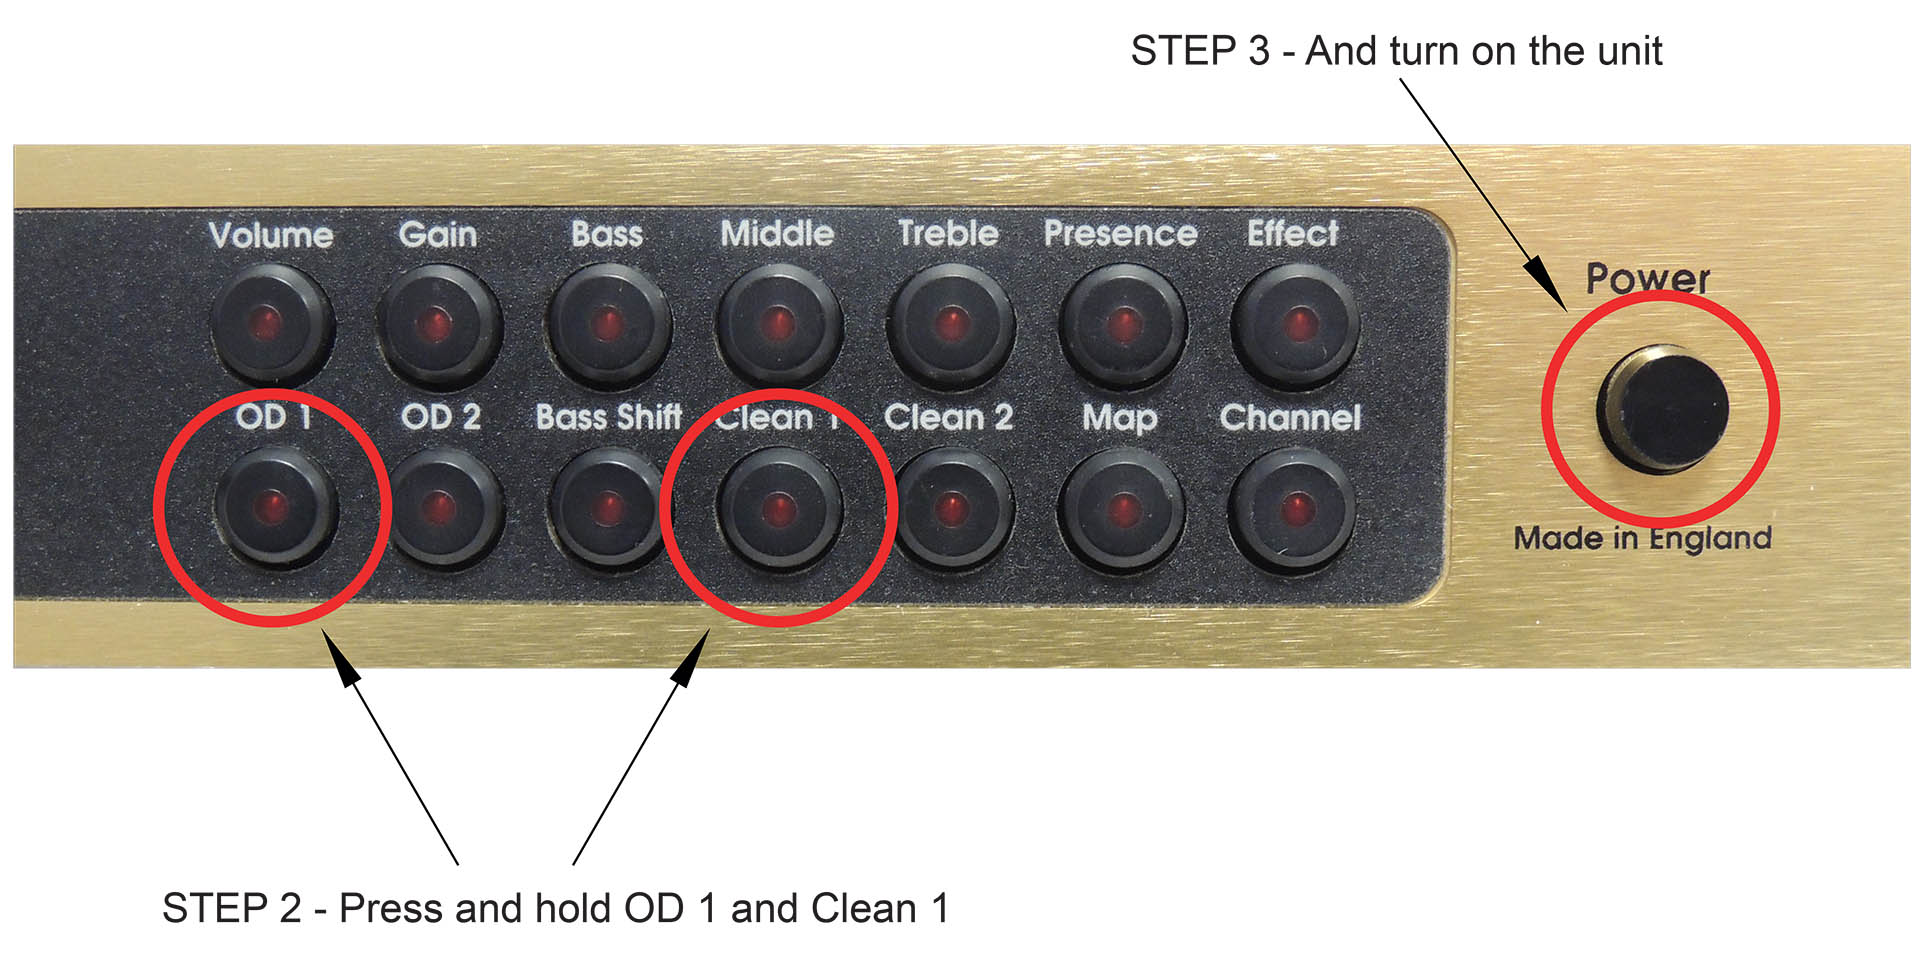
If you need to reinitialise your JMP-1, here's how:
- Switch off JMP-1 via the power button on the far right.
- Hold down the OD1 button and the CLEAN 1 button.
- While holding down these buttons, switch on the JMP-1.
- Wait a few seconds while the display flashes and then release the OD1 and CLEAN 1 buttons.
Now then, you're JMP-1 might NOT reset! Yes, that's right. If your machine is locked, performing a factory reset will be useless unless you unlock your JMP-1 first.
To check the memory protect status of your JMP-1, simply try to save a patch. If the display shows 'St L', then your JMP-1 is locked and you will need to unlock it prior to performing a factory reset.
Unlocking is simple. Just follow this procedure:
- Try to save a patch.
- While 'St L' is displayed, press the <CHANNEL> button.
- The unit will unlock.
- You can now perform a factory reset as above.
MARSHALL JMP-1 MEMORY BULK DUMP
While you're here, you may find it useful to know how to dump the entire memory of your JMP-1 to a sequencer or sysex package like MIDI-Ox or SEND-SX.
- Just connect the MIDI OUT from your JMP-1 to the MIDI IN of your sequencer or computer's MIDI interface.
- If using a computer, select that port in your sysex package.
- Now just press <Patch> and <Volume> simultaneously on your JMP-1.
- THE END!
You may also find this dedicated JMP-1 editor useful: http://jmp-editor.mattzick.com/download.html