I've been toiling with the idea of replacing the static 8k x 8 RAM in our favourite MIDI valve pre-amp with a non-volatile SRAM (nvSRAM) for long time, now and I'm delighted to report that after a lot of work, including testing over recent weeks, my Oracle battery eliminator for the Marshall JMP-1 is finally here.
I understand why batteries were used to back up machine memory in say the late seventies and eighties and even in the nineties but now-a-days, it all seems totally unnecessary. Could it possible to integrate modern nvSRAM technology into a machine that's more than thirty years old, though?
Modern machines don't have batteries. Many will be familiar with my love of the Behringer DEQ2496 Ultracurve Pro, which is an example off the top of my head, of a machine that doesn't have battery backed-up memory. Indeed, when I say 'modern', please consider that at the time of writing this, the DEQ2496 is more than fifteen years old!
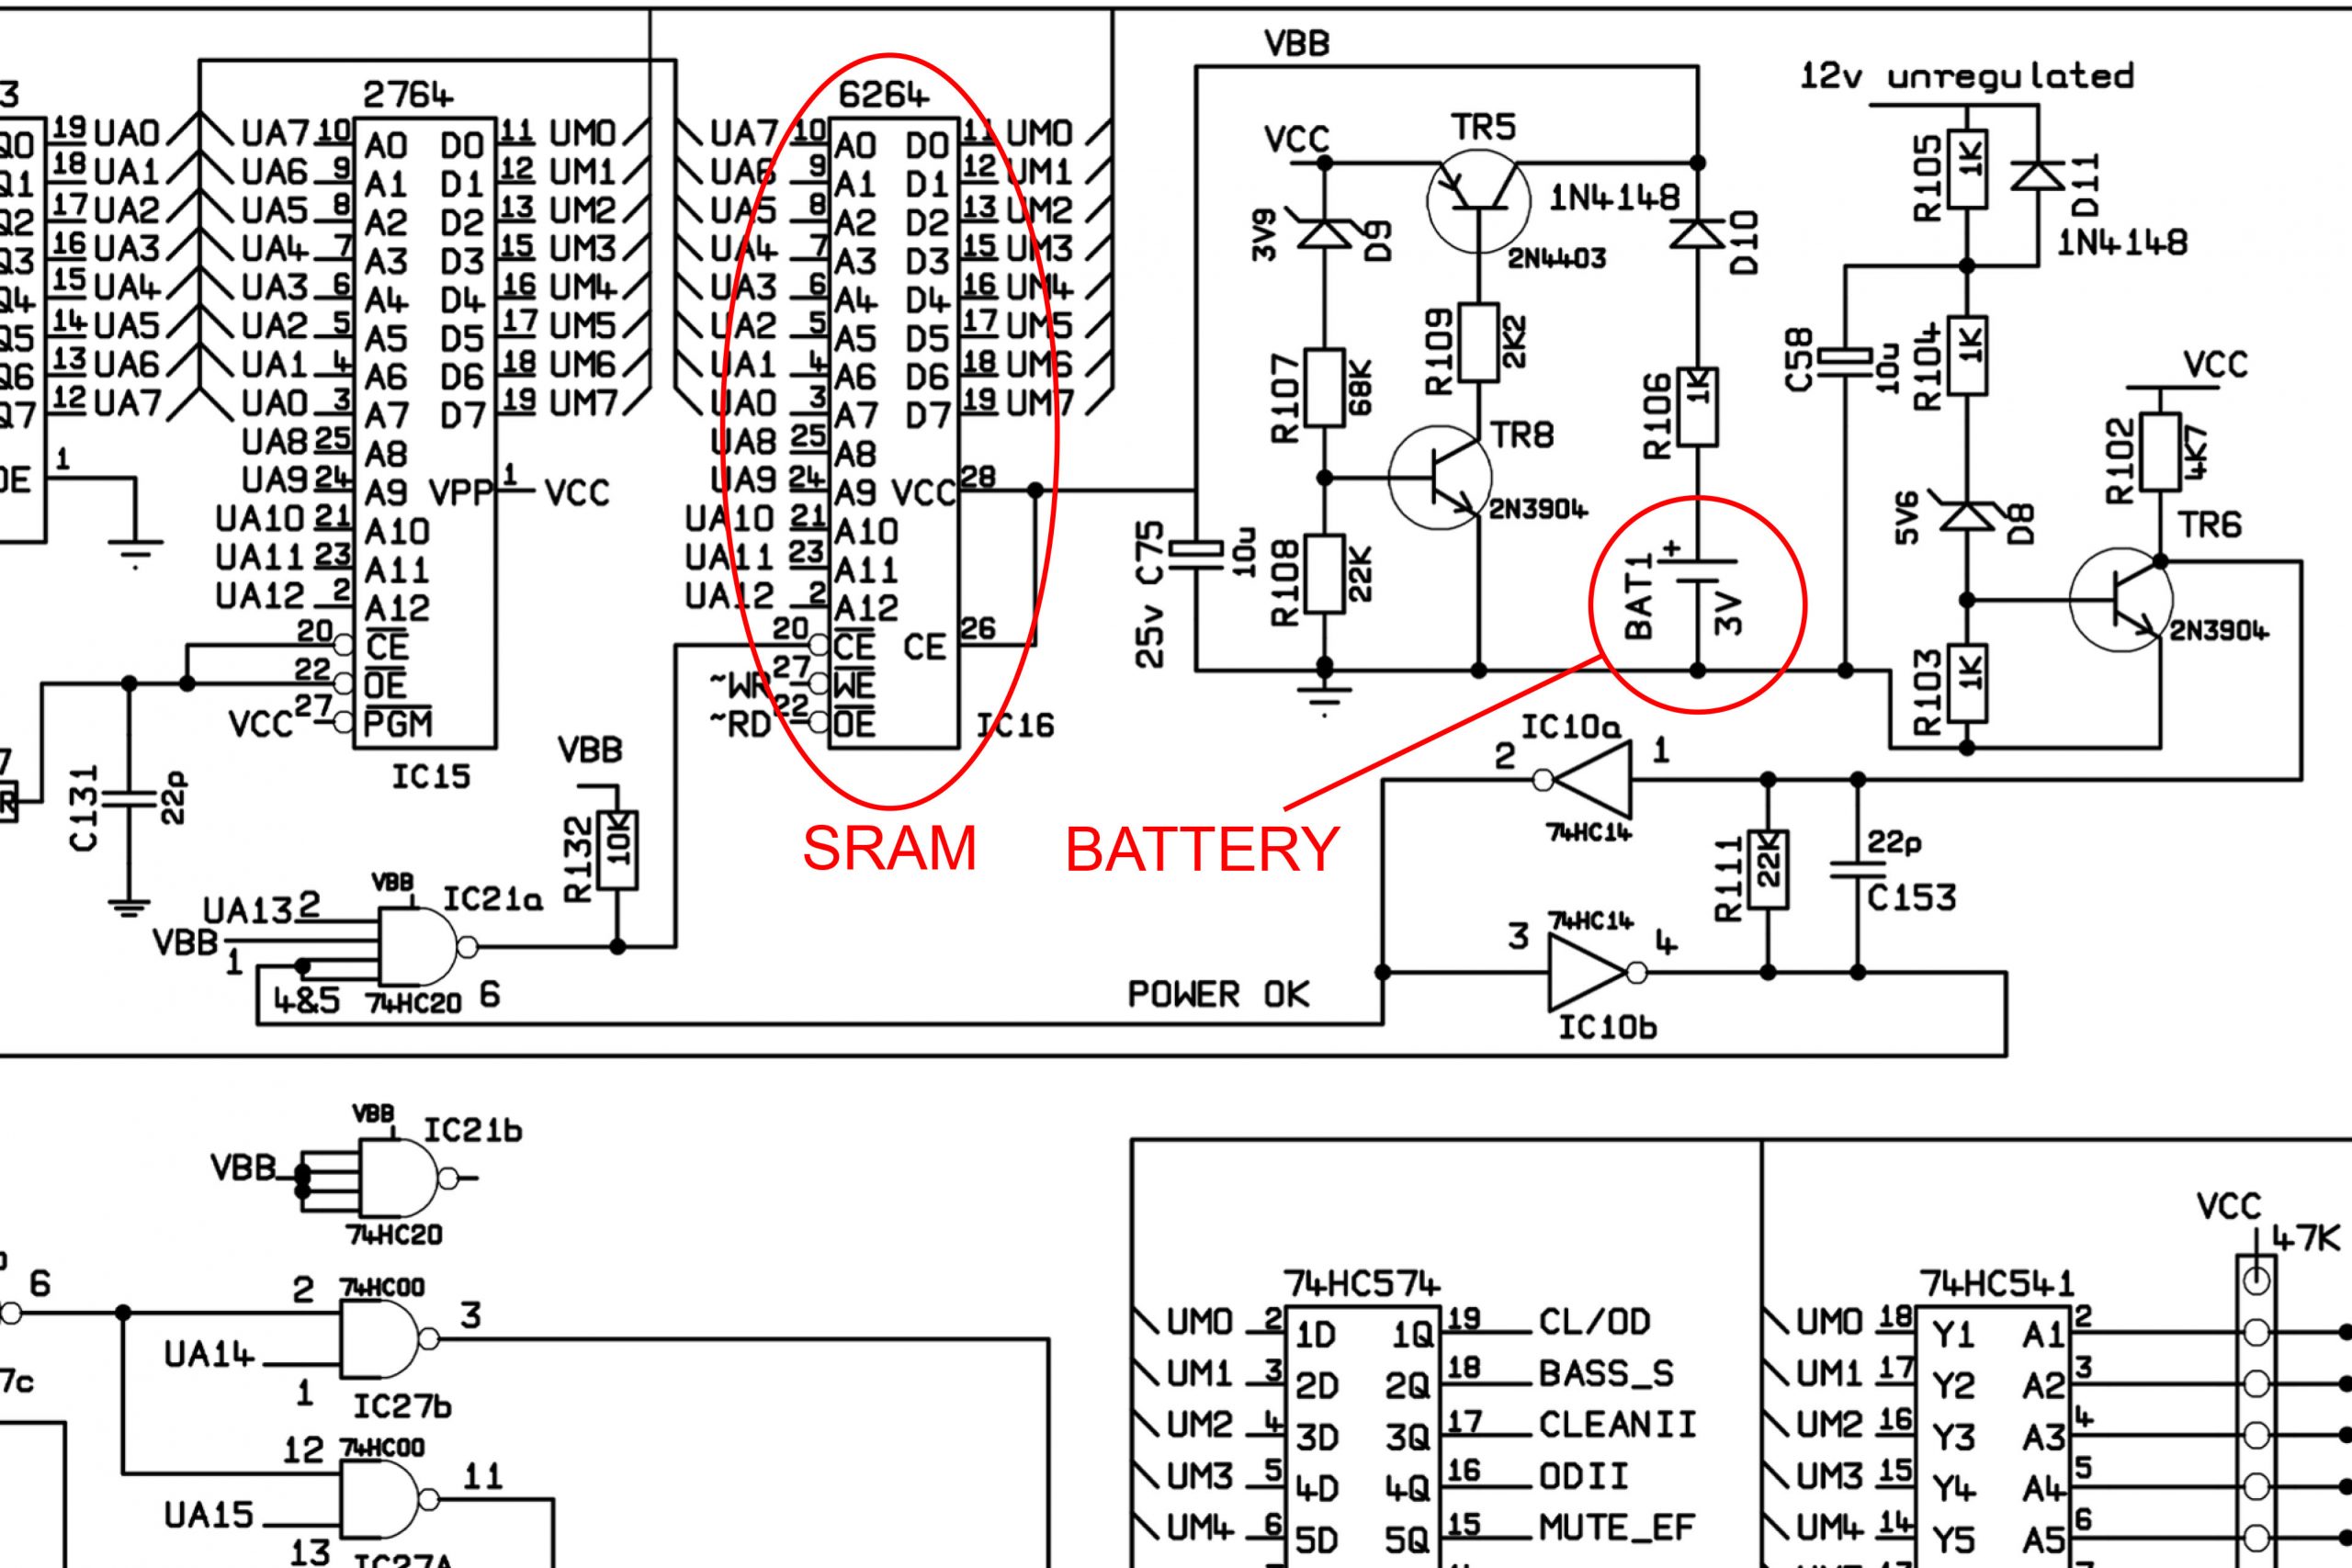
CPU control in the JMP-1 is typical of the time. Although I know this machine inside-out, it was still worth double-checking, just to make sure I hadn't missed anything. Indeed it was obvious that other than removing the battery, no other modifications were necessary to implement Oracle.
Look, no battery means that you'll never have to worry about losing your pre-sets and more importantly (perhaps) is that a battery won't leak if it's not there! Oh wow... peace of mind all around. That's exactly what my Oracle battery eliminator for the Marshall JMP-1 was intended to achieve.

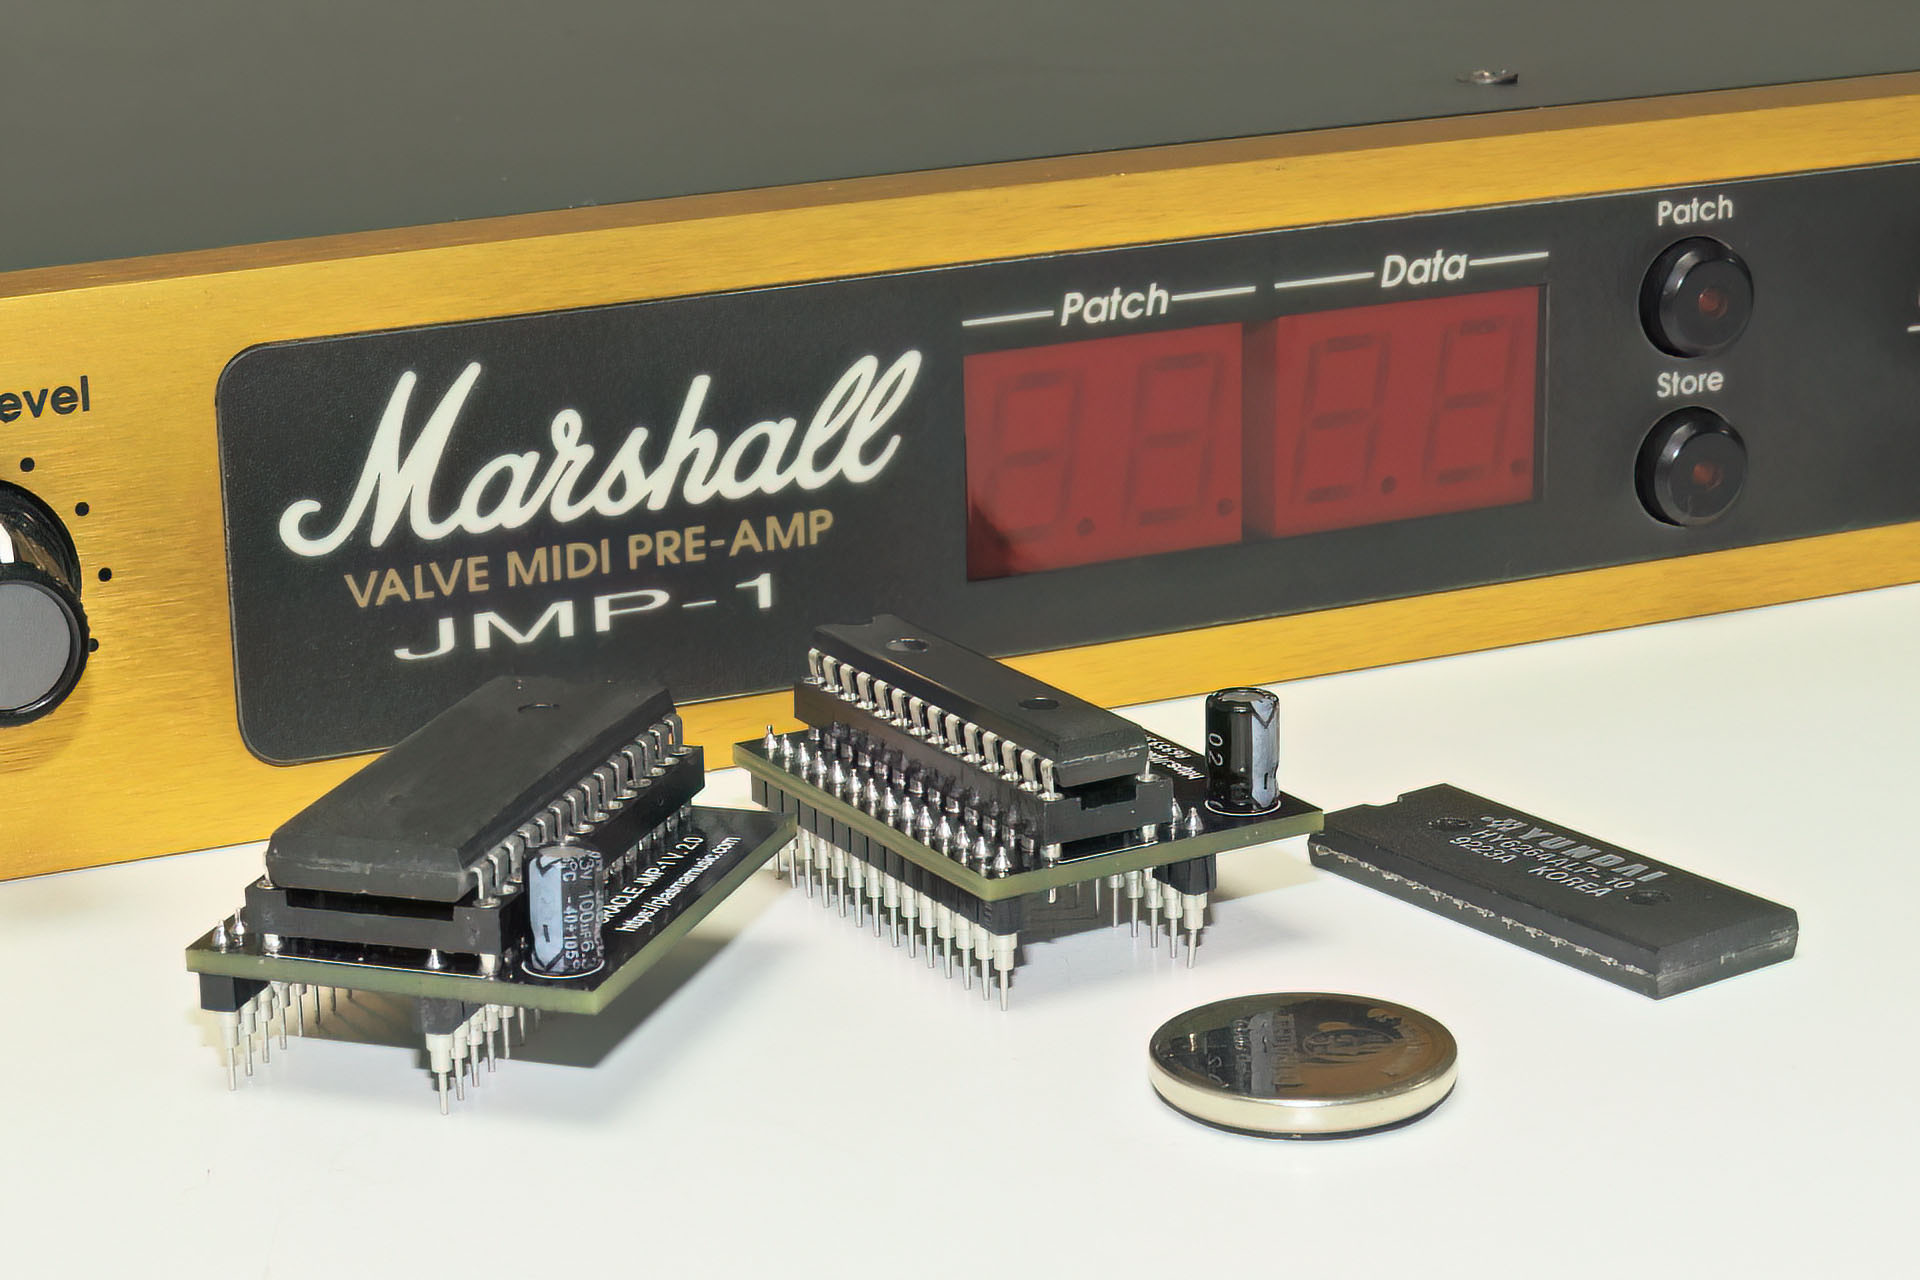
Well anyway, a few months ago, I decided to just do it and so I've developed a little kit which involves replacing the Hyundai HY6264 SRAM chip inside the JMP-1, with a snap-in PCB which has few components on it and which means that you can pull out your battery and lose it. "Seriously?" Yes, SERIOSULY!!!!
So the real challenge wasn't finding a suitable nvSRAM chip. Oh no, there are loads out there. Unfortunately, many of them still rely on batteries but instead of an external battery, the battery is built into the chip, which... kind of just moves the problem from one place to another. Those that don't however, are either much larger than 64k or simply aren't pin-for-pin compatible with the SRAMs of yesteryear, or both. Hey, I got there in the end! 🙂
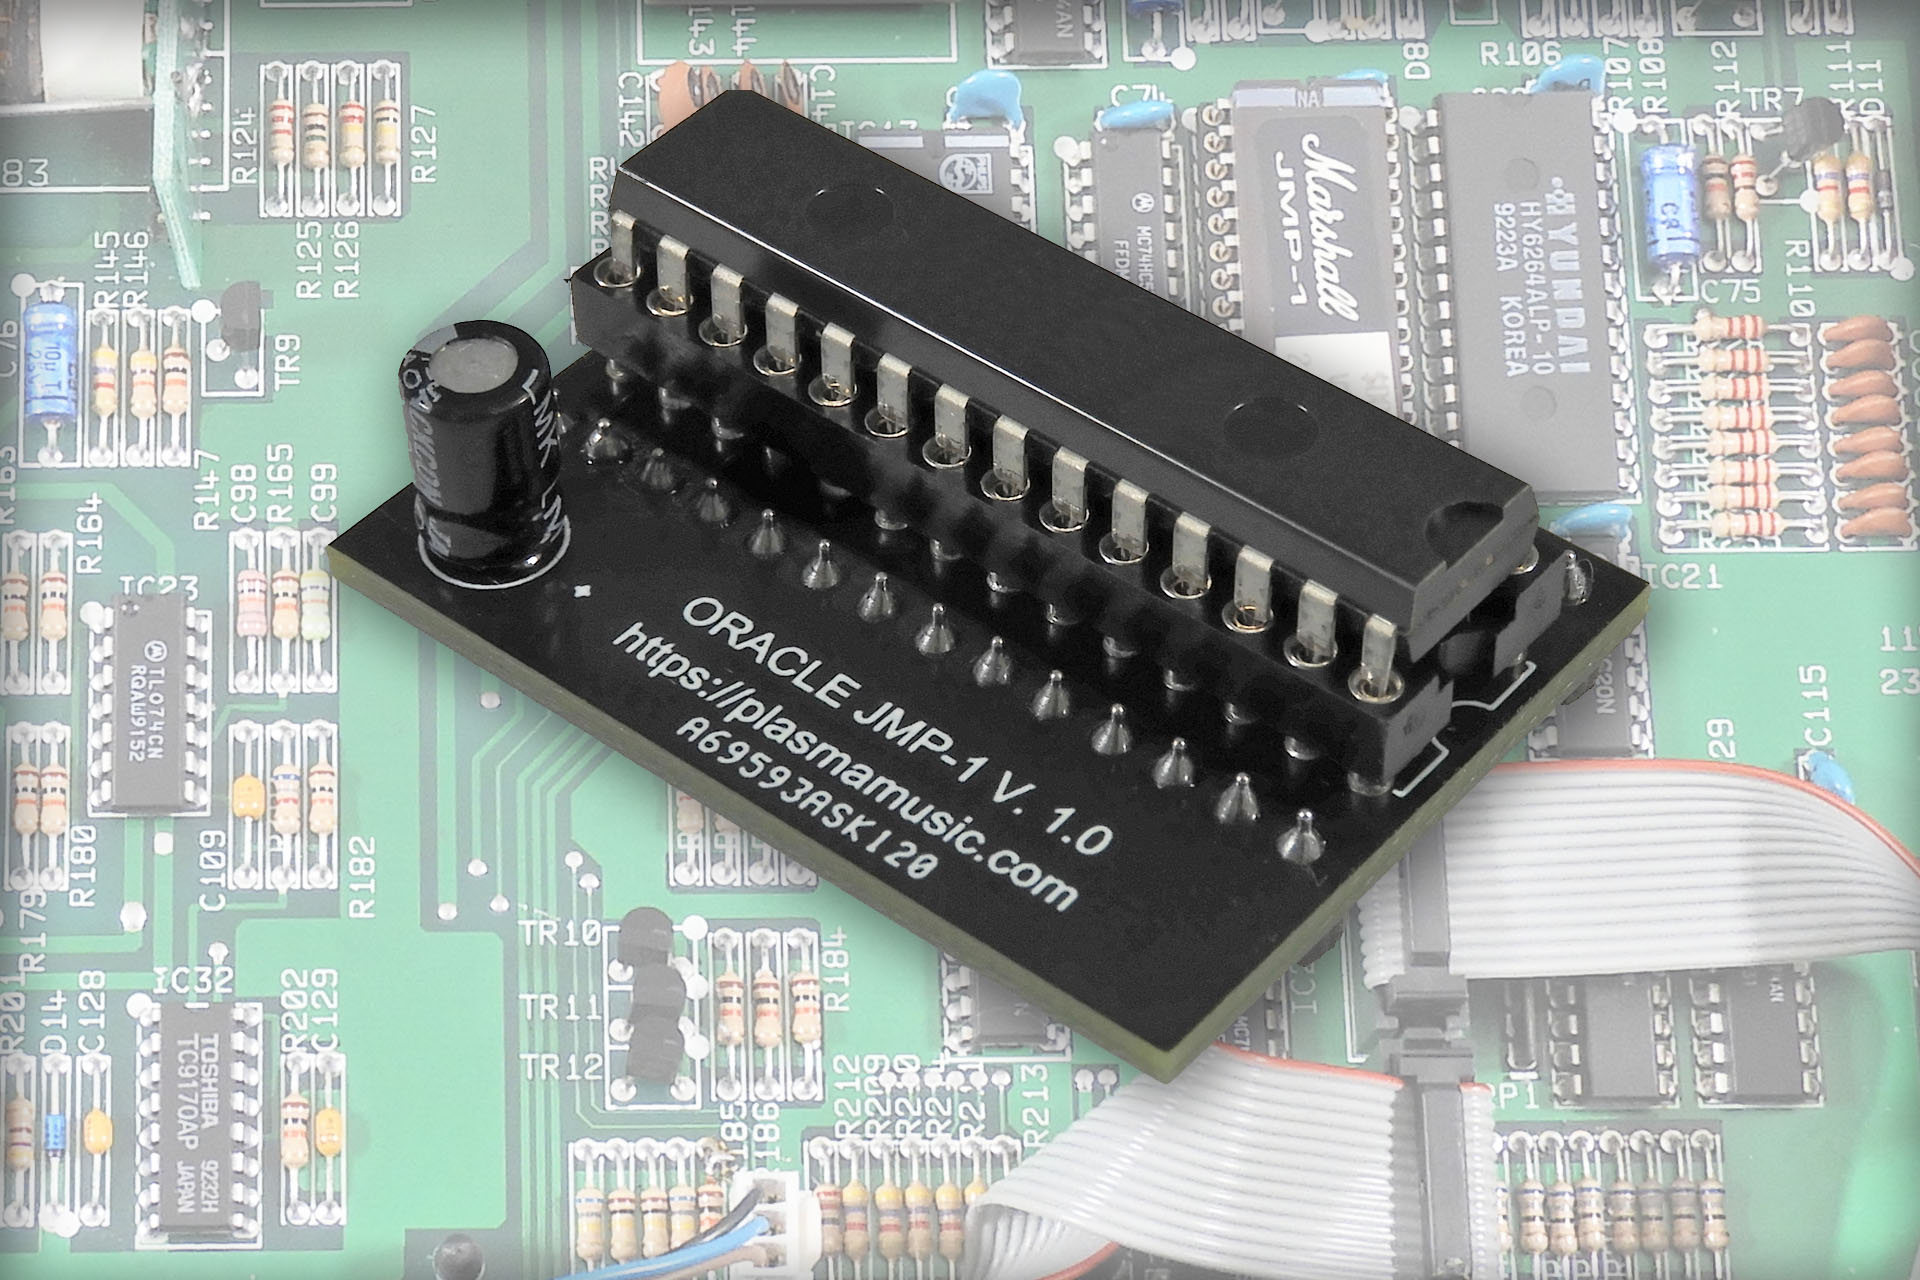
The Oracle JMP-1 kit includes a 28-way turned-pin IC socket, so once the original device is removed, all you have to do is solder in the socket and drop in Oracle. This is a great option because it allows you to return your JMP-1 to factory hardware at any time, by simply pulling out Oracle and installing a Hyundai HY6264 or equivalent SRAM IC.
SO HOW DOES ORACLE JMP-1 WORK?
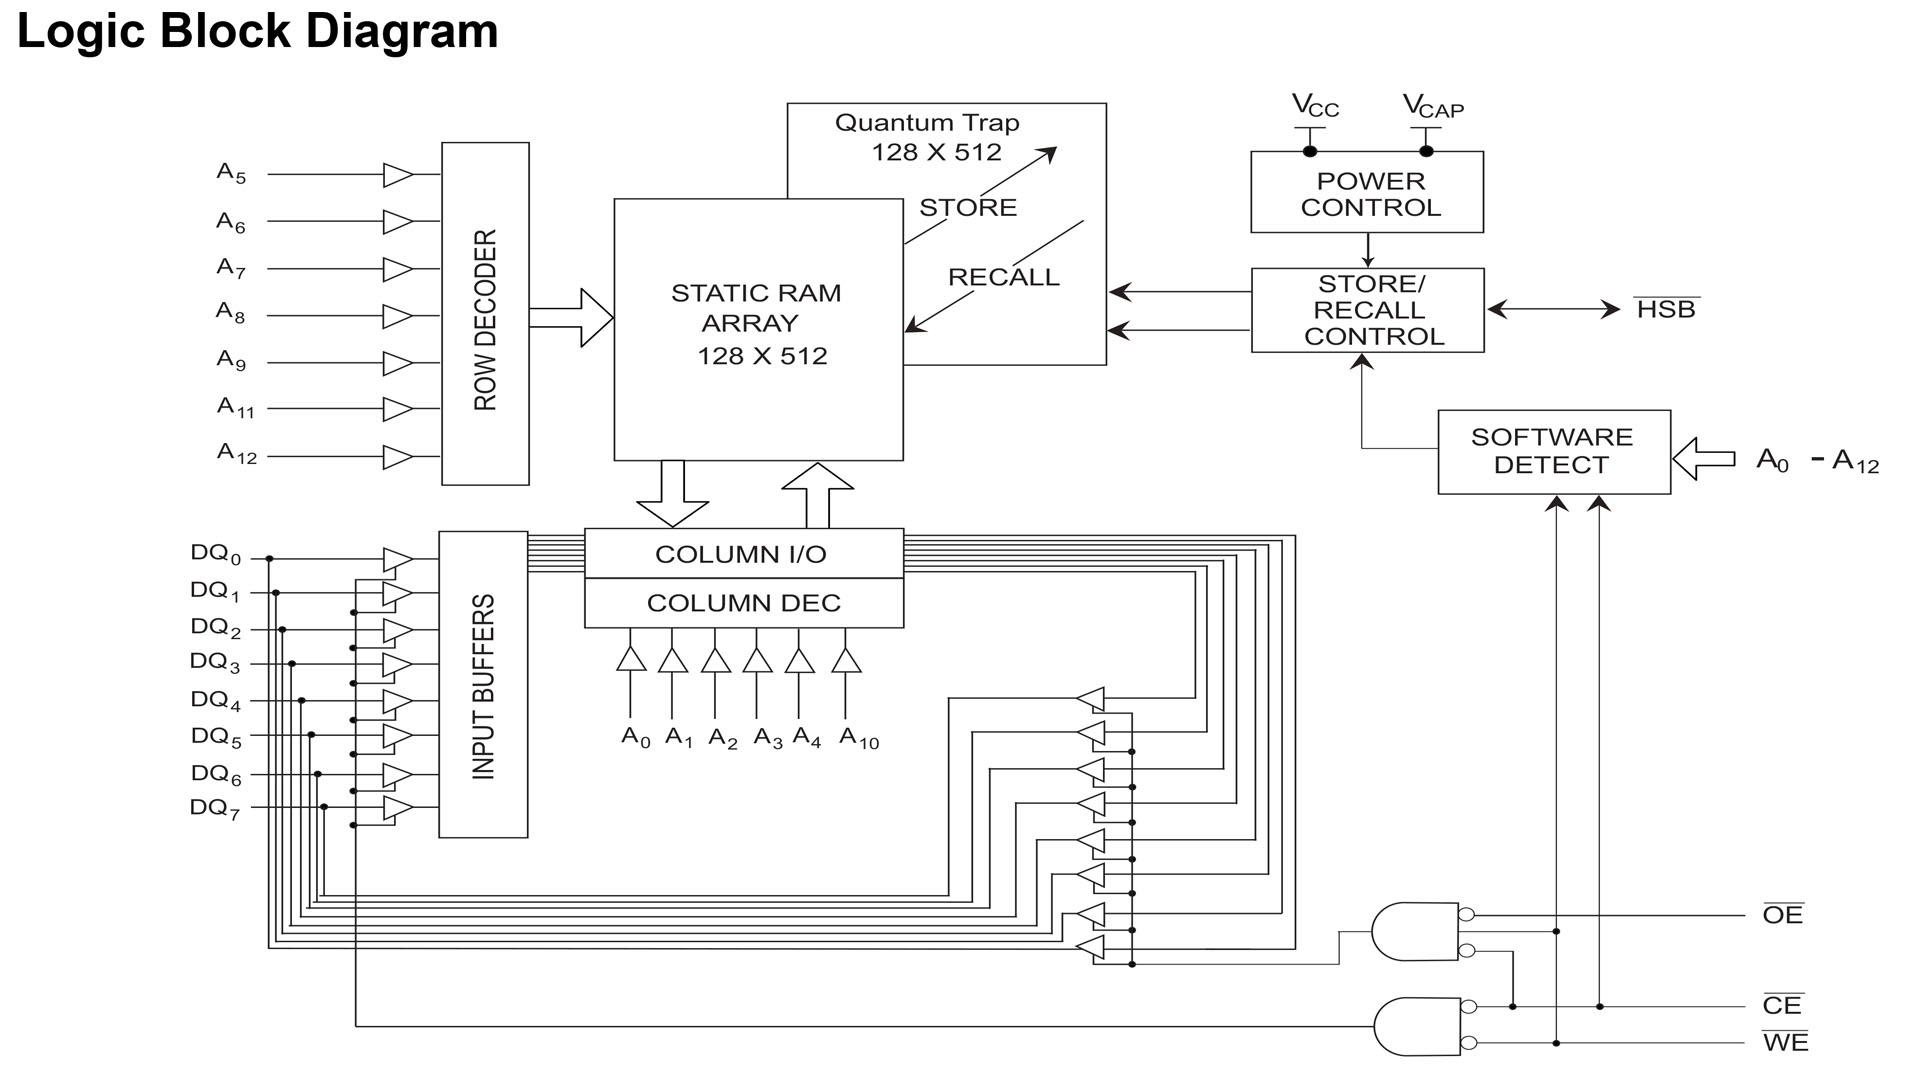
Okay, so it's not magic. At the heart of my Oracle battery eliminator for the Marshall JMP-1, is an IC that uses something called quantum trap technology (well, perhaps it is magic). Fundamentally there are two parts to the IC; a conventional static RAM (SRAM) like the original Hyundai Hy6264) and an Electrically Erasable Programable Random Access Memory (EEPROM). When switched on, the SRAM fires up and reads and writes data as one would expect, like nothing's really changed. The data that's in the SRAM however, can be written into the EEPROM. This is done by one of two methods; either in software or by specific hardware configuration, the latter of which has a two or three options. Well, I wasn't going to try rewriting the JMP-1's firmware so the autosave hardware configuration seemed to be the obvious way to go. Oracle JMP-1 is set up to retain memory when your JMP-1 is switched off. Isn't that just so cool?!?!?
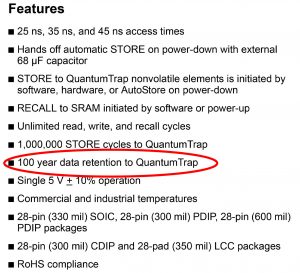
Of course, Oracle won't retain your JMP-1's memory indefinitely. Nothing lasts forever, right? It will however, keep your pre-sets safe for a very long time. Opposite is an extract from the nvSRAM device's datasheet and amongst the features, the manufacturer quotes a 100 year memory retention.
Just above that specification, you'll also notice that the datasheet quotes a million save cycles. What that means is that if you switch your JMP-1 off twenty-seven times a day, the nvSRAM chip will work fine for a hundred years!
I'm not quite sure how we're going to check those specifications. I'm definitely not going to be around that long. On the other hand, if they're correct, Oracle JMP-1 will last a lot longer than several CR2032s!
As I've already said, I checked out a whole bunch of devices that would be suitable for my Oracle battery eliminator for the Marshall JMP-1. With very specific technical criteria in mind, price was also going to be an important factor, especially if I was intending to release Oracle as a commercial product, . Trying to satisfy all requirements, I actually settled on two versions of the same device. Technically they're identical but one has a physical form factor of a 300 mil (7.62mm row spacing) 28-pin DIP IC and the other is packed into a 600 mil (15.24mm row spacing) 28-pin DIP IC. Yes, you guessed it, the 'slim' version is much more expensive. Not being sure whether or not using the higher-cost IC would be sustainable, I ended up designing two PCBs hence, V. 1.0 and V. 2.0.
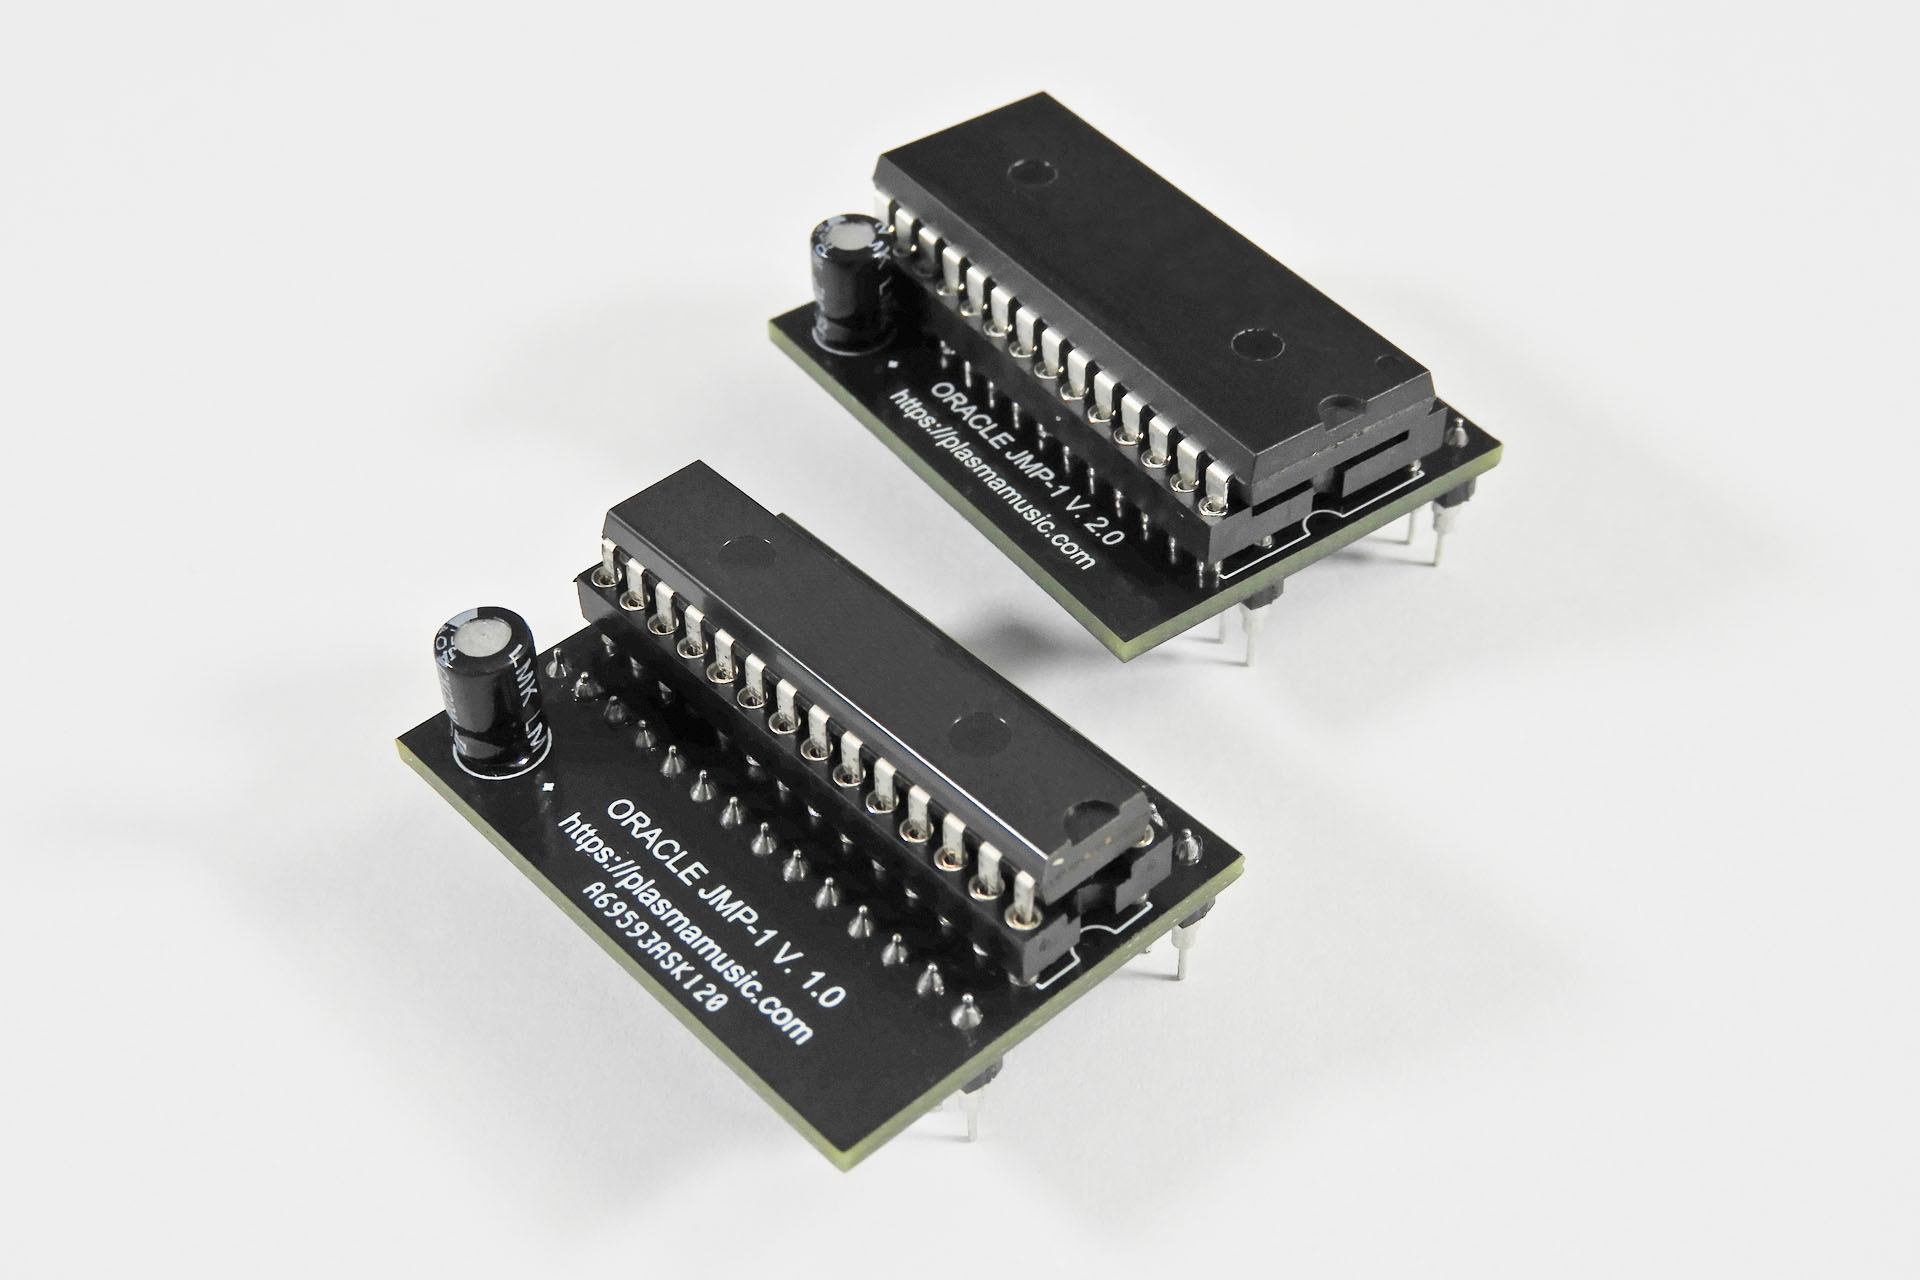
For the time-being, both versions will be available but I have a feeling that I'll have to phase out V. 1.0, due to cost.
So just to be clear, the two devices are functionally identical. The choice of whether you have Oracle with the narrow-body or the wide-body IC is entirely subjective and is NOT dependant on the SRAM or anything else inside your Marshall JMP-1
I'm a stickler for detail and I also believe in preventative action so apart from Oracle JMP-1 being supplied with a high-quality turned-pin 28-pin IC socket, it also comes with a small 4mm rubber pad with double-sided tape on one side. This gets stuck on the bottom your JMP-1 PCB, underneath Oracle, or rather the supplied IC socket. Why? Well, I'm just a bit worried that in all the excitement, it would be quite easy to just press Oracle into place a little too hard! The rubber pad will supply some support and prevent damage to the JMP-1 PCB. 🙂
There's another slightly less obvious benefit to Oracle; since your JMP-1's memory, i.e. your pre-sets, MIDI mapping, etc are stored in a device that doesn't need a battery, guess what? You can pull Oracle and drop it into another JMP-1 and all your stuff will be as it was but in the new box! Coolamundo, dudes! 😮
My Oracle battery eliminator for the Marshall JMP-1 joins my growing arsenal of bits 'n' pieces that I make for one of the best guitar pre-amps ever and having a Marshall JMP-1 with no battery, well it's just seriously cool! 😀 You can check out all my Marshall JMP-1 stuff here.
After a lot of testing over several weeks, I'm delighted to announce that my conclusions confirm that Oracle JMP-1 works just great.

Oracle JMP-1 battery eliminator for the Marshall JMP-1 is available to buy here:
CR2032 BATTERY ADAPTER FOR THE MARSHALL JMP-1
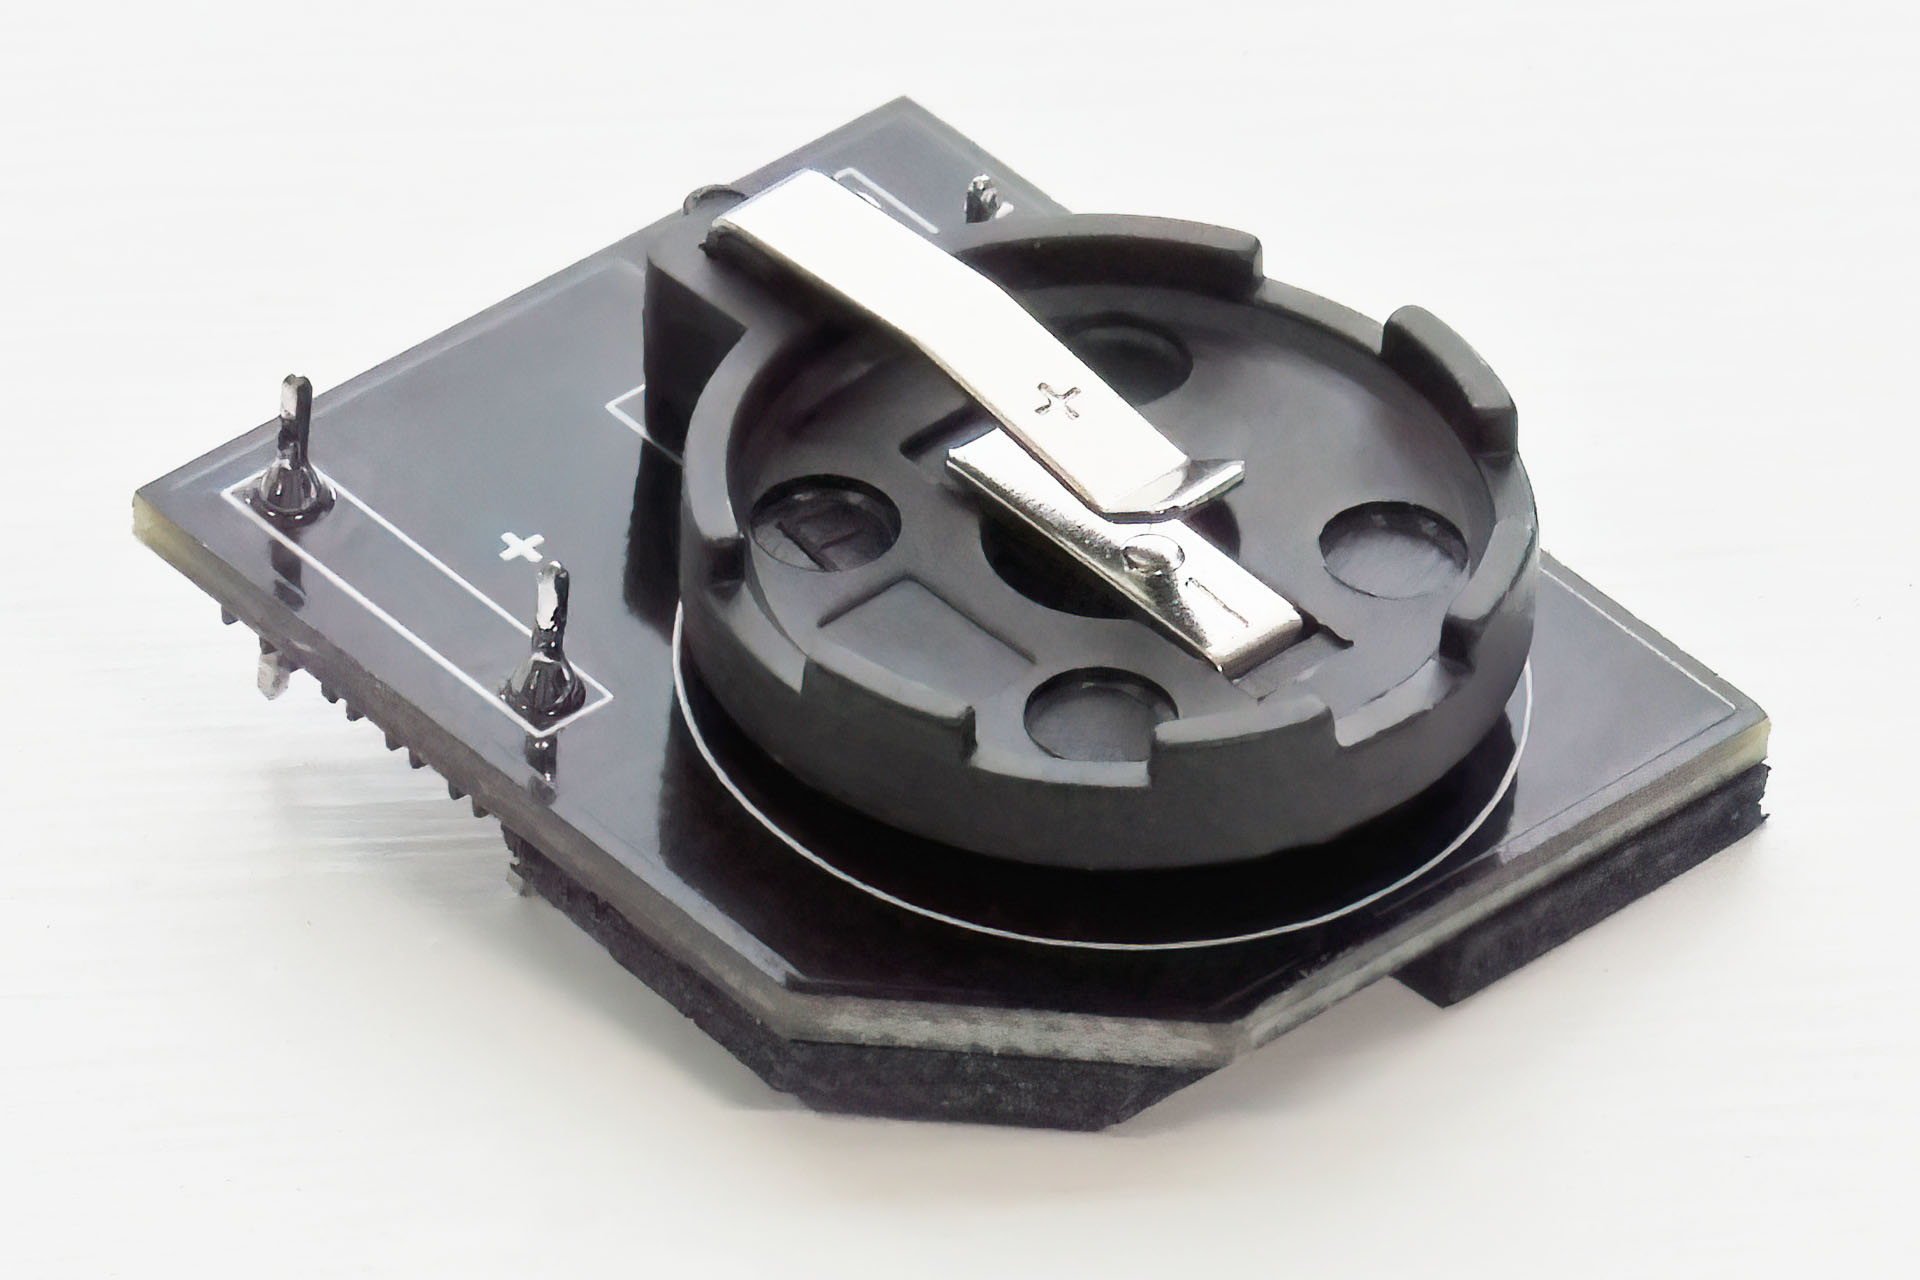
Back in July 2023 (like only nine months ago), I released a CR2032 battery adapter for the JMP-1. I had to find it slightly amusing, that I decided to follow up on my idea of Oracle so soon after I'd launched this adapter. Typical!
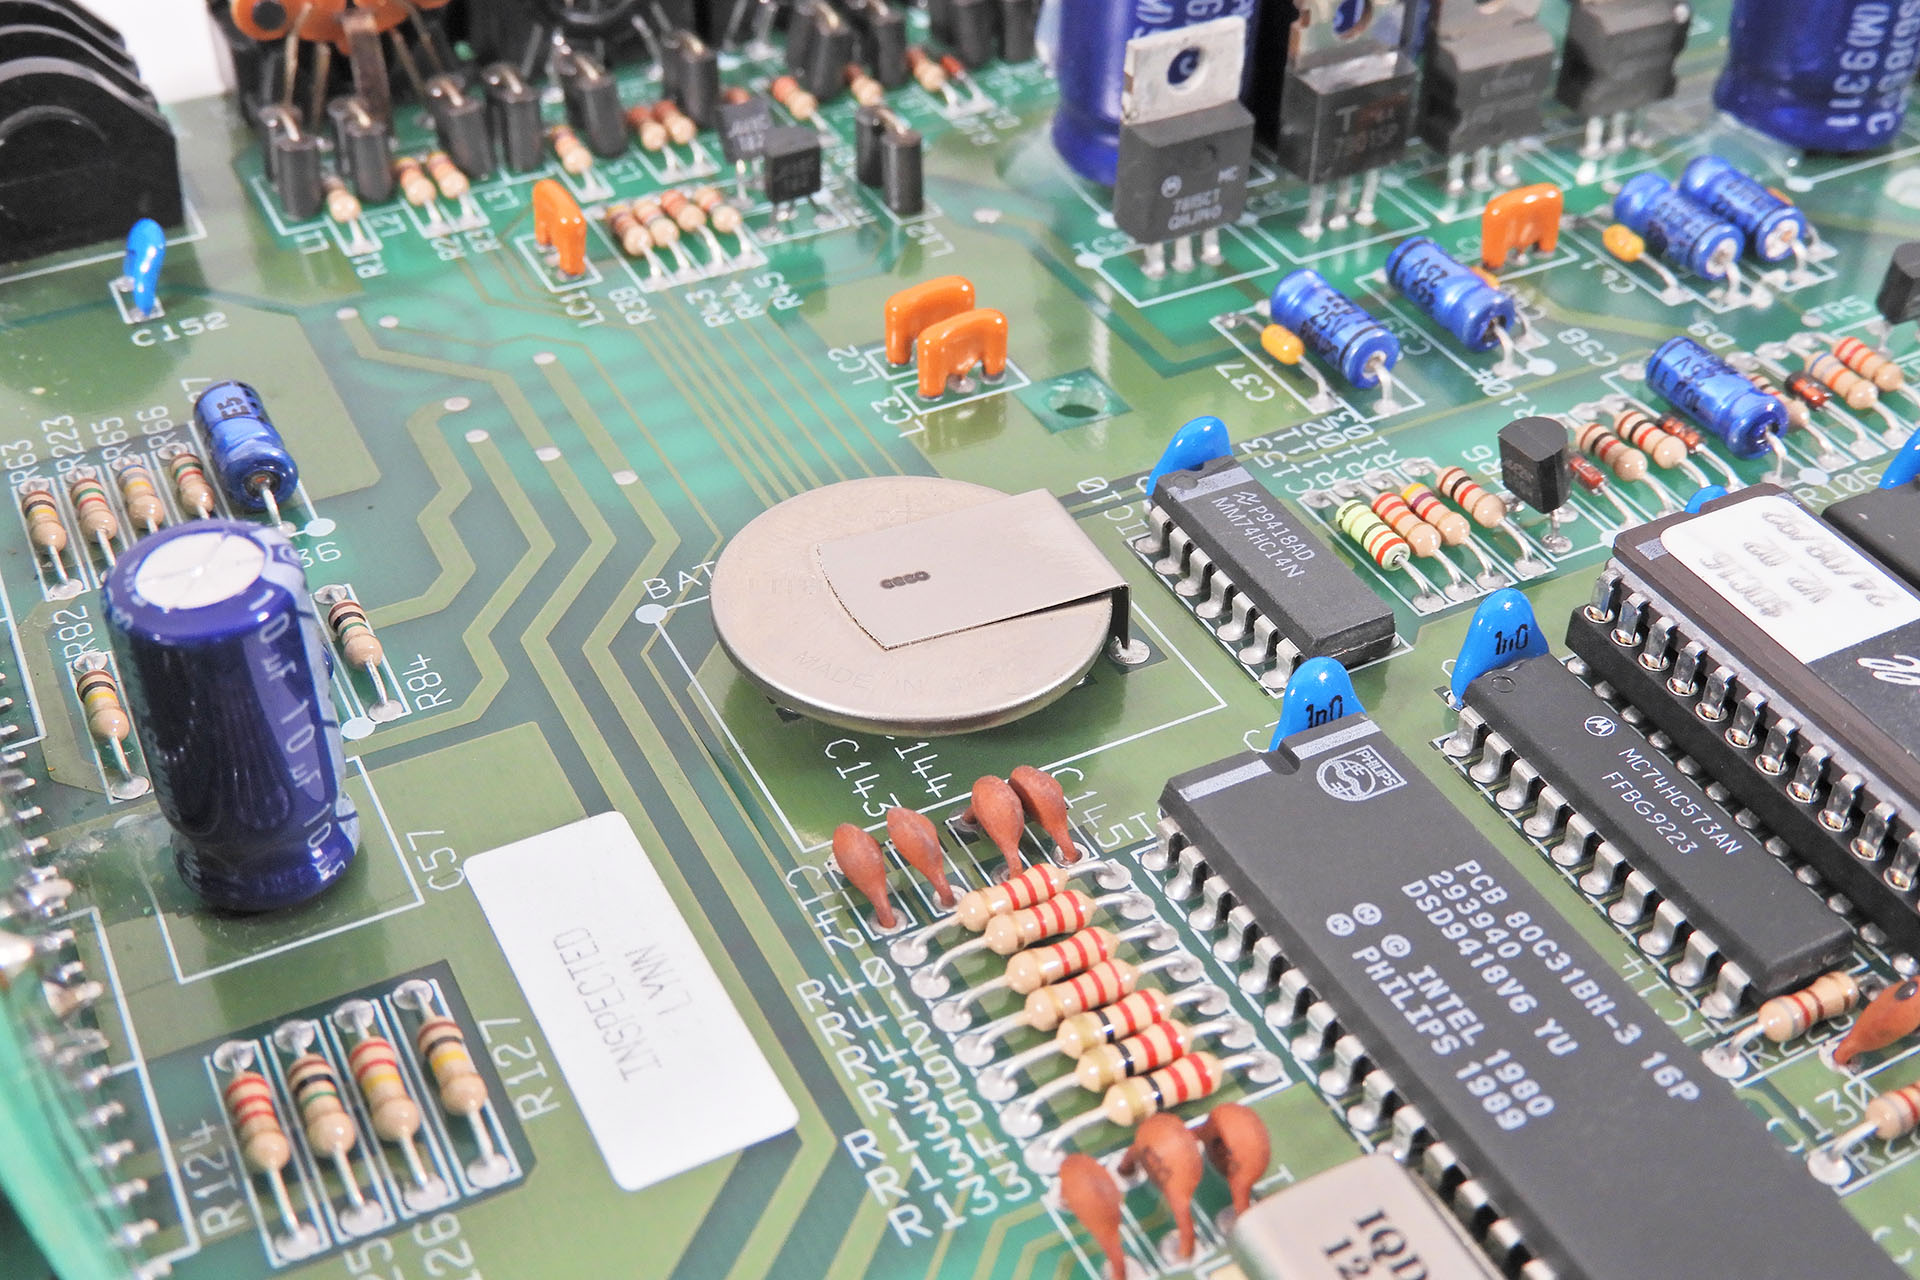
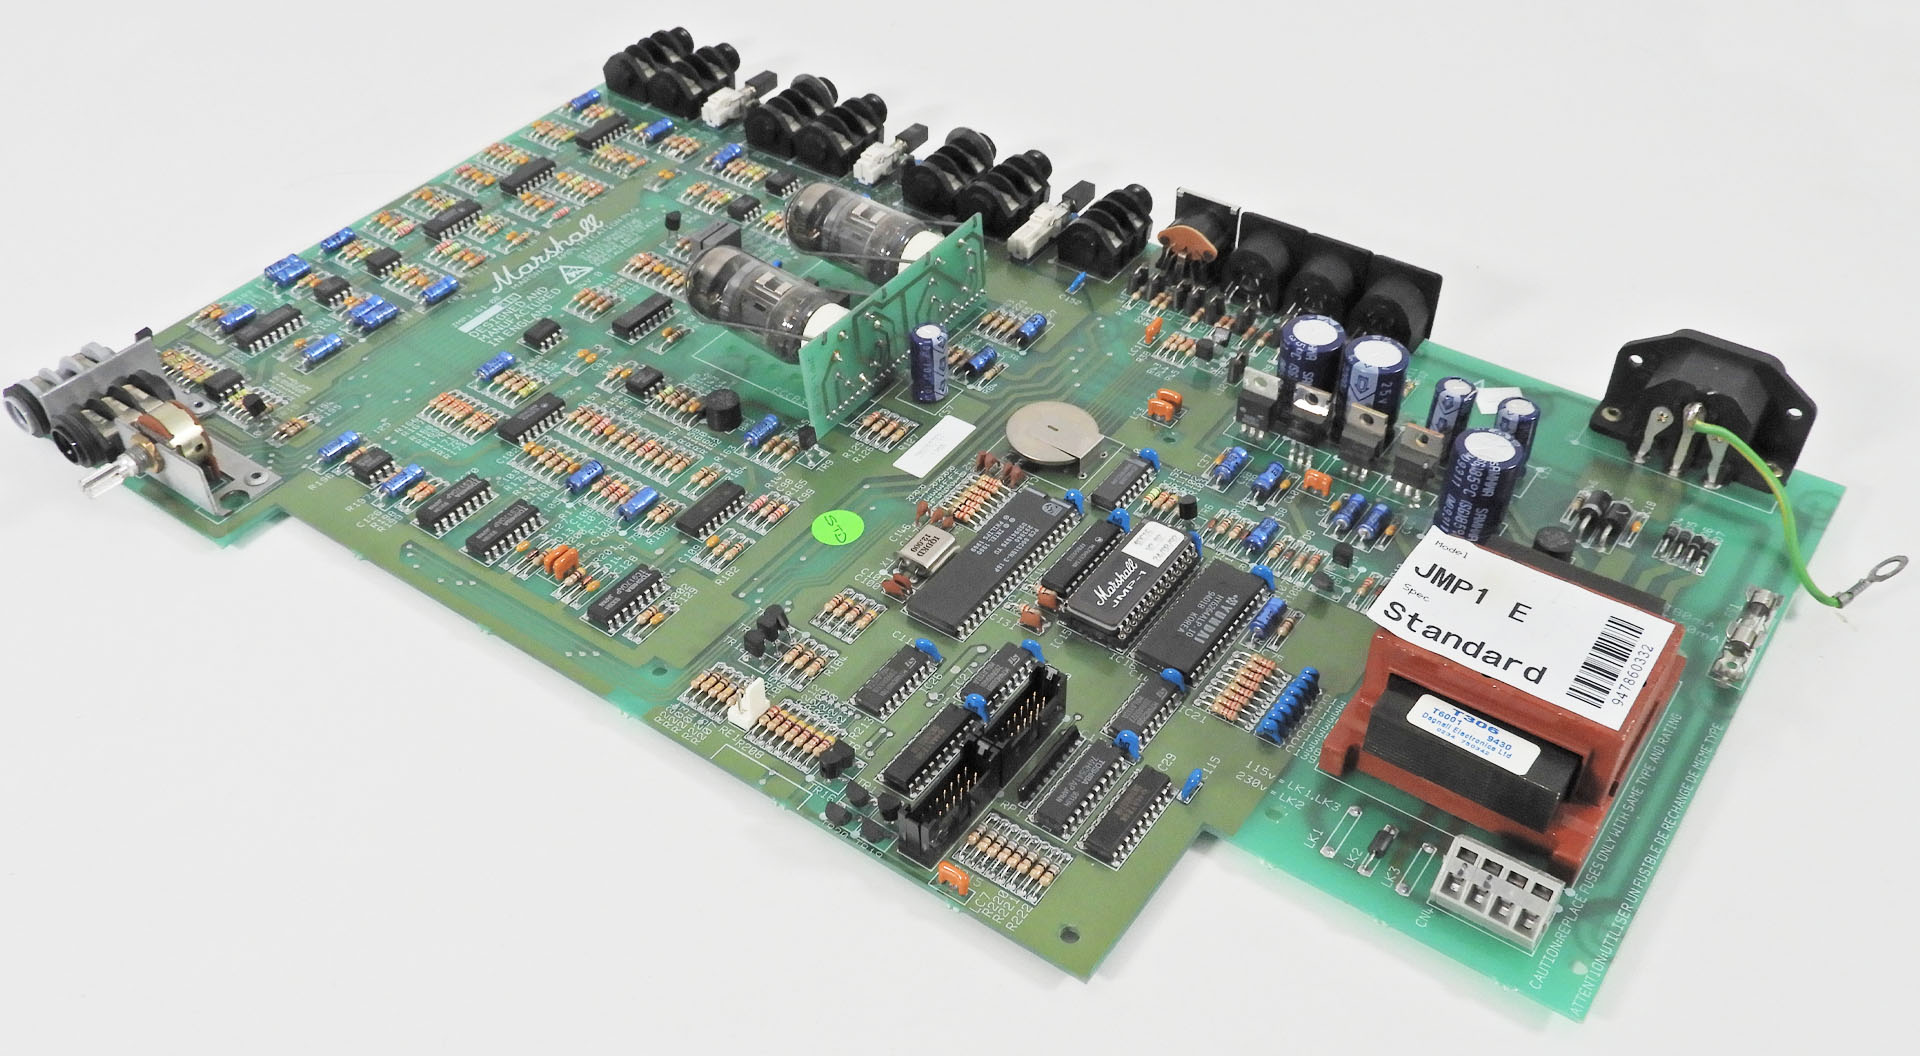
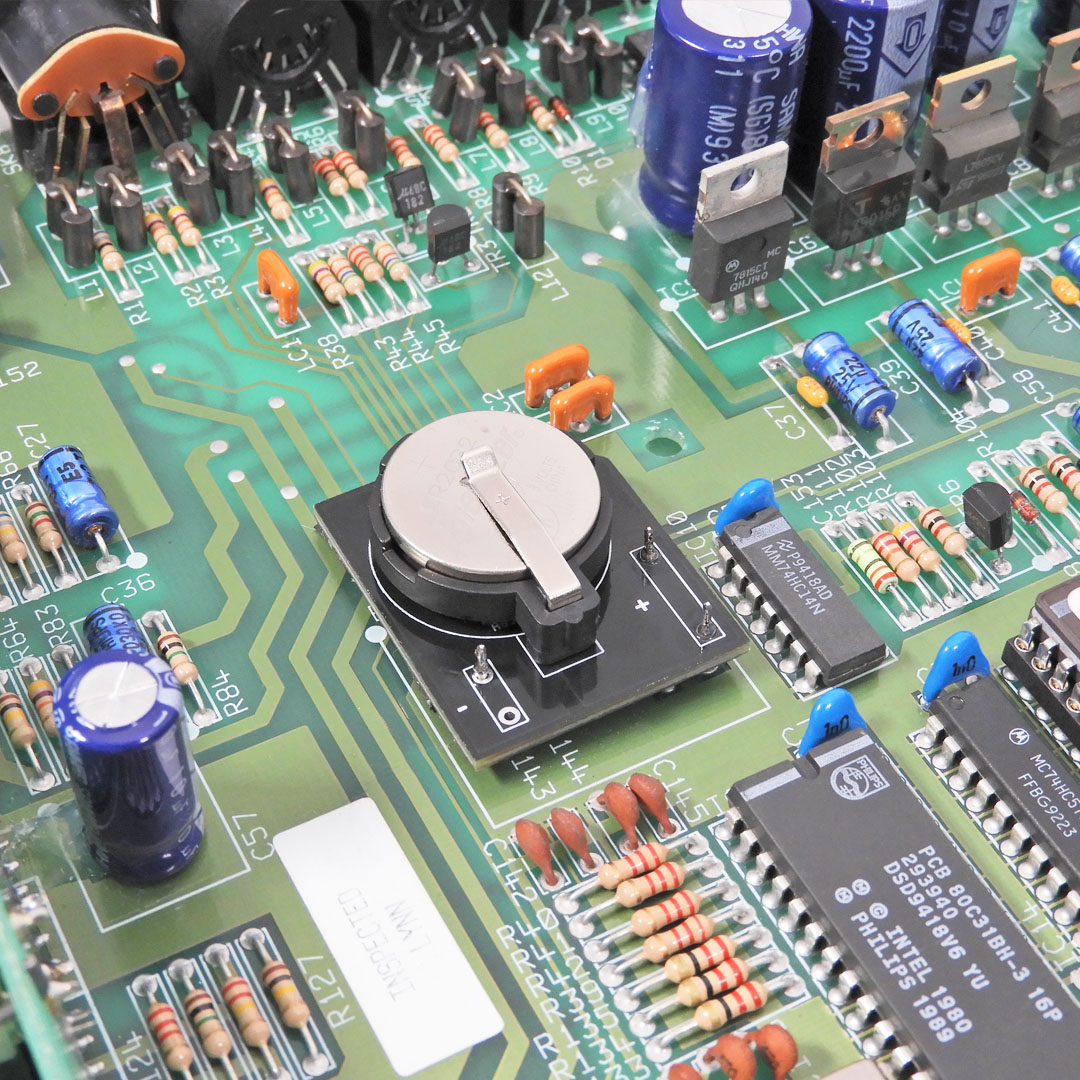
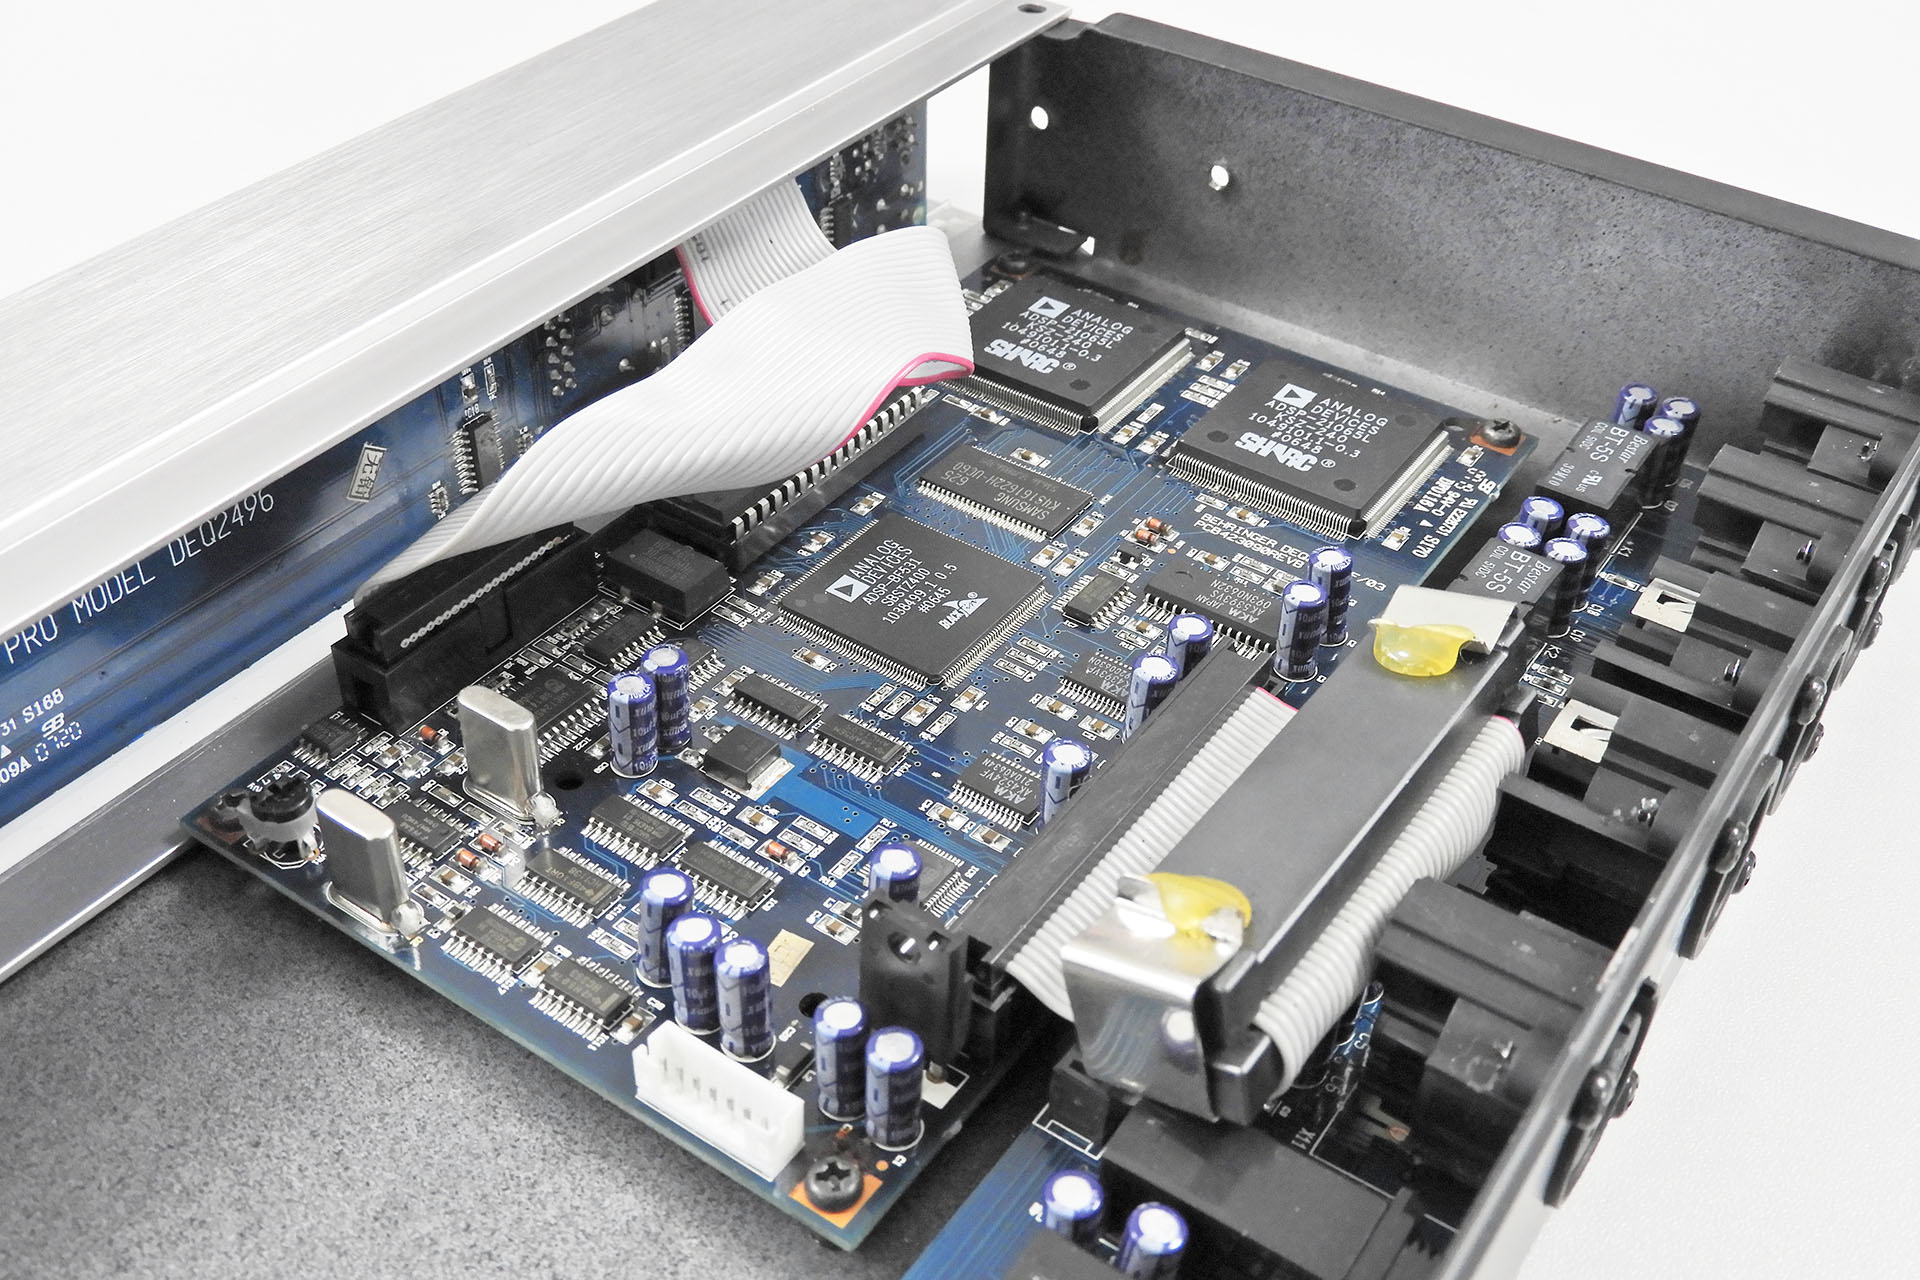
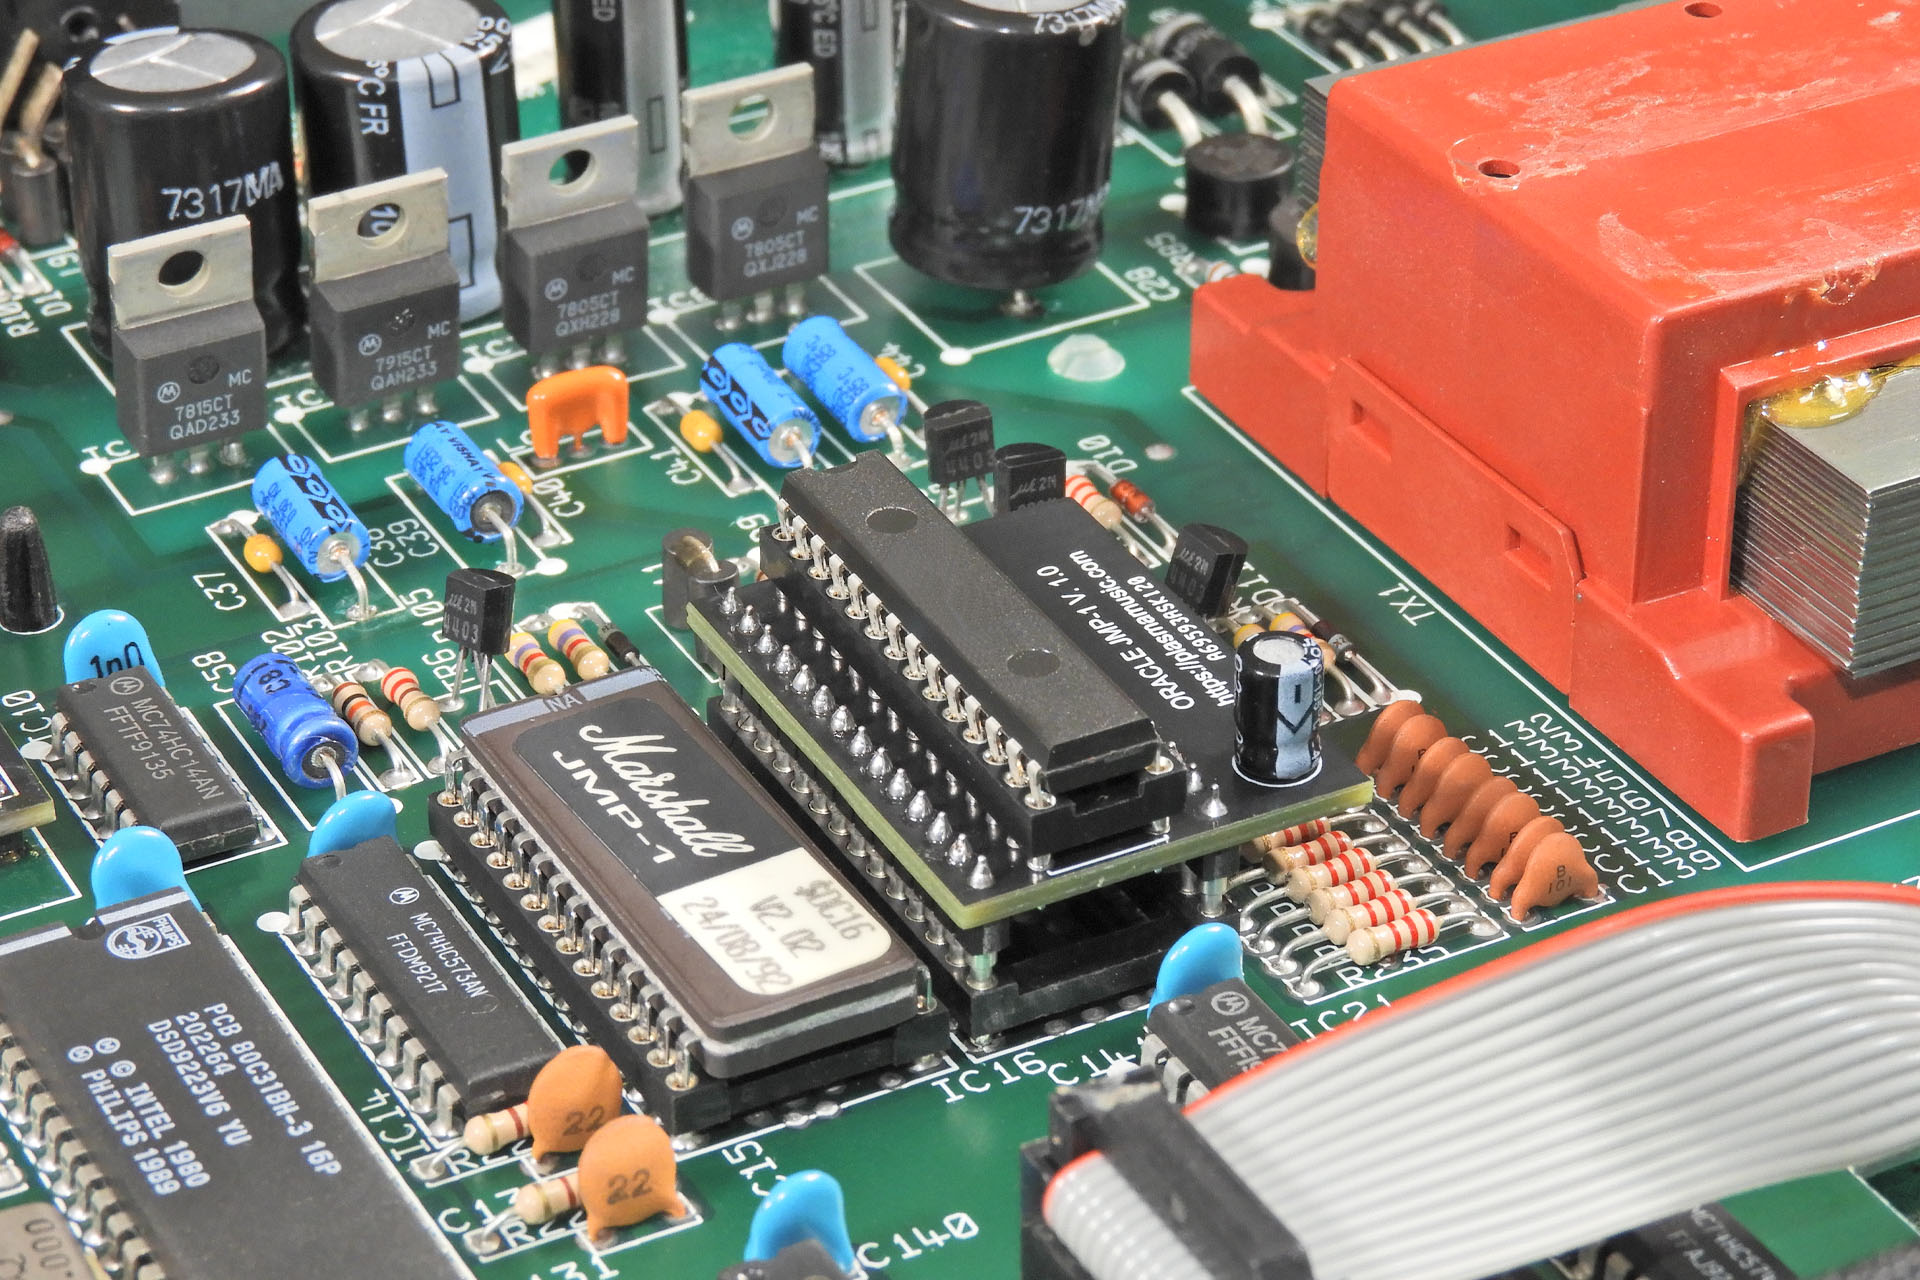
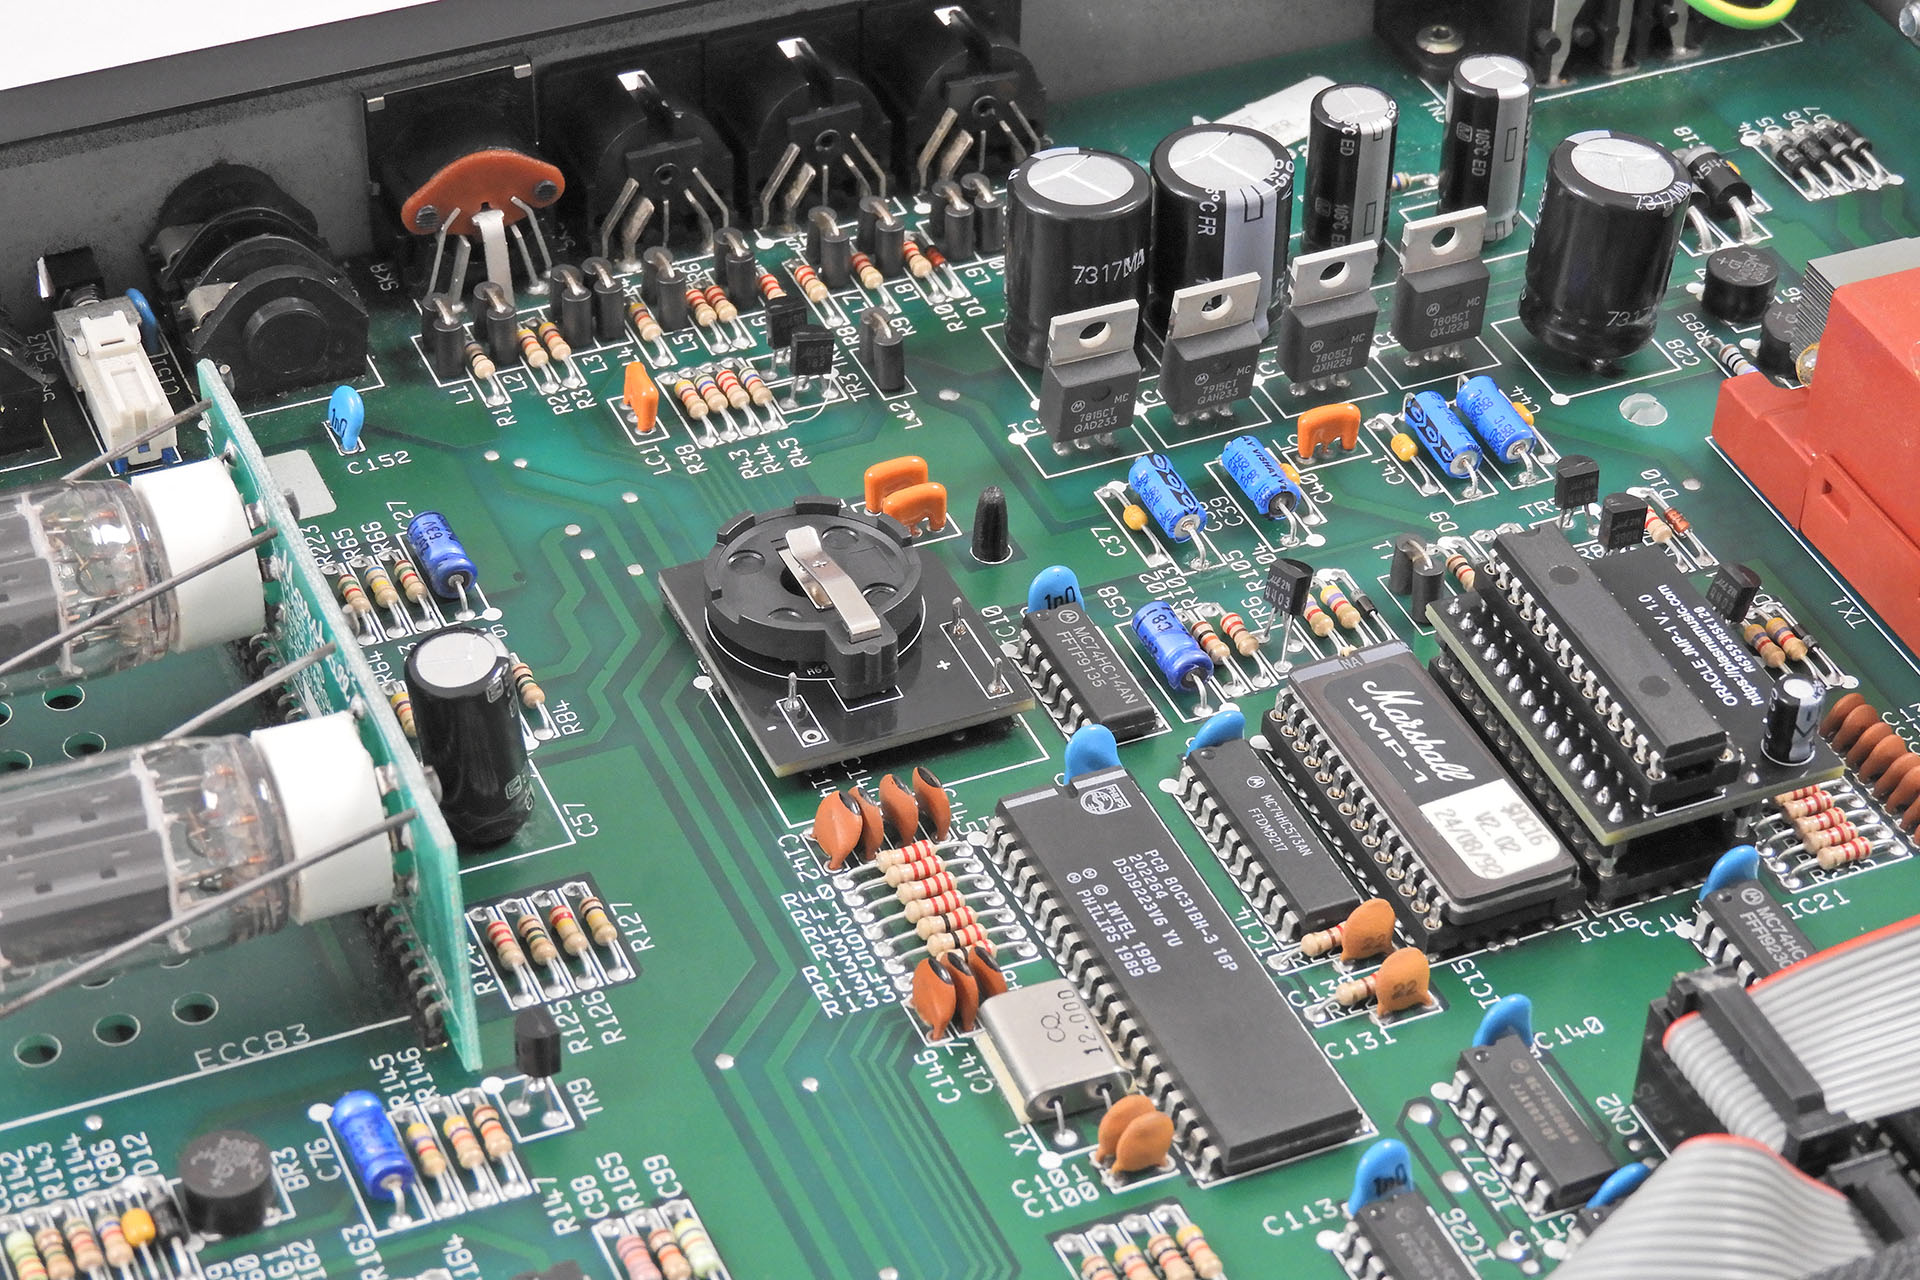
The image below is of my 'lab' JMP-1. It's used to test stuff I make for the JMP-1 before I send it out to customers. As you can see, Oracle JMP-1 is installed as is my CR2032 battery adapter... less the battery, of course.
My CR2032 battery adapter will remain available as I fully accept that swapping out that big SRAM IC for Oracle JMP-1, isn't going to be everyone's cup of tea. You can read more about it here.
Okay so, I'm sure folks are thinking "Why Oracle JMP-1? Why not just Oracle?" Well, I'm currently developing similar devices to eliminate the necessity for battery backed up memory for other machines. Some of those machines for example, don't even have 64k RAM and therefore use a 24-pin nvSRAM device. Also, component layout and PCB size may vary so as to fit.