

Just before Christmas 2020, I received a SoundLab SST-19 guitar pre-amp and a Cheetah MS6 synth module. Both needed power supplies. The SST-19 was immaculate and the customer was confident that it was working (when it had a working power supply, of course). You can read all about that here soon. The MS6 however, was a different story all together. The customer told me that one day it just went bang. In fact, it tripped the electricity supply of his house! After a brief conversation via e-mails, he sent me his machine requesting a complete Cheetah MS6 power supply build.
I was told that the machine was working prior to the bang but a fault big enough to trip a domestic electricity supply might also have damaged the MS6. It was a gamble and there weren't too many resources available for this thing, either. Here’s a list of useful stuff that I did find:
- http://www.vintagesynth.com/misc/ms6.php
- http://www.maad.net/ms6/
- http://www.butoba.net/homepage/ms6.html
Readable schematics were also thin on the ground and when I did find a copy that looked reasonably okay, that’s all it was, a schematic with very little other technical reference.
SIDE NOTE
To speed things up in the long run, I periodically spend a little time cleaning up, redrawing and organising the MS6 schematics. Hoping that my efforts will be helpful to someone else and being my small contribution to the Cheetah MS6 community, my redrawn and reorganised schematics can be downloaded here. Please note that this is an on-going project. Correcting typos and mistakes is one thing but the font that Cheetah used was shocking awful for technical drawings of this nature. The numbers '6' and '8' can easily be confused as can the letters 'A' and 'R', for example. As I said, this is an on-going project and I try to work on the schematics when I can so please be patient.
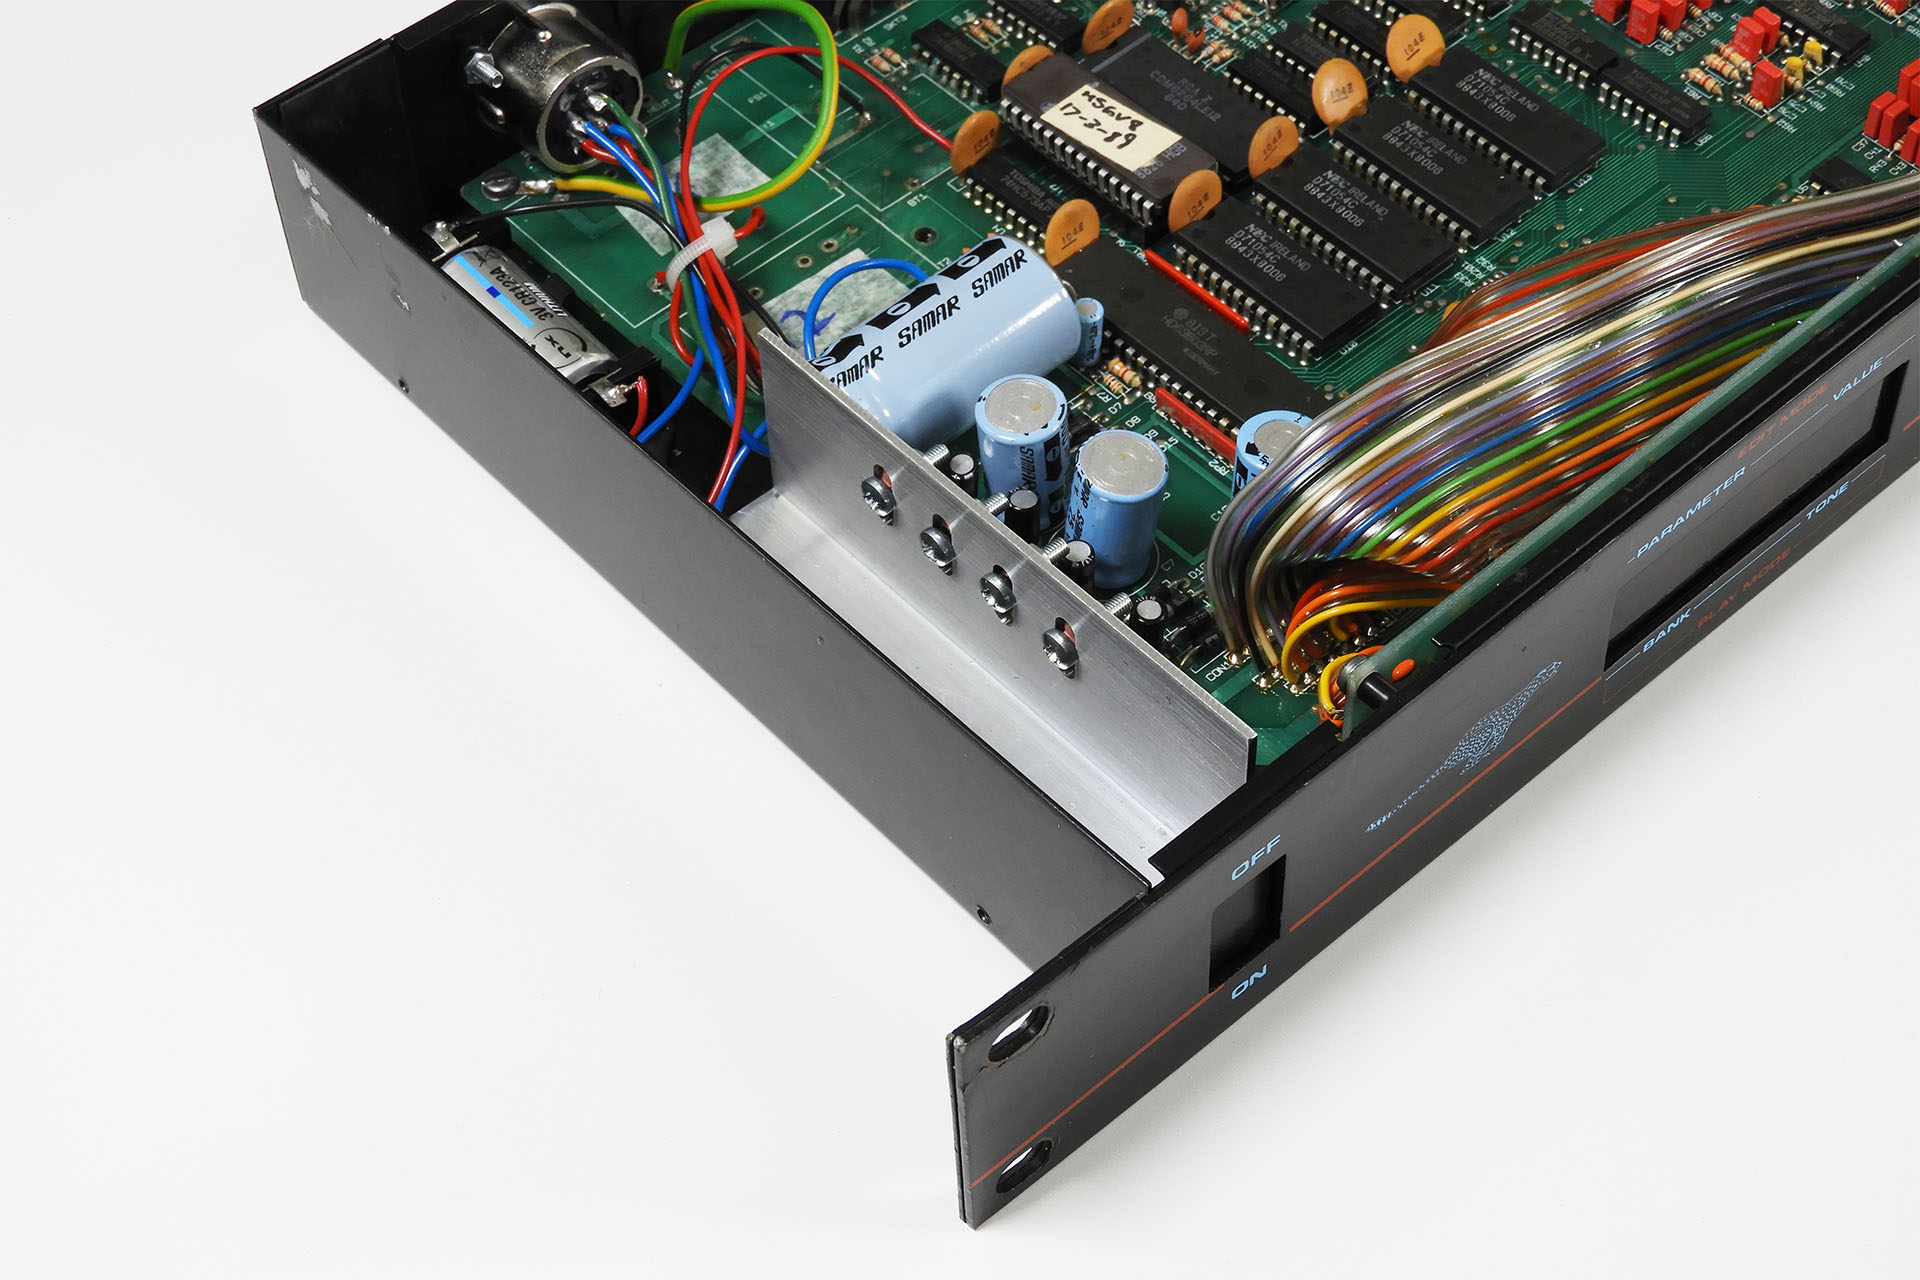
So, where were we? Oh yeah... The unit turned up and I took off the lid. Ah! So, someone’s been in here before. Three of the four regulators had been replaced. Factory attached to a thin aluminium strip which had then been glued to the inside of the case, the soldering on the replacement regulators was just atrocious!
After taking the board out, it was obvious that this box had sustained fluid damage at some point in its life. Hmm… looked like I had my work cut out. Oh and the original firmware had been swapped out for the custom Maad KM 1.3 which actually, was a good thing. Indeed, I've only heard good things about this new code. 🙂
Anyone who’s familiar with the Cheetah MS6 will be aware that the power supply is well, bloody awful. It’s not uncommon for example, for the case to go live. Yes, you read correctly. On top of that, the transformers (yes, there two) are underrated making them quite unreliable and the original heatsinking for the voltage regulators (that thin aluminium strip I mentioned earlier) is in my opinion, quite inadequate. In fact in the image below, you'll notice that only two of the four regulators are actually attached to the heatsink. That's factory, by the way. It's just such an incredibly bad design and such a shame for a cool little analogue synth.
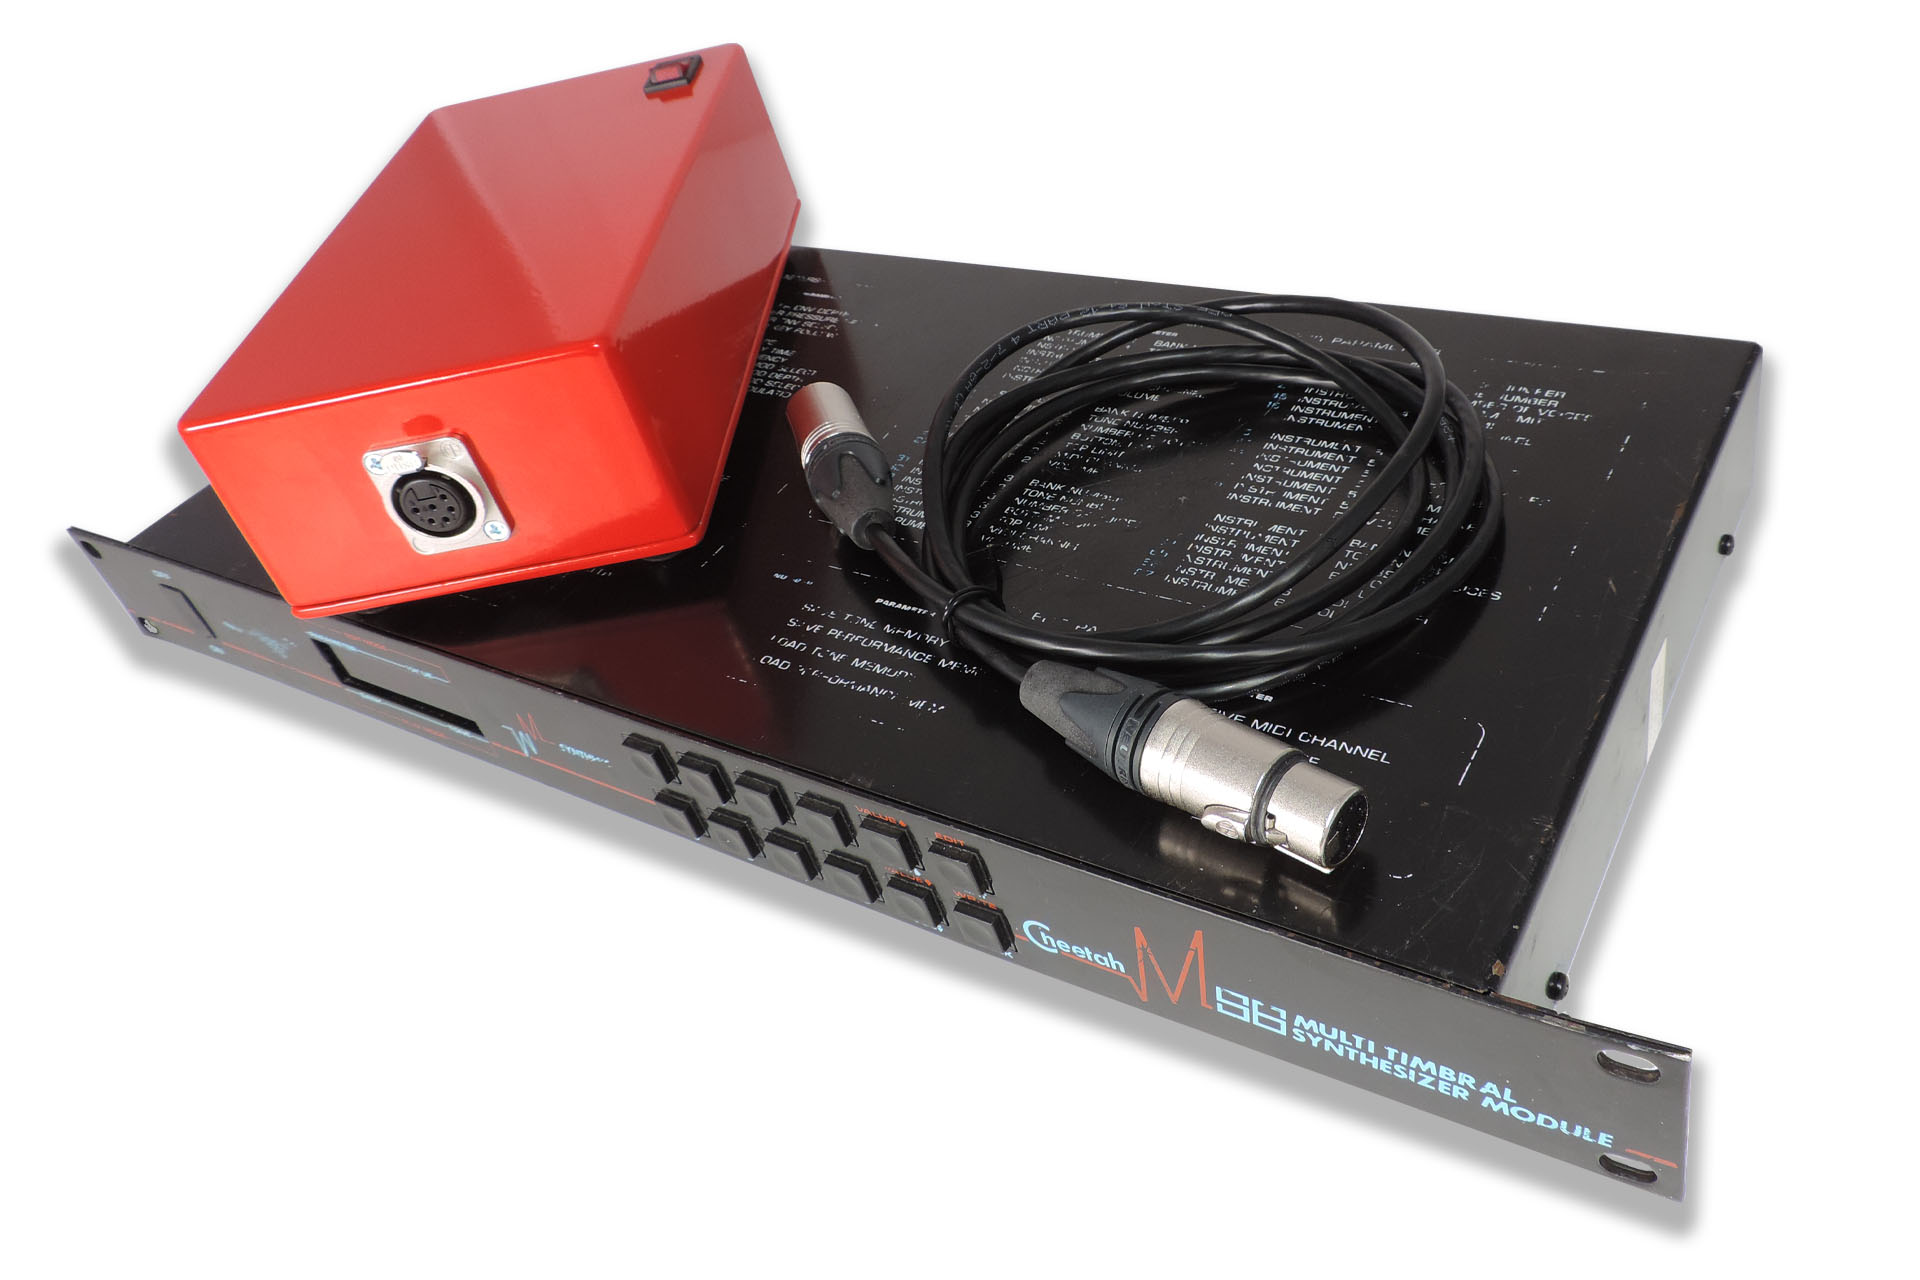
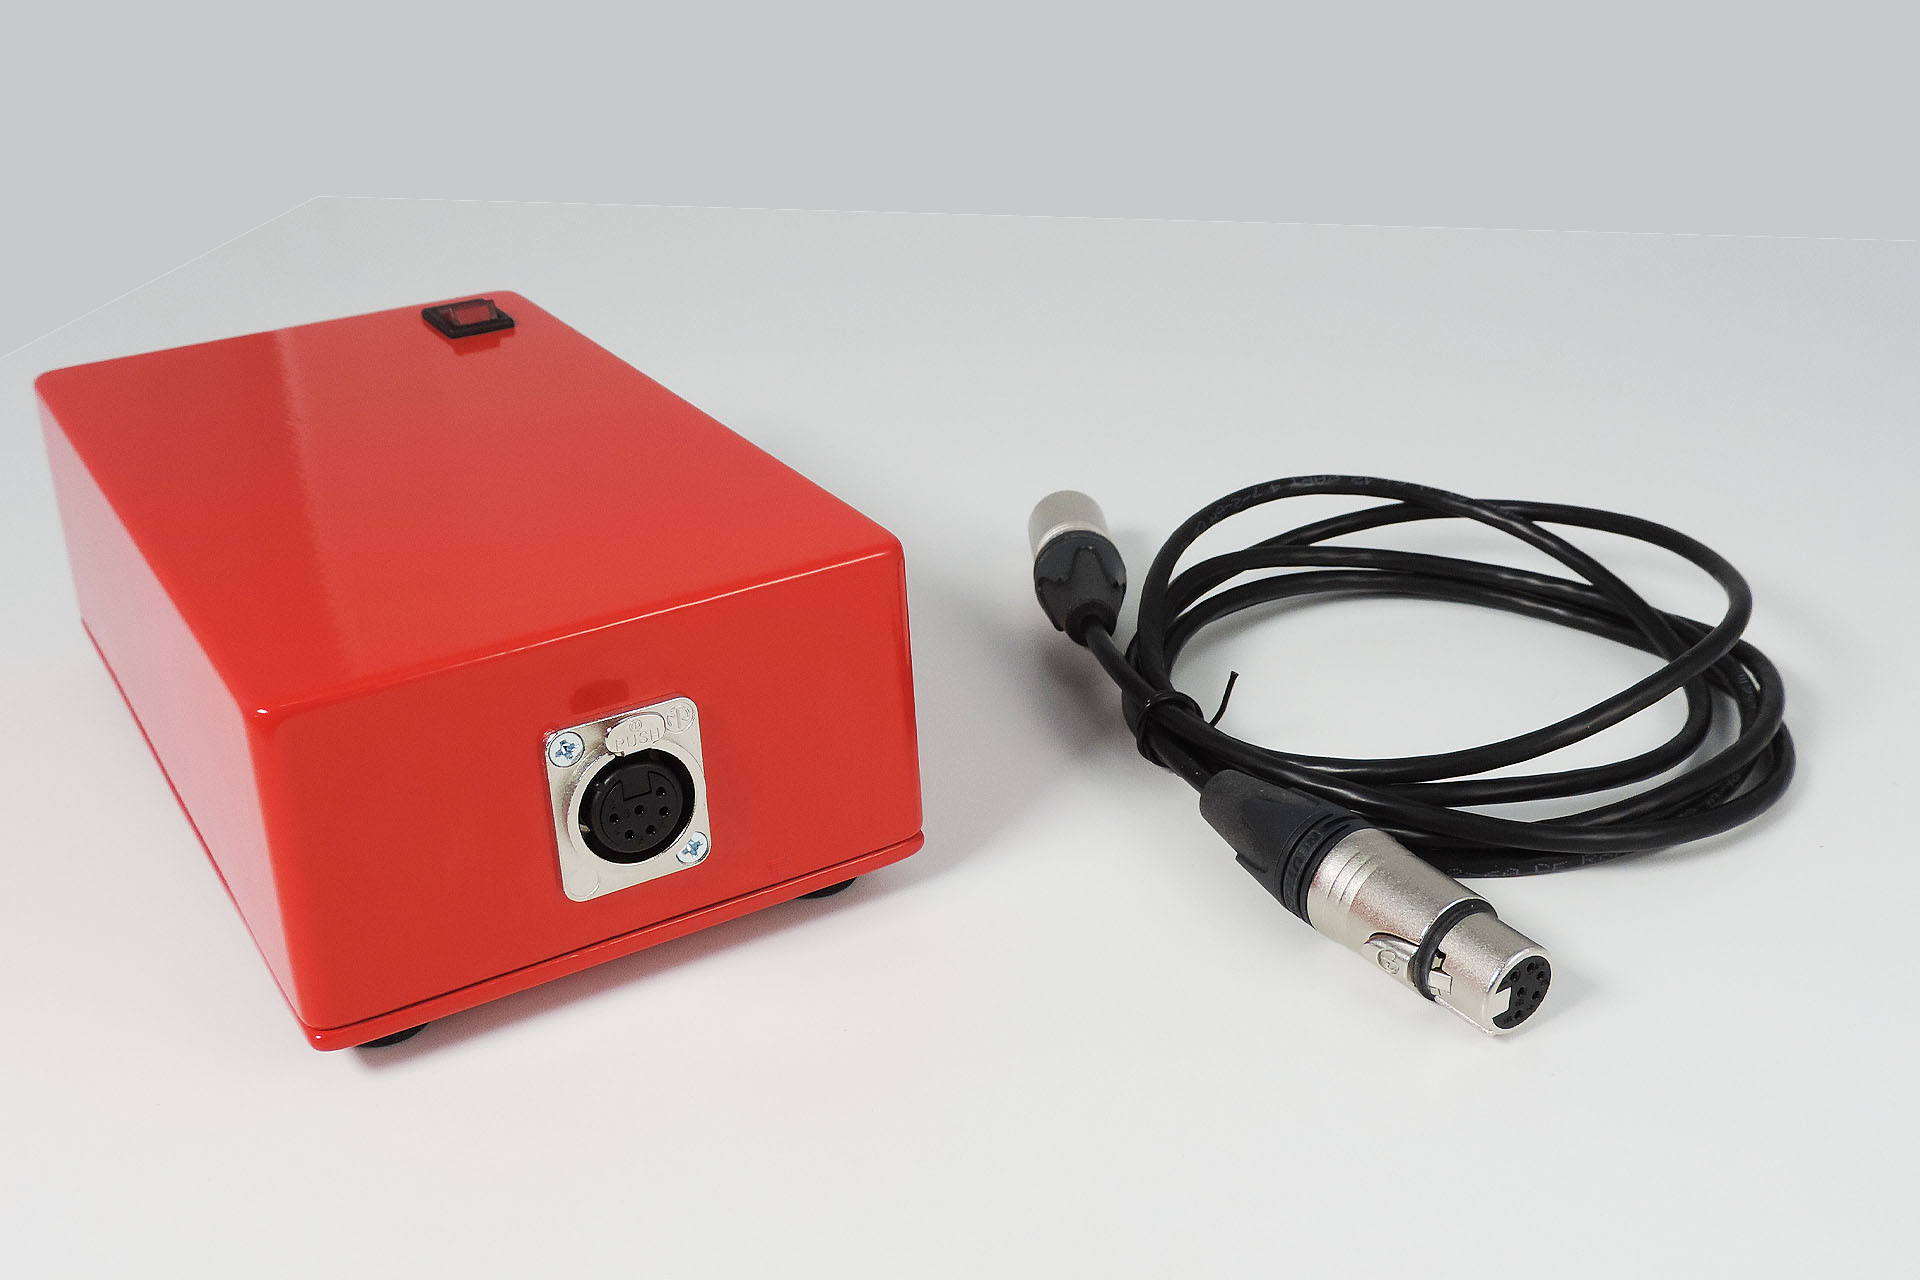
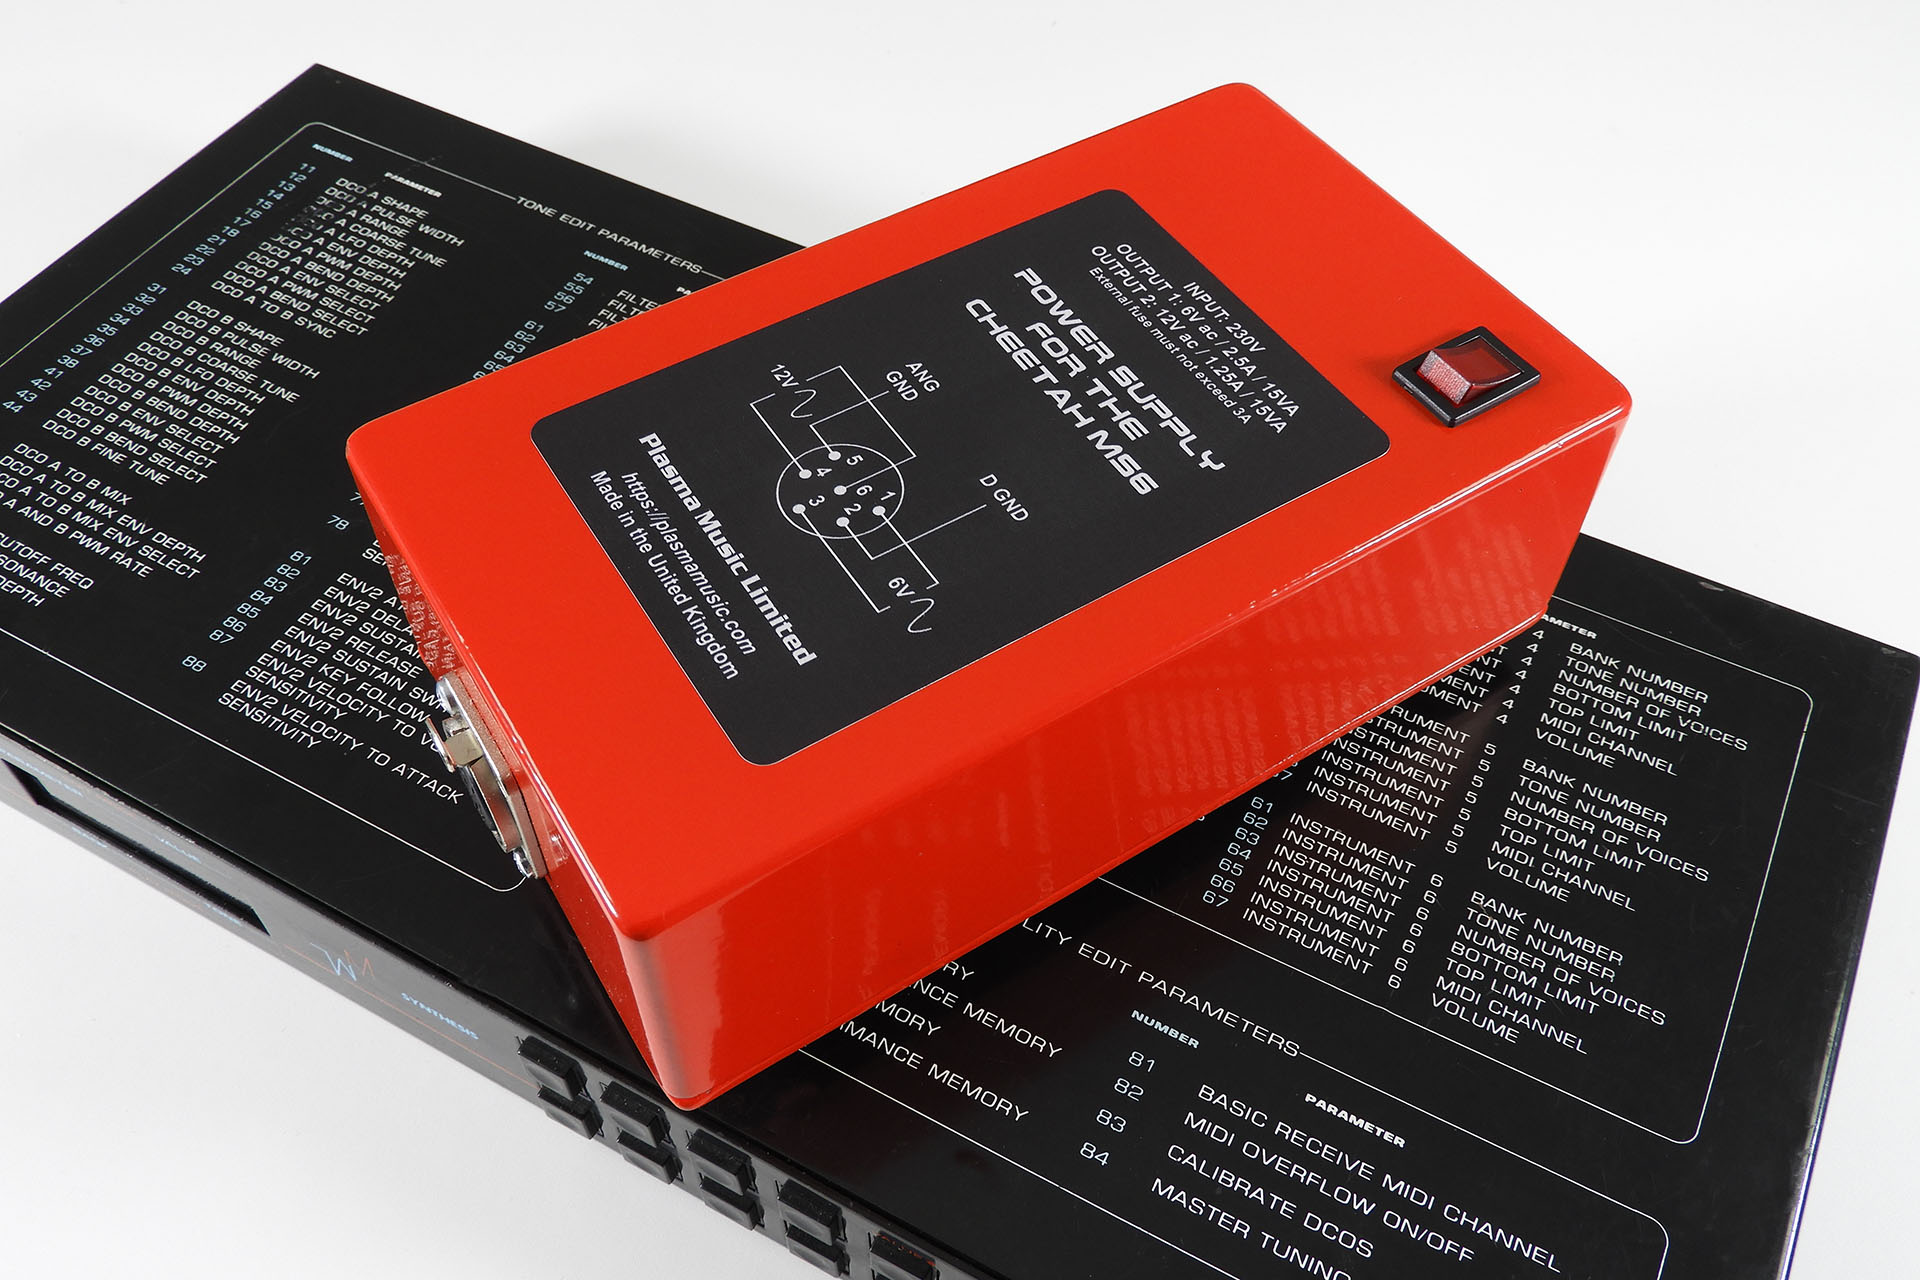
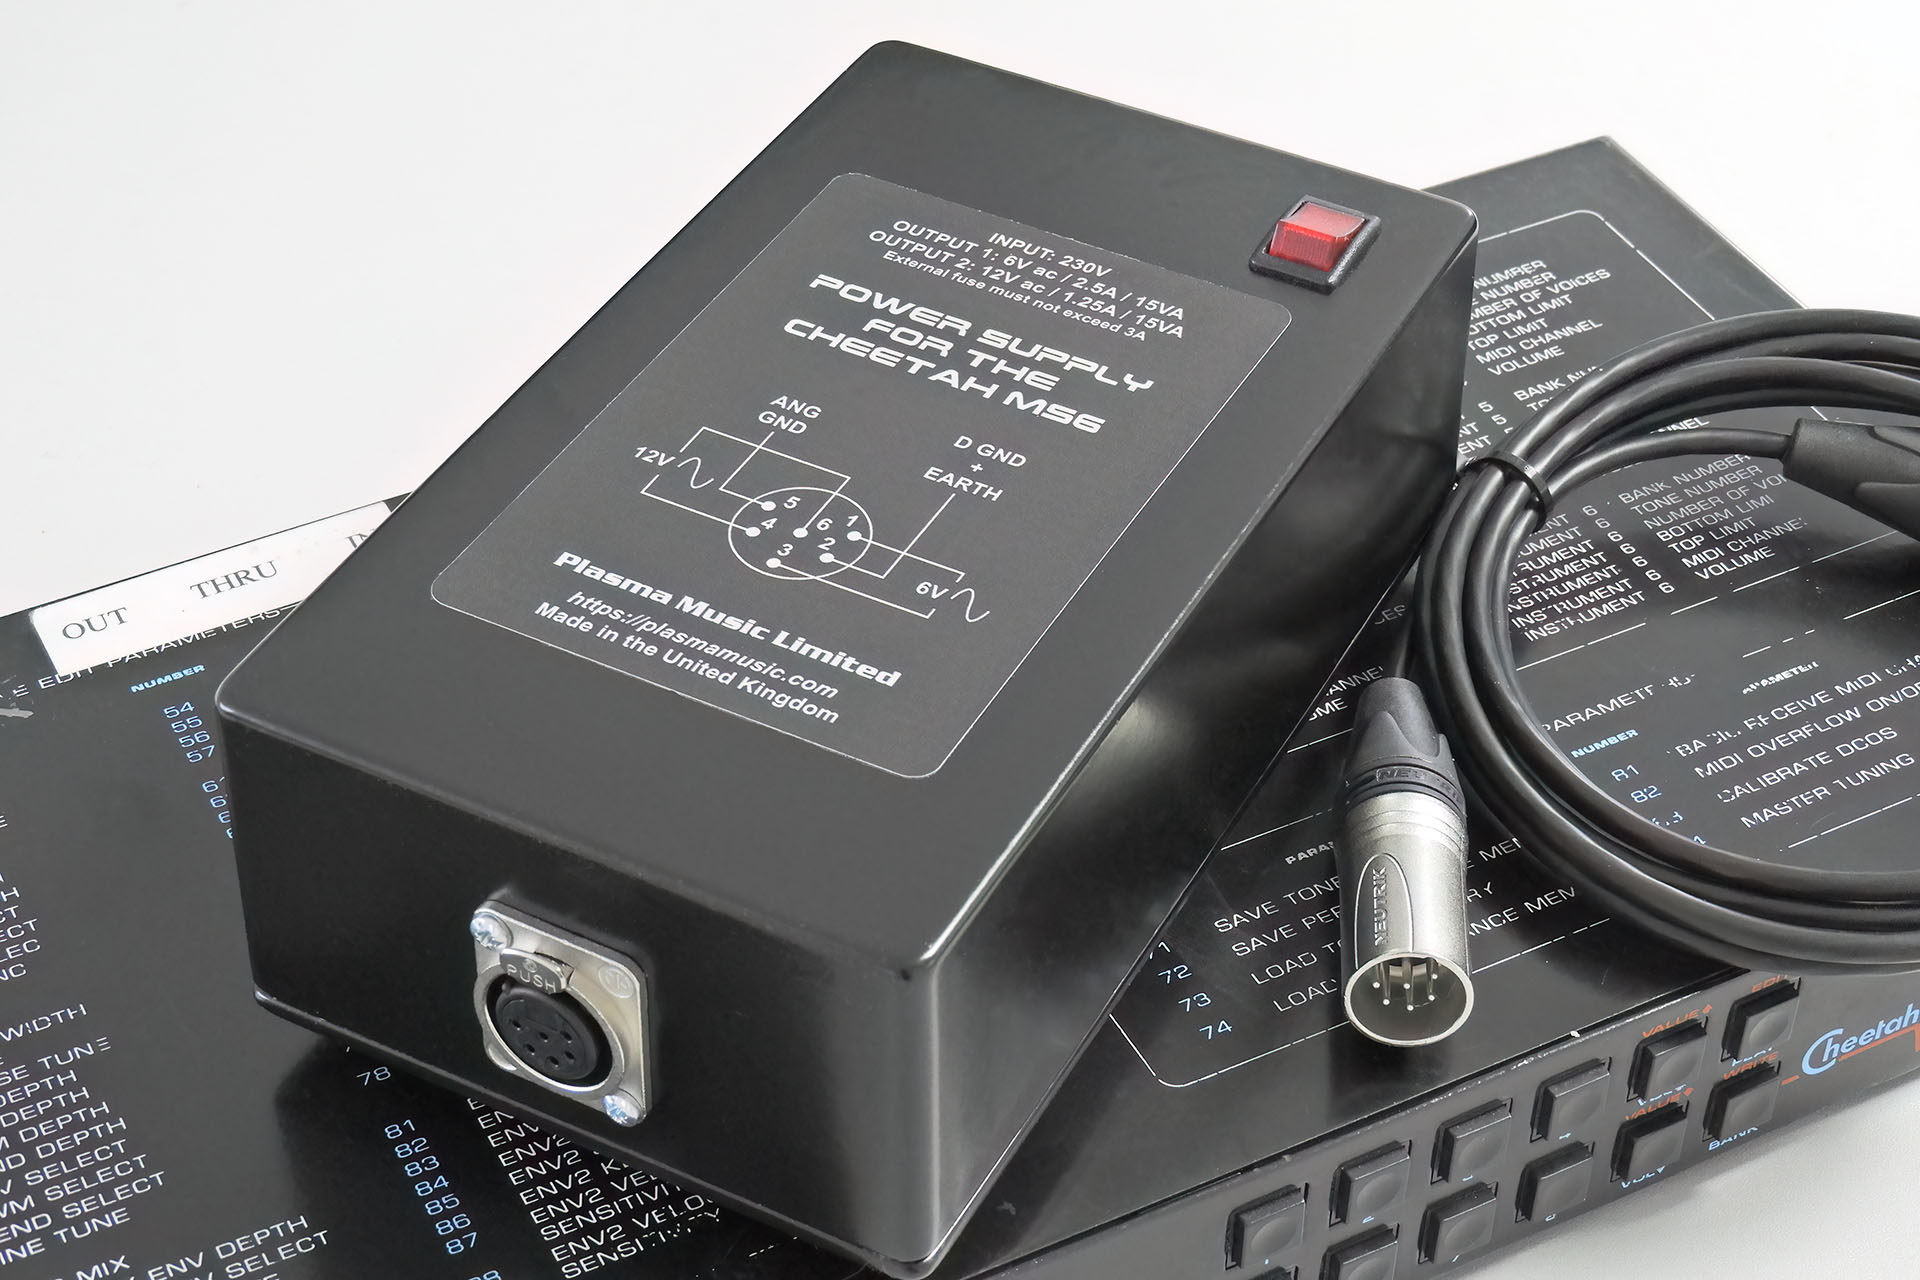
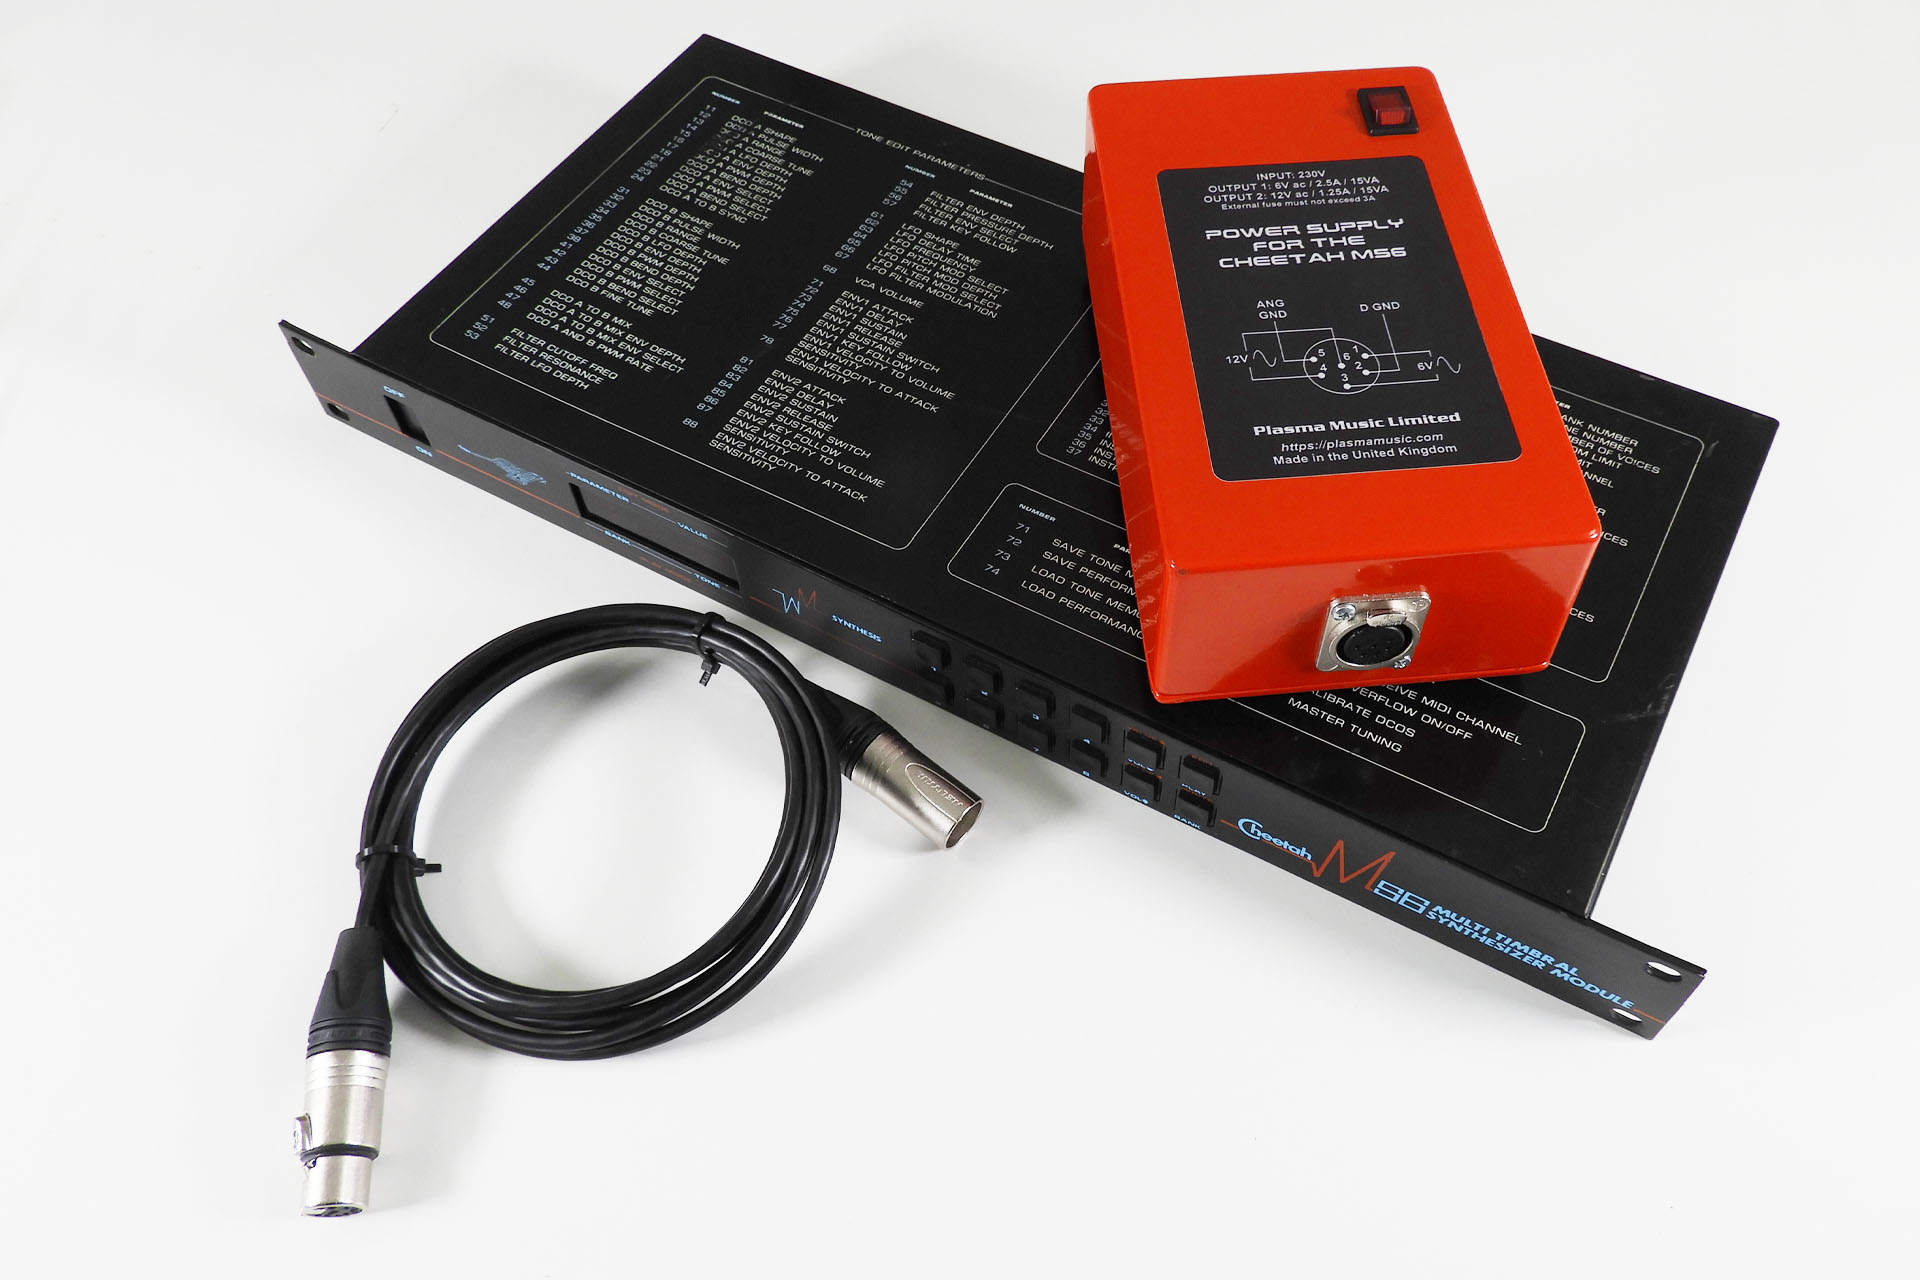
My initial approach to the project was to build an external box which would house two uprated transformers and then provide a suitable connection from the box to the MS6. The latter part would require a hole or two to be drilled into the rear case of the MS6 but I've done this kind of thing before on other machines like the Line 6 Pro racks (Echo Pro, Mod Pro and Filter Pro).
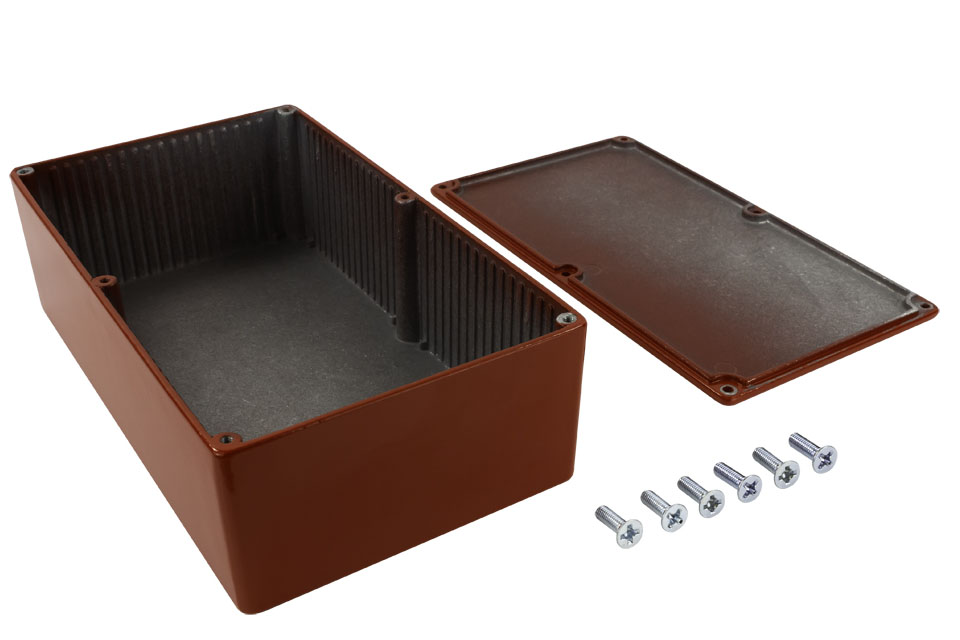
For the external enclosure, I chose one of my favourite, 'go-to' boxes; the Camdenboss RTM5006/16. Earthing this very substantial diecast steel enclosure would create a Faraday cage and hence, provide excellent screening ; perfect for housing the uprated transformers.
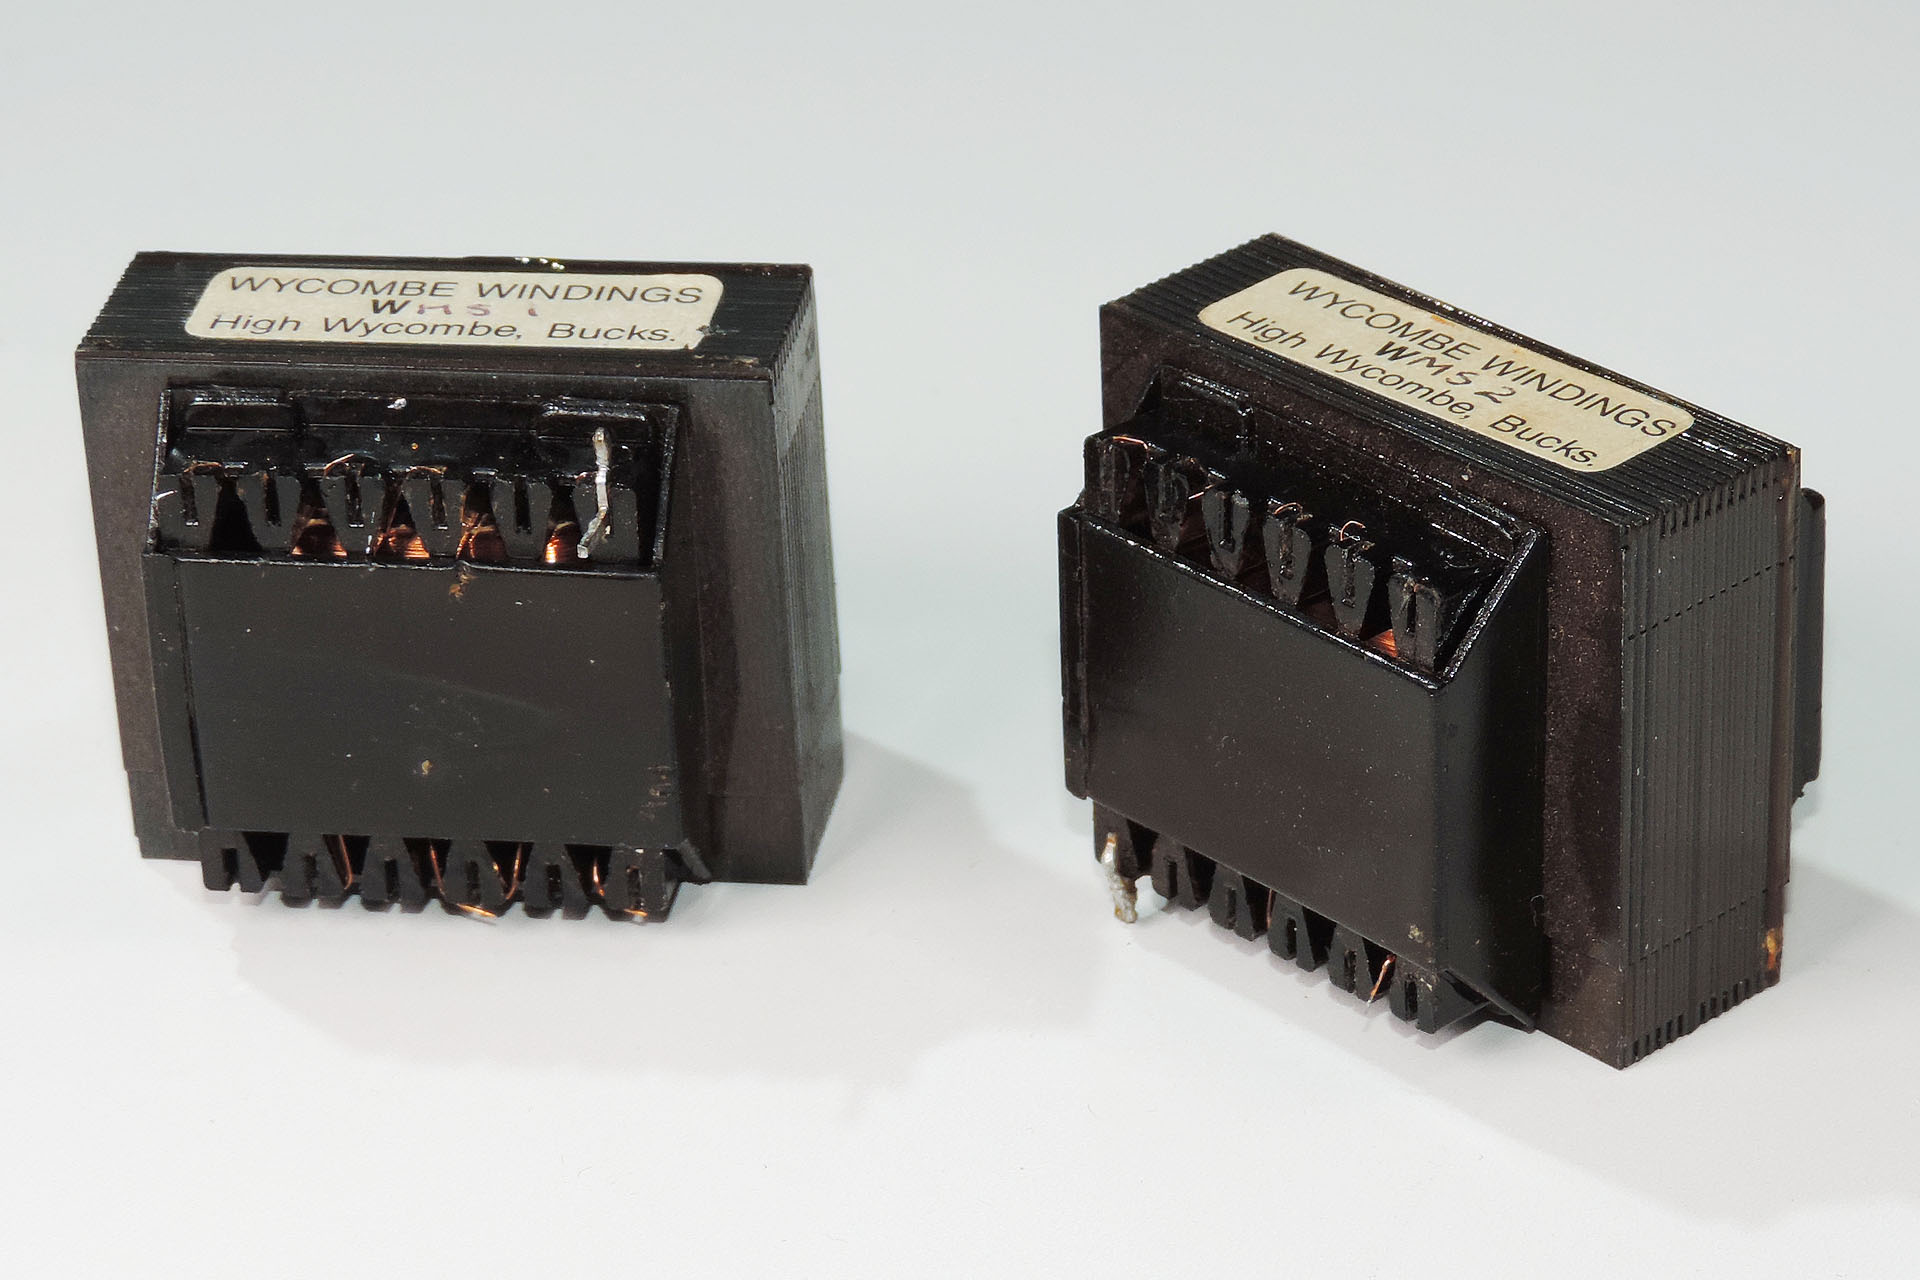
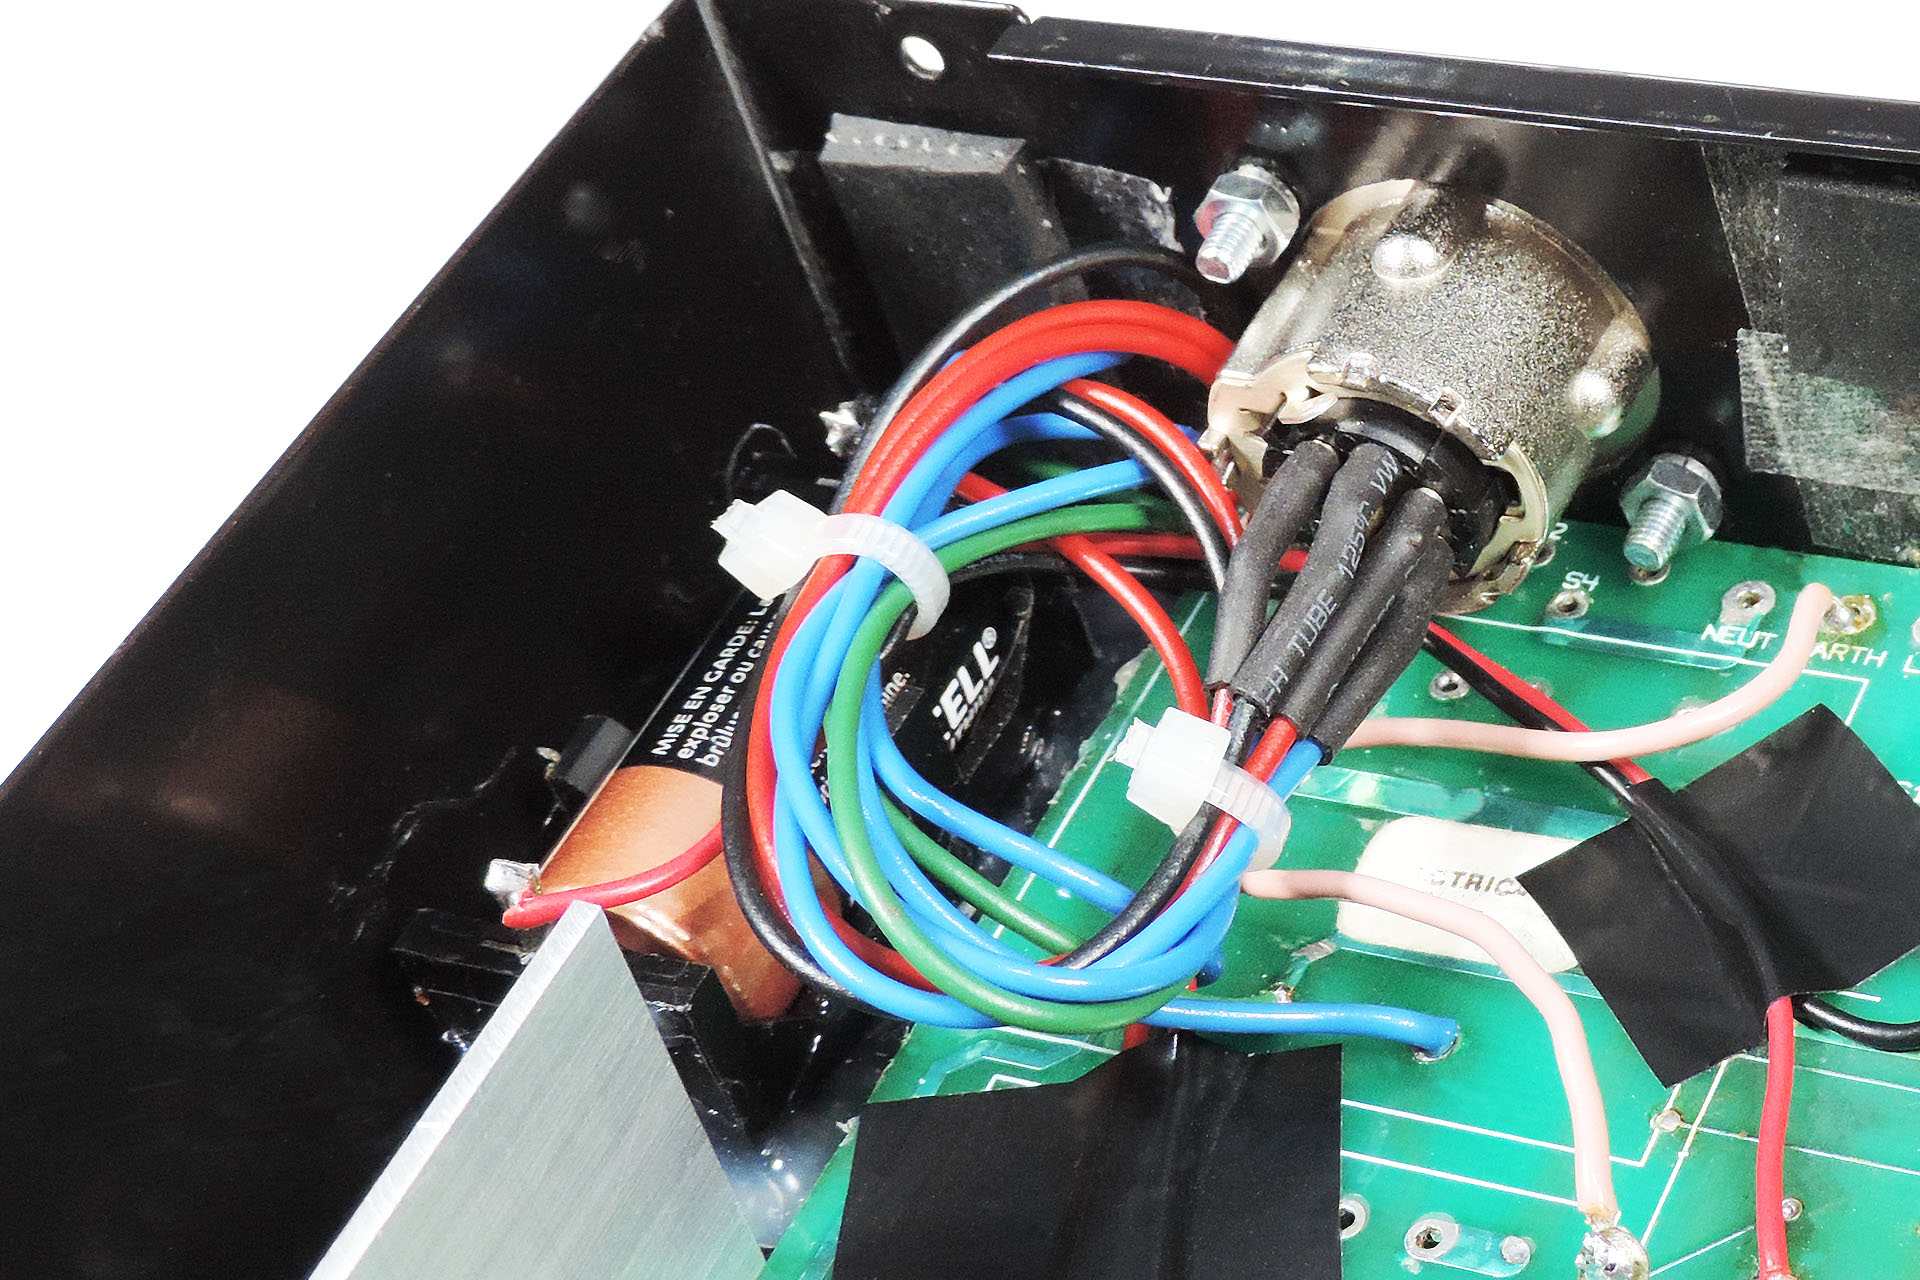
There are four regulators in the MS6, supplying +/-5V and +/-12V. Removing the original transformers was a bit tricky but once they were out, my idea was to drop in connections from the power socket which would be fitted, to the main PCB where the secondaries of those transformers connect to the board. Complimentary (balanced) voltage rails, meant there was a centre-tap for the AC feeding each pair of supplies so a minimum of a 6-core cable was needed.
While that was going on, I cleaned up the PCB, getting rid of as much sign of the fluid damage as I could.
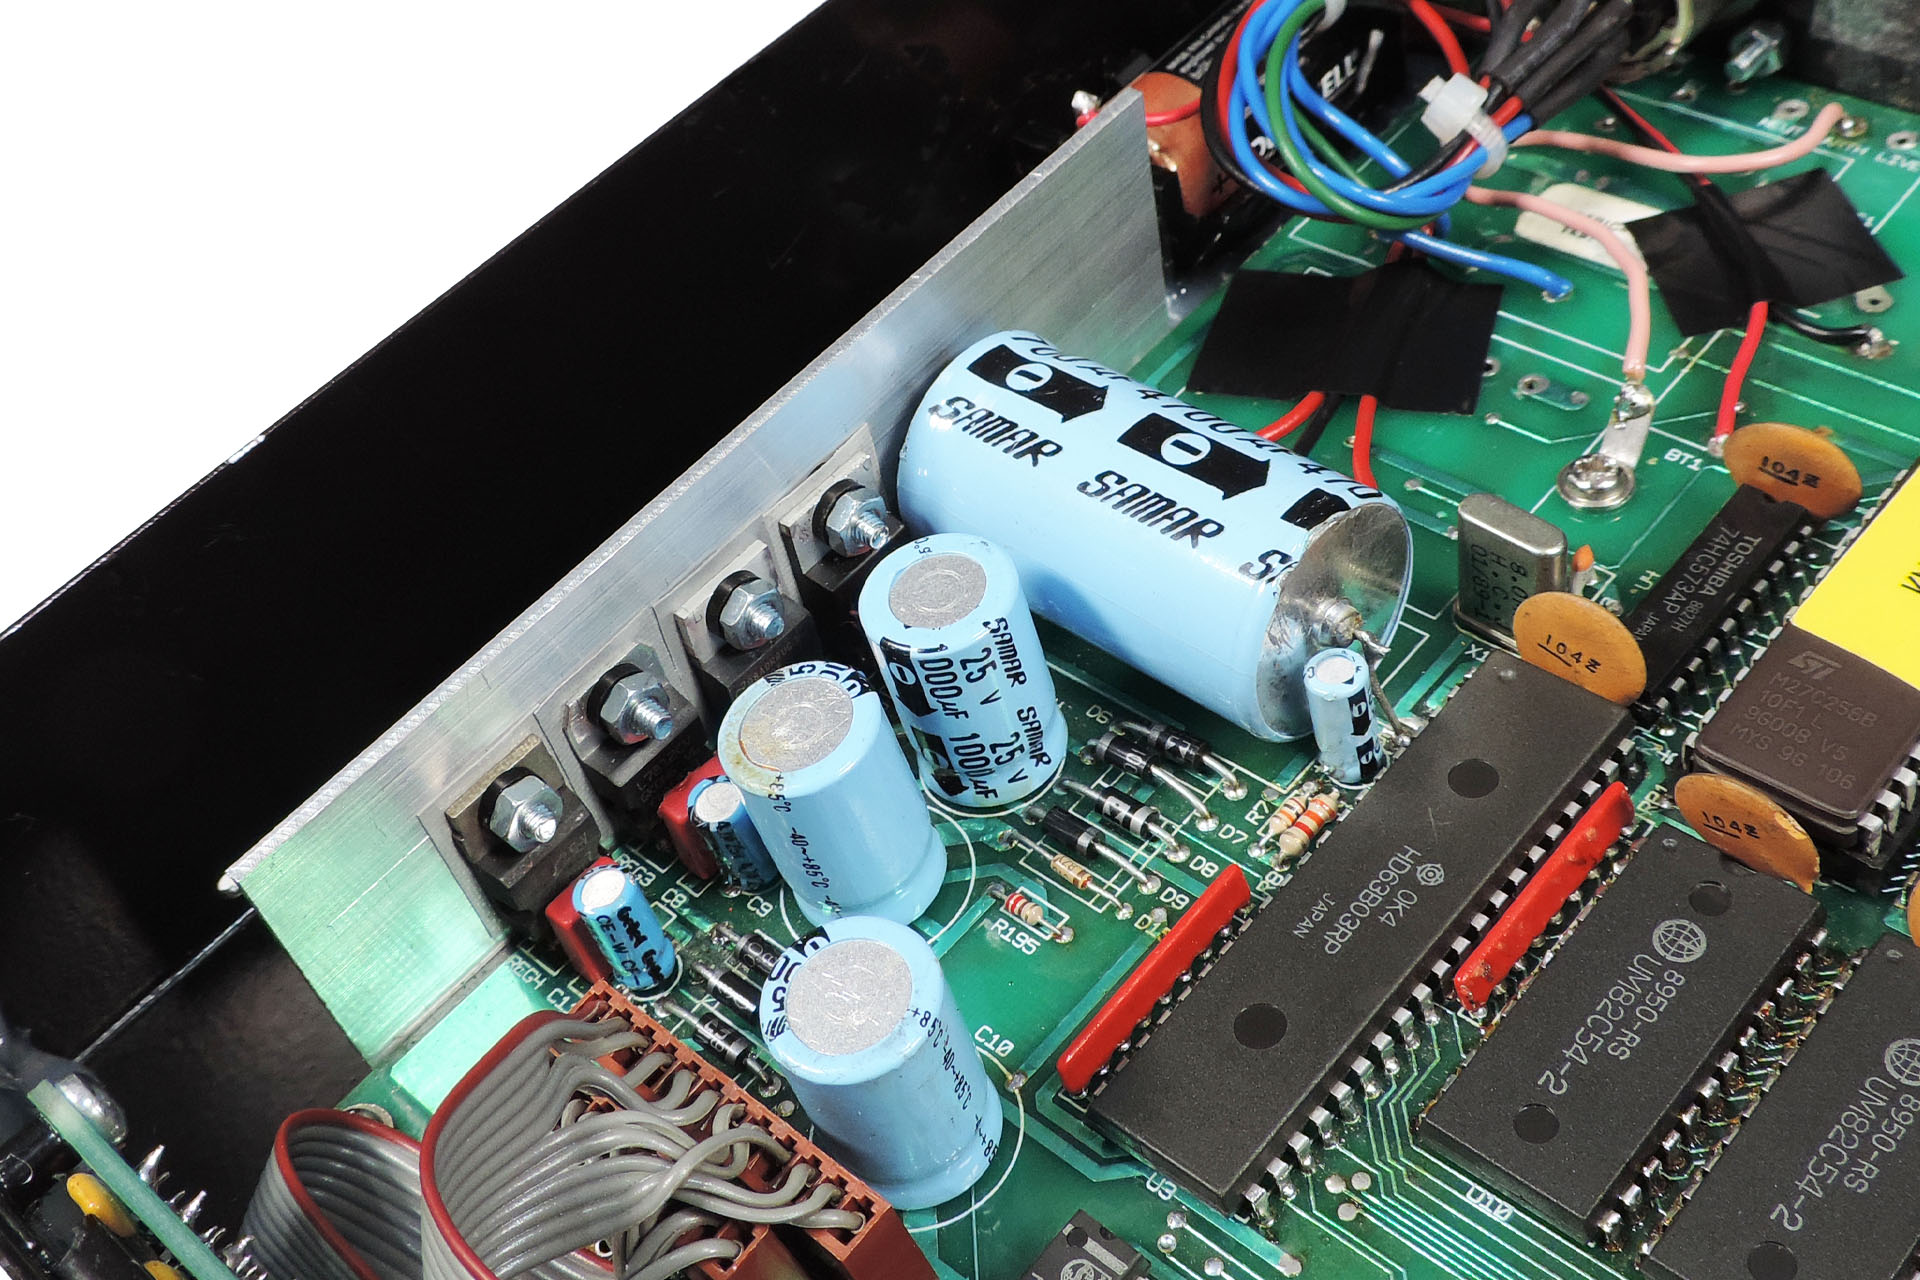
Next was the post transformer part of the power supply which as I’ve already mentioned, was a real mess. The PCB seemed quite fragile around the rectifier diodes, capacitors, etc so I had to be careful. While I was in design mode, I knocked up a drawing for a 'proper' heatsink.
Well, I took the stripped-out case, the enclosure for the external power supply and my drawings to Lenton Engineering in Watford and a couple of weeks later, I got the call informing me that everything was ready to collect.
The transformers, switches and connectors all fitted perfectly into my cool steel external enclosure, so if nothing else, I would end up with a groovy dual-voltage AC power supply. 🙂
The heatsink also fitted perfectly which was a relief as when I was designing it, the regulators on the MS6 I had, were a bit all over the place. It took me a minute to realise that the distance between the TO-220 mounting holes was an imperial half-inch and NOT metric.
By now, I'd made the cable that would connect the external box to the MS6 so all that was left to do was to screw the connector socket to the rear of the MS6 chassis and then wire it to the main PCB.

So, all was done pretty quickly and it was test time. As usual, I cleared a big space, just in case it all went bang... again. Well, it didn’t. In fact, nothing happened at all for a few seconds. While the unit was still on, I quickly measured voltages and all looked good; +/-5V and +/-12V. Then characters appeared in the display but not as expected. All that was shown was ‘FE’ which was flashing and every now-and-then, some random stuff.
I'm aware that when the memory is empty, the Cheetah MS6 loads factory pre-sets from ROM and doesn't require re-initialisation as such, or loading of factory patches via some fancy button hold-down routine. Since I'd already removed the original battery (because it had leaked), automatic re-initialisation is exactly what the machine was trying to do. There was another issue however; the buttons on the front-panel were totally unresponsive.
After a few minutes of power, I noticed that one of the multiplexers was seriously hot, so I immediately switched off. I replaced the cooking 74138 and tried again. Wow! This time it all fired up perfectly! It still displayed 'FE' but this time successfully went into its initialisation sequence and of course, the front panel buttons were now working. No doubt, the 74138 was a victim of the power fault which broke the instrument in the first place.
I hooked up a MIDI keyboard and attached the output to my mixer. Hey, I’ve got sound. More than that, all the voices are working. This was all quite a relief.
So what about the memory back-up battery? Well, I decided to implement my Live Forever battery mod.
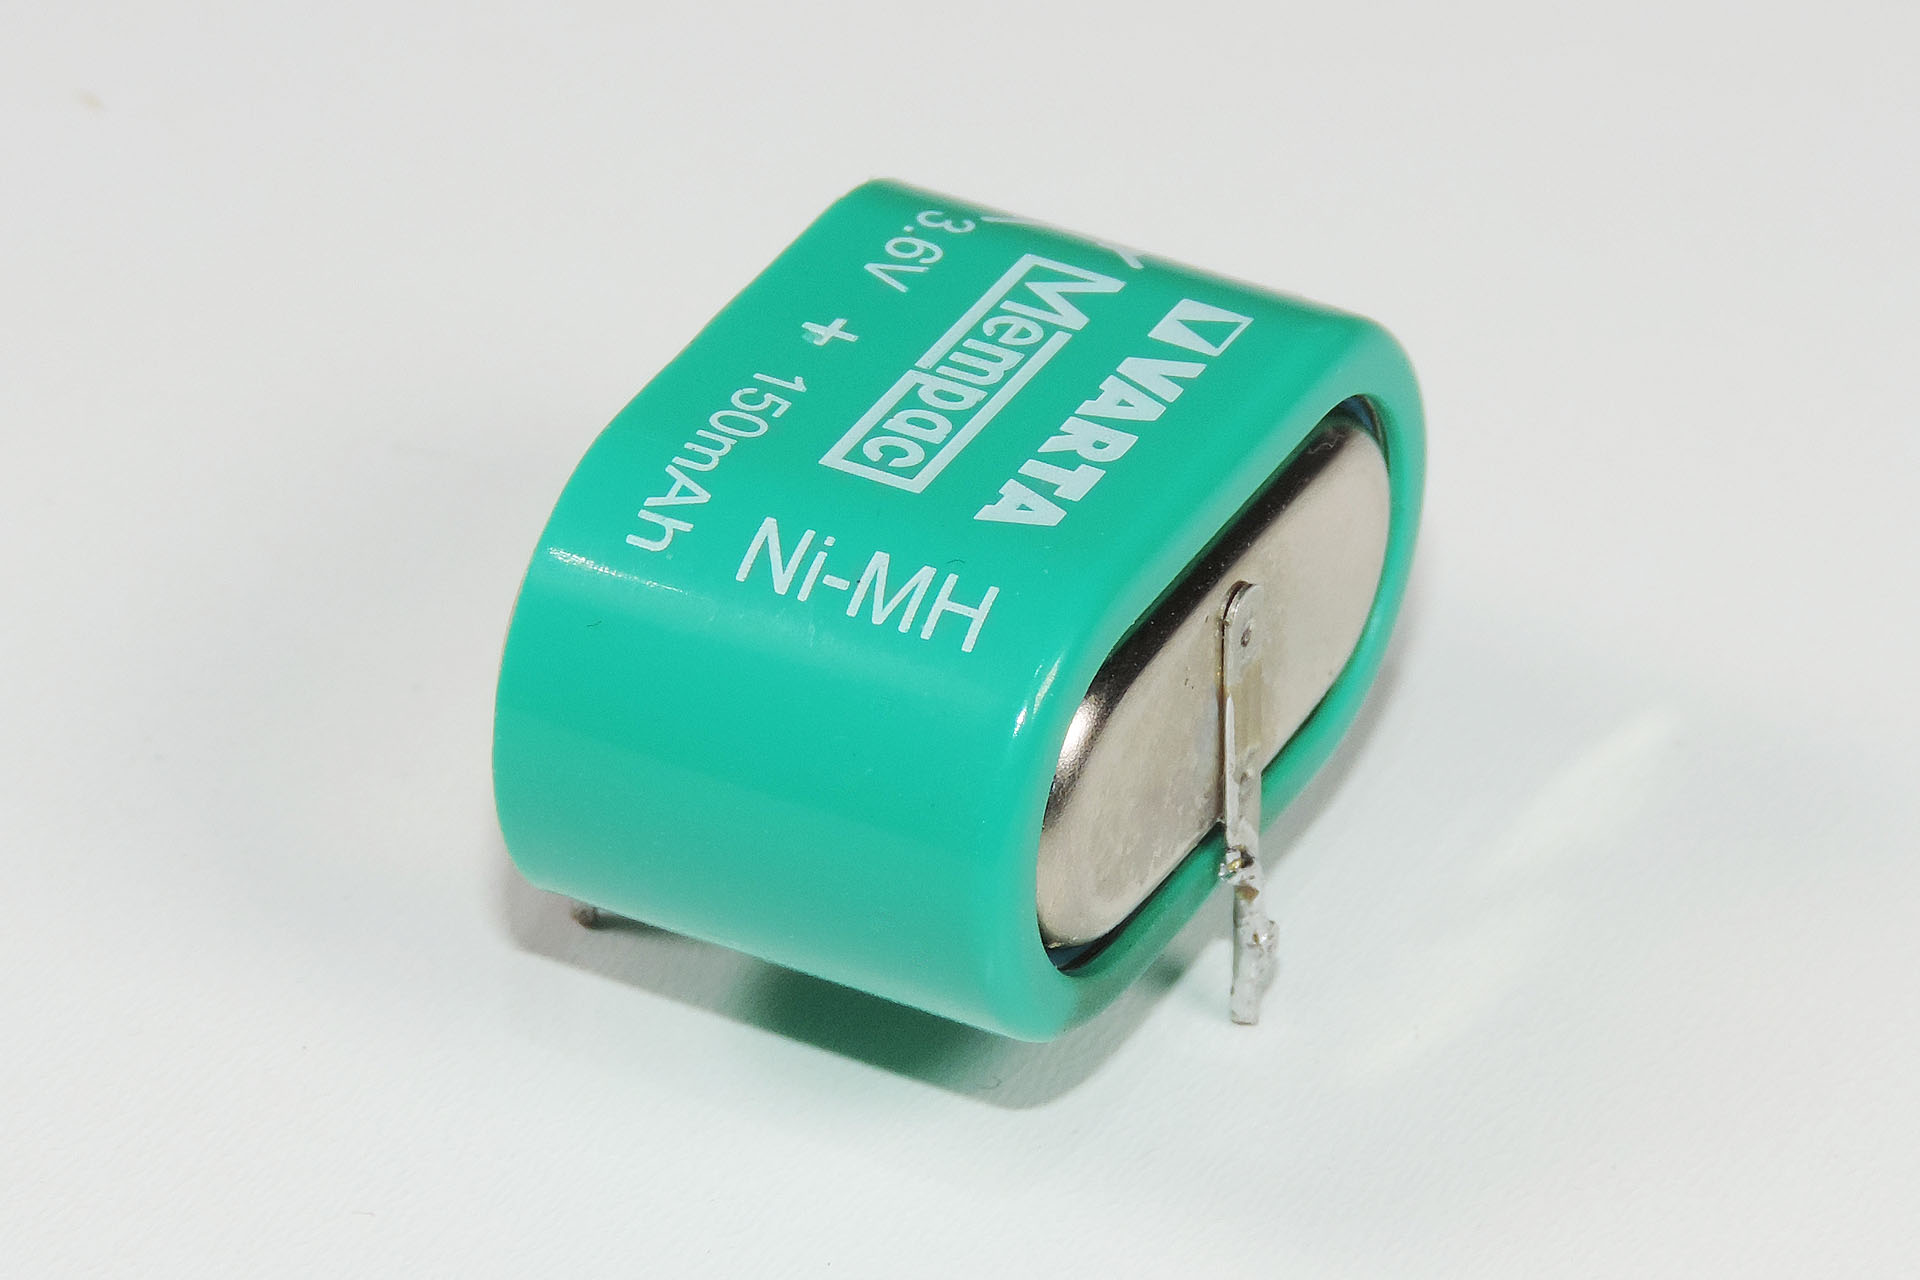
This required a slight modification to the battery back-up circuitry as the original battery was a rechargeable Ni-MH type. I was dropping in a lithium battery which I really didn’t want the MS6 to charge, when it was powered on!
Once that was done, I tried again. You know what? This thing doesn’t sound too bad. Of course there's better but you have to bear in mind the price bracket of this box when it first came out, about 300 GBP.
The power supply in these machines is notoriously bad. In fact, I’ll go so far as to say “it’s not a matter of if but when it'll blow”. On top of that and as has been proved by the customer of this unit, they don't need to fail 'quietly'. This is a real shame as the synth is actually really quite good with six analogue voices and even multitimbrality. It’s also a shame that the MS6 has an old-style Ni-MH battery. If not charged regularly, there’s a significant chance of this leaking… all over your main PCB!
So, if you have a Cheetah MS6 that you love dearly, please don’t hesitate to contact me regarding
- an external power supply,
- my Live Forever memory back-up battery mod
And finally... There's one aspect of the Cheetah MS6 that I haven't mentioned yet and that is the low-level of earth induced hum. Well, you'll be delighted to know that with the installation of my external power supply, this is KILLED! 😊
UPDATE - 10th May 2022
I've now built quite a few of these power supplies for customers who just love their Cheetah MS6. As such, I've also managed to work out a price. The following is everything I did to get to a reliable and safe solution and for which I do NOT charge:
- Reverse engineering the original MS6 internal power supply.
- Reverse engineering the MS6 battery back-up facility and adapting it to take a lithium cell.
- Designing the external enclosure for the new power supply.
- Designing the cut-out required in the MS6 chassis.
- Designing a proper heatsink for the regulators.
- Selecting reliable components for the new power supply and the battery back-up circuitry.
- A considerable amount of testing! 🙂
When working on your MS6, here's what I do and what I charge for:
- Preliminary check of your MS6.
- Taking apart and dismantling the entire unit.
- Removing redundant power supply components.
- Removing back-up battery and associated components.
- Preparing and delivering metalwork of external enclosure and MS6 chassis for drilling.
- Building external power supply into steel enclosure and custom power cable.
- Installing custom heatsink.
- Modifying the battery back-up circuit and installing the new lithium battery.
- And of course, reassembling and then testing the unit.
To do the whole job (excluding metal work, of course), easily takes a couple of days and I simply can’t charge for all of that. If I did, the cost of this MS6 power supply would exceed the value of the MS6 itself!
So, prices for my Cheetah MS6 power supply, now start from 590 GBP. Yes, I know it's expensive but there's a lot of metalwork involved and this is done by another company which I've been using for forty years and do excellent work for me.
UPDATE - AUGUST 2023
Since posting this article however, I'm truly humbled by the number of enquiries I've received and how many of those enquiries have turned into customers trusting me with their units. In fact, after having done two or three, I decided to design a label for the power supply.
I used the term 'start' in the previous update because the price of the red diecast enclosure has gone up by 66% since I started building these. To save you a little money, I'm now offering exactly the same power supply in a black version of the steel diecast box that I used to use and still keep the price at 590 GBP. I can still do the red case but it's an additional 30.00 GBP now! 🙁
The price of the Neutrik connectors that I use, has also gone up but I'm absorbing that cost. 🙁
Please remember that Plasma Music Limited is VAT registered so VAT at 20% needs to be added to builds purchased within the UK.
Today, I've received another MS6 with the customer wanting the works. This prompted me to update this post.
I'm delighted that MS6 owners are finding this page and responding to my advice to do something before it's too late. These are really lovely machines with a classic eighties sound. Don't let them die!
UPDATE - 13th October 2022
Working by myself on things like valve amps and dodgy old synth modules like err... the Cheetah MS6, is sometimes concerning as I often run the risk of electric shock and of course, there's no one with me to assist, if things go badly wrong.
I've currently got three MS6s with a forth due in shortly. The owner of tonight's machine didn't want my external power supply and after the repair, while doing the final tests, I got hit... the big ZING. Ouch! Straight off the case, no less. Yes, you read correctly; off the case. As many Cheetah MS6 owners may be aware, this is an annoying and potentially lethal MS6 issue.
It took a while to isolate things and make the machine safe but guys, I can't emphasise just how bad the power supply is, in these machines. PLEASE GET IT SORTED!!!!!
UPDATE - 24th October 2022
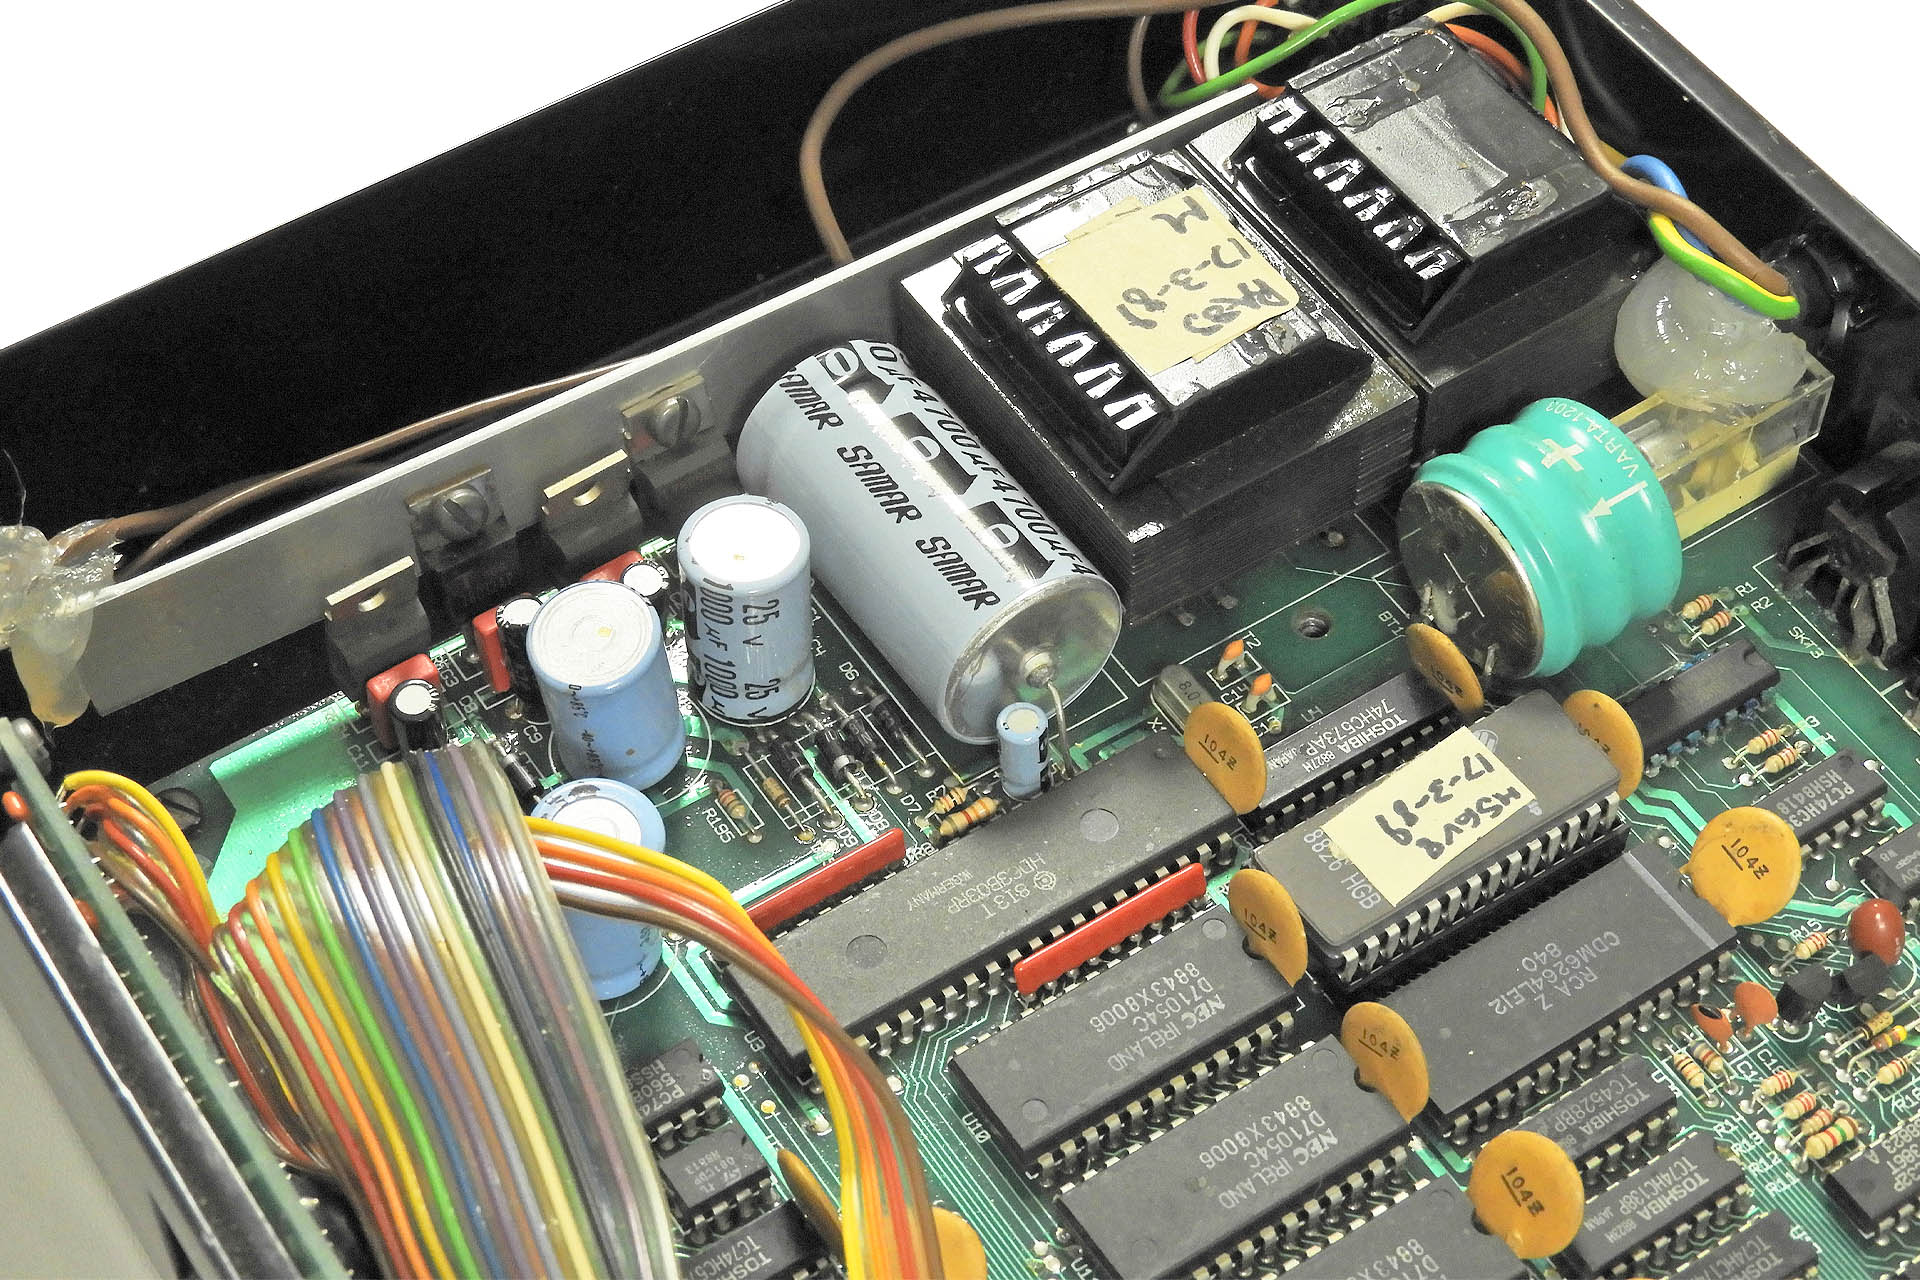
Below is a picture of another of the three MS6s I have in, prior to any work being carried out. The PCB is quite different to others I've seen and I believe this one to be either a prototype or a very early version.
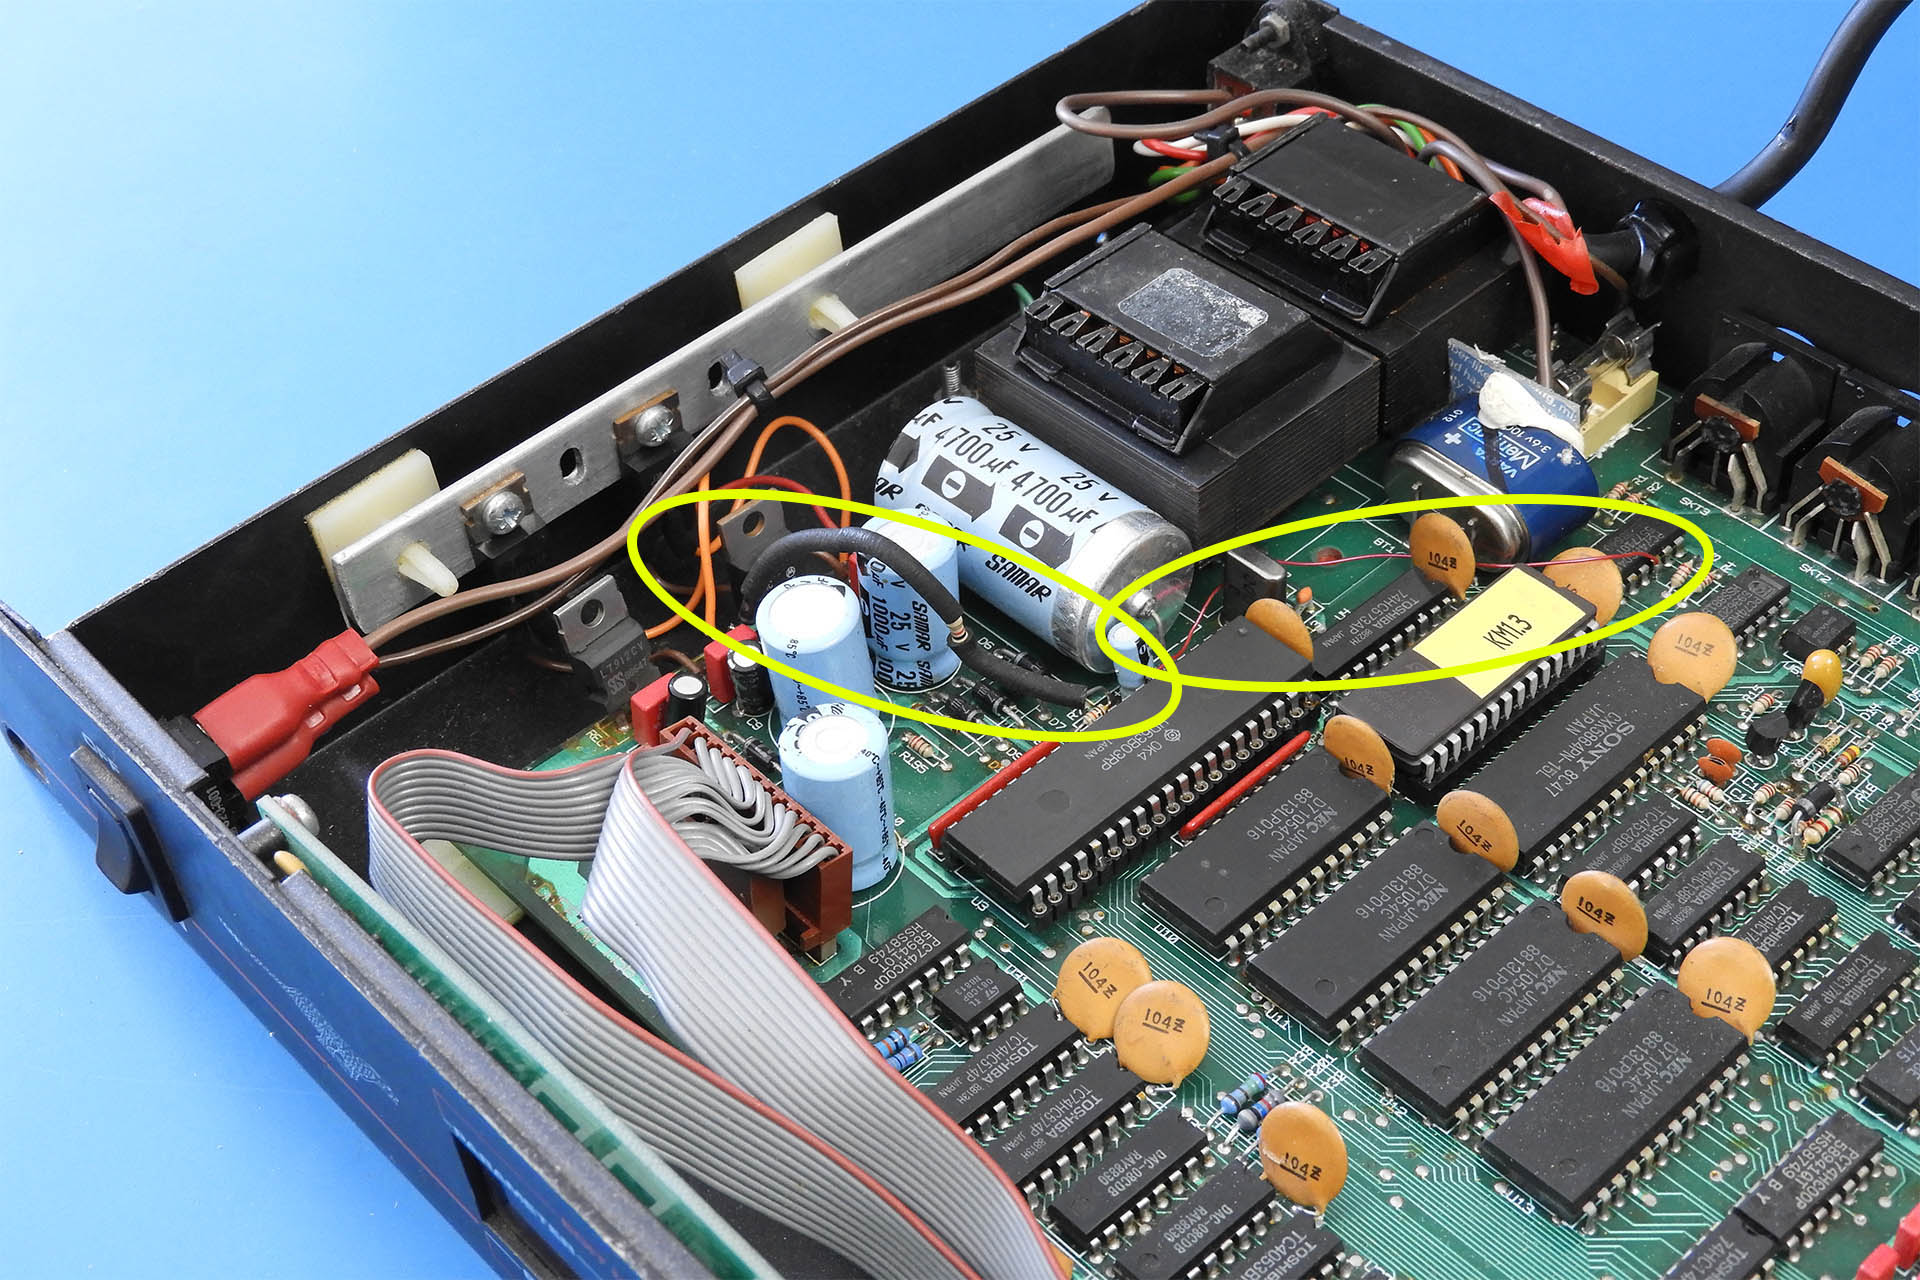
In common with all MS6s, it has the badly mounted regulators, only two of which are mounted to a thin aluminium strip (the heatsink). I've highlighted the reset line and the diode connection between +12V and the processor's STBY, NMI and IAQ1 ports.
This machine was a challenge and after building the external power supply, modifying the rear of the case, making one of my custom heatsinks, implementing my Live-Forever battery mod', the bloody thing wouldn't boot. 🙁
I was really careful to make sure that the flying wires were in the right place. I double checked my work and although the unit would power up, it wouldn't boot. That led me to believe it was a processor reset kind of issue.
After a bit of hunting around, I sussed out that the +12V regulator was duff. Although the digital circuitry is running at +5V, as mentioned above, processor STBY, NMI and IAQ1 are derived from the +12V line.
I swapped out the 7812 and voila, another rescued Cheetah MS6 that's going to be around for many years to come.
UPDATE - 1st November 2023
Weirdly and three years later, the first MS6 I received and which is featured at the beginning of this post, found its way back to me... from another customer and without the power supply that I built for it. Read the whole story here. 🙂
UPDATE - 13th December 2023
My Cheetah MS6 power supply has proved to be a lot more popular than I imagined. I've therefore decided to include it in my on-line store:
UPDATE - 12th February 2025
My external power supply for the Cheetah MS6 addresses the main issue with this underrated, classic vintage synthesiser module, the original (internal) power supply. After having built a lot of these since I launched this upgrade, way too many to count, I have a confession to make; I’ve never been 100% happy with it!
By definition, an upgrade enhances the original product. Unlike my other upgrades however, the external power supply module for the MS6 requires modifications to the original MS6 case. This is in stark contrast to my prime objective of keeping the appearance of the host unit as original as possible.
Well, the customer of the last MS6 I had in, allowed me to consider a different approach. For a start, although quite inoperative, I decided to keep the original ON / OFF switch on the front panel and the voltage selector switch on the rear panel, in place.

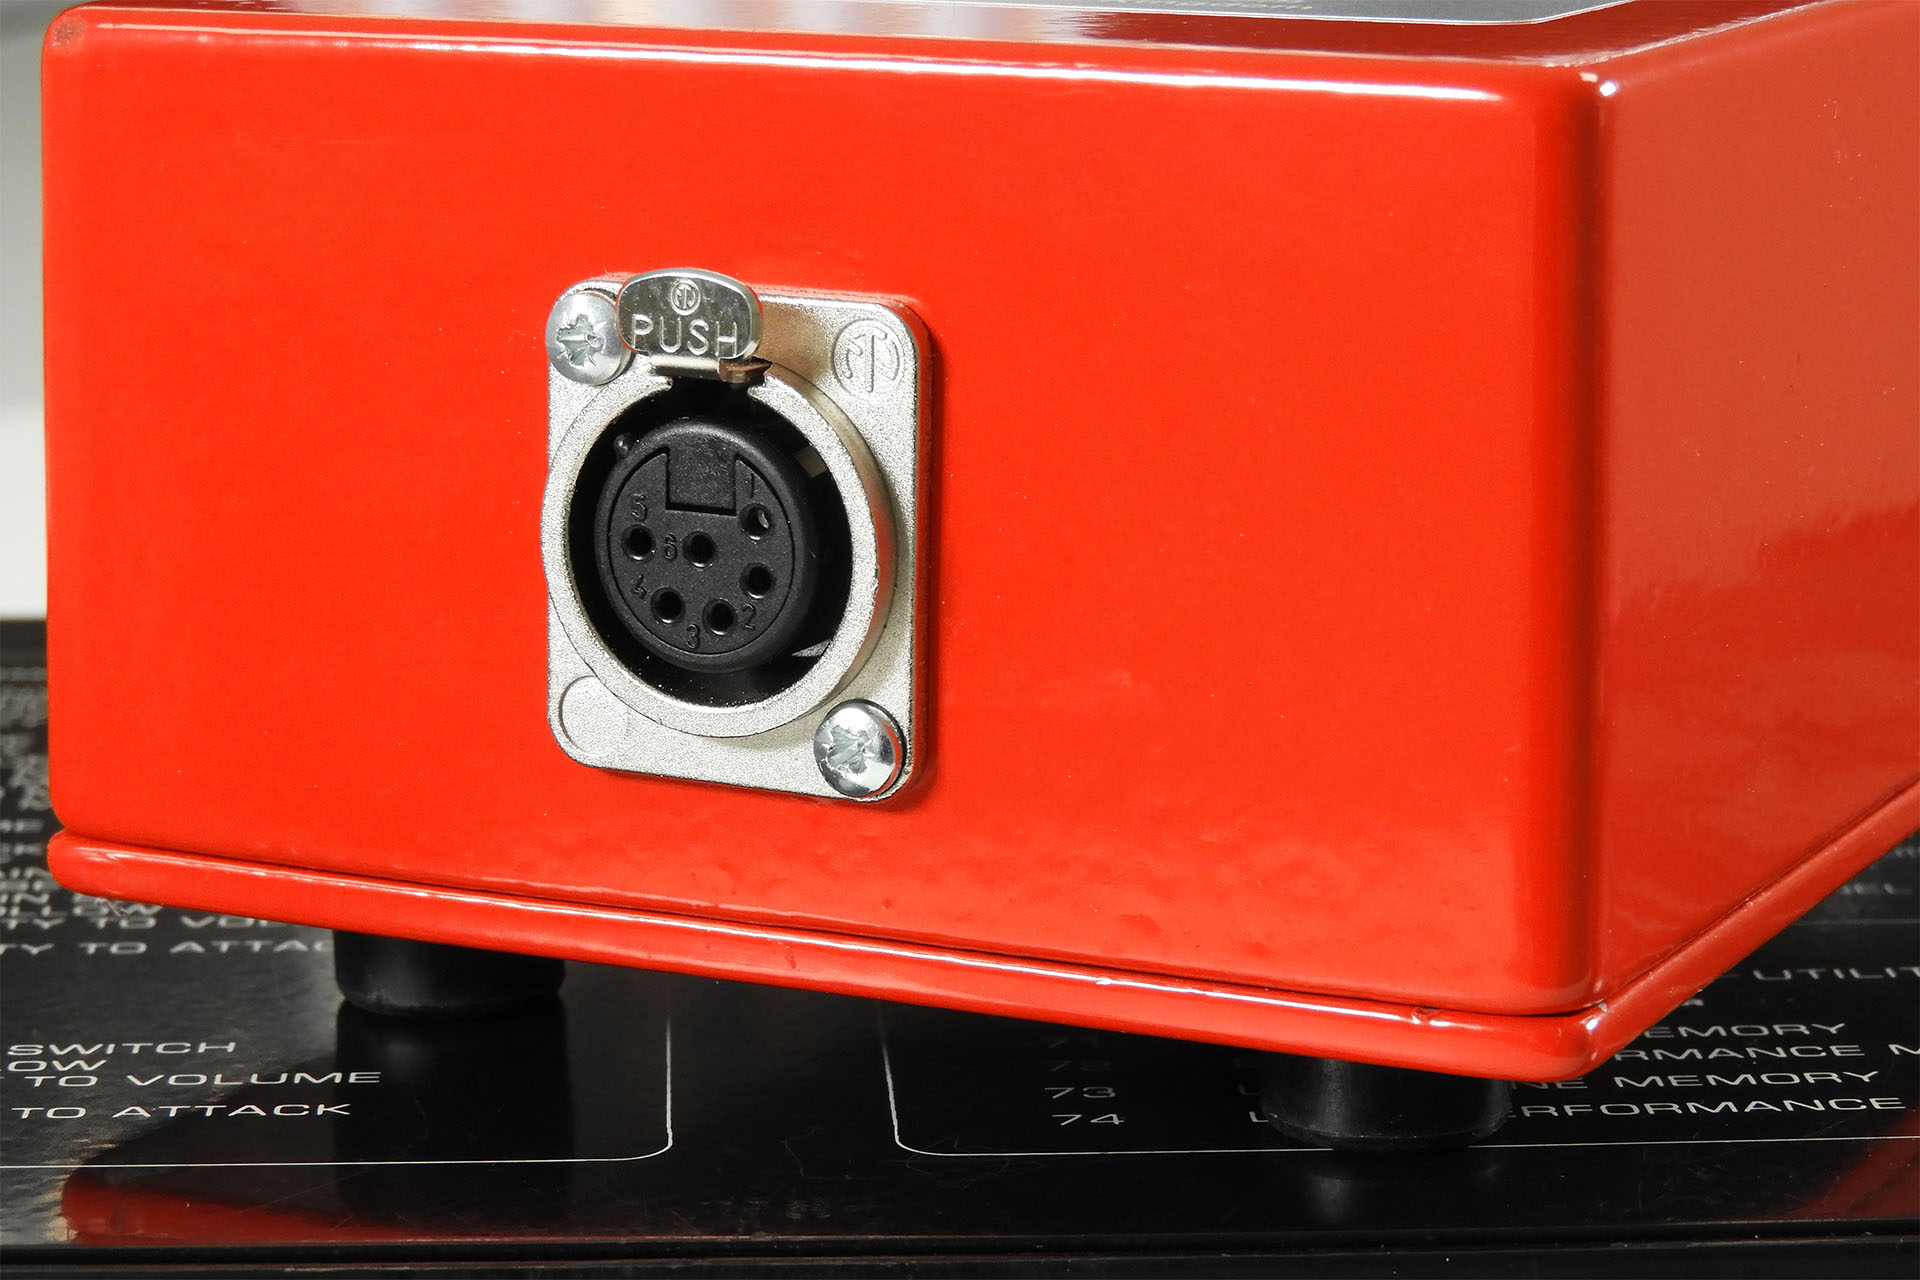
Now the important bit... instead of fitting a Neutrik 6-way connector on the rear, I changed the cable that I used so as to allow me to access the inside of the MS6 via the original cable entry. The hole cut-out here was incorrect for the original cable gland and so I used something considerably more secure; a proper, industrial cable gland!

The net result is a safe and very secure feed from the external power supply to the MS6 but… with no holes drilled into the MS6 chassis and nothing removed, thereby preserving the original appearance of the unit.
With ever increasing prices, keeping the cost of my external power supply for the Cheetah MS6 down, has been particularly challenging. That’s because I don’t do the metalwork myself and sub-contract it to another company. If the other company’s costs go up, then so do mine! 🙁
One advantage of the new approach is that I don’t need to strip the MS6 chassis, tape it up and give it over to be drilled out. This gives me and of course my customers, a substantial cost saving.
So, as of immediate effect, all my Cheetah MS6 power supplies will be offered with the new integrated power supply cable which connects to the external unit as before.
AND NOW FOR THE BIG SURPRISE....
My power supply for the Cheetah MS6 is now available with a cool optional extra! 😮
Guys, I've designed a balanced output stage for the MS6. It's actually more than that as I wanted to kill two birds with one stone and do things properly.
Based on my Polaris balanced outputs board for the Marshall JMP-1, 'Rigel' gives the MS6 a balanced output but also amplifies the output signal to +4dBm studio-level.

Let me explain... Most consumer audio stuff runs at -10dBm which is about ¼V. Professional audio equipment however, runs at +4dBm which is about 1¼V. The problem is, that to deliver +4dBm requires the analogue audio to be driven from a minimum of +/-15V. Unfortunately, the power supply in the Cheetah MS6 only provides +/-12V for analogue. "Hmm... So how are you going to get around that, Alex?"

Yeah, you guessed it, I sneaked in another power supply, specifically to drive Rigel! This could only be achieved because I chose slightly higher rated power transformers in my external PSU.
"Where did you sneak in the other power supply?" I hear you ask. Well, I added a couple of M3 hex PCB stand-offs to my ultra-cool heatsink so Rigel's +/-15V PSU sits neatly in the MS6's power supply section with all the other regulators, etc. Well out of the way of any analogue electronics, Rigel's power supply won't pose a source of noise and interference.

Anyway, Rigel now gives the Cheetah MS6 a fully balanced, +4dBm output ensuring full signal compatibility with any professional recording environment. WOW!!! 😮😮😮

IMPORTANT - Rigel is only available when purchasing my external power supply for the Cheetah MS6. Rigel is NOT available separately. That’s because my power supply is slightly overrated and is able to deliver the AC voltage necessary to produce the +/-15V required for a +4dBm signal.

UPDATE - 24th September 2025
I didn't realise how popular this thing would be. I definitely didn't realise that there were so many MS6s out there and MS6 diehards! 😎 Always wanting to do a little better, I managed to make a deal directly with the manufacturer of the enclosure and decided to buy a few, all with a view to reduce the price of my external power supply for the Cheetah MS6.
I'm now delighted to announce that the enclosure is only available in red but the price of the whole kit has actually come down! Yes, that's correct. No expensive option for the red case and the price is actually lower. I think that calls for another 😎