

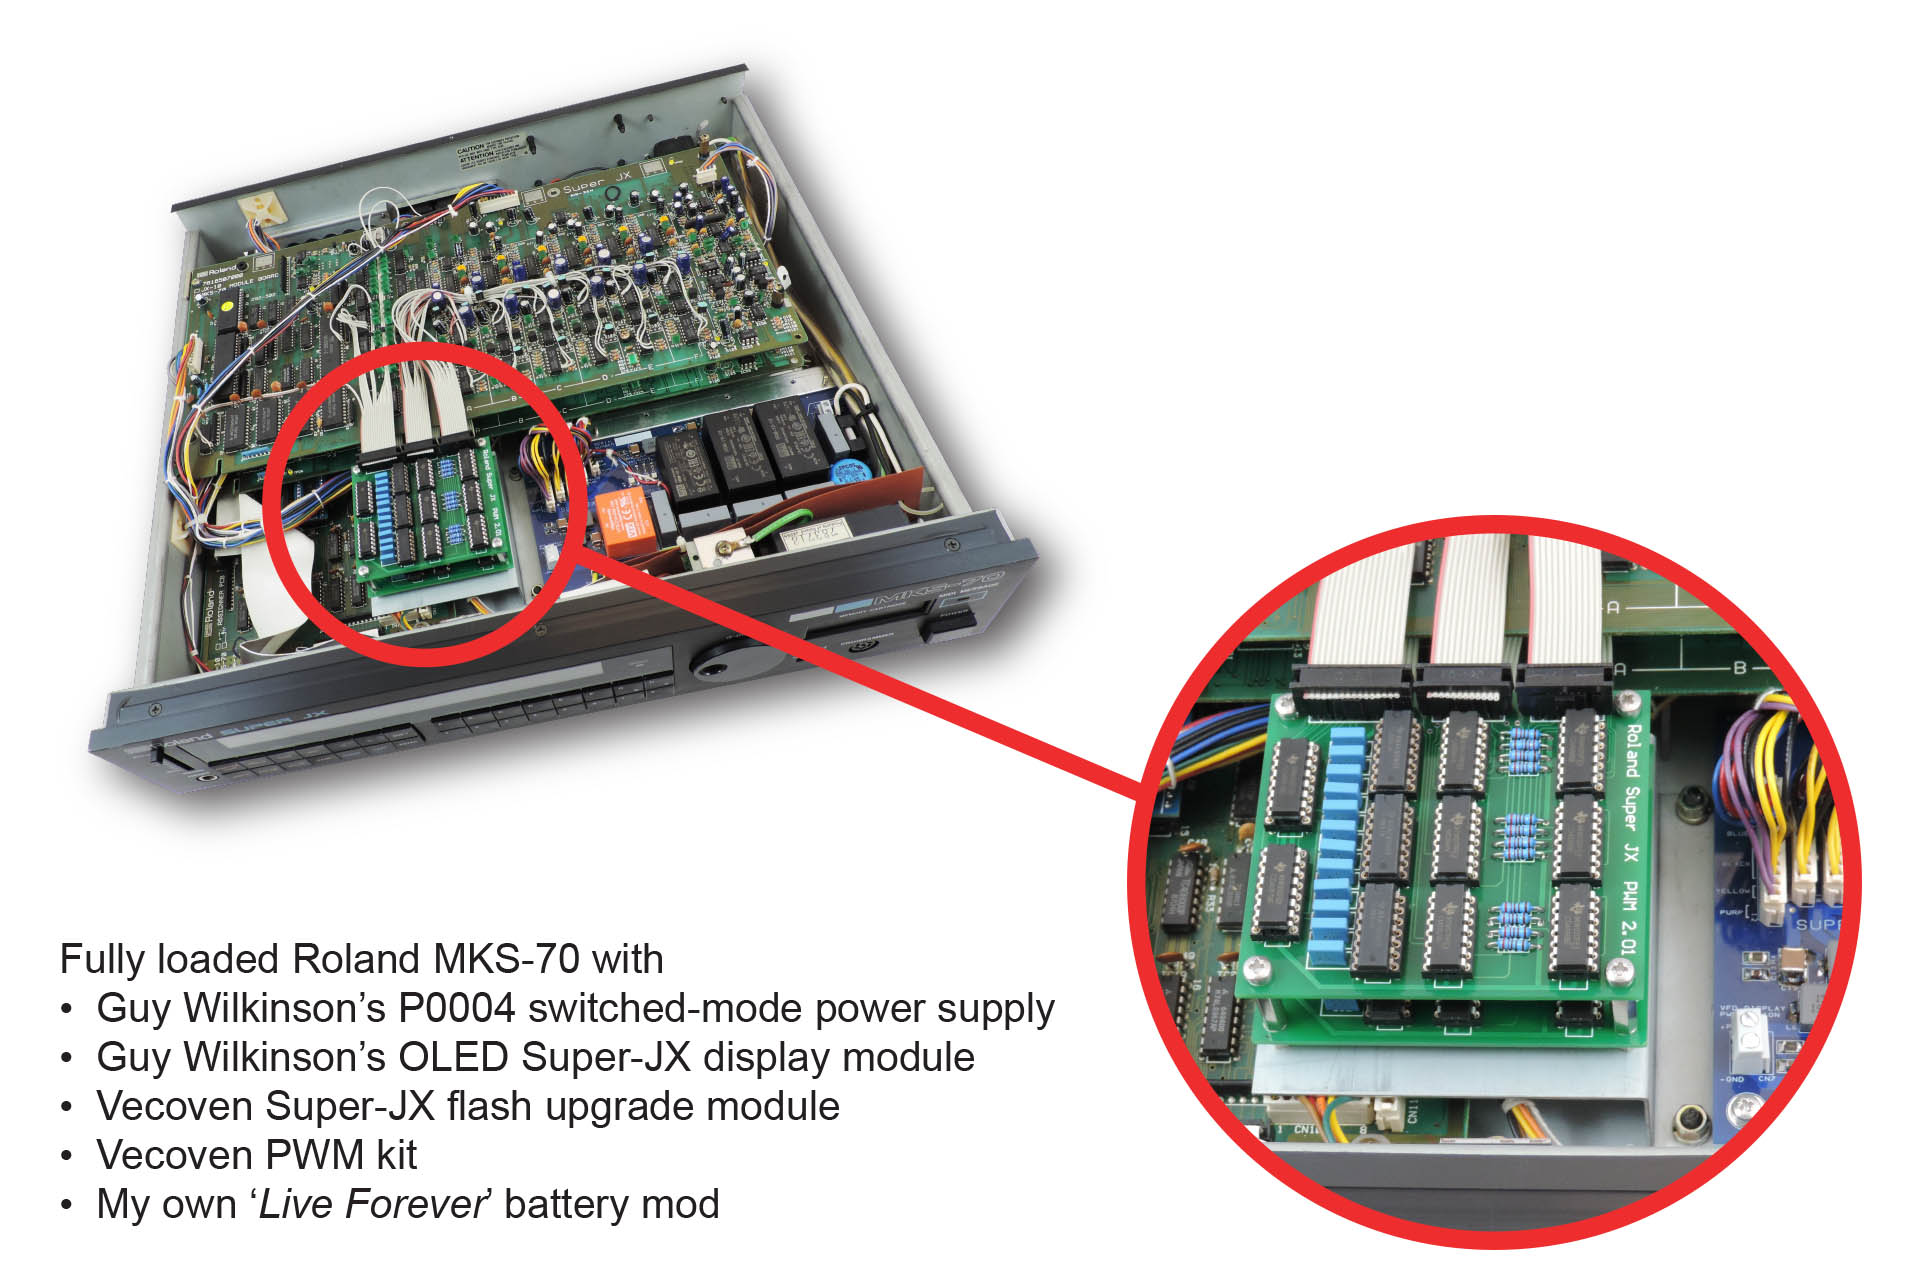
Following on from my post covering the installation of a replacement power supply into a Roland MKS-70, I decided to do another post on a whole bunch of cool Roland MKS-70 upgrades which I discovered during lock-down 2020. Apologies if some stuff is kinda repeated.
Back in April 2020, I got a Roland MKS-70 in for repair. It was powering up but wasn’t booting. While replacing original components that were over thirty years old on the power supply, another MKS-70 came in with err… power issues.
This all happened during lock-down so progress on the repairs was kinda slow. I did however, have lots of time to see what I could find on-line.
I very quickly came across supersynthprojects.com and over a period of days, got to know Guy Wilkinson, a vintage synth enthusiast with a very relevant background. Guy has developed a switched-mode power supply for the JX-10 and MKS-70.
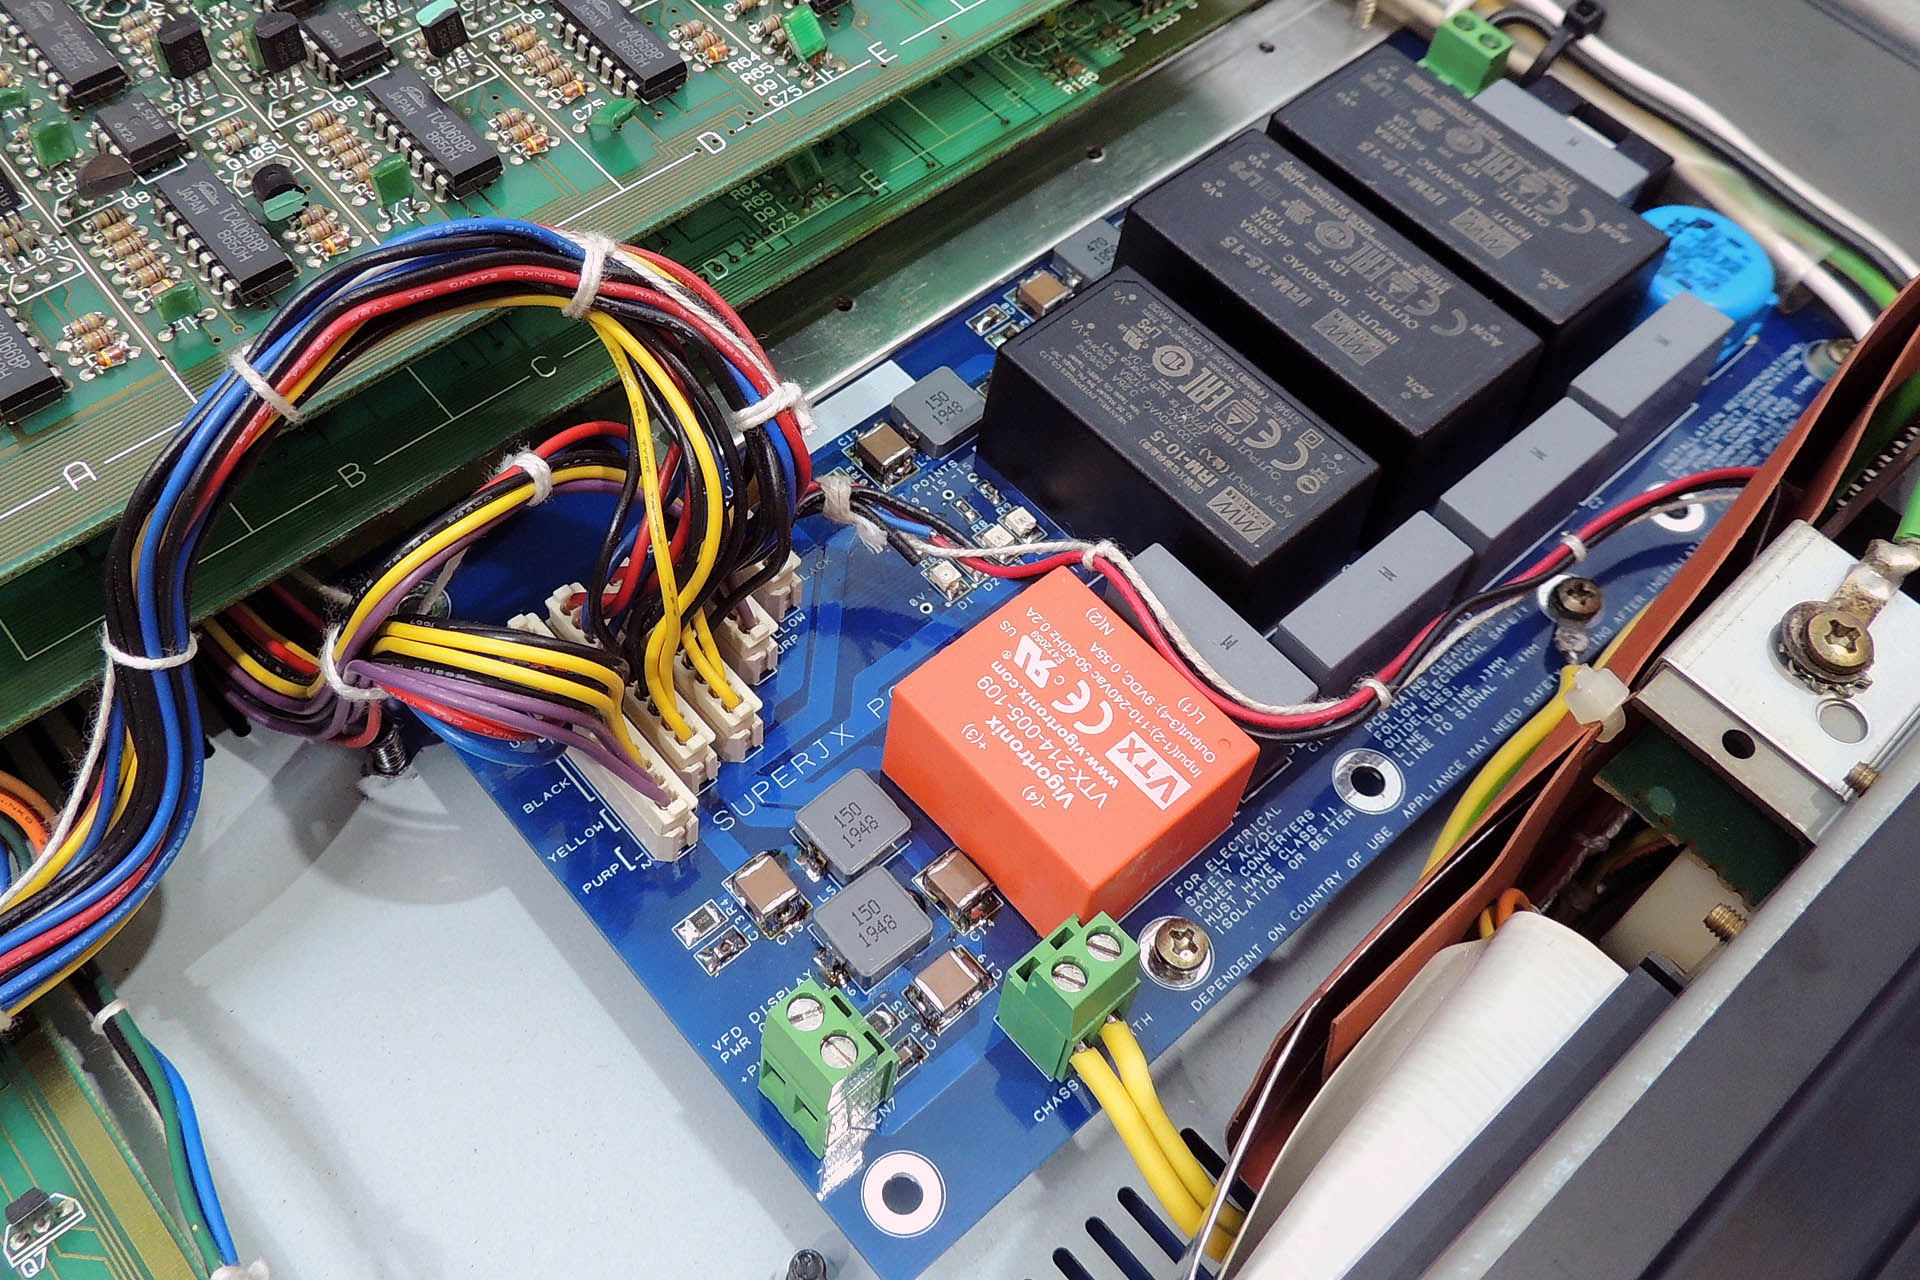
There are two MASSIVE hidden bonuses when using something like Guy's P0004 power supply;
- Unlike the original Roland PSU, the +5V supply on the P0004, is NOT derived from the +15V line and is fully independent. Hence, any fault on the +15V line, won’t affect the +5V supply.
- In the event of a failure, the respective supply will simply stop working and chuck out 0V.
Big deal, so... Well, sadly, I occasionally see a MKS-70 which has had a failure of the +5V supply. If the failure is as a result of the +15V going wacky, this often results in the +15V line jumping to like +22V, thus maxing out the +5V regulator circuitry and taking out your assigner board. That’s basically a bricked MKS-70! 🙁
Guy also supplies a variety of displays, one of which particularly caught my attention, the Super-JX OLED upgrade display. As many Super-JX owners will know, the original vacuum fluorescent display (or VFD) as well as the FIP coil that drives it, is just about impossible to get hold of now. VFDs and FIP coils fail, so any potential replacement is well worth checking out, especially if it's going to be OLED cool.
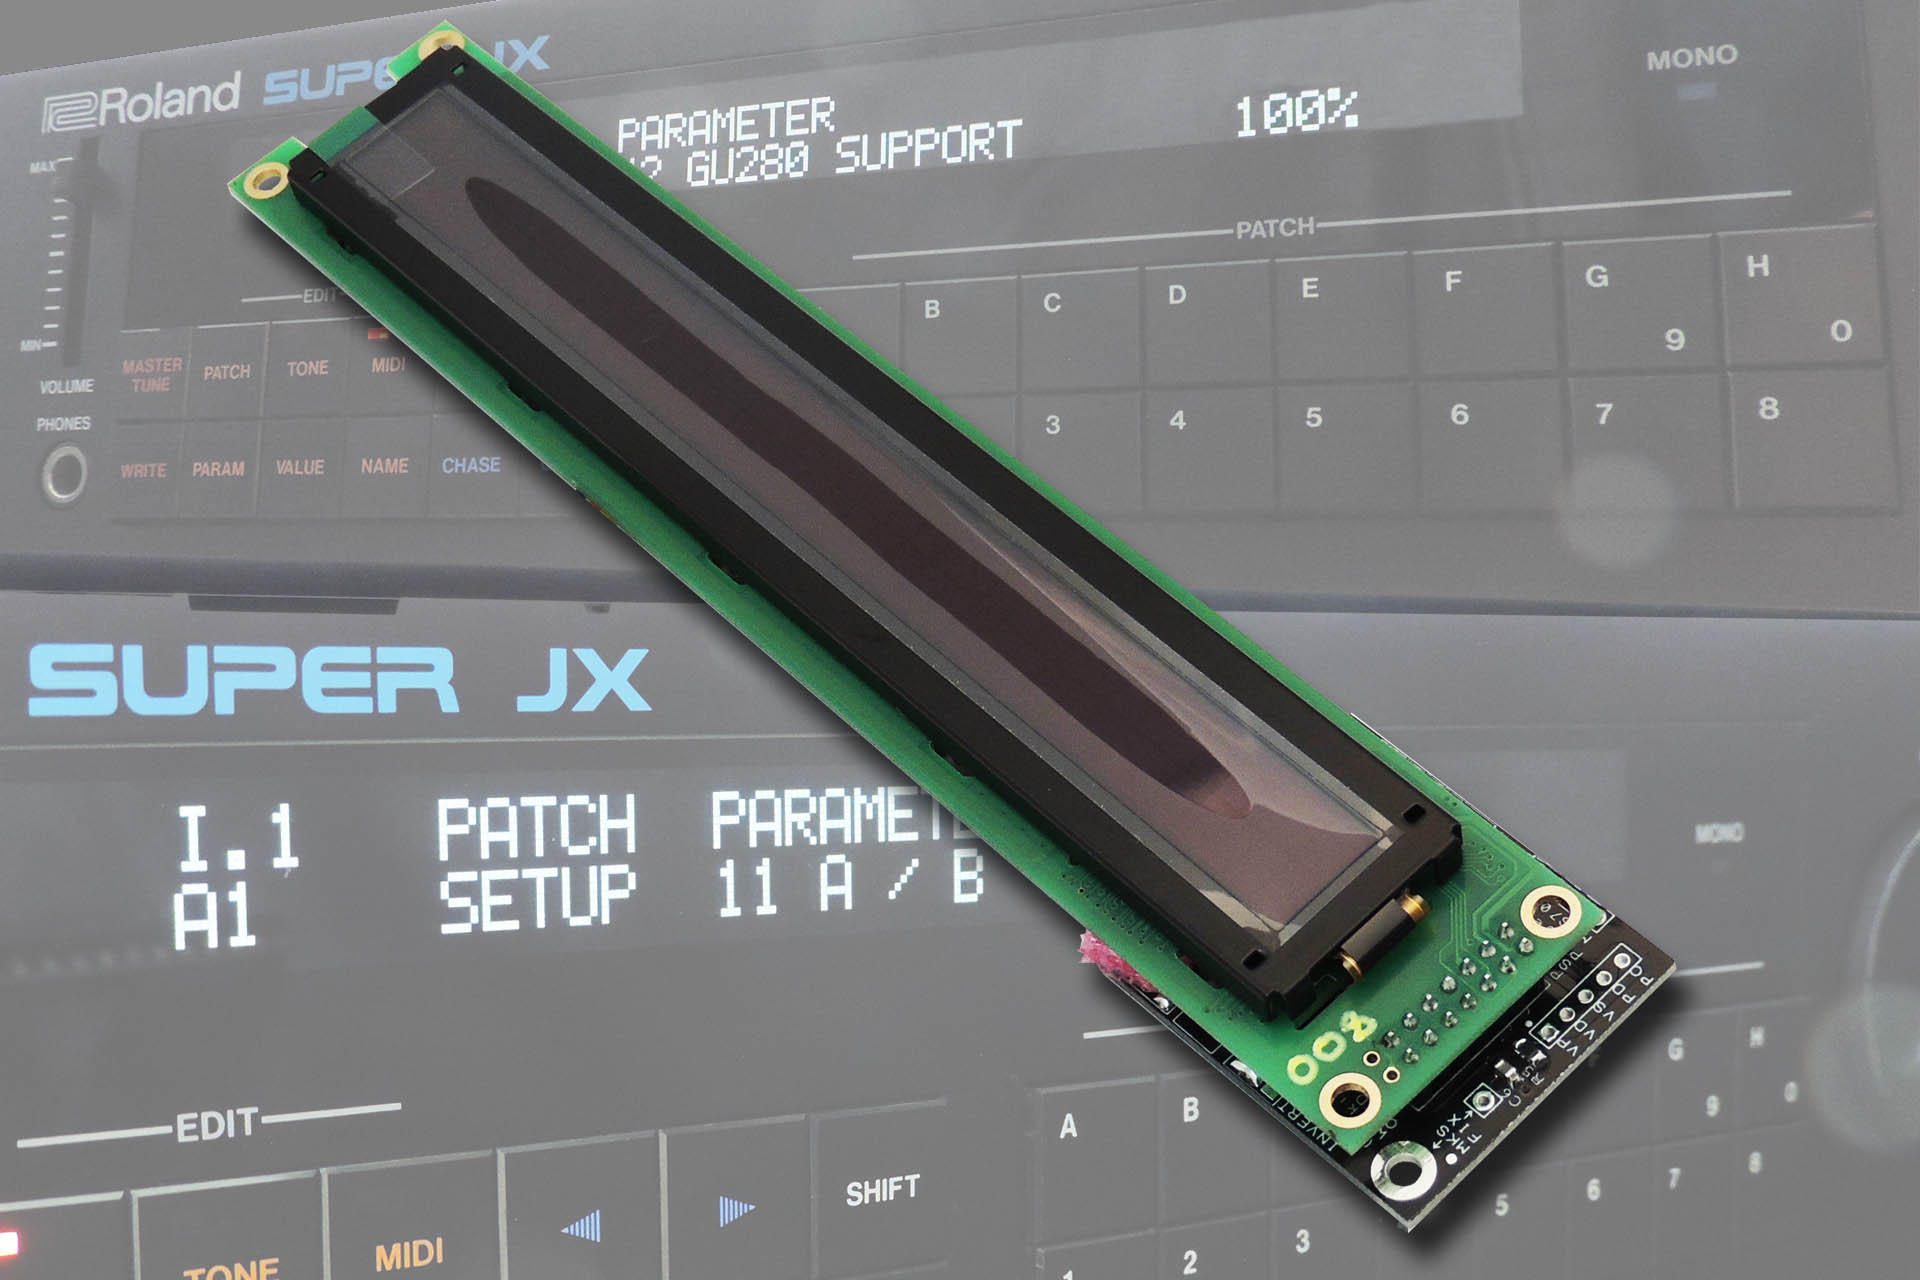
I've always wondered why some people use the adjective "sexy" to describe tech'. Guy's Super-JX OLED looks stunning and now I know. I just can't stop looking at it! 😛
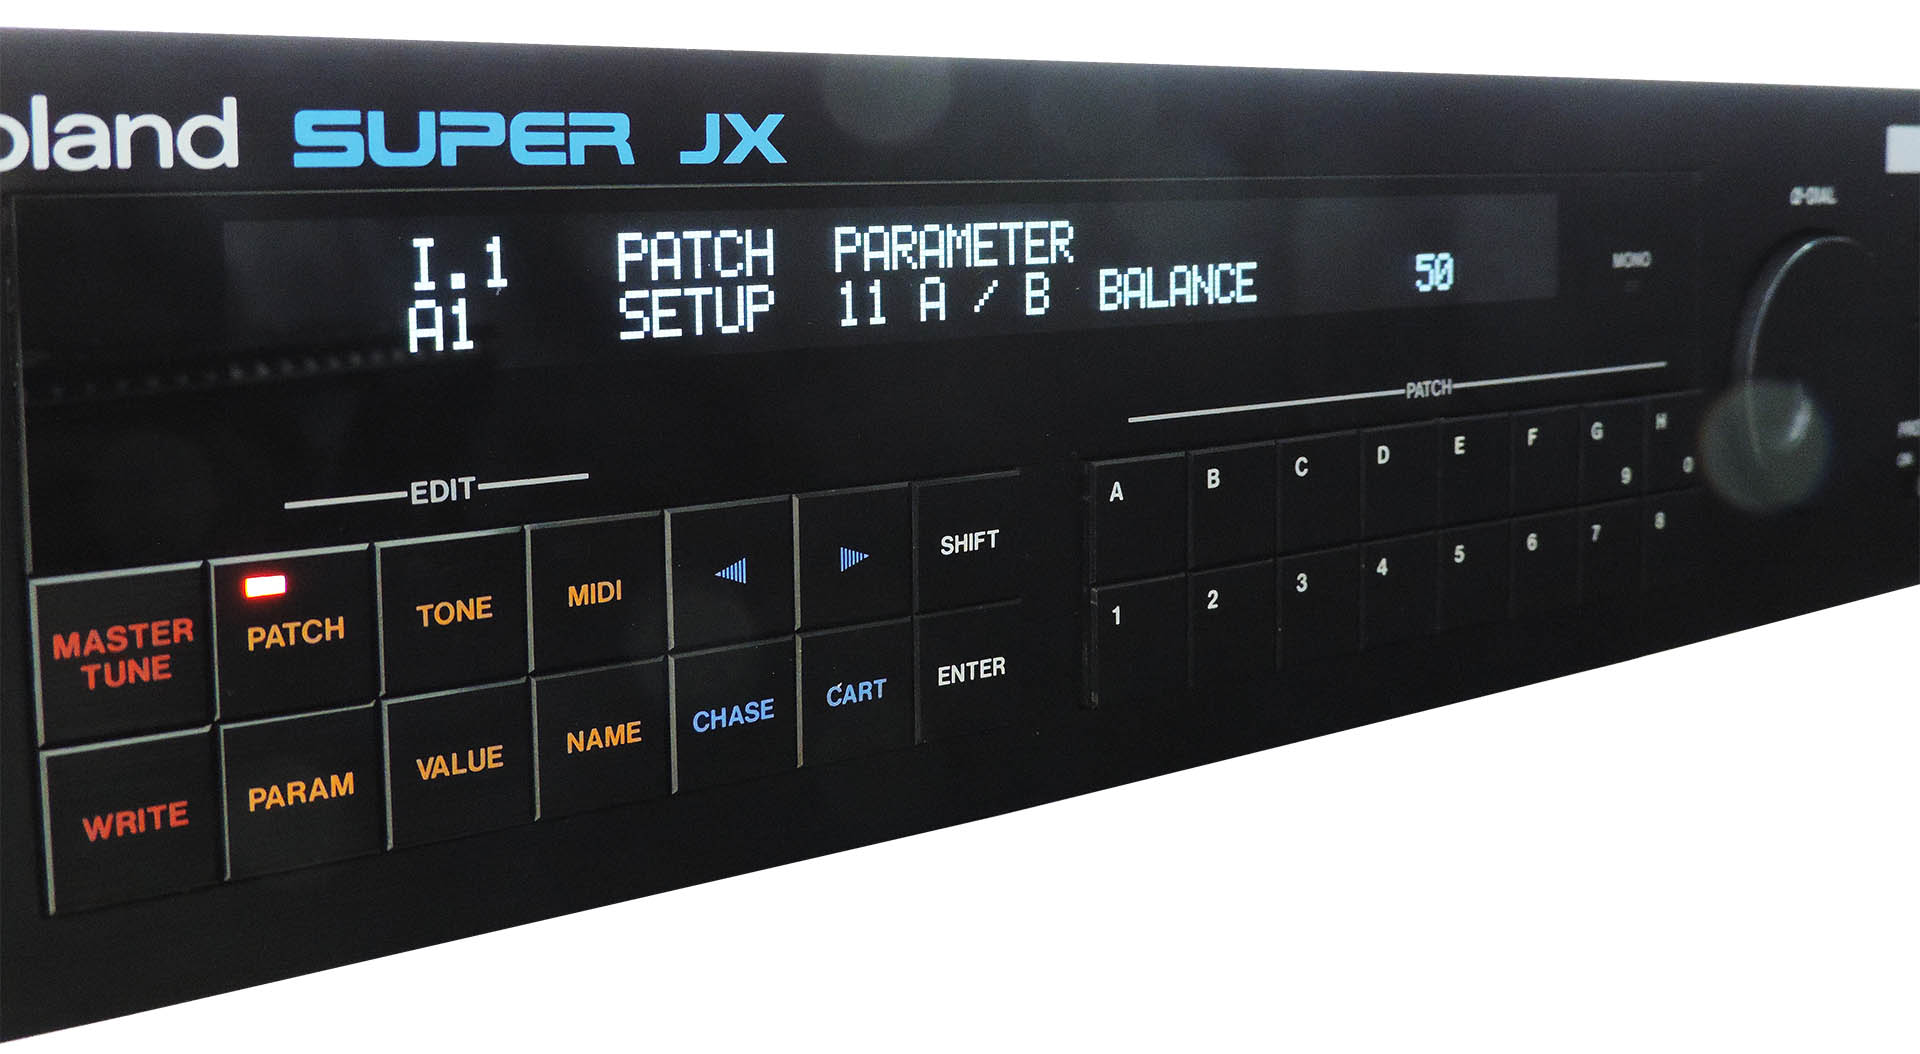
Guy Wilkinson's VFD module looks more like the original Roland display. With Fred's firmware, brightness of the GU-280 can be changed.
As I continued my research into the world of Roland Super-JX upgrades, I came across vecoven.com and the Vecoven PWM upgrade; a kit which provides the Super-JX sounds with pulse-width modulation. WHAT!?!?!?!
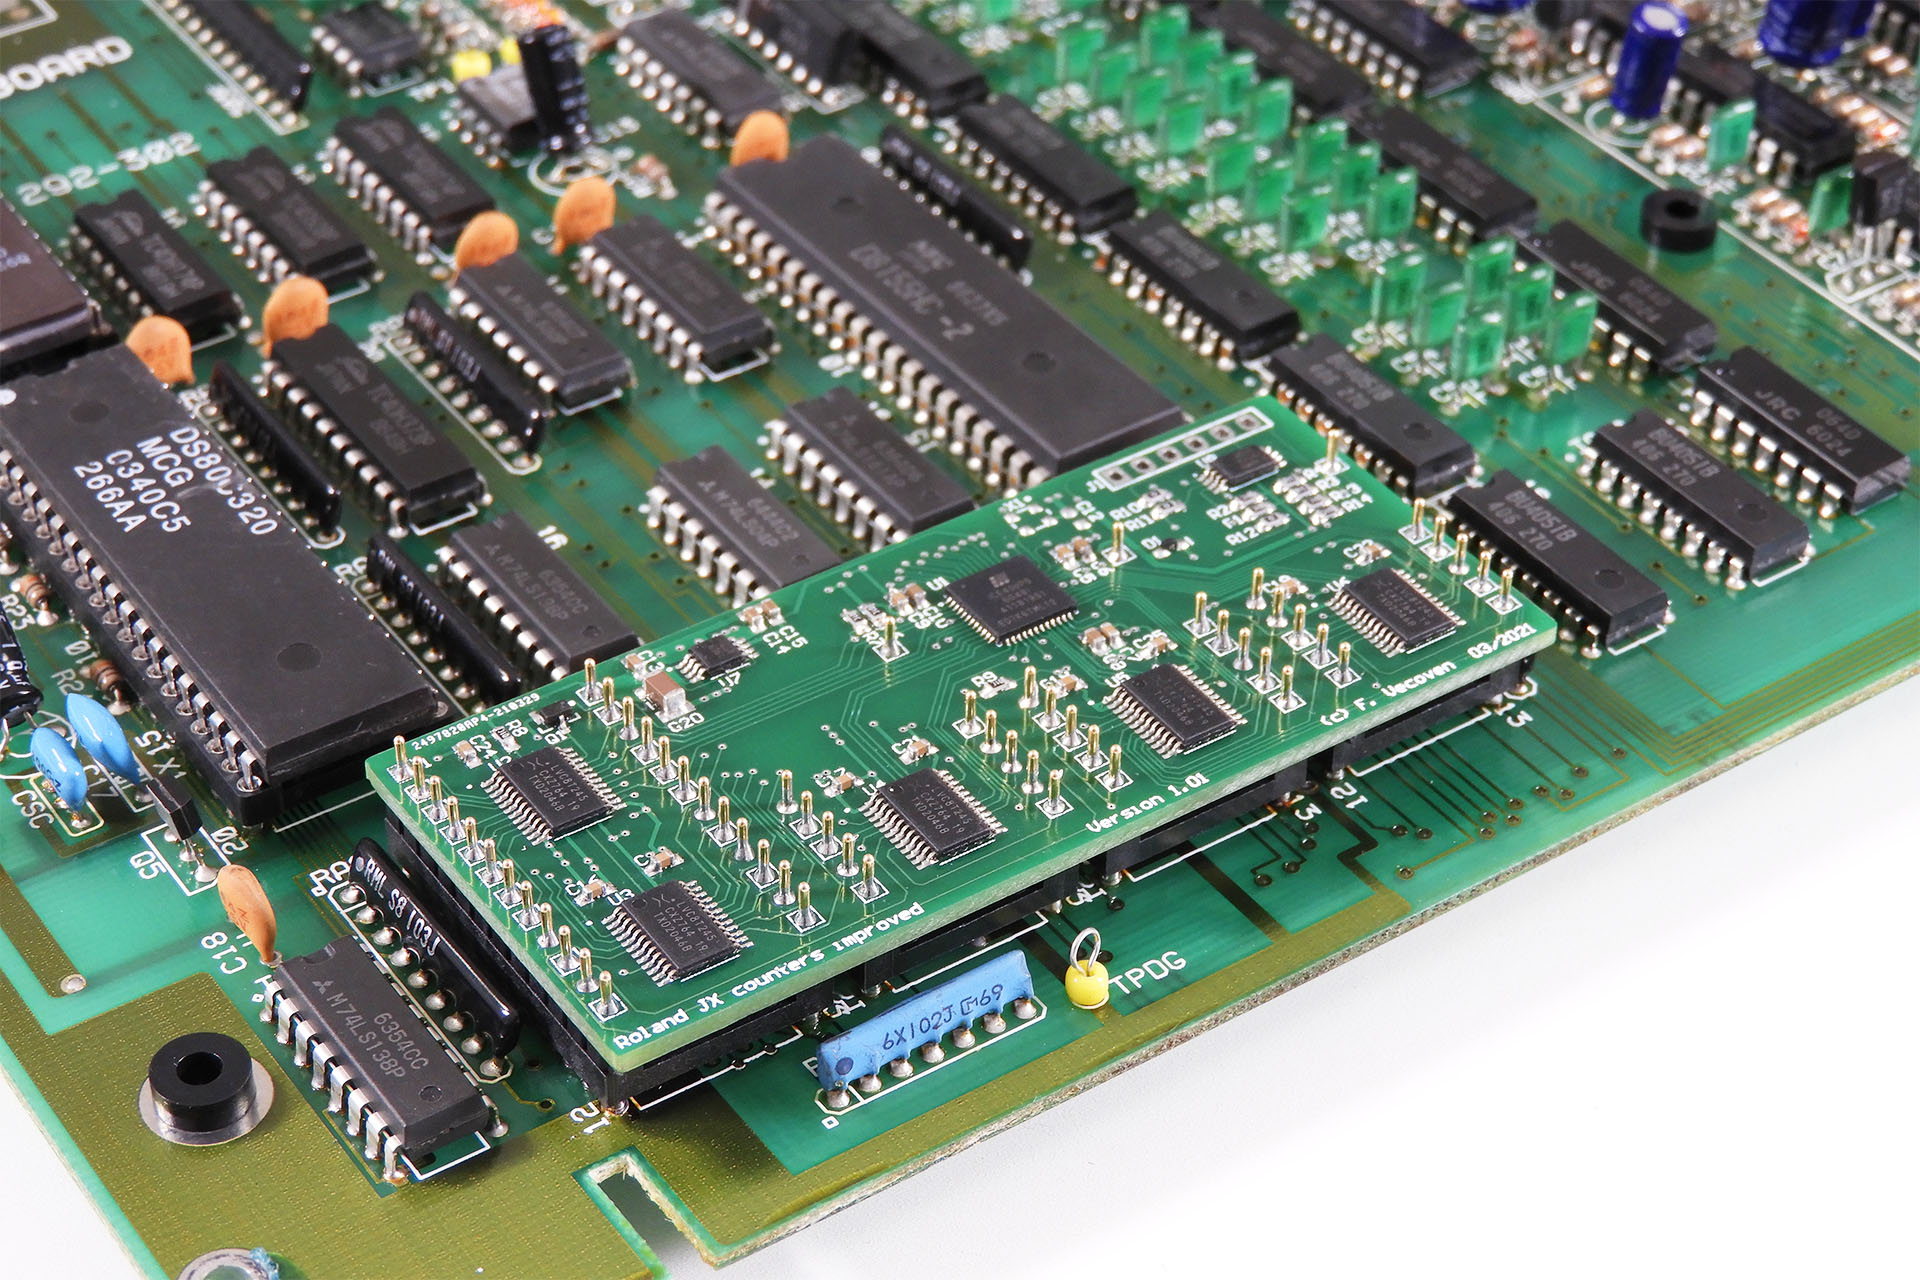
Fred Vecoven sells the PWM upgrade as a self-assembly kit comprising two small PCBs (one for each voice board), lose components, three EPROMs and two replacement 80C320 processors (again one for each voice board). An option to buy populated PCBs is also available.
Neither the self-assembly kit or the pre-assembled PCBs kit are however, supplied with cabling or connectors, presumably because there are several potential mounting options. Guy's website has detailed installation instructions for Fred's PWM kit, both for the JX-10 and MKS-70.
Below is a pair of Vecoven PWM upgrade PCBs which I have made up myself.
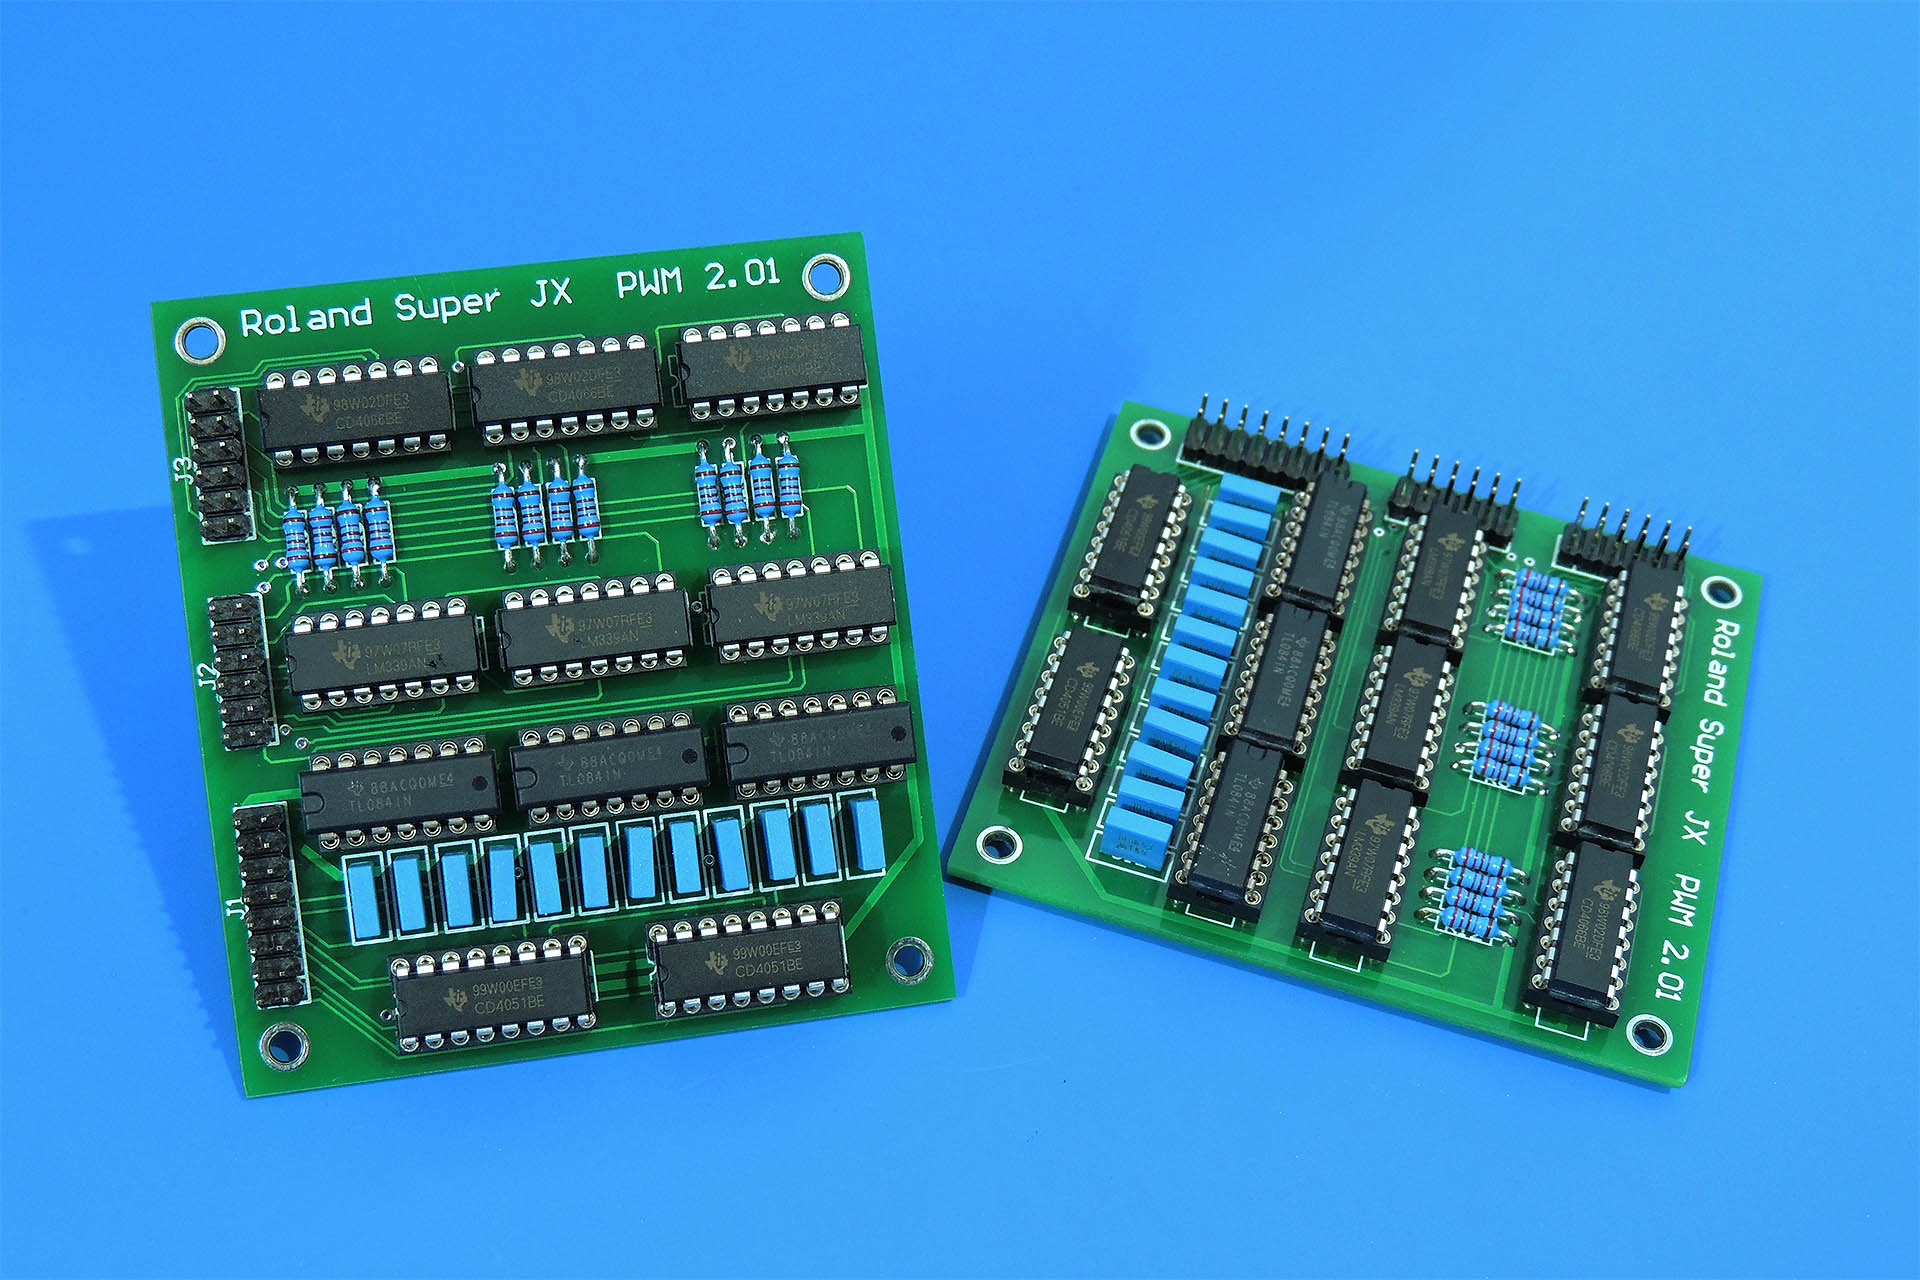
The keen and eagle-eyed will have noticed that the ICs aren't soldered directly to the PCB and that instead, I've chosen to use turned-pin sockets; always a good idea!
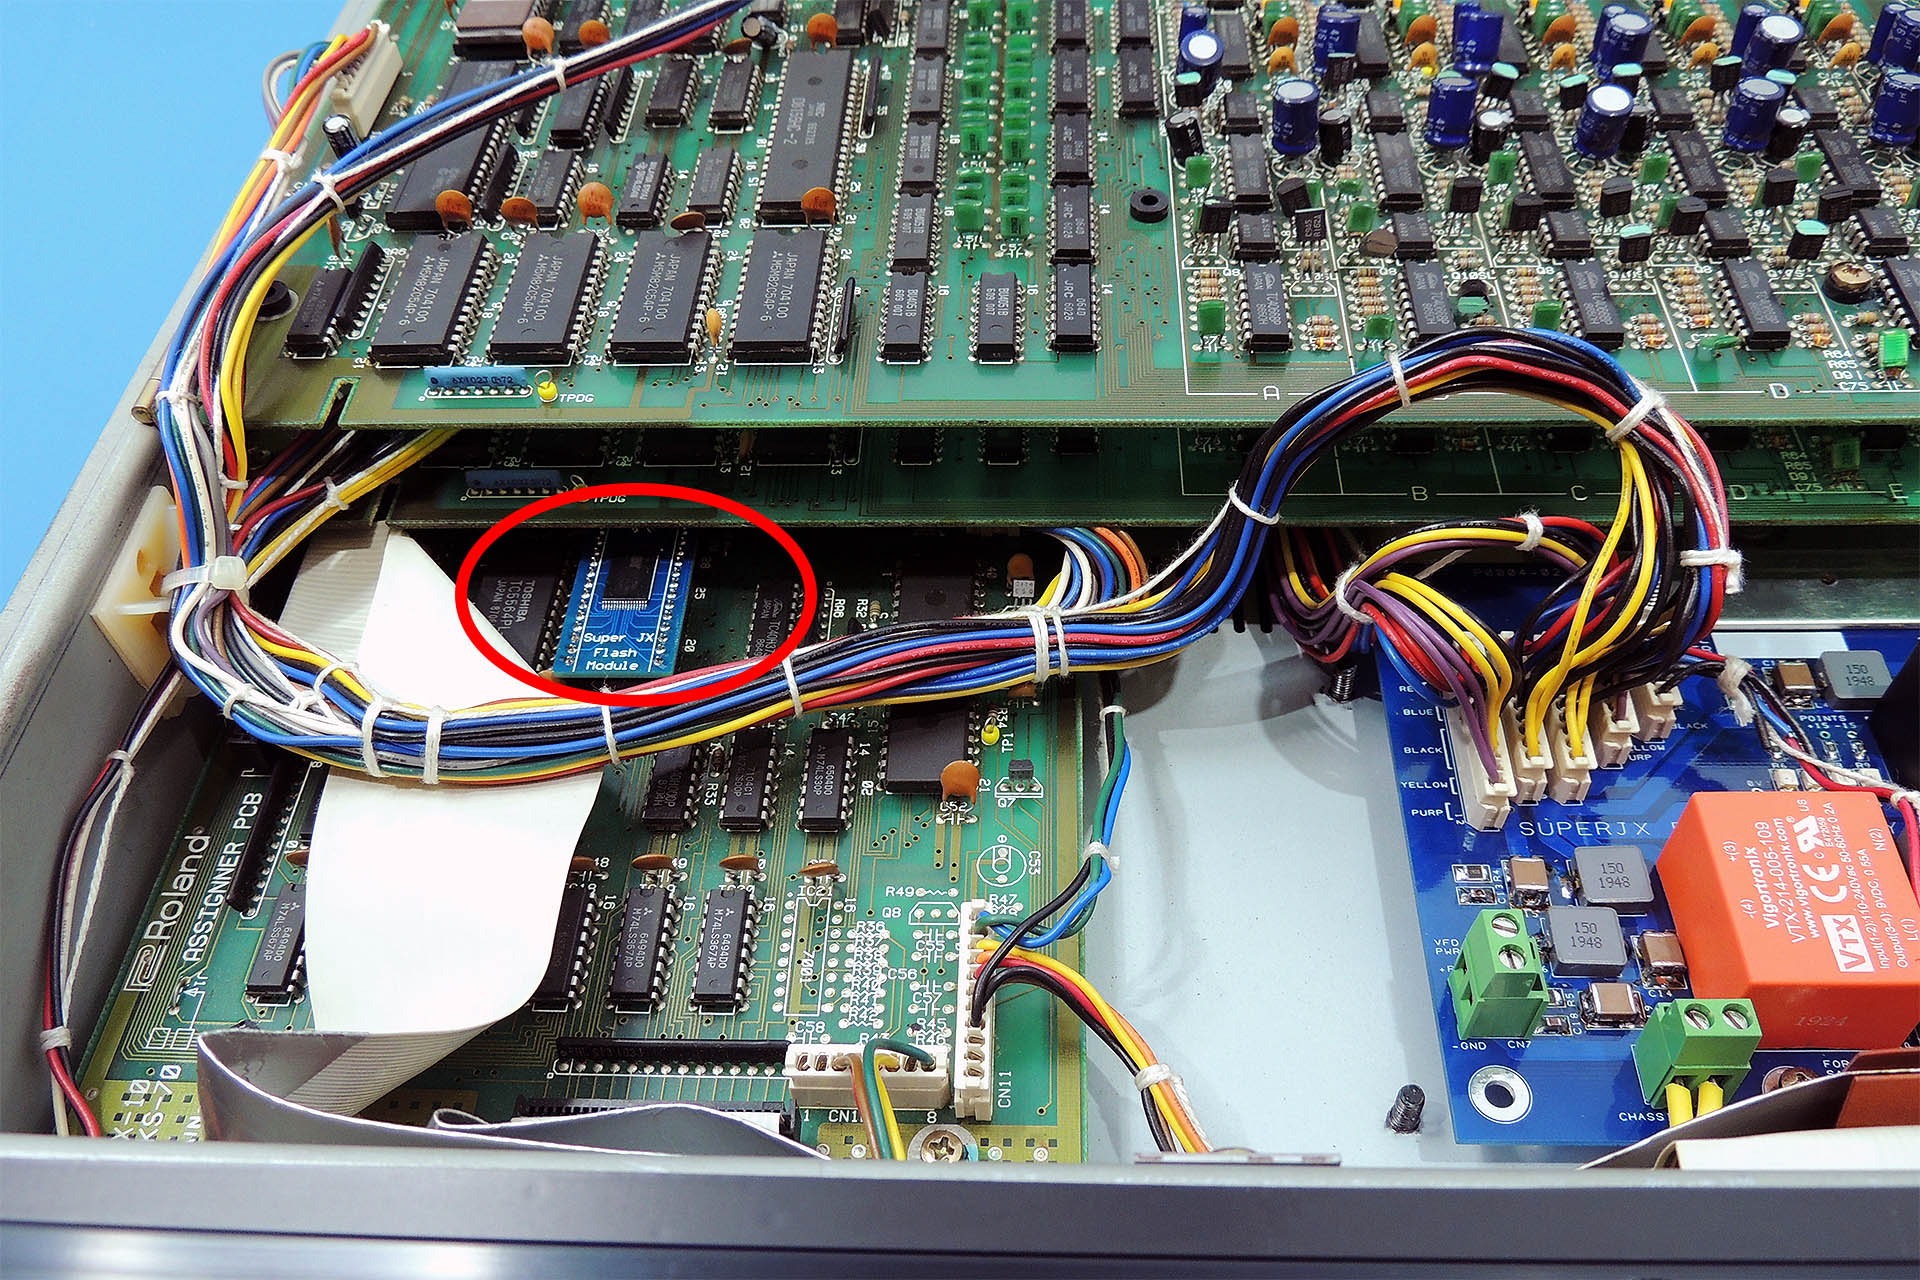
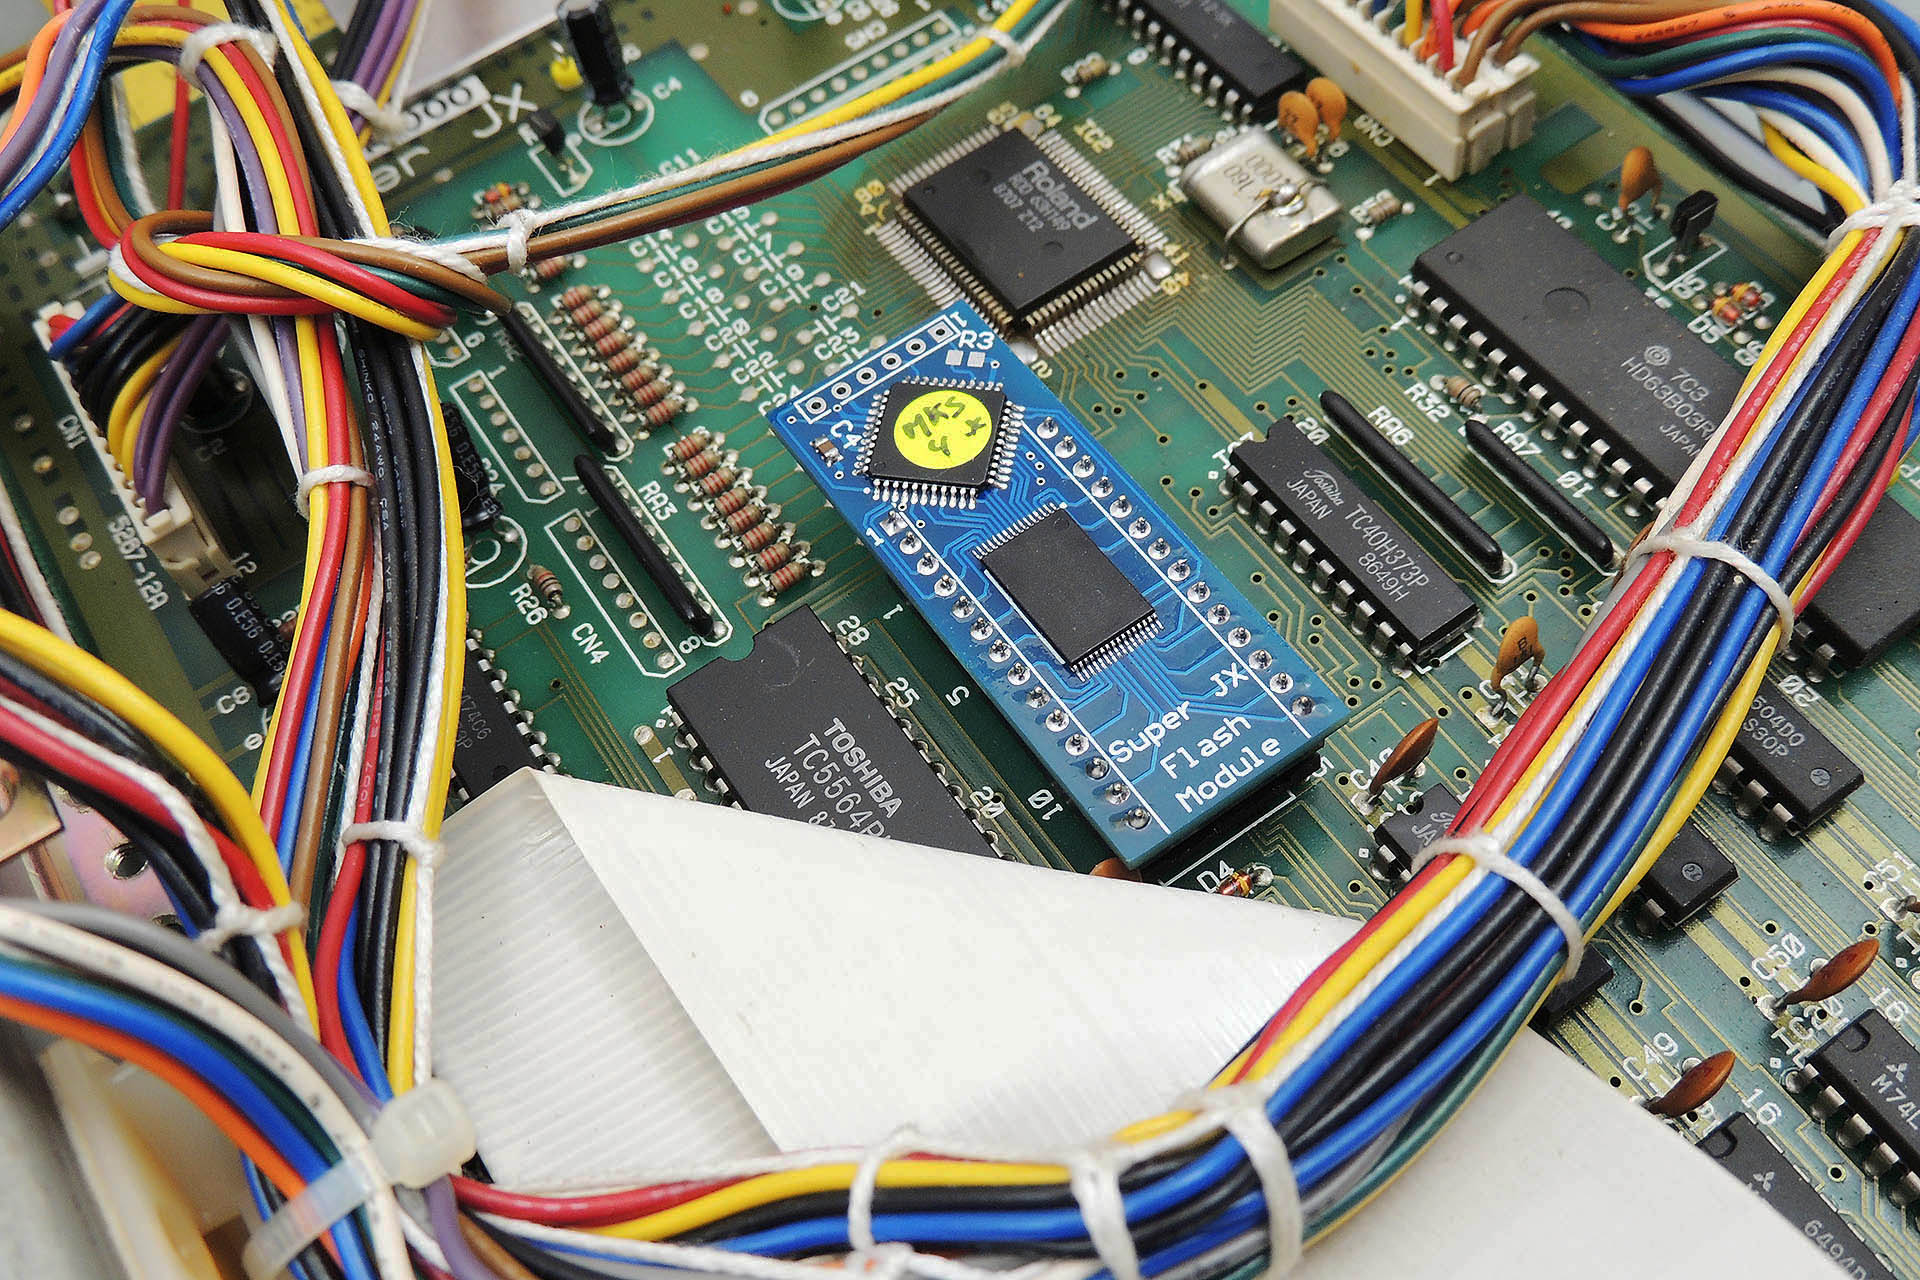
Fred Vecoven has also rewritten the Super-JX firmware and has developed a flash upgrade module which, apart from increasing the memory to the equivalent of thirty-two Roland M64C cartridges (yes, that's right... 32 x M64Cs), allows firmware updates via MIDI. Fred's firmware also gives you some control over how Guy's displays work. Hey, is that teamwork or what?
Well it just so happens that I also have a Roland MKS-70 (yeah, I know... you're really surprised, right?) and all this stuff just sounded soooo exciting. Within a few days, I ended up with a switched-mode power supply PCB and an OLED kit from Guy and a PWM kit and a Super-JX flash module from Fred. My wife wasn't happy.
And I thought lock-down was going to be oh soooo boring!
I had to buy all the components for the P0004 power supply but conveniently, Guy has a very detailed bill of materials (BoM) on his website. This made components purchase very easy. The OLED module came fully assembled and Guy e-mailed me instructions on how to install it. As previously mentioned, Fred's PWM kit doesn't include connectors and cables so I also had to buy some bits to get this going.
Getting to know Guy and Fred was a privilege. In fact, I eventually struck up a deal with Guy and I am now offering ready-built versions of his P0004 switched-mode power supply board, as well as an installation service for this fantastic upgrade and his Super-JX replacement displays.
Click here for my prices:
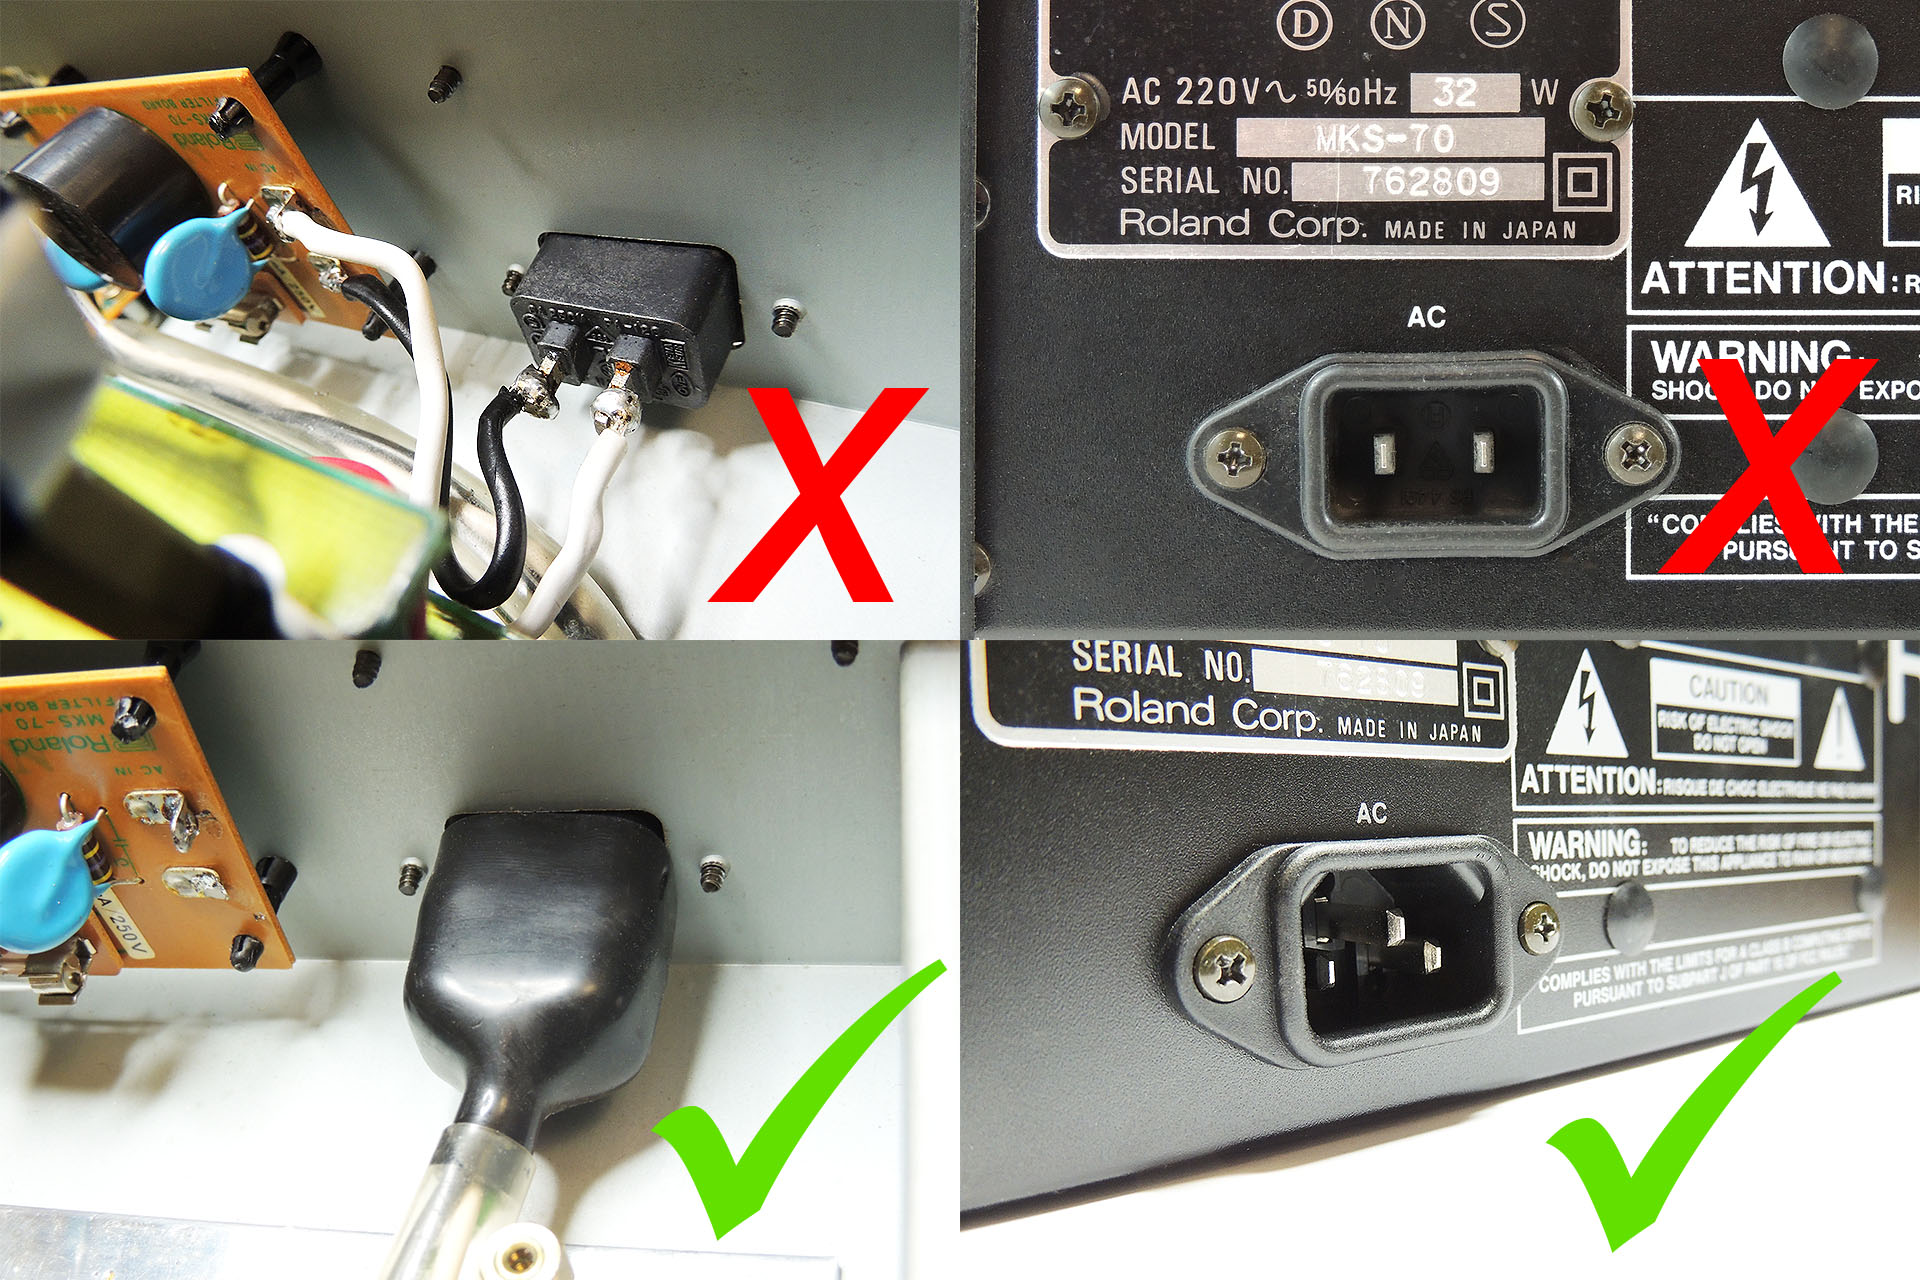
If you're fitting the switched-mode power supply module yourself and your MKS-70 or JX-10 has a 2-pin IEC mains input socket, then you must replace it with a 3-pin IEC mains input socket. The replacement switched-mode power supply MUST be connected to earth as must the chassis of your Super-JX.
I offer a comprehensive earth bonding kit comprising the following:
-
- 1 x IEC 3-pin chassis socket.
- 1 x insulating boot for IEC socket.
- 2 x Pre-cut earth leads terminated at one with earth tag.*
- 1 x M3 earth tag (for one side of IEC socket).
*One earth lead connects IEC earth to chassis via one of the screws that secures the IEC socket. The other earth lead connects the P0004 power supply to the chassis via any M3 screw.
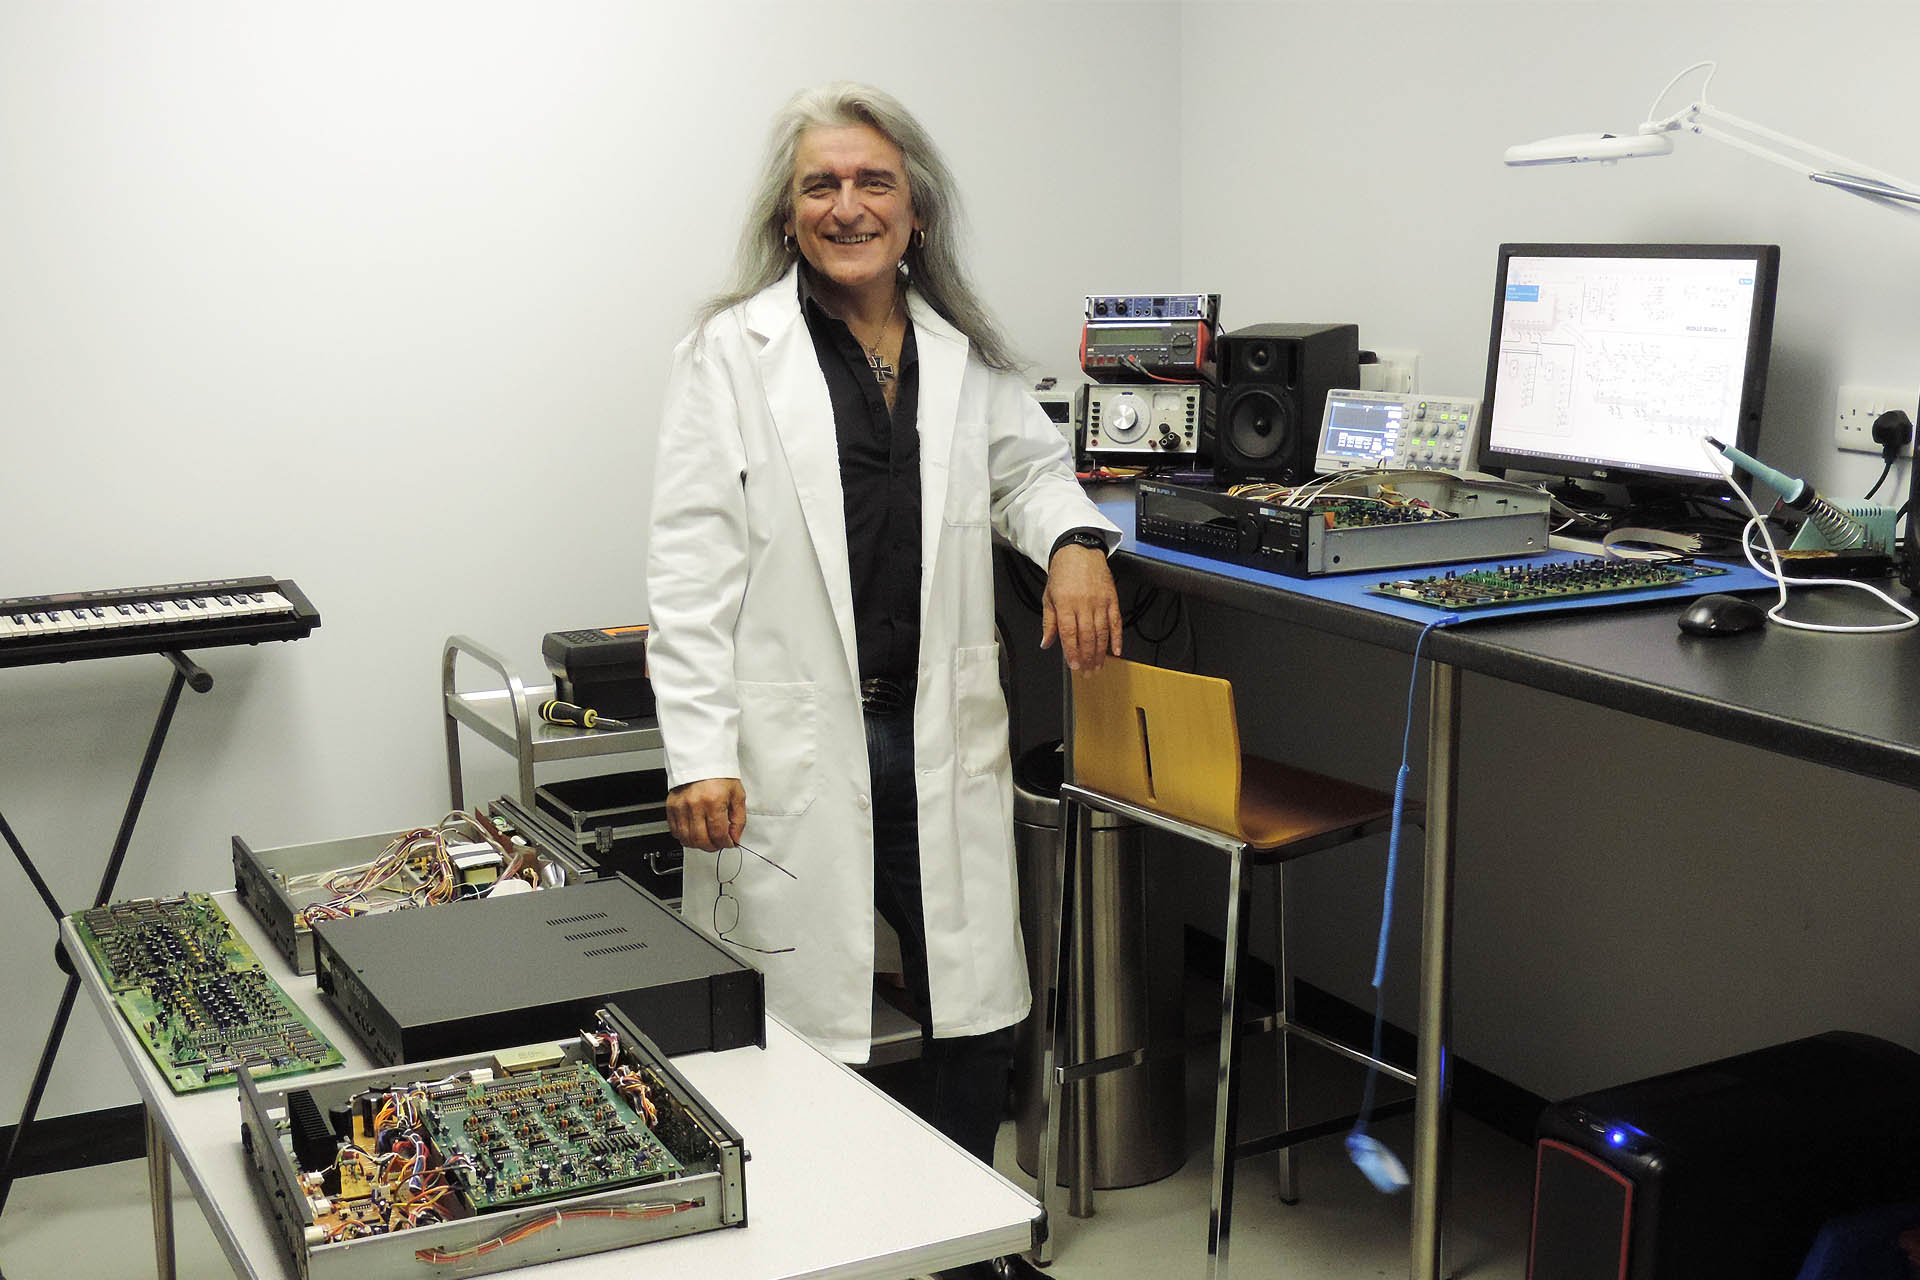
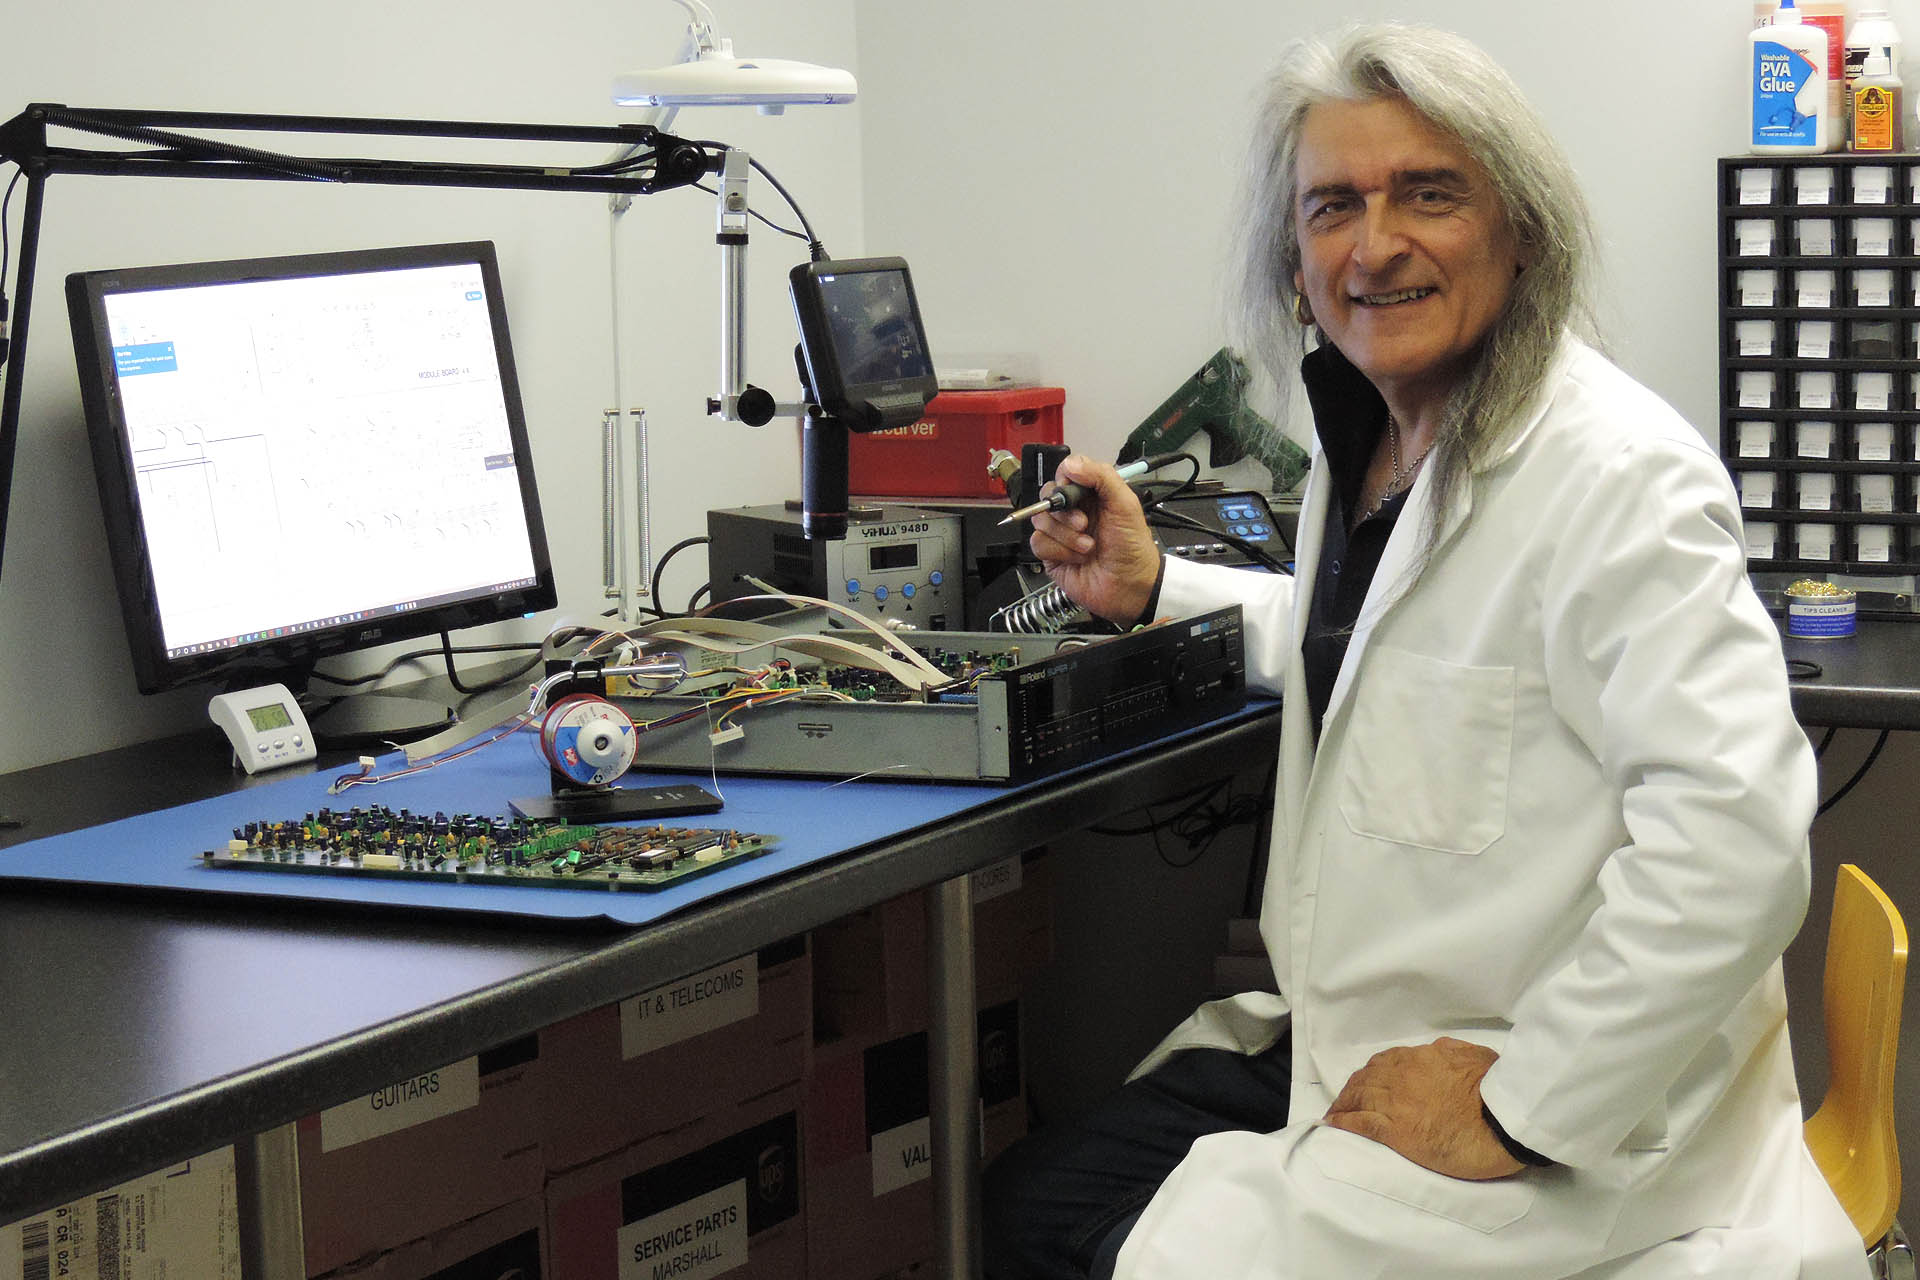
Installing these Roland Super-JX upgrades into my own MKS-70, was hard work but I had a lot of fun doing it and... I got to know a couple of seriously intelligent dudes.
My humble contribution to the awesome work that Guy and Fred have done, is a simple bracket which makes mounting the PWM boards into a MKS-70 a little easier. IMPORTANT: Since the bracket secures to the transformer mounting studs, it can only be fitted if Guy's P0004 switched-mode power supply is also installed.
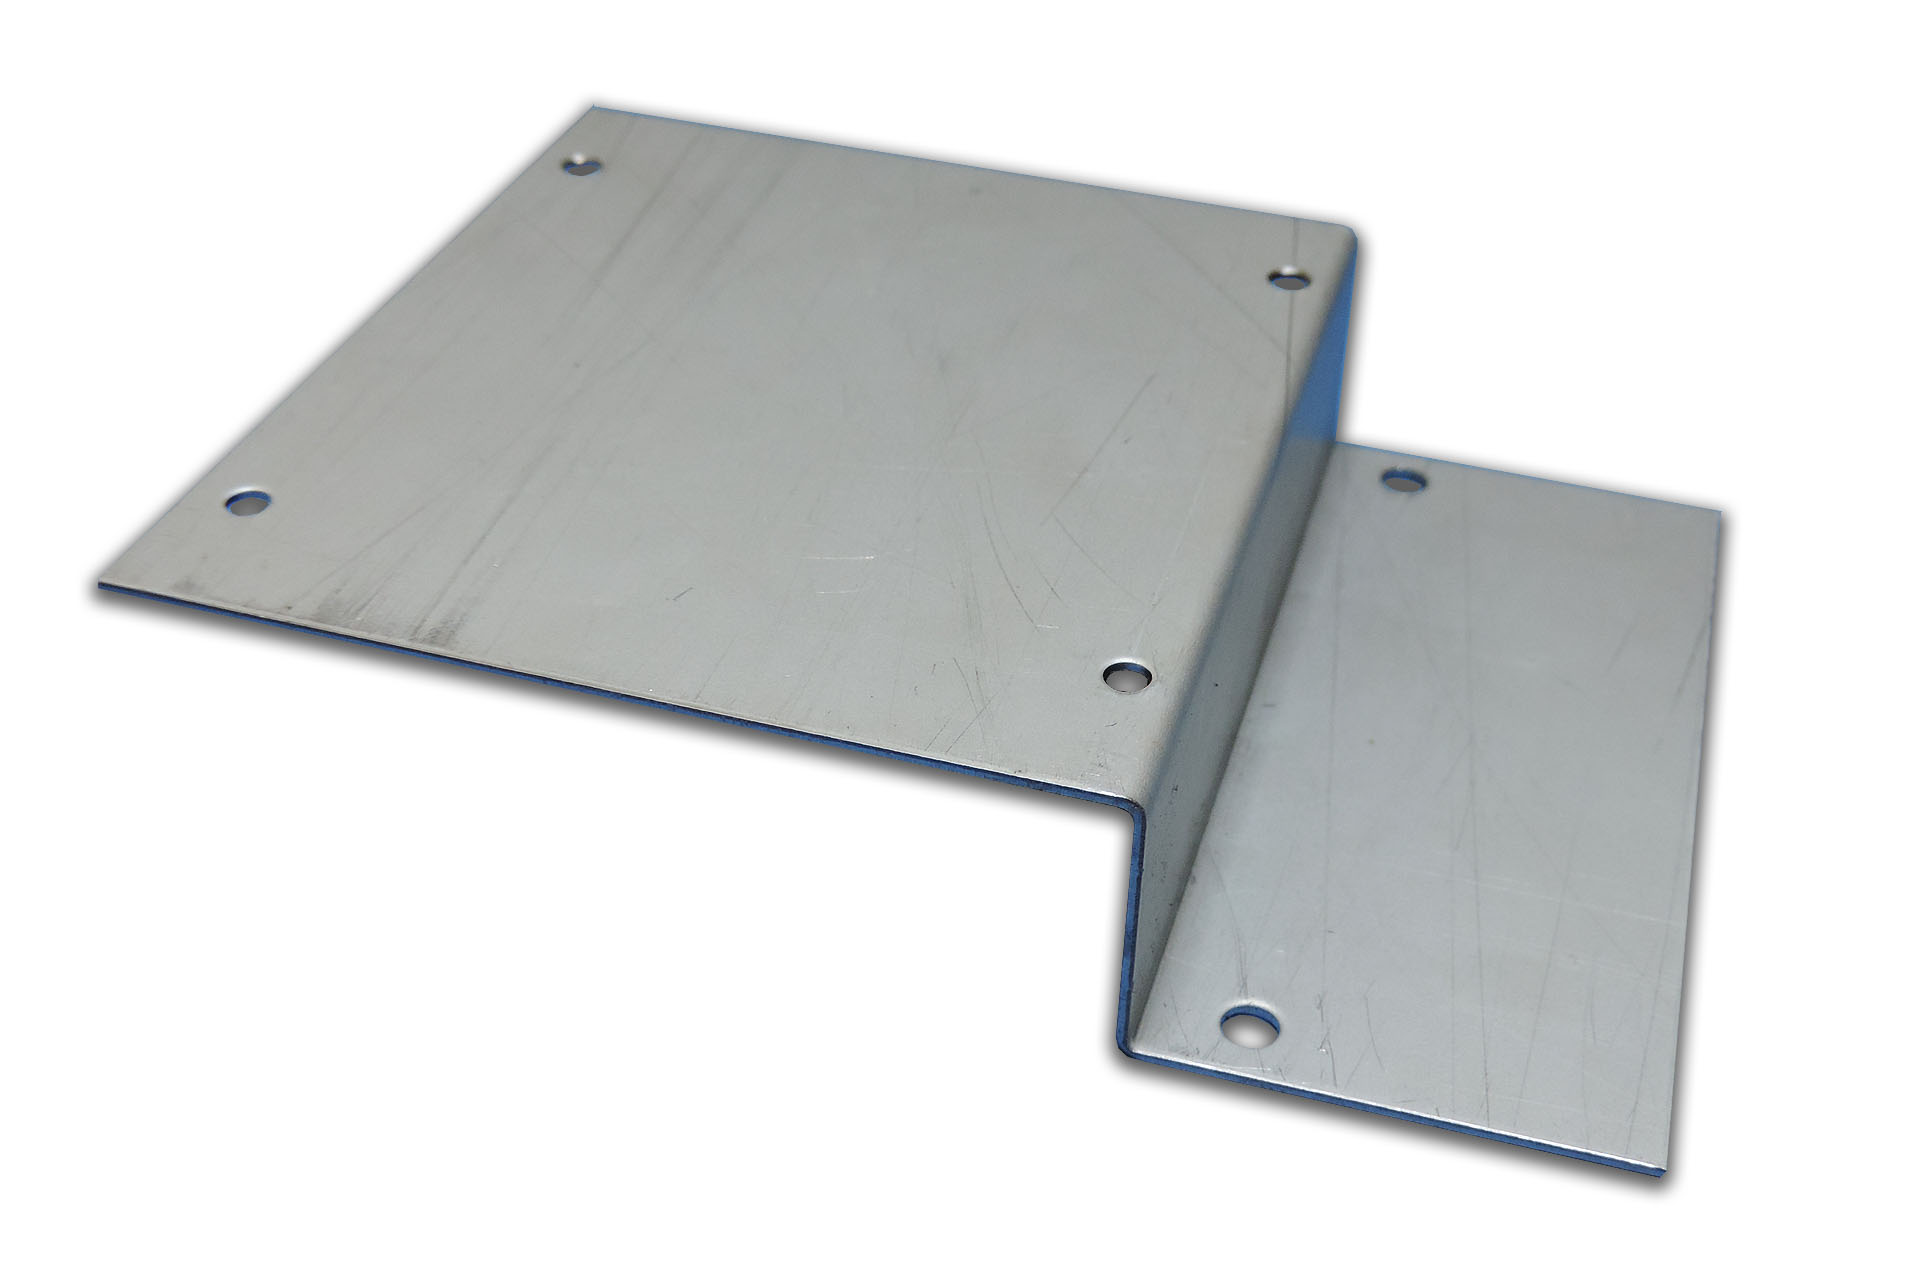
The IDC connectors I've used, don't have the tidy fold-over clamp (retainer). That's because those ones are too high and this neat little mounting solution won't work as the whole assembly will simply be too high to fit in the MKS-70's 2U case.
The other point to note is that the V02 mounting bracket puts the Vecoven PWM daughter-boards, in very close proximity of the voice-boards. Hence and unlike if mounting the Vecoven PWM daughter-boards to the voice-boards, vertical and NOT right-angle IDC headers must be fitted to the PWM boards.
I wasn't going to offer this bracket as an item as it didn't seem worth it but I've been persuaded to get some made up and so I’m selling them with fixing hardware (screws, washers, spacers), as a kit for 27.60 GBP. This includes tax but excludes shipping. If you fancy one, you can either buy now from here or just message me.
Note that the bracket isn't necessary when fitting the PWM kit into a JX-10.
Inspired by Guy's switched-mode power supply, I've proposed a couple of joint projects so watch this space!
!!! WORDS OF CAUTION !!!
These machines are over thirty years old. As such, nuts and screws have seriously bedded in. You may find some glue around the nuts and even some signs of corrosion.
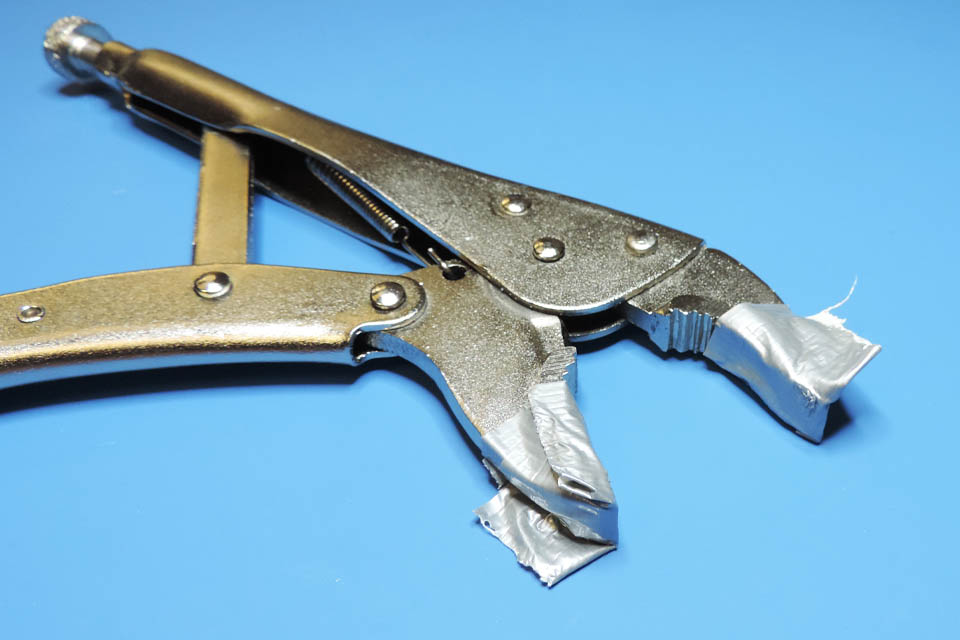
If you're upgrading one of these machines yourself, please take care when undoing nuts and screws. The studs which secure the massive heat-sink plate of the original power supply and also the transformer for example, can become lose. When trying to remove the nuts on the inside of the chassis, they'll just spin around and they won't undo. If this happens, you'll need a pair of mole-grips to carefully hold the studs from underneath the case while gently loosening the nuts with a box spanner on the inside of the case.
Mole grips can be a little aggressive so you might want to think about protecting the case with some thick tape. Put the tape around the lug of each stud and also put some tape on the tips of the jaws of the mole-grips. I found thick masking tape best for the case and lugs and cloth (or gaffer) tape is good on the mole-grips.
When re-assembling, I would recommend replacing the nuts and soaking them in a lubricant like WD-40 prior to fitting.
!!! NOT FOR THE FAINT HEARTED !!!
The second point I should make is that with the exception of the Vecoven Flash module, all other upgrades mentioned here, require some considerable experience of soldering, desoldering, working with surface-mount devices and respecting electrical safety and electrostatic sensitivity. You should also be prepared to drill into existing PCBs and / or original chassis metal work.
!!! Remember, if you get it wrong, you might permanently damage your synth !!!
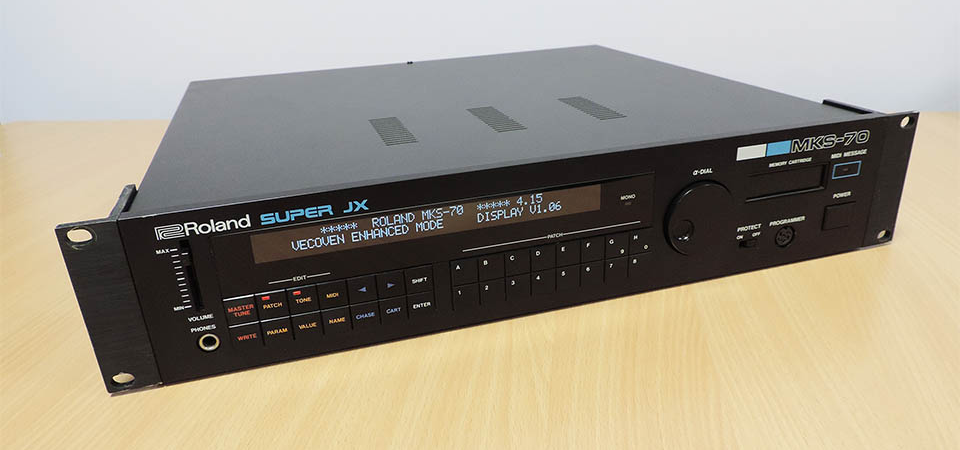
Today, my MKS-70 still looks pretty much as it did when my good friend Rob donated it to me, several months ago. Under the bonnet however, it’s quite a different beast. The sound is still lush and beautiful but...
- As a result of installing Guy’s P0004 switched-mode power supply, not only has reliability and longevity been increased but this machine can be plugged straight into just about any mains supply on the planet.
- The sounds can now benefit from pulse-width modulation thanks to the Vecoven PWM upgrade.
- The Vecoven Super-JX flash module has increased the memory to a ridiculous amount; more patch changes and less SysEx transfers!
- Firmware updates can now be performed over MIDI.
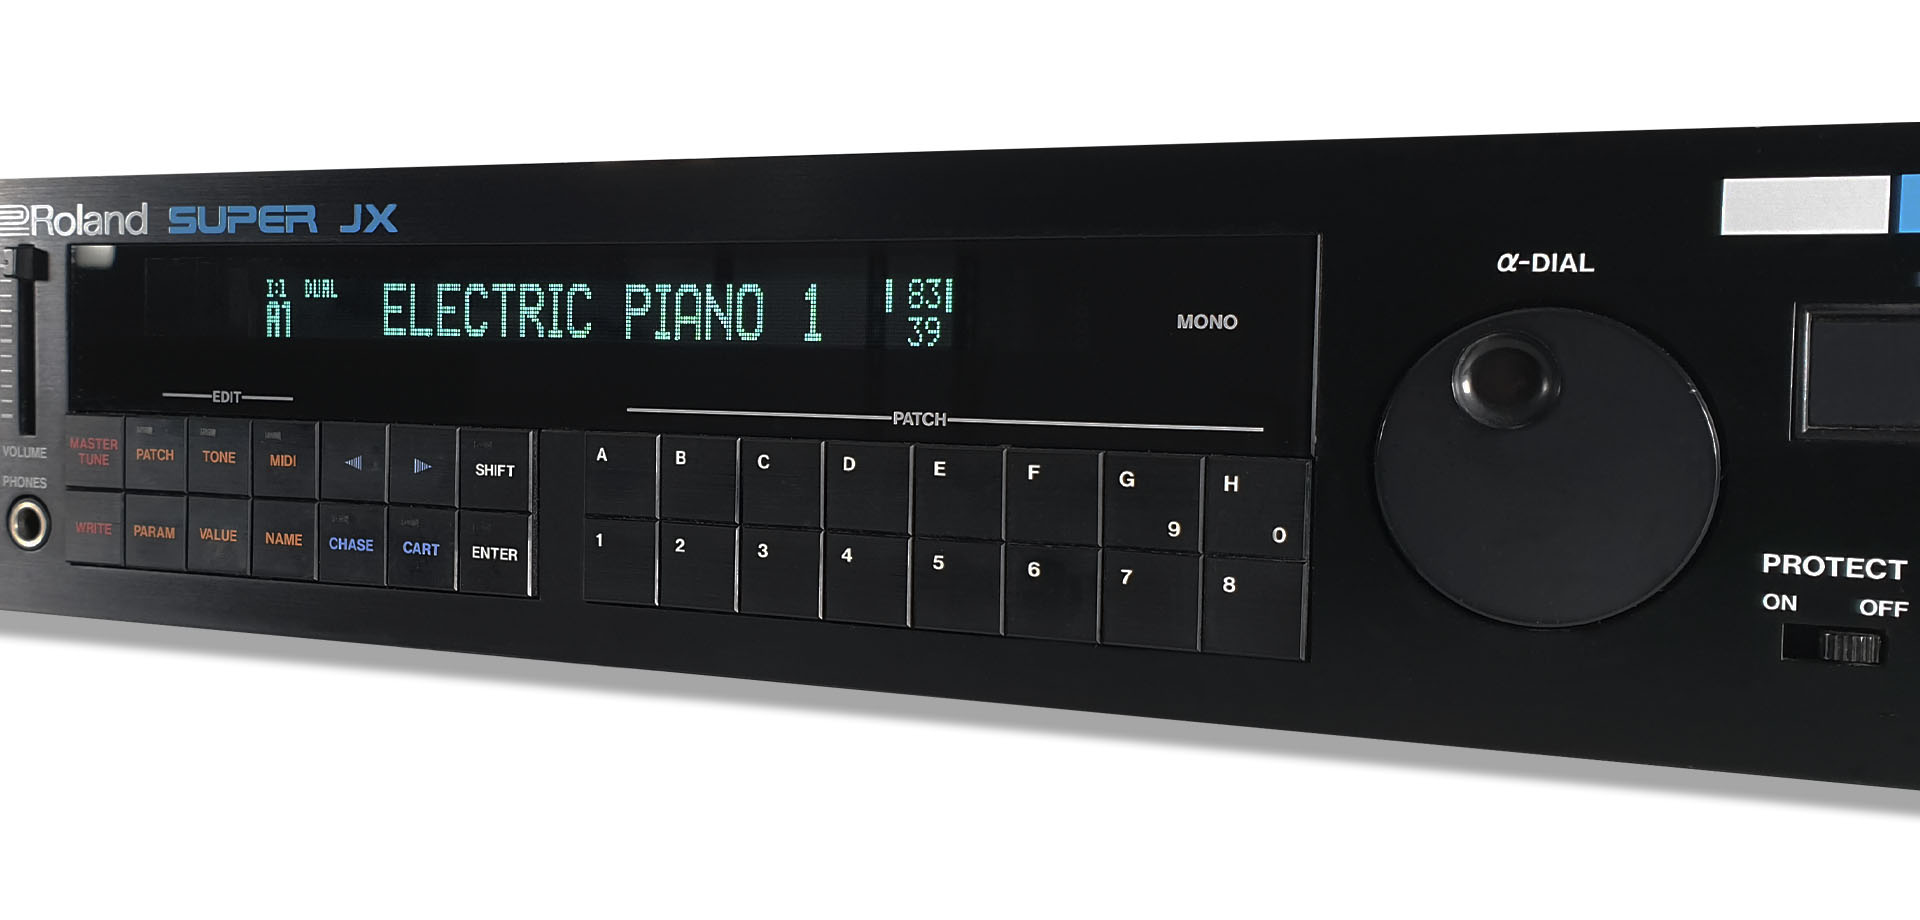
- Guy's Super-JX OLED display looks quite simply, beautiful. To the experienced Super-JX user, it might be the only indication that something is err... different.
- The Super-JX OLED will live much longer than the original VFD and FIP coil which can only give peace-of-mind.
LIVE FOREVER BATTERY MOD
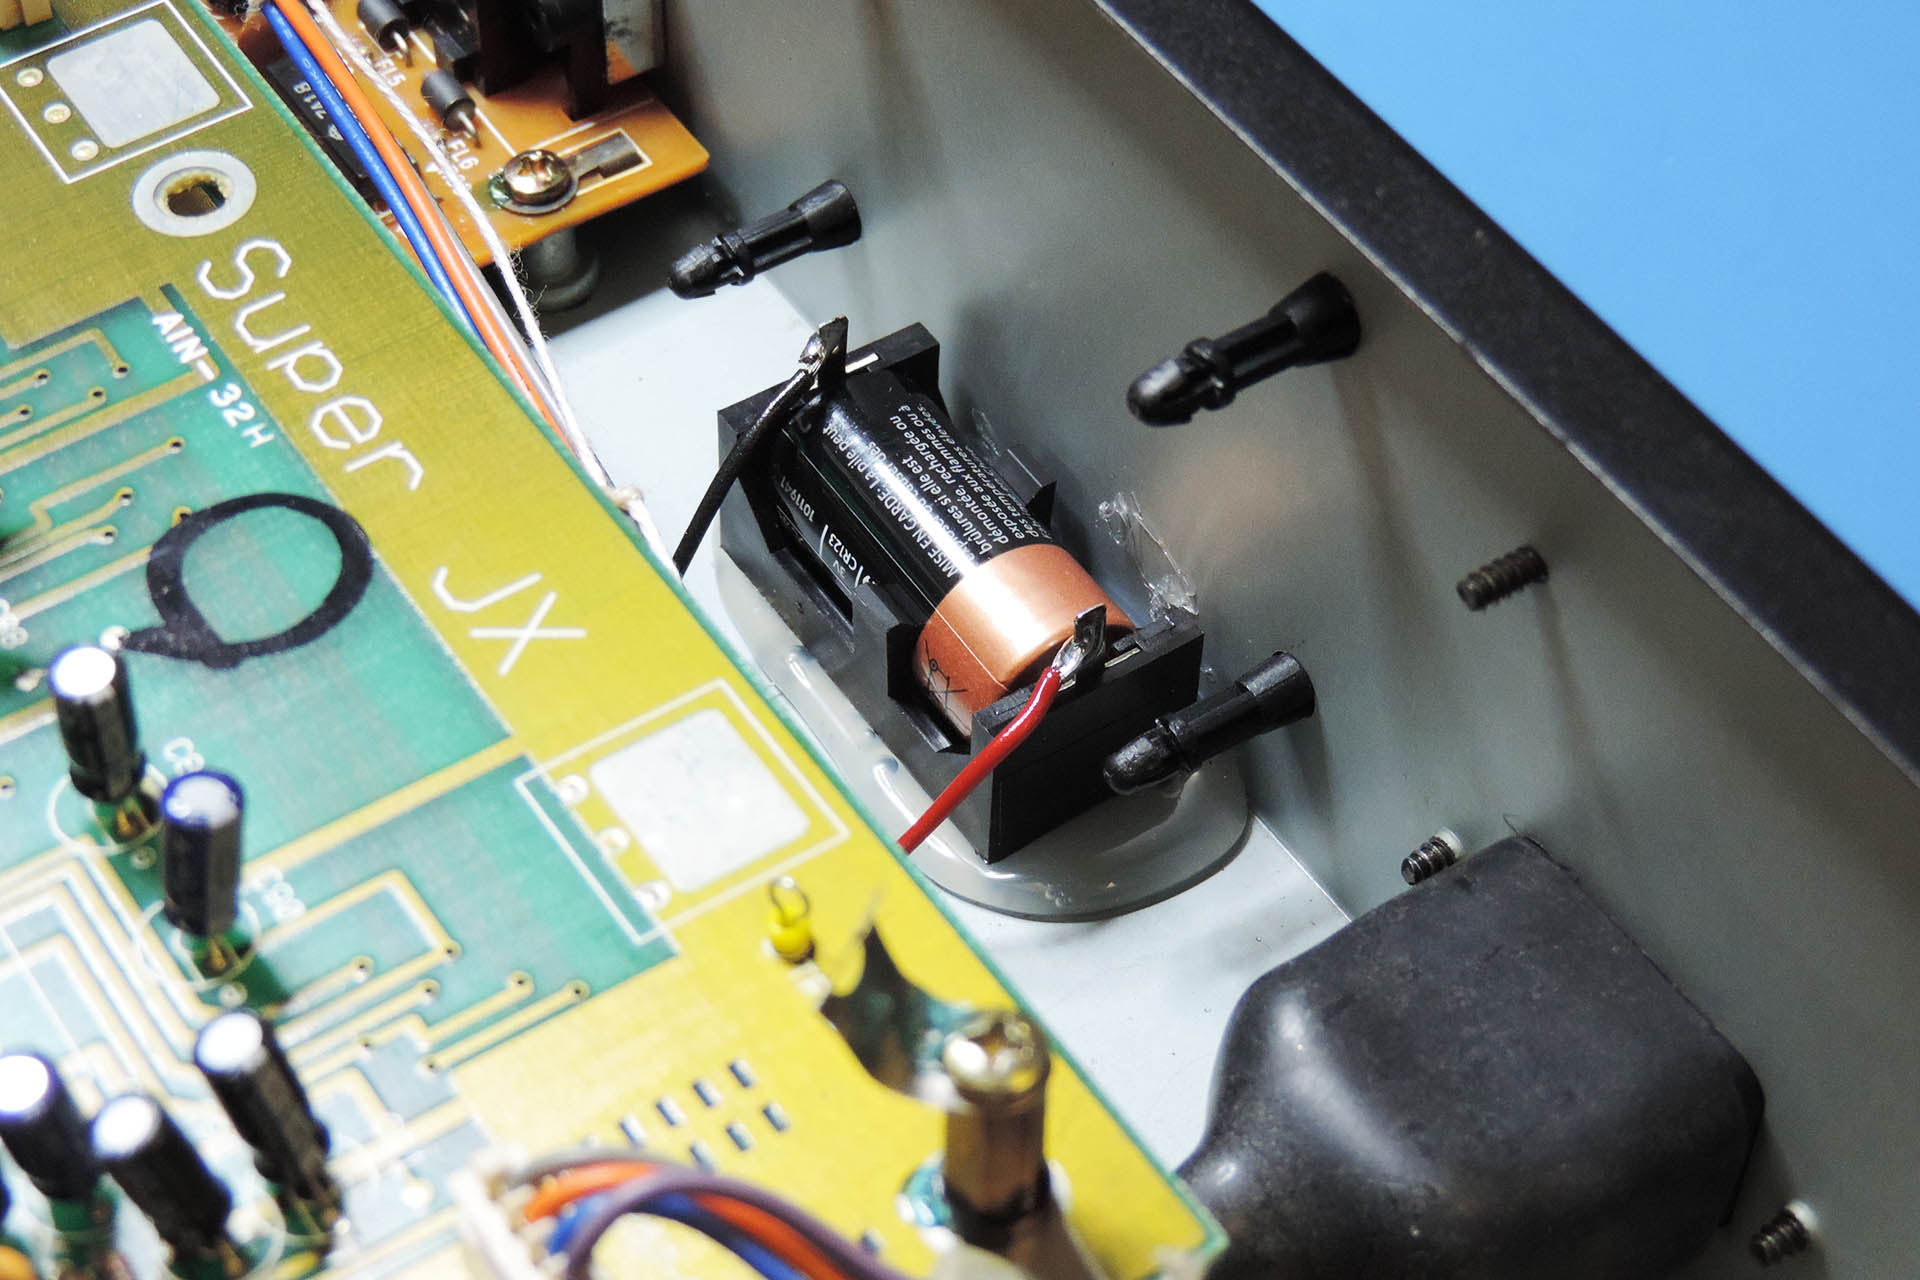
This is something I do which isn't unique to the Roland MKS-70 and which can be fitted into almost any synthesiser or effects processor. It's NOT literally a 'Live Forever' battery mod as nothing obviously lives forever. The chances are however, that it'll out live you!
The damage caused by battery leakage can be irreversible. It's not just a case of losing all those tones and patches that you err... forgot to back up. Battery leakage can seriously damage the PCB on which the battery is mounted; usually the CPU board in most machines.
I mount a high-capacity lithium battery off any PCB giving you the following three main benefits:
- Will last a lot longer than the standard CR2032 which is found in most synthesisers and effects processors.
- Mounted off-PCB so in the remote event that it does leak, sensitive electronics inside your equipment is protected.
- Positioned such that battery voltage can be easily checked by only removing the top of your machine.
If you missed it earlier, all my prices can be found here.
SUPER-JX EDITORS, CONTROLLERS, PROGRAMMERS
Anyone with a Super-JX will be aware of the Roland PG-800, a programmer / editor, specifically for the JX-10 and MKS-70. Today, PG-800s are hard to find, relatively expensive and quite honestly, you'd be lucky to find one in really good condition. I'm not talking cosmetically but electronically and it's worth bearing in mind, that parts are becoming ever scarcer.
Thankfully, a company called RetroAktiv makes a small collection of hardware programmer / editors for several popular vintage synthesisers... including our beloved Super-JX.
I don't have one of these myself but I've heard only good things about the RetroAktiv MPG-70. On top of that... damn, it looks good!
At 875 USD, the RetroAktiv MPG-70 costs a couple of hundred USD more than an original Roland PG-800. The thing is, even if you forget about the fact that this box is going to be considerably more reliable than thirty-something year old electronics, you're getting a lot more for your money and (I'm going to say it again) it just looks awesome.
If you're still not convinced, then RetroAktiv also makes a smaller Super-JX editor called the MPG-8, which retails for just 349 USD.
One of the many features of both of these controllers, is full compatibility with the Vecoven PWM upgrade and firmwares.
For some time now, I've been using a plug-in called Ctrlr. It’s basically an open-source environment for Windows, OS X and Linux, which allows users to develop programmers and editors for just about anything. Many users share their ‘panels’ on the Ctrlr website and I was so surprised to find a panel specifically for the Vecoven V.4 firmware upgraded Roland Super-JX. This doesn't really fall into the category of Roland MKS-70 upgrades as such but I think it still deserves a mention. Available for Windows and OS X, 32 or 64-bit and in plug-in or stand-alone format, you really need to check this out. Oh and it's free! 😀
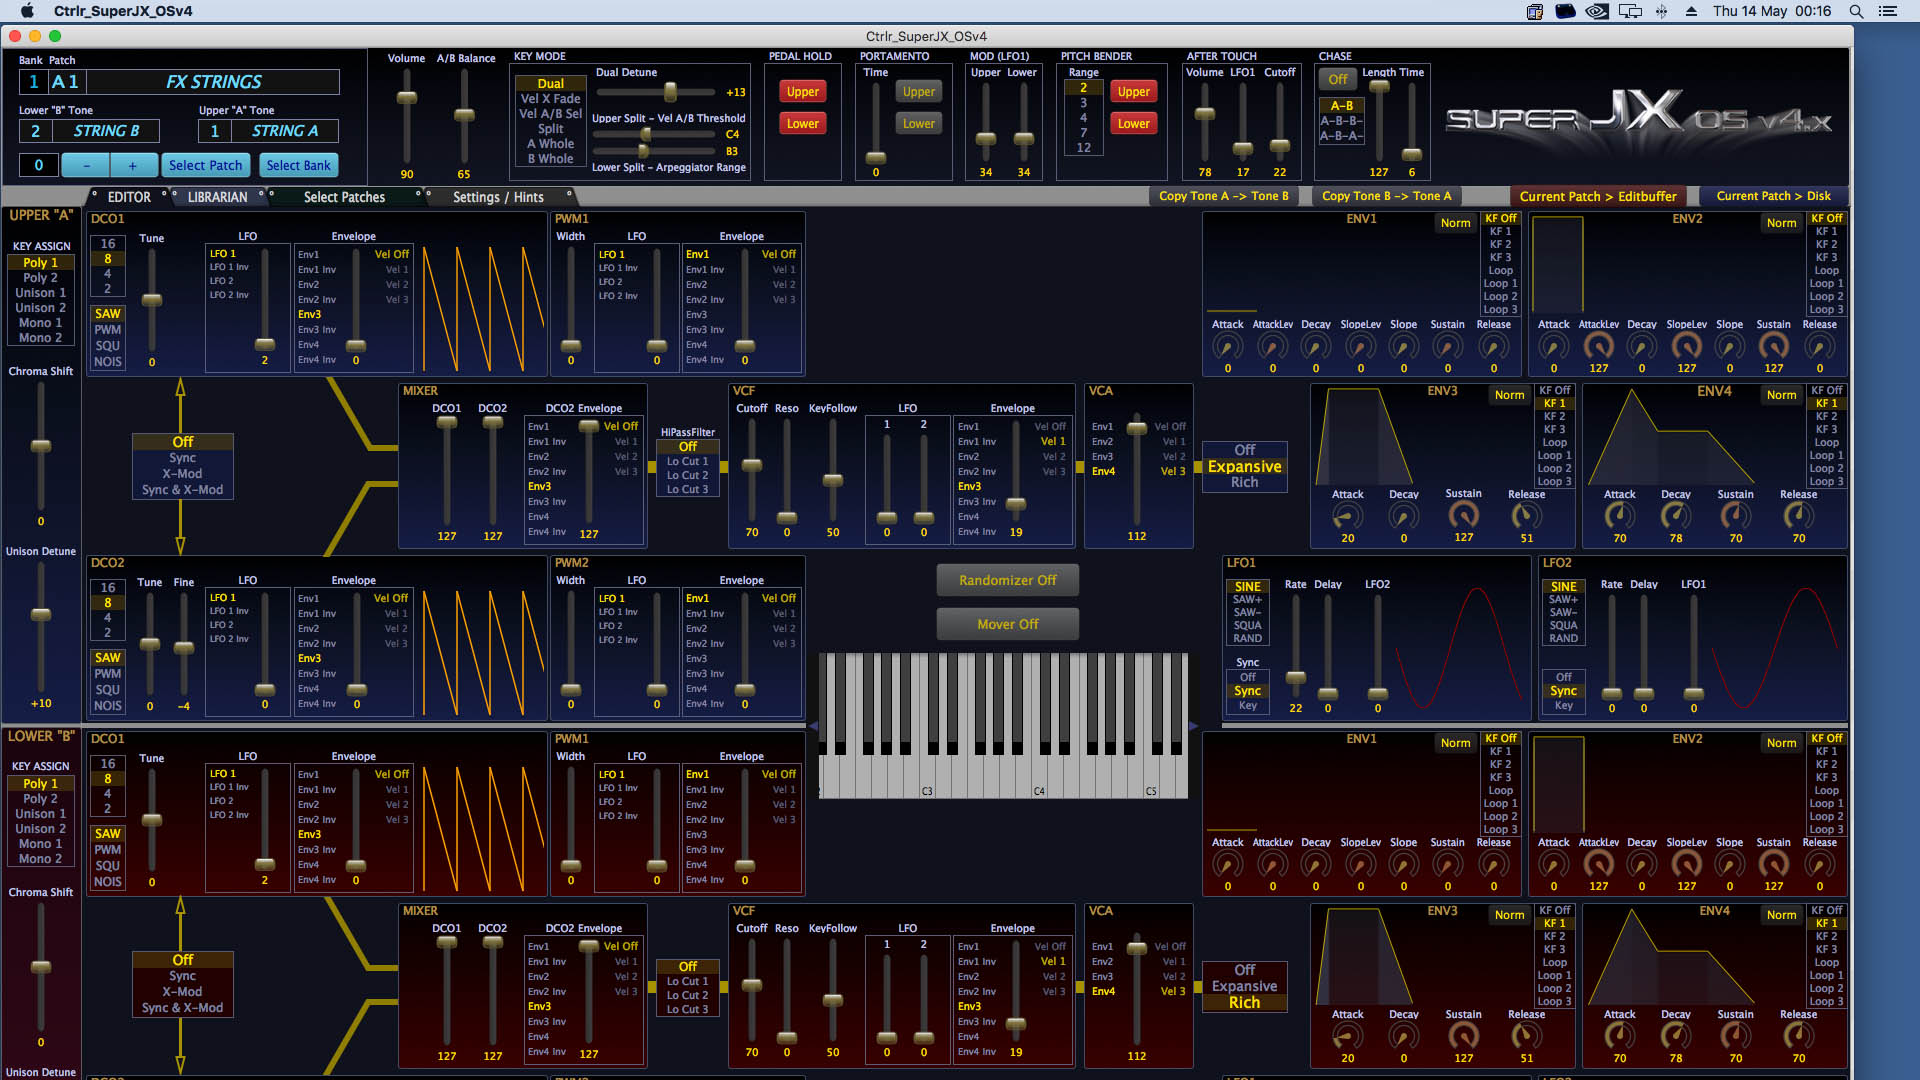
The RetroAktiv programmers will work with Super-JXs running standard (factory) firmware although some sliders and knobs won't do anything as there's no PWM to modify, for example. The Ctrlr panel above will ONLY work with Vecoven version 4 firmware. While I've seen Ctrlr panels that'll work with Vecoven version 3 firmware, I haven't come across anything that'll work with bog standard Roland firmware.
It's been most reassuring to discover that I'm not alone, that there's a whole community out there that share my appreciation and even passion, for this underrated monster of a synthesiser. I'm so grateful to people like Guy, Fred and the RetroAktiv crew, who after more than thirty years from it's launch, have embraced the potential of the Roland Super-JX, developing upgrades that ensure this magnificent machine lives on.
I'd love to contribute what I can so please don't hesitate to contact me if you'd like more information on any of the Roland MKS-70 upgrades (or JX-10 upgrades) mentioned here. I'd love to hear from fellow fans of this awesome synth. 😎
In the meantime, here's a few links that you might want to check out:
https://supersynthprojects.com - This is Guy Wilkinson's website full of seriously useful information about the Roland Super-JX.
http://super-jx.com/ - Sites like this, truly keep the legend alive!
http://www.vintagesynth.com/roland/jx10.php - An excellent reference site.
https://www.facebook.com/groups/SuperJX/ - You just knew that there had to be a Facebook group, right?
https://www.facebook.com/groups/1837407526336417/ - ...or two!!!
Retroaktiv MPG-70 hardware Super-JX programmer
UPDATE: 11th July 2020
Wow! Since I put up this post, things have got a little busy.
UPDATE - 17th August 2021
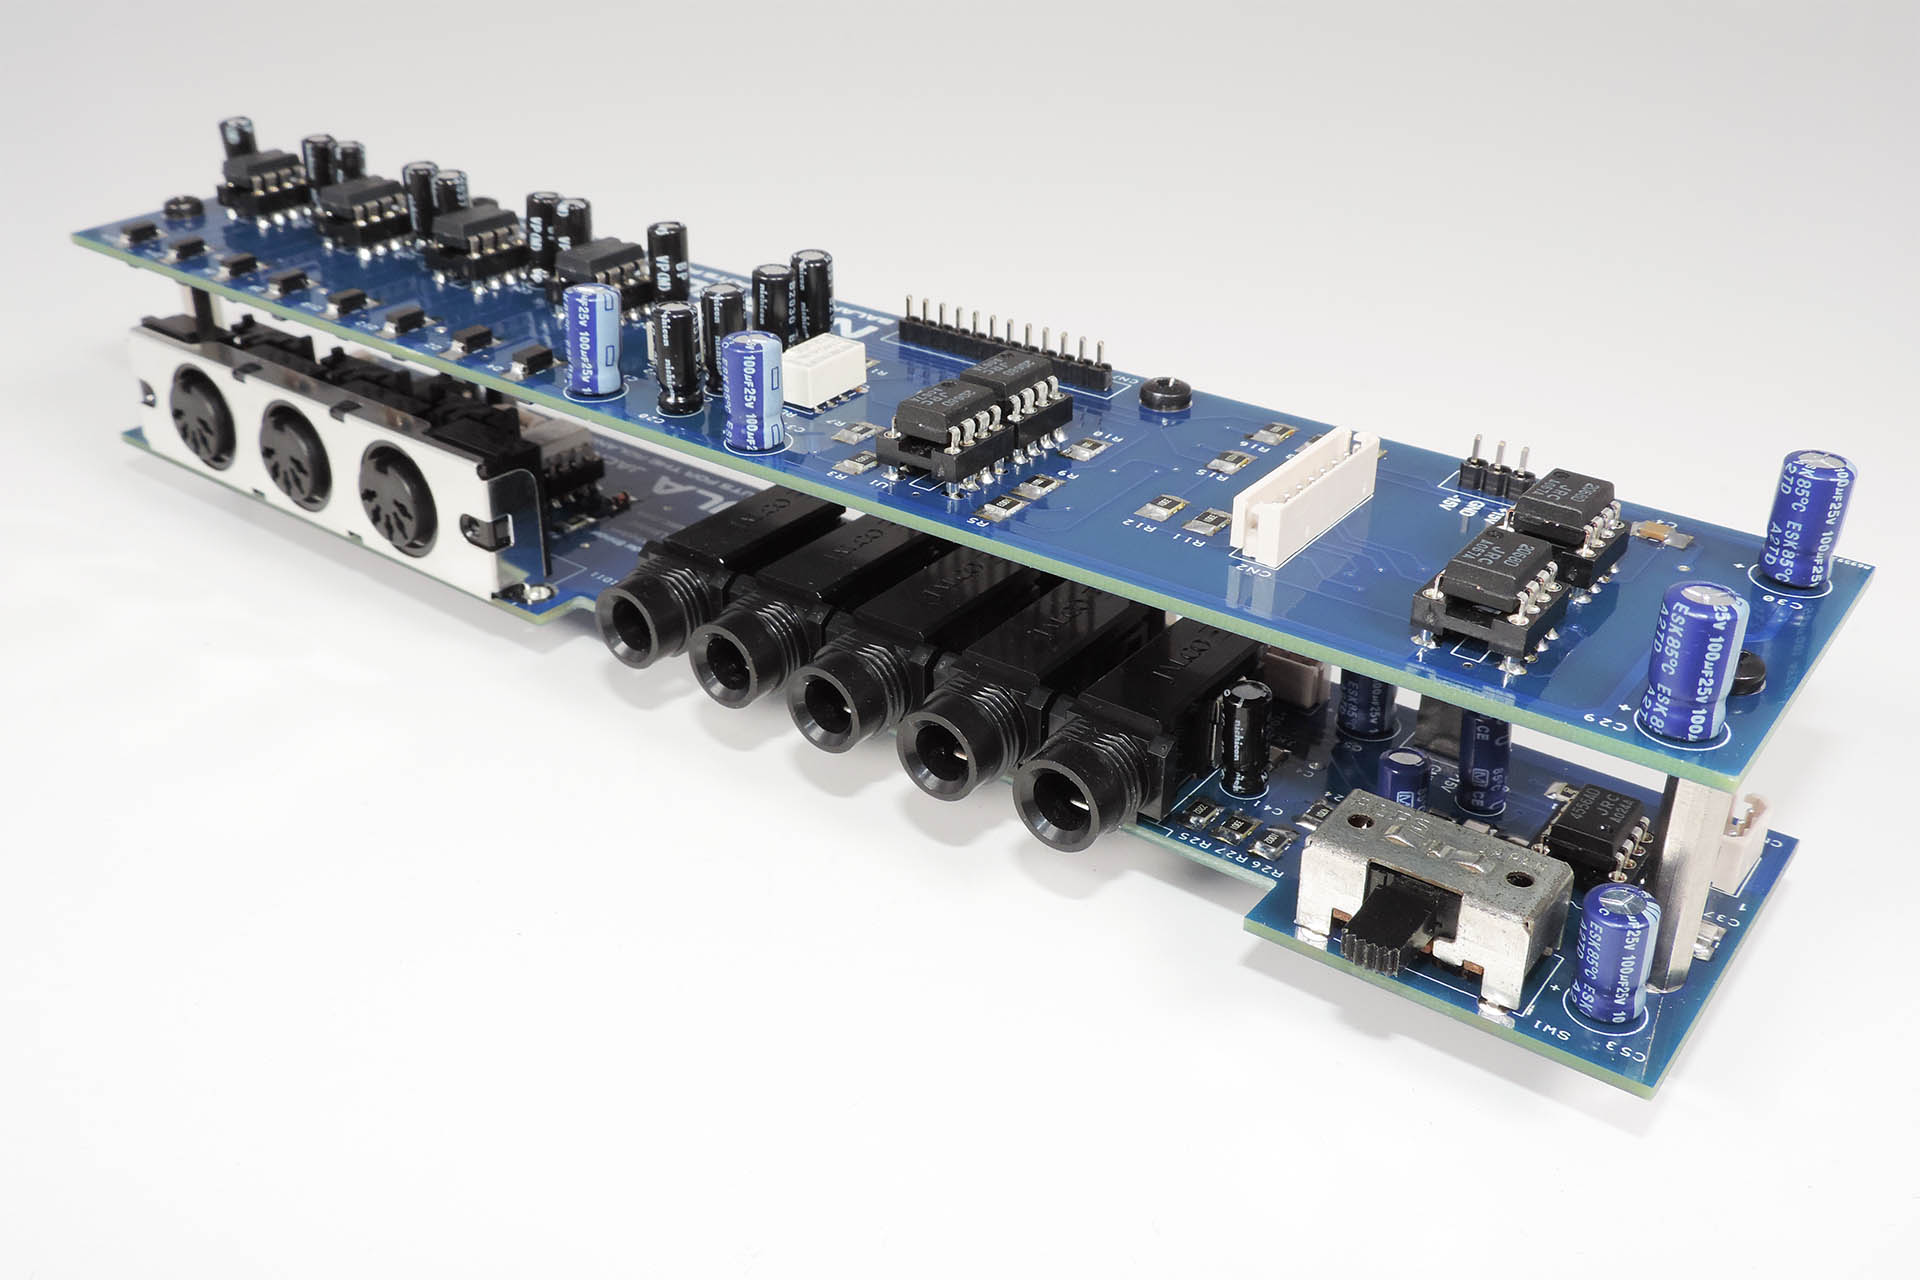
Today I launched Nebula, a replacement jack-board for the MKS-70 with upgraded MIDI and balanced outputs. Read all about it here.
UPDATE - 19th June 2022
I've been meaning to add this update for months so finally...
A few months ago, Fred Vecoven launched his digital PWM upgrade. It's brilliant! You can read more about it here.
Simple and elegant, Fred Vecoven's new digital PWM upgrade for the Roland Super-JX is quite simply beautiful.
UPDATE - 19th January 2024
Over the past few days, I've been experimenting with replacing the wires that connect the module-boards to the jack-board, in the Roland MKS-70, with screened cables.
It's not as simple as it might sound. To start with, I needed a tool that cost over 400 GBP. I also needed to carefully consider some aspects of the original connection.
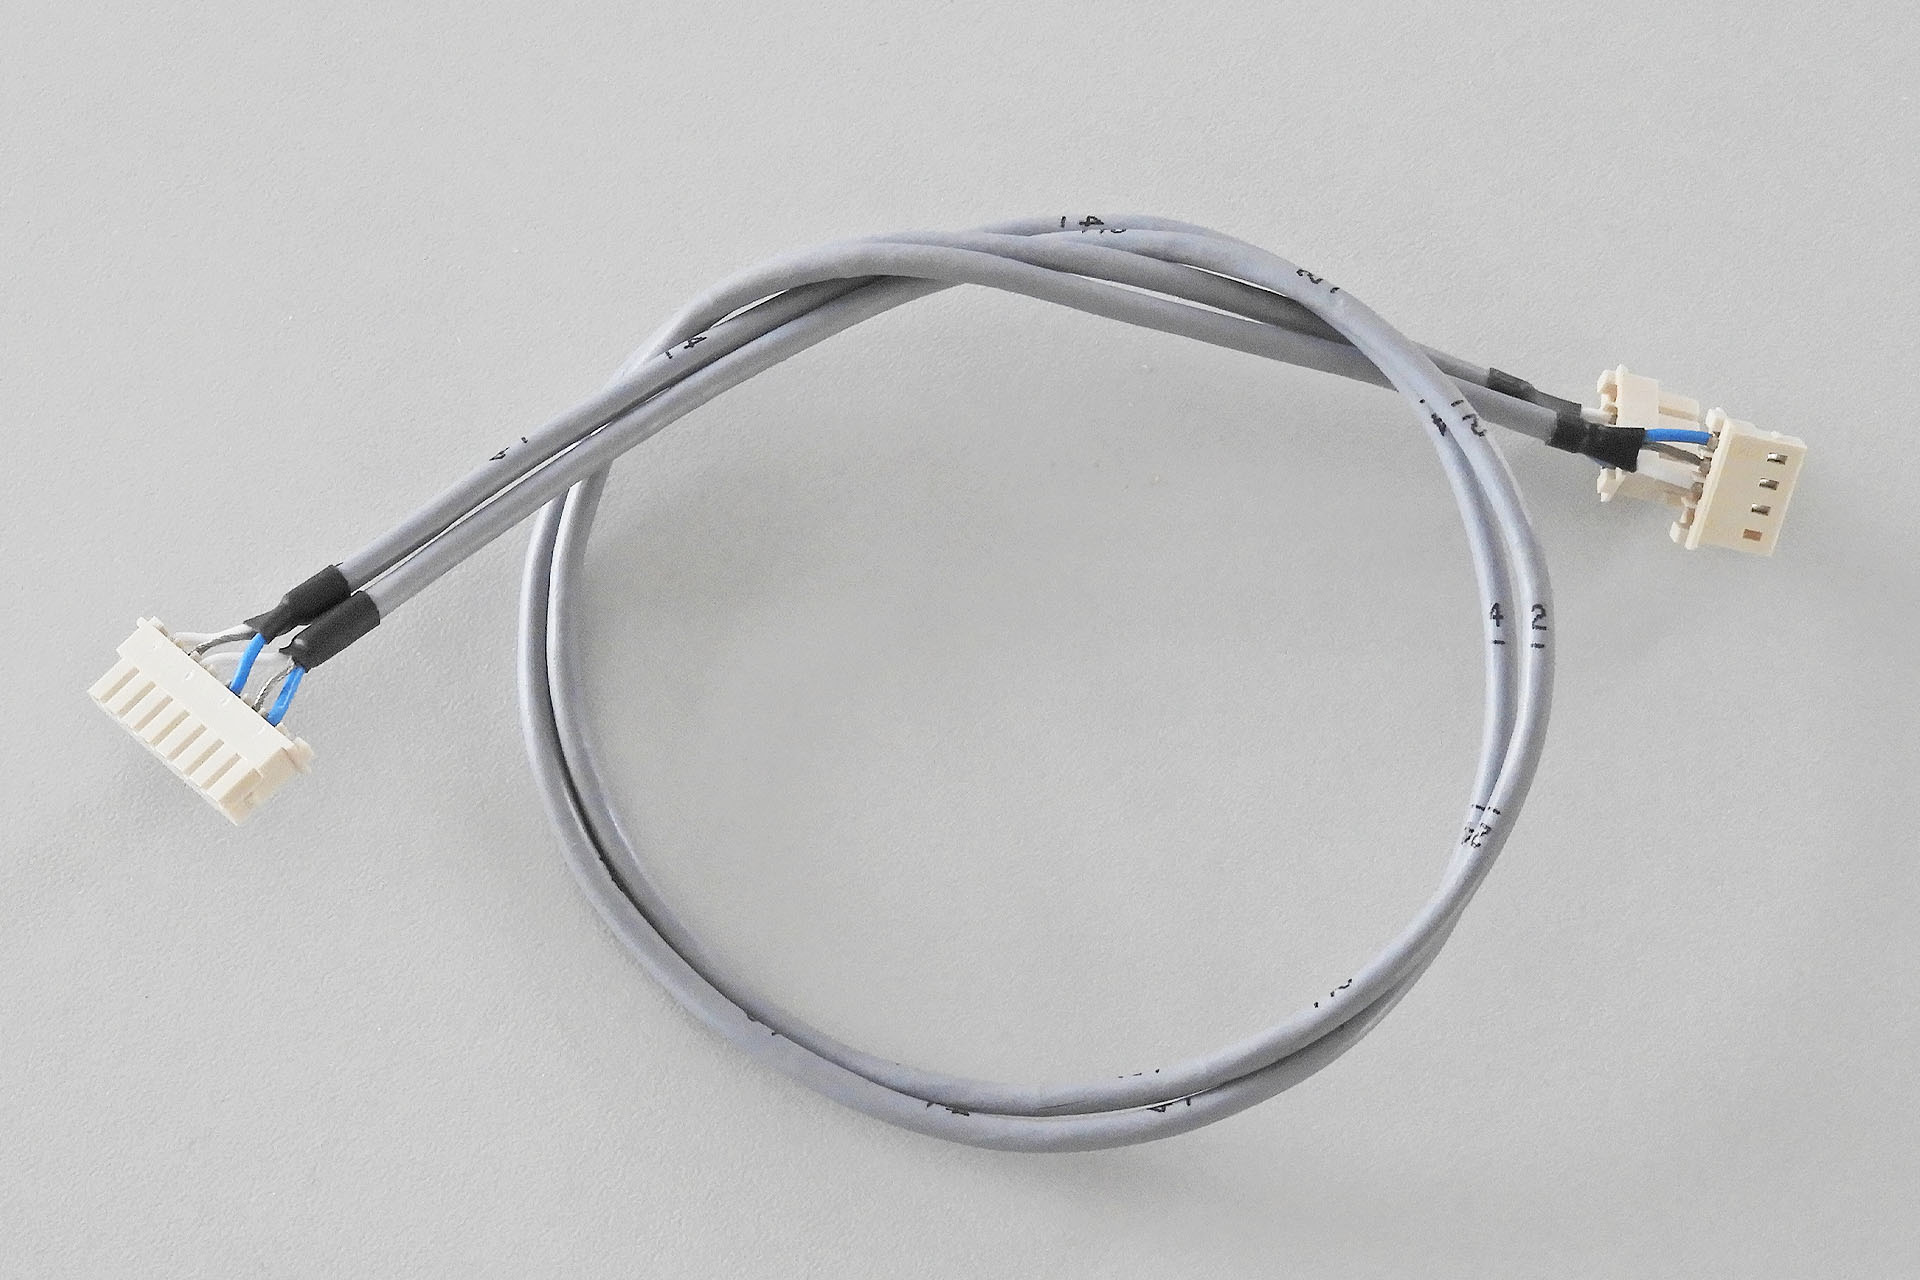
After some tests and experiments however, I'm delighted to announce that my screened audio cables for the Roland MKS-70 are now available in my e-store. You can read more about this easy to install upgrade, here.