Skip to content

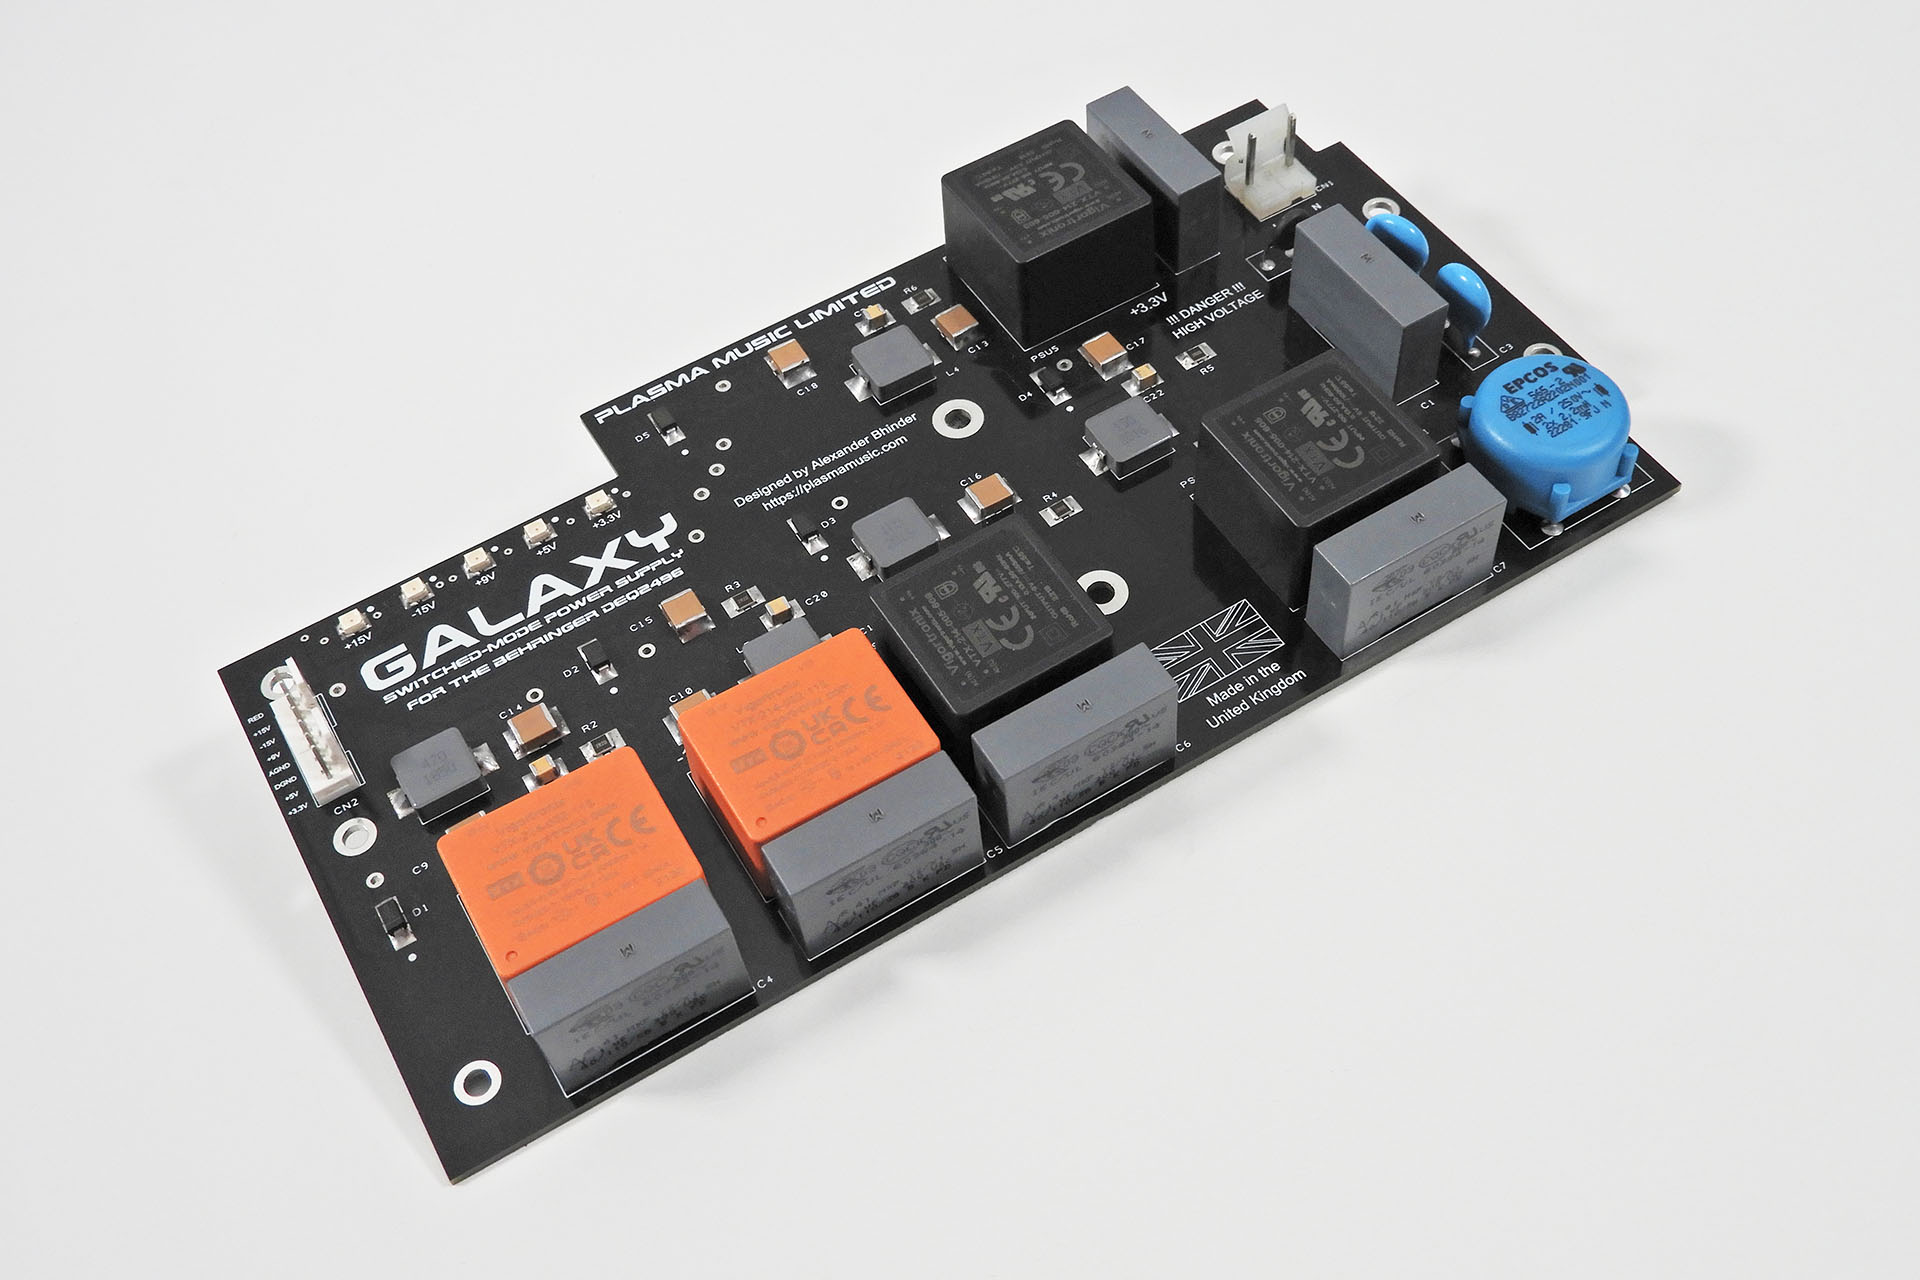
Welcome to my Galaxy! Initially a proof-of-concept, Galaxy ended up being the ultimate Behringer Ultracurve Pro replacement power supply!

Galaxy replacement power supply for the Behringer DEQ2496
Galaxy replacement power supply for the Behringer Ultracurve Pro.

I’ve been a big fan of this processor since Behringer launched the 2U DSP8000 Ultracurve which soon evolved into the DSP8024 Ultracurve. It's no surprise therefore, that I'm currently using six Behringer DEQ2496 Ultracurve Pros in my studio. An excellent processor which in its current version, offers features and benefits such as

  • Compact 1U format
  • Ergonomic front-panel layout
  • Intuitive GUI on a large display
  • Simultaneous multi-function processing
  • Huge audio connection options, both analogue and digital
  • Professional interfaces including Word Clock
  • Excellent audio quality
  • Analogue true bypass
  • Internal memory
  • MIDI to allow remote control and saving of internal memory to a computer
  • Amazingly cost-effective solution
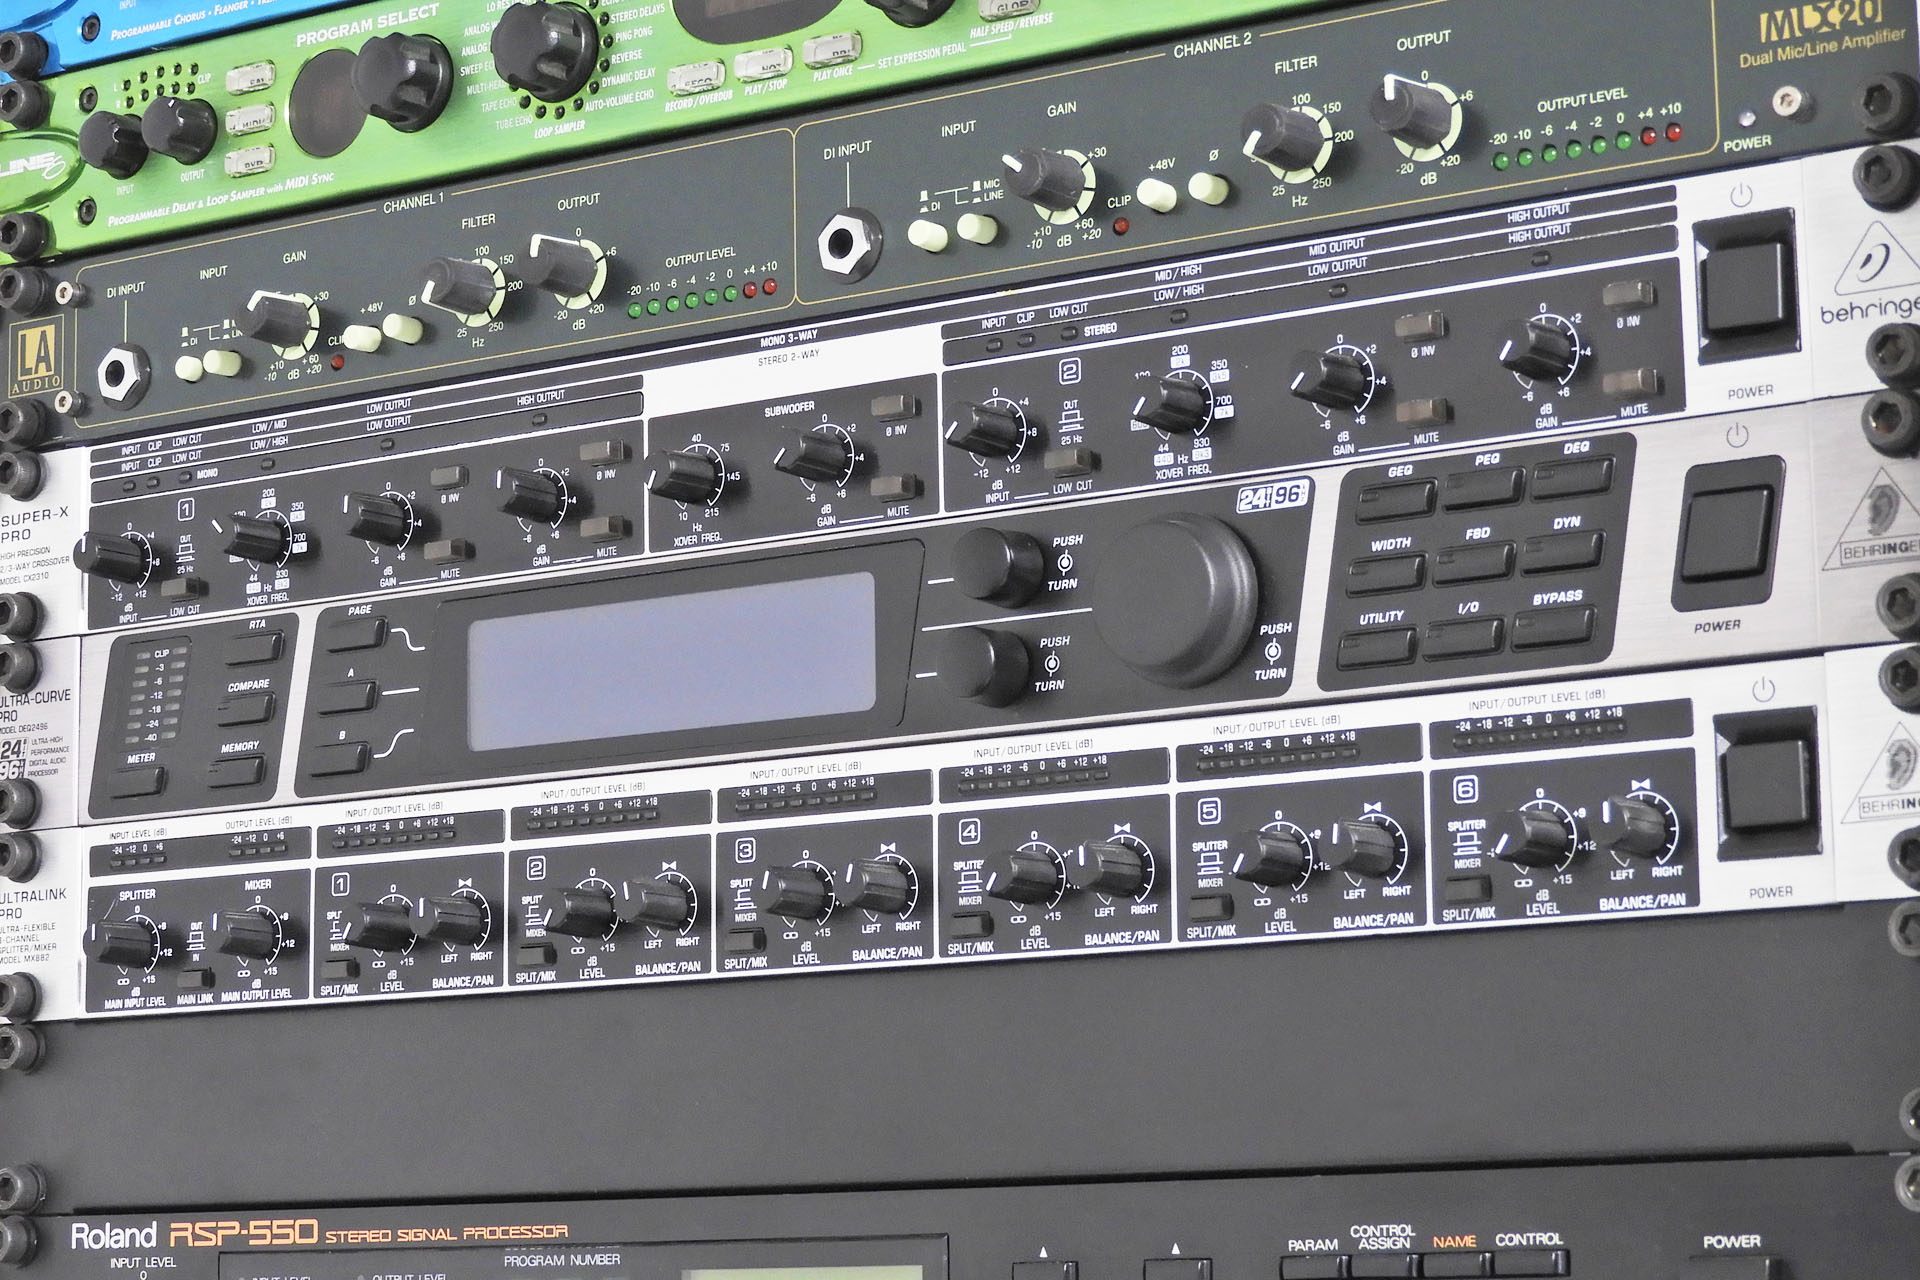
One of six Ultracurves in my studio
One of six Ultracurves in my studio together with another couple of Behringer 'Swiss army knife' type processors.

The Behringer DEQ2496 joins a selected few processors that can be found in recording studios, broadcast studios, night clubs, theatres, in the filed, audiophile set-ups and home theatre systems. That in itself is a big deal.

So why are we here? What’s wrong with the DEQ2496?

Well, nothing really but despite its huge feature list, the fact that at the time of writing, it’s still in production and retails for a very acceptable price, it does have one or two snaggy annoyances.

Made in the Far East, quality control used to be and sometimes still is an issue. Problems with internal cables for example, have been well documented. In fact, I’ve repaired a lot of Ultacurves over the years and indeed many have had simple inter-board connection issues.

Great but that’s still not why we’re here!

With thousands of Ultracurves across the world now getting quite old, many DEQ2496 power supplies are starting to fail. Symptoms are various ranging from erratic or unpredictable behaviour, to the DEQ2496 simply not switching on.

Yeah but hang on a second... is the power supply in the Ultracurve Pro actually a Behringer power supply? 

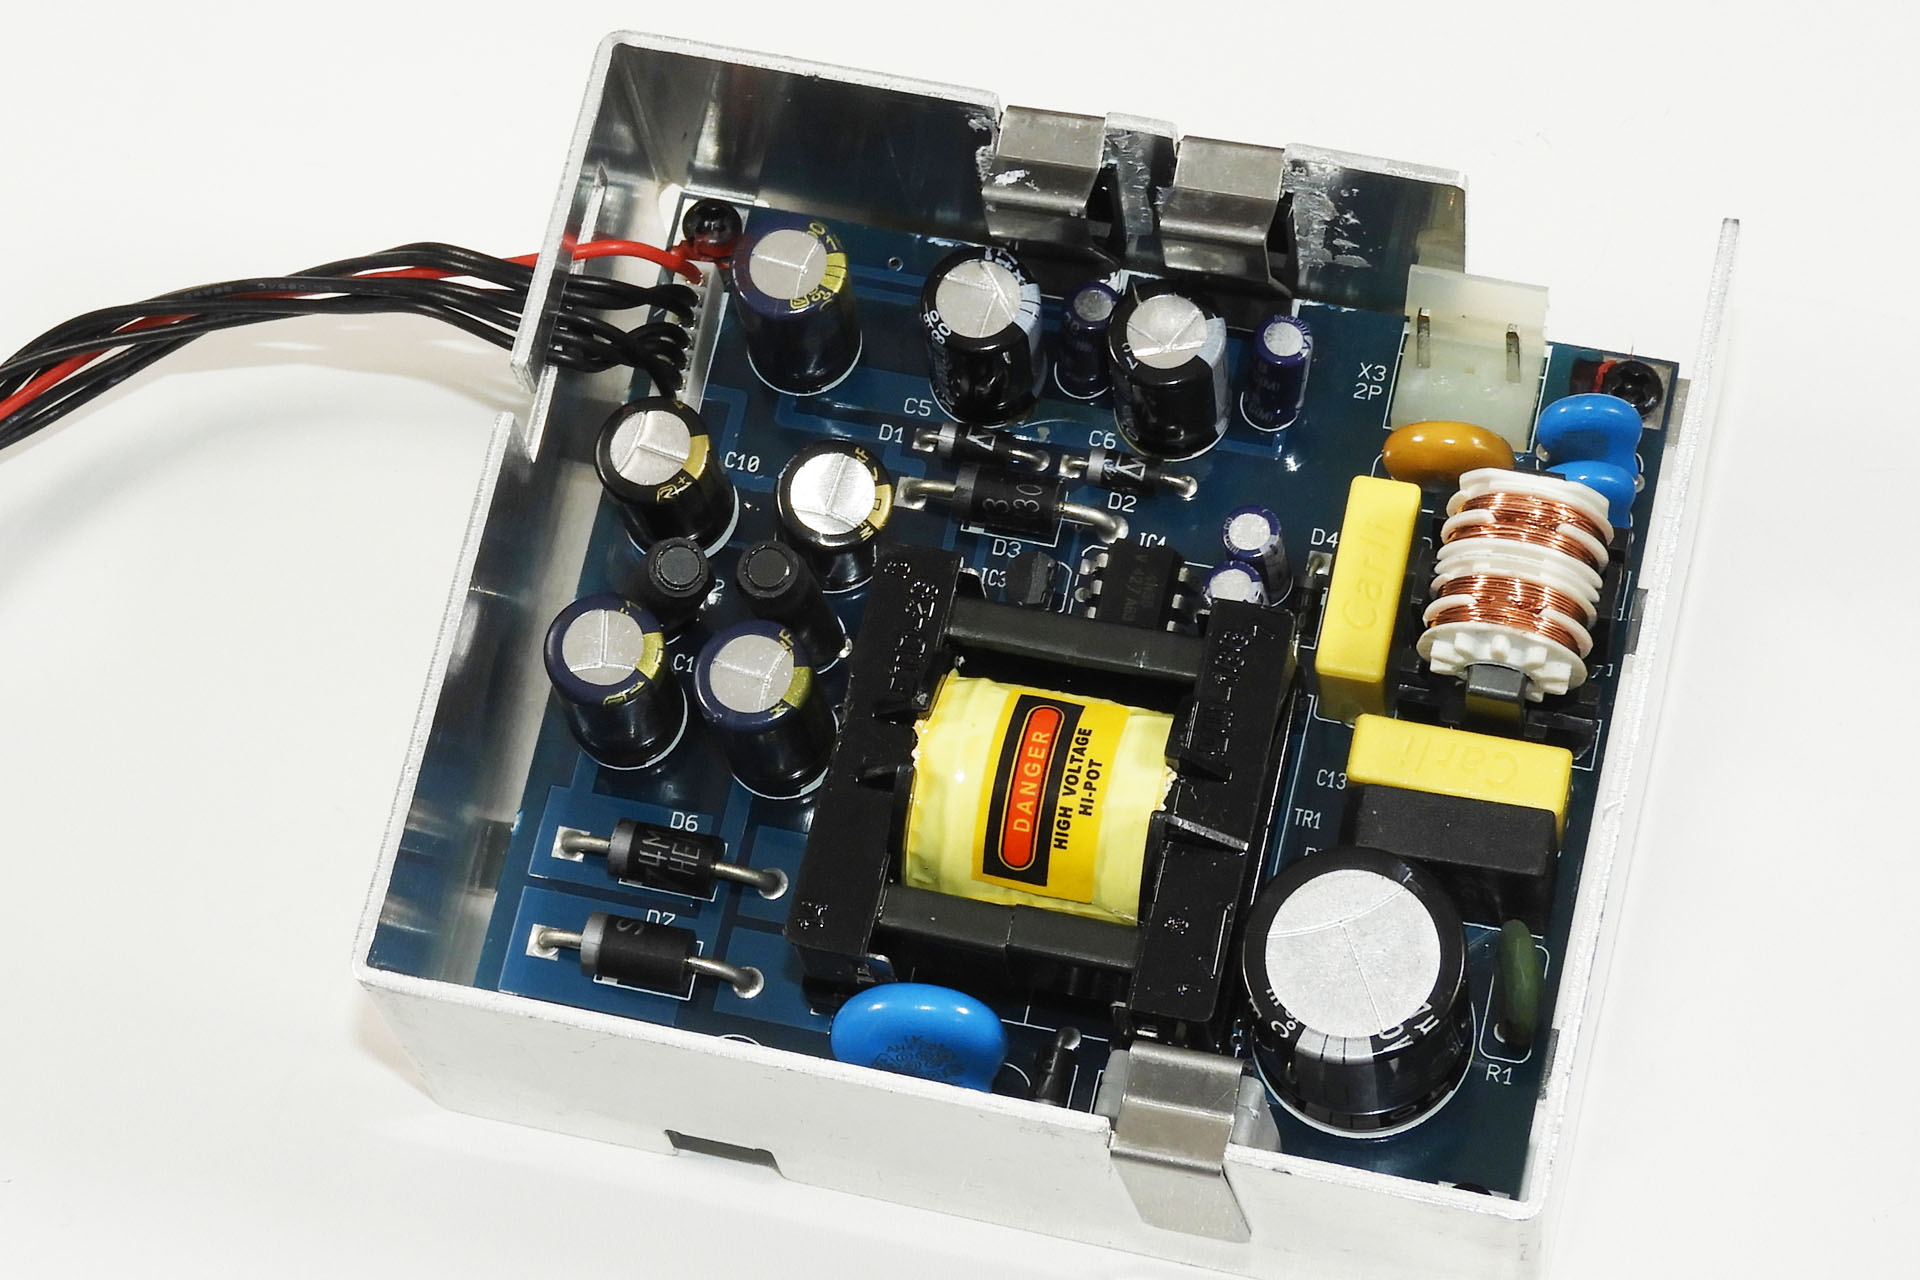
Good question! Labelled as a Behringer Model PSU2496, it would appear that it's actually made by Eton, a well respected manufacturer of switched-mode power supplies and is from the ET166 range.

Behringer PSU2496 or Eton ET166
The Behringer PSU2496 power supply or is it an Eton ET166?

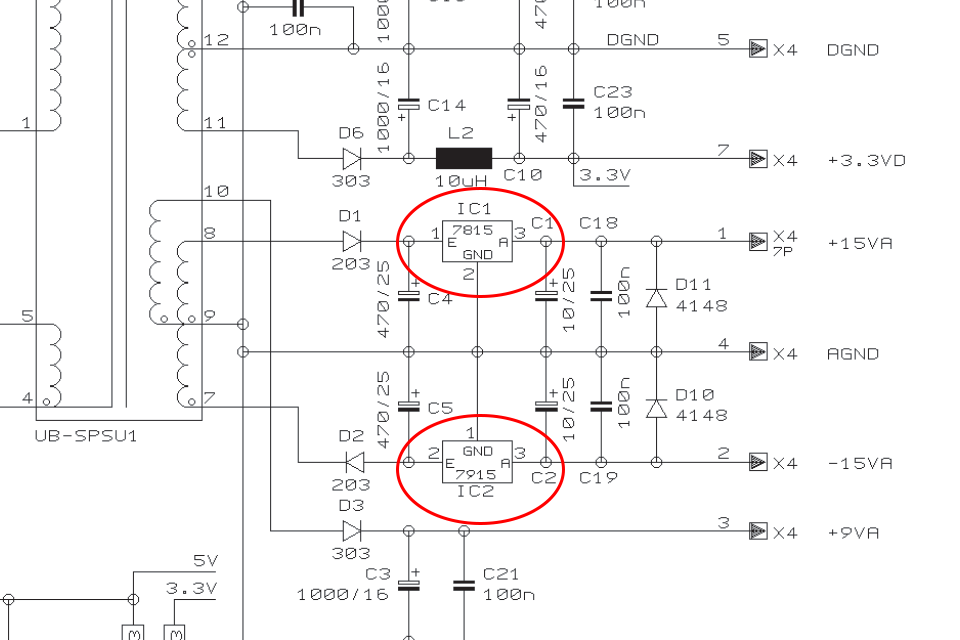
The PSU2496 is a very cleverly designed little power supply. Labelled as a switched-mode power supply (SMPS), it's actually a hybrid. The voltage for the +/-15V analogue supplies for example, comes off a pair of 78 / 79 series regulators. The input to those regulators however, does come from a very fast-switching back-end. It's a trick I've used myself, to make guitar pedal power supplies and it works really quite well. Using LDO regulators on the back-end of a SMPS is an excellent way to reduce EMC and ripple but is expensive for manufacturers to implement.

Behringer PSU2496 uses linear voltage regulators for main audio supplies
The Behringer PSU2496 uses linear voltage regulators for+/-15V audio supplies.

The PSU2496 is packed with a bunch of similarly neat little features including proper capacitive ground / earth decoupling which I have incorporated into the Galaxy design.

From my experience, these things don't fail because of poor design, sub-standard components or build quality. They fail because they're old. A lot of heat is generated by the power supply and devices will eventually succumb to thermal stress. It's that simple. When it comes to current provision, it's difficult to tell what margins exist between the PSU2496 rated currents and what the DEQ2496 pulls off each supply. One could argue that the reason the PSU2496 runs so hot is because there isn't much margin at all and that the power supply is actually running near to the edge of its limits.

In the event of PSU failure, swapping out the through-hole electrolytic capacitors for high-temperature rated, low ESD equivalents, can help but sometimes other components fail and fault-finding a switched-mode power supply can be quite challenging, even with the appropriate technical literature. The wire-wound components are of particular concern as it's virtually impossible to acquire these as spare parts.

Initially a proof-of-concept, my Behringer Ultracurve Pro replacement power supply wasn’t intended to become a commercial product. Once it was up and running, installed in two of my own Ultracurves and having worked flawlessly for a couple of months, I mentioned the project to some friends and customers who I knew were DEQ2496 owners. Within a couple of weeks, three customers had brought me their Ultracurves asking if I could install my Behringer Ultracurve Pro replacement power supply. That’s when things started to get serious and Galaxy was born.

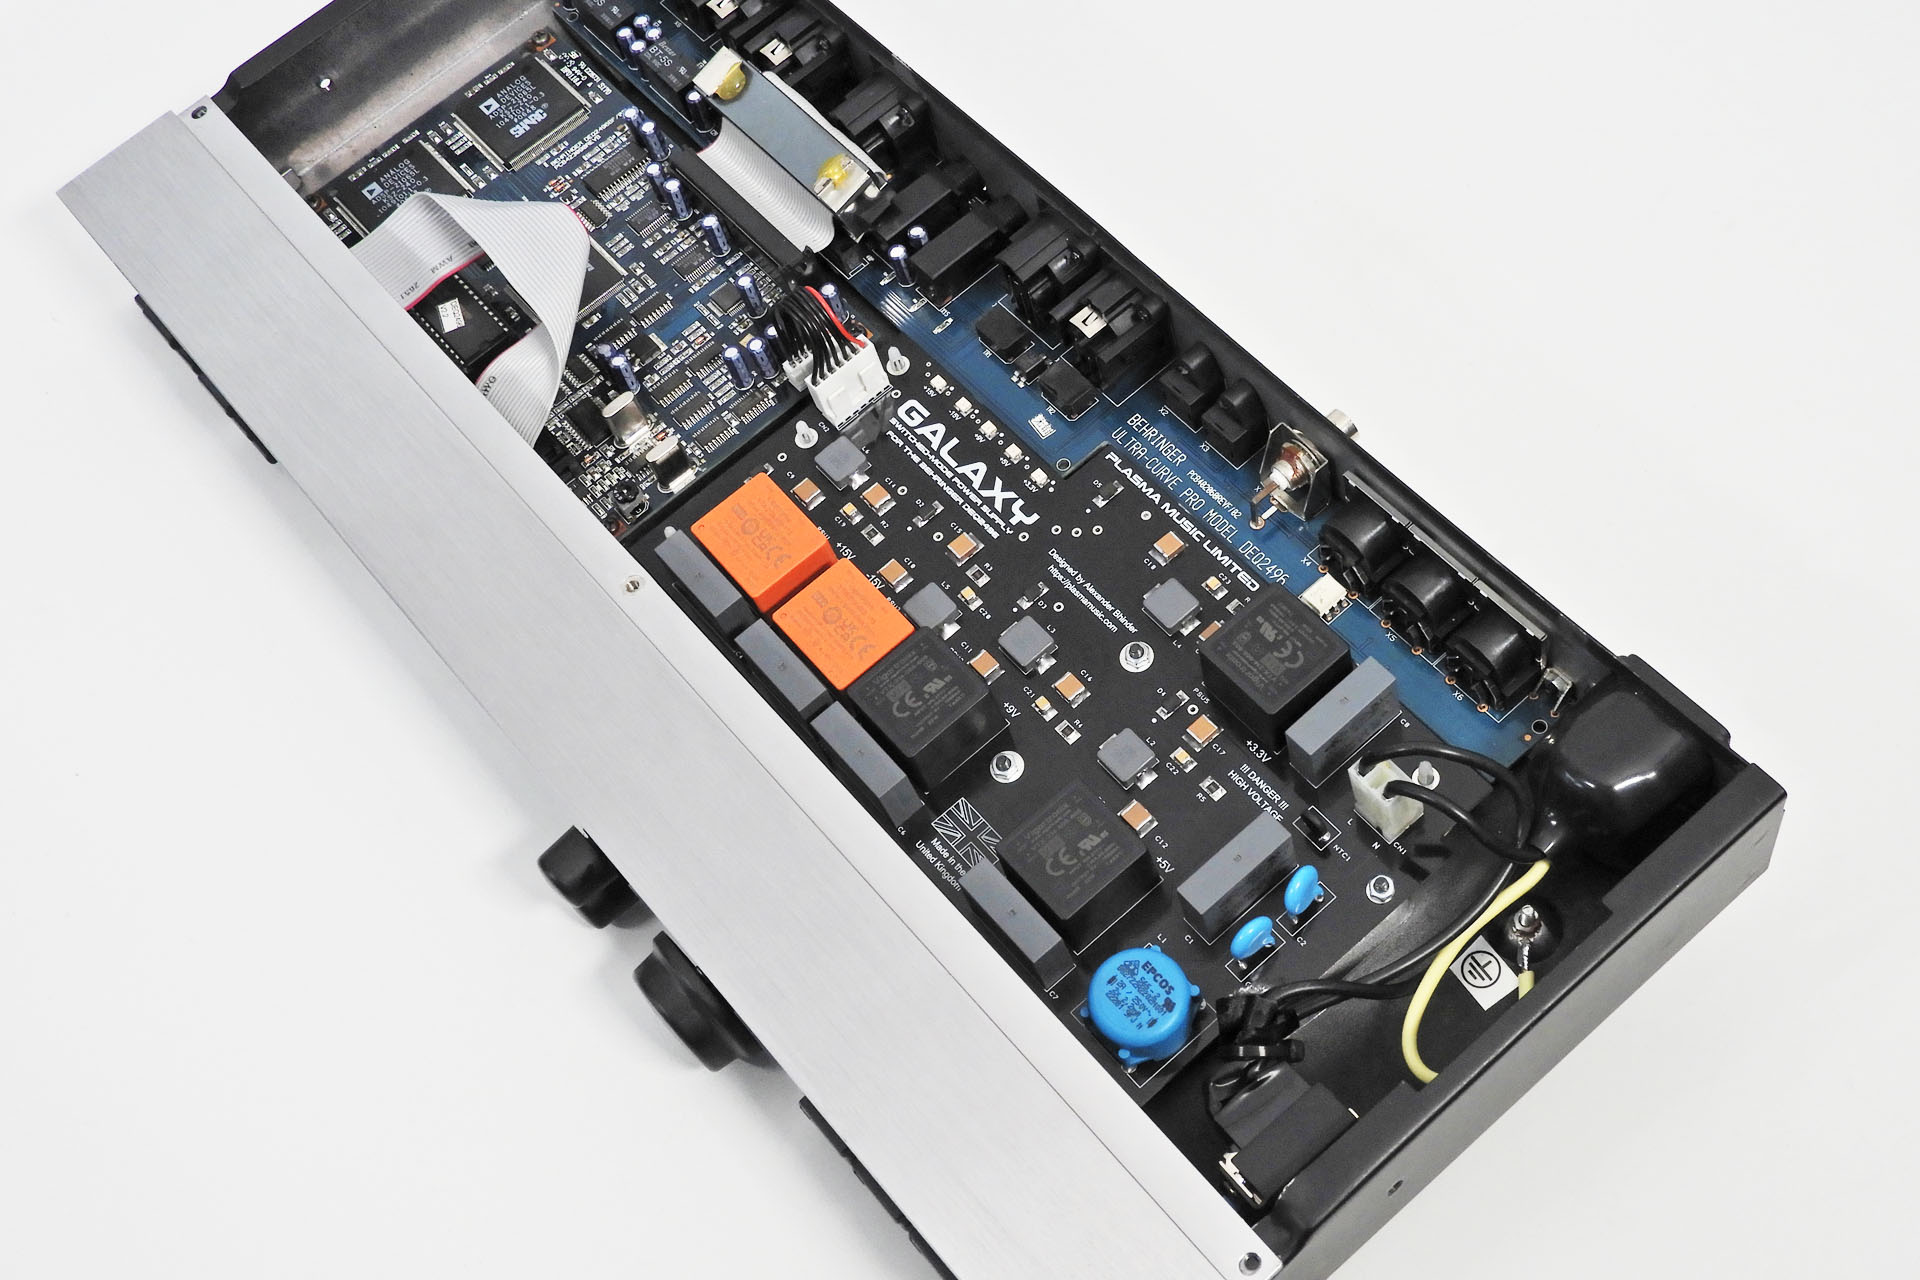
Galaxy replacement power supply for the Behringer DEQ2496 fits like a glove
Galaxy fits like a glove into the Ultracurve Pro.

Had I designed a power supply similar to the Behringer PSU2496 (or Eton ET166), I don't think I'd have come up with anything much better, to be honest. As I've already commented, it's actually a good power supply! Anyway, fortunately there's enough room in the DEQ2496 case to develop something a little special and what this awesome processor really deserves.

Galaxy is also a SMPS but with several differences to the Behringer PSU2496.

Unlike the PSU2496 with all its interdependencies, Galaxy offers fully independent voltage supplies, with only pre-filtered mains, common to all.

Using low-leakage AC / DC converters which are both over-voltage and over-current protected, the heat generated is much, much lower than the original PSU2496. During tests, I measured the temperatures of the converters an hour after power-up and with the top-case on. The hottest measured only 38°C. To put things into perspective, one of the processors was about 42°C.  It's quite reassuring that Galaxy is running cool and not significantly contributing to the heat build-up inside the Ultracurve as was its predecessor.

Galaxy replacement PSU for the Behringer DEQ2496 is an easy installation
I wanted Galaxy to be an easy installation, something that anyone with a little technical competence could achieve.

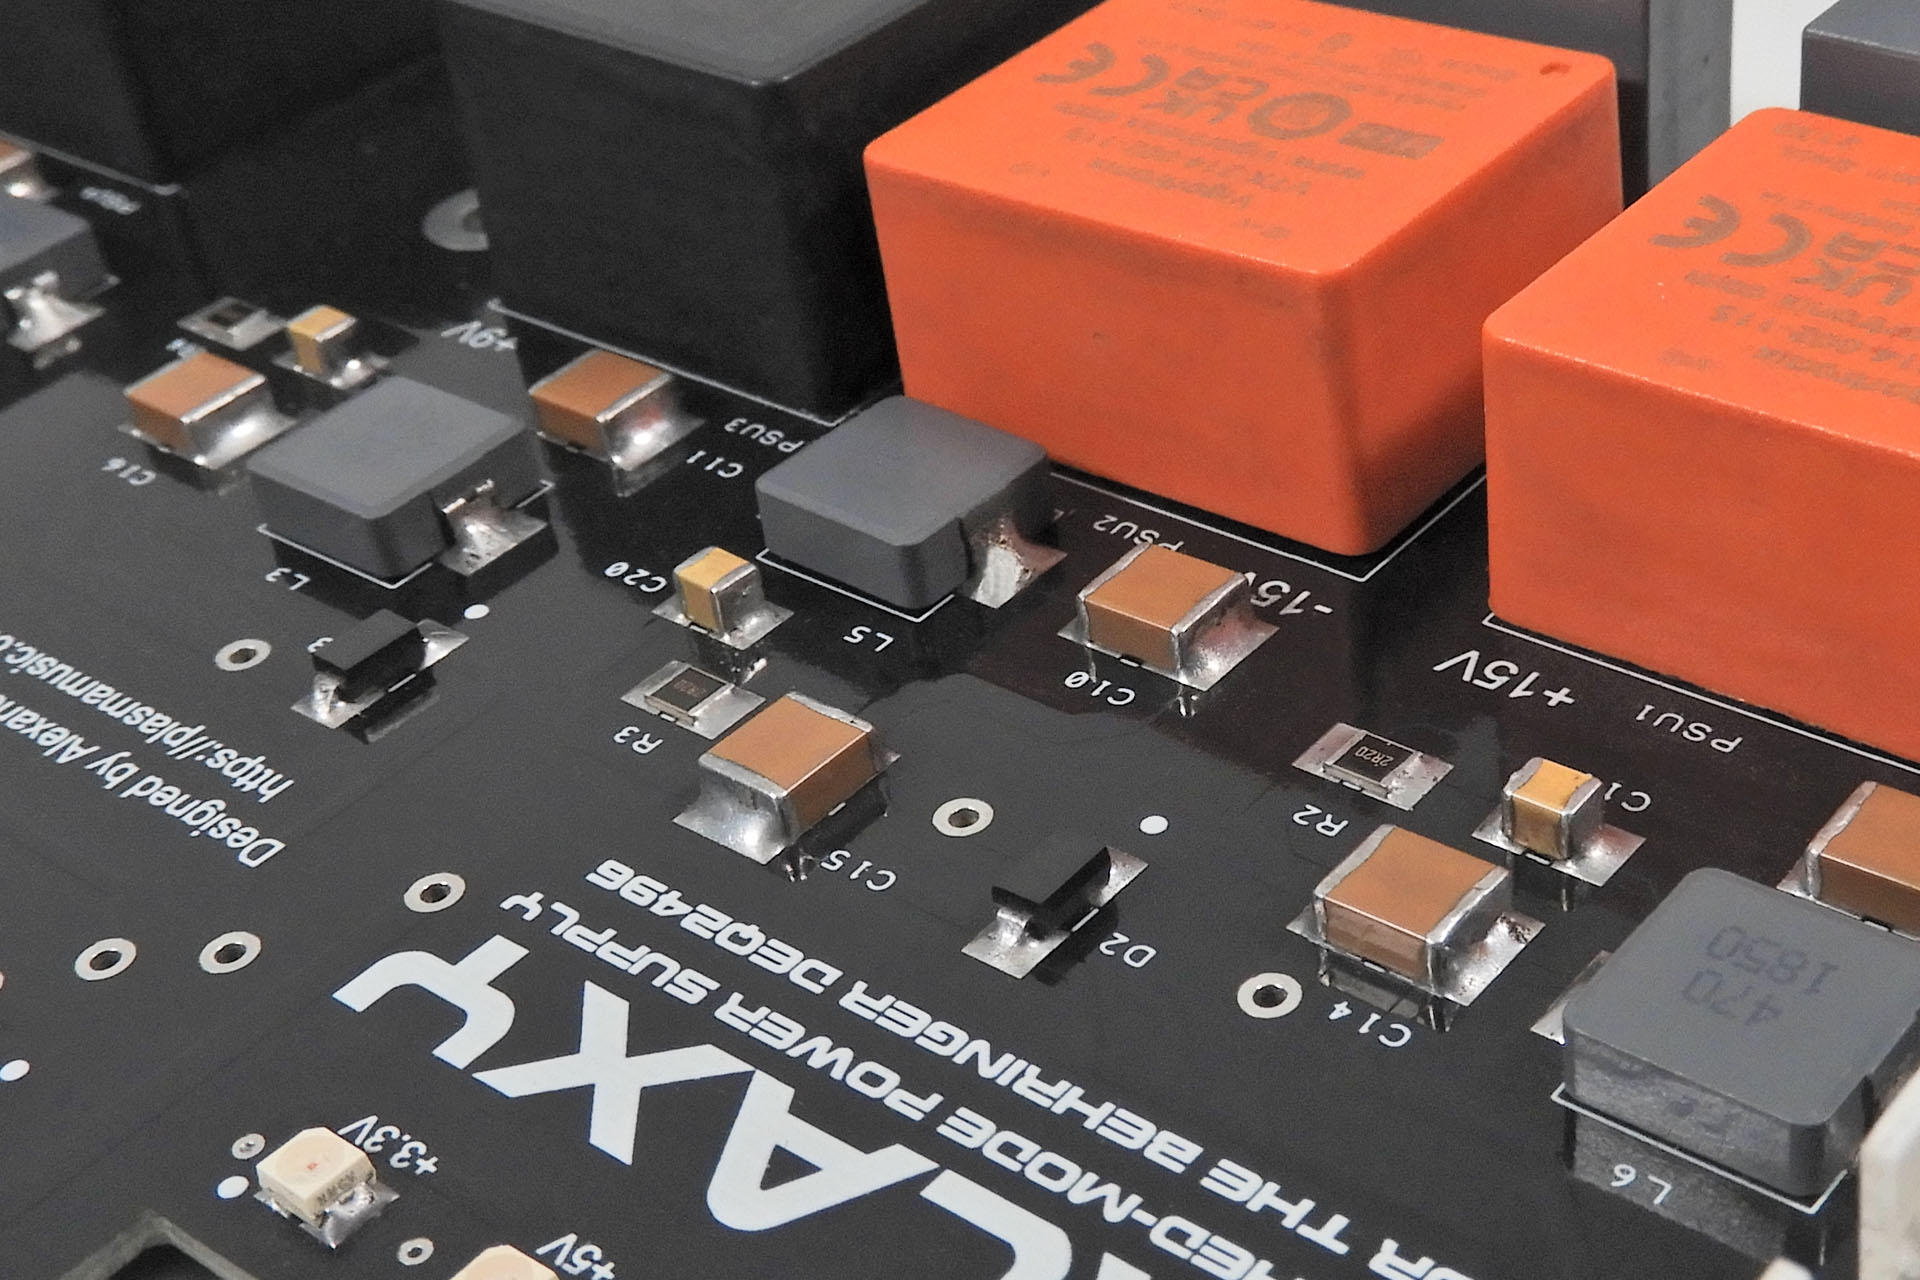
Switched-mode power supplies shouldn't generate hum like linear power supplies. Due to the nature of operation however, they can / do generate very high-frequency noise. When designing switched-mode power supplies intended for use in audio electronics, comprehensive noise filtering is paramount. To that end, Galaxy has precision-designed filters on the back-end of each AC / DC converter, including those that supply 5V and 3.3V for the digital side of things (something you don't see too often).

Galaxy has precision designed filters on all supplies
Galaxy has independent voltage supplies and each is individually filtered.

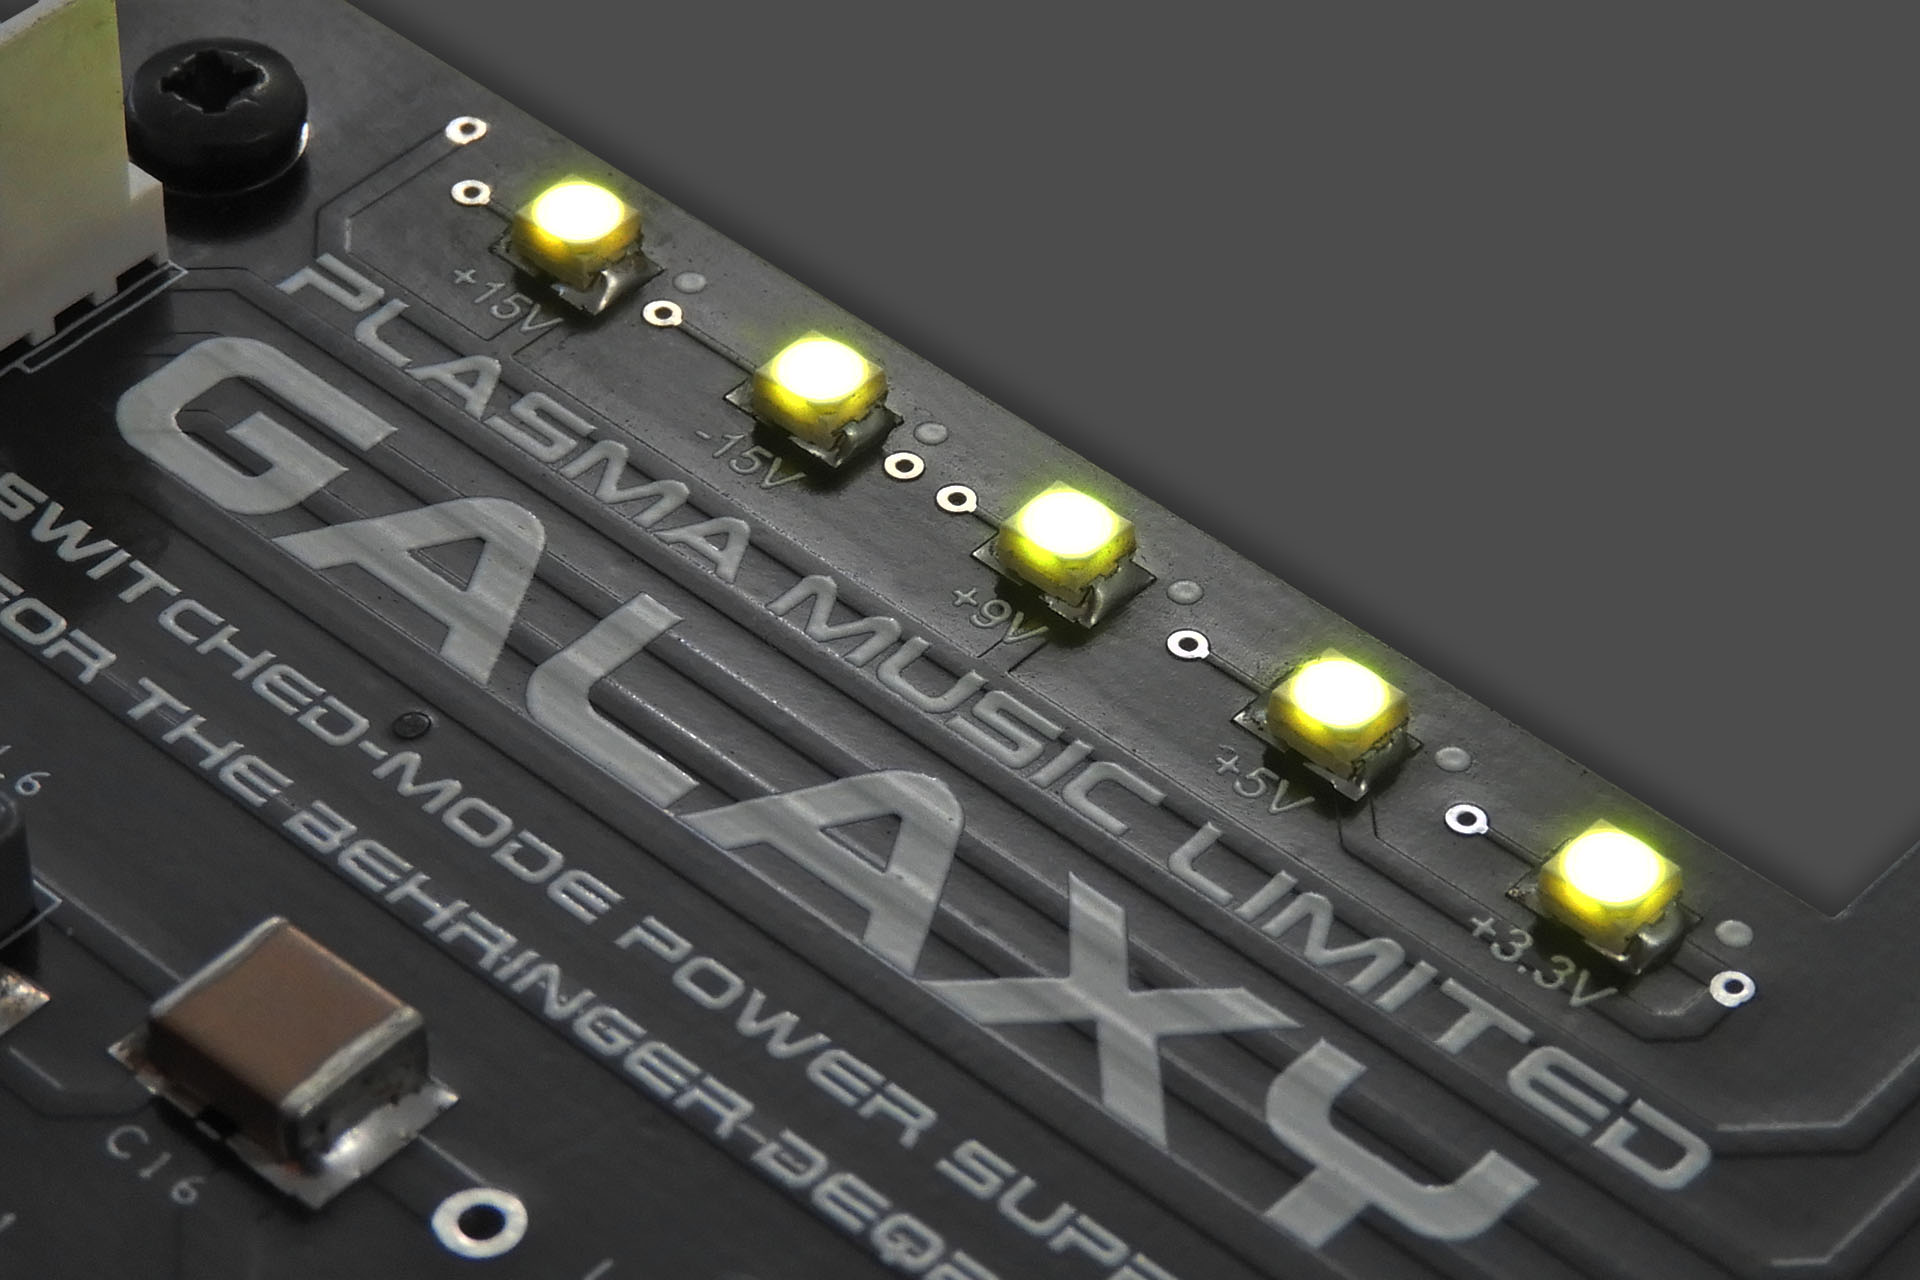
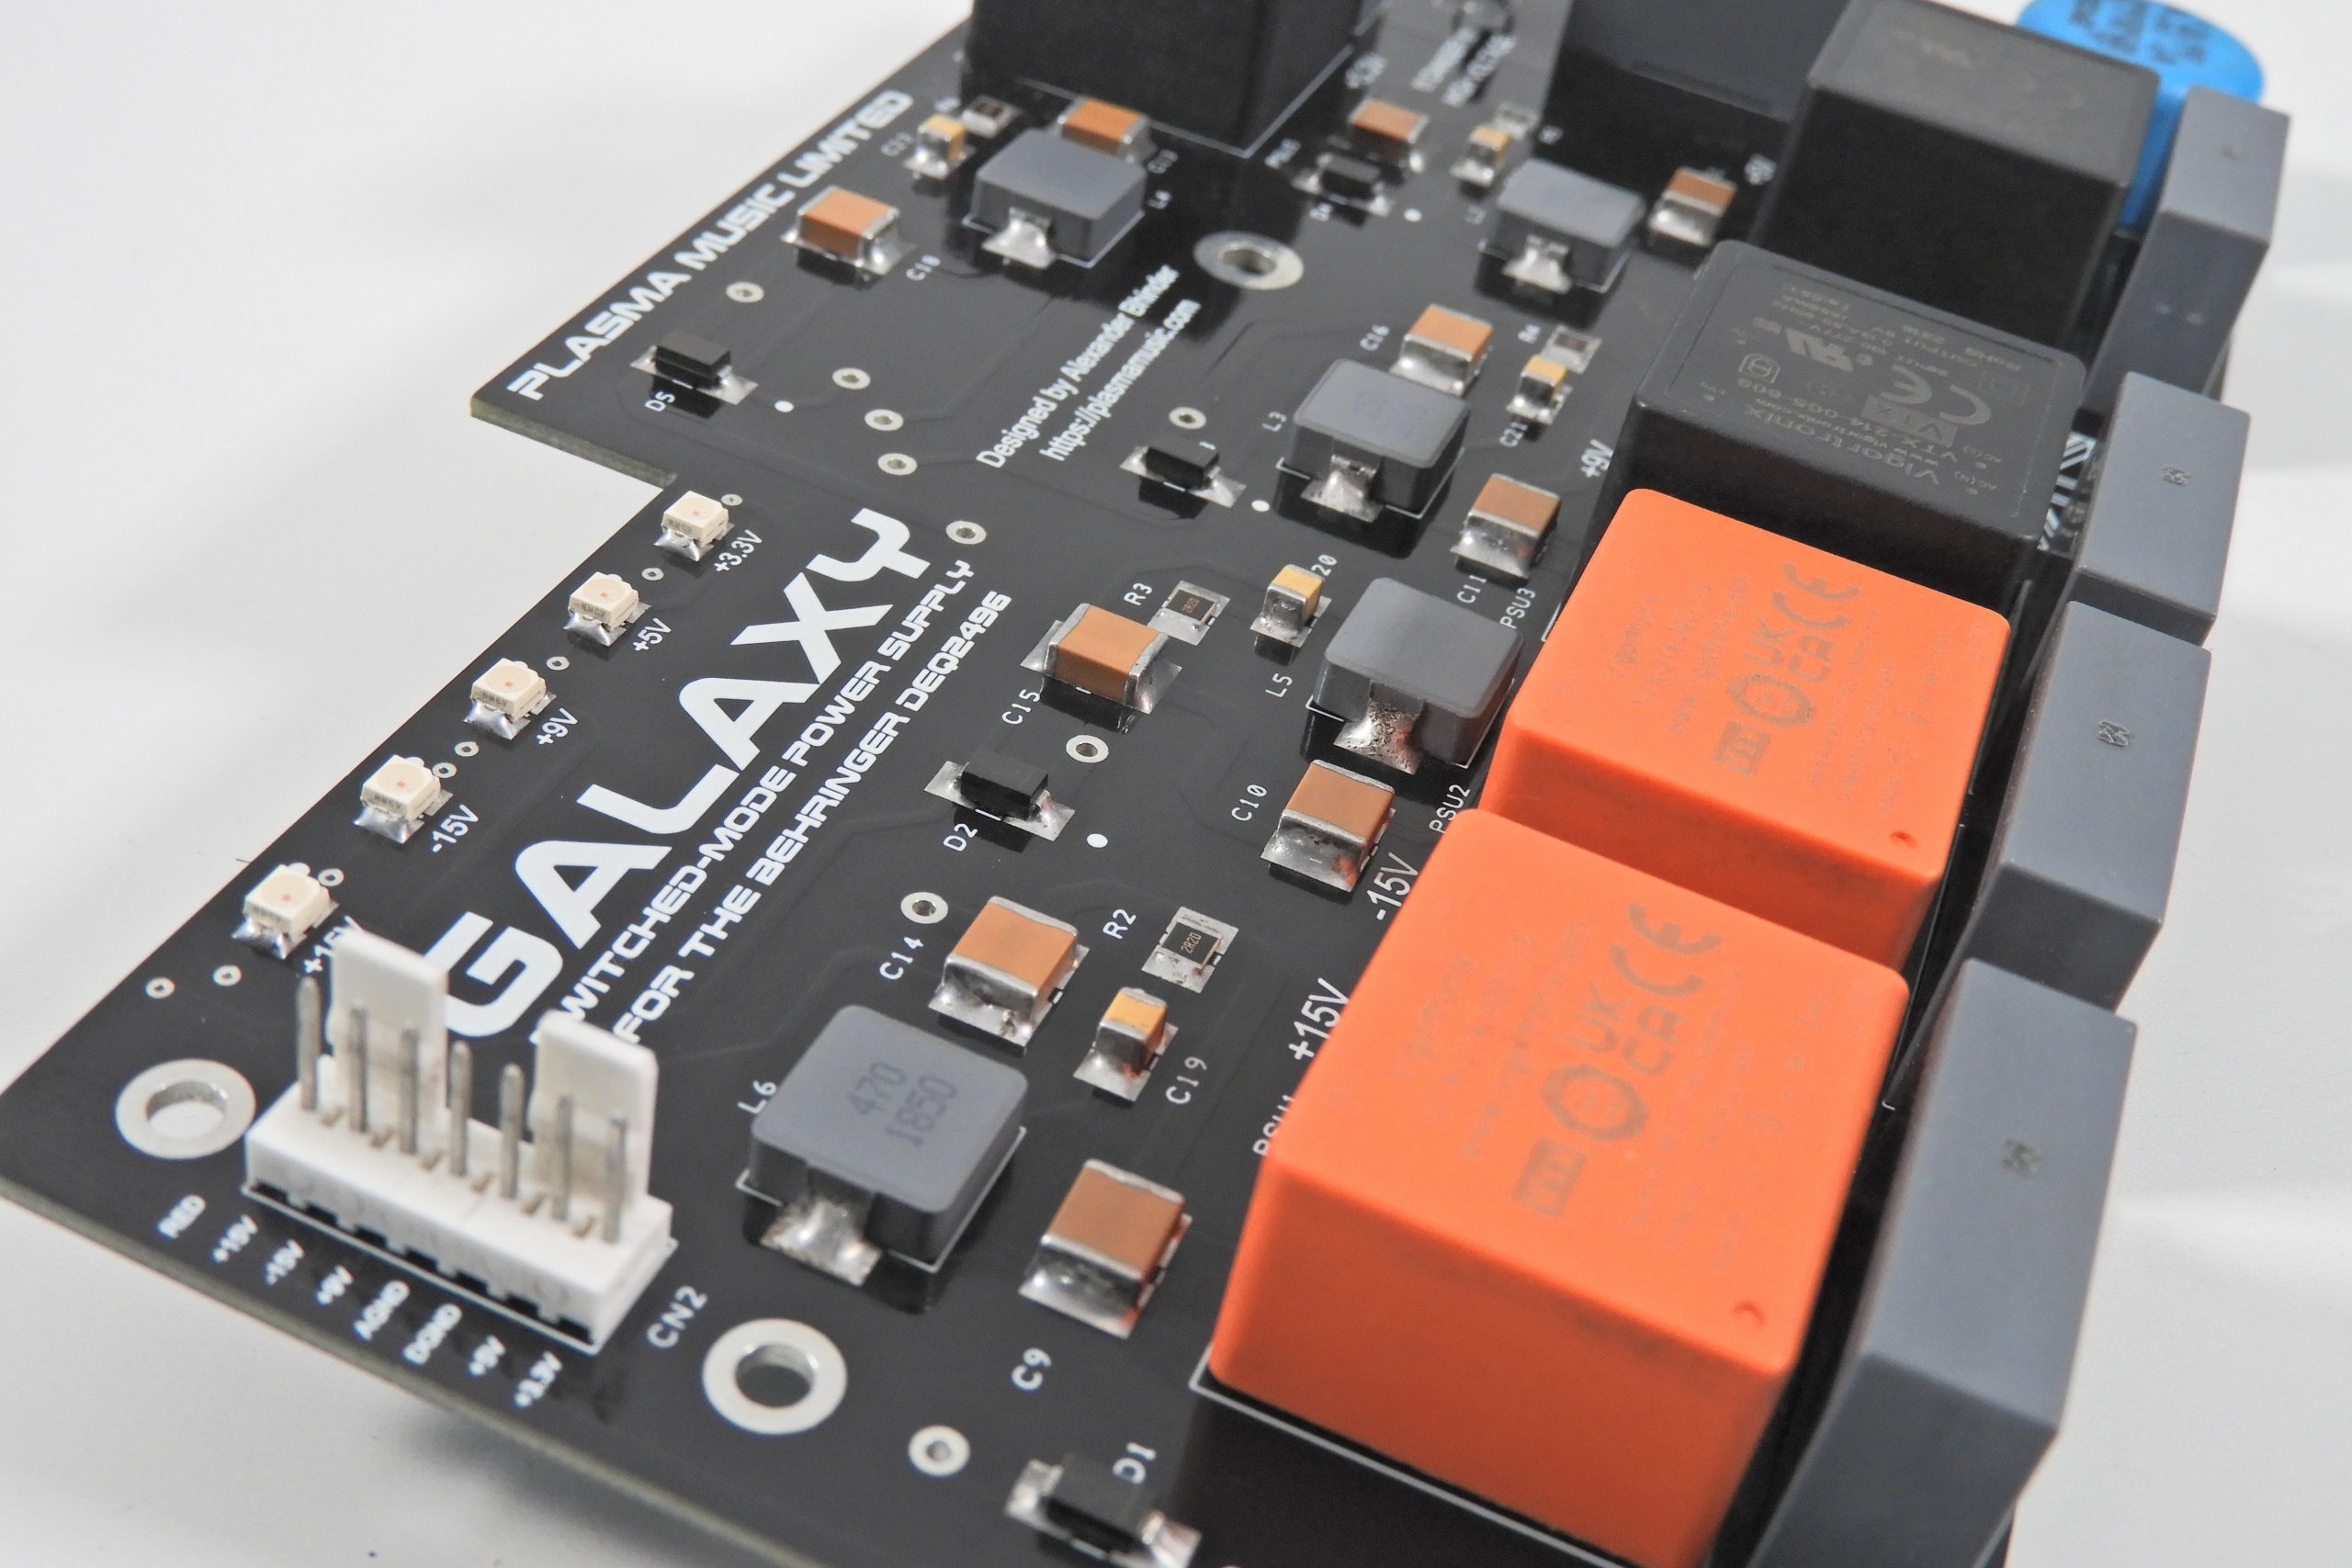
Each supply also has its own status LED giving a simple visual indication that respective supply lines are working.

Galaxy status LEDs let you know what's going on
Galaxy glows in the dark! Independent status LEDs show you that things are working. It's going to be bright in that box...

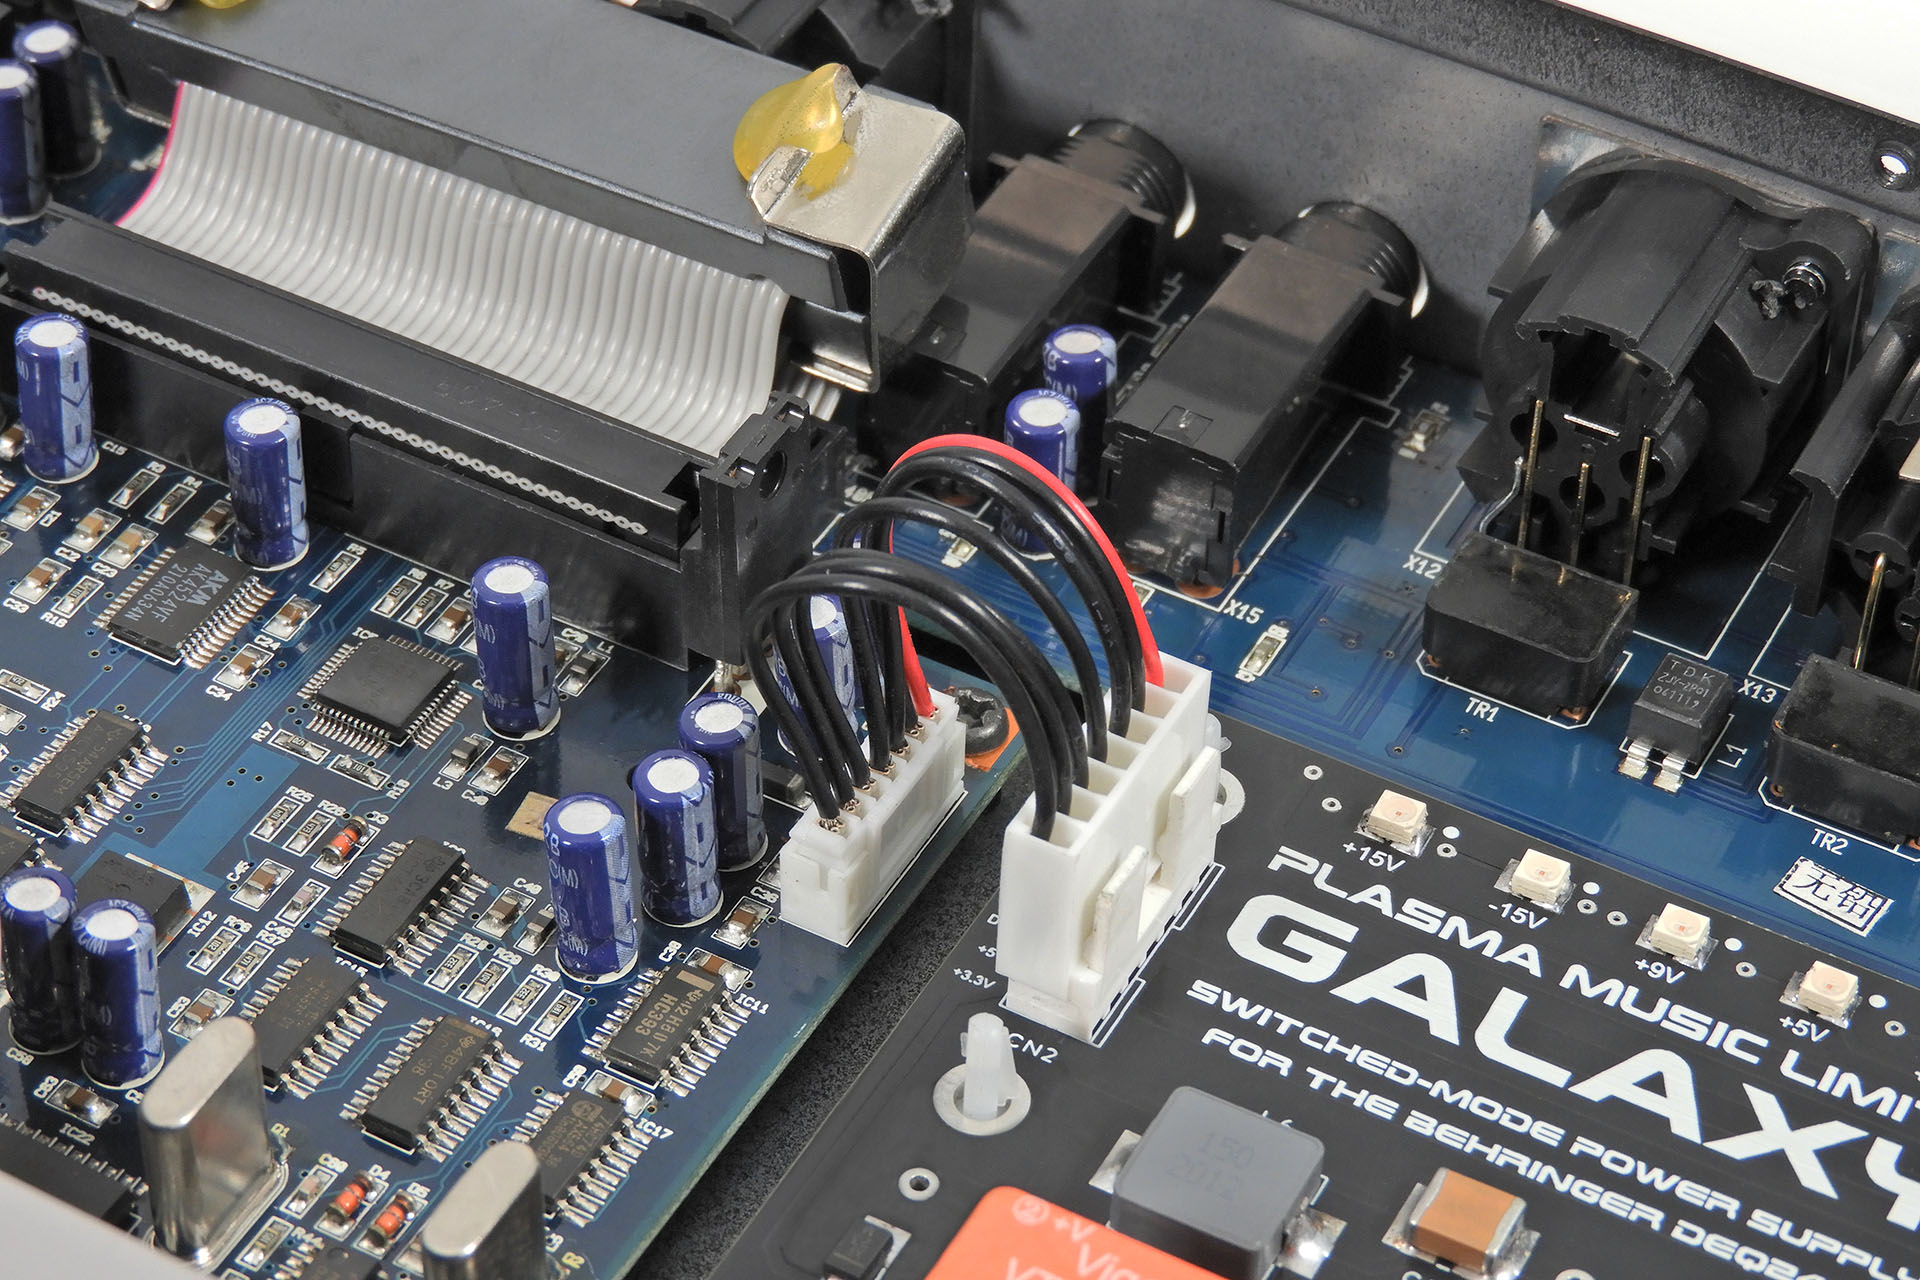
Voltages are directed to a rather over-sized 2.54mm (0.1 inch) pitch Molex KK 259 header and Galaxy is supplied with a connection cable to go to the Behringer DEQ2496 main-board.

Molex to JST connector from Galaxy to DEQ2496 main-board
7-way Molex to JST connector from Galaxy to DEQ2496 main-board is included with the kit.

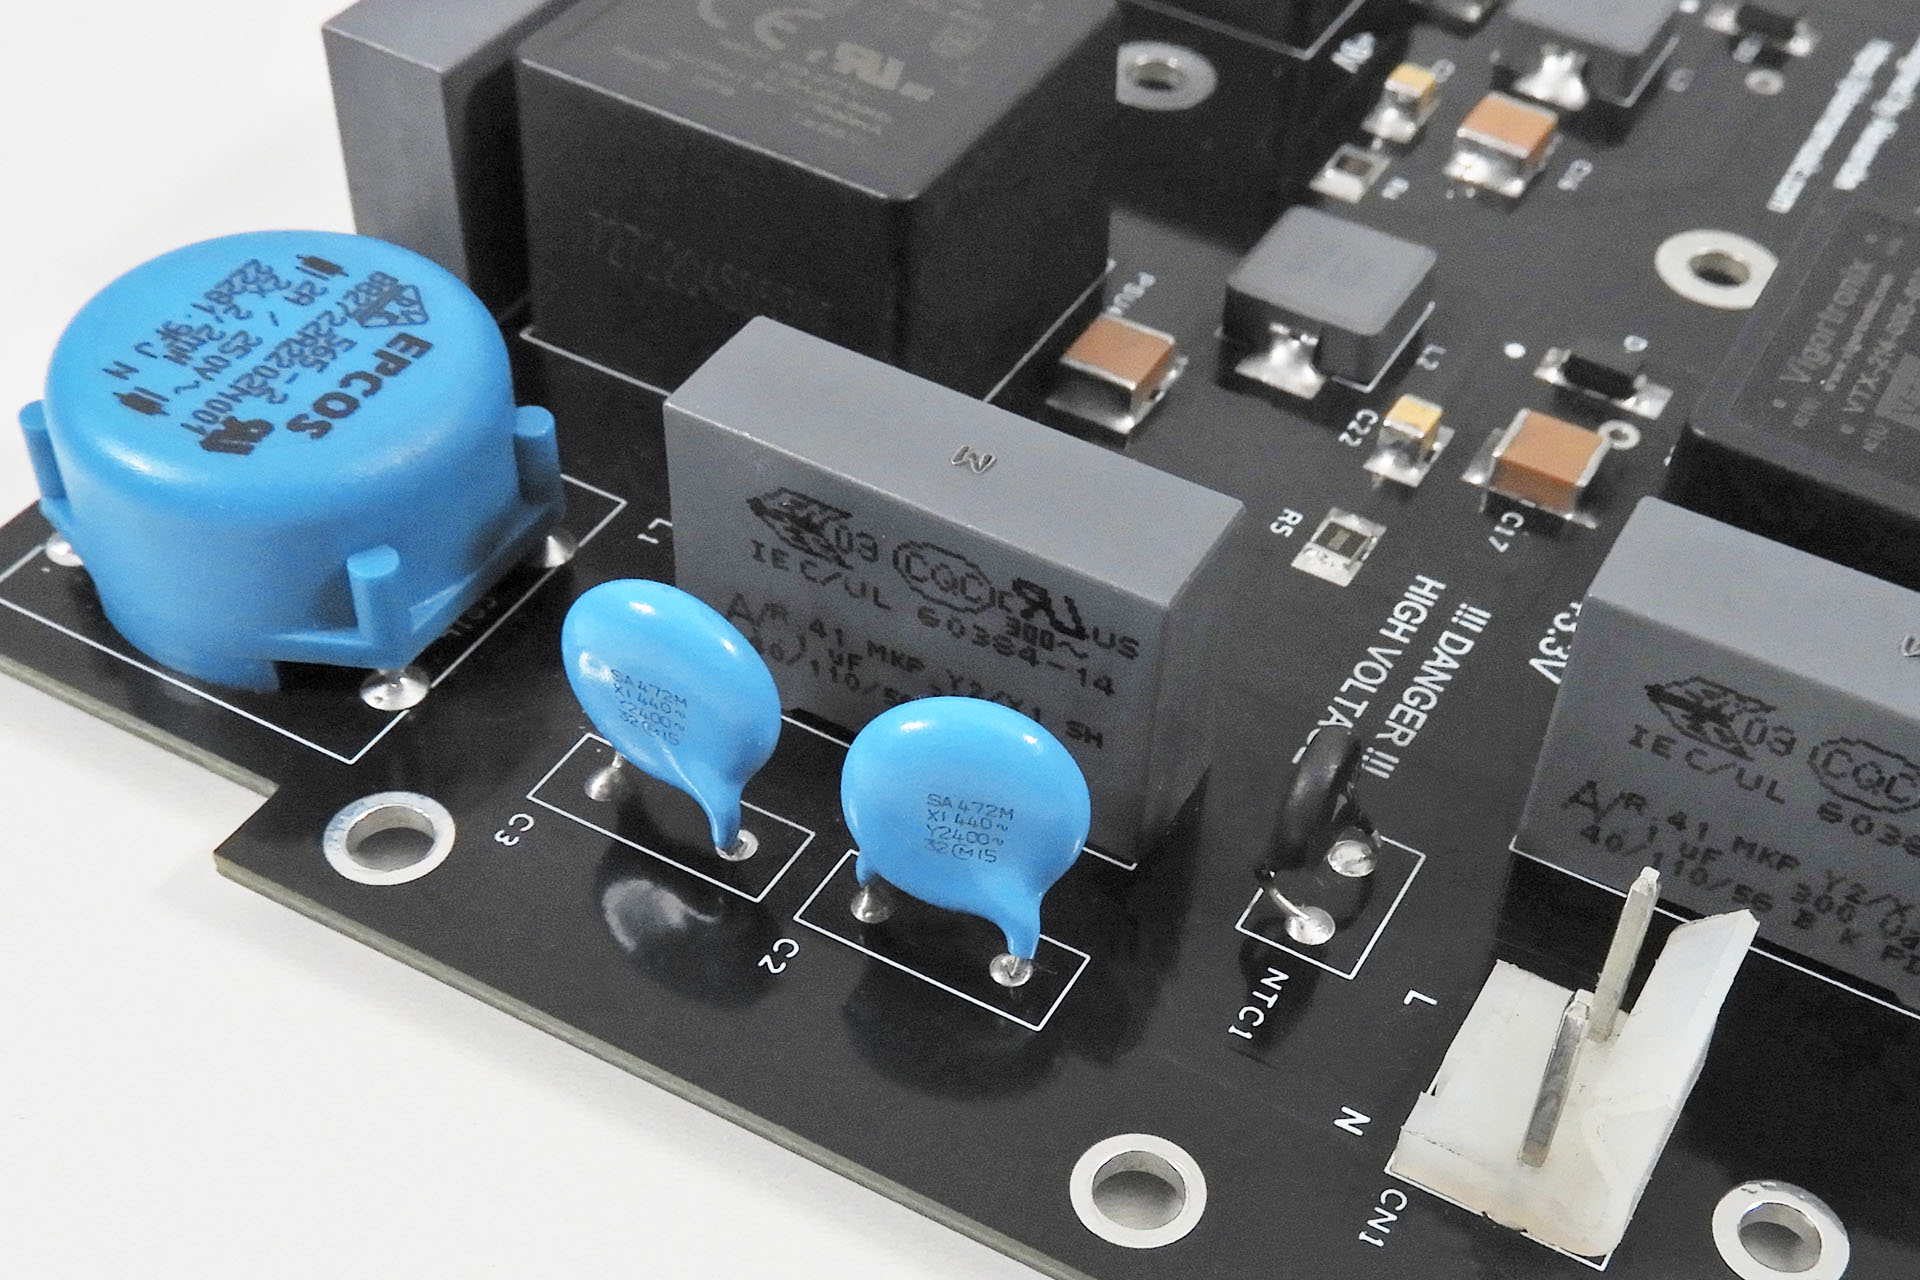
Like all my modular switched-mode power supplies, there’s very little exposed mains voltage on the top-side of the PCB.

Galaxy mains filtering
Galaxy has minimal exposed mains on the top-side of the PCB. There's no need to upgrade the Ultracurve's fuse and filtering ensures a clean and healthy mains AC is fed to the AC / DC converters.

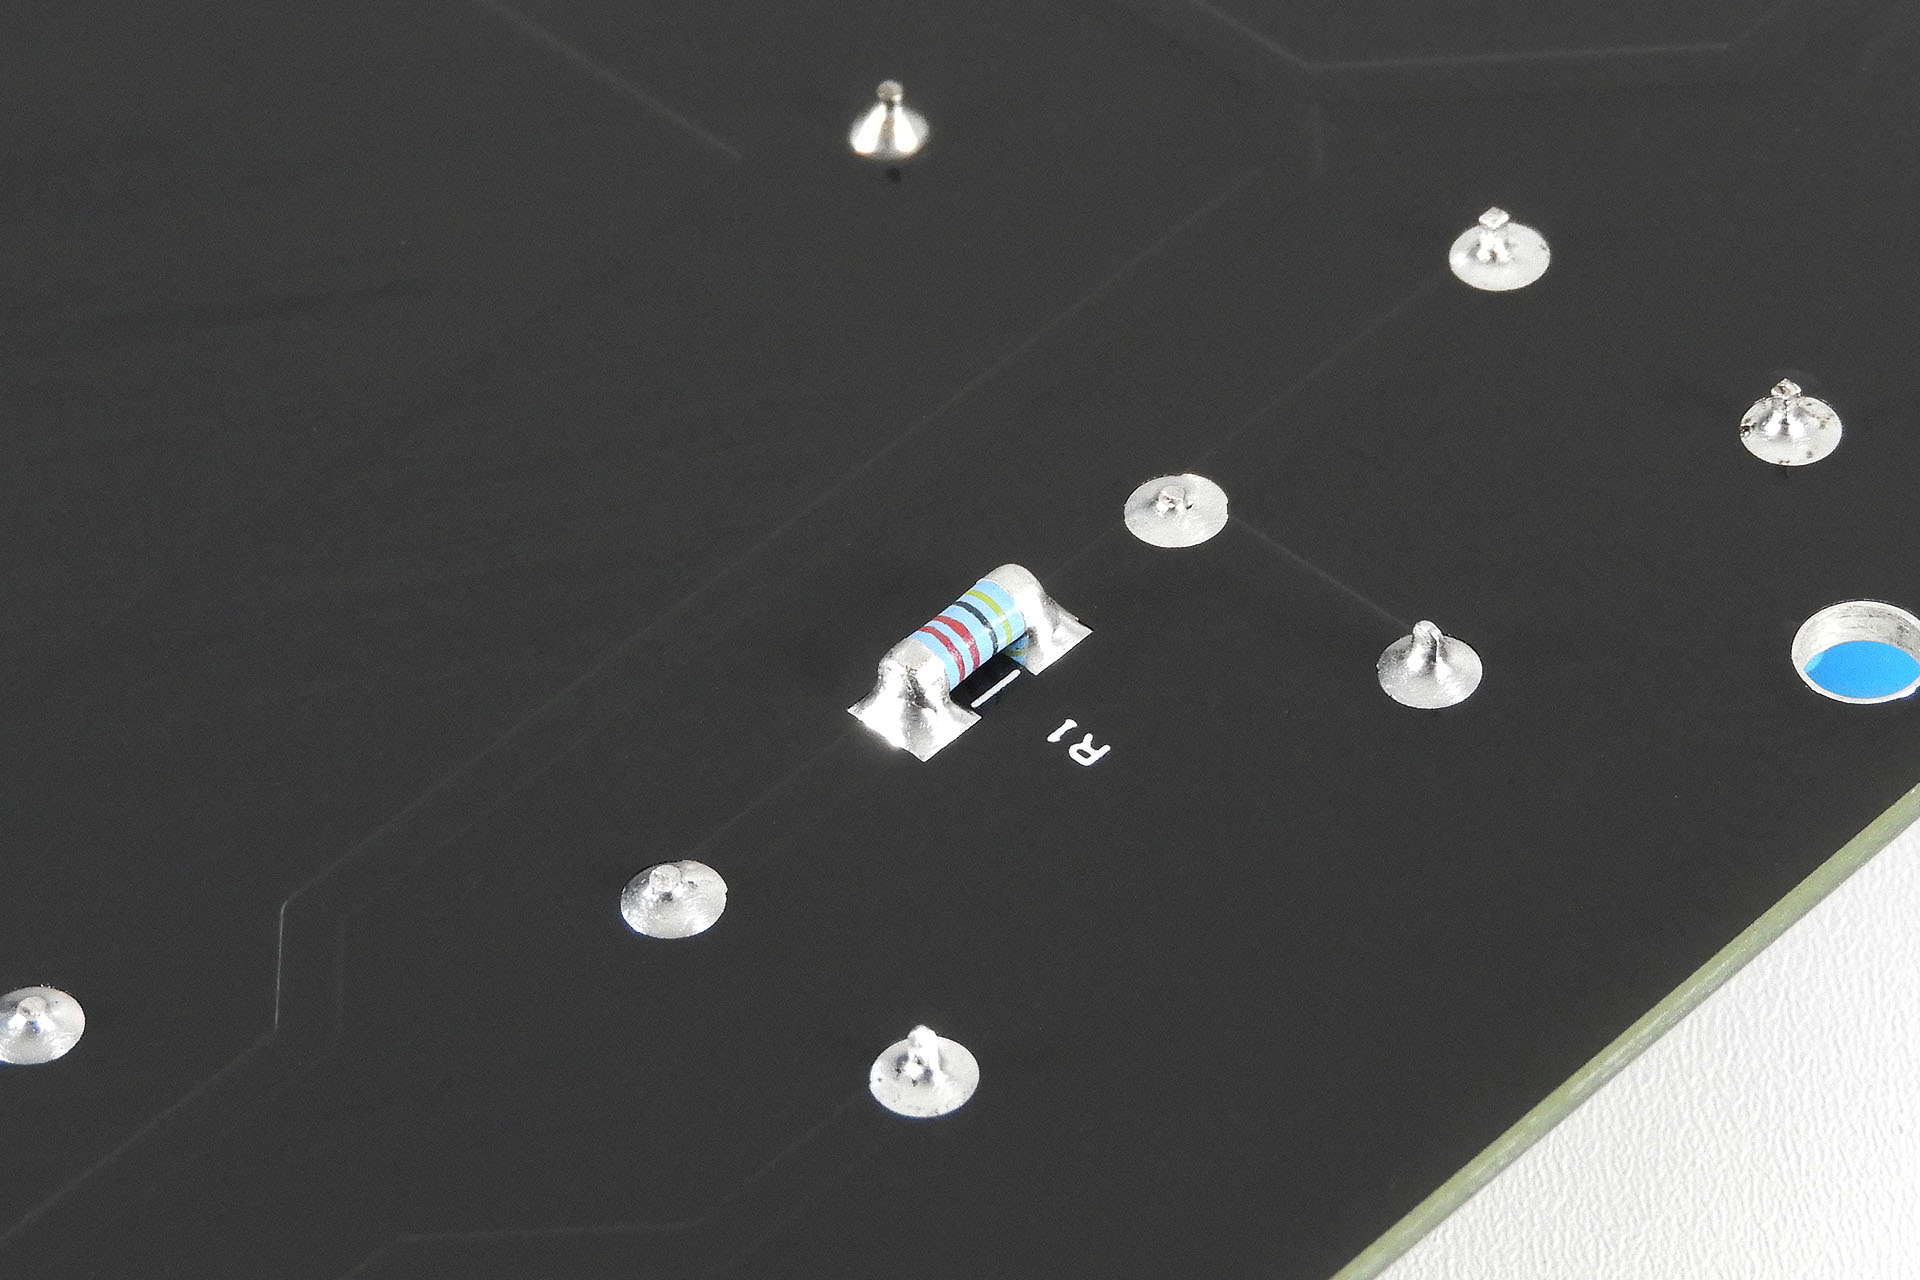
In fact, safety always comes first so again in common with all my modular switched-mode power supply designs, Galaxy features a bleed resistor across the already fuse protected mains supply.

Galaxy bleed resistor is underneath the board
To reduce exposed mains on the top-side of the PCB, the bleed resistor is mounted underneath the board.

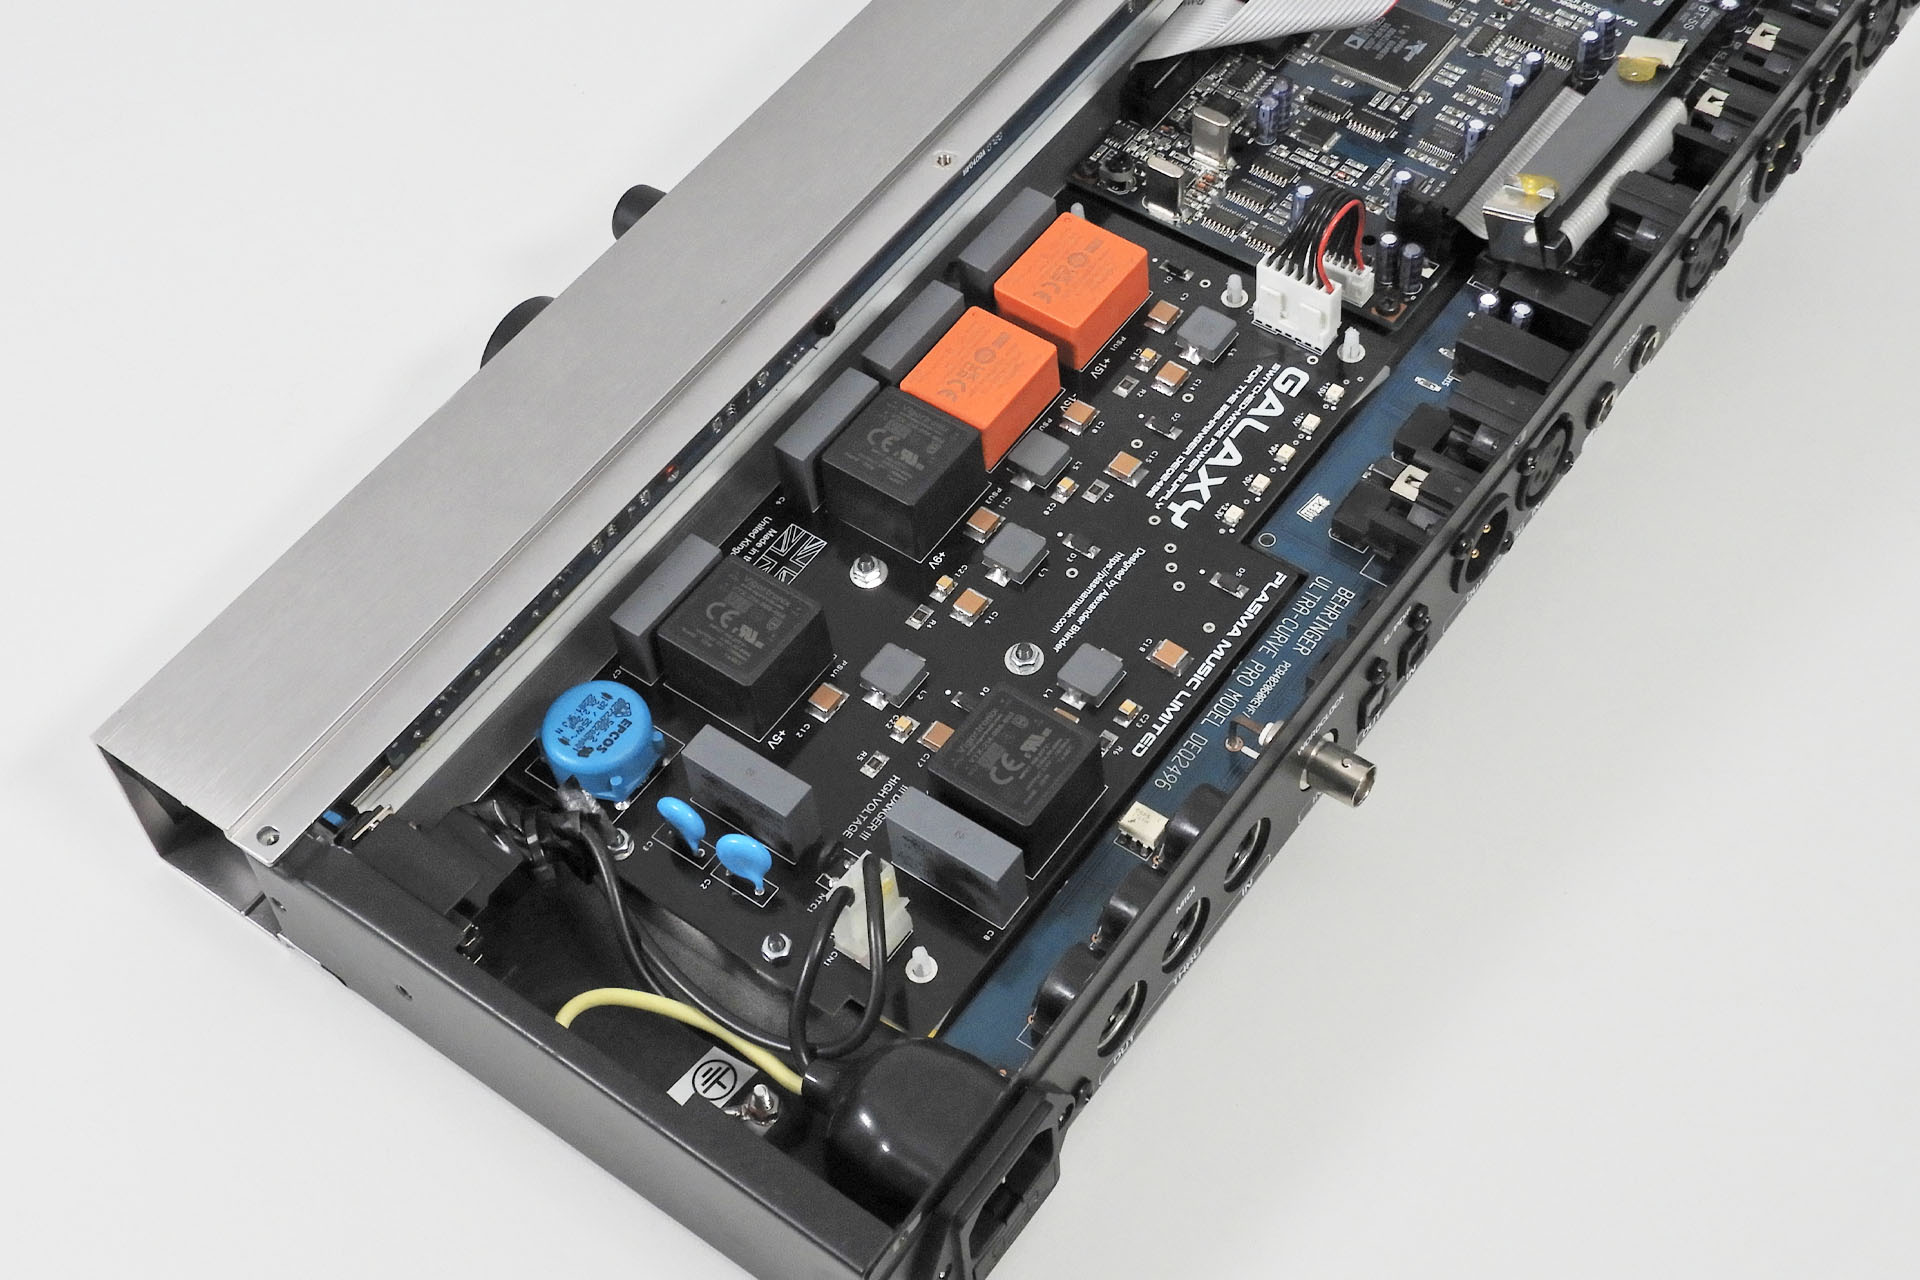
With safety still in mind, Galaxy is secured to the inside of the DEQ2496 chassis using the same mounting points as the original power supply. Stand-offs around the two connectors, reinforce the PCB and prevent the PCB from bending when connecting the mains supply from the switch and the connector from Galaxy to the main processor-board.

Galaxy mounting to DEQ2496 chassis
Galaxy uses the same mounting points as the original power supply and is very secure.

After measuring the current consumption of each voltage line, I wanted my Behringer replacement power supply for the DEQ2496 to have as much headroom as possible. One of my initial design objectives therefore, was that each voltage supply of Galaxy should be able to offer at least twice the current that is required.  Taking advantage of the space available in the DEQ2496 case, I was able to fulfil that objective. Not stressed and with ample headroom, this is one reason why Galaxy runs so cool; the power supply can actually deliver considerably more power than is needed.

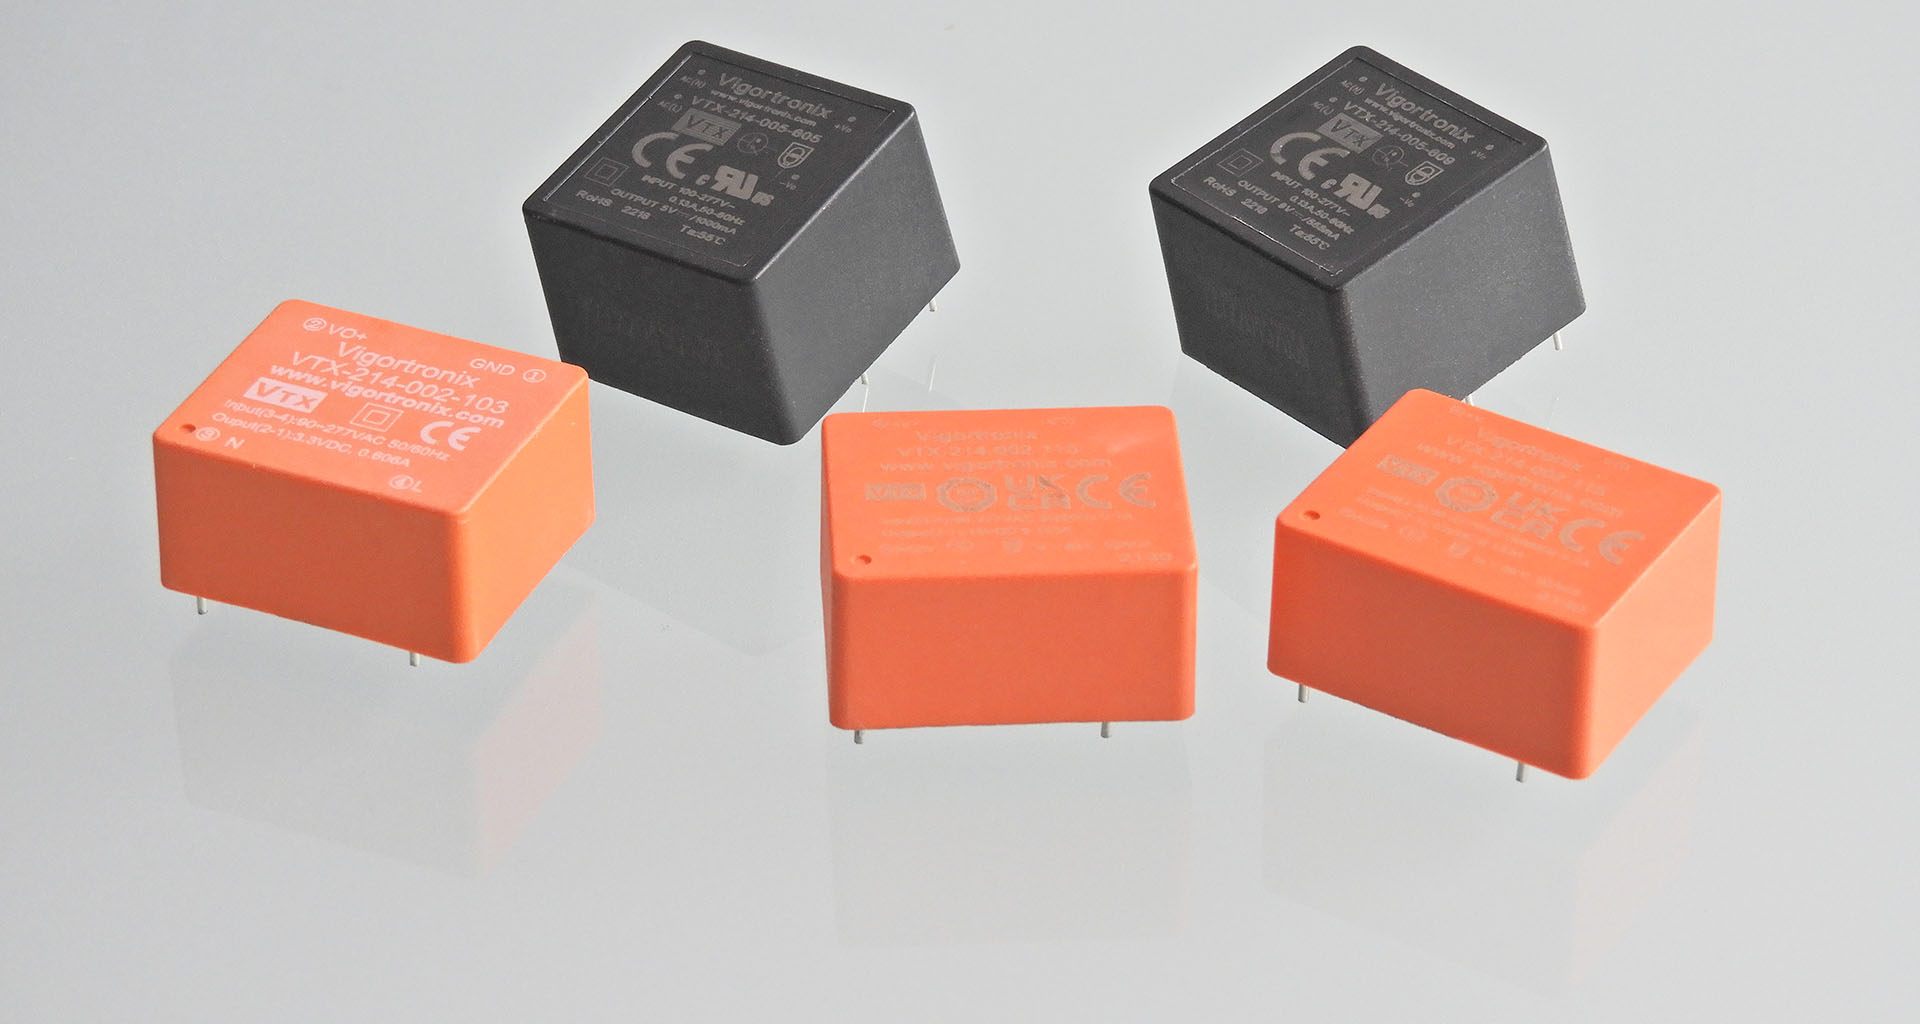
Galaxy uses British made Vigortronix AC DC converters
Galaxy uses high-specification, low-leakage, British made Vigortronix AC / DC converters with built-in over-current and over-voltage protection.

I'm so sorry to have to say this but one potentially big issue with Far Eastern manufactured equipment that's powered from mains, is the lack of standardisation, compliancy and safety of the power inlet. Quite frankly, it's all over the place. Live and neutral are often swapped around and it's very common for the power switch to be connected to the neutral line. This is really frustrating when it comes to confirming which line the fuse is in, for example.

"So what's the big deal?" I hear you ask.

Hey, don't take my word for it. The following was taken from some PAT testing guidance I found on line here.

Under normal circumstances, the current will go to the appliance down the live wire first passing through the plug fuse (and any internal fuse).  If the appliance has a fault and draws too much current, the fuse would detect this and blow.  If the live and neutral wires are crossed over, the current passes down the neutral first.  The result is the equipment user could be at risk if the appliance has a fault.

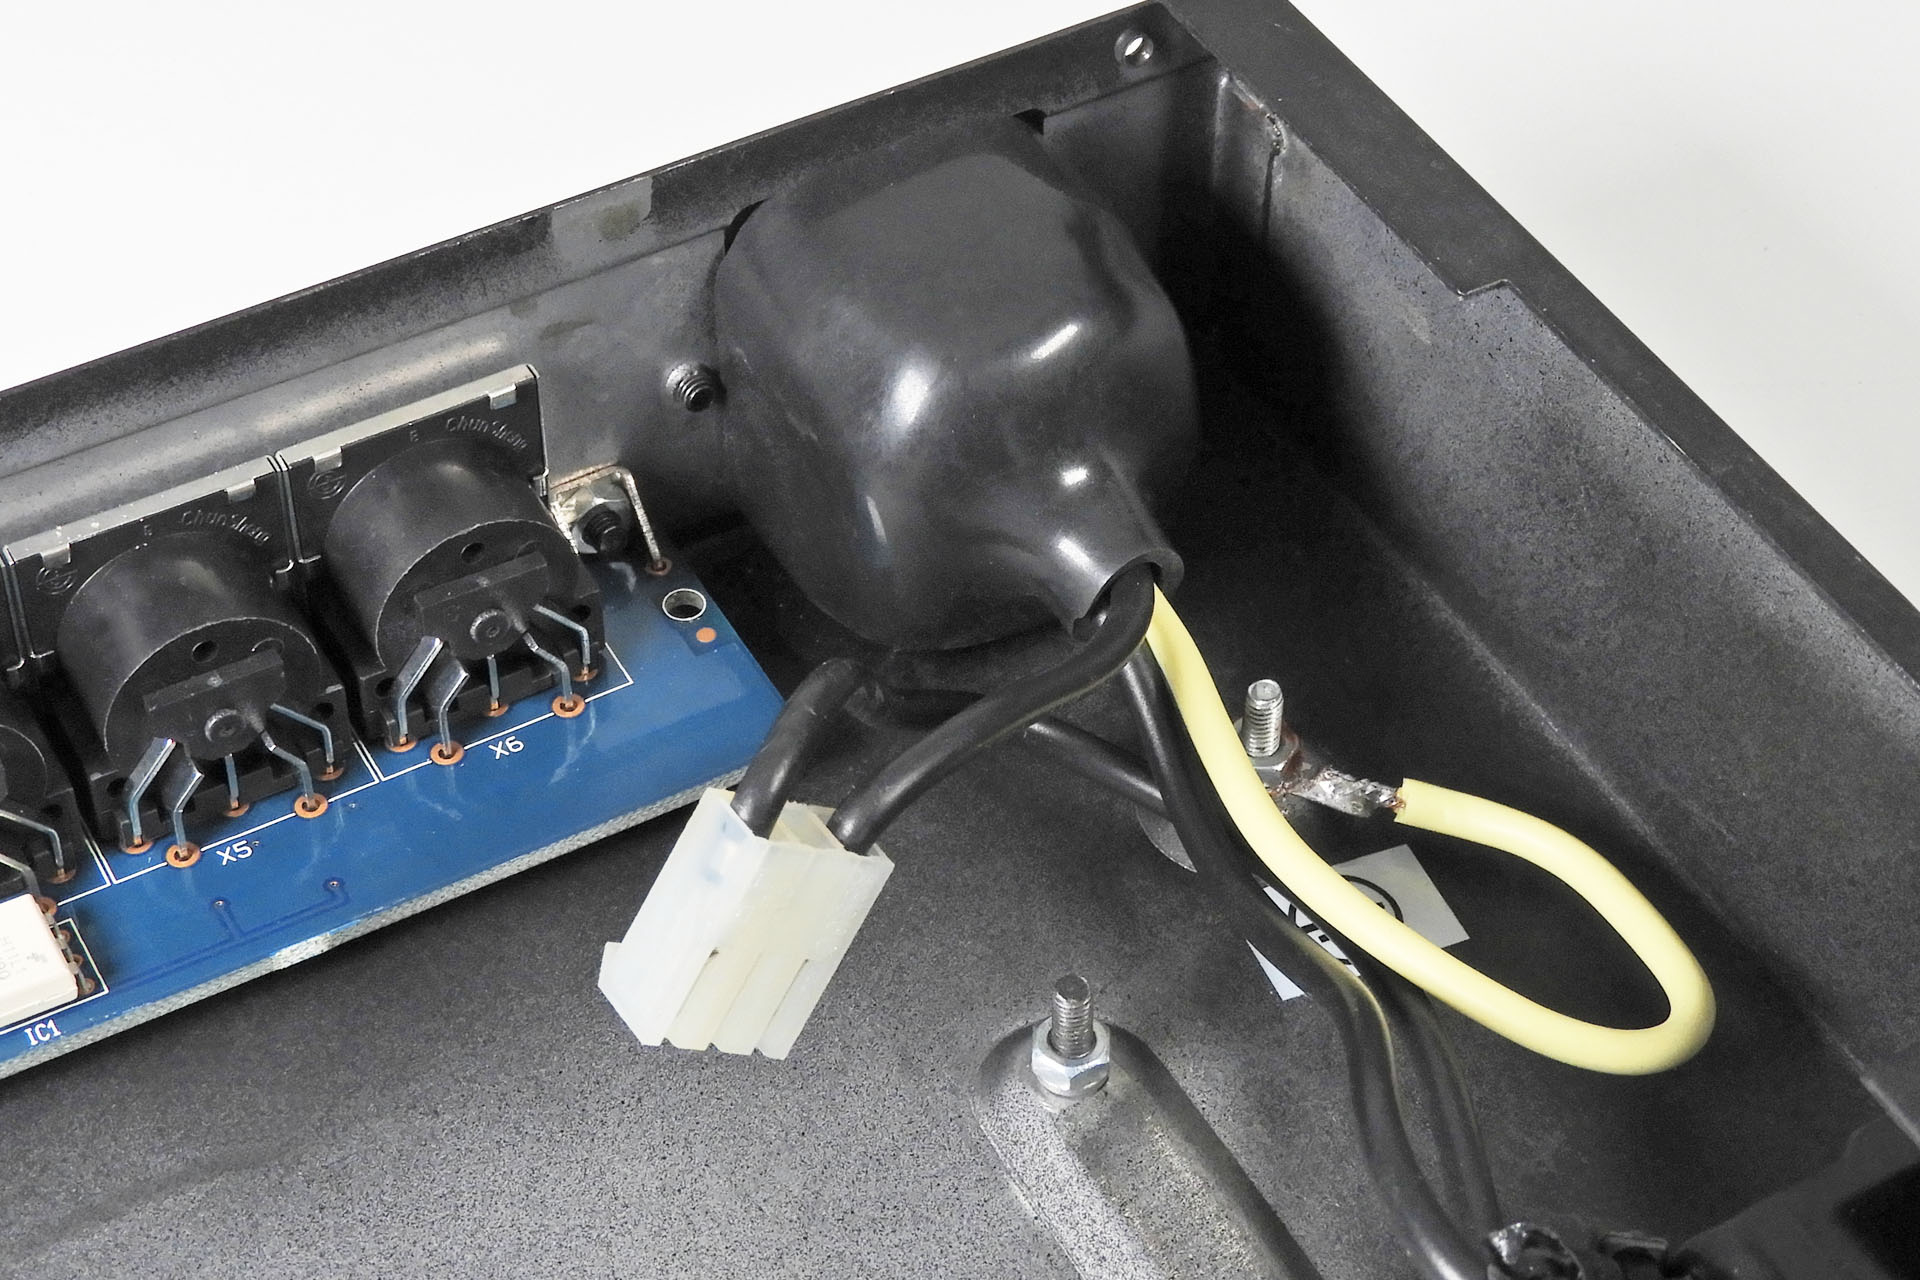
I therefore include a couple of bits with Galaxy like an insulating boot that fits over the back of the IEC socket. I also recommend that while the box is open, you check the input mains polarity and correct it if it's wrong.

Mains power input to the Behringer Ultracurve Pro can be non-standard
Galaxy includes a kit to help make the Ultracurve Pro a little safer. All required information is included in the installation manual.

Behringer has a well established reputation for making affordable audio gear. It doesn't always mean however, that quality needs to be compromised. The DEQ2496 Ultracurve Pro epitomises that fact. Competitively priced, it's difficult to find something similar. My Galaxy replacement power supply for the DEQ2496 will ensure that at least the power side of things will run smoothly and last for a very long time. 🙂

Replacement power supply for the Behringer DEQ2496 Ultracurve Pro
Replacement power supply for the Behringer DEQ2496 Ultracurve Pro.

Installing Galaxy is amazingly straight-forward for anyone who has experience with opening up 19-inch rack gear. Personally, I would check the polarity of the mains live / neutral, correct them if they're wrong and check that the ON / OFF switch is switching live and not neutral. Other than that, there's no desoldering / soldering, just four screws to remove, four replacement (longer) screws to fit, a couple of connectors to pull off the old PSU and main-board and then connect Galaxy.


UPDATE - 23rd July 2023

I’ve already mentioned that my Galaxy replacement power supply for the Behringer DEQ2496  was basically a proof-of-concept project so you can imagine my surprise when orders quickly began to match those of my other power supplies.

All of my power supplies are soak tested for twenty-four hours, prior to shipping but I’ve never been happy that I’ve only been able test them ‘off load’ which means that the respective PSUs haven't been subjected to a current demand, as they would be in real life.

On the other hand, it’s quite impractical to have original machines on which to test power supplies like Aurora for the Roland MKS-80, Supernova for the Roland Juno-106 and Guy Wilkinson’s P0004 for the Roland Super-JX and so on.

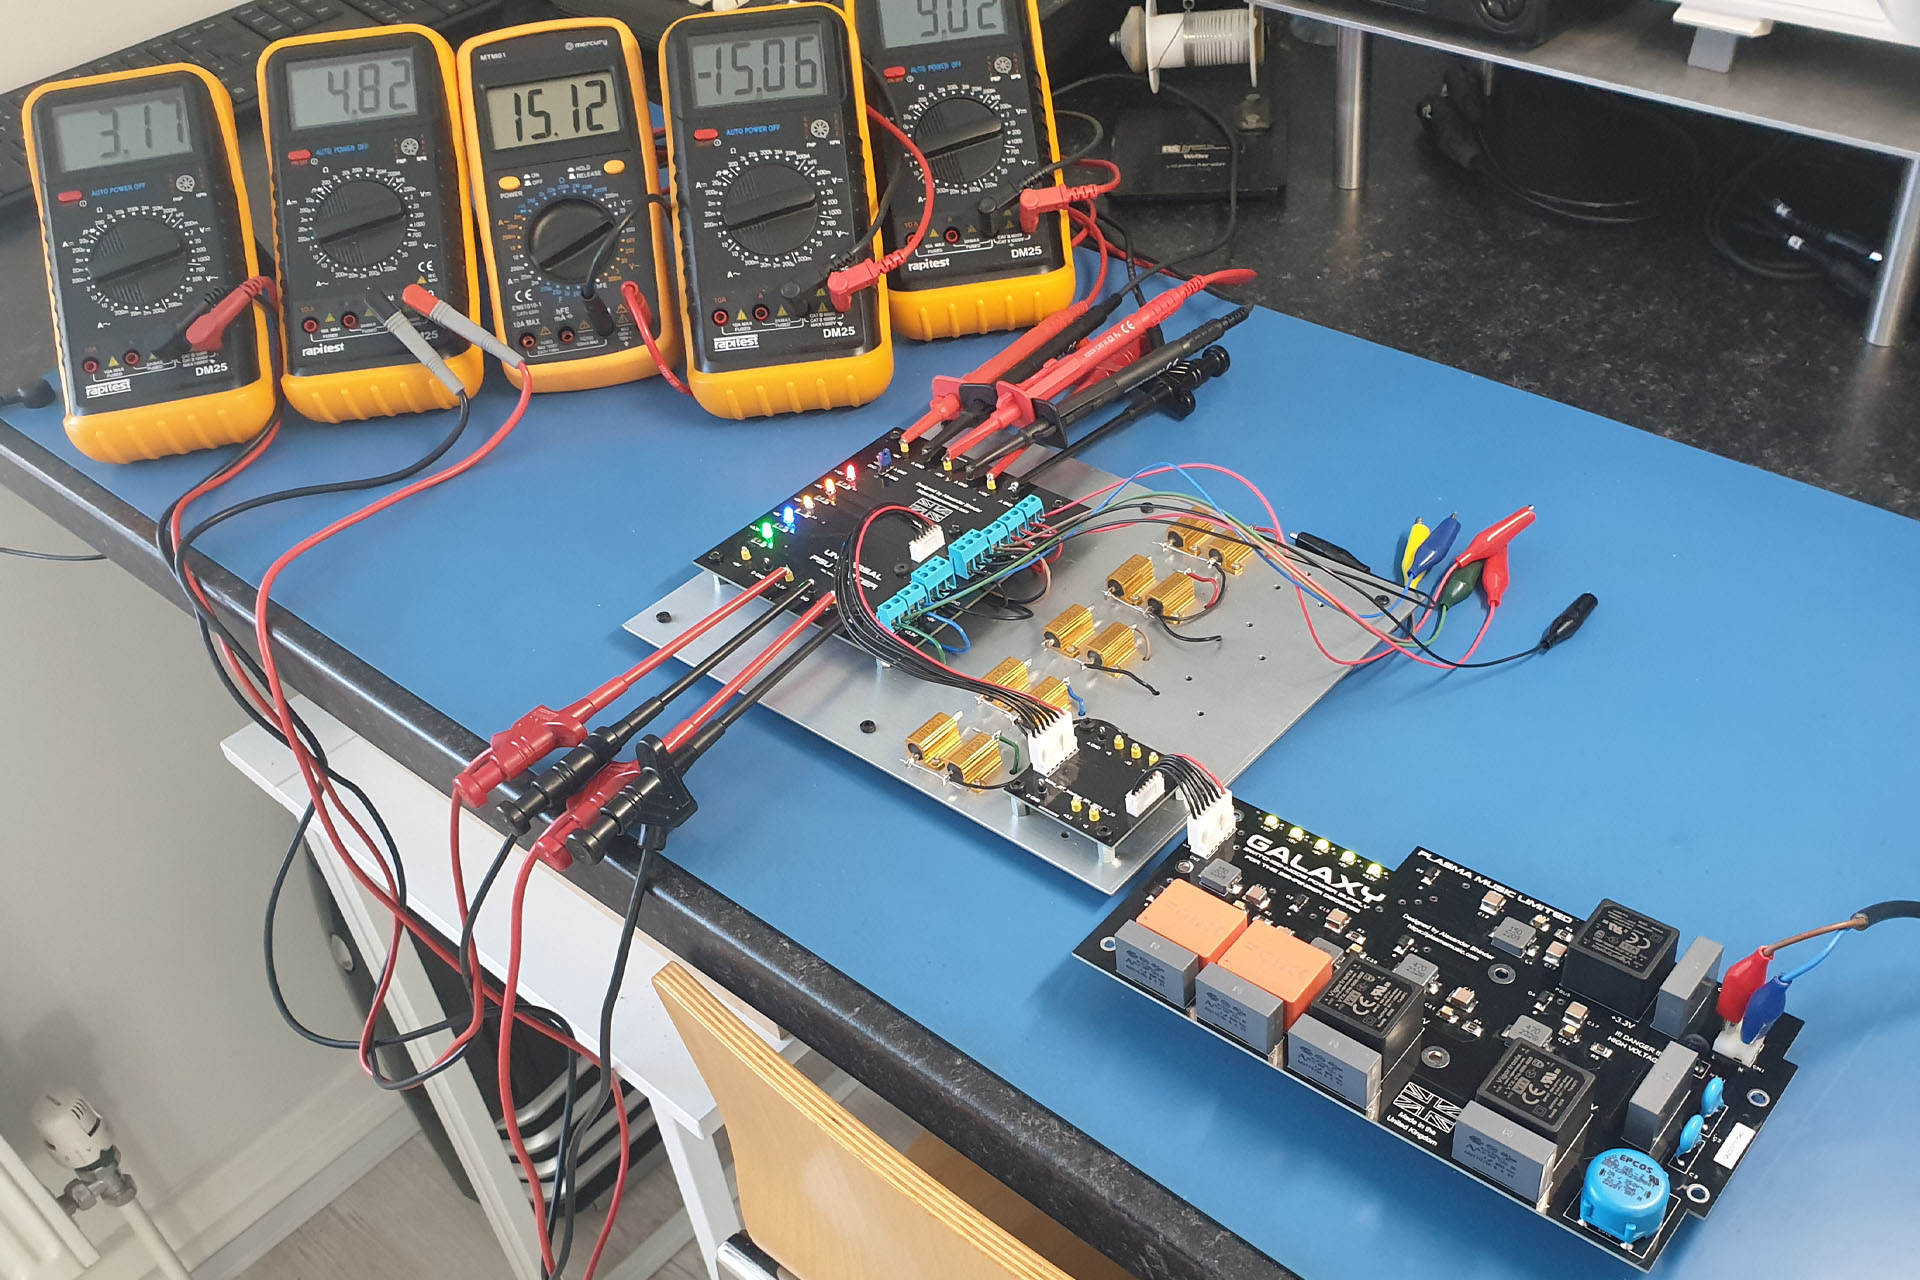
Well, that has all changed as my Galaxy project encouraged me to design a small test rig which now allows me test all of my power supplies, with a load.

Galaxy replacement PSU for DEQ2496 on test rig
Each Galaxy undergoes basic Voltage testing under load on my universal power supply test rig.

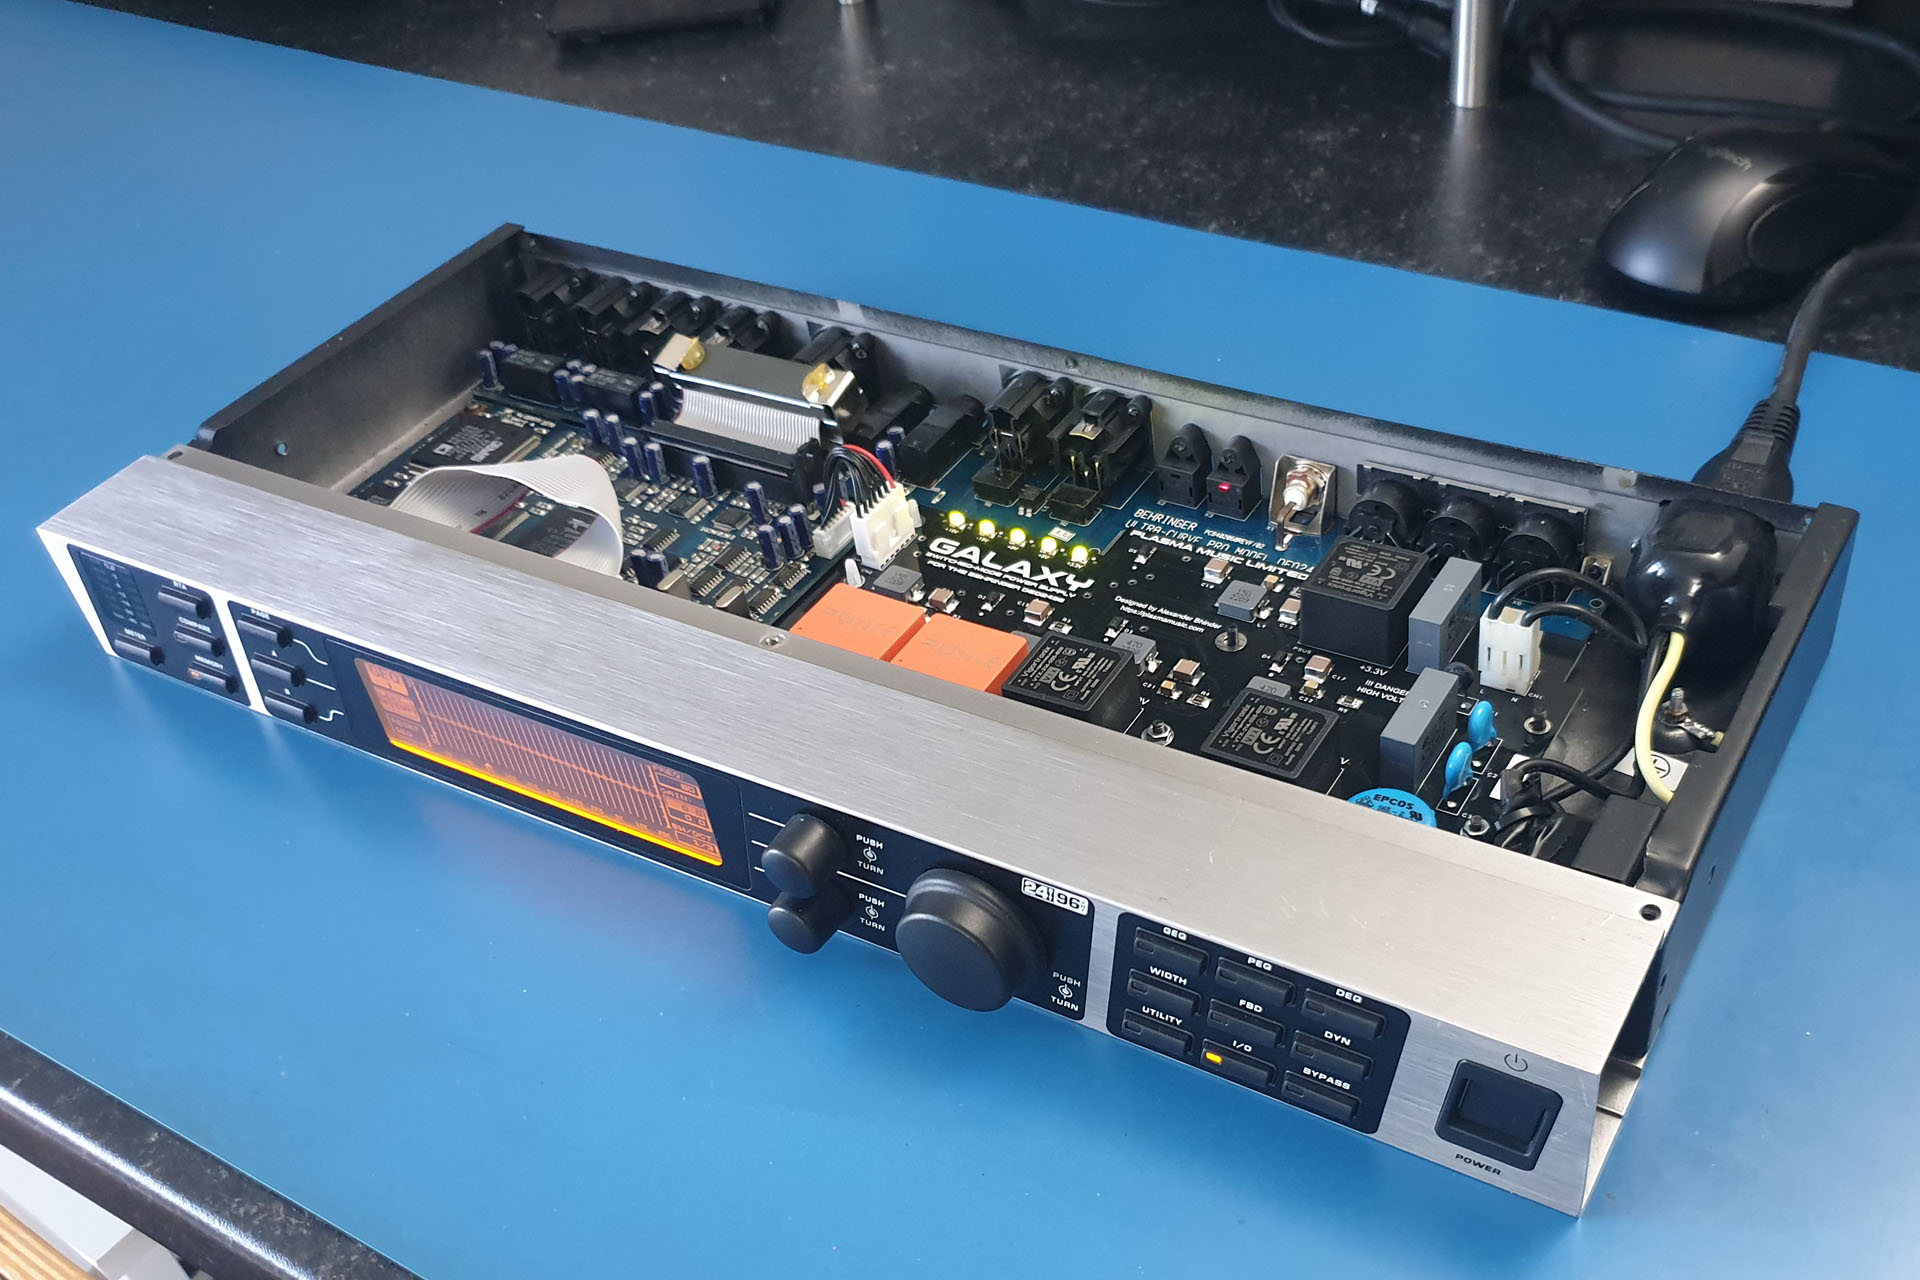
After the basic voltage test, every Galaxy then spends twenty-four hours in my test Behringer DEQ2496 Ultracurve Pro, before it's shipped to the customer.

Galaxy final testing in Behringer Ultracurve Pro
Galaxy is then tested for twenty-four hours in a real Behringer UltraCurve Pro, prior to shipping.

Plasma Music Limited - I'm deeply concerned about the environment and the exploitation of labour and so  I always use local manufacturers in preference to the Far East, with the following in mind:
  1. I can be confident that workers are treated fairly and earn a proper wage.
  2. I can be confident of the standard of quality of each item that is delivered to me.
  3. Communication is important and using local manufacturers, all correspondence is quick and understandable.
  4. I believe in supporting the local economy.
  5. I can be confident that the disposal of manufacturing waste is managed properly and in accordance with national and EU law.
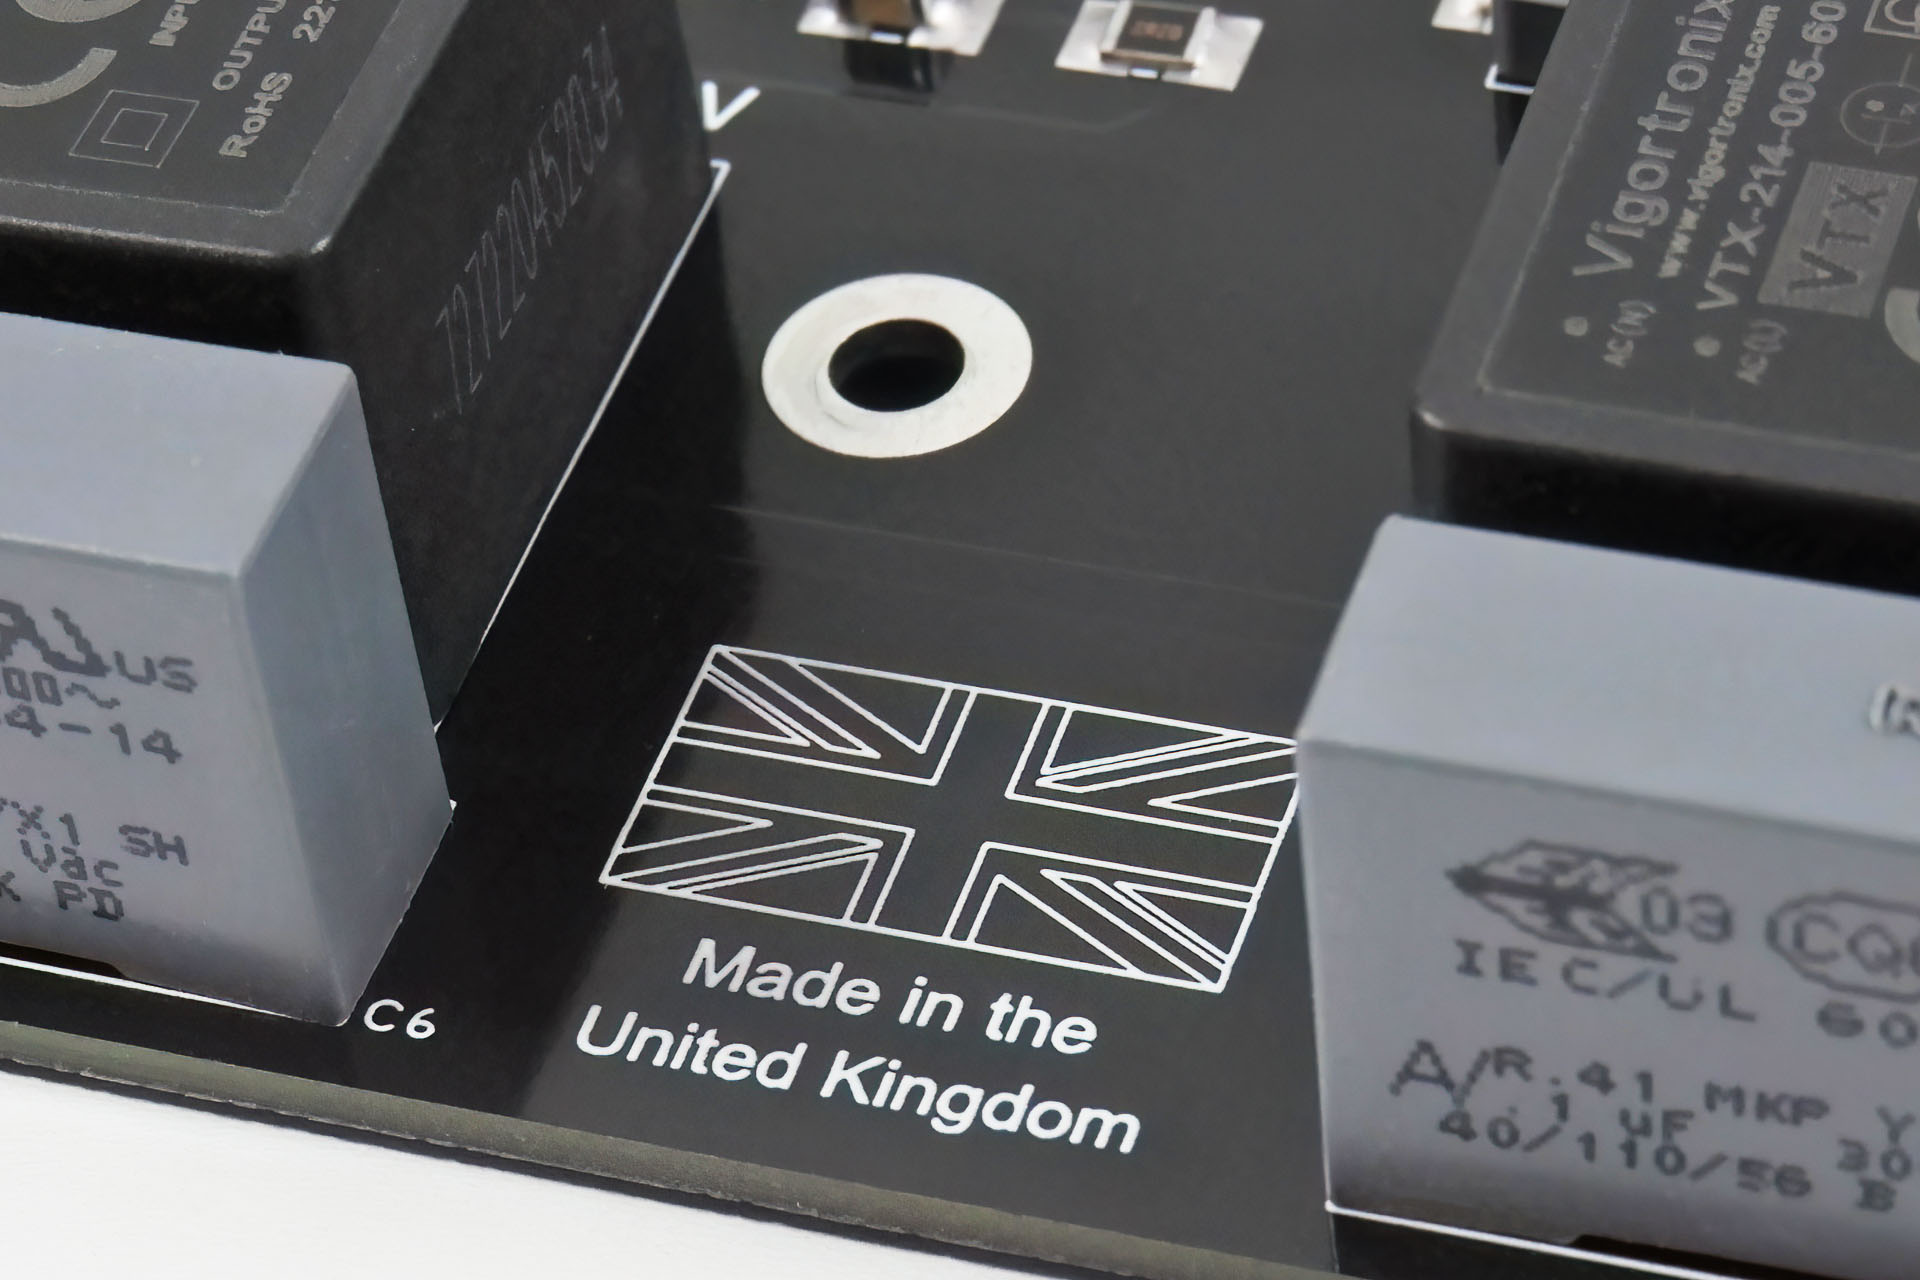
Galaxy modular switched-mode power supply for the Behringer Ultracurve Pro made in the UK
Galaxy replacement power supply for the Behringer Ultracurve Pro is made in the UK.

Using local manufacturers isn’t the cheapest option but the above points are important to me. I hope that they’re important to you too.

Many users of this well known pre-amp, will be familiar with the infamous Marshall JMP-1 hum! Emanating from the transformer, the hum is caused by oscillating laminates which don't just produce hum but also can generate a huge amount of heat, thereby potentially reducing the life expectancy of your transformer.

Months in the making, I'm delighted to announce my new PML-TX01 replacement transformer for the Marshall JMP-1.

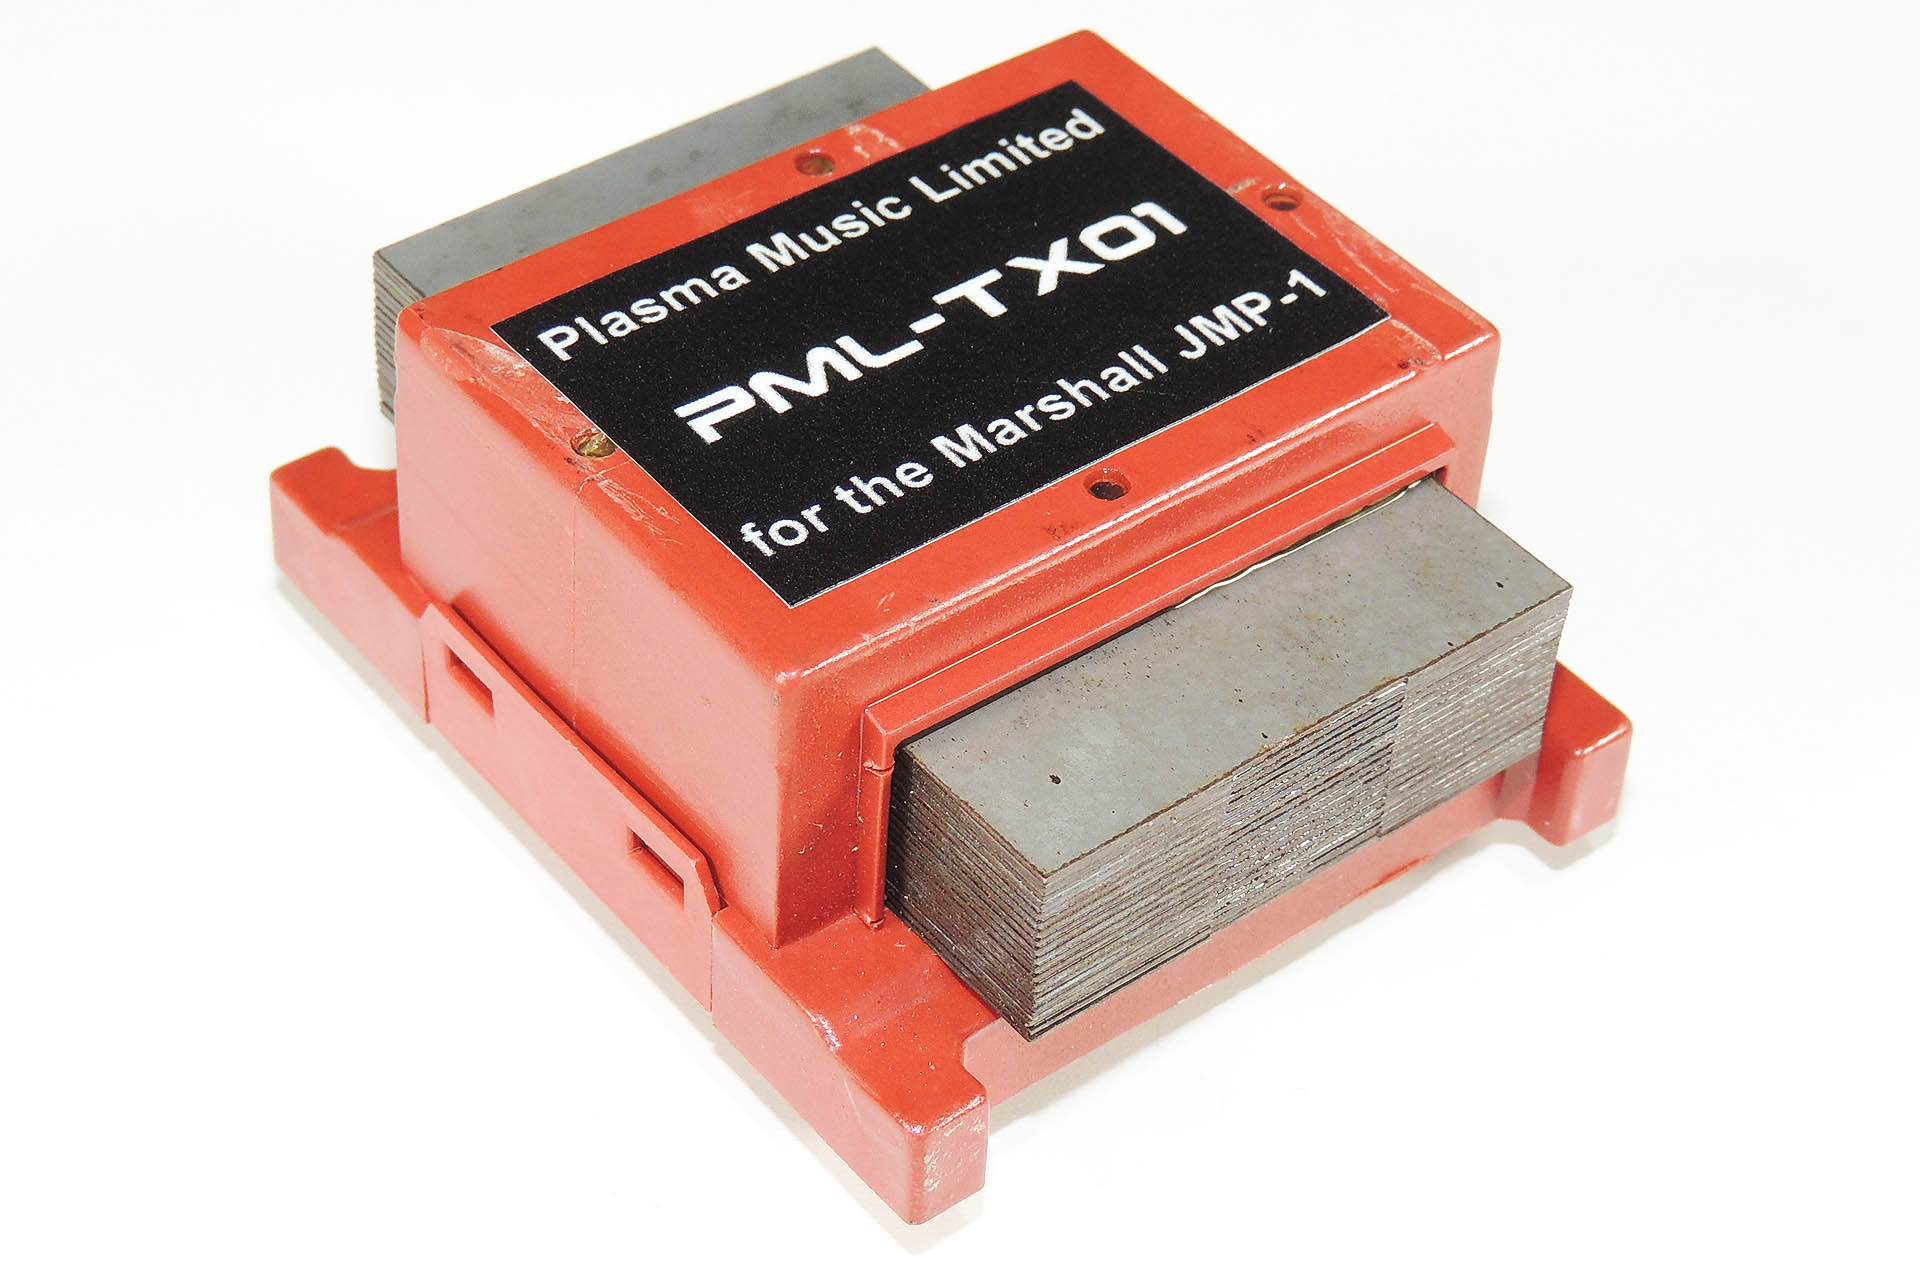
A replacement transformer for the Marshall JMP-1, my very quiet PML-TX01
And here it is... my PML-TX01 transformer for the Marshall JMP-1

Looking just like the original TXMA-00014 and being pin-for-pin compatible, my PML-TX01 is identical except for one feature; the material used for the laminates is of a much higher quality. This single unique aspect of the PML-TX01 reduces the likelihood of laminate oscillations, excessive heat and mechanical hum.

My PM-TX01 is of course pin-for-pin compatible with the original Marshall TXMA-00014

In a quiet recording environment, the Marshall JMP-1 hum is super-annoying and at last, a solution is now available. If you have hum issues with your JMP-1, then I strongly suggest that you consider this little upgrade.

This item regularly goes out of stock, I'm afraid but... I encourage customers to back-order. Unfortunately, the crappy e-commerce plug-in I use, only tells the links (like the one above) that the item is out of stock. What 's the bloody point of that?!?!?! So if you want this, then please just visit the PML-TX01 page on my e-store here.


MARSHALL JMP-1 VOLTAGE SELECTION

I regularly receive two questions from those interested in my PML-TX01:

  1. Is the PML-TX01 replacement transformer for the Marshall JMP-1, 240V or 120V?
  2. Are the voltage selector components diodes, ferrite beads or just fancy wire links?
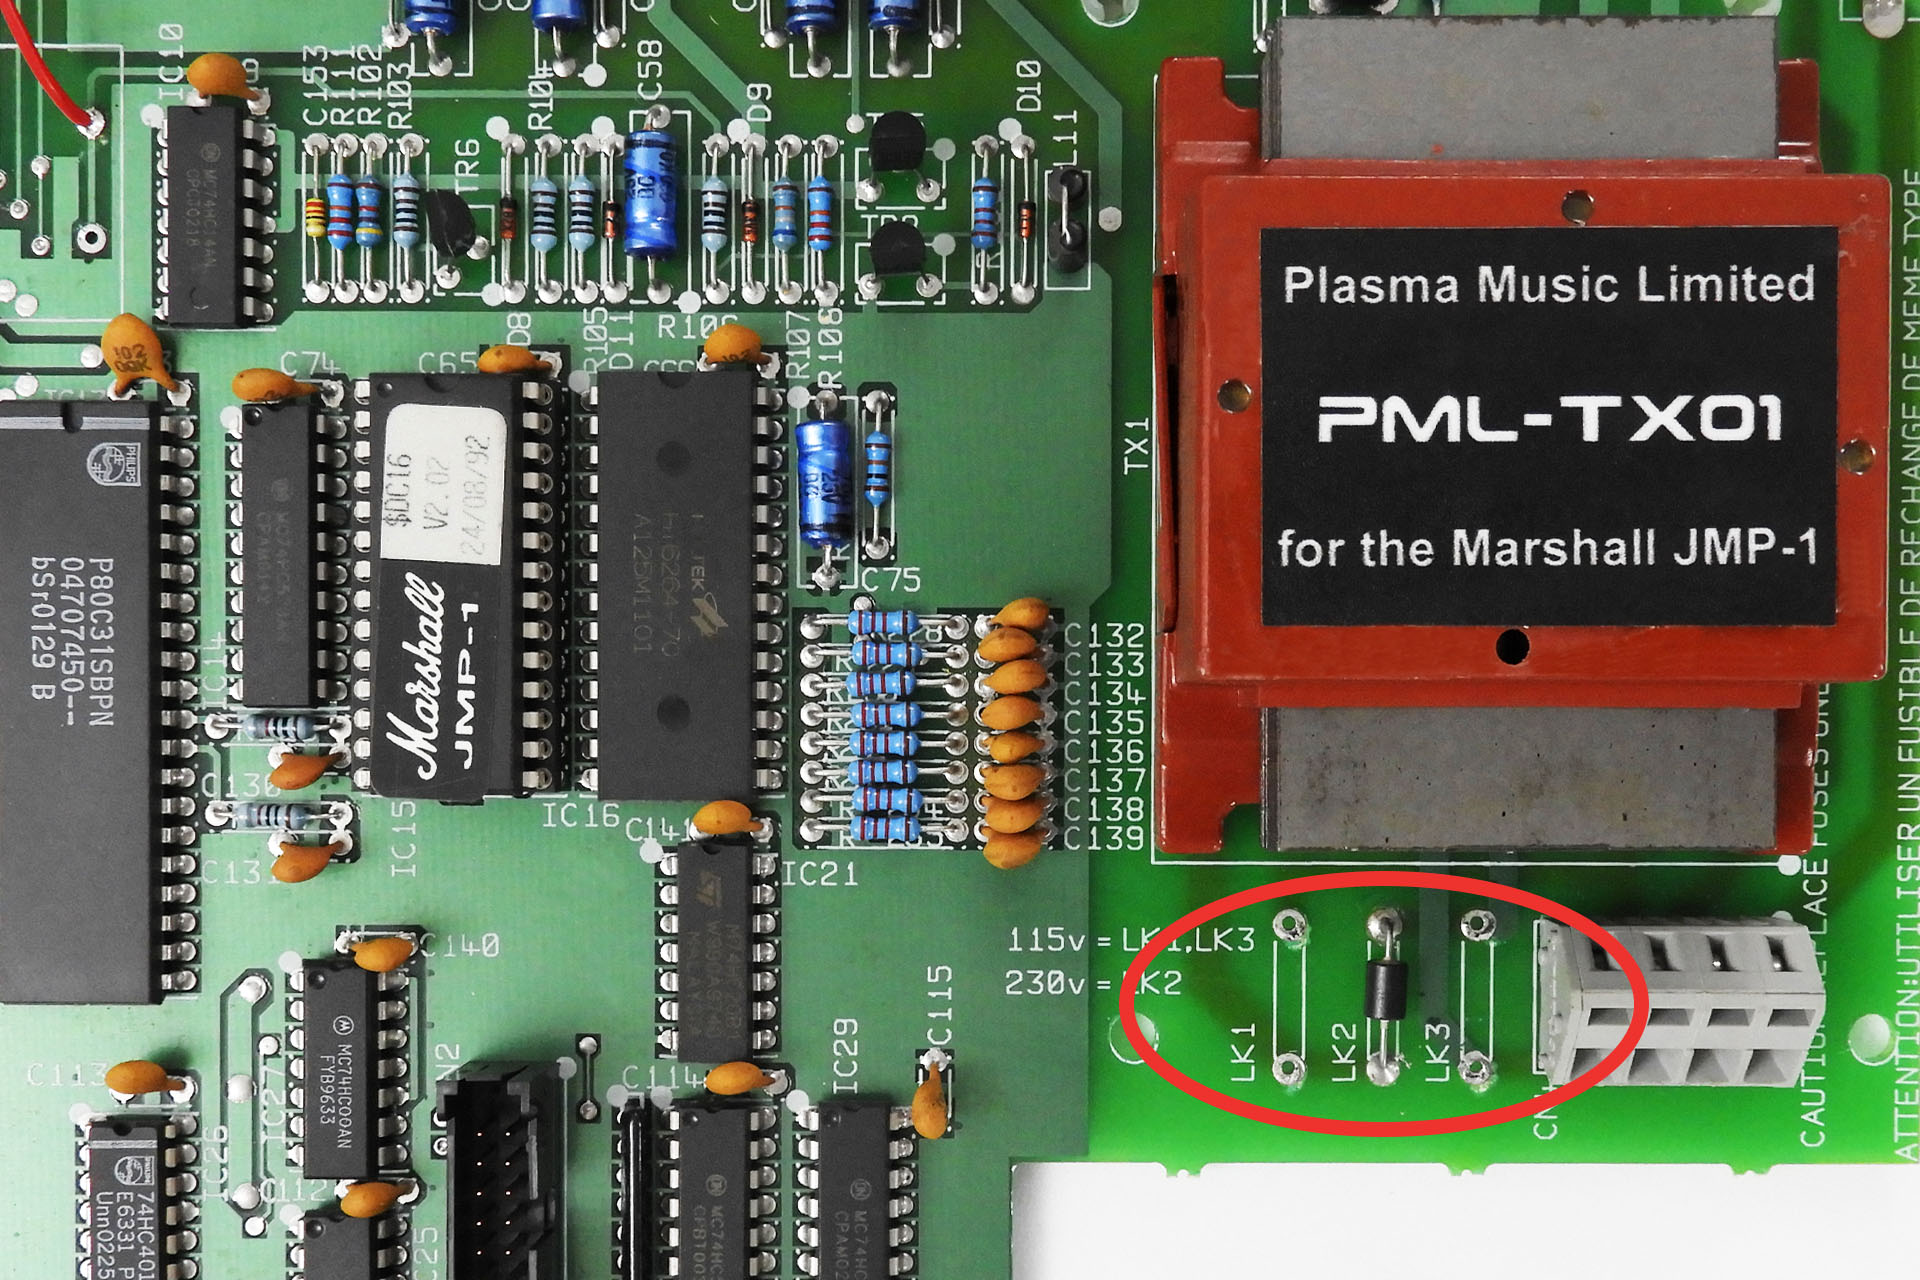
Marshall JMP-1 voltage selection
Here are the link locations to select the voltage rating of the primary windings for the transformer in a Marshall JMP-1. The example shown is set to 230V.

The answer to the first question is, just like the original TXMA-00014, my PML-TX01 has two separate primary windings, each rated at 115V. So…

  • EUOPEAN / UK VOLTAGE SELECTION. Wired in series, the primary becomes a single 230V winding. To wire in series, connect ONLY LK2.
  • USA / CANADA / JAPAN VOLTAGE SELECTION. Wired in parallel, the primary becomes a single 115V winding. To wire in parallel, connect LK1 and LK3.

The original links were JUST WIRE LINKS, so you can use wire.

JMP-1 Input Voltage Selection Schematic
This representation might make things a little clearer. Apart from the higher quality material used for the laminates, the PML-TX01 is a direct drop-in replacement for the original Dagnall TXMA-00014.

IMPORTANT

The above is a simple schematic REPRESENTATION of how the links are connected to configure the primaries for either 230V or 115V operation. The physical configuration of the voltage selector links however, is a bit unconventional and suggests that the transformer's primary windings are mirrored with START and FINISH for each winding not being where one might expect! The STARTs, for example could be the the two middle pins and the FINISHes, the two outside pins. Normally, transformer windings would be laid out START - FINISH, START - FINISH. I thought it might therefore be helpful to provide an illustration of the actual (physical) layout of the power input in the Marshall JMP-1 (below).

Marshall JMP-1 Input Voltage Physical Layout
Here's the actual layout of the input voltage side of the Marshall JMP-1. Note that the start and finish of the transformer coils aren't where you might expect.

SIDE NOTE

One might ask why the two individual primary windings are put in parallel for 115V. Why not just use one winding?

Well, a system uses a certain amount of power. Power is the product of voltage and current: P = V x I.

You can probably see now that if you half the voltage, you'll need twice the current to deliver the same amount of power. Placing the two primaries in parallel does just that, it doubles the current going into the system. 🙂

And lastly...

! ! ! DON'T FORGET TO CHECK THE FUSE RATING ! ! !

So as I've just intermated, the power requirement of a machine is the same whatever the supply voltage. Since power = current x voltage, if you're halving the voltage, you'll be doubling the current.

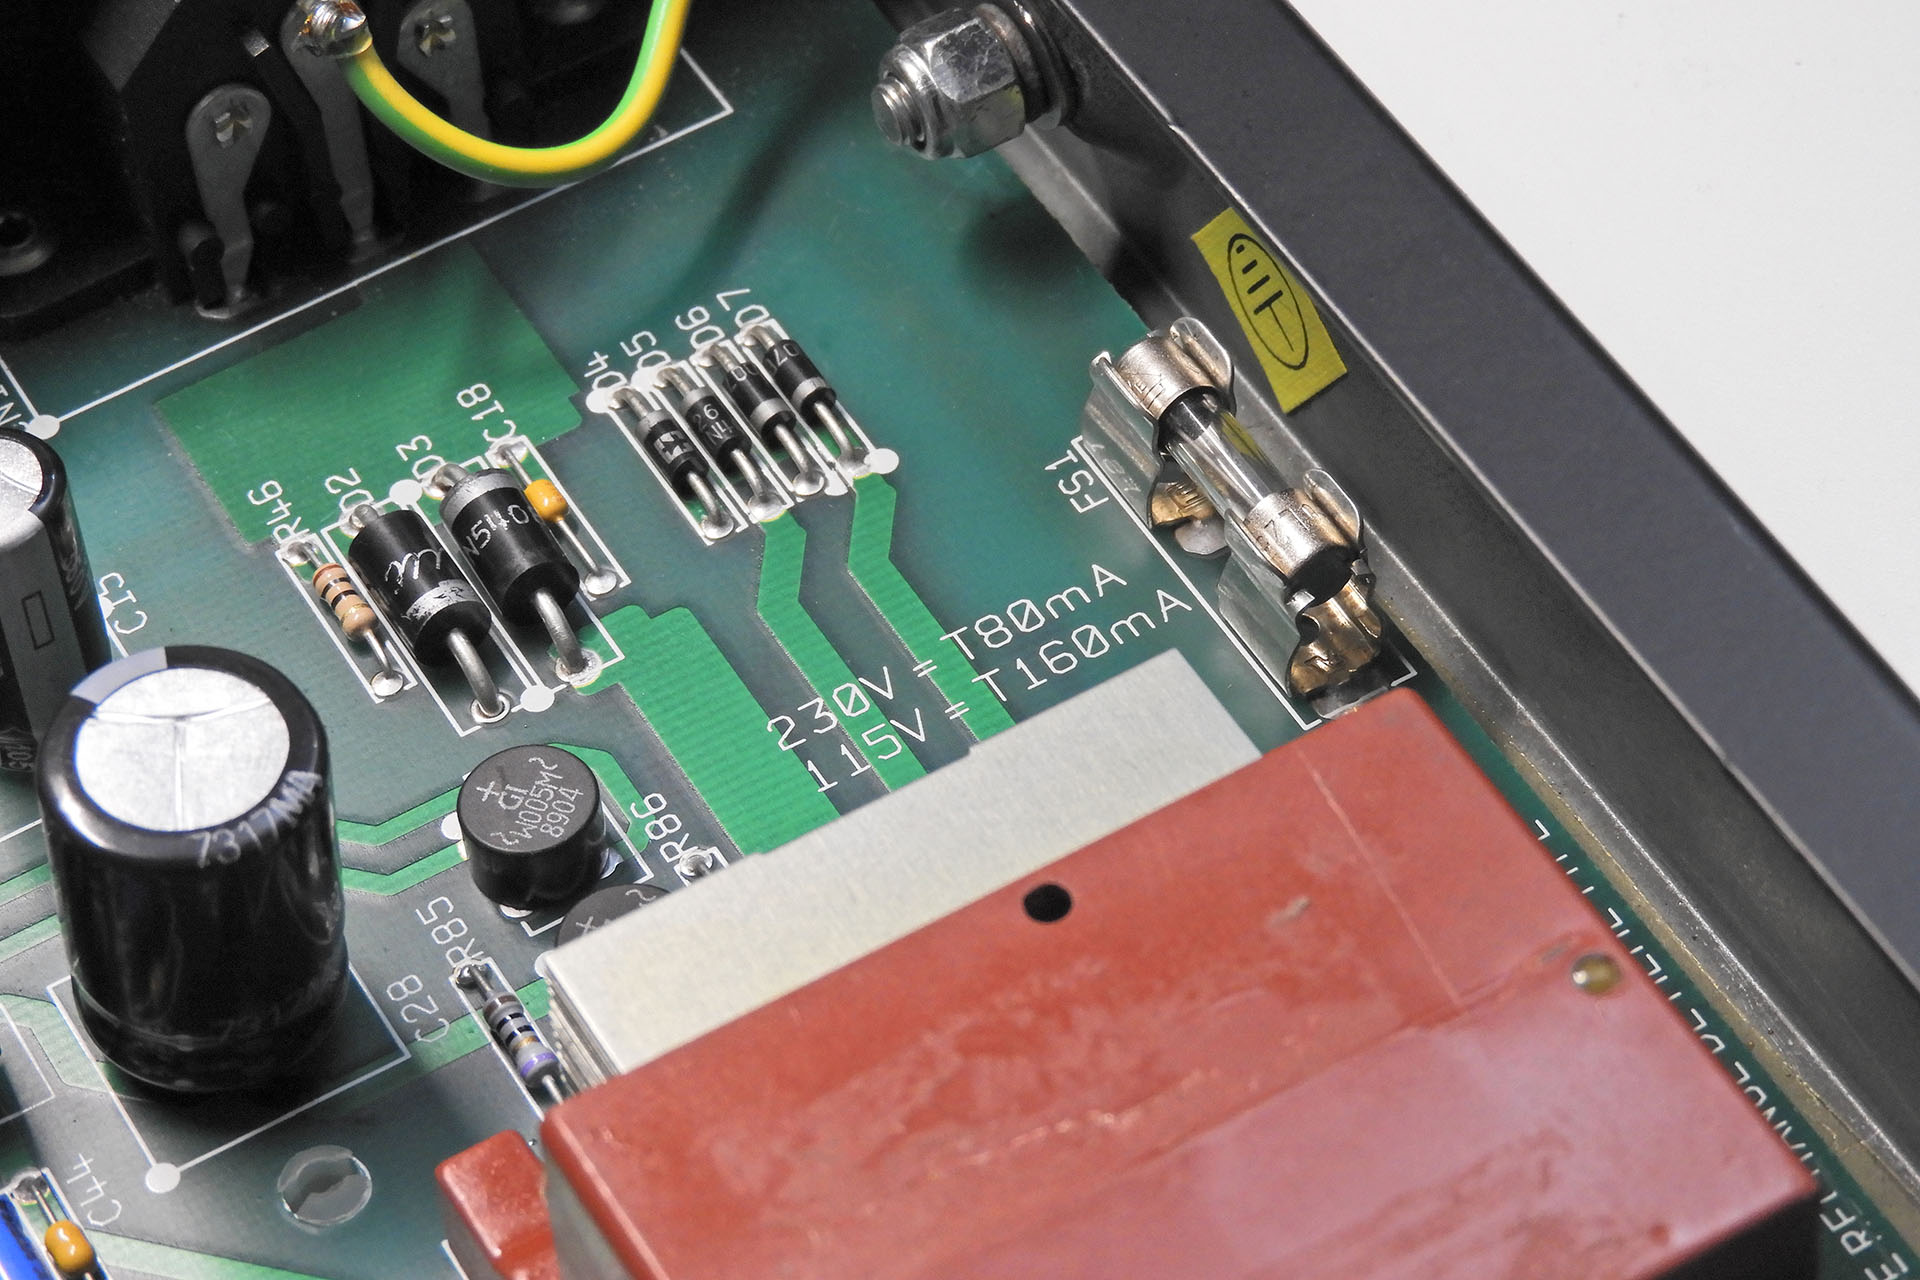
Marshall JMP-1 fuse
Don't forget to select the correct fuse rating for your region.

If running at 230V, the JMP-1 fuse should be 80mA (230V x 0.08A = 18.4W).
If running at 115V, the JMP-1 fuse should be 160mA (115V x 0.16A = 18.4W).

'T' stands for 'time delay' so use a time delay fuse.

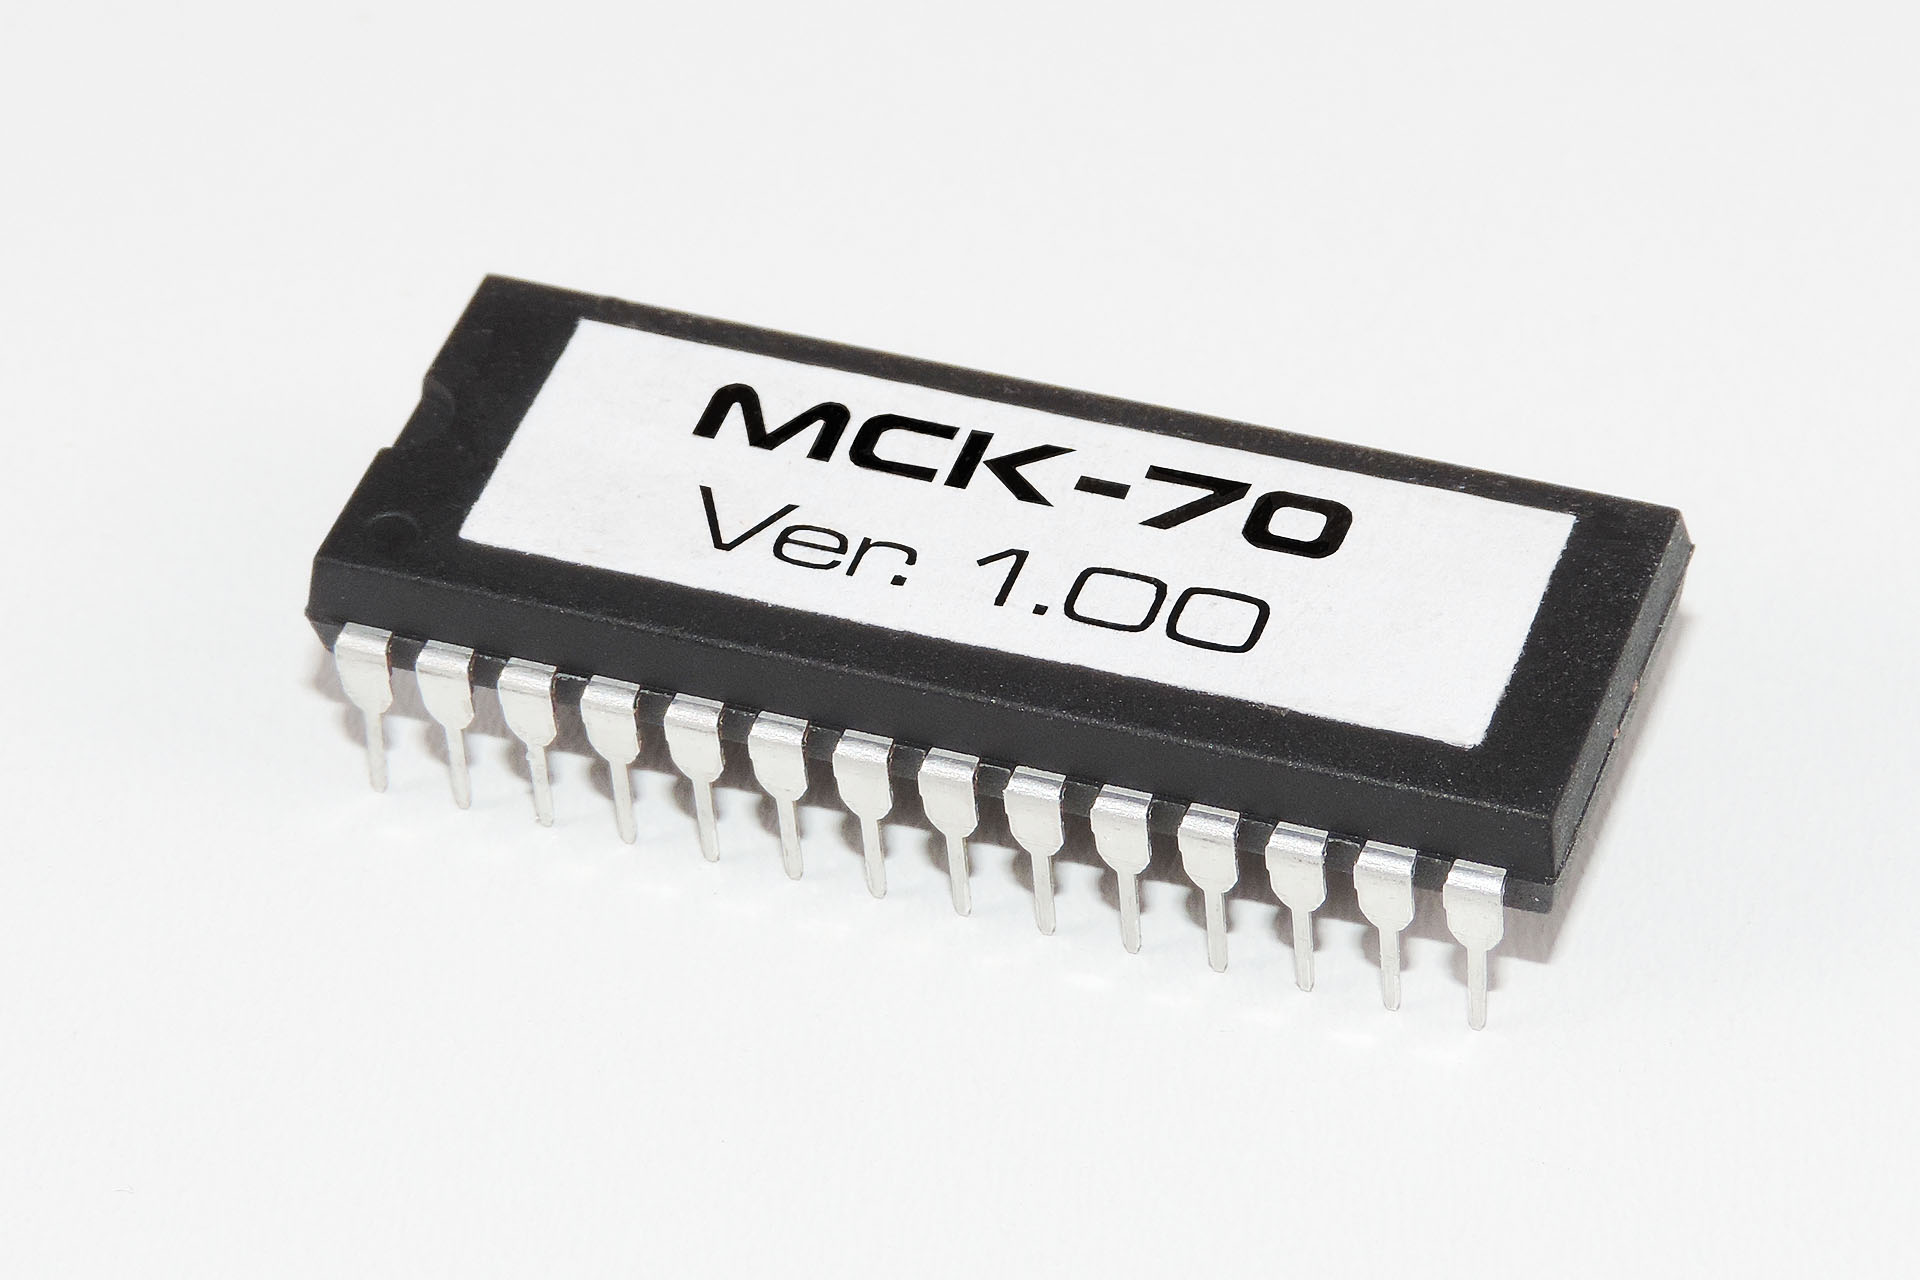
MCK-70 Memory Checker for the Roland MKS-70 and JX-10.

Introducing a fantastic utility, MCK-70 is a memory checker for the Roland JX-10 and MKS-70, developed by non-other than Guy Wilkinson.

A few weeks ago, I received a Roland MKS-70 from a customer in Canada. He’d just had it upgraded with Guy Wilkinson’s fabulous VFD module and Fred Vecoven’s PWM mod but then weird things started to happen. This machine was then sent a couple of thousand miles across the Atlantic to see what I could do with it.

The first thing was to fix the power supply. Indeed, it was shot. Signs of heat damage and all regulated outputs showing zero volts except the -15V line which was reading -21.5V, wasn’t a good start. Oh dear. Anyway, I got that going temporarily as the customer agreed to have Guy Wilkinson’s P0004 switched-mode power supply installed.

The next issue was that some voices weren’t playing. After going over the voice-boards and confirming that they were both okay, I decided to look at the assigner (CPU) board.

To keep things simple, I disconnected the Vecoven PWM mod and I also installed the original Roland firmware. This meant that I had to have the voice-boards connected which is a bit of a pain.

After a lot of testing, chatting with Fred Vecoven and Guy Wilkinson, it seemed clear that the machine had a memory issue.

Guy told me that he’d developed a little bit of software to test the RAM in the Super-JX, so we agreed that this would be a perfect opportunity to actually check it out.

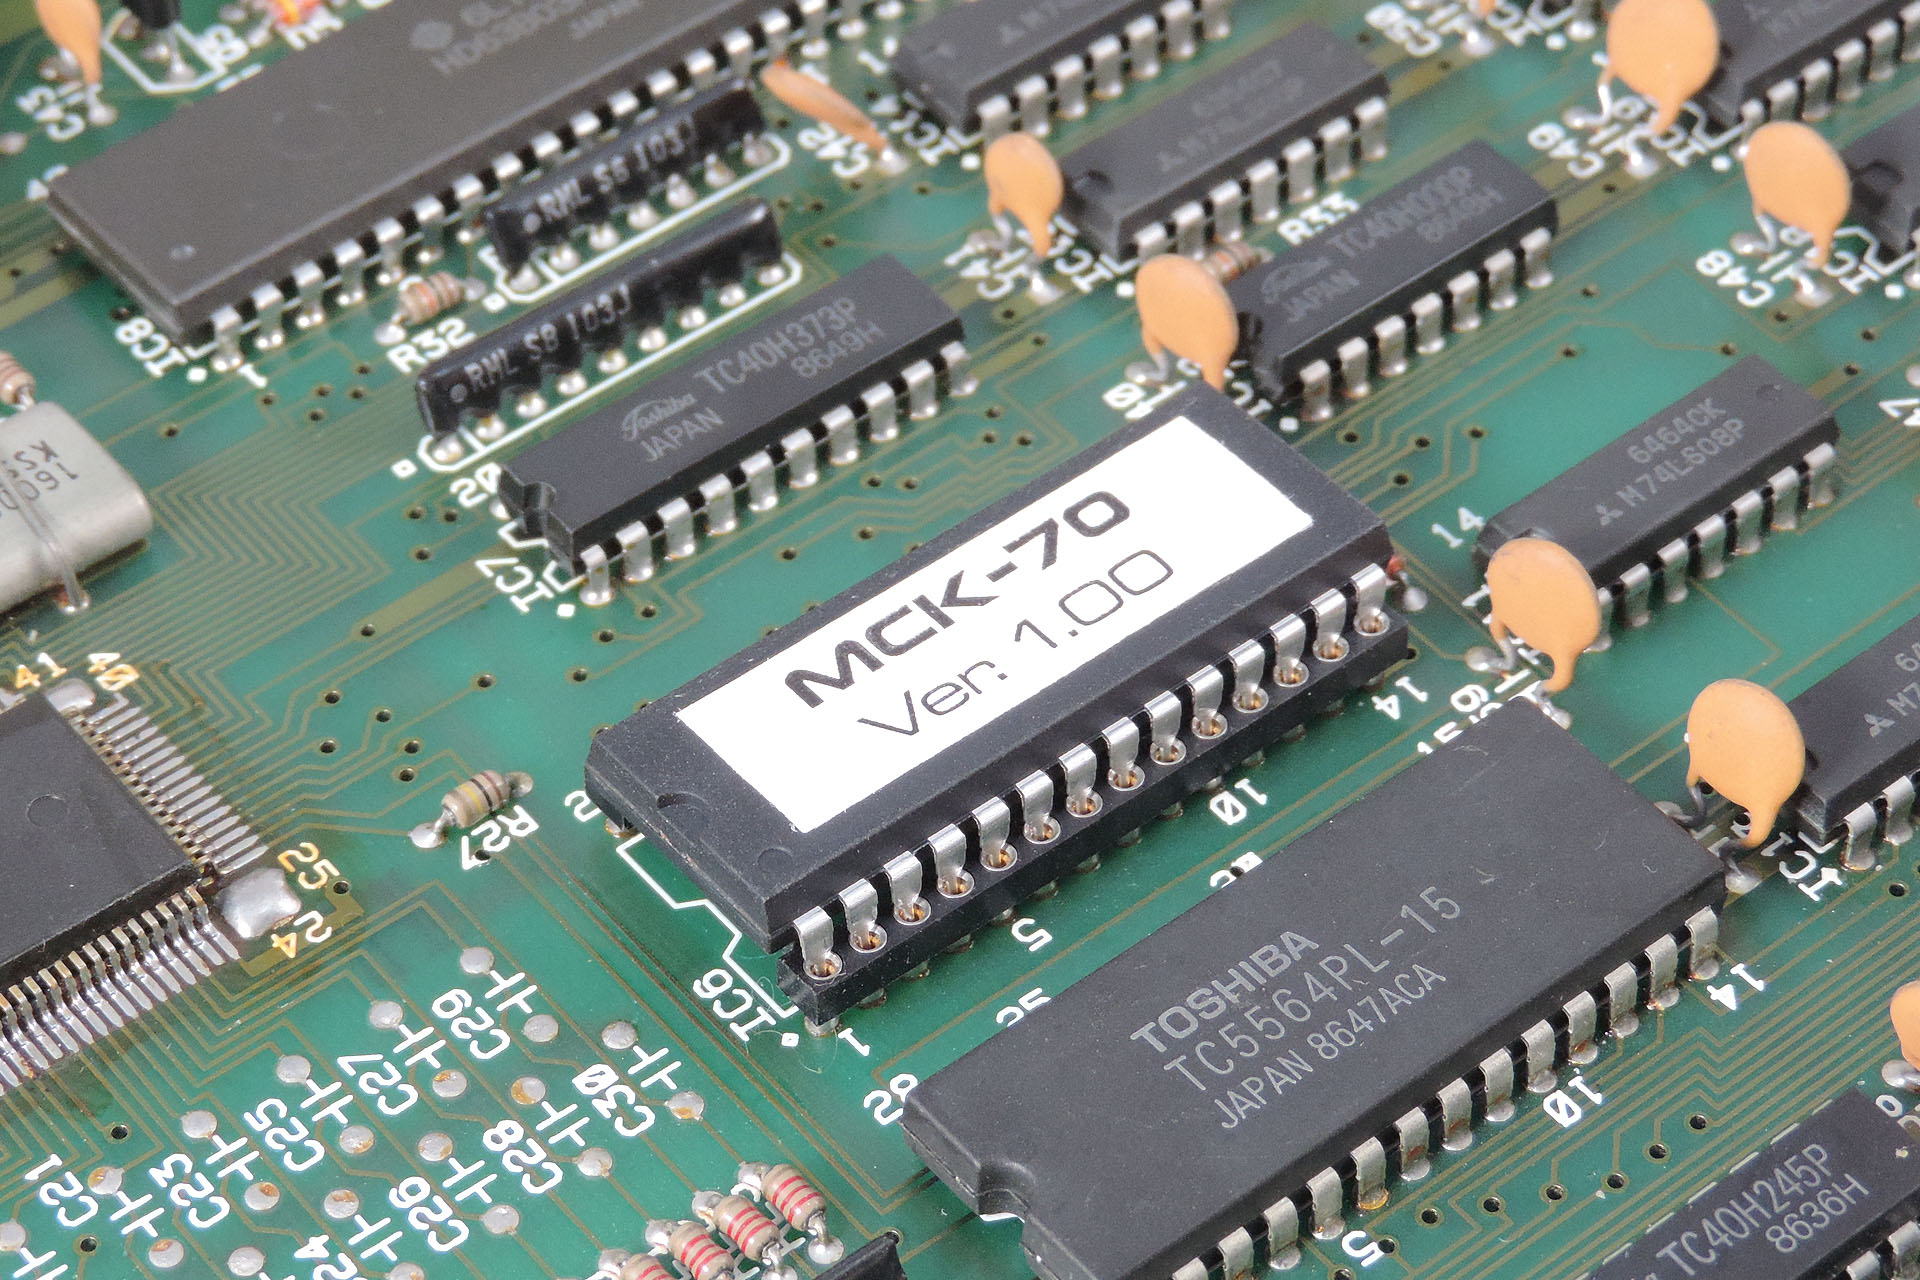
Guy e-mailed me the bin file, I promptly burnt a ROM, installed it into the MKS-70’s Assigner-board and switched on. Oh wow! This is so cool!

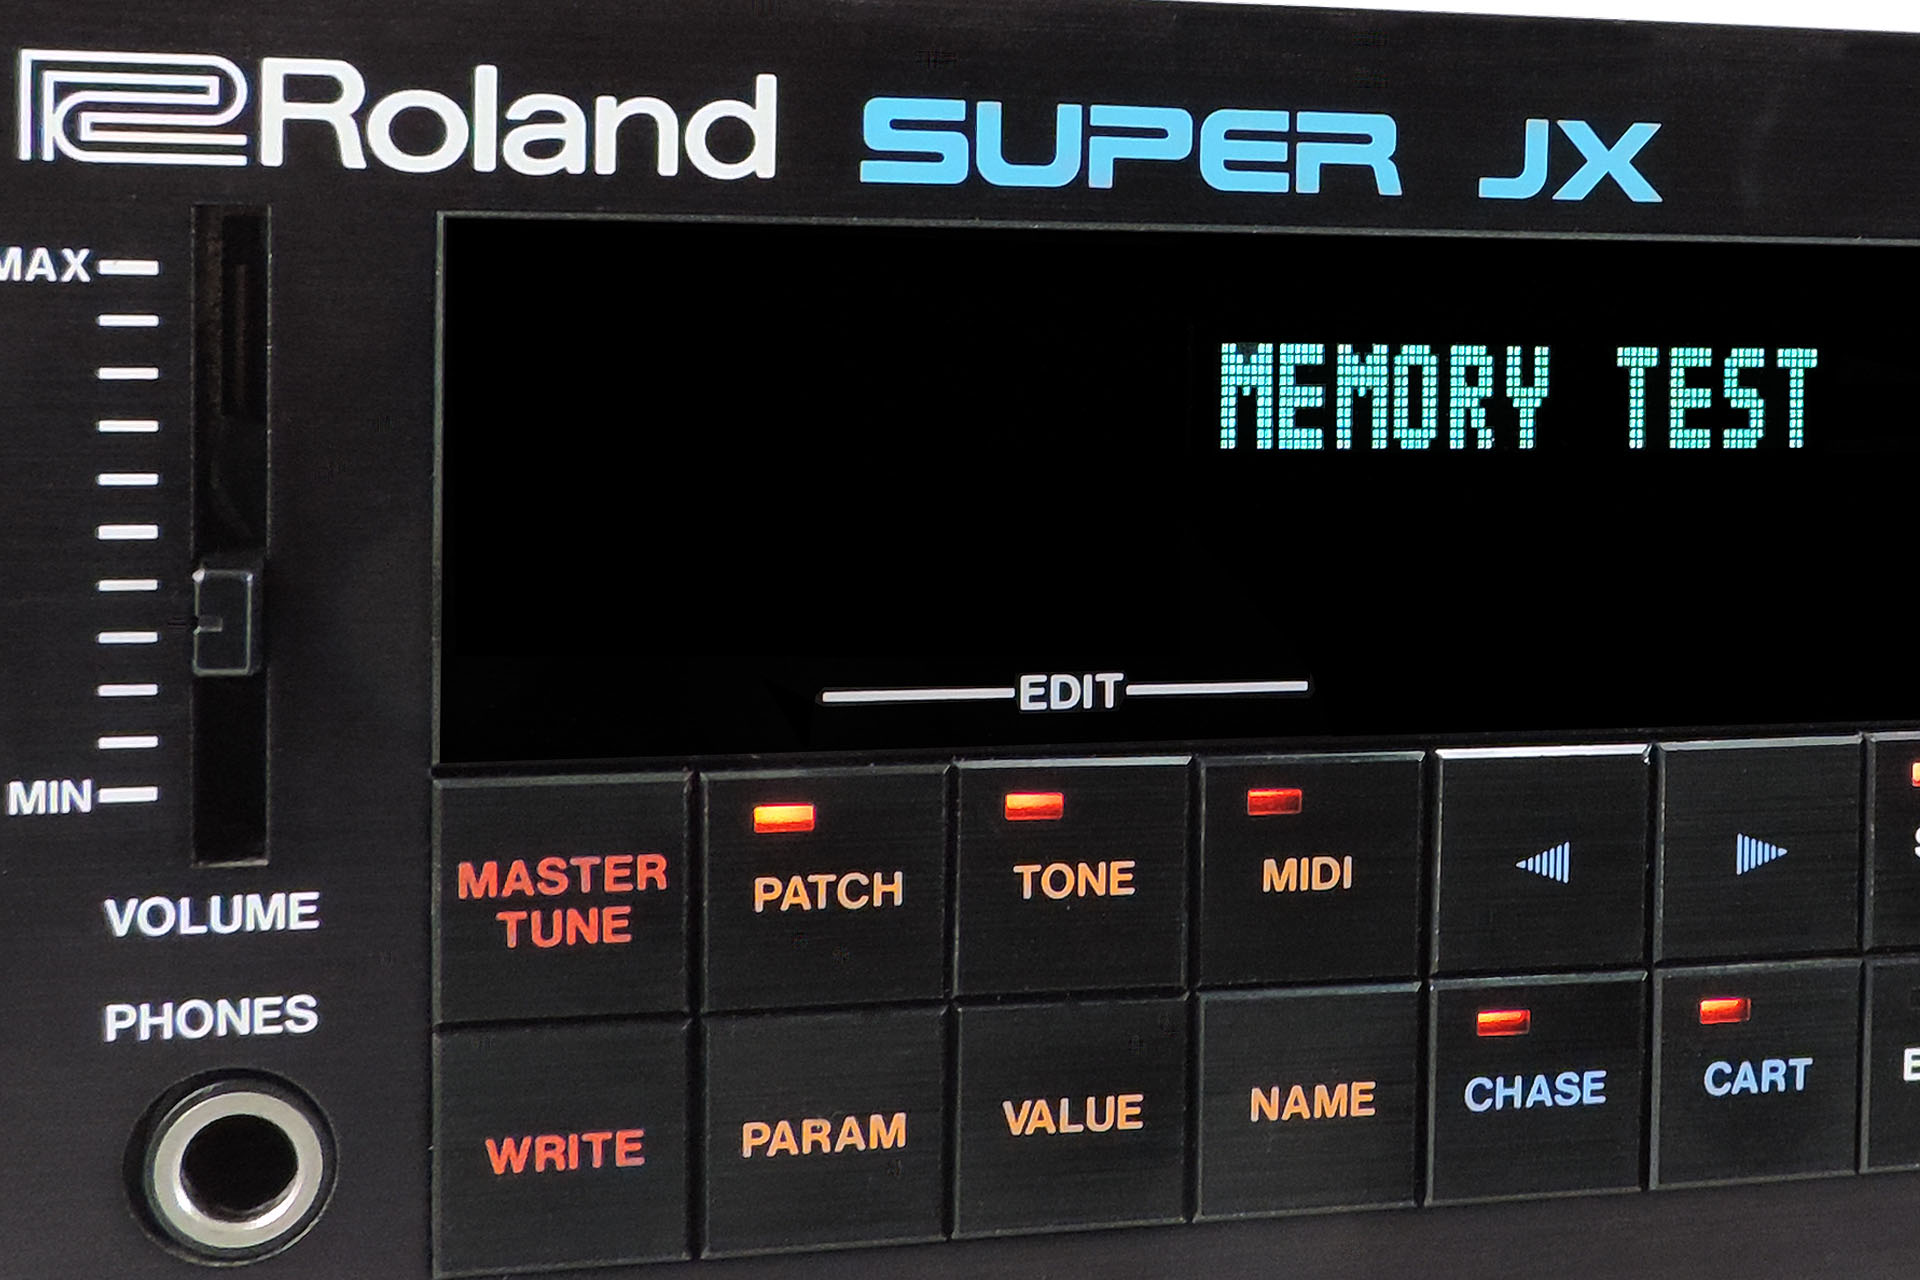
MCK-70 in action

Running in the processor's on-board memory and thereby leaving all other memory free, MCK-70 systematically checks not only the main RAM but also the gate-array RAM, writing all zeros as it sweeps. After a few seconds, you end up with an ultra-clean slate, a Super-JX that's cleaner than factory!

I then loaded some factory stuff into the MKS-70. Wow! All looking good so far. Programming a very simple tone and patch confirmed that everything was working and that the issues that were present before, were all gone. Guy, you’re a genius! THANK YOU, my friend. 🙂

MCK-70 Boot
MCK-70 will work on the Roland MKS-70 and the JX-10.

It was obvious that MCK-70 would be really useful to others and so Guy and I decided to make MCK-70 Memory Checker for the Roland MKS-70 and JX-10, available to purchase in my on-line store.

A great tool for anyone who may have similar JX-10 or MKS-70 memory corruption problems, MCK-70 will save you a lot of hassle and money. Removing the TC5564 RAM chip requires removal of the assigner-board and unlike the voice-boards, the assigner-board has a couple of delicate membrane cables connecting it to the display board and the cartridge board. You really want to avoid disturbing these, if you can. On top of that, the TC5564PL-15 isn’t at all easy to get hold of.

So, just imagine if you could check the memory in your MKS-70 and fully initialise it. Why on earth would you want to go to all the trouble of changing the RAM chip just because a few noughts and ones are temporarily in the wrong place?

IMPORTANT

  • Not only available as a downloadable .bin file allowing you to burn MCK-70 on to your favourite 27C256, MCK-70 can also be purchased pre-burnt on to a ROM which will be sent out to you.
  • MCK-70 will totally delete the memory in your machine. Don't mess with it unless you actually have an issue or your machine's memory is backed up.
  • To be clear, MCK-70 will work in the Roland JX-10 and the MKS-70.

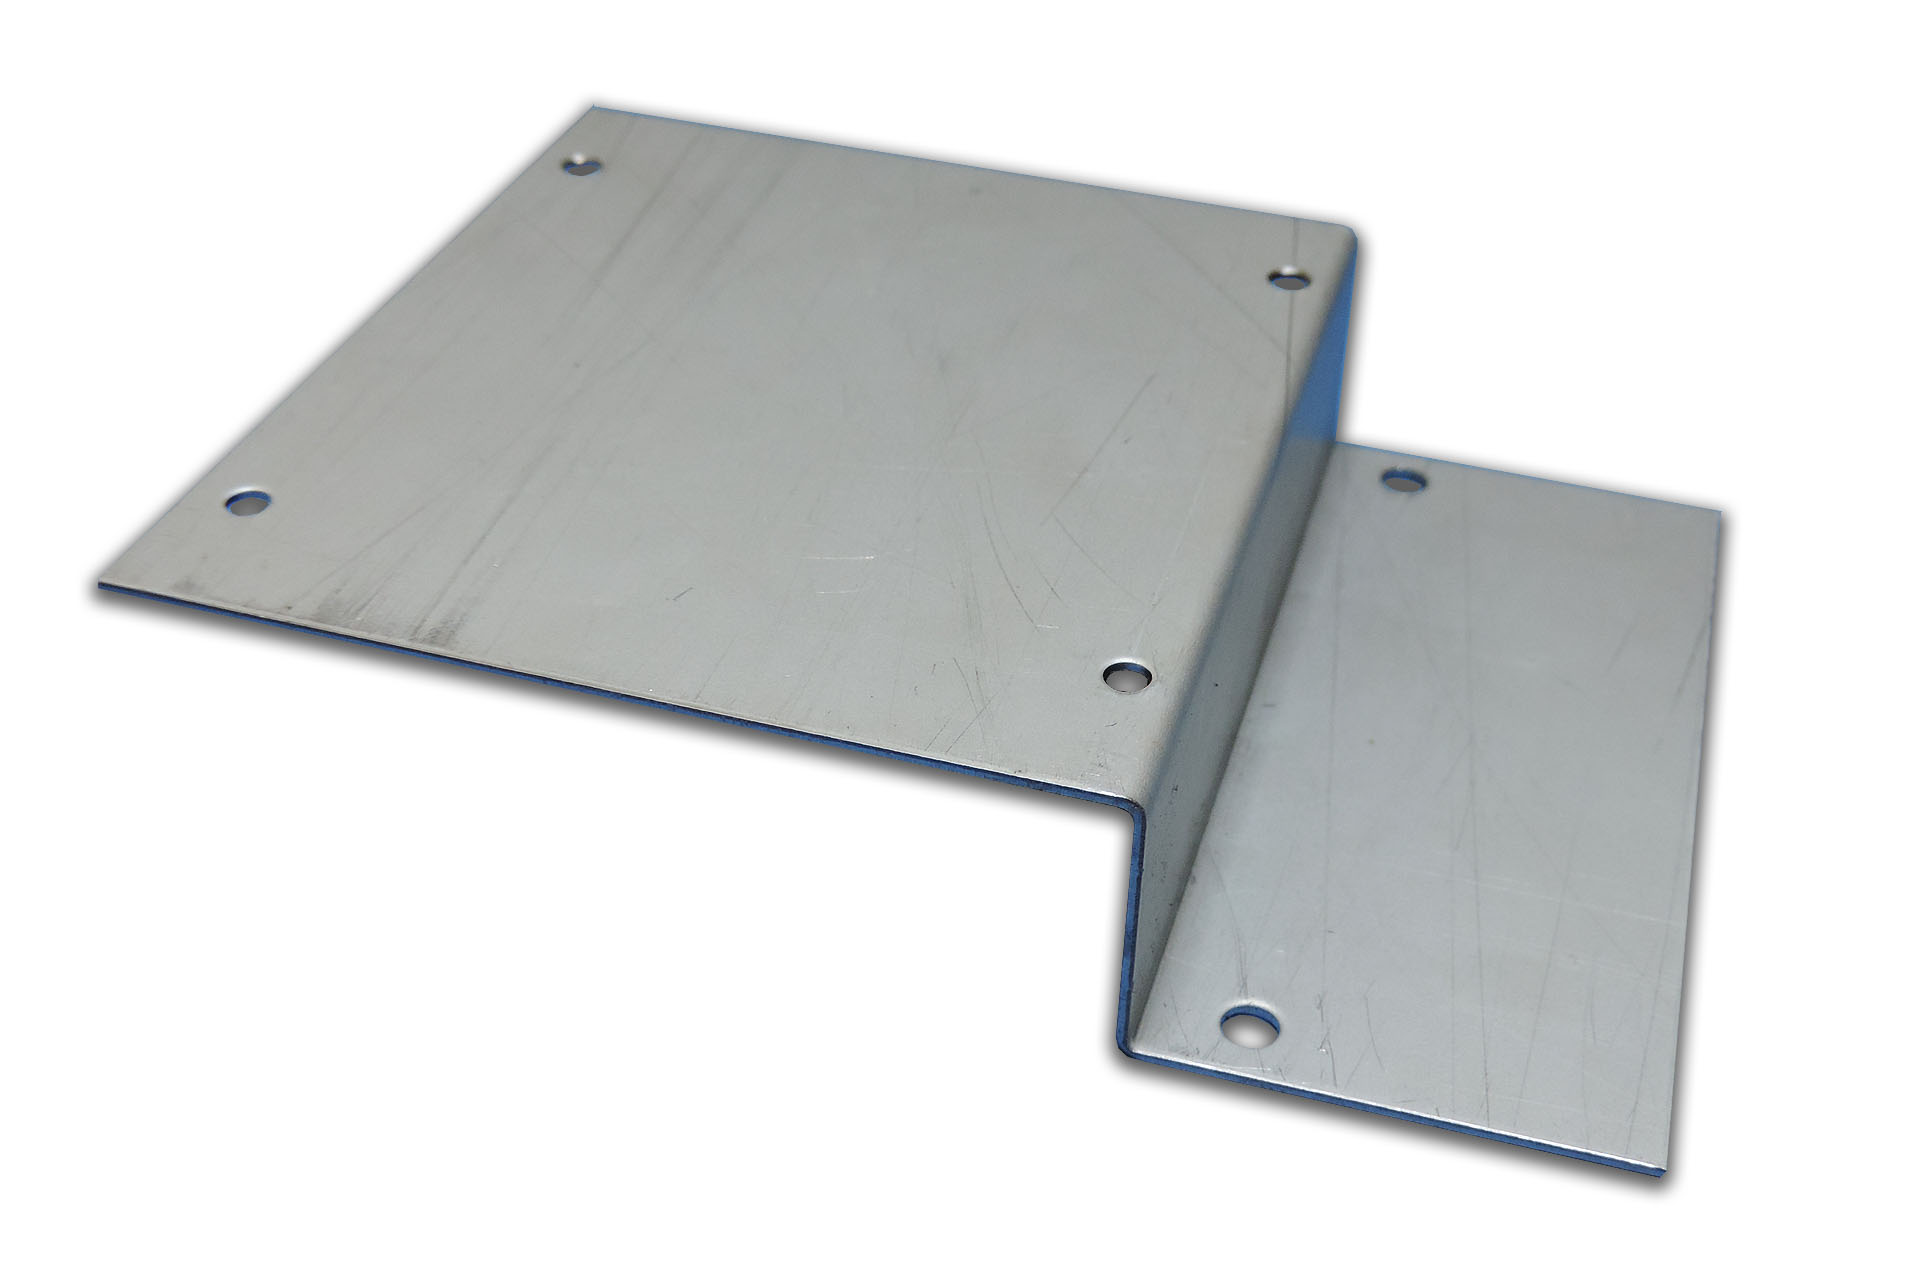
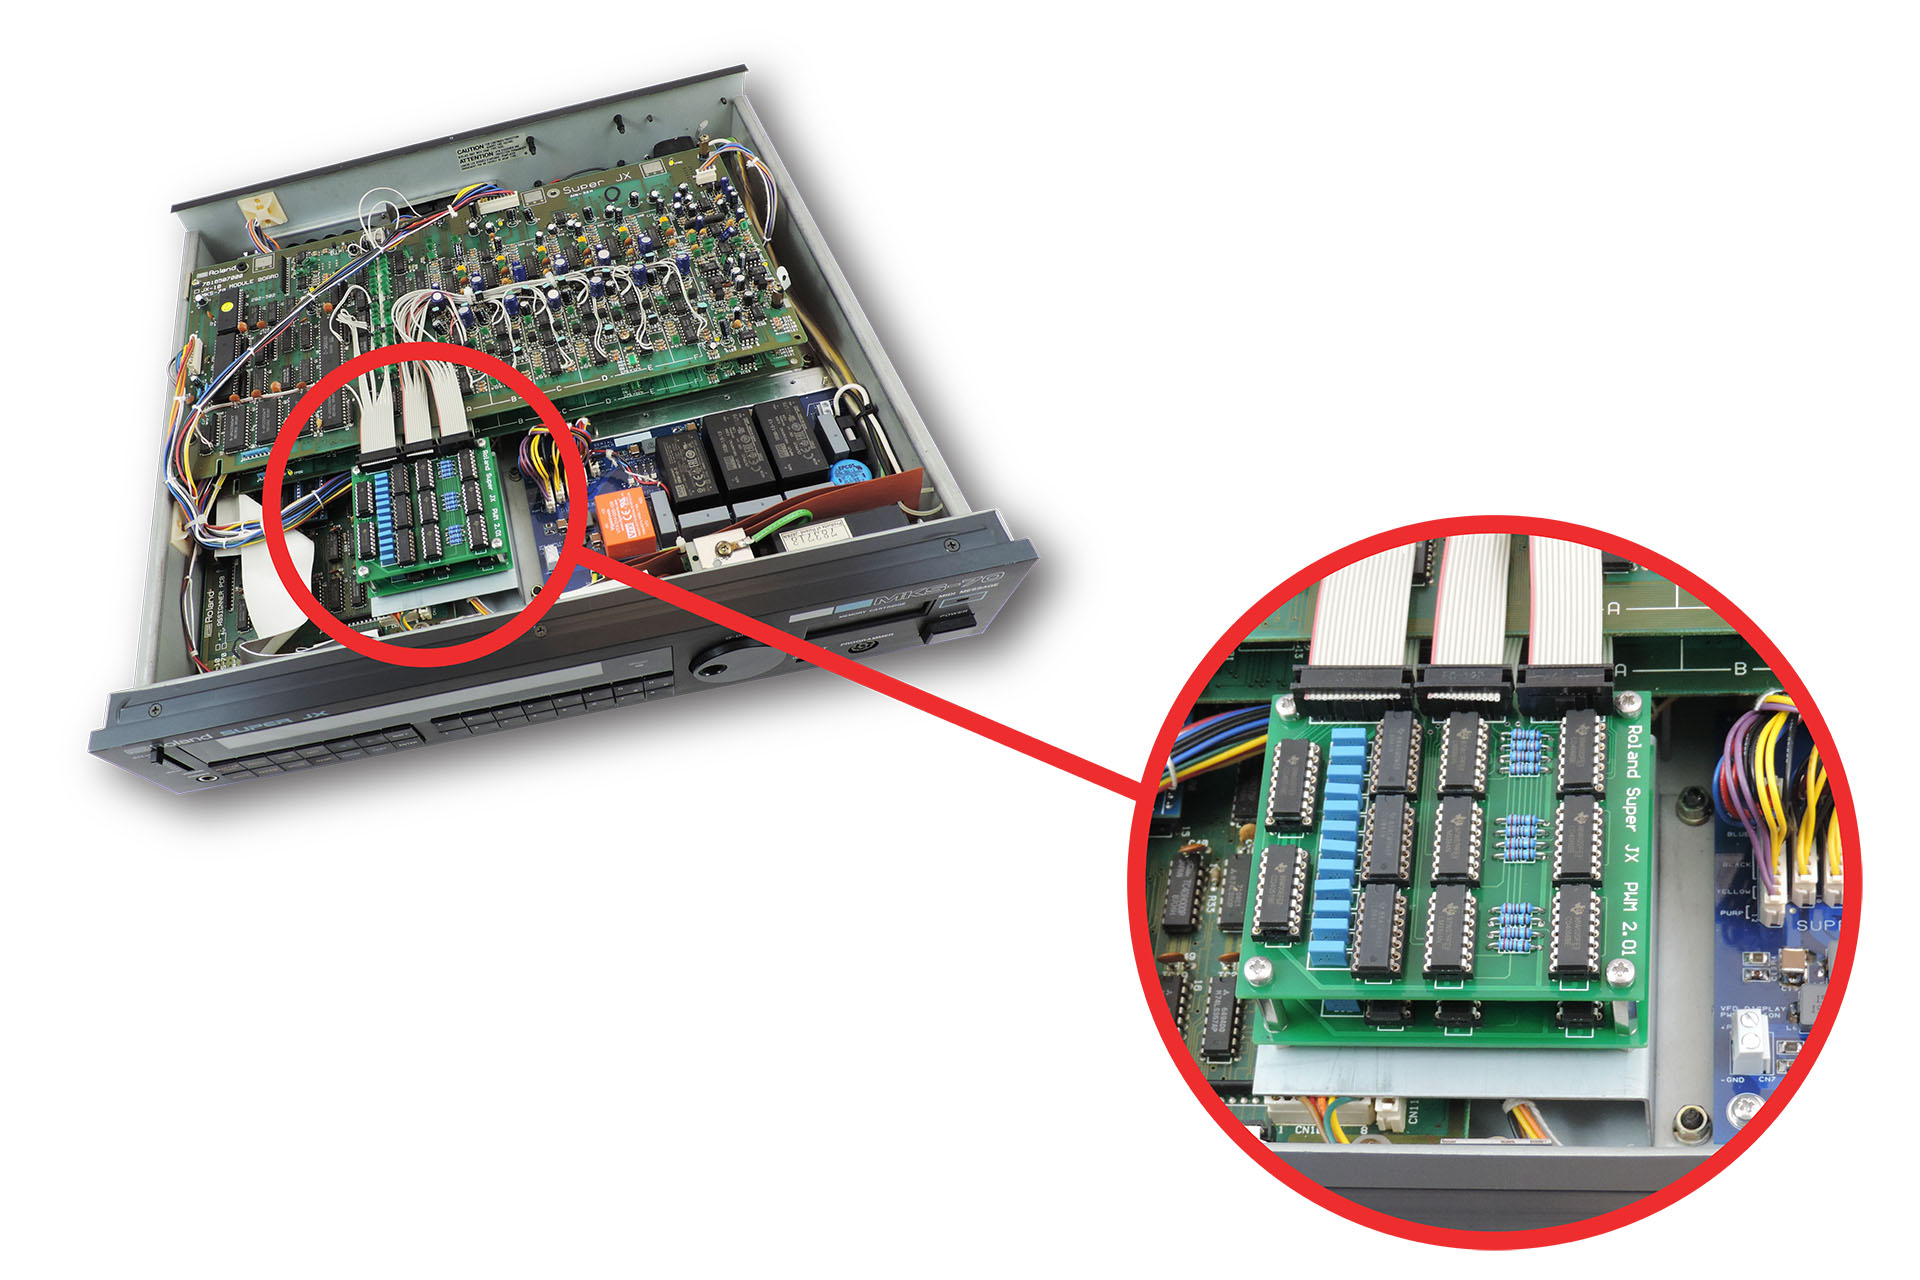
The V02 mounting bracket for the Vecoven PWM mod, allows the two boards of the mod to be mounted off the voice-boards in a MKS-70.

The V01 custom mounting bracket for Vecoven PWM mod for MKS-70
Custom mounting bracket for Vecoven PWM kit in Roland MKS-70.

Occupying the space previously taken up by the transformer, the V02 can ONLY be fitted if Guy Wilkinson's P0004 power supply is installed.

V01 bracket fitted in Roland MKS-70
Notice that Guy Wilkinson's P0004 power supply is also fitted.

There are two main advantages to using the V02 mounting bracket for the Vecoven PWM mod:

  • You don't have to drill any holes into your MKS-70 voice-boards.
  • The PWM mod can very easily and quickly be disconnected from the voice-boards.

IMPORTANT: The V02 mounting bracket is a great solution and keeps things tidy but... due to the fact that the V02 mounts the Vecoven PWM boards in very close  proximity to the voice-boards, it's strongly recommended that vertical IDC headers are fitted to the PWM boards and that the Molex headers used on the ribbon cables are NOT foldback types.

Read more about upgrades for the Roland Super-JX here, or check out Fred Vecoven's awesome PWM mod here. Alternatively, you can just buy it now:

A full guide to mounting the Vecoven PWM daughter-boards to the V02 bracket and securing the V02 bracket into your MKS-70, is available after purchase.

Live Forever battery mod at Plasma Music
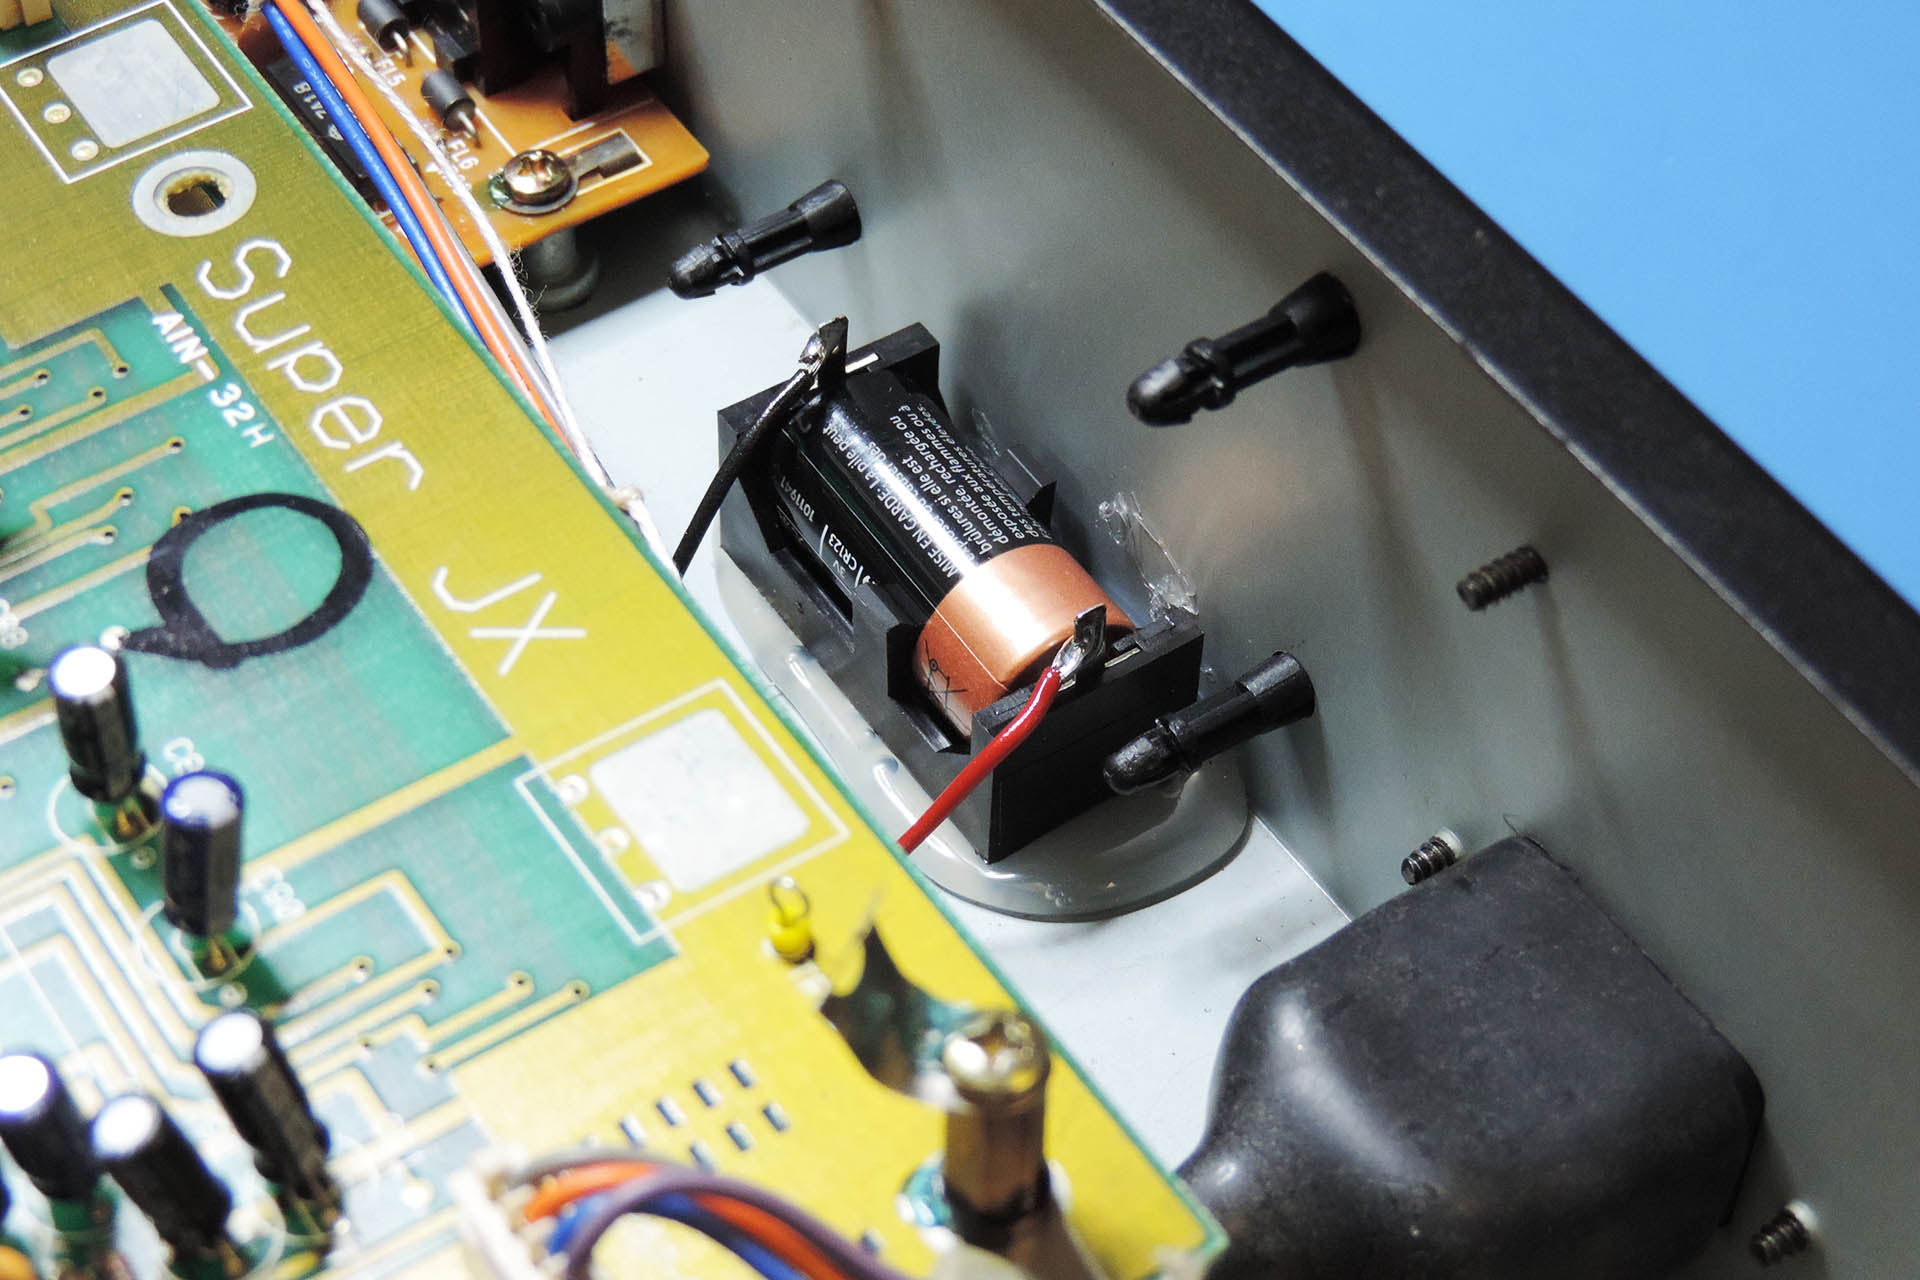
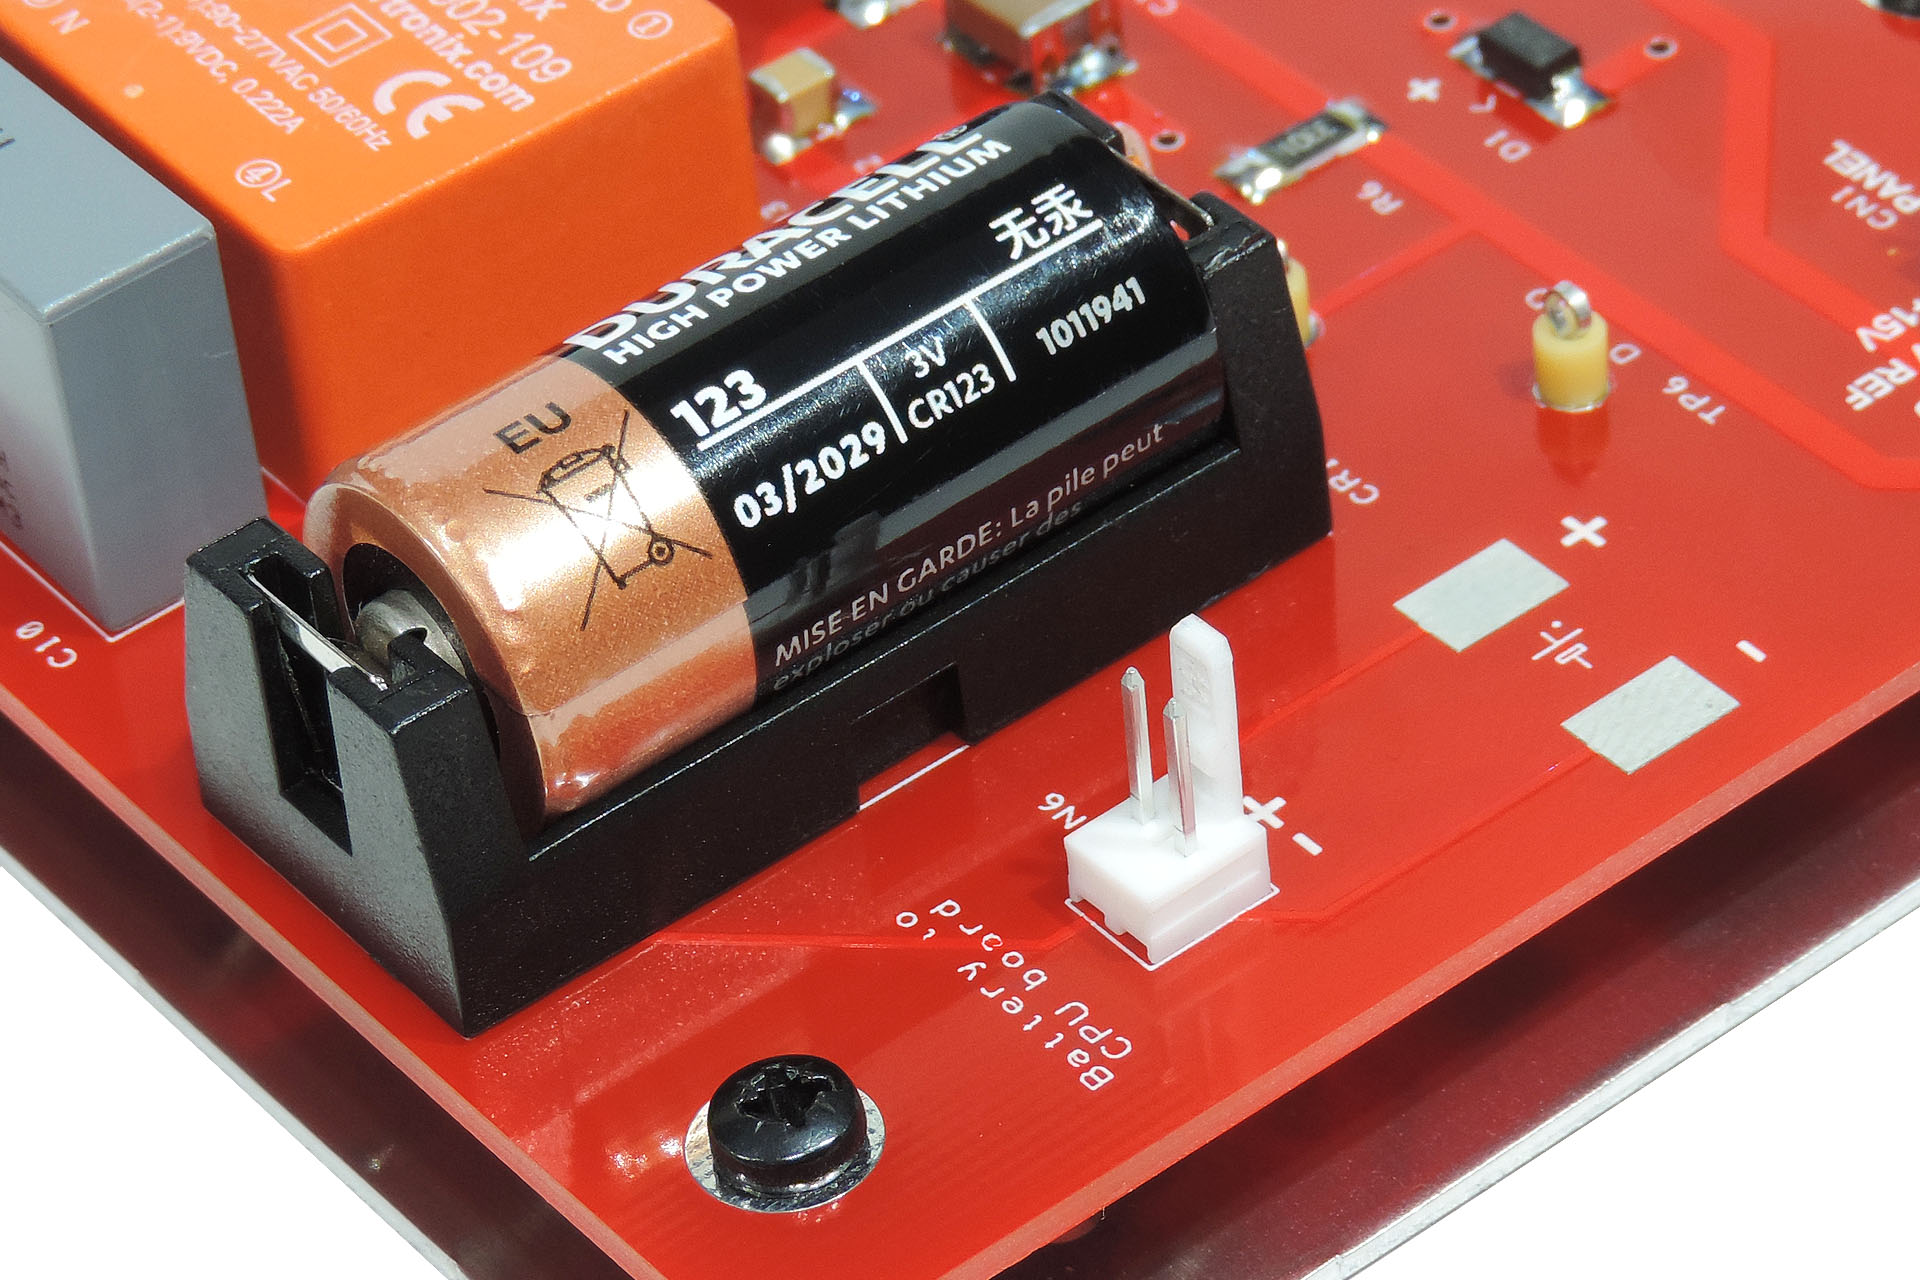
Large capacity CR123A battery mounted off-board in a Roland MKS-70.

My Live Forever back-up battery mod isn't rocket science. It's not even particularly clever but an incredibly simple upgrade to many synthesisers, sound modules and effects processors, it does offer the following advantages:

  • Reduced risk of battery leakage.
  • Reduced risk of damage to sensitive electronics as a result of battery leakage.
  • Easier replacement of memory back-up battery.
  • Easier measurement of memory back-up battery voltage.
  • Higher capacity battery means that it'll probably outlive you!

So just about all digital equipment has some sort of mechanism to provide memory retention. Your equipment has patches, right? So those patches are 'remembered' by your gear with the use of a memory back-up battery.

Newer equipment doesn't always have a memory back-up battery. Instead, memory is held within what is known as non-volatile RAM.

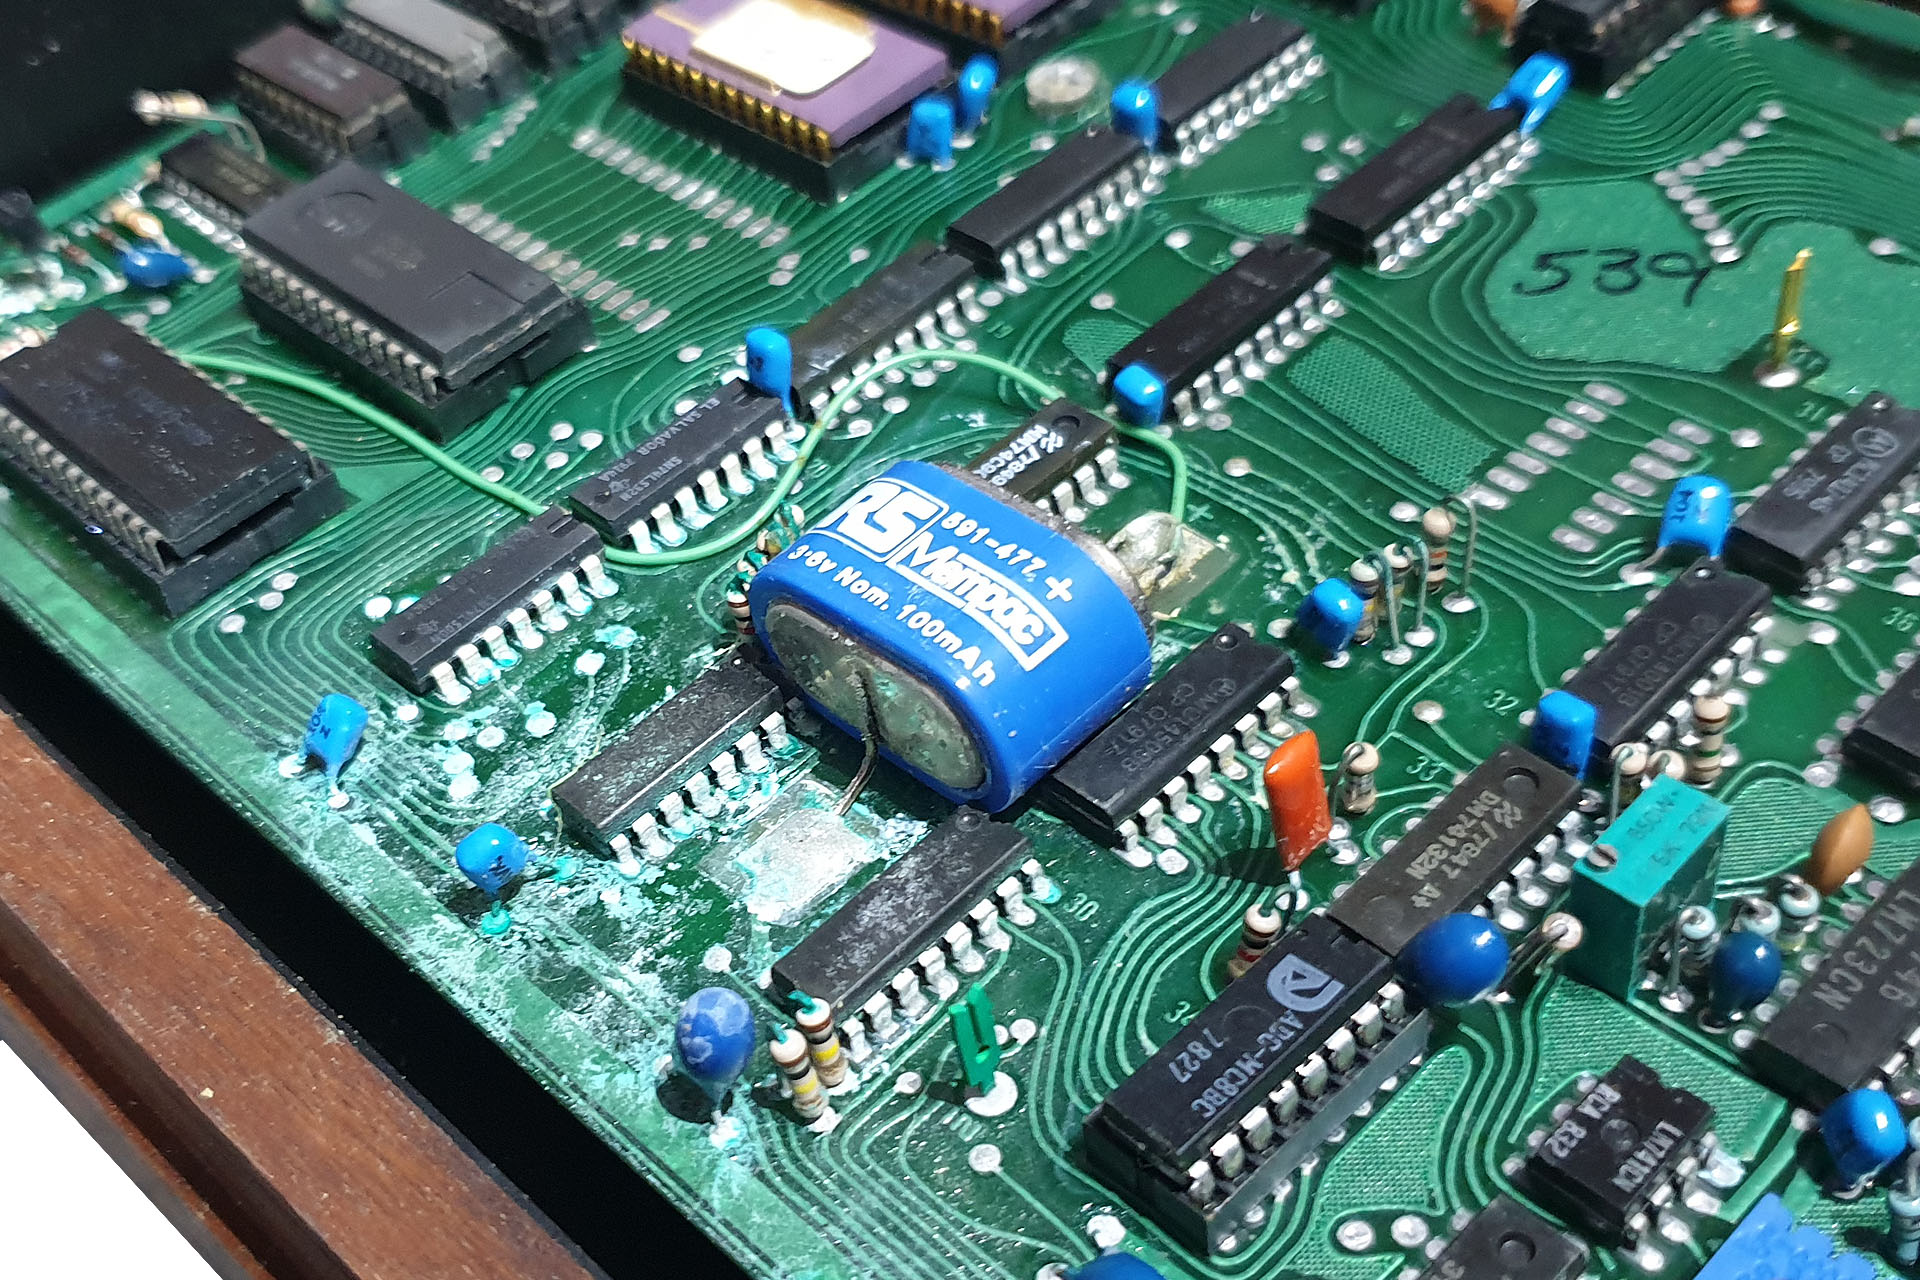
Anyway, older stuff does have a memory back-up battery and if left unchecked, the results can be devastating. I recently did a post on a gorgeous Sequential Circuits Prophet 5 Rev 2 that hadn't been touched for over thirty years. Of course during that time, the back-up battery had degraded and had in fact leaked all over the CPU board. It's going to take me months to sort out the mess and that's going to be expensive!

Battery Acid Damage in Prophet 5 2 (2020.12.16)
After thirty years, this battery in a Sequential Circuits Prophet 5 is more than just flat!

My Live Forever battery mod doesn't just involved replacing the original battery with a larger type. If possible, I try to mount the holder for the new battery, usually a lithium CR123, directly on to the chassis and off any PCB. In the event that the battery does leak, then it won't damage any circuitry.

Of course mounting the new battery on to the chassis isn't always possible. The Marshall JMP-1 is a good example. There are two versions of the  JMP-1. One has a case with a little room to allow for a CR123 battery holder to be mounted to the metal. The other and more popular version doesn't. In situations where the battery can't be mounted off-PCB, I simply have to find the best place to put it.

MEMORY BACK-UP BATTERY TYPES

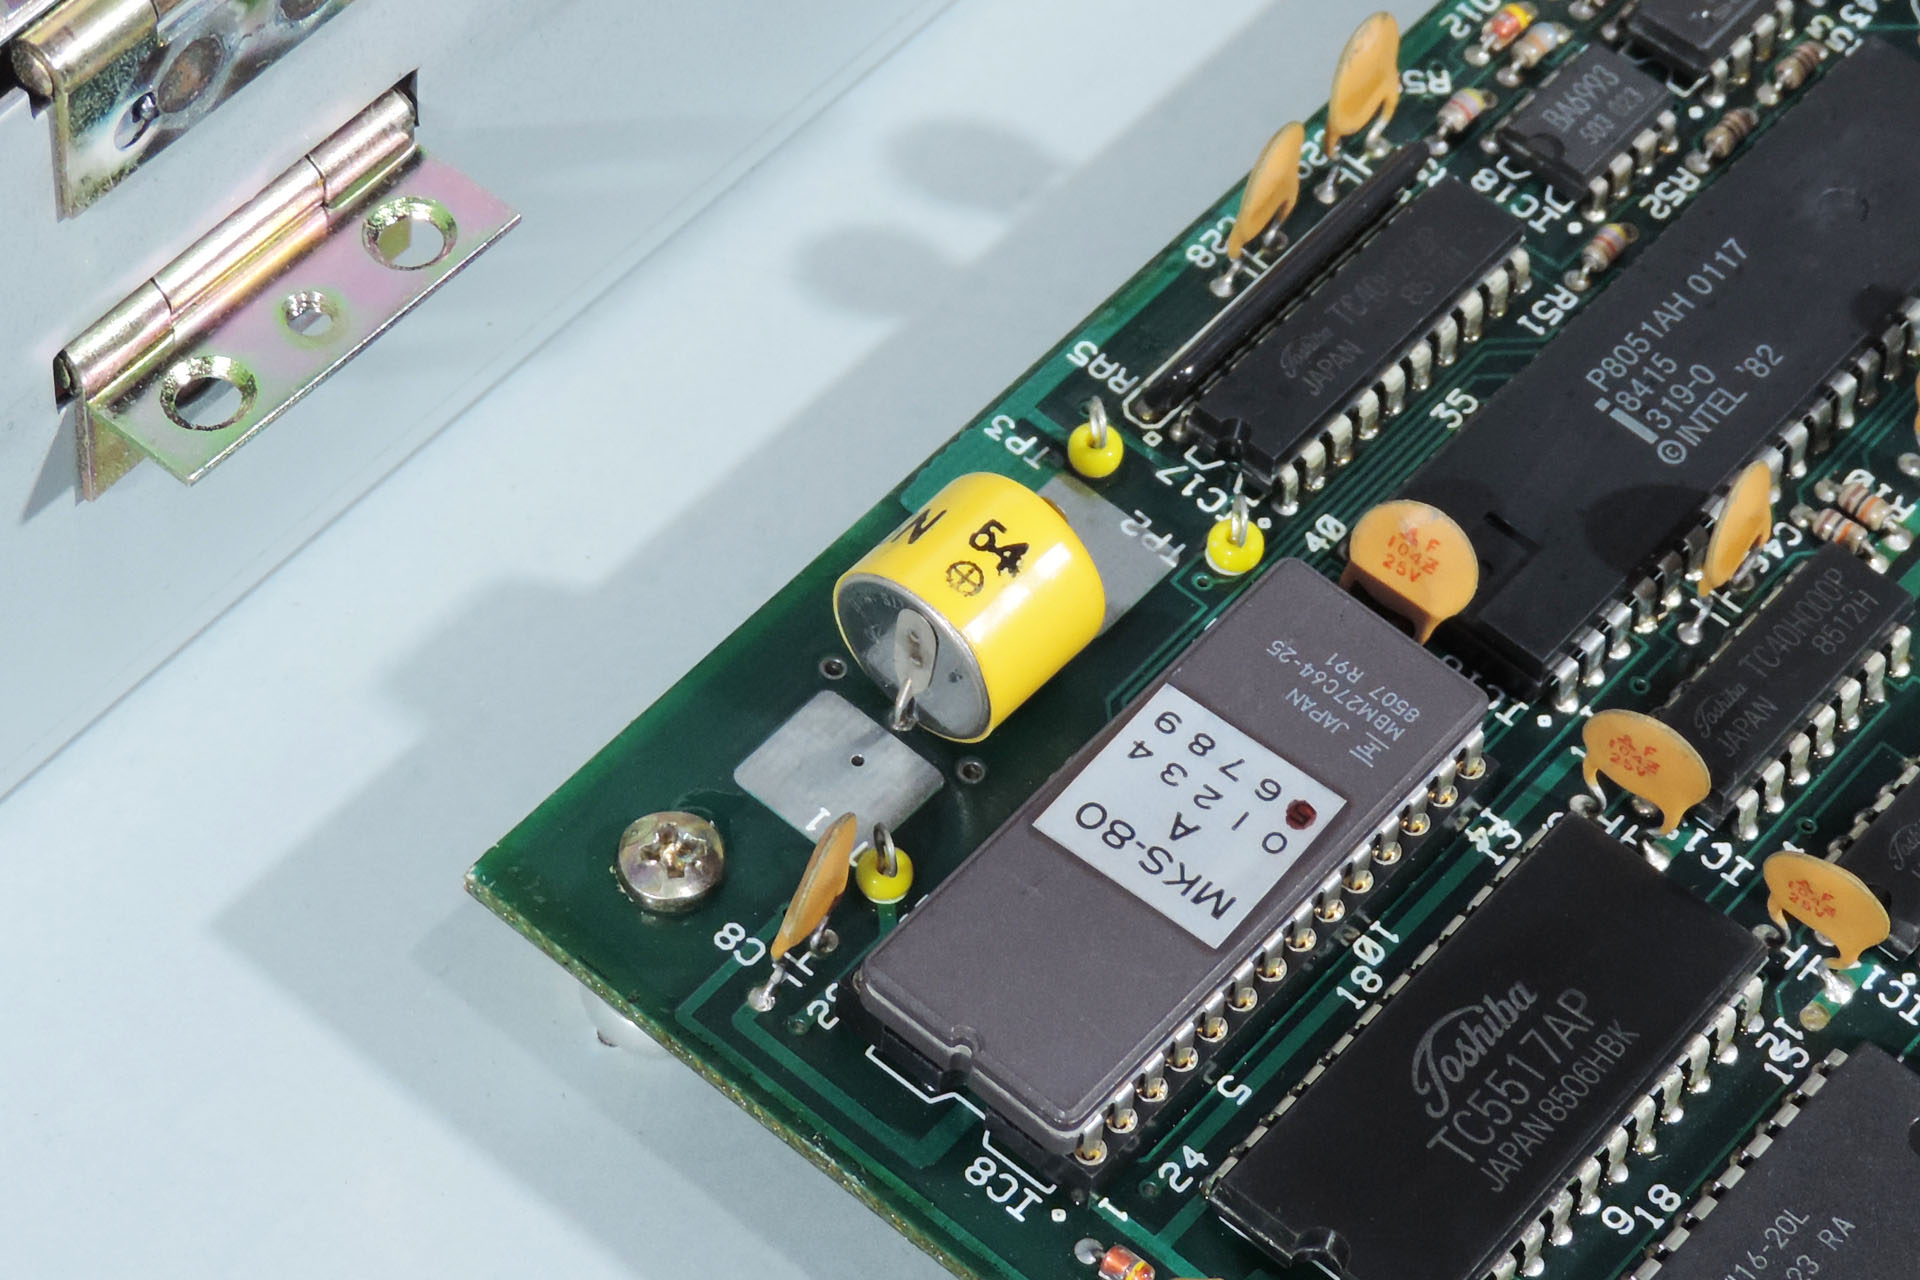
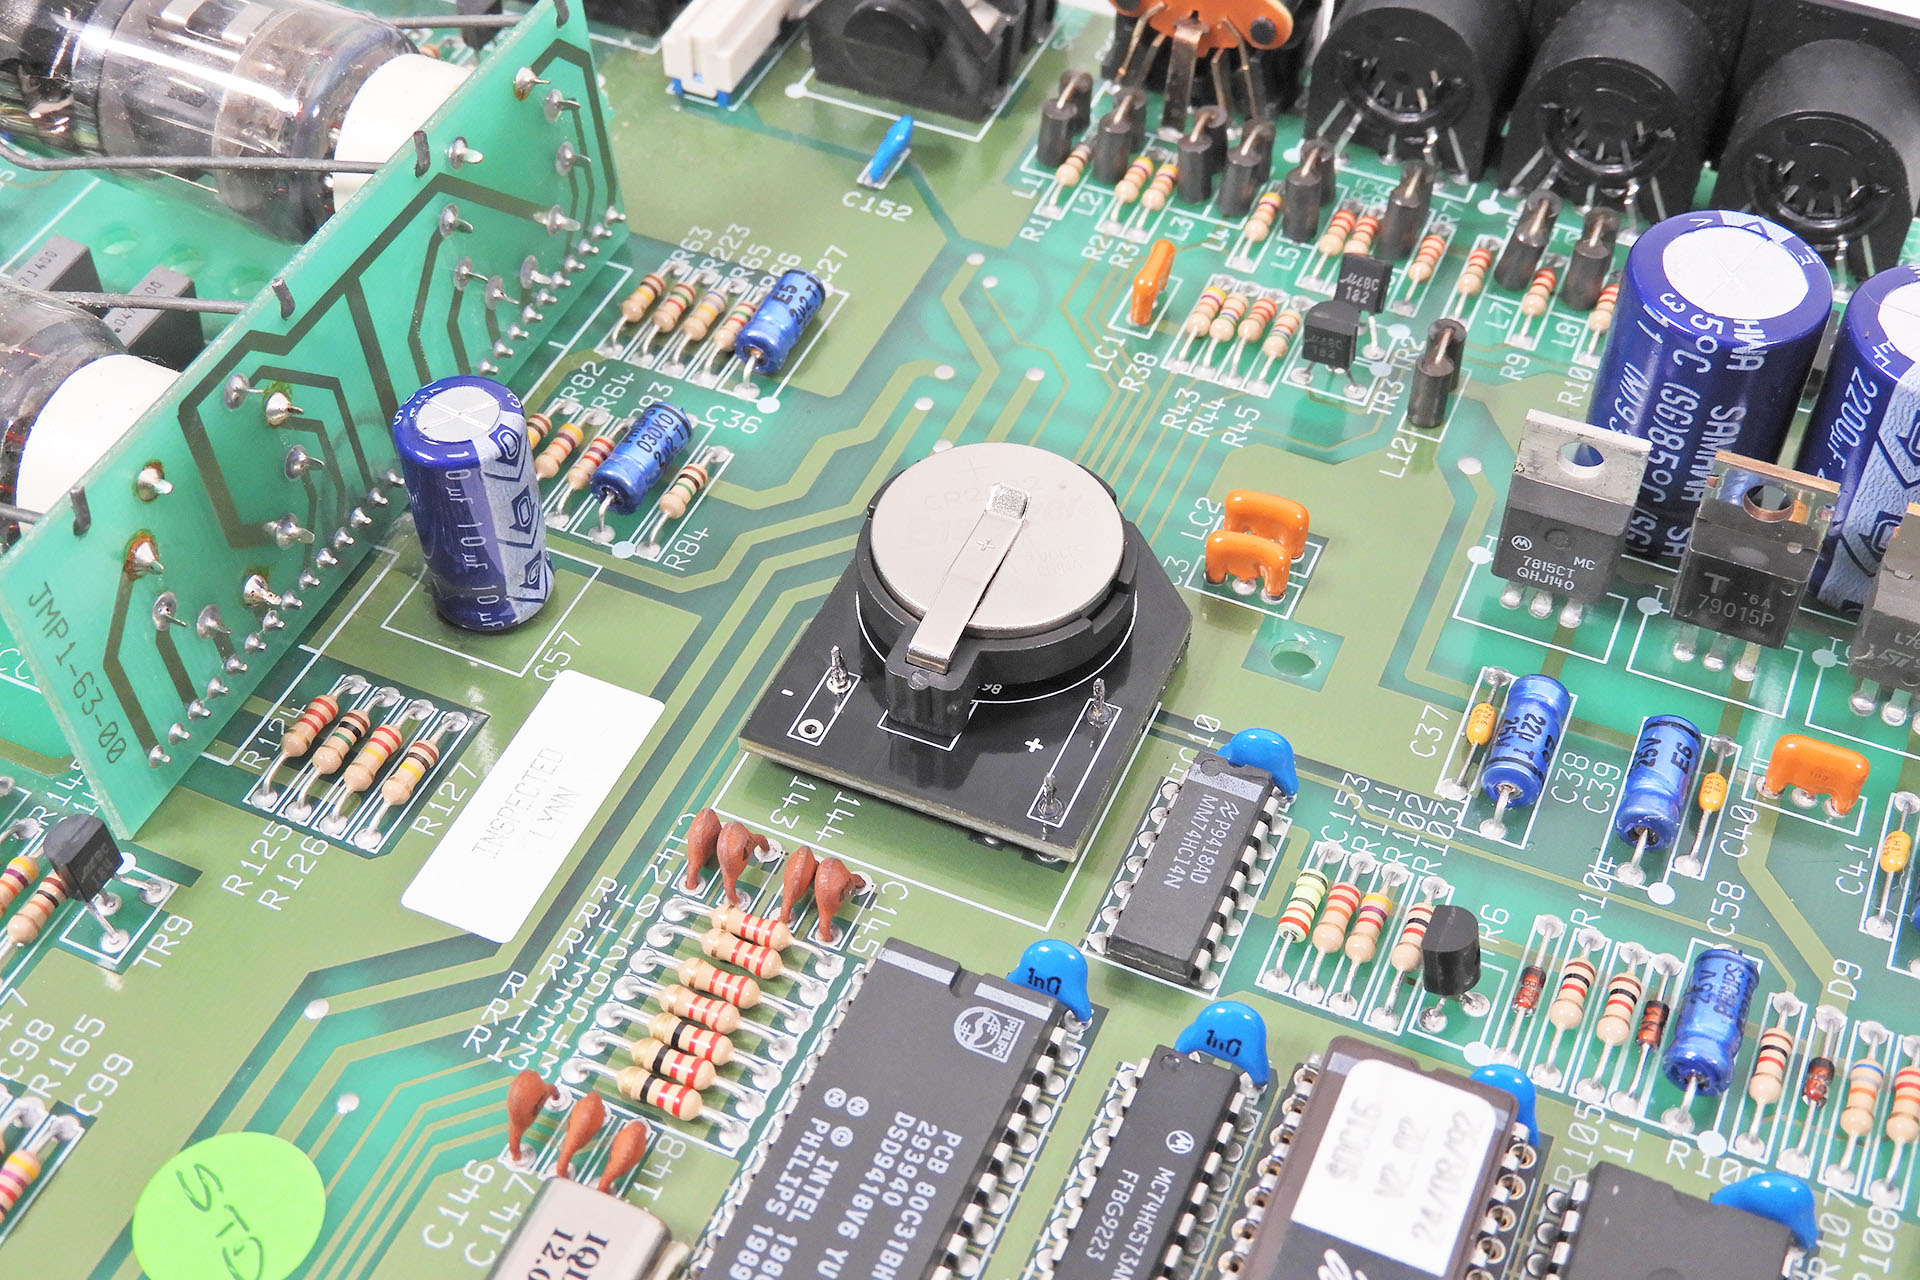
Most vintage equipment that uses a memory back-up battery does so with something like a CR2030, CR2032 or similar type 'coin' battery that's soldered to a PCB and located close to the RAM (memory chip). This isn't always the case, though. The Roland MKS-80 for example, used a CR-1/3N battery as pictured below.

Back-up battery in Roland MKS-80

My Live Forever battery mod involves replacing the original battery with a much higher capacity CR123 type cell which is also small enough to fit into many situations.

Supernova has on-board back-up battery for Juno-106 memory back-up
My Supernova replacement switched-mode power supply for the Roland Juno-106 comes with my Live-Forever memory back-up battery mod on-board.

The default battery chemistry is lithium or rather lithium manganese dioxide (LiMnO2). They're cheap, readily available and very reliable.

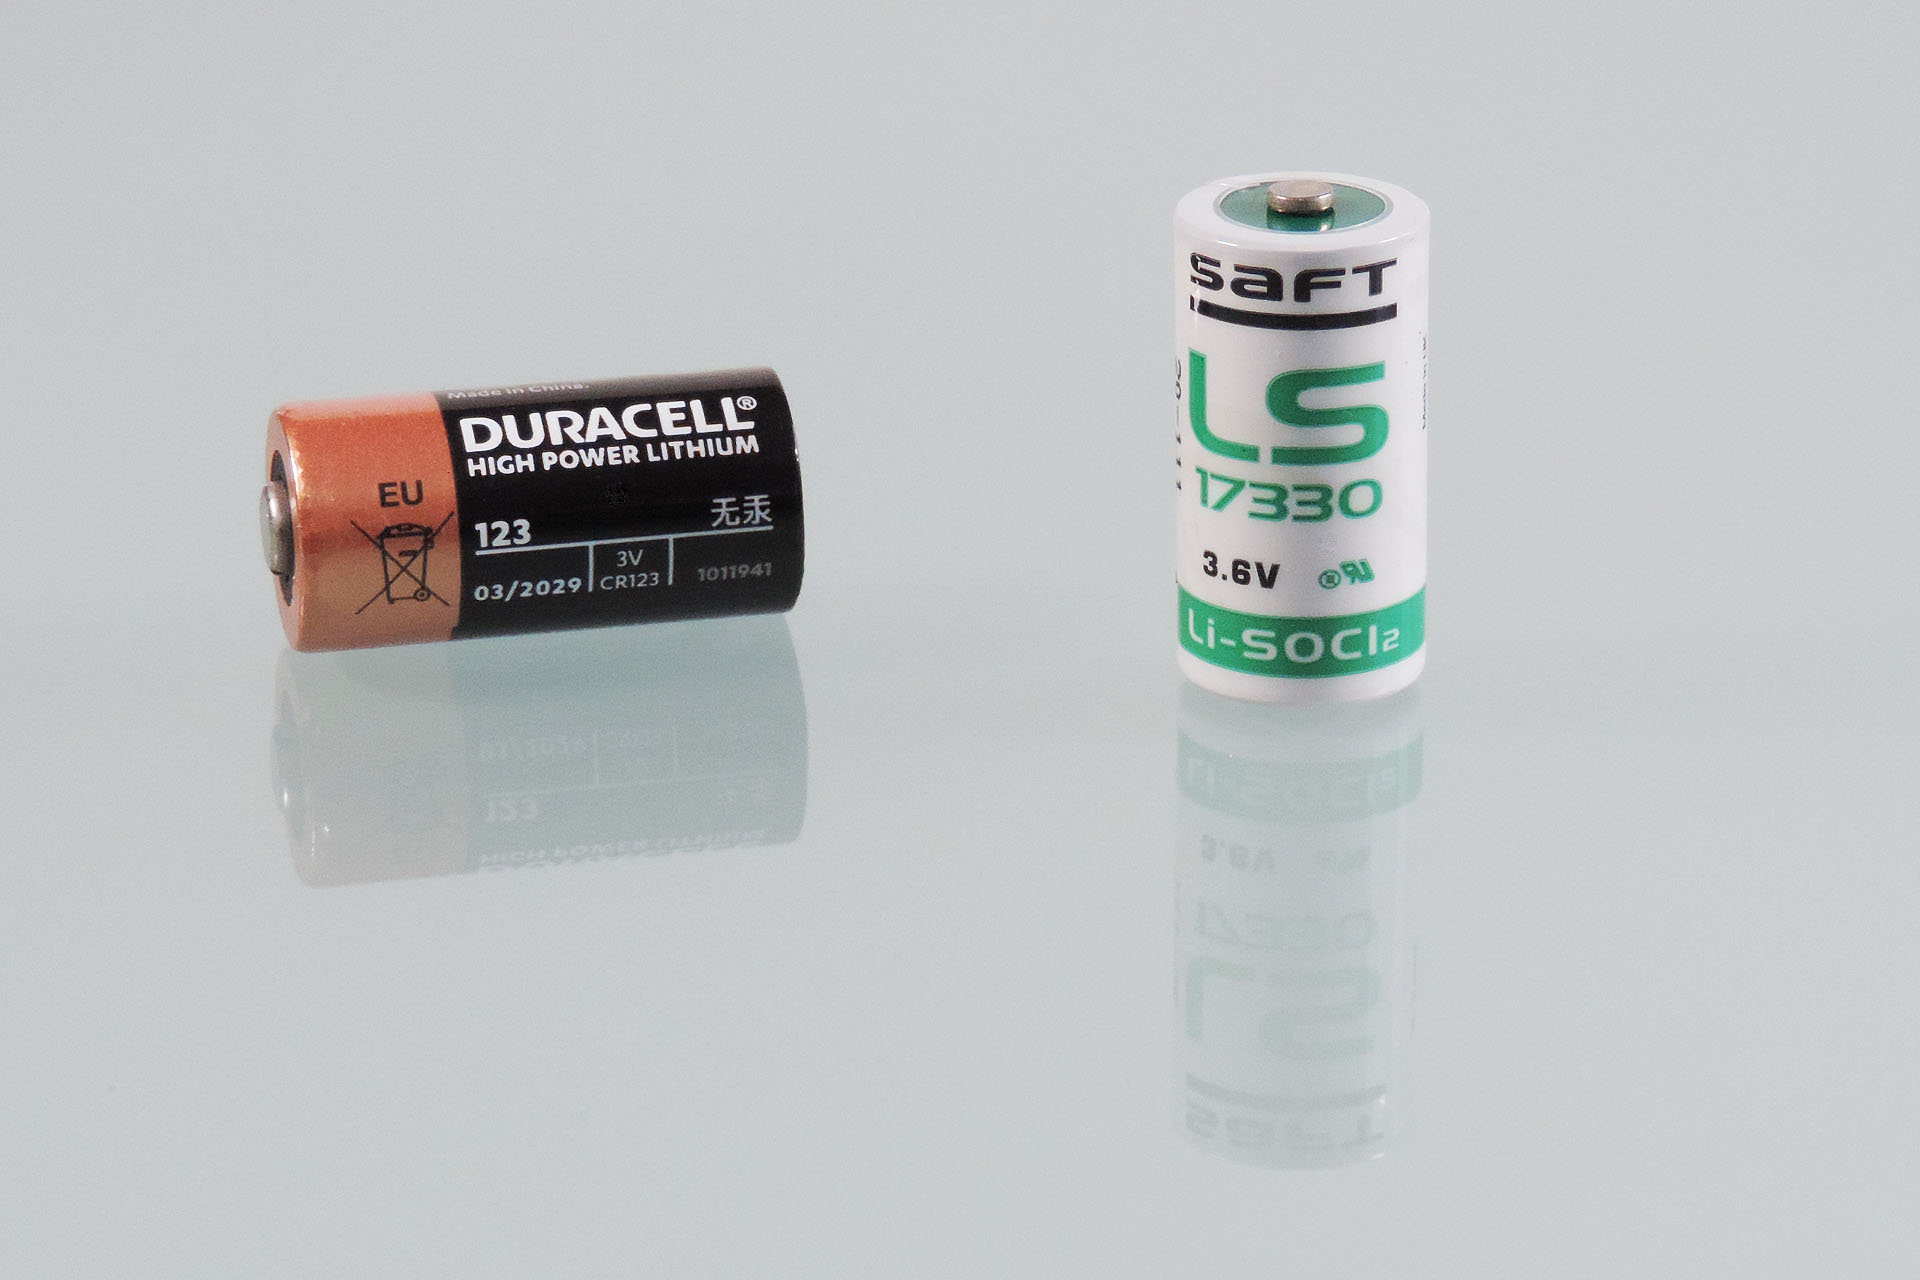
Lithium CR123s however, aren't the only option that can be used for replacing the original memory back-up battery. While sticking with the CR123 form-factor, I'm a big fan of Lithium thionyl chloride batteries (LiSOCl2), for example. Designed specifically for very low-current, very long-life applications, they're ideal for the job. They are however, more expensive and more difficult to procure.

jhsbjshdb
On the left is a standard Duracell manganese dioxide (LiMnO2) CR123 battery. On the right is the super performance Saft Lithium thionyl chloride batteries (LiSOCl2) CR123 battery.

Finally, a long time ago, I experimented with clip-on retainers that fit over the CR123 battery holder, thereby offering more physical security to the actual battery.

Well, apart from having installed my Live Forever battery mod into countless machines over the years, all of my own gear is fitted with my mod. In over thirty years, I have NEVER experienced a battery being dislodged from the battery holder and feel that any impact that would be strong enough to do that, would most likely seriously damage the machine that it's fitted to!

The main reason I don't supply the retention clip however, is that they have a very (VERY) tight fit. I'm concerned that if the battery ever does need to be removed, damage to the unit may occur while simply trying to remove the clip! 🙁

Anyway, my Live Forever memory back-up battery mod is available for just about any synthesiser, sound module or effects processor so don't hesitate to contact me if you have any questions. In the meantime, if you'd like to learn more about lithium manganese dioxide and Lithium thionyl chloride batteries, please check out these links:

https://en.wikipedia.org/wiki/List_of_battery_sizes#Lithium_cells

https://www.geeksforgeeks.org/difference-between-volatile-memory-and-non-volatile-memory/

http://www.tadiranbat.com/compare-lithium-cells.html


UPDATE - 22nd July 2023

I often get asked about the memory back-up battery in the Marshall JMP-1 and with soldered batteries not really being in fashion anymore, replacements are difficult to get hold of. I therefore decided to knock up a small PCB that mounts into the original battery location but which has a CR2032 clip. This allows for easy battery changing with a standard (you guessed it) CR2032. Measuring the voltage on the battery is a little easier, too. 🙂

CR2032 adapter installed in Marshall JMP-1

RE-MKS-80 replacement rack-ears for Roland DDR-30 at Plasma Music

I didn't originally intend to design a pair of rack ears for the Roland DDR-30. My idea was to make a pair of rack ears just for the MKS-80. Modelled on the rack ears of my own MKS-80, Lenton Engineering in Watford, delivered yet another superb job, based on my plans.

After a little digging around however, I subsequently discovered that as well as the DDR-30, these rack ears will also fit a whole bunch of other Roland 2U modules from the same era:

  • Roland MKS-7 Super Quartet (released 1986)
  • Roland MKS-10 Planet-P piano module (released 1984)
  • Roland MKS-20 Rack mount version of the RD-1000 digital piano (released 1986)
  • Roland MKS-30 Rack-mount of the JX-3P synthesiser (released 1984)
  • Roland MKS-80 Rack mount version of something in between the Jupiter 6 and Jupiter 8 keyboard synthesisers (released 1984)*
  • Roland MKS-100 Rack mount version of the S-10 sampler (released 1986)

* If you have a MKS-80 Rev 4, then you'll only use three screws each side. Yes, that's right; Roland didn't standardise the rack case 'till the Rev 5 was released!

Please note that these rack ears are only available in black and as a pair.

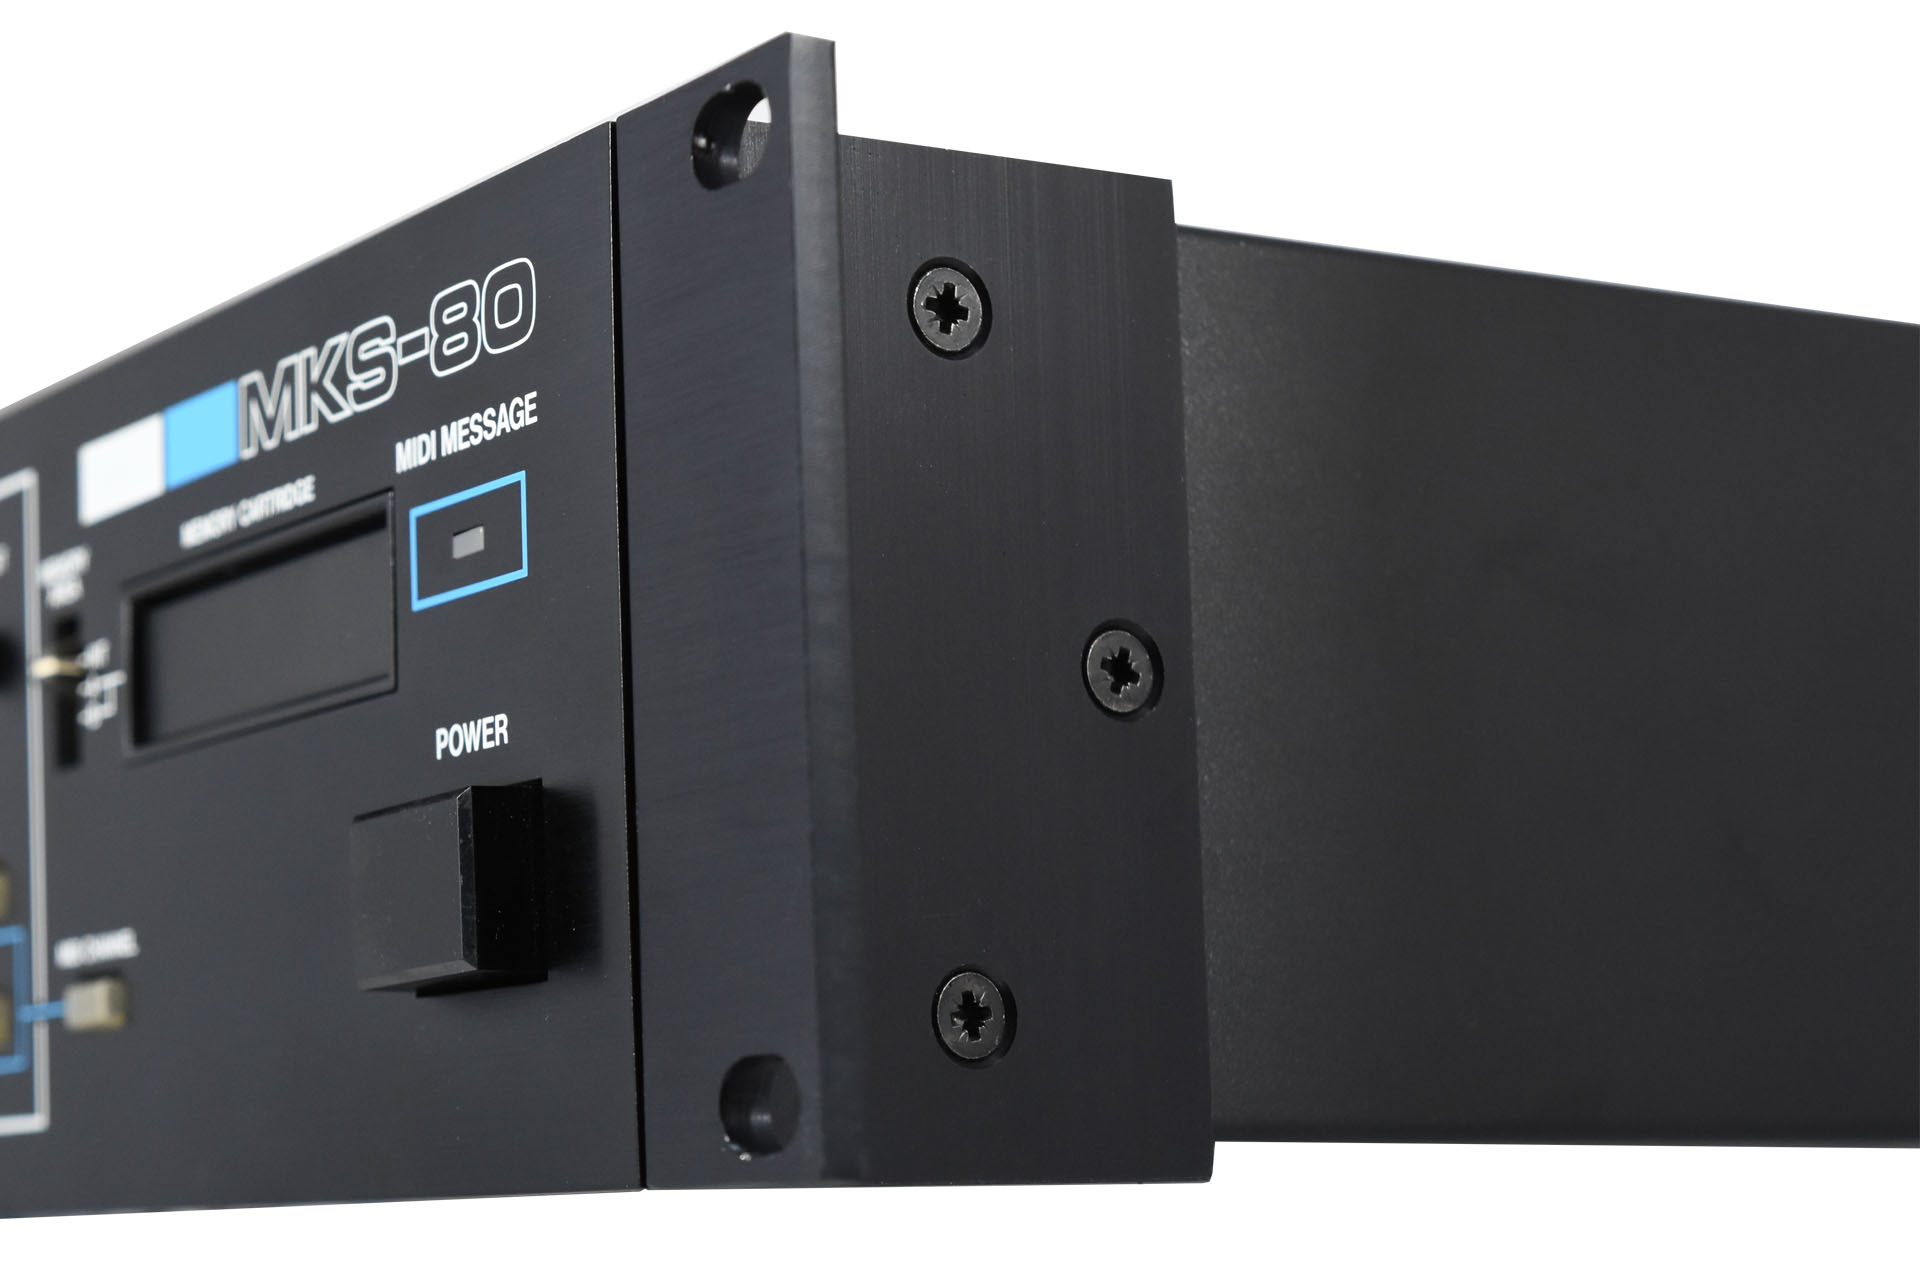
RE-MKS-80 Replacement Rack Ears Fitted to Roland MKS-80
Image shows RE-MKS-80 fitted to a Roland MKS-80 as I don't have a DDR-30.

When the prototypes were ready to collect, I got a real shock. They seemed to fit better than the originals and they looked just great!

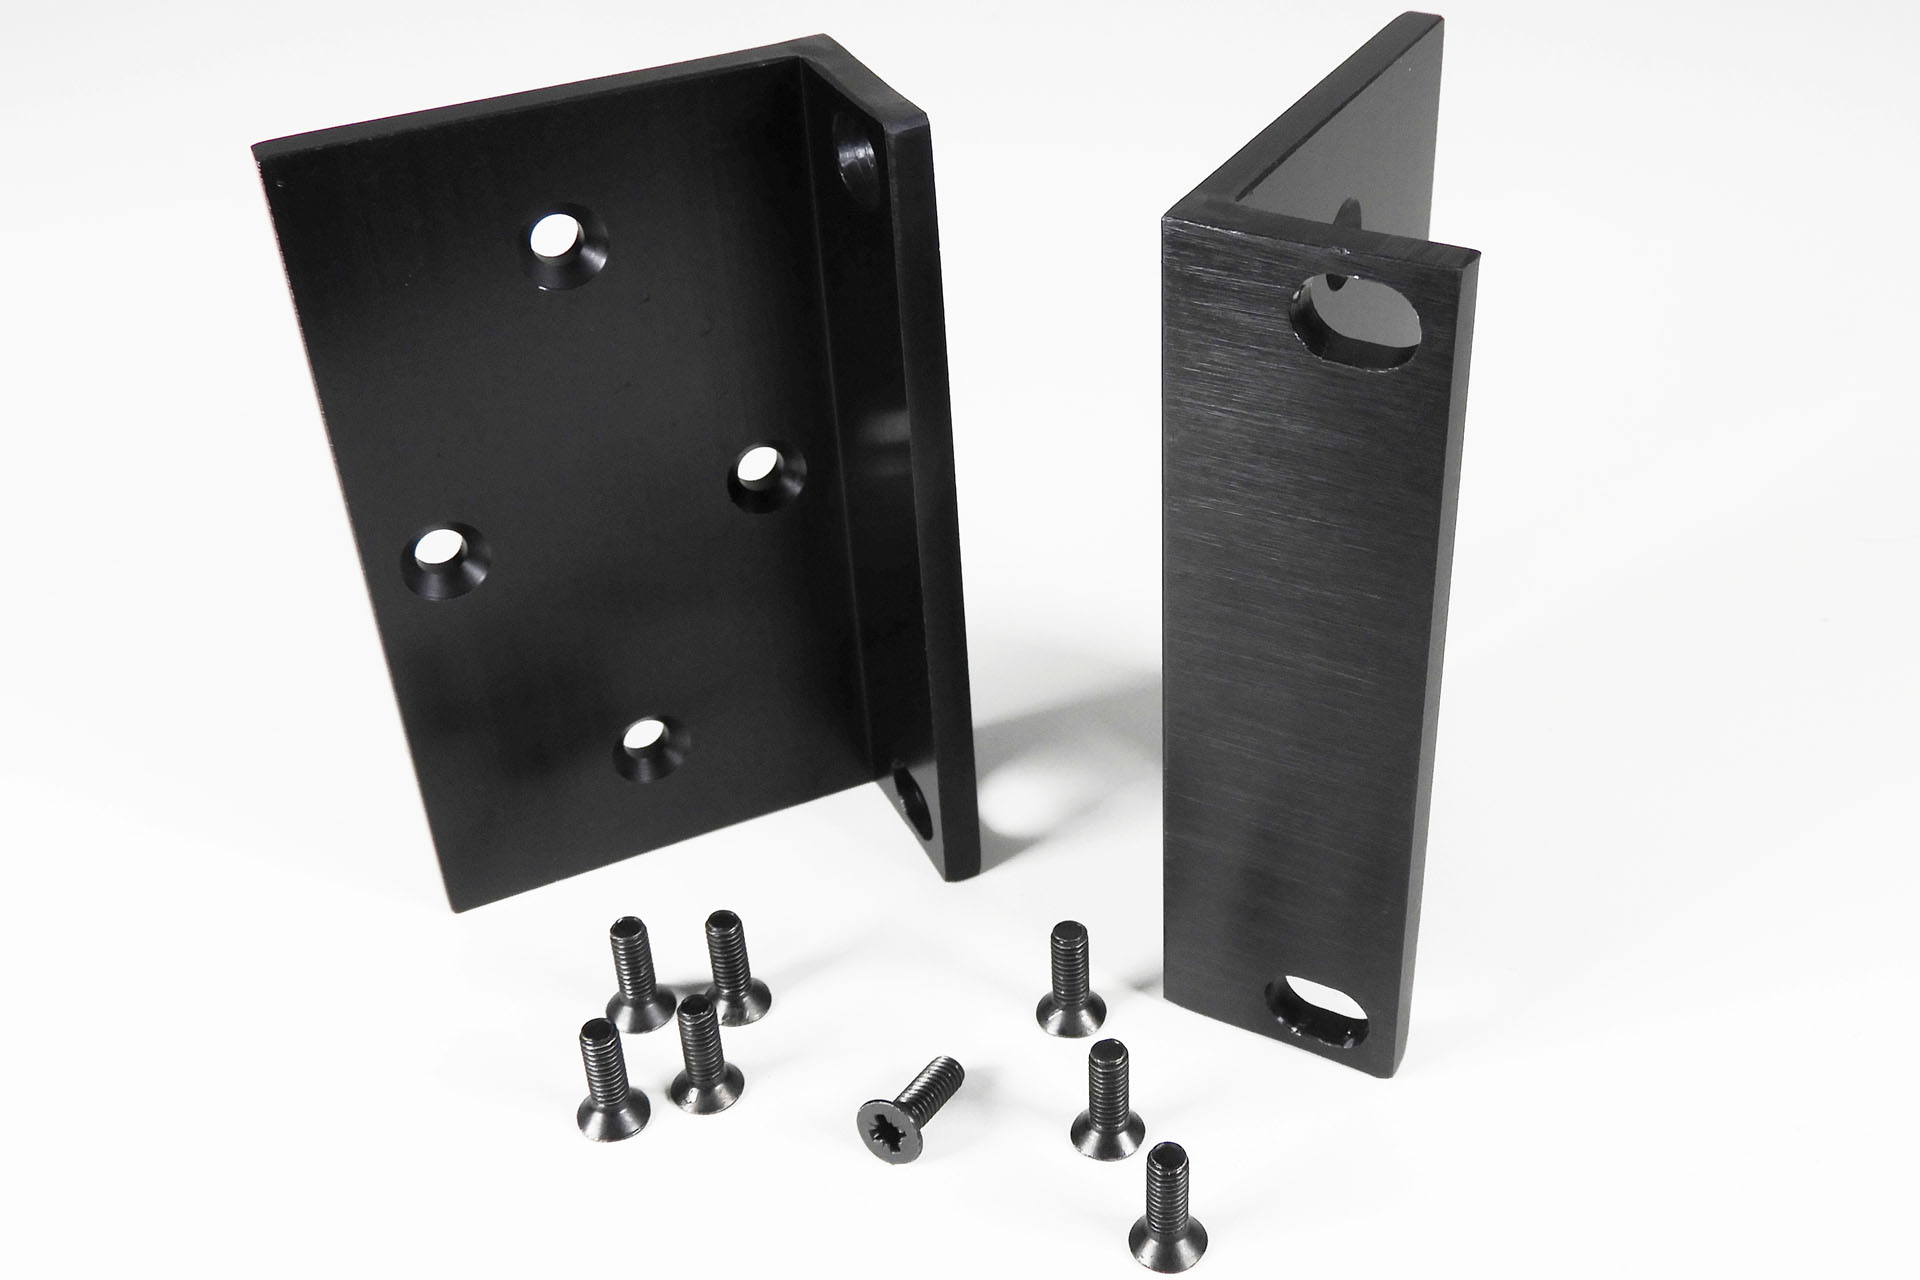
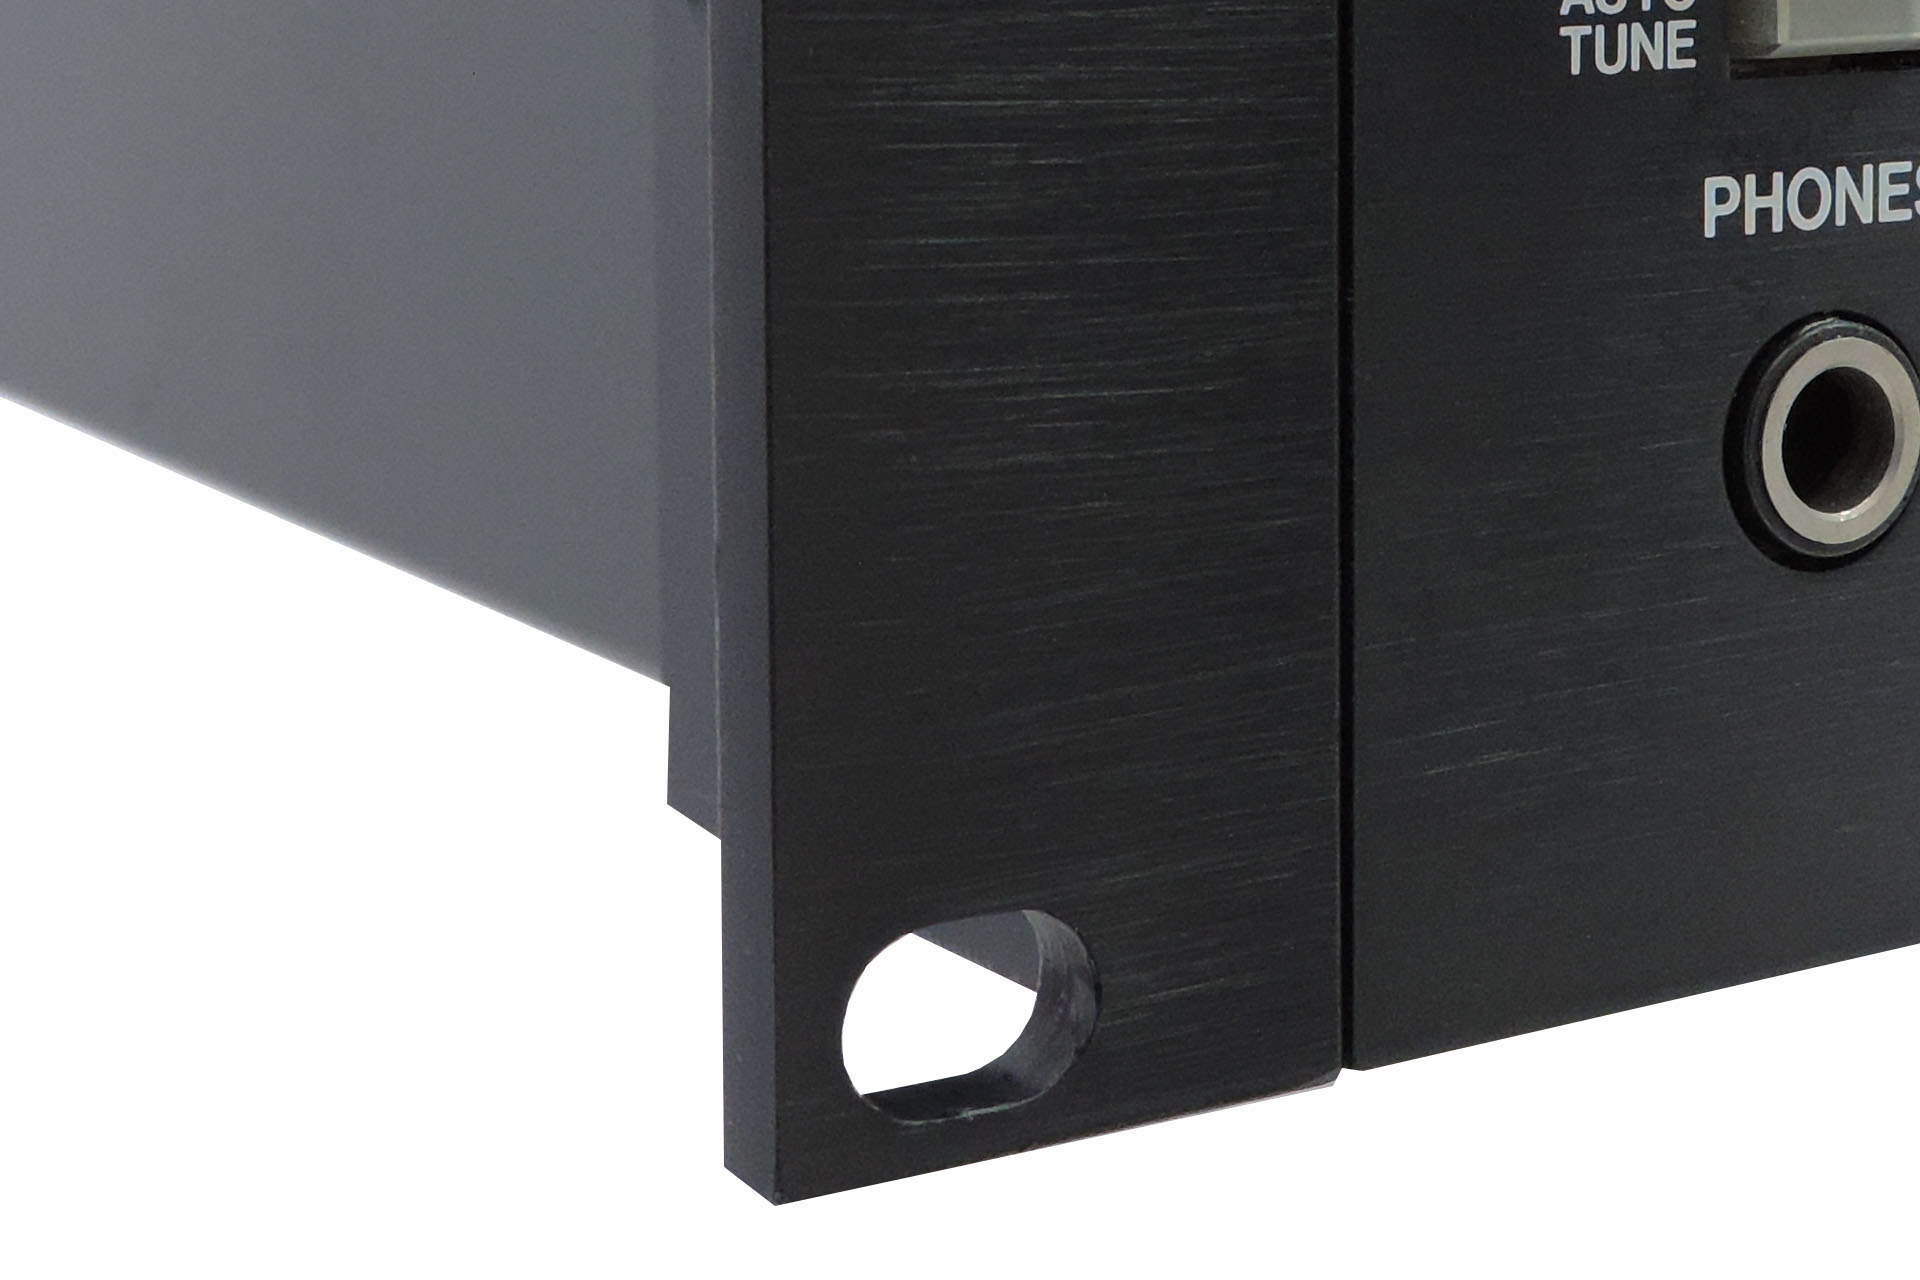
Just like the originals, these rack ears are made of aluminium, with a lovely horizontally running mill finish. Supplied with eight black countersunk pozidrive machine screws, the only thing you need to fit these, is a screwdriver! 🙂

My rack-ears have a horizontally running mill-finish, just like the originals

Sadly, my own DDR-30 was sold many years ago and I can only model these rack ears on my own MKS-80 as pictured.

I'm now happy to announce that these rack ear kits are available to purchase.

IMPORTANT: Shipping price is for worldwide delivery. 🙂


Plasma Music Limited -

I'm deeply concerned about the environment and the exploitation of labour and so  I always use local manufacturers in preference to the Far East, with the following in mind:
  1. I can be confident that workers are treated fairly and earn a proper wage.
  2. I can be confident of the standard of quality of each item that is delivered to me.
  3. Communication is important and using local manufacturers, all correspondence is quick and understandable.
  4. I believe in supporting the local economy.
  5. I can be confident that the disposal of manufacturing waste is managed properly and in accordance with national and EU law.

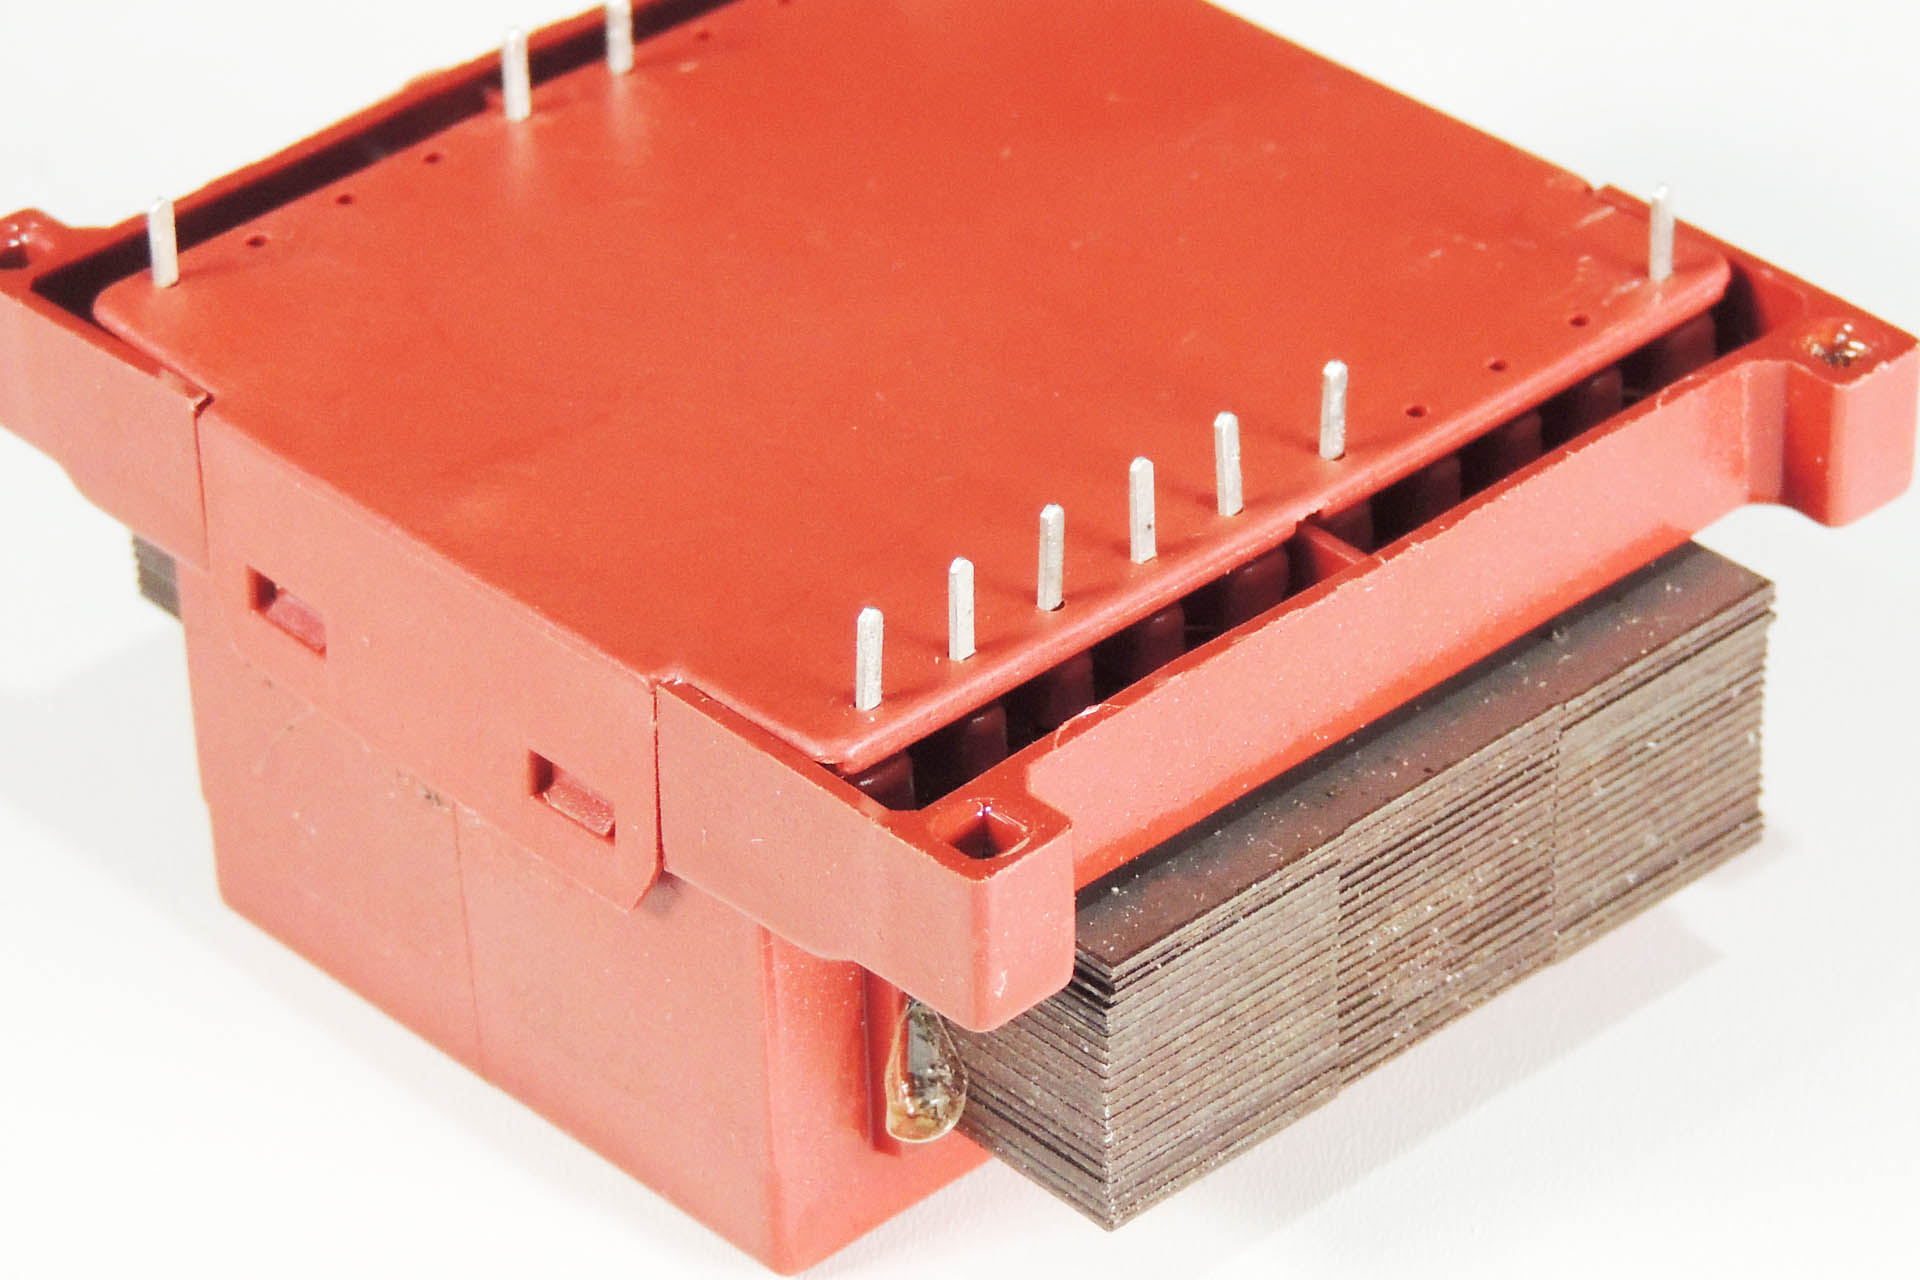
Plasma Music uses local manufacturers

Using local manufacturers isn’t the cheapest option but the above points are important to me. I hope that they’re important to you too.

RE-MKS-80 replacement rack-ears for Roland MKS-10 at Plasma Music

I didn't originally intend to design a pair of rack ears for the Roland MKS-10. My idea was to make a pair of rack ears just for the MKS-80. Modelled on the rack ears of my own MKS-80, Lenton Engineering in Watford, delivered yet another superb job, based on my plans.

After a little digging around however, I subsequently discovered that as well as the MKS-10, these rack ears will also fit a whole bunch of other Roland 2U modules from the same era:

    • Roland MKS-7 Super Quartet (released 1986)
    • Roland MKS-20 Rack mount version of the RD-1000 digital piano (released 1986)
    • Roland MKS-30 Rack-mount of the JX-3P synthesiser (released 1984)
    • Roland MKS-80 Rack mount version of something in between the Jupiter 6 and Jupiter 8 keyboard synthesisers (released 1984)*
    • Roland MKS-100 Rack mount version of the S-10 sampler (released 1986)
    • Roland DDR-30 Electronic drum module (released 1985)

* If you have a MKS-80 Rev 4, then you'll only use three screws each side. Yes, that's right; Roland didn't standardise the rack case 'till the Rev 5 was released!

Please note that these rack ears are only available in black and as a pair.

RE-MKS-80 Replacement Rack Ears Fitted to Roland MKS-80
Image shows RE-MKS-80 fitted to a Roland MKS-80 as I don't have a MKS-10.

When the prototypes were ready to collect, I got a real shock. They seemed to fit better than the originals and they looked just great!

Just like the originals, these rack ears are made of aluminium, with a lovely horizontally running mill finish. Supplied with eight black countersunk pozidrive machine screws, the only thing you need to fit these, is a screwdriver! 🙂

My rack-ears have a horizontally running mill-finish, just like the originals

Unfortunately, I don’t have a Roland MKS-10 and so the rack ears are shown attached to my own MKS-80.

I'm now happy to announce that these rack ear kits are available to purchase.

IMPORTANT: Shipping price is for worldwide delivery. 🙂


Plasma Music Limited -

I'm deeply concerned about the environment and the exploitation of labour and so  I always use local manufacturers in preference to the Far East, with the following in mind:
  1. I can be confident that workers are treated fairly and earn a proper wage.
  2. I can be confident of the standard of quality of each item that is delivered to me.
  3. Communication is important and using local manufacturers, all correspondence is quick and understandable.
  4. I believe in supporting the local economy.
  5. I can be confident that the disposal of manufacturing waste is managed properly and in accordance with national and EU law.

Plasma Music uses local manufacturers

Using local manufacturers isn’t the cheapest option but the above points are important to me. I hope that they’re important to you too.

RE-MKS-80 replacement rack-ears for Roland MKS-100 at Plasma Music

I didn’t originally intend to design a pair of rack ears for the Roland MKS-100. My idea was to make a pair of rack ears just for the MKS-80. Modelled on the rack ears of my own MKS-80, Lenton Engineering in Watford, delivered yet another superb job, based on my plans.

After a little digging around however, I subsequently discovered that as well as the MKS-100, these rack ears will also fit a whole bunch of other Roland 2U modules from the same era:

  • Roland MKS-7 Super Quartet (released 1986)
  • Roland MKS-10 Planet-P piano module (released 1984)
  • Roland MKS-20 Rack mount version of the RD-1000 digital piano (released 1986)
  • Roland MKS-30 Rack-mount of the JX-3P synthesiser (released 1984)
  • Roland MKS-80 Rack mount version of something in between the Jupiter 6 and Jupiter 8 keyboard synthesisers (released 1984)*
  • Roland DDR-30 Electronic drum module (released 1985)

* If you have a MKS-80 Rev 4, then you'll only use three screws each side. Yes, that's right; Roland didn't standardise the rack case 'till the Rev 5 was released!

Please note that these rack ears are only available in black and as a pair.

Image shows RE-MKS-80 fitted to a Roland MKS-80 as I don't have a MKS-100.

When the prototypes were ready to collect, I got a real shock. They seemed to fit better than the originals and they looked just great!

Just like the originals, these rack ears are made of aluminium, with a lovely horizontally running mill finish. Supplied with eight black countersunk pozidrive machine screws, the only thing you need to fit these, is a screwdriver! 🙂

My rack-ears have a horizontally running mill-finish, just like the originals

Unfortunately, I don’t have a Roland MKS-100 and so the rack ears are shown attached to my own MKS-80.

I'm now happy to announce that these rack ear kits are available to purchase.

IMPORTANT: Shipping price is for worldwide delivery. 🙂


Plasma Music Limited -

I'm deeply concerned about the environment and the exploitation of labour and so  I always use local manufacturers in preference to the Far East, with the following in mind:

  1. I can be confident that workers are treated fairly and earn a proper wage.
  2. I can be confident of the standard of quality of each item that is delivered to me.
  3. Communication is important and using local manufacturers, all correspondence is quick and understandable.
  4. I believe in supporting the local economy.
  5. I can be confident that the disposal of manufacturing waste is managed properly and in accordance with national and EU law.

Plasma Music uses local manufacturers

Using local manufacturers isn’t the cheapest option but the above points are important to me. I hope that they’re important to you too.

RE-MKS-80 replacement rack-ears for Roland MKS-30 at Plasma Music

I didn’t originally intend to design a pair of rack ears for the Roland MKS-30. My idea was to make a pair of rack ears just for the MKS-80. Modelled on the rack ears of my own MKS-80, Lenton Engineering in Watford, delivered yet another superb job, based on my plans.

After a little digging around however, I subsequently discovered that as well as the MKS-30, these rack ears will also fit a whole bunch of other Roland 2U modules from the same era:

  • Roland MKS-7 Super Quartet (released 1986)
  • Roland MKS-10 Planet-P piano module (released 1984)
  • Roland MKS-20 Rack mount version of the RD-1000 digital piano (released 1986)
  • Roland MKS-80 Rack mount version of something in between the Jupiter 6 and Jupiter 8 keyboard synthesisers (released 1984)*
  • Roland MKS-100 Rack mount version of the S-10 sampler (released 1986)
  • Roland DDR-30 Electronic drum module (released 1985)

* If you have a MKS-80 Rev 4, then you'll only use three screws each side. Yes, that's right; Roland didn't standardise the rack case 'till the Rev 5 was released!

Please note that these rack ears are only available in black and as a pair.

RE-MKS-80 Replacement Rack Ears Fitted to Roland MKS-80
Image shows RE-MKS-80 fitted to a Roland MKS-80 as I don't have a MKS-30.

When the prototypes were ready to collect, I got a real shock. They seemed to fit better than the originals and they looked just great!

Just like the originals, these rack ears are made of aluminium, with a lovely horizontally running mill finish. Supplied with eight black countersunk pozidrive machine screws, the only thing you need to fit these, is a screwdriver! 🙂

My rack-ears have a horizontally running mill-finish, just like the originals

Unfortunately, I don’t have a Roland MKS-30 and so the rack ears are shown attached to my own MKS-80.

I'm now happy to announce that these rack ear kits are available to purchase.

IMPORTANT: Shipping price is for worldwide delivery. 🙂


Plasma Music Limited -

I'm deeply concerned about the environment and the exploitation of labour and so  I always use local manufacturers in preference to the Far East, with the following in mind:

  1. I can be confident that workers are treated fairly and earn a proper wage.
  2. I can be confident of the standard of quality of each item that is delivered to me.
  3. Communication is important and using local manufacturers, all correspondence is quick and understandable.
  4. I believe in supporting the local economy.
  5. I can be confident that the disposal of manufacturing waste is managed properly and in accordance with national and EU law.

Plasma Music uses local manufacturers

Using local manufacturers isn’t the cheapest option but the above points are important to me. I hope that they’re important to you too.

RE-MKS-80 replacement rack-ears for Roland MKS-20 at Plasma Music

I didn’t originally intend to design a pair of rack ears for the Roland MKS-20. My idea was to make a pair of rack ears just for the MKS-80. Modelled on the rack ears of my own MKS-80, Lenton Engineering in Watford, delivered yet another superb job, based on my plans.

After a little digging around however, I subsequently discovered that as well as the MKS-20, these rack ears will also fit a whole bunch of other Roland 2U modules from the same era:

  • Roland MKS-7 Super Quartet (released 1986)
  • Roland MKS-10 Planet-P piano module (released 1984)
  • Roland MKS-30 Rack-mount of the JX-3P synthesiser (released 1984)
  • Roland MKS-80 Rack mount version of something in between the Jupiter 6 and Jupiter 8 keyboard synthesisers (released 1984)*
  • Roland MKS-100 Rack mount version of the S-10 sampler (released 1986)
  • Roland DDR-30 Electronic drum module (released 1985)

* If you have a MKS-80 Rev 4, then you'll only use three screws each side. Yes, that's right; Roland didn't standardise the rack case 'till the Rev 5 was released!

Please note that these rack ears are only available in black and as a pair.

RE-MKS-80 Replacement Rack Ears Fitted to Roland MKS-80
Image shows RE-MKS-80 fitted to a Roland MKS-80 as I don't have a MKS-20.

When the prototypes were ready to collect, I got a real shock. They seemed to fit better than the originals and they looked just great!

Just like the originals, these rack ears are made of aluminium, with a lovely horizontally running mill finish. Supplied with eight black countersunk pozidrive machine screws, the only thing you need to fit these, is a screwdriver! 🙂

My rack-ears have a horizontally running mill-finish, just like the originals

My rack-ears have a horizontally running mill-finish, just like the originalsUnfortunately, I don’t have a Roland MKS-20 and so the rack ears are shown attached to my own MKS-80.

I'm now happy to announce that these rack ear kits are available to purchase.

IMPORTANT: Shipping price is for worldwide delivery. 🙂


Plasma Music Limited -

I'm deeply concerned about the environment and the exploitation of labour and so  I always use local manufacturers in preference to the Far East, with the following in mind:
  1. I can be confident that workers are treated fairly and earn a proper wage.
  2. I can be confident of the standard of quality of each item that is delivered to me.
  3. Communication is important and using local manufacturers, all correspondence is quick and understandable.
  4. I believe in supporting the local economy.
  5. I can be confident that the disposal of manufacturing waste is managed properly and in accordance with national and EU law.

Plasma Music uses local manufacturers

Using local manufacturers isn’t the cheapest option but the above points are important to me. I hope that they’re important to you too.