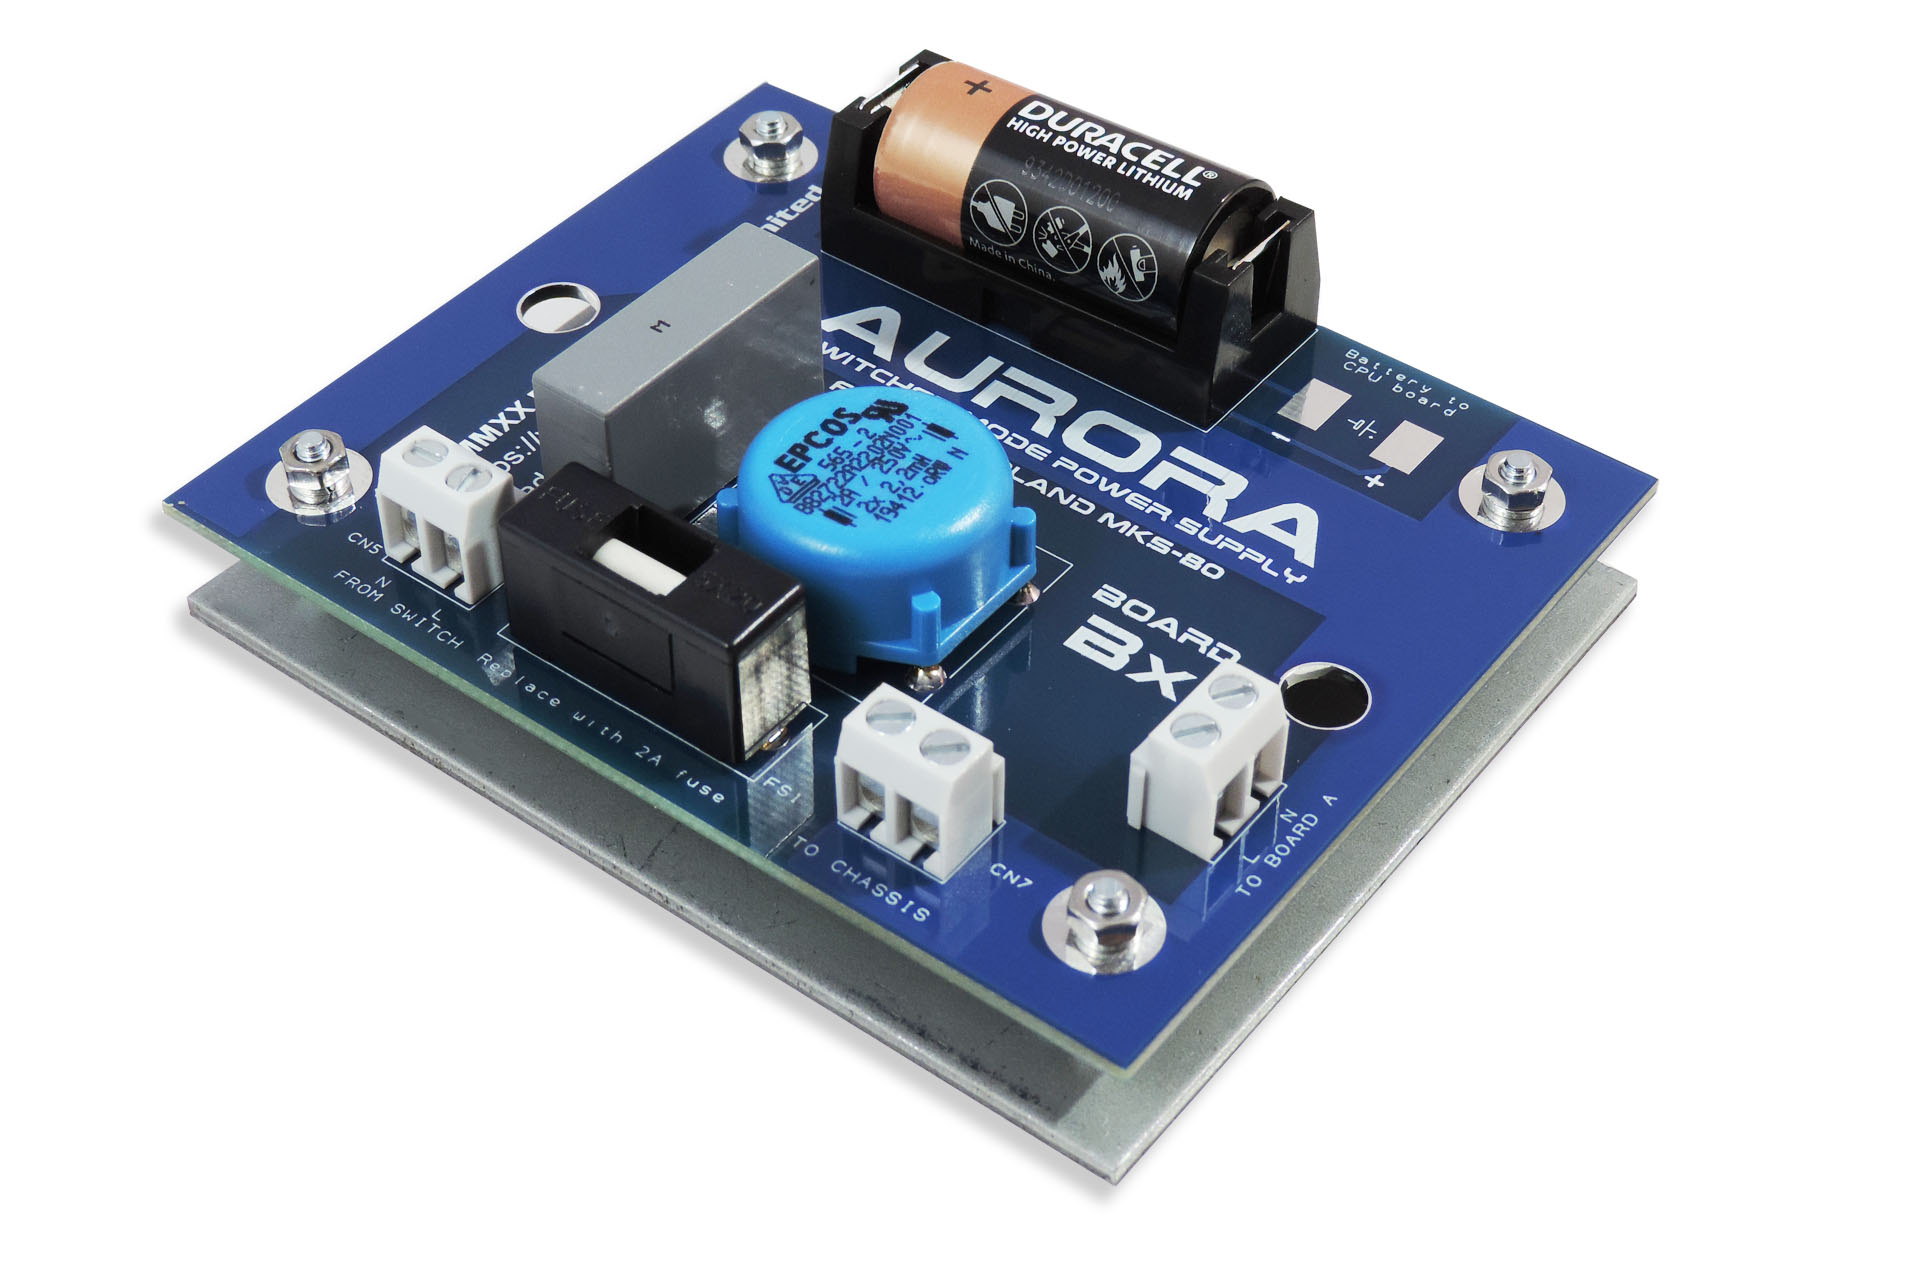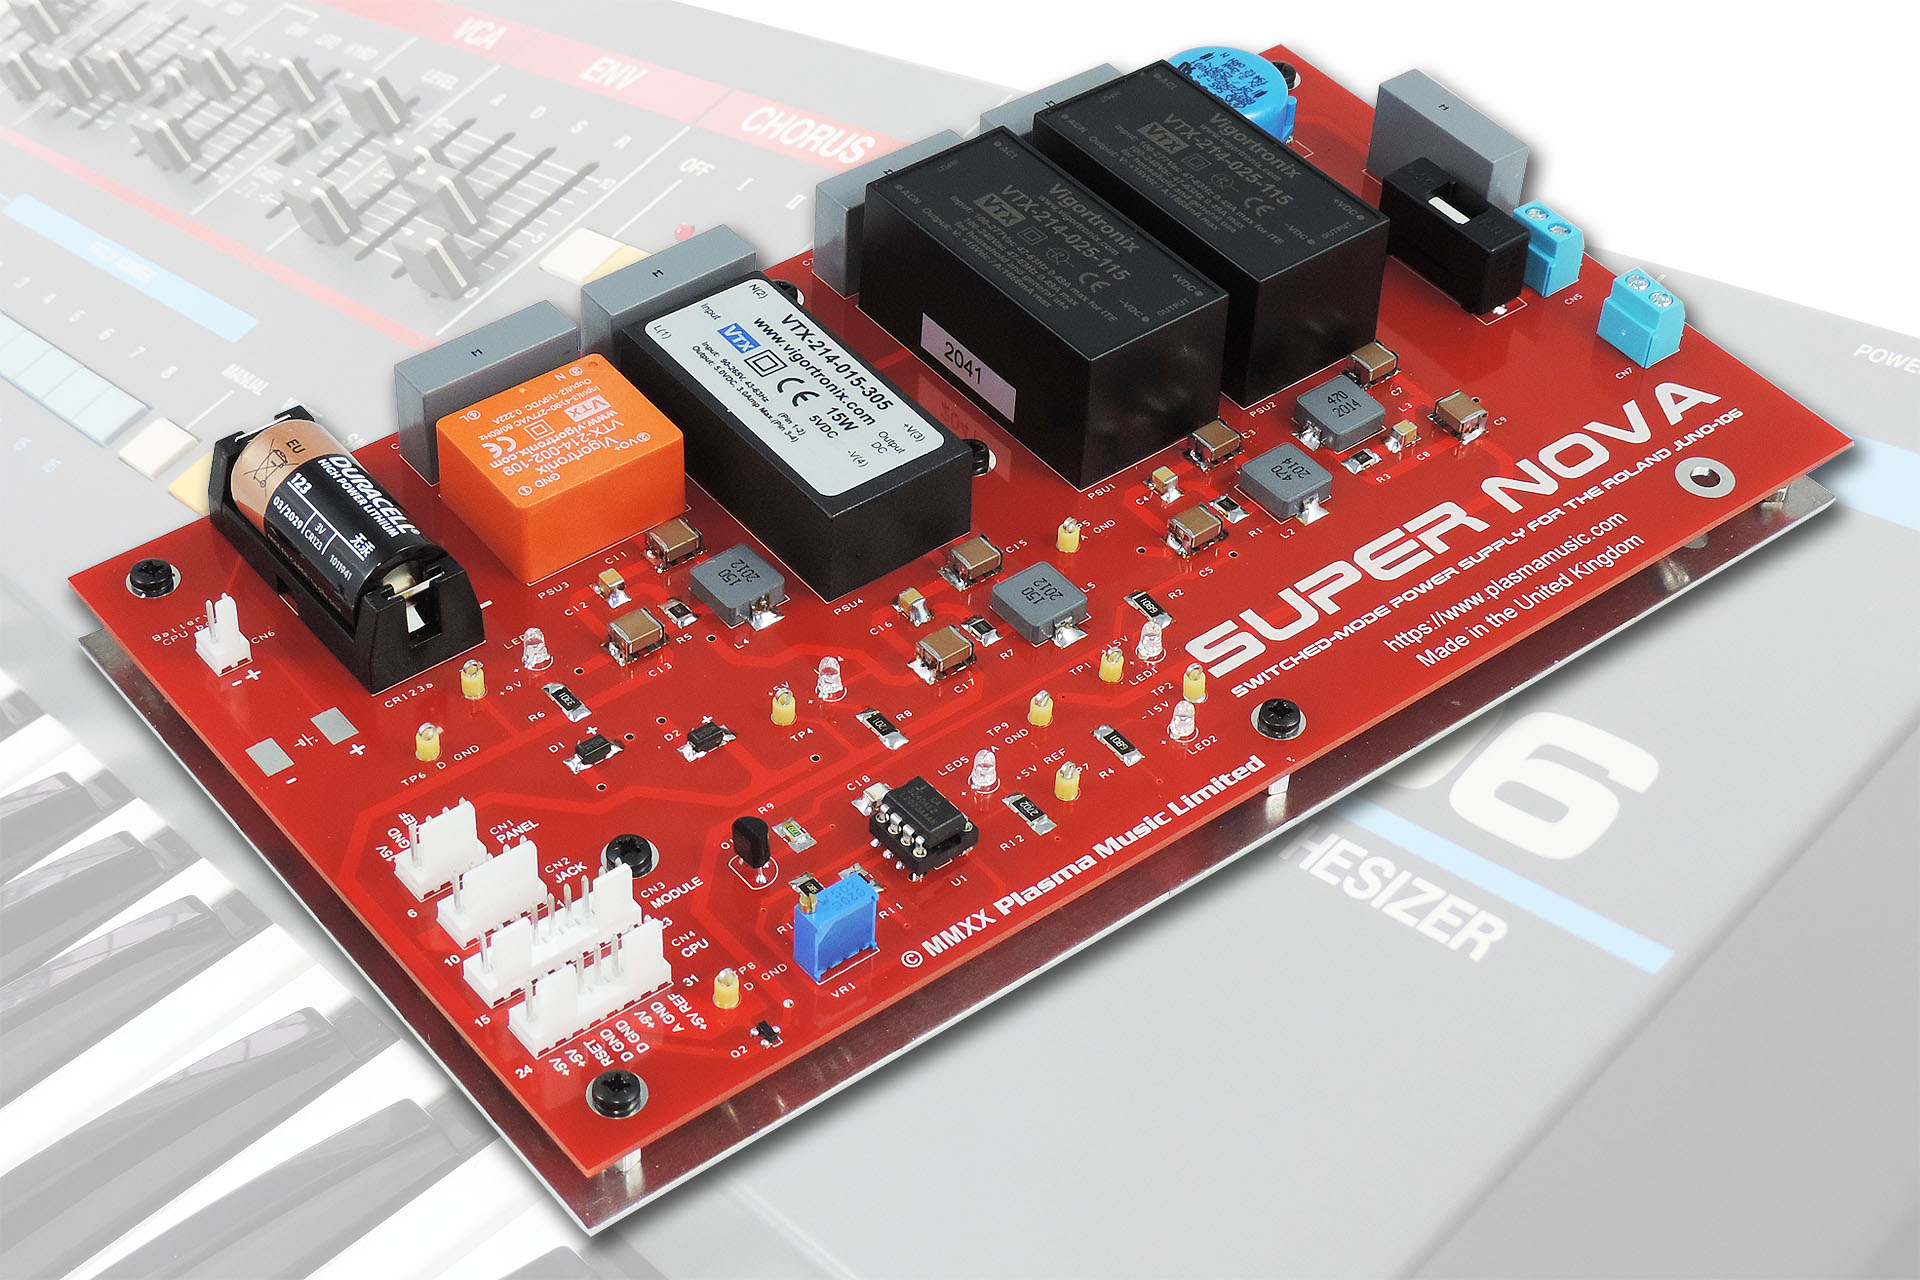
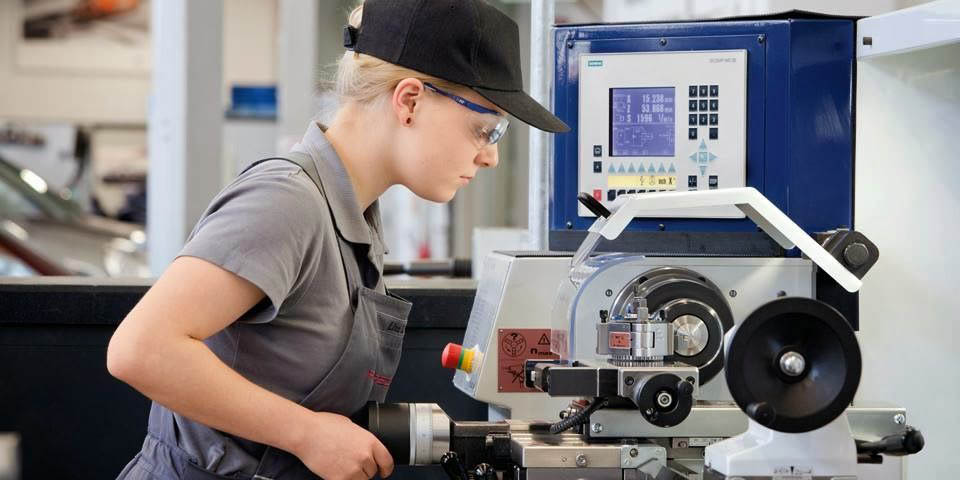
Following on from last summer’s Aurora project (read more about that here), I thought I’d have another look inside one of my favourite keyboard synths and see if I could do something similar. Well, it took me about a week to design the basics of what was very quickly to become the Supernova switched-mode power supply for the Roland Juno-106.
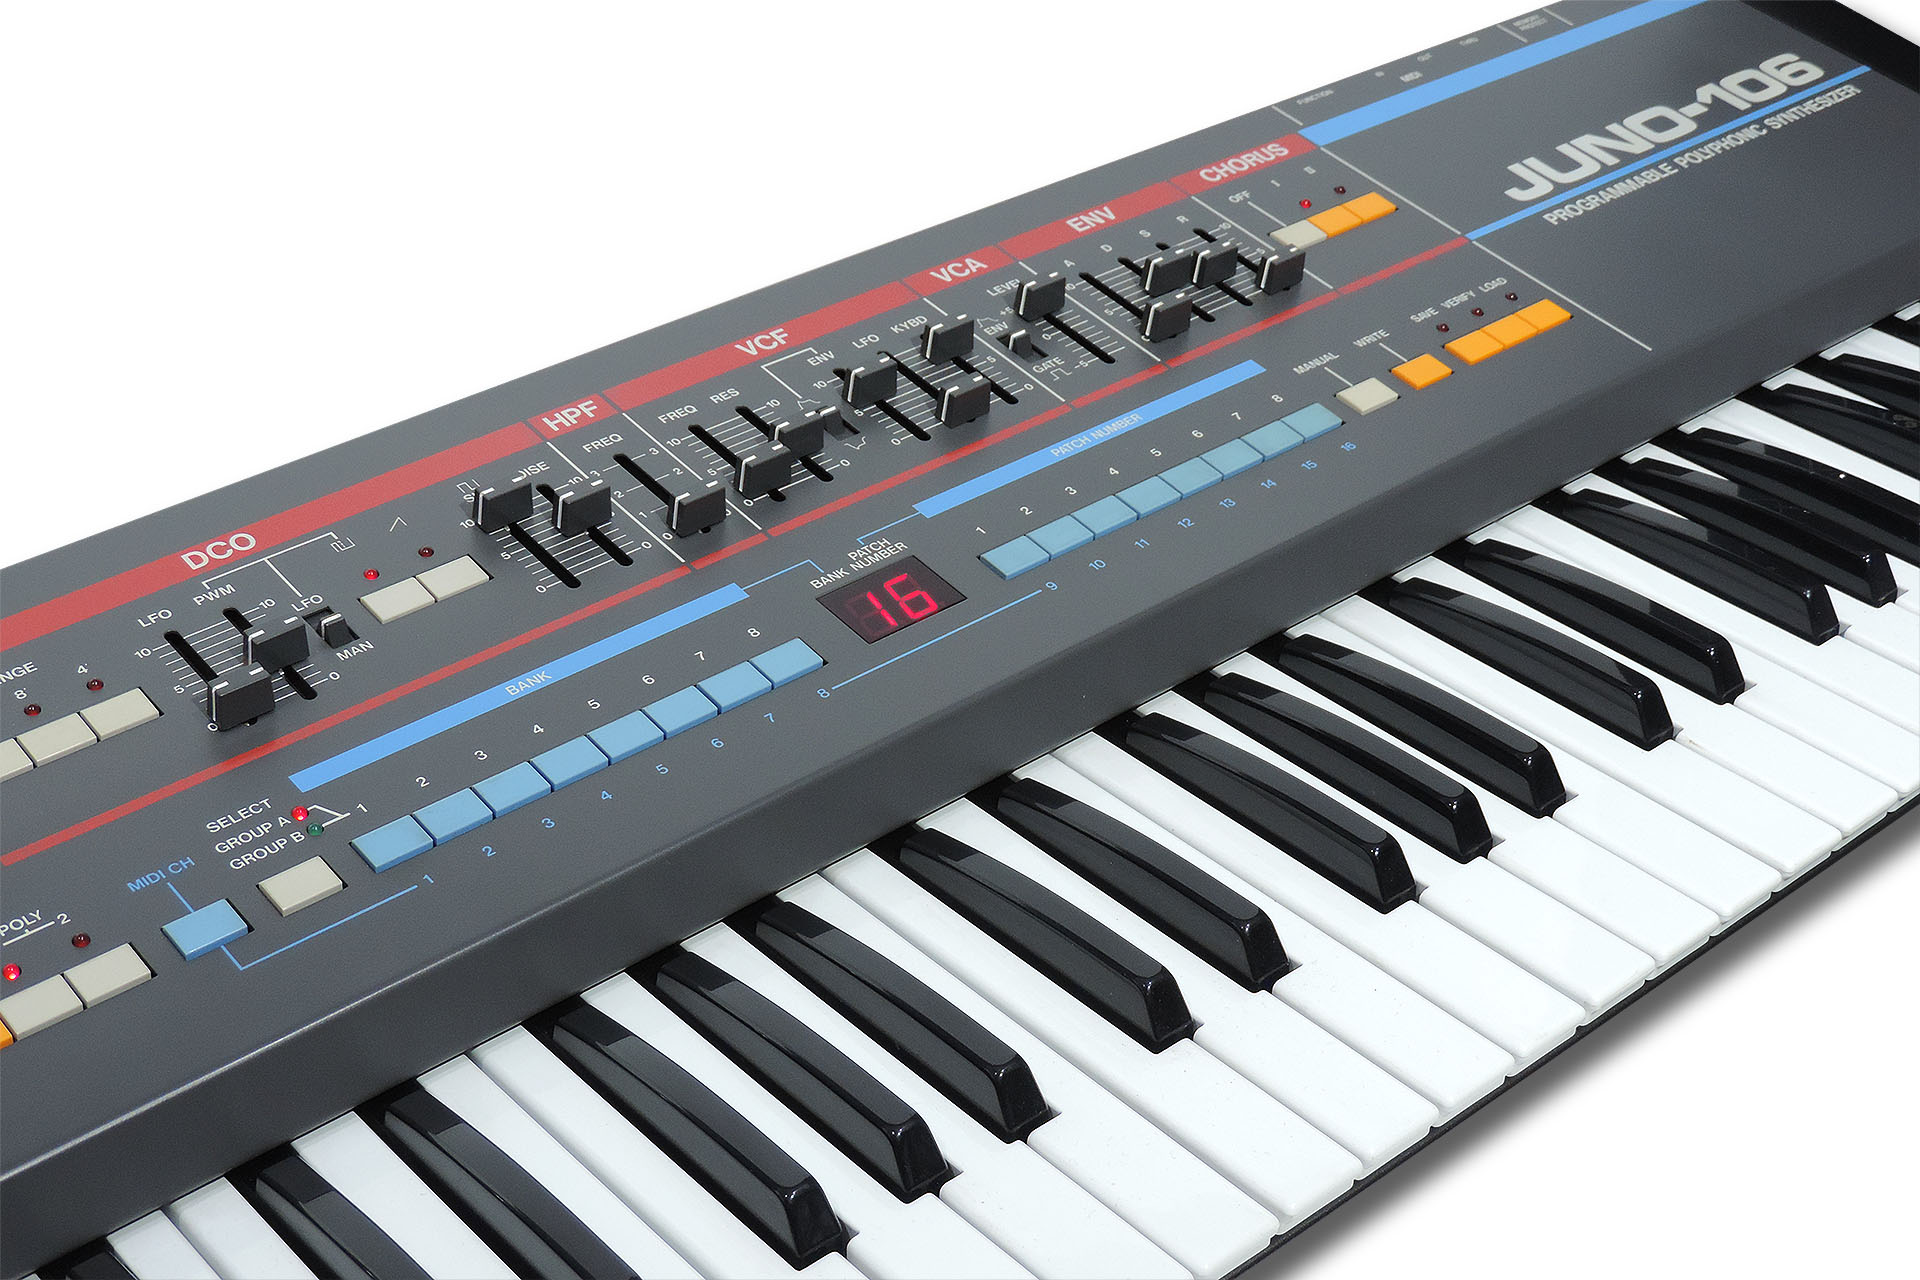
Being a guitarist, my selection of keyboard synthesisers is quite modest but I consistently find it amusing that many musicians walking into my studio, inevitably make a bee-line for my humble Juno-106.
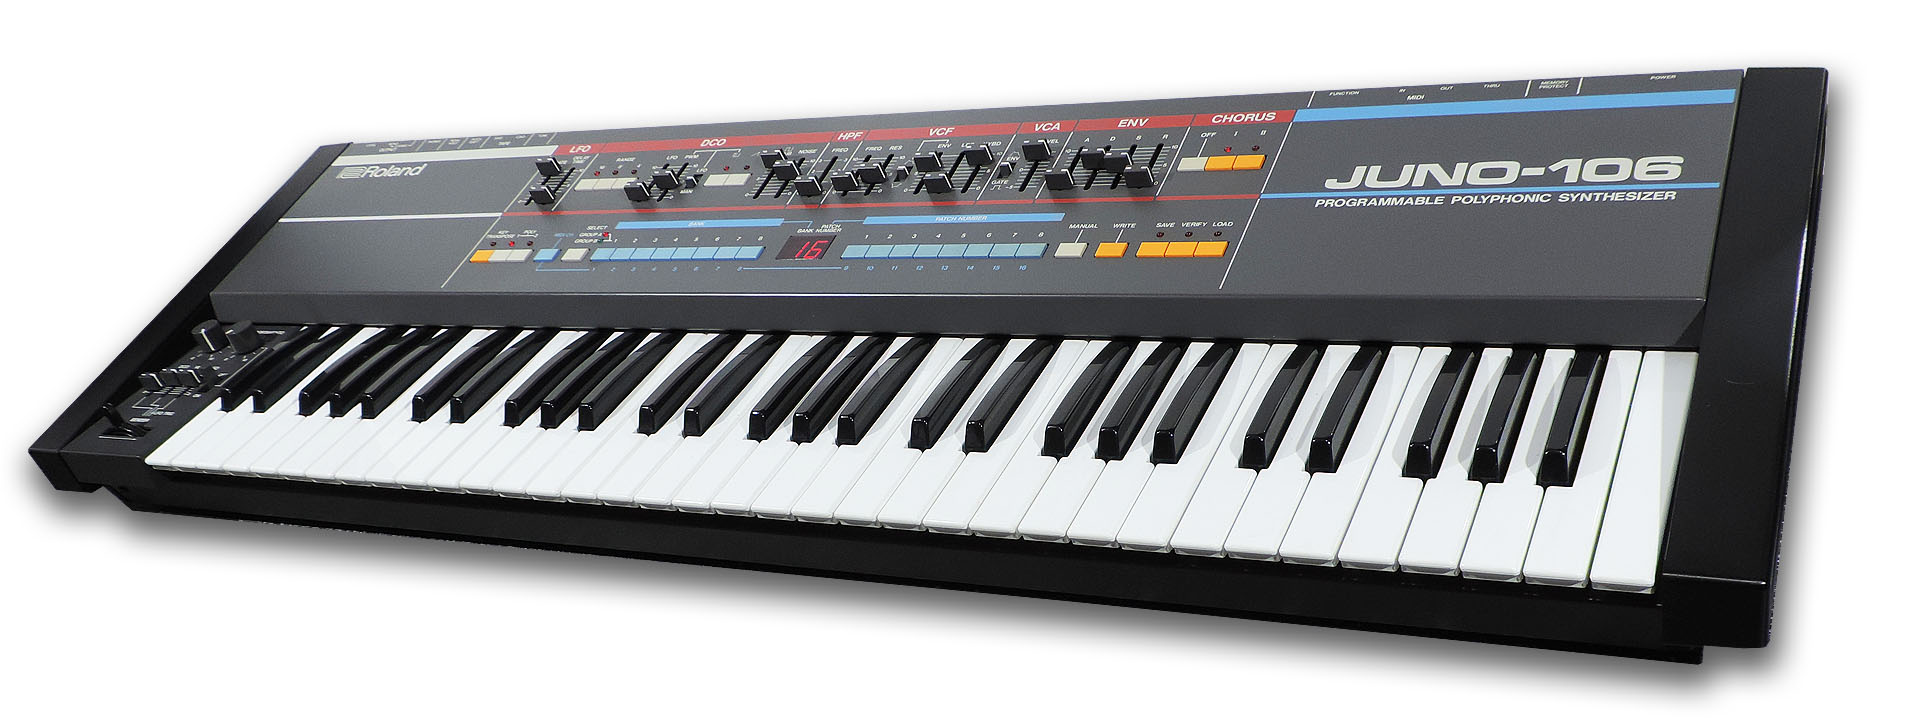
I have always loved this machine! It’s just so easy to ‘draw’ a sound using the top-panel controls and it always delivers. Lush, phase coherent and warm with no mistaking that classic Roland chorus, the Juno-106 has played a big part in my own musical history.
Intended as a budget synthesiser, the Juno-106 was released in 1984, the same year as the MKS-80 and the JX-8P. It’s lack of velocity sensitivity and simple voice architecture didn’t seem to inhibit this monster-sounding machine’s popularity. Indeed, the Juno-106 is probably one of the best-selling synthesisers of all time.
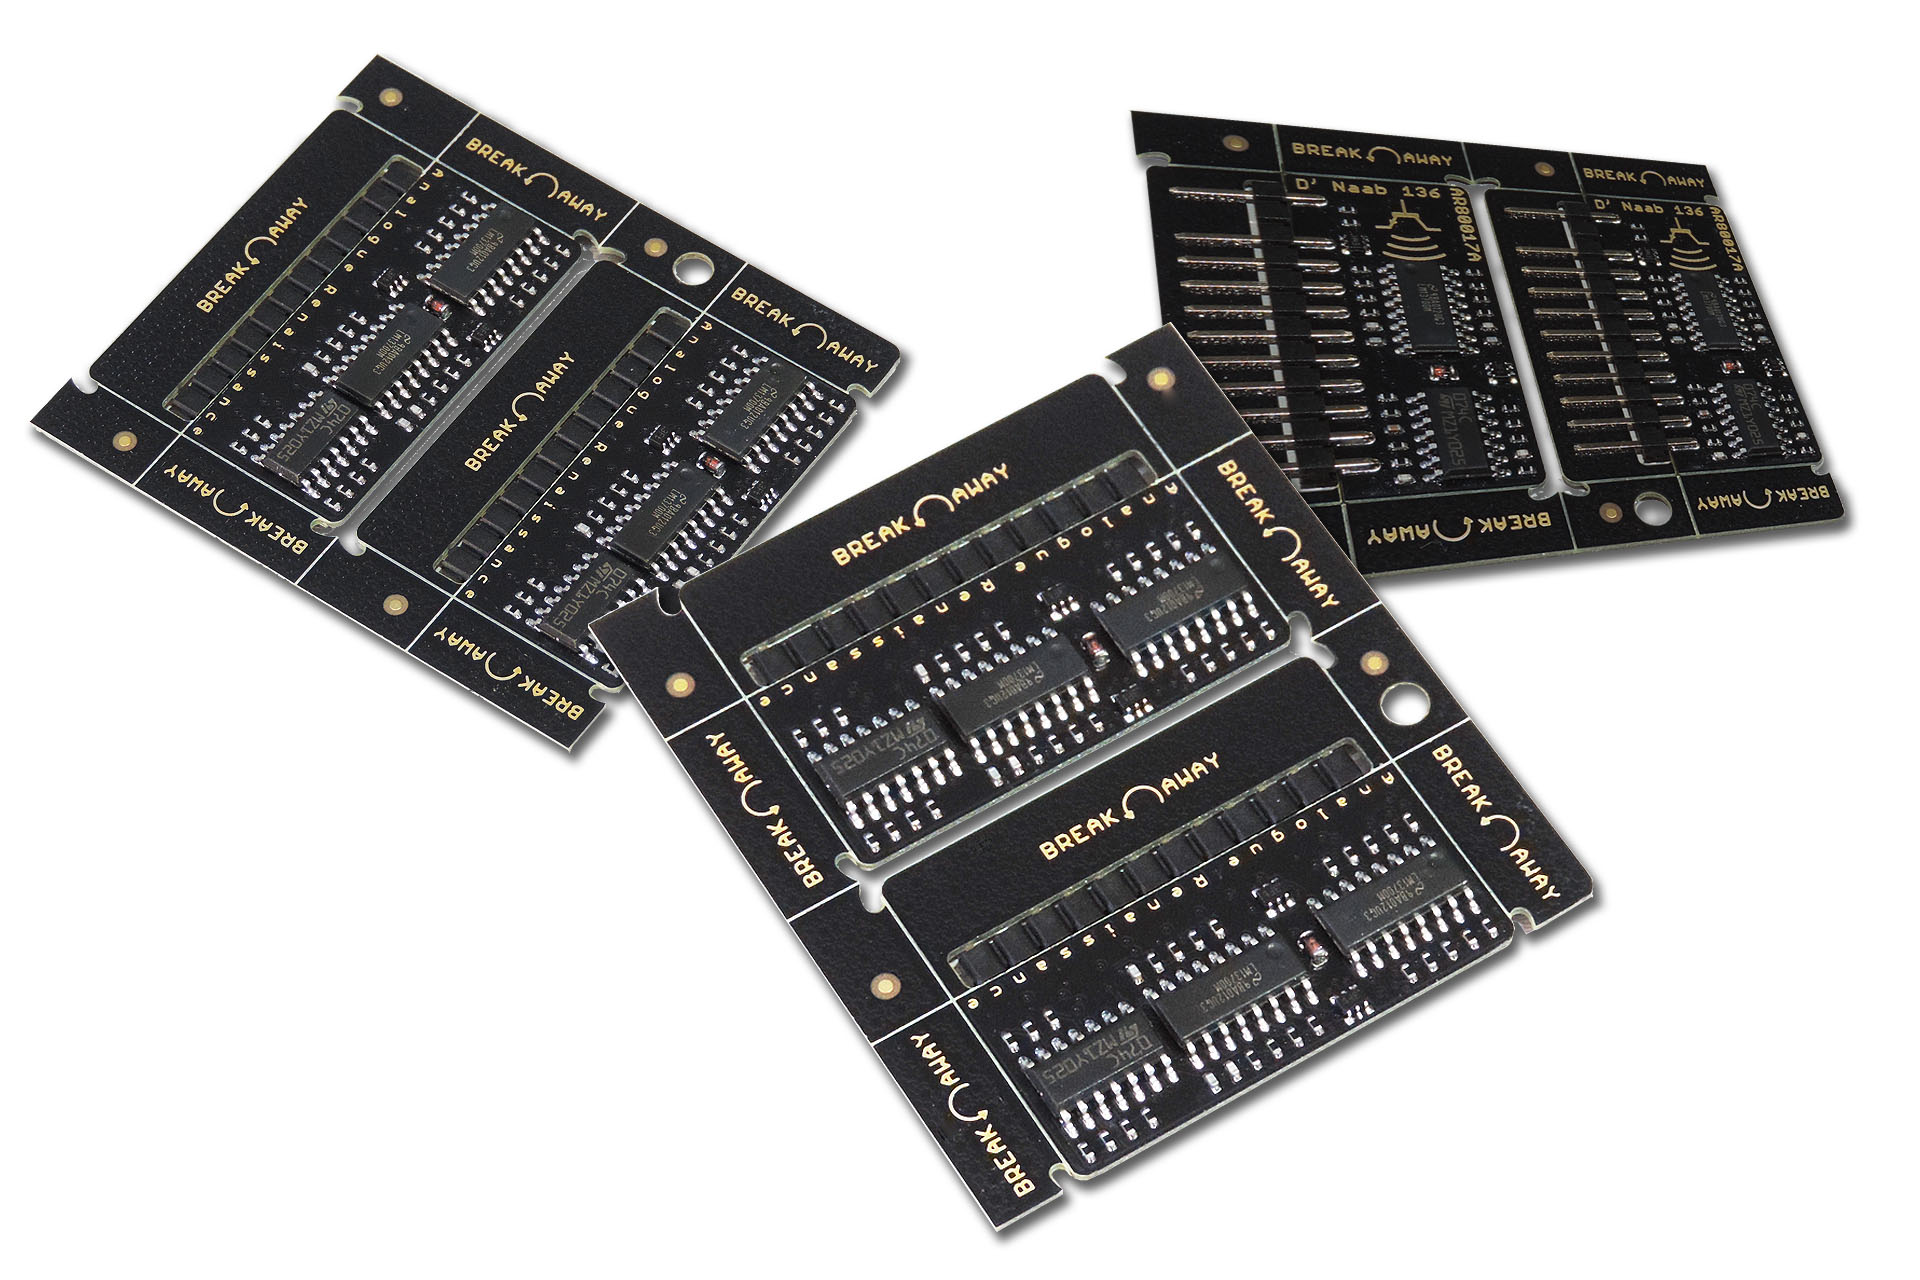
Today many named artists still use this fab synth and variations like the Juno-106S and HS-60 (or Synth Plus 60) both with built-in speakers, still sit in many a lounge or music room. After more than three decades however, time is taking its toll. Many will be familiar with the failing 80017A VCA / VCO devices, for example. Fortunately, Analogue Renaissance offers a replacement, the AR80017A. My Juno-106 is doing alright at the moment so I haven’t had the opportunity to try these yet. Having said that, I’ve only heard good things about the AR chips and I salute Jeroen Allaert of Cask Strength Electronics for such excellent work. On top of that, they look really, really cool!
KiwiTechnics has always been a name you can trust when it comes to synth repairs and upgrades and after a couple of years in development, the guys recently launched a seriously powerful hardware / firmware combination for the Juno-106. Known as the Kiwi-106, this is a significant upgrade offering a huge array of fantastic and modern features that well, change everything! In fact one of the reasons Super Nova is red is to match the Kiwi-106 so I strongly suggest that you check out kiwitechnics.com to find out more!
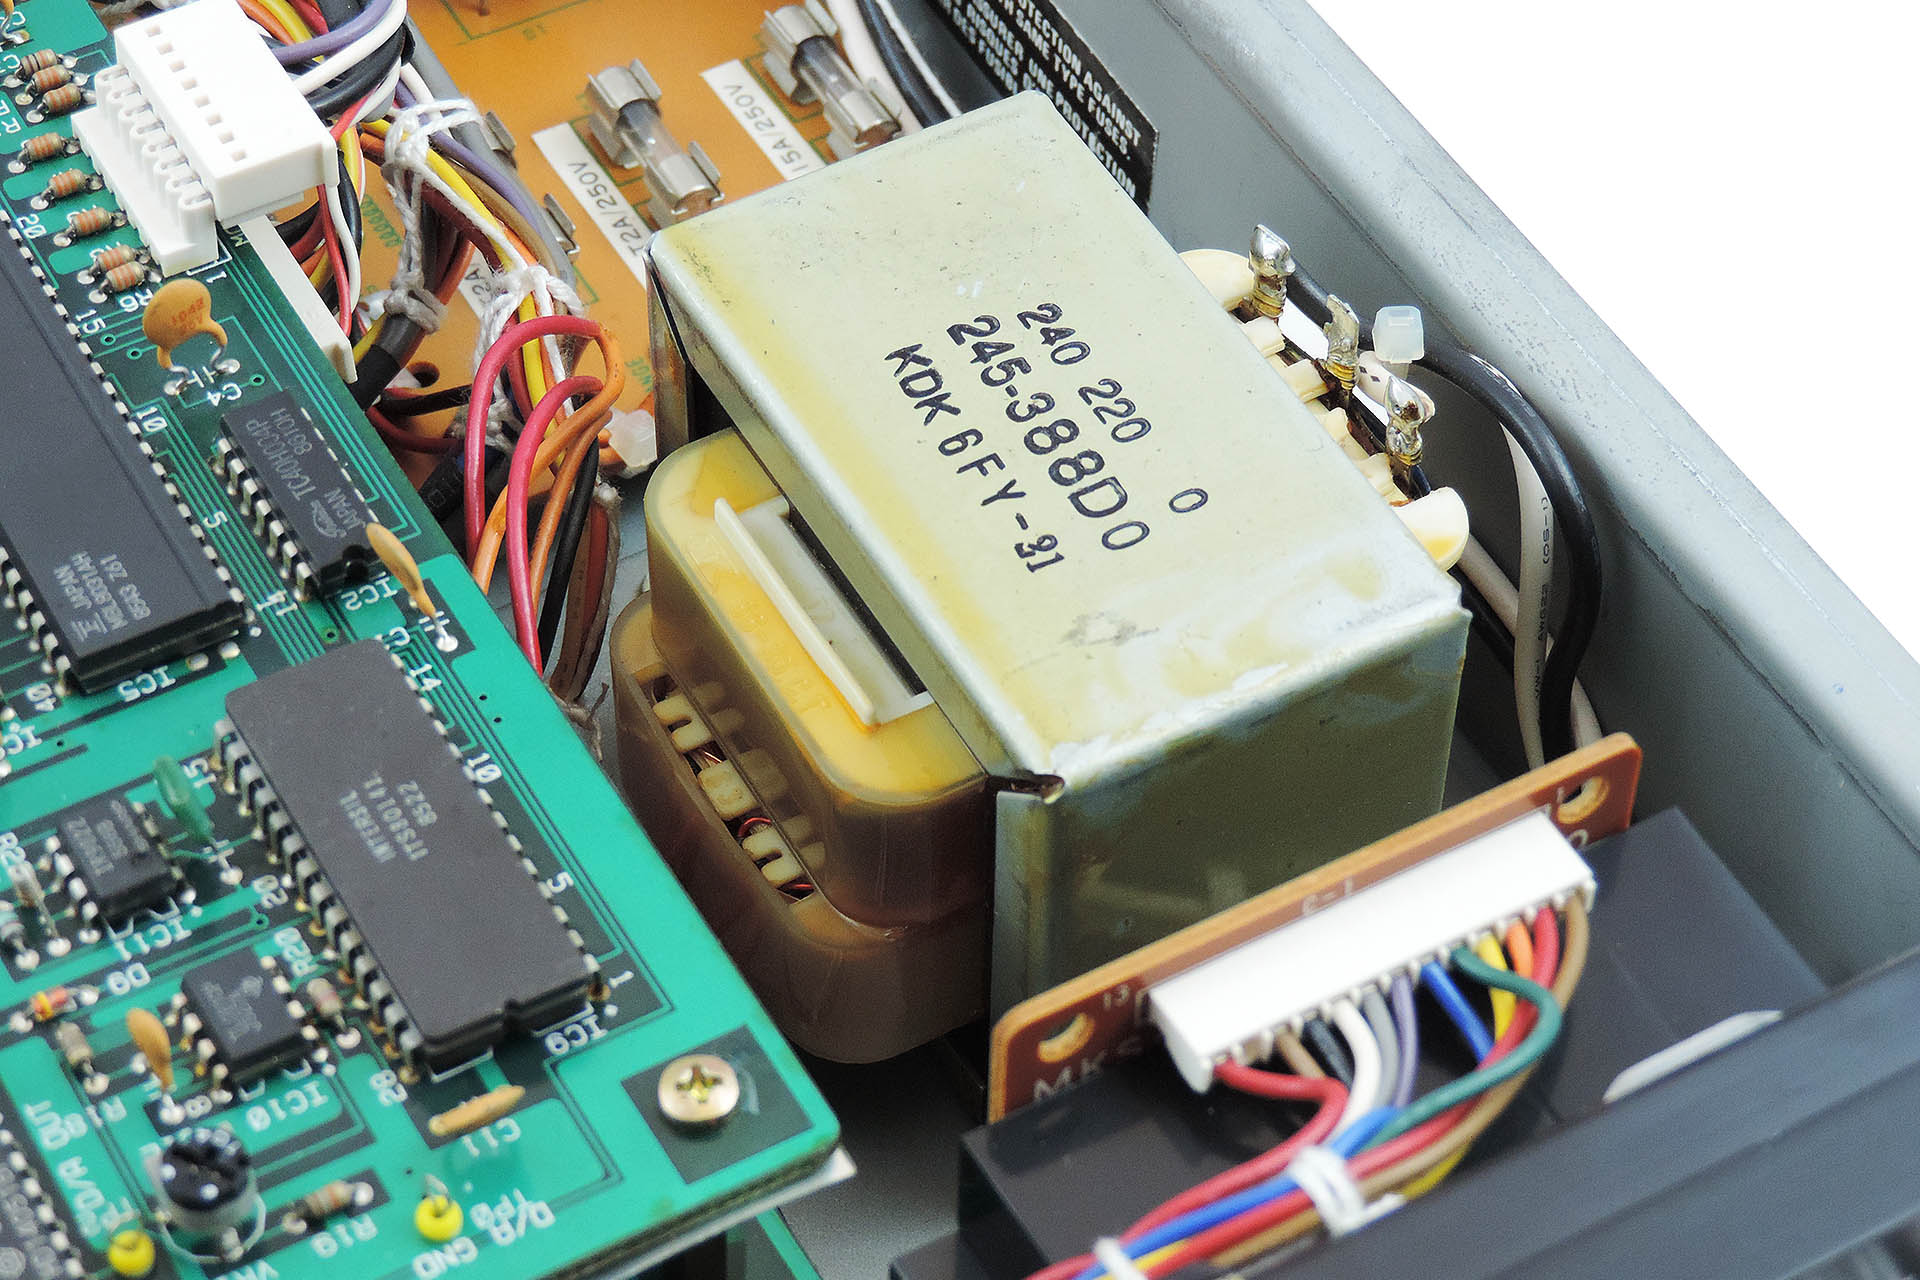
All these people doing this great stuff for the Roland Juno-106 and I couldn’t find anyone making a replacement power supply. Perhaps it's because we all know that Roland power supplies are really quite robust and have stood the test of time.
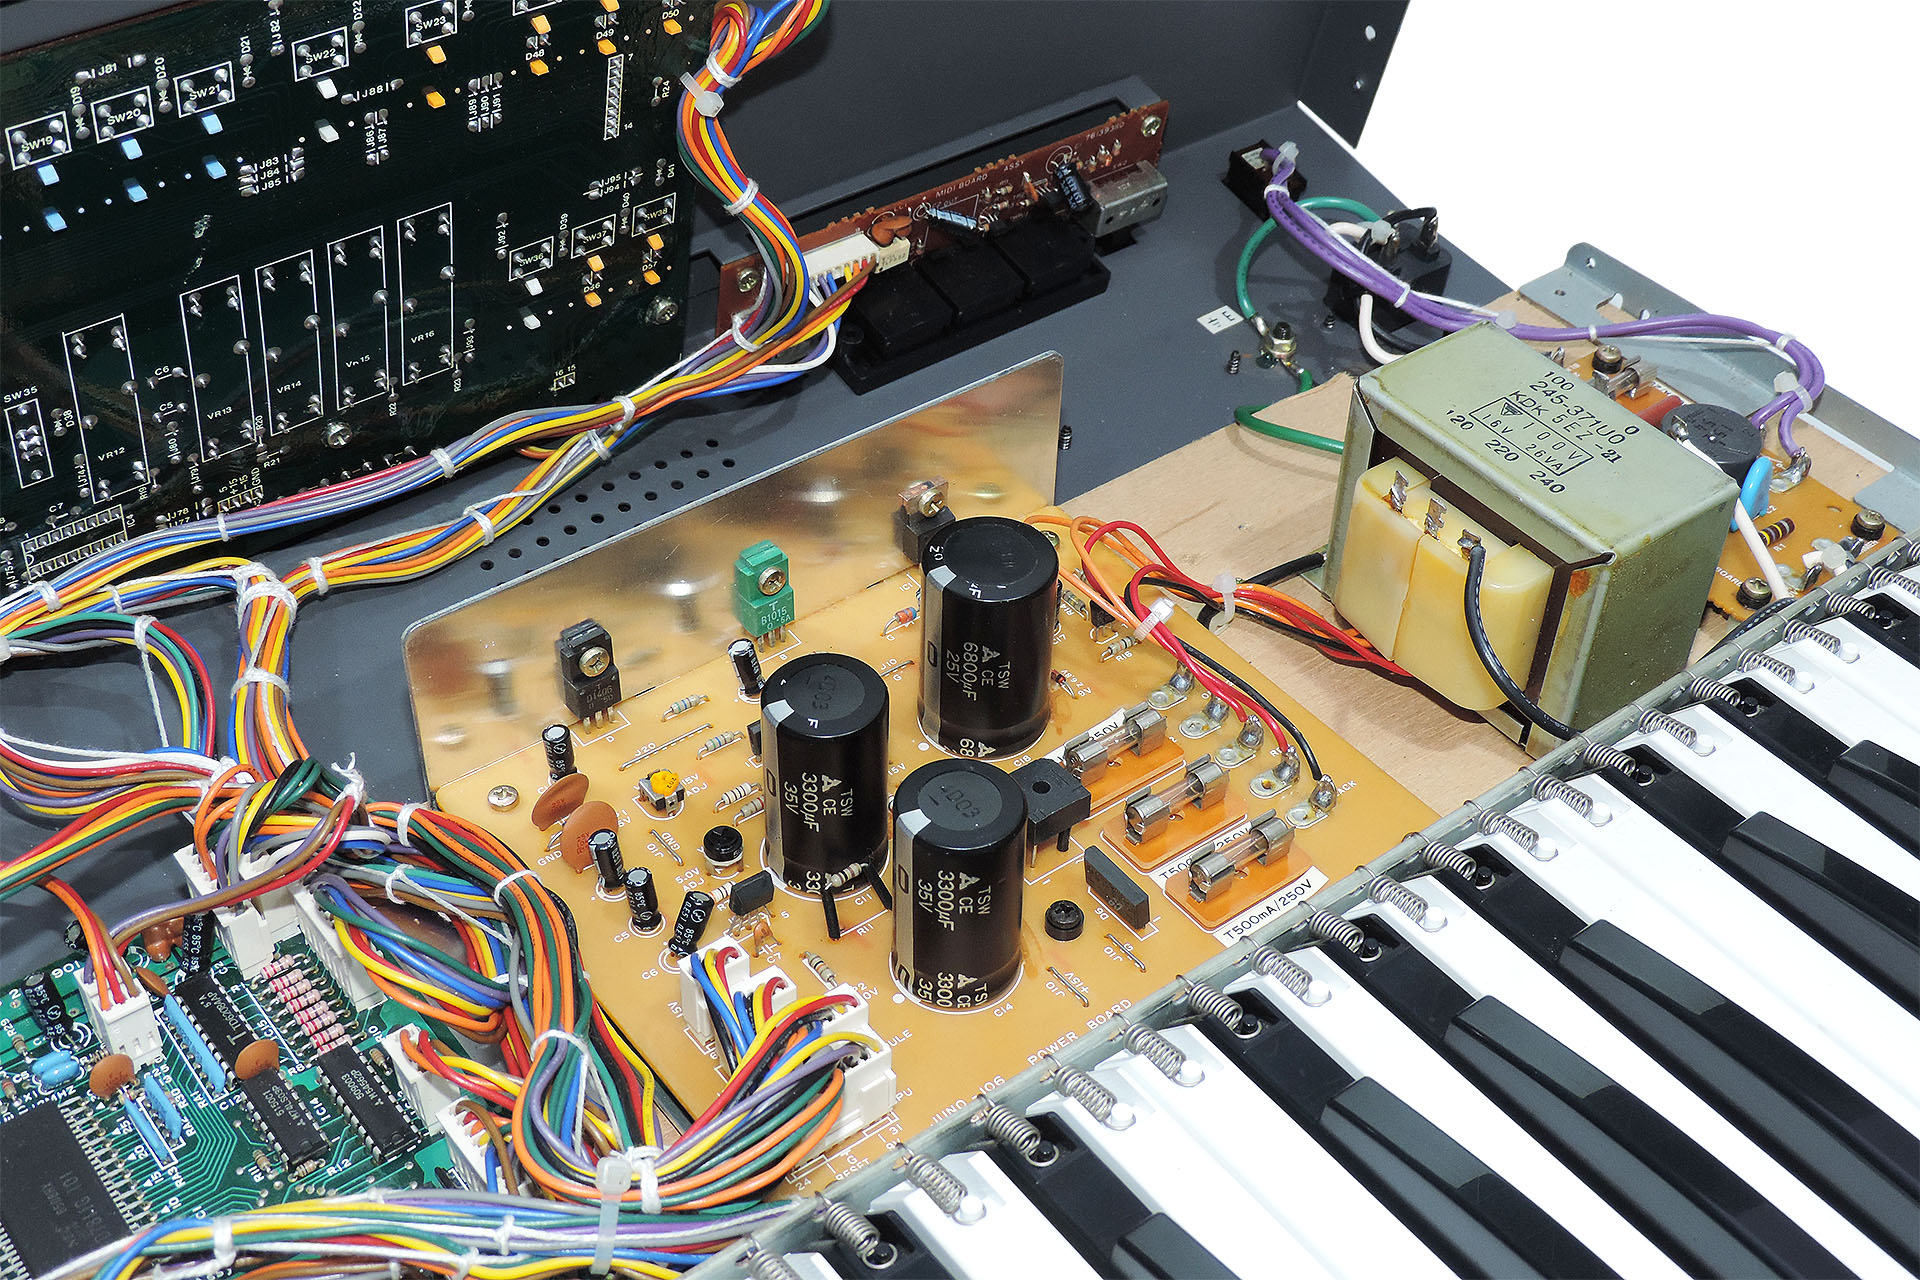
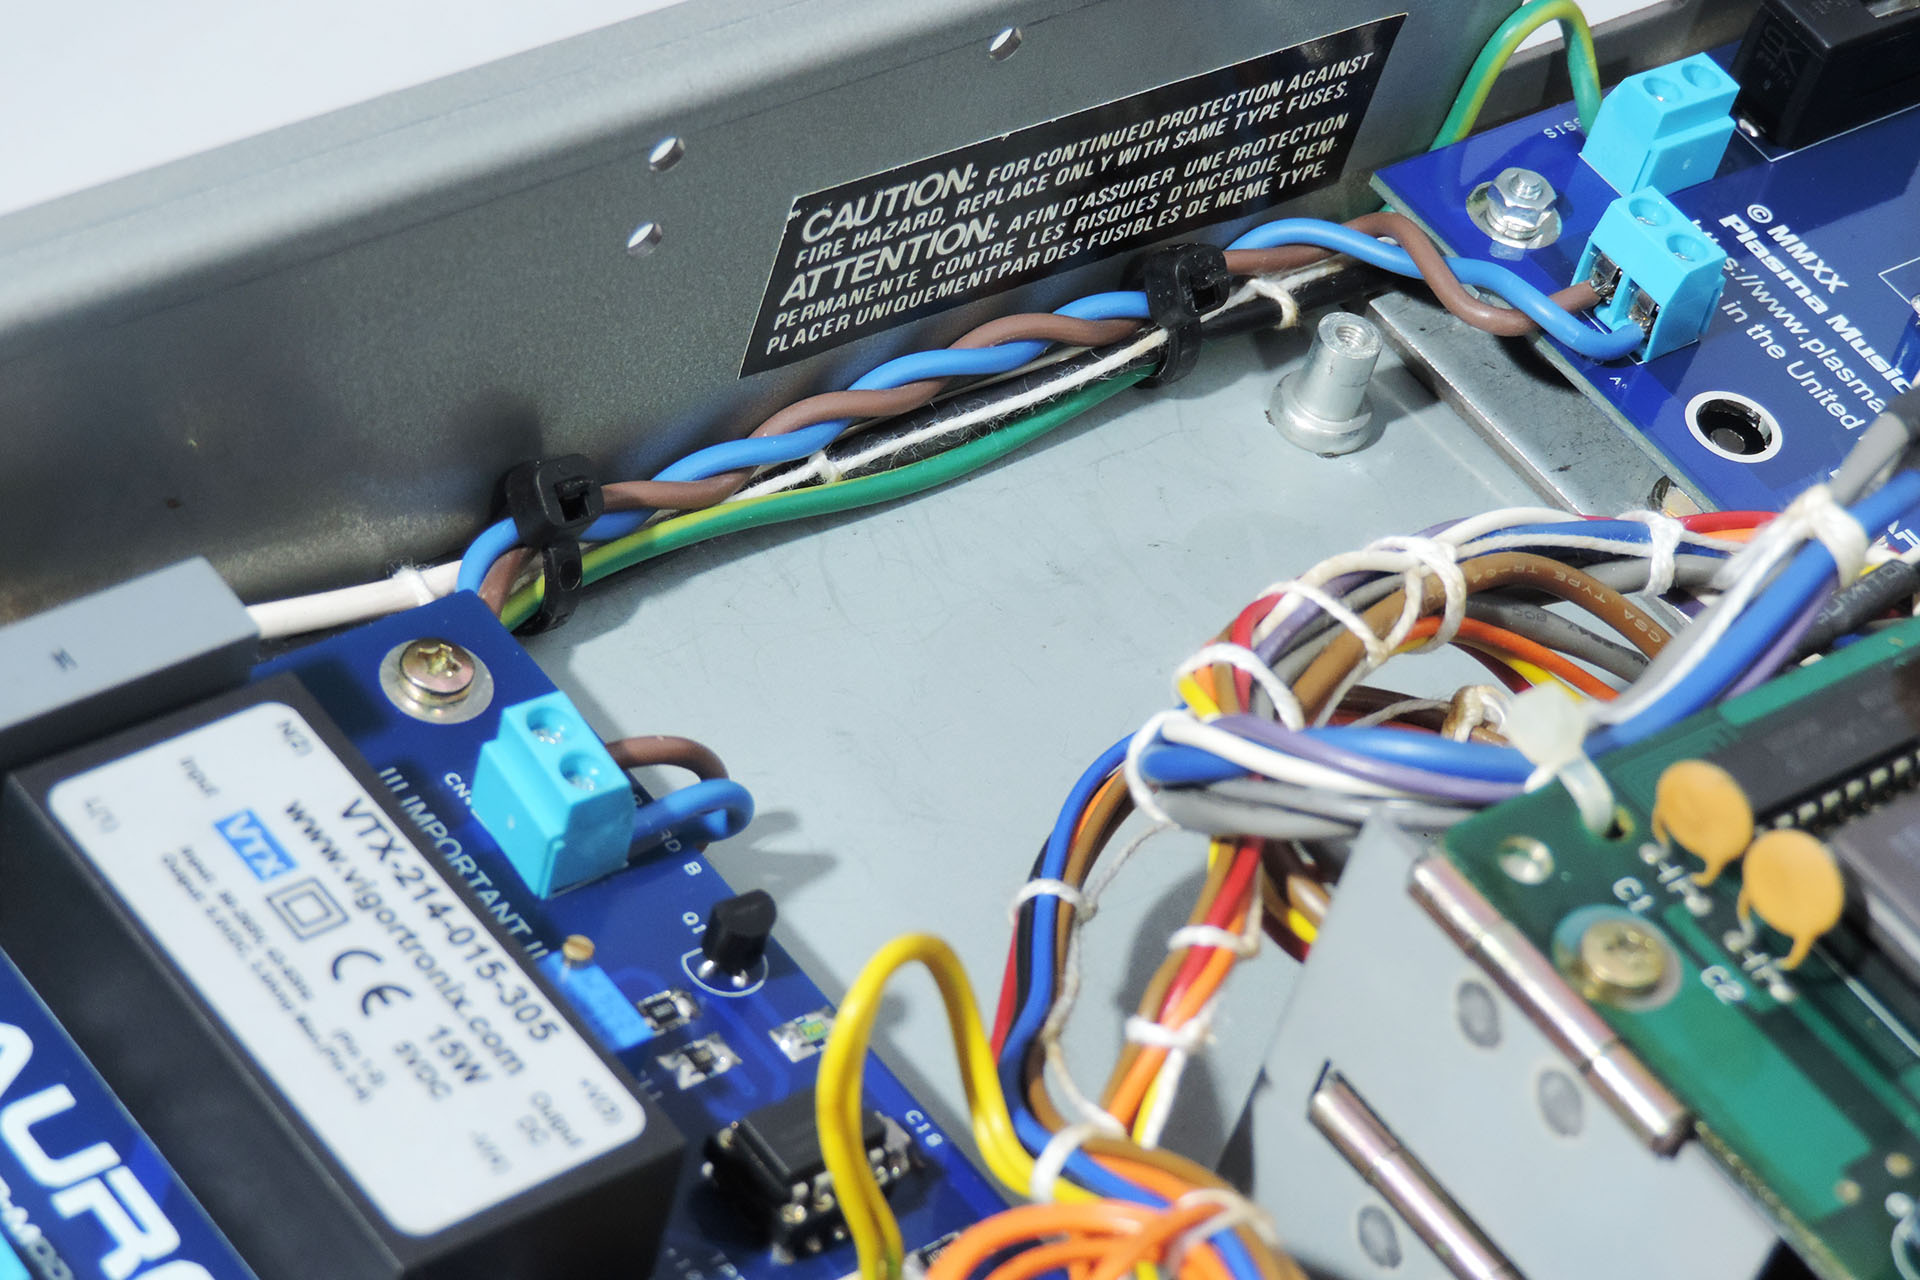
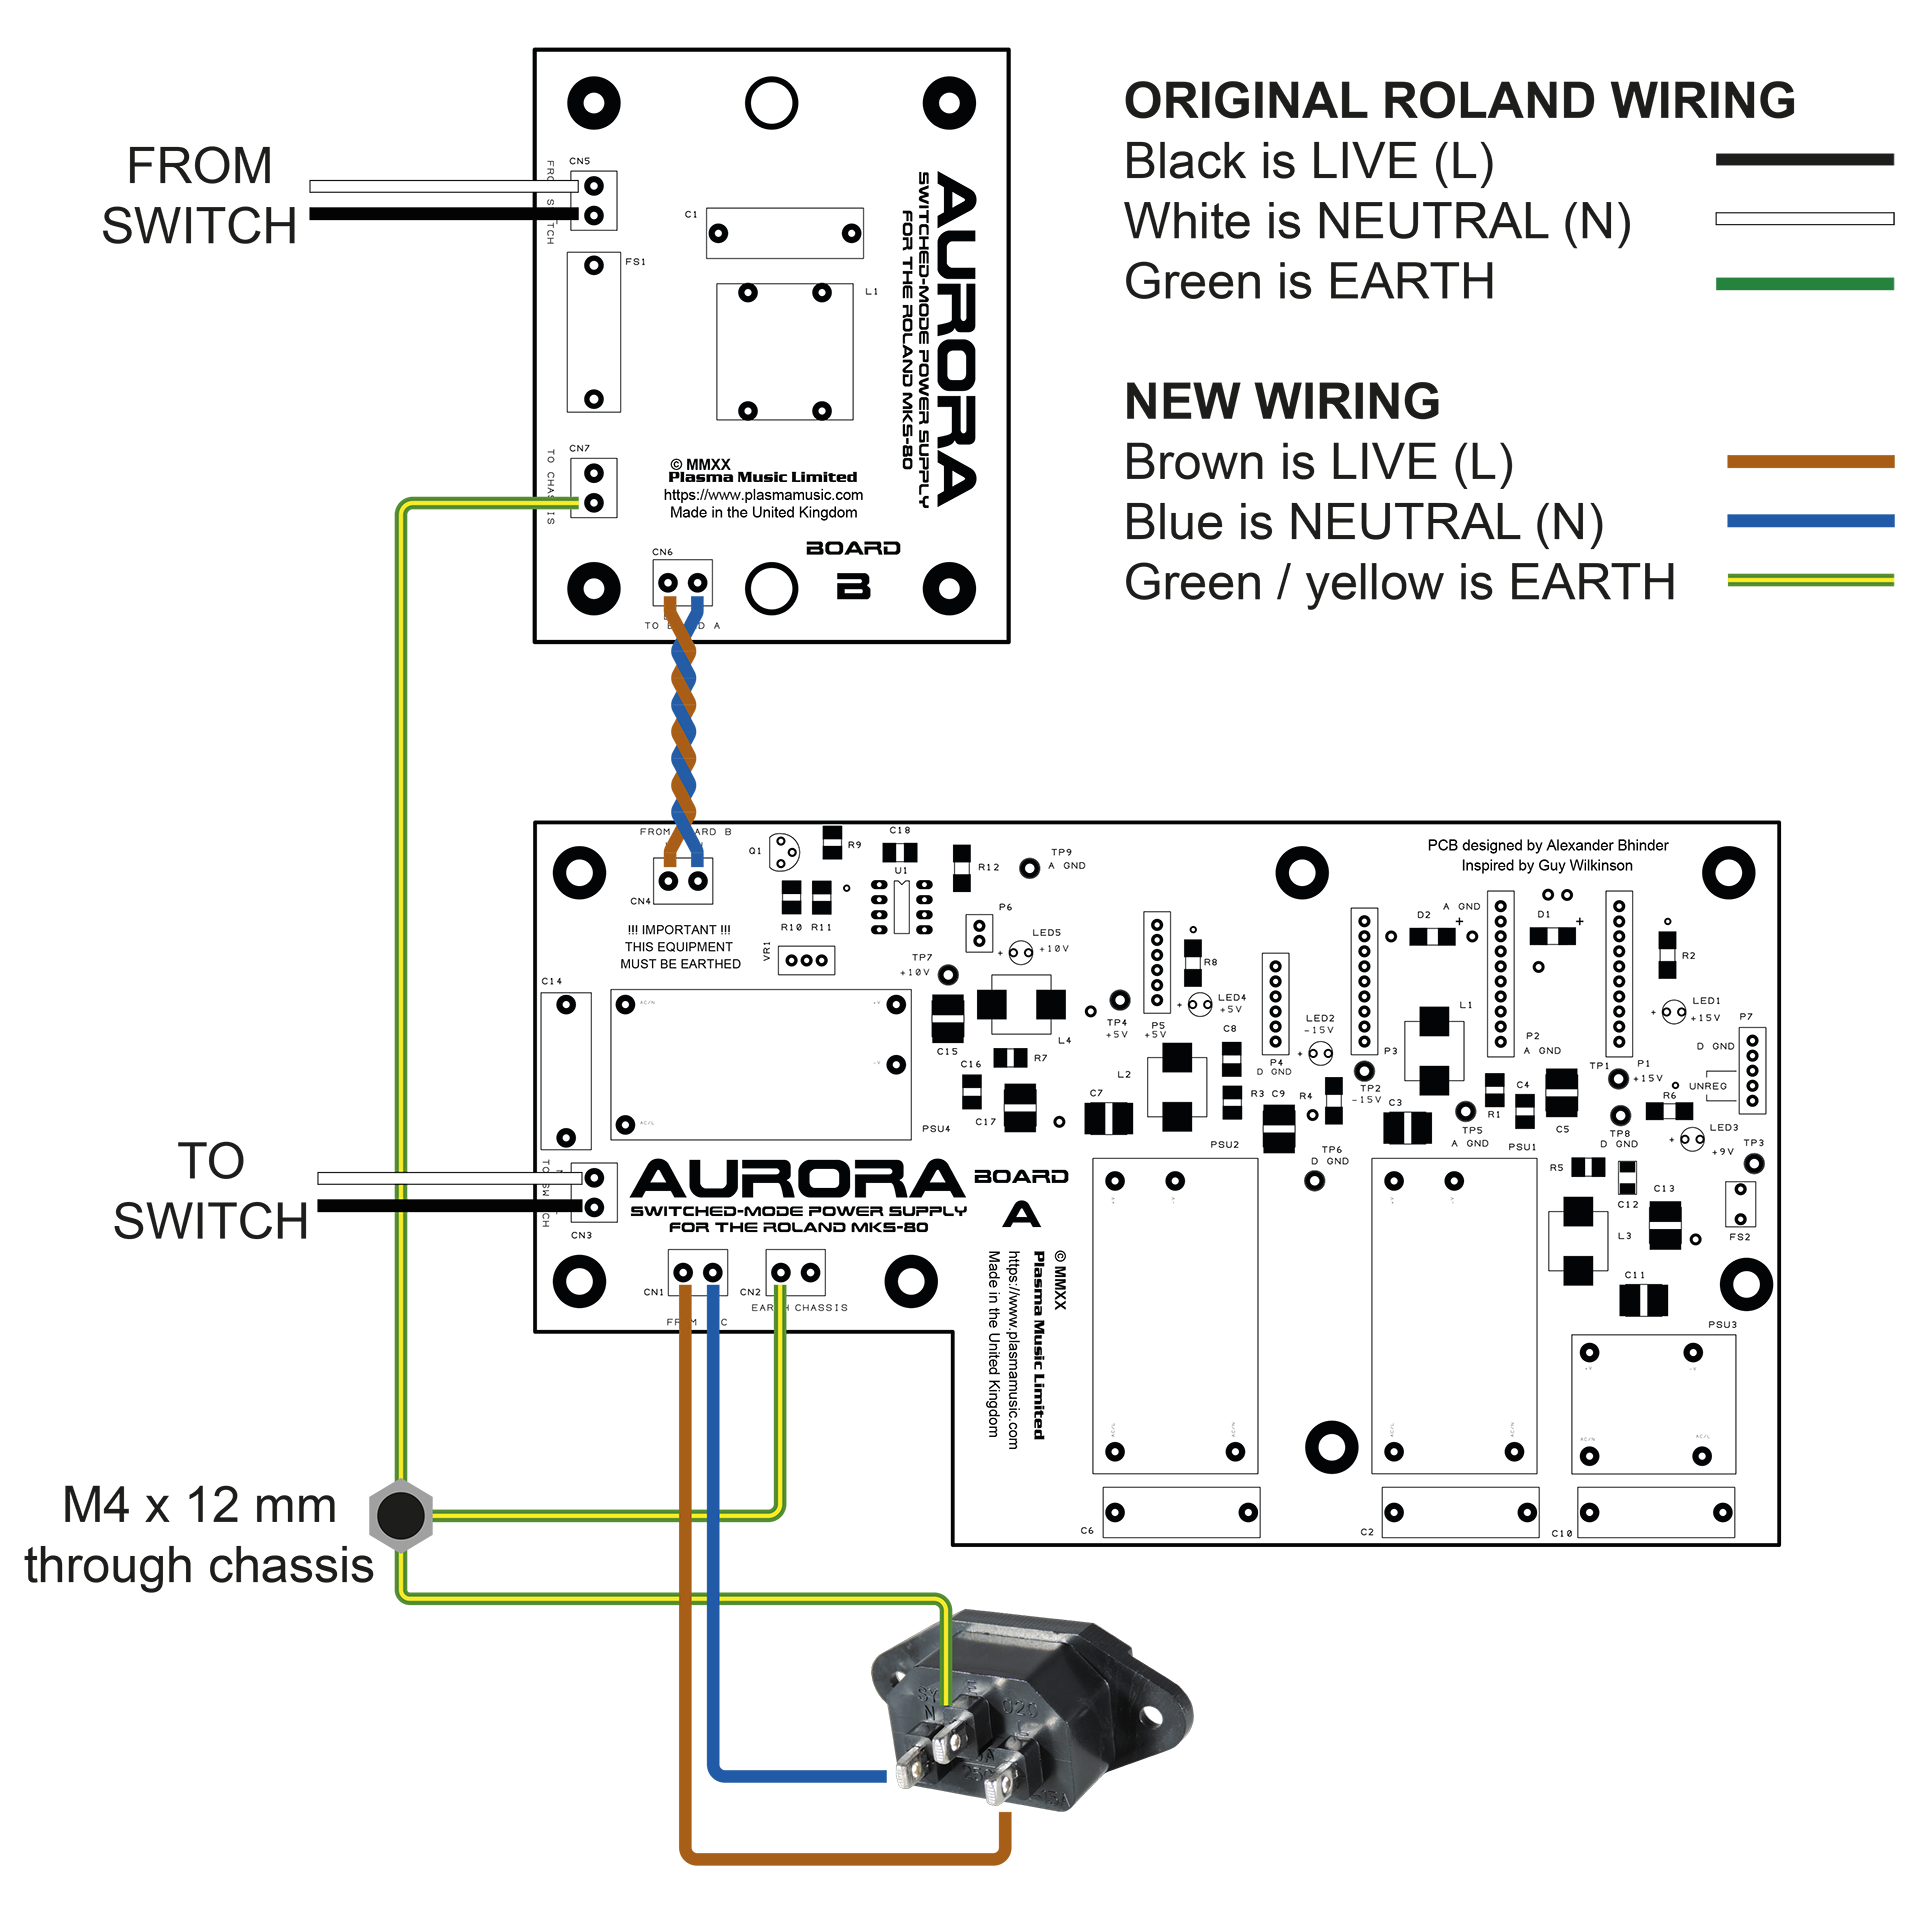
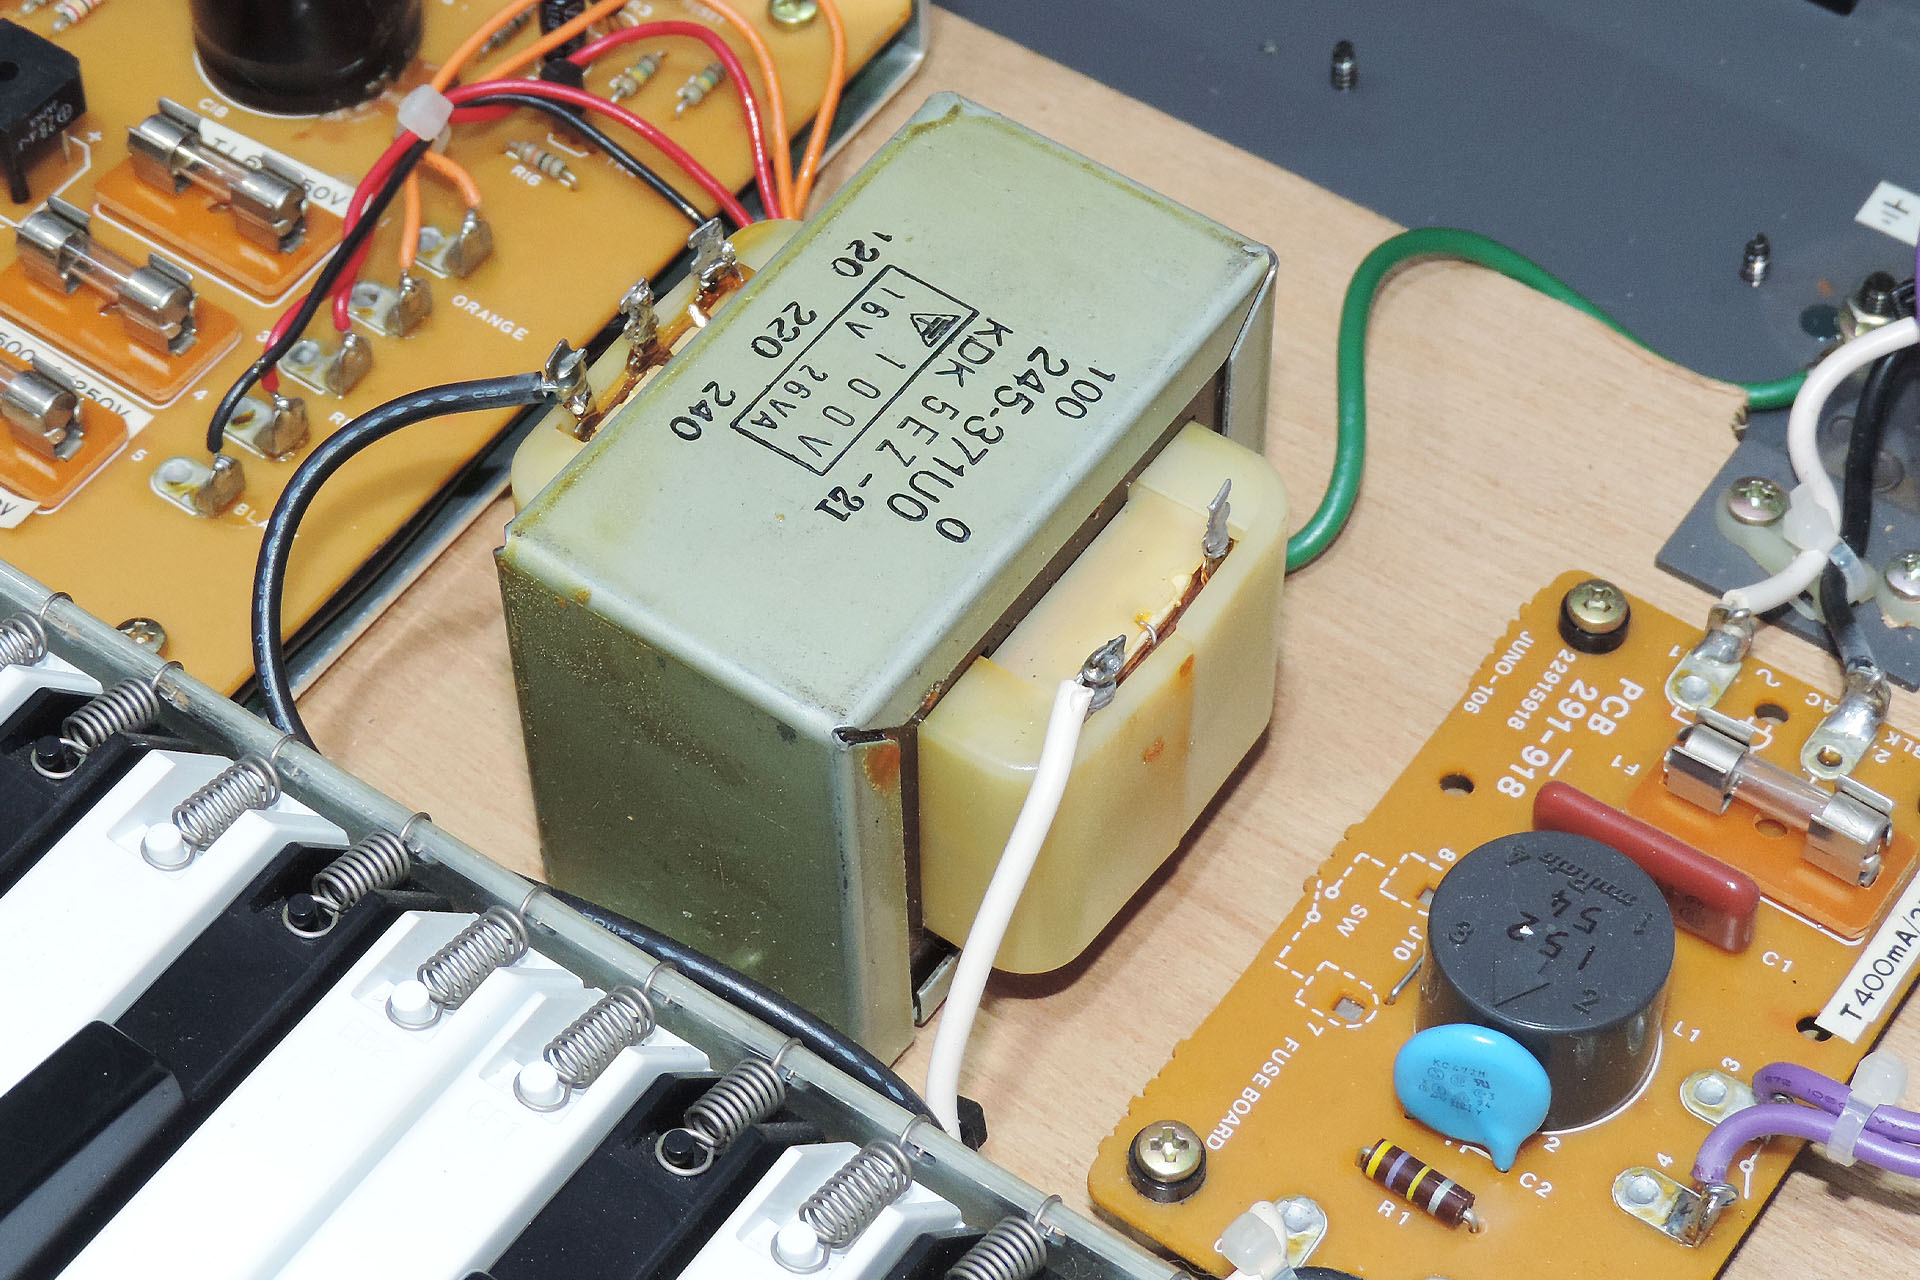
An interesting feature and unlike many synthesisers of that era, the transformer in the Juno-106 is multi-tapped meaning that by moving a wire from one post to another (and changing the fuse), you can use the synth on virtually any domestic voltage supply across the world.
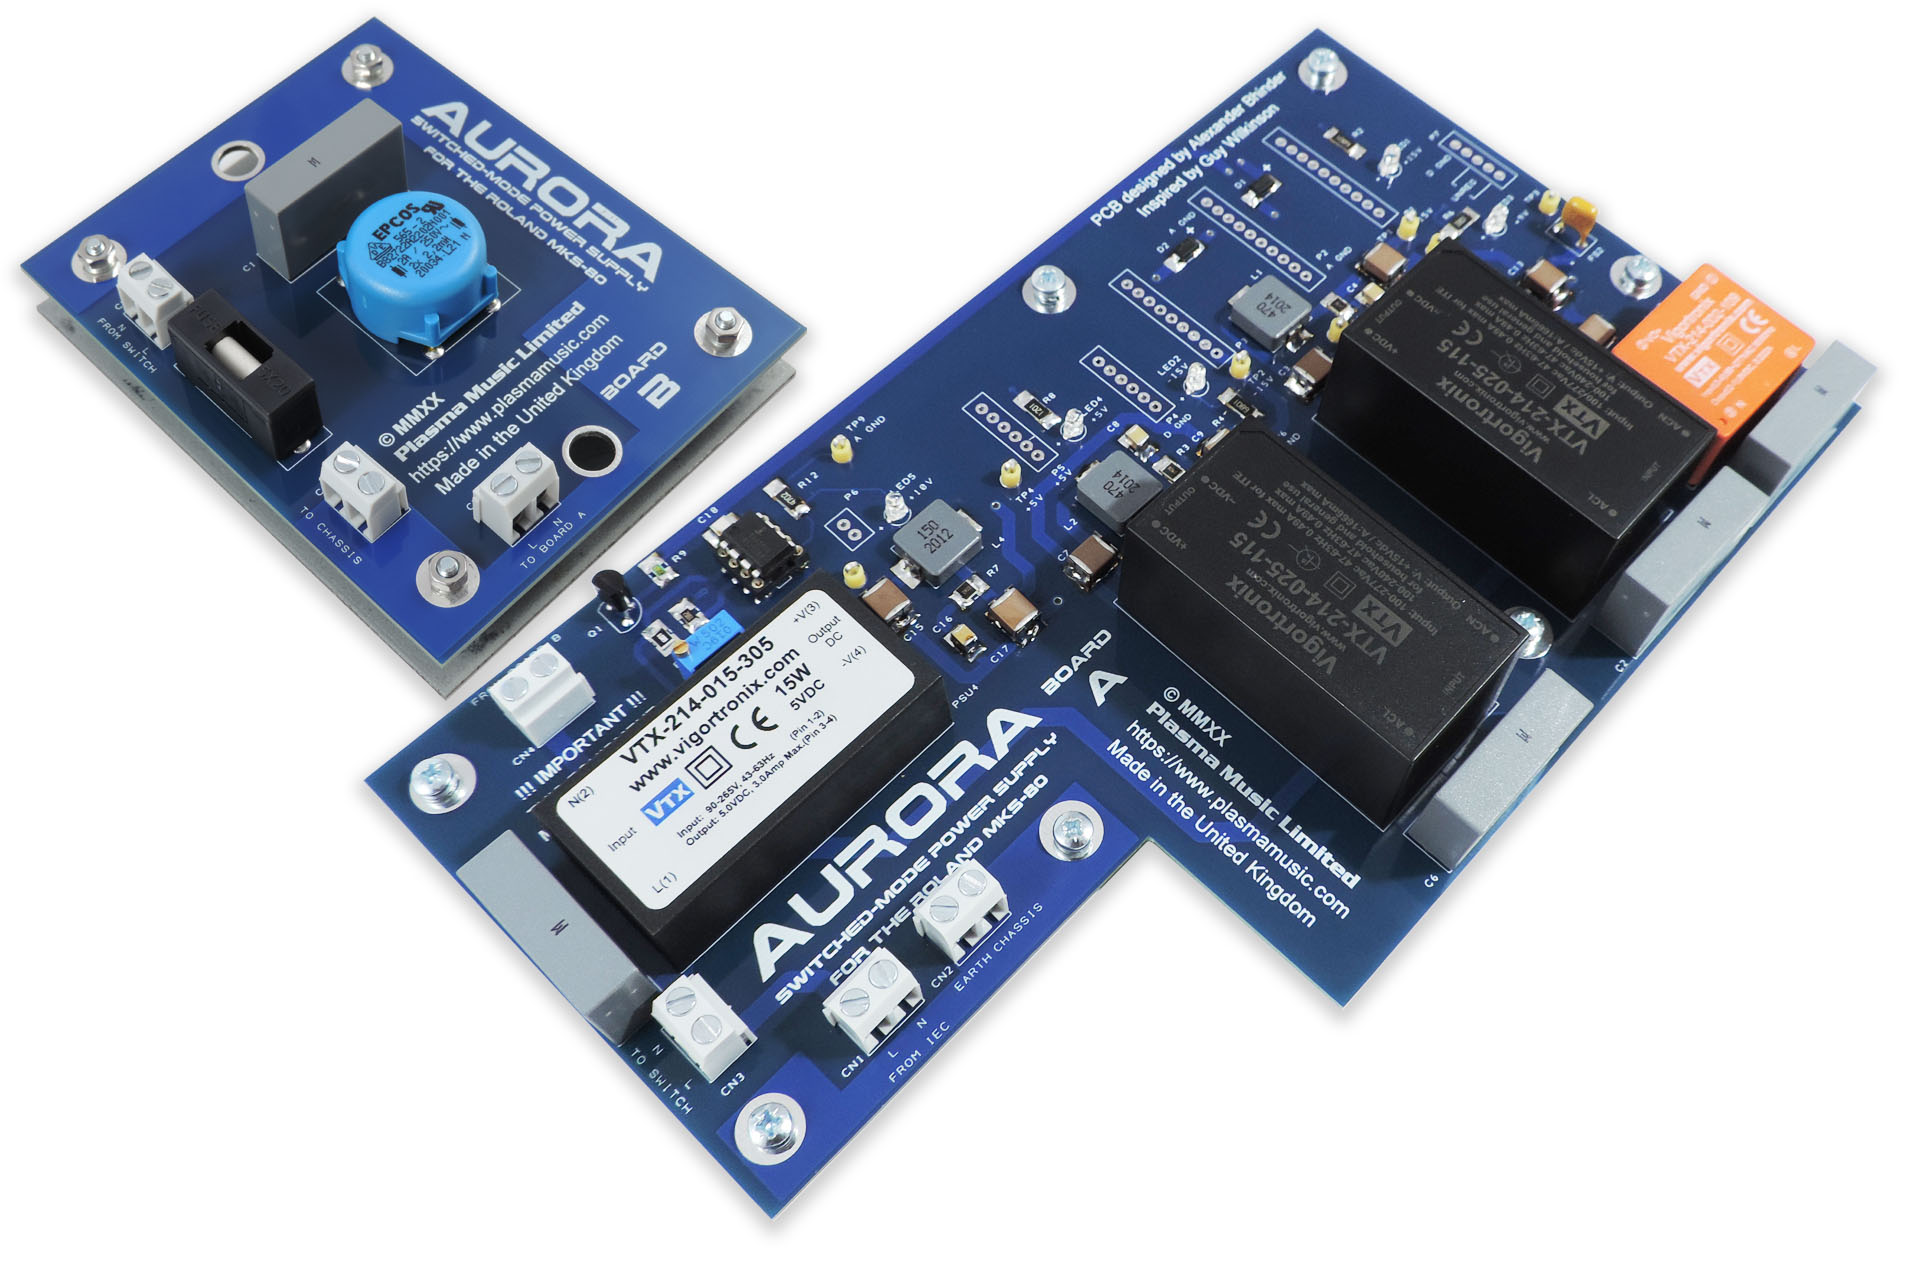
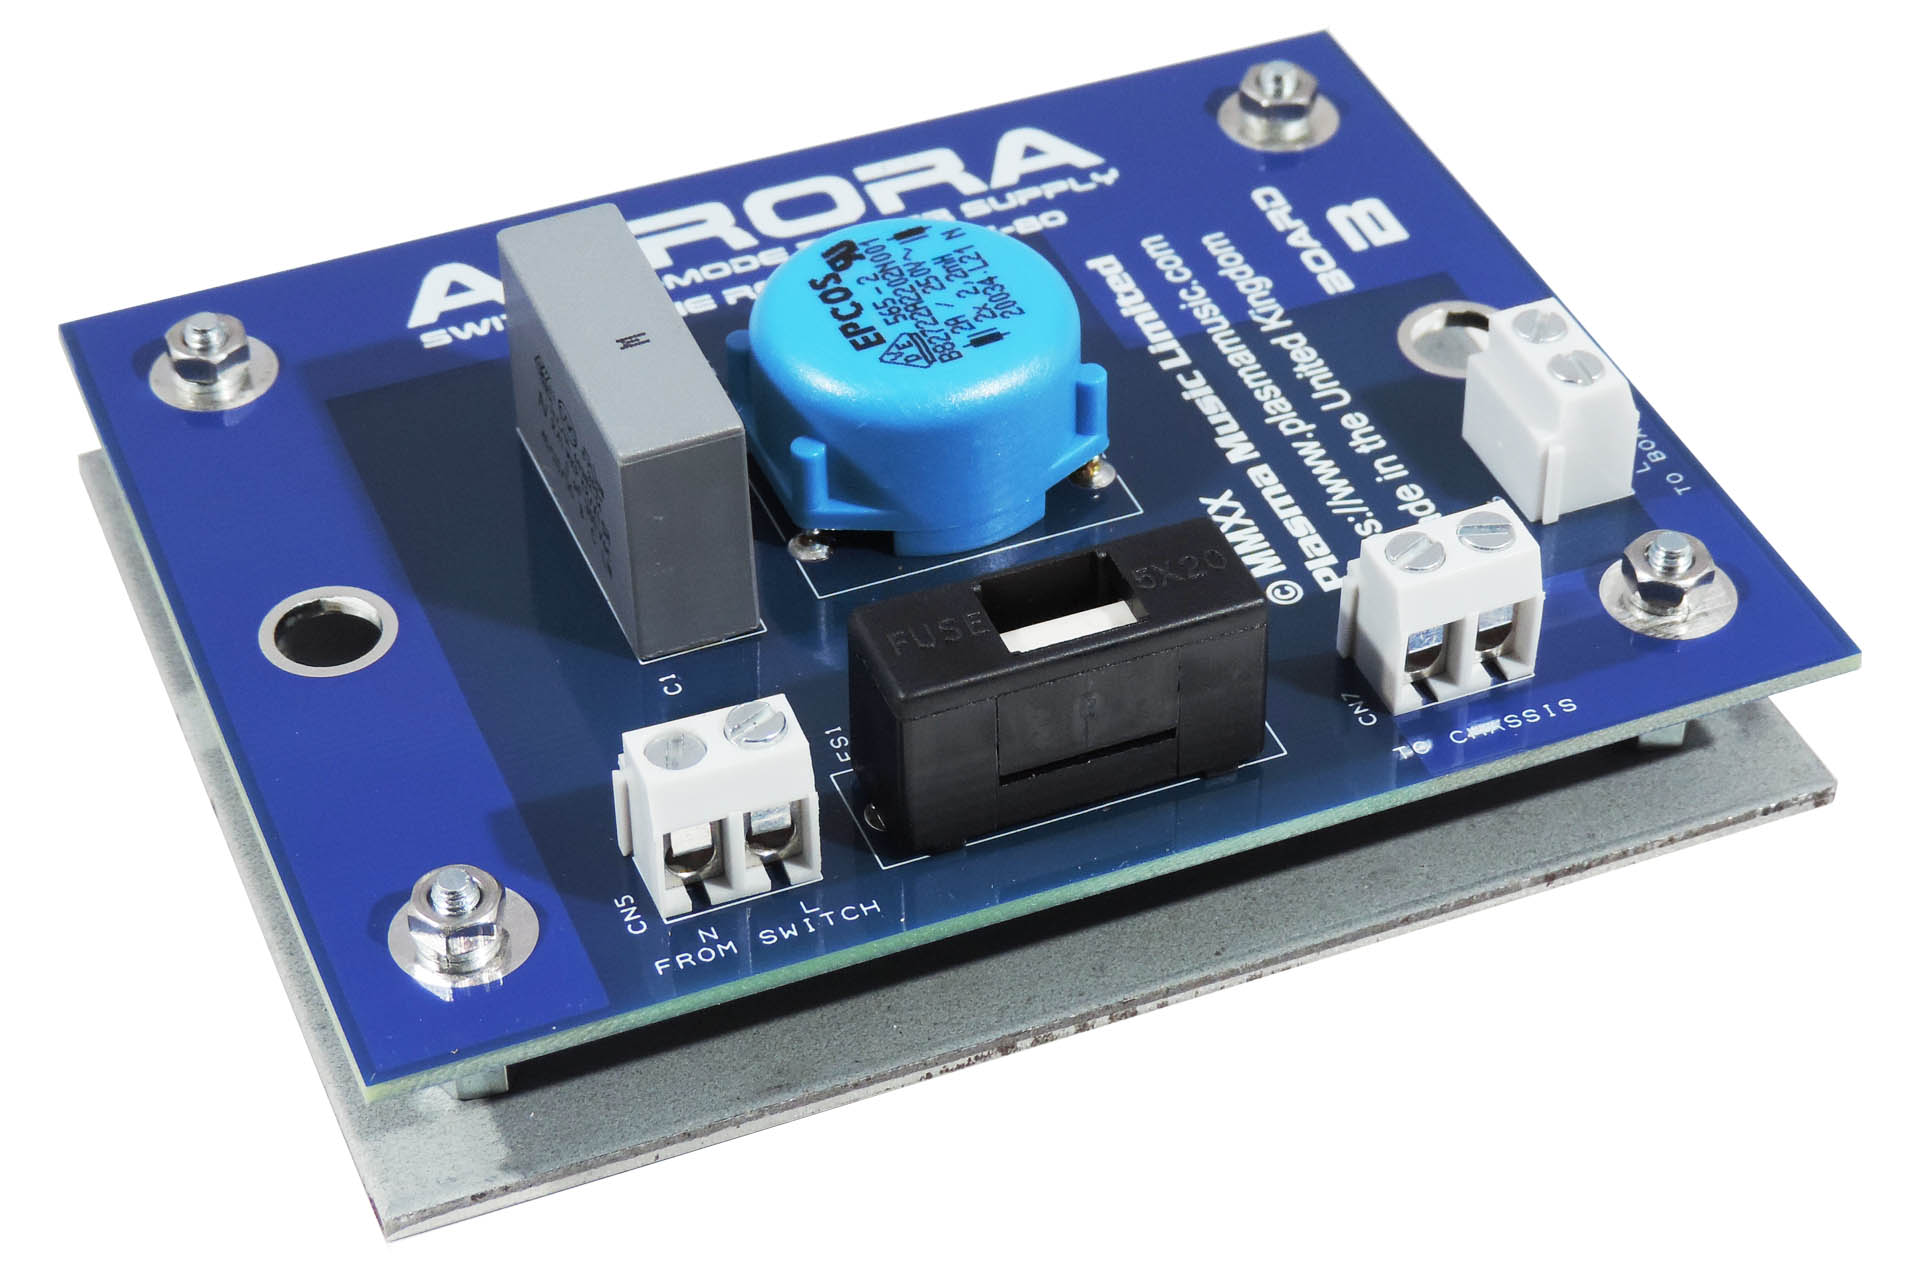
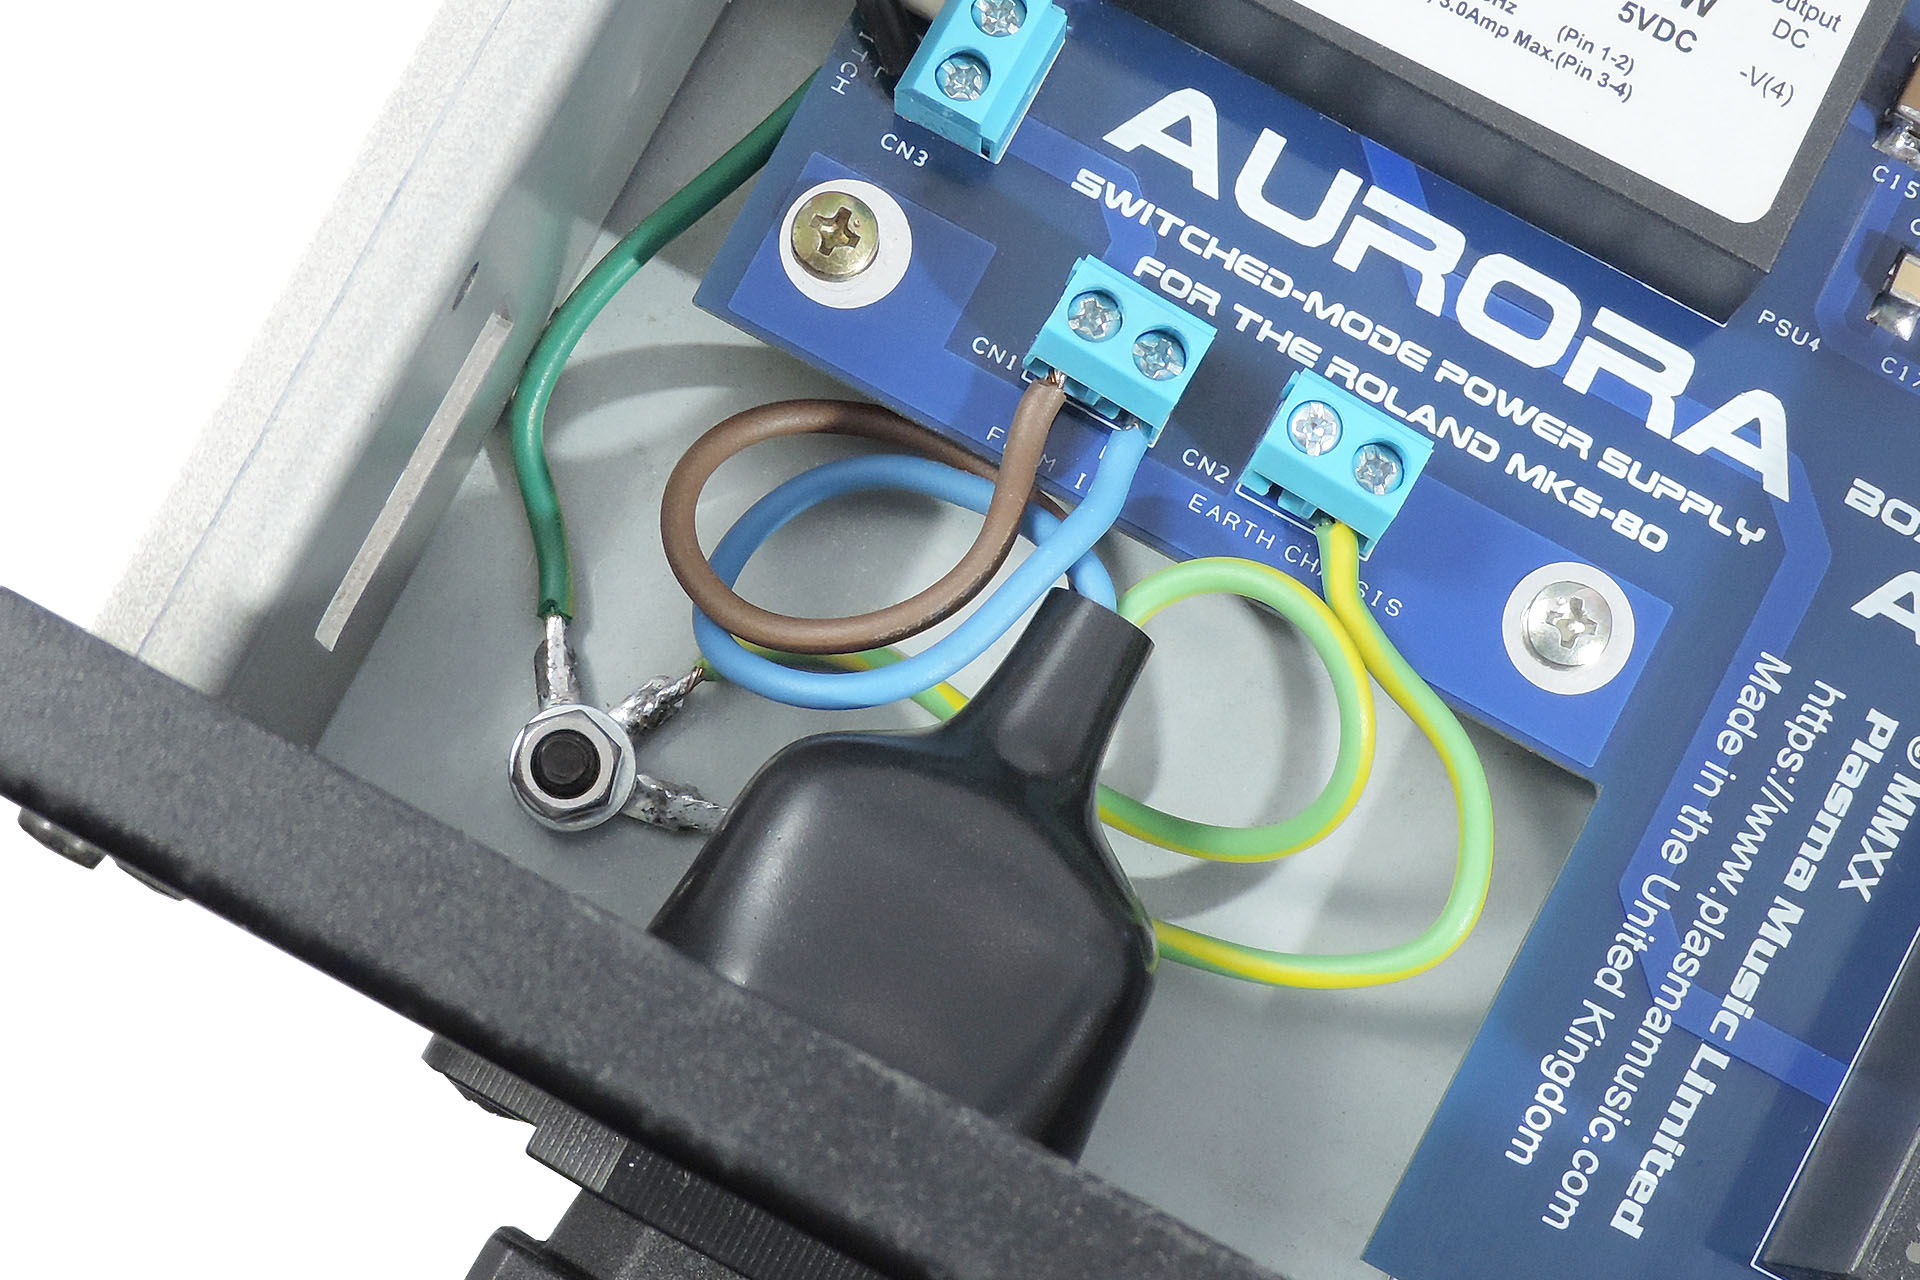
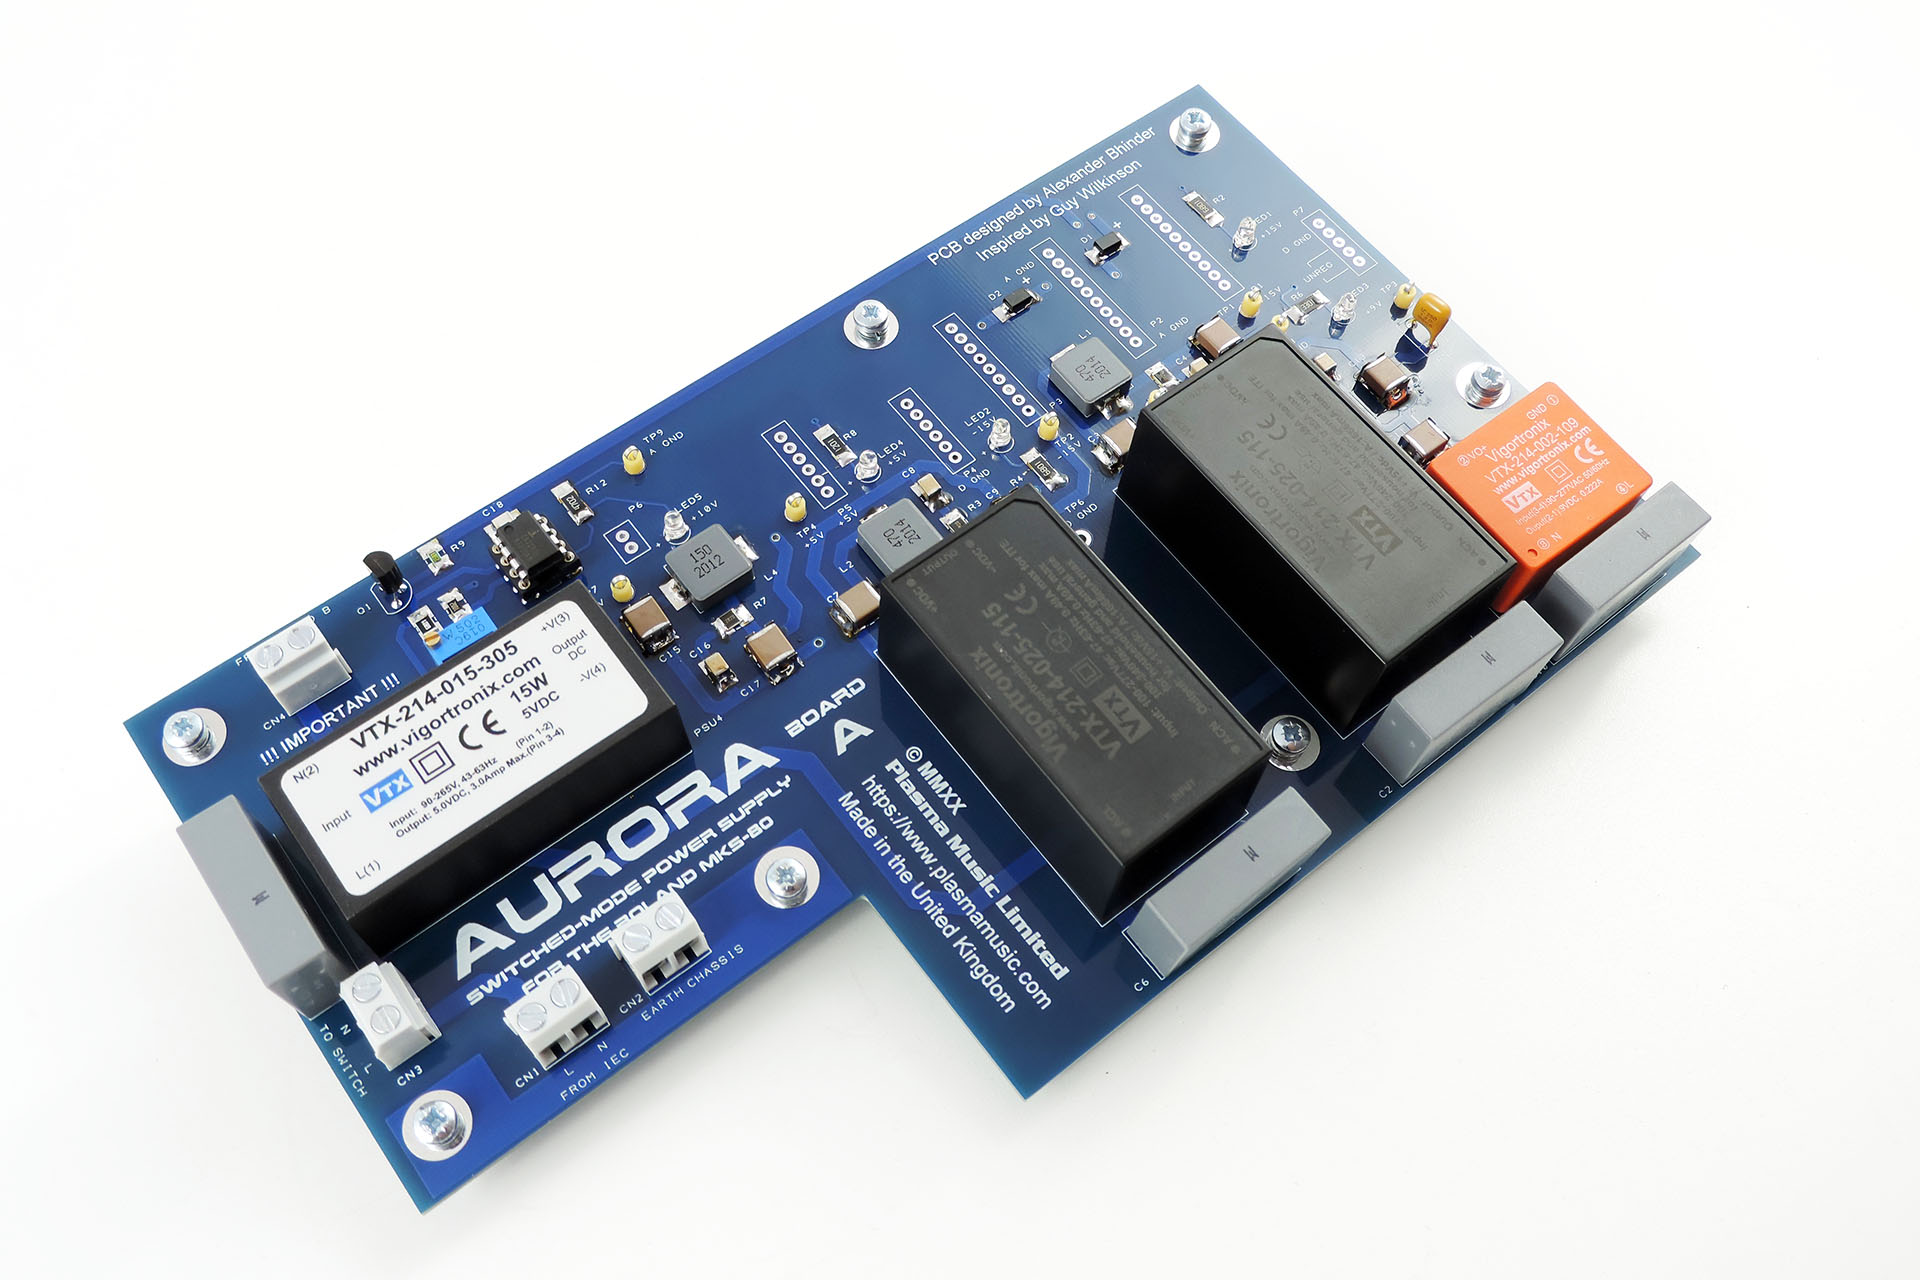
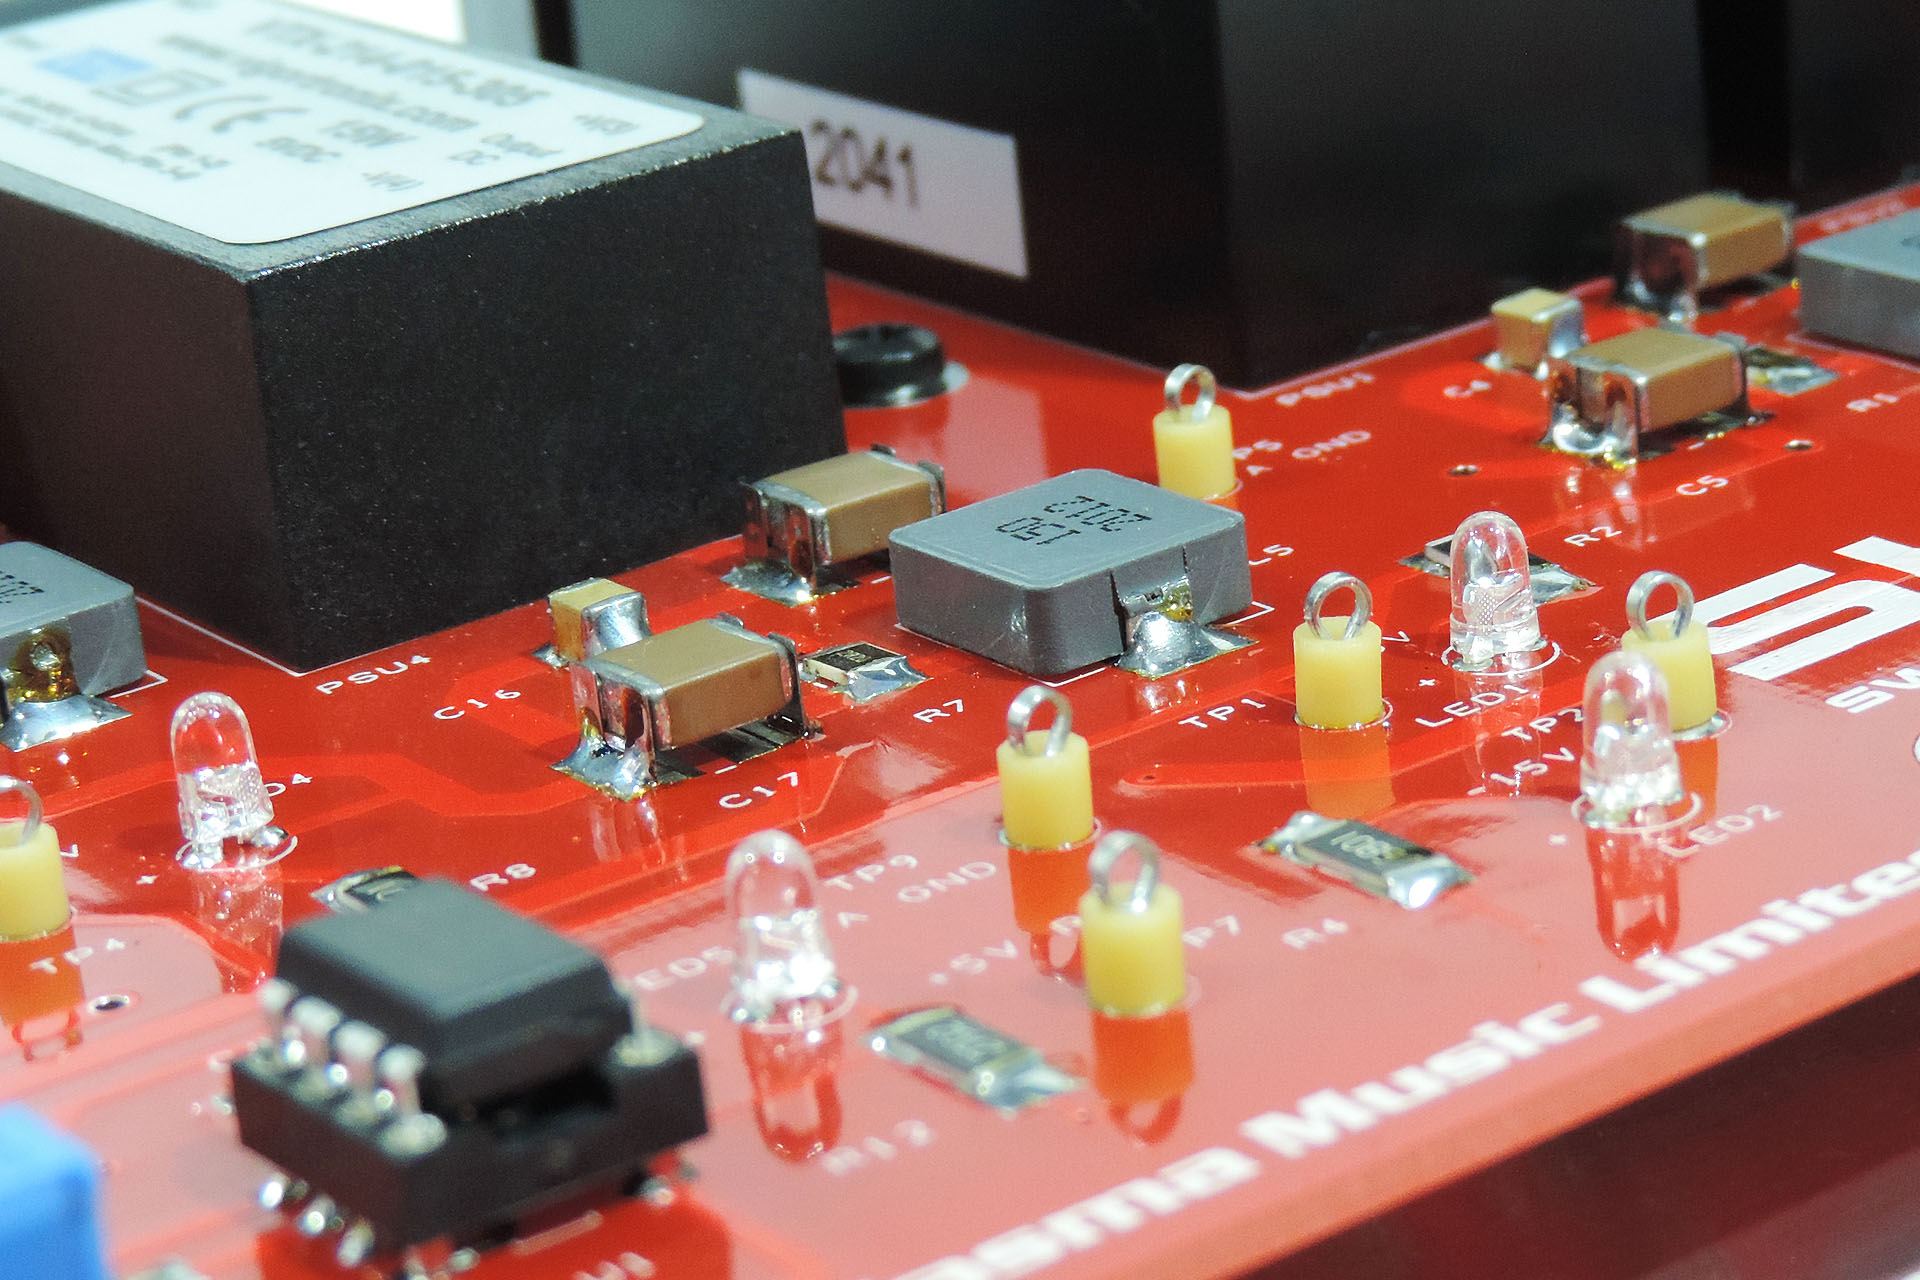
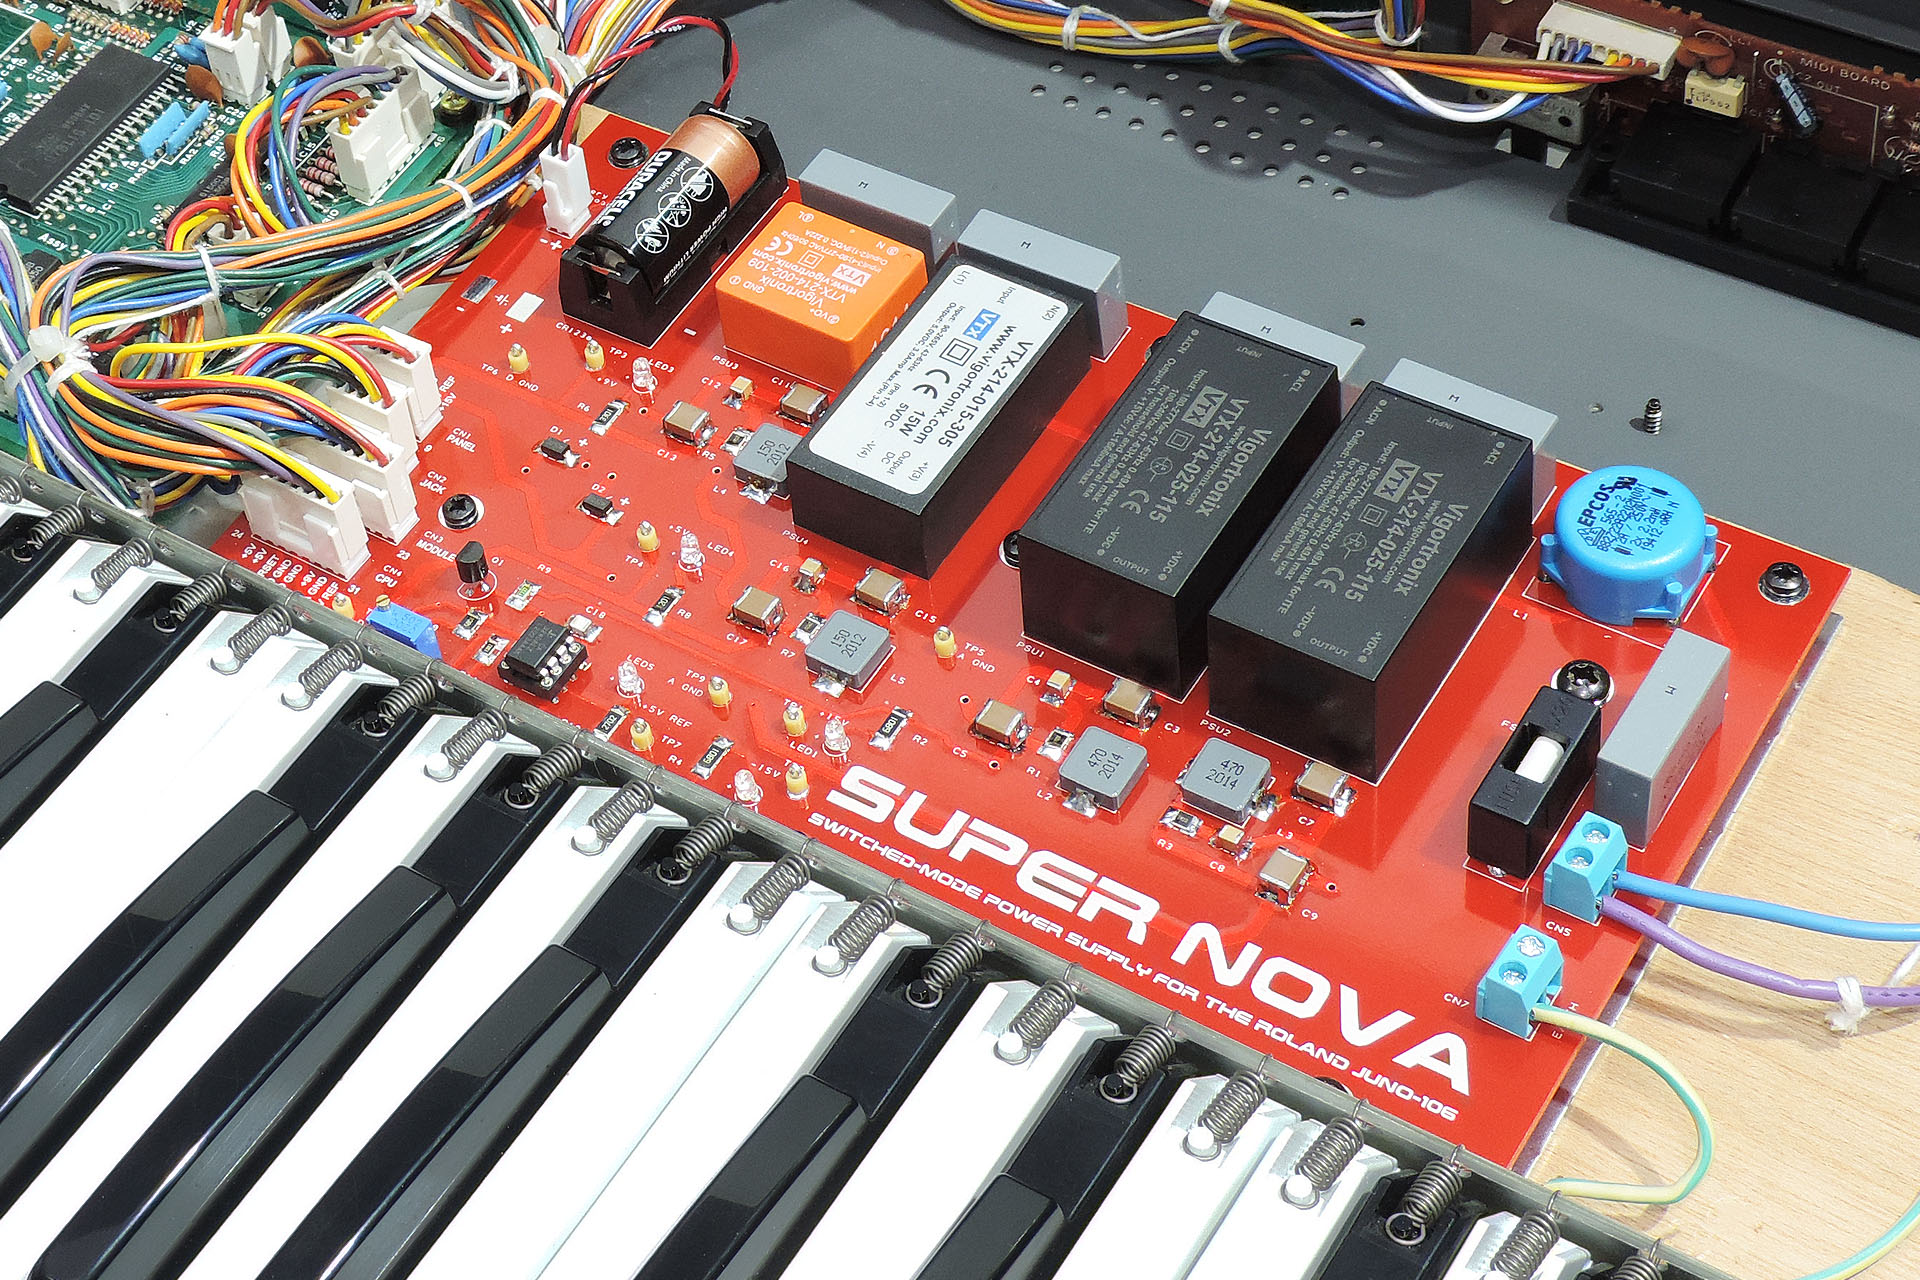
The thing is, power supplies do fail. If the transformer packs up for example or starts humming, then that’s it. That’s why I designed Super Nova. Not just a replacement power supply, Supernova is a modern, switched-mode power supply for the Roland Juno-106, meaning that for a start, it generates considerably less heat than the original linear power supply. There’s NO mains hum either and since Supernova's filters are based on my good friend, Guy Wilkinson's design, Super Nova is also super quiet. And of course, being a switched-mode design, you can still plug your Juno-106 into any electricity supply around the world but this time... without having to open it up and change the transformer tap!
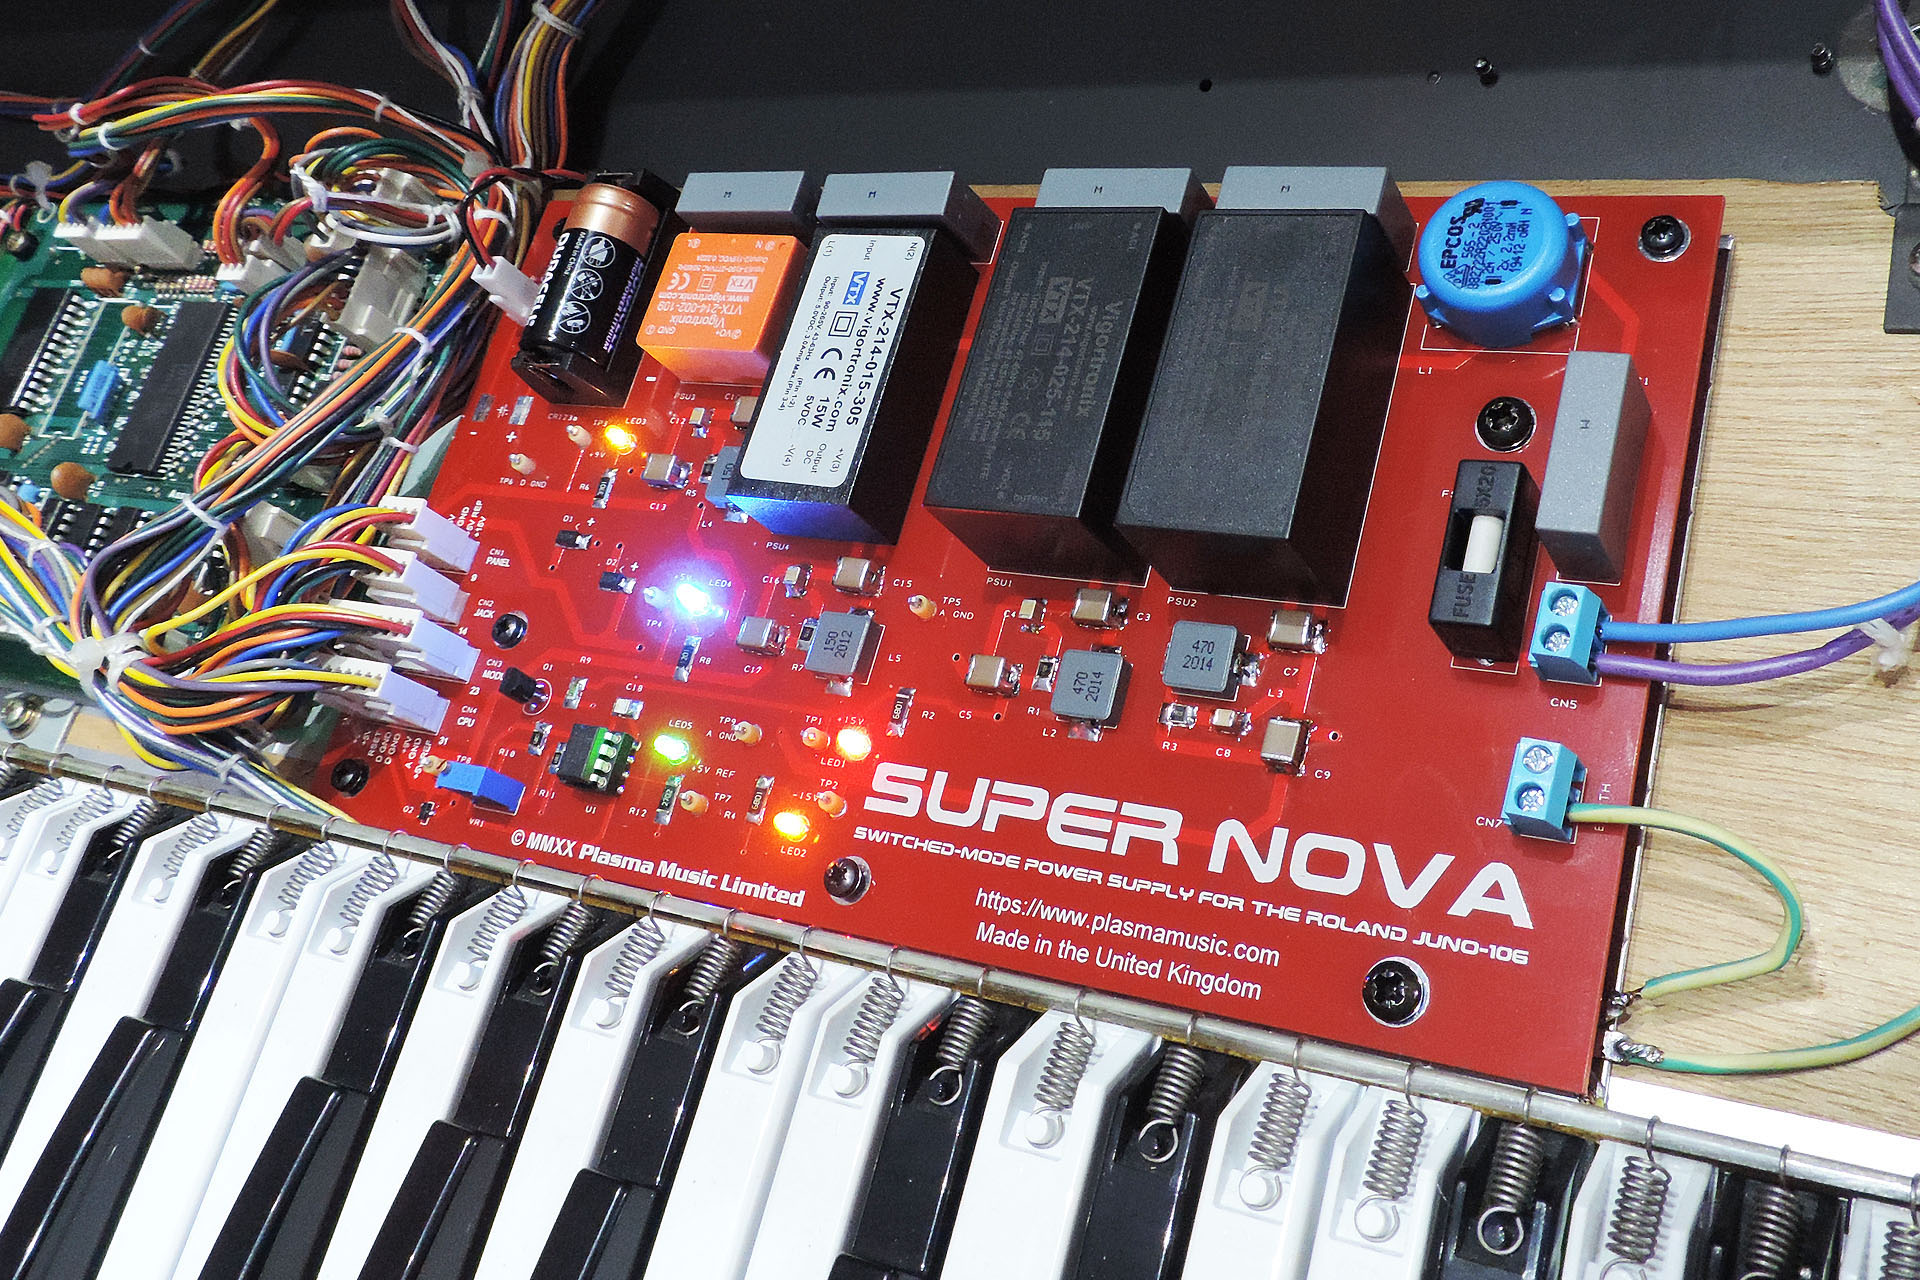
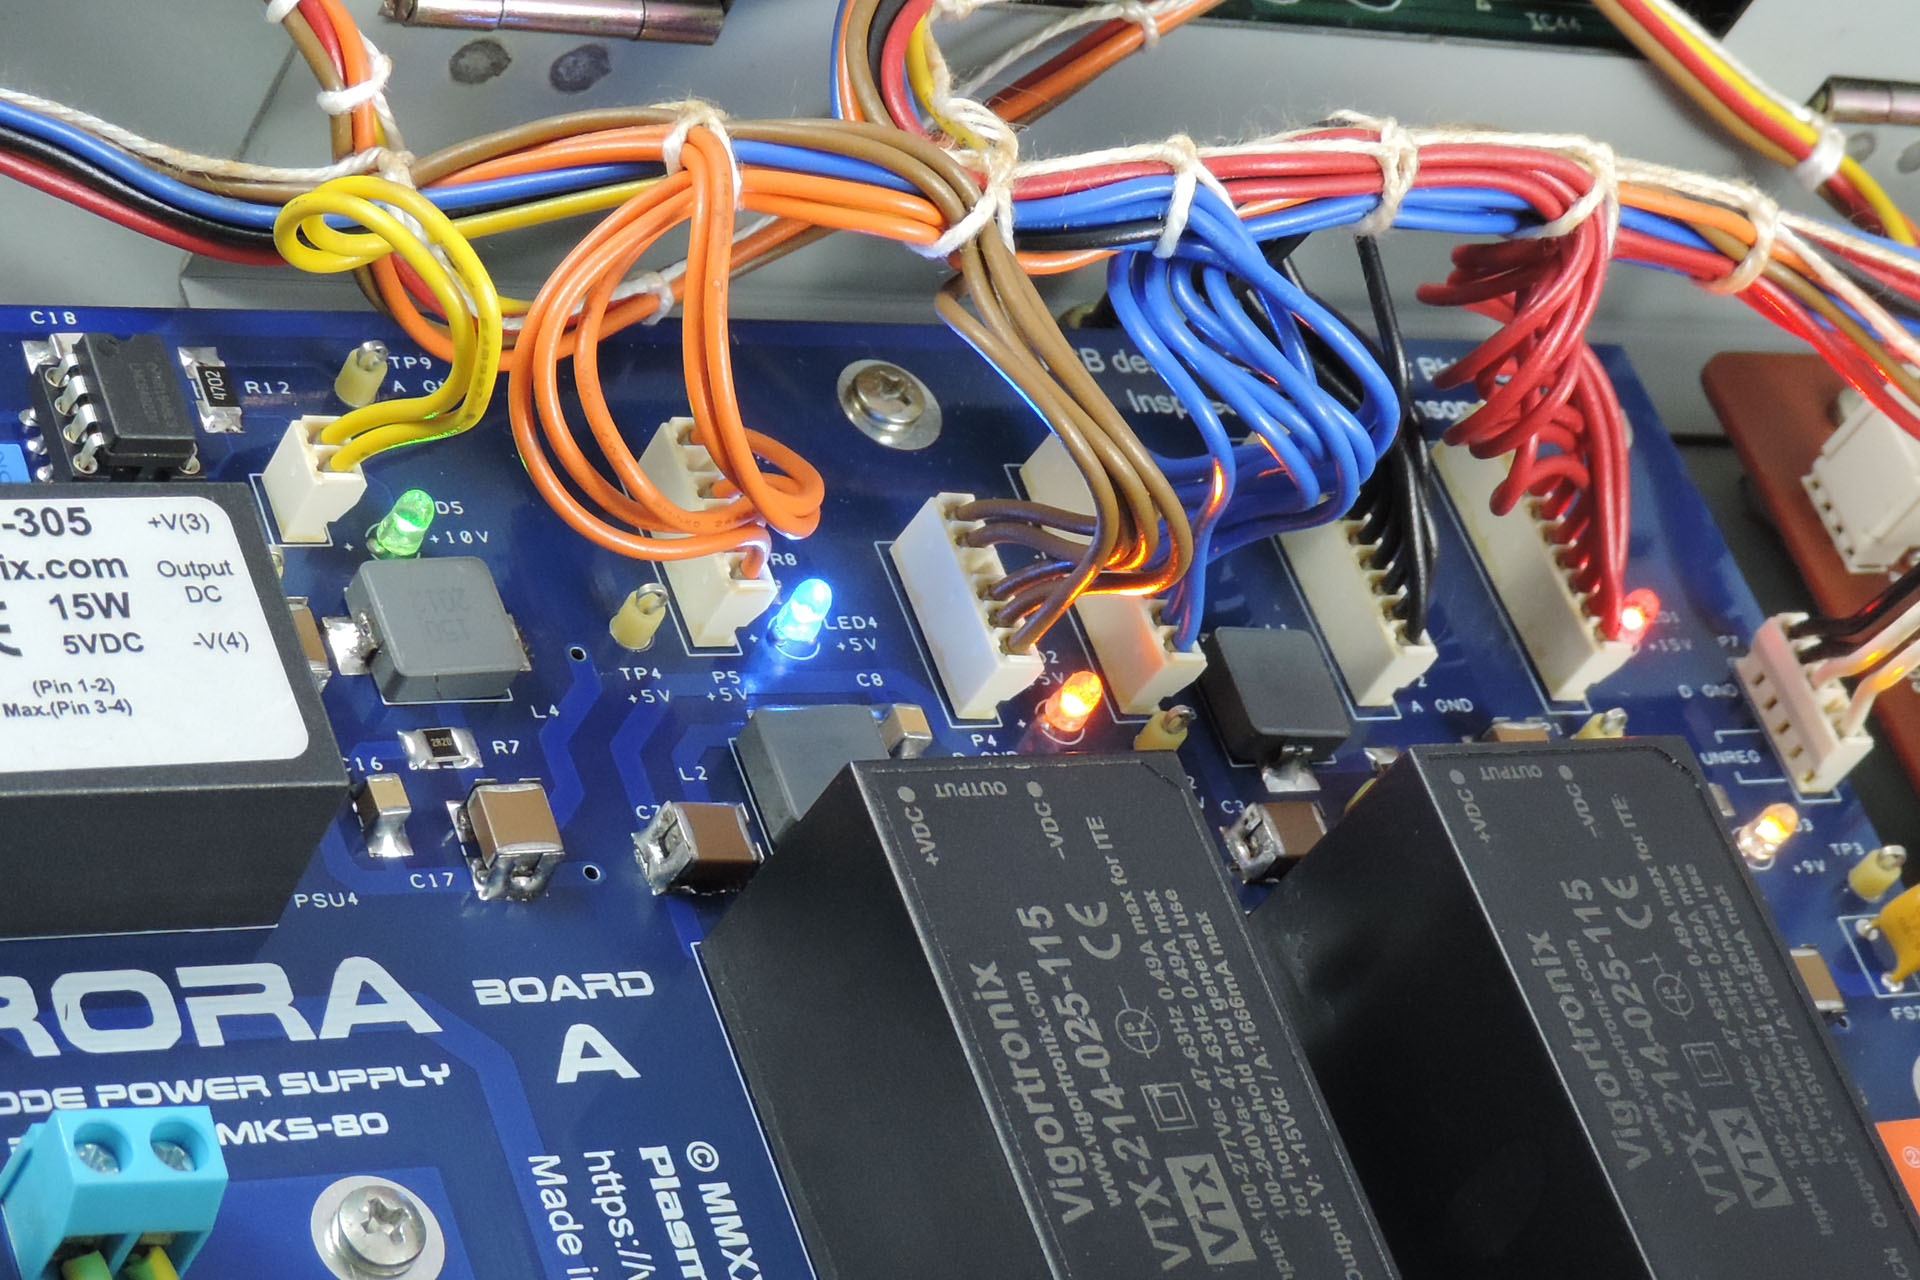
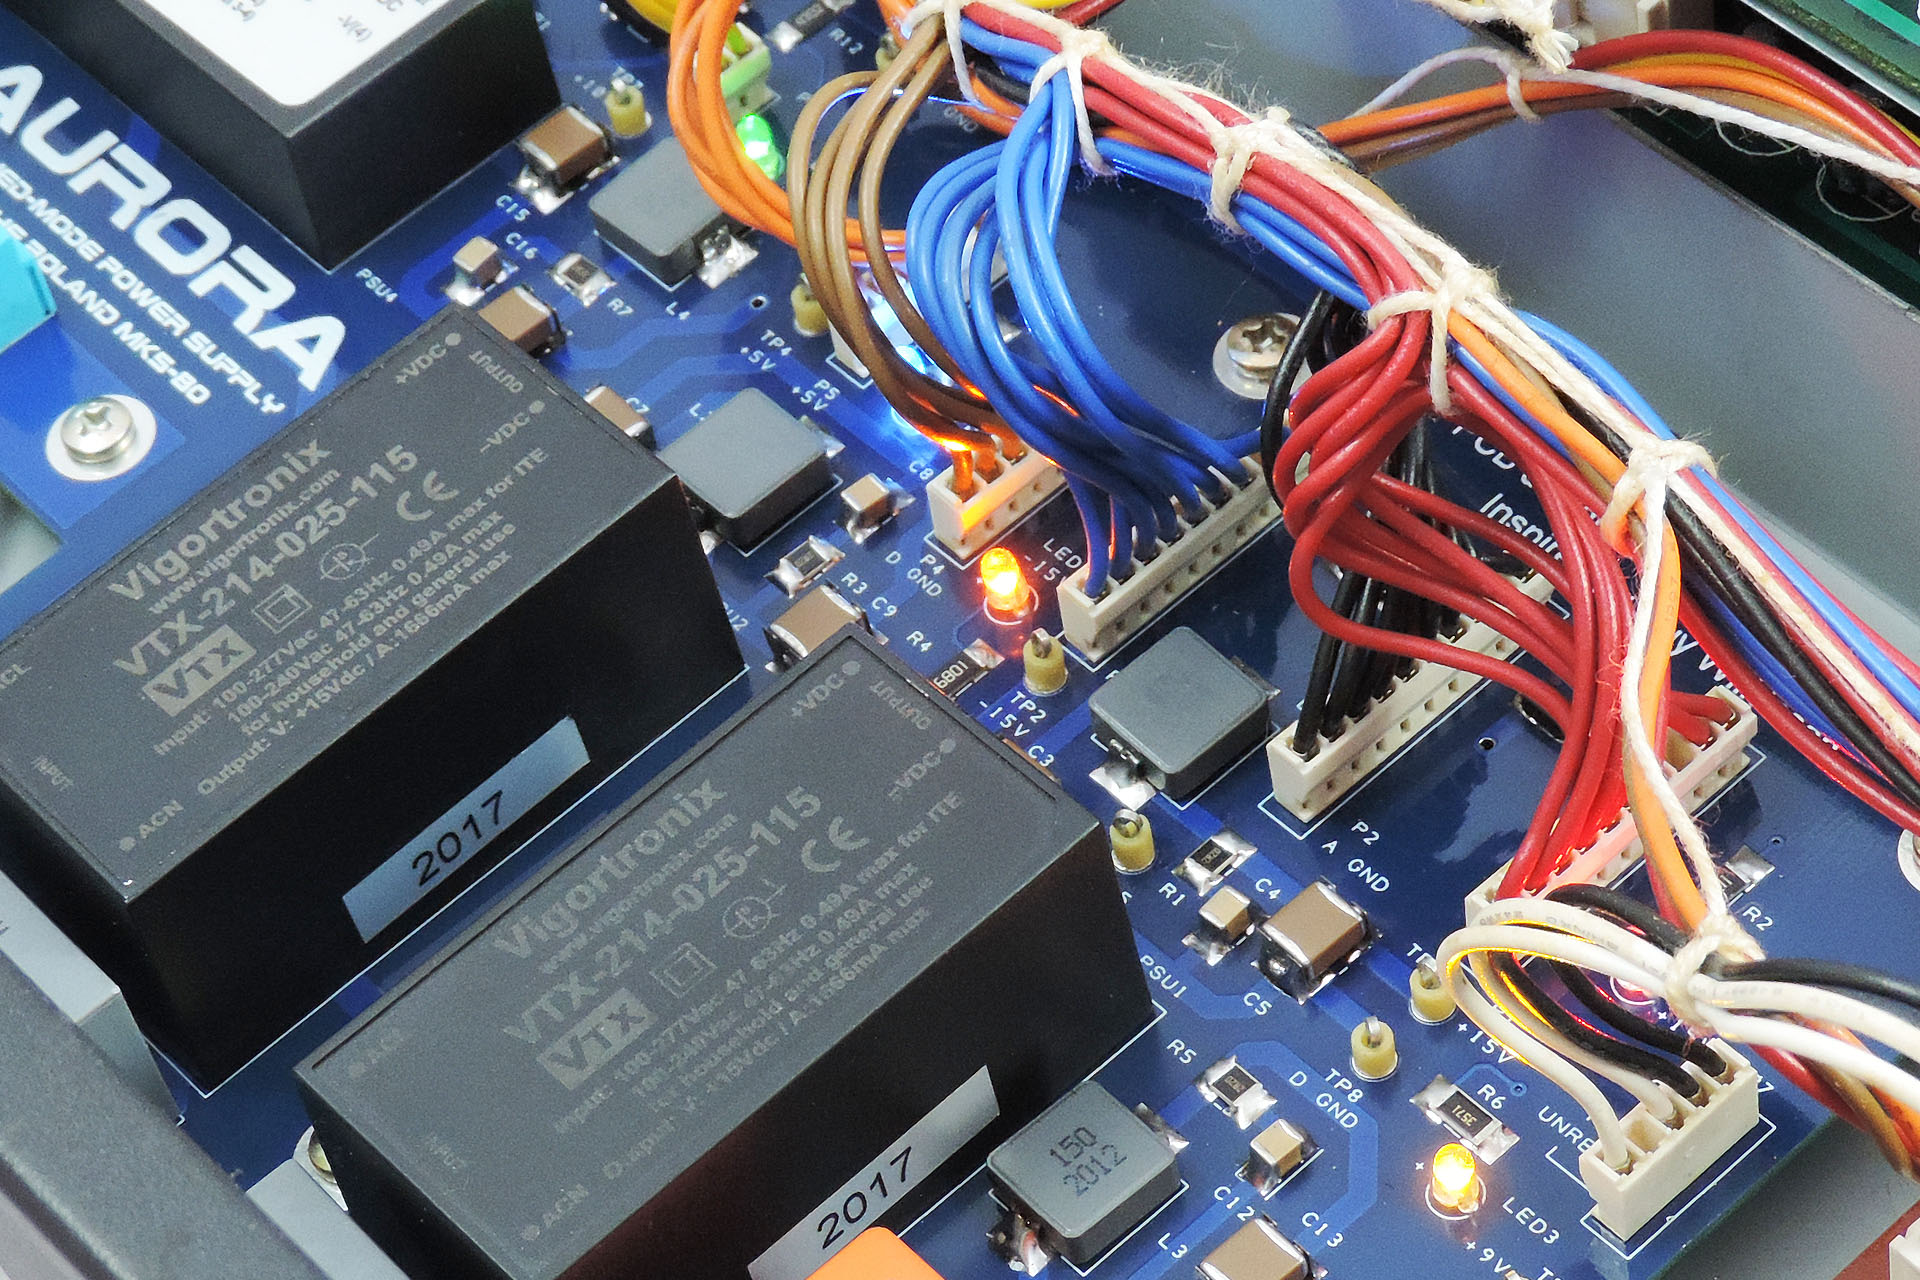
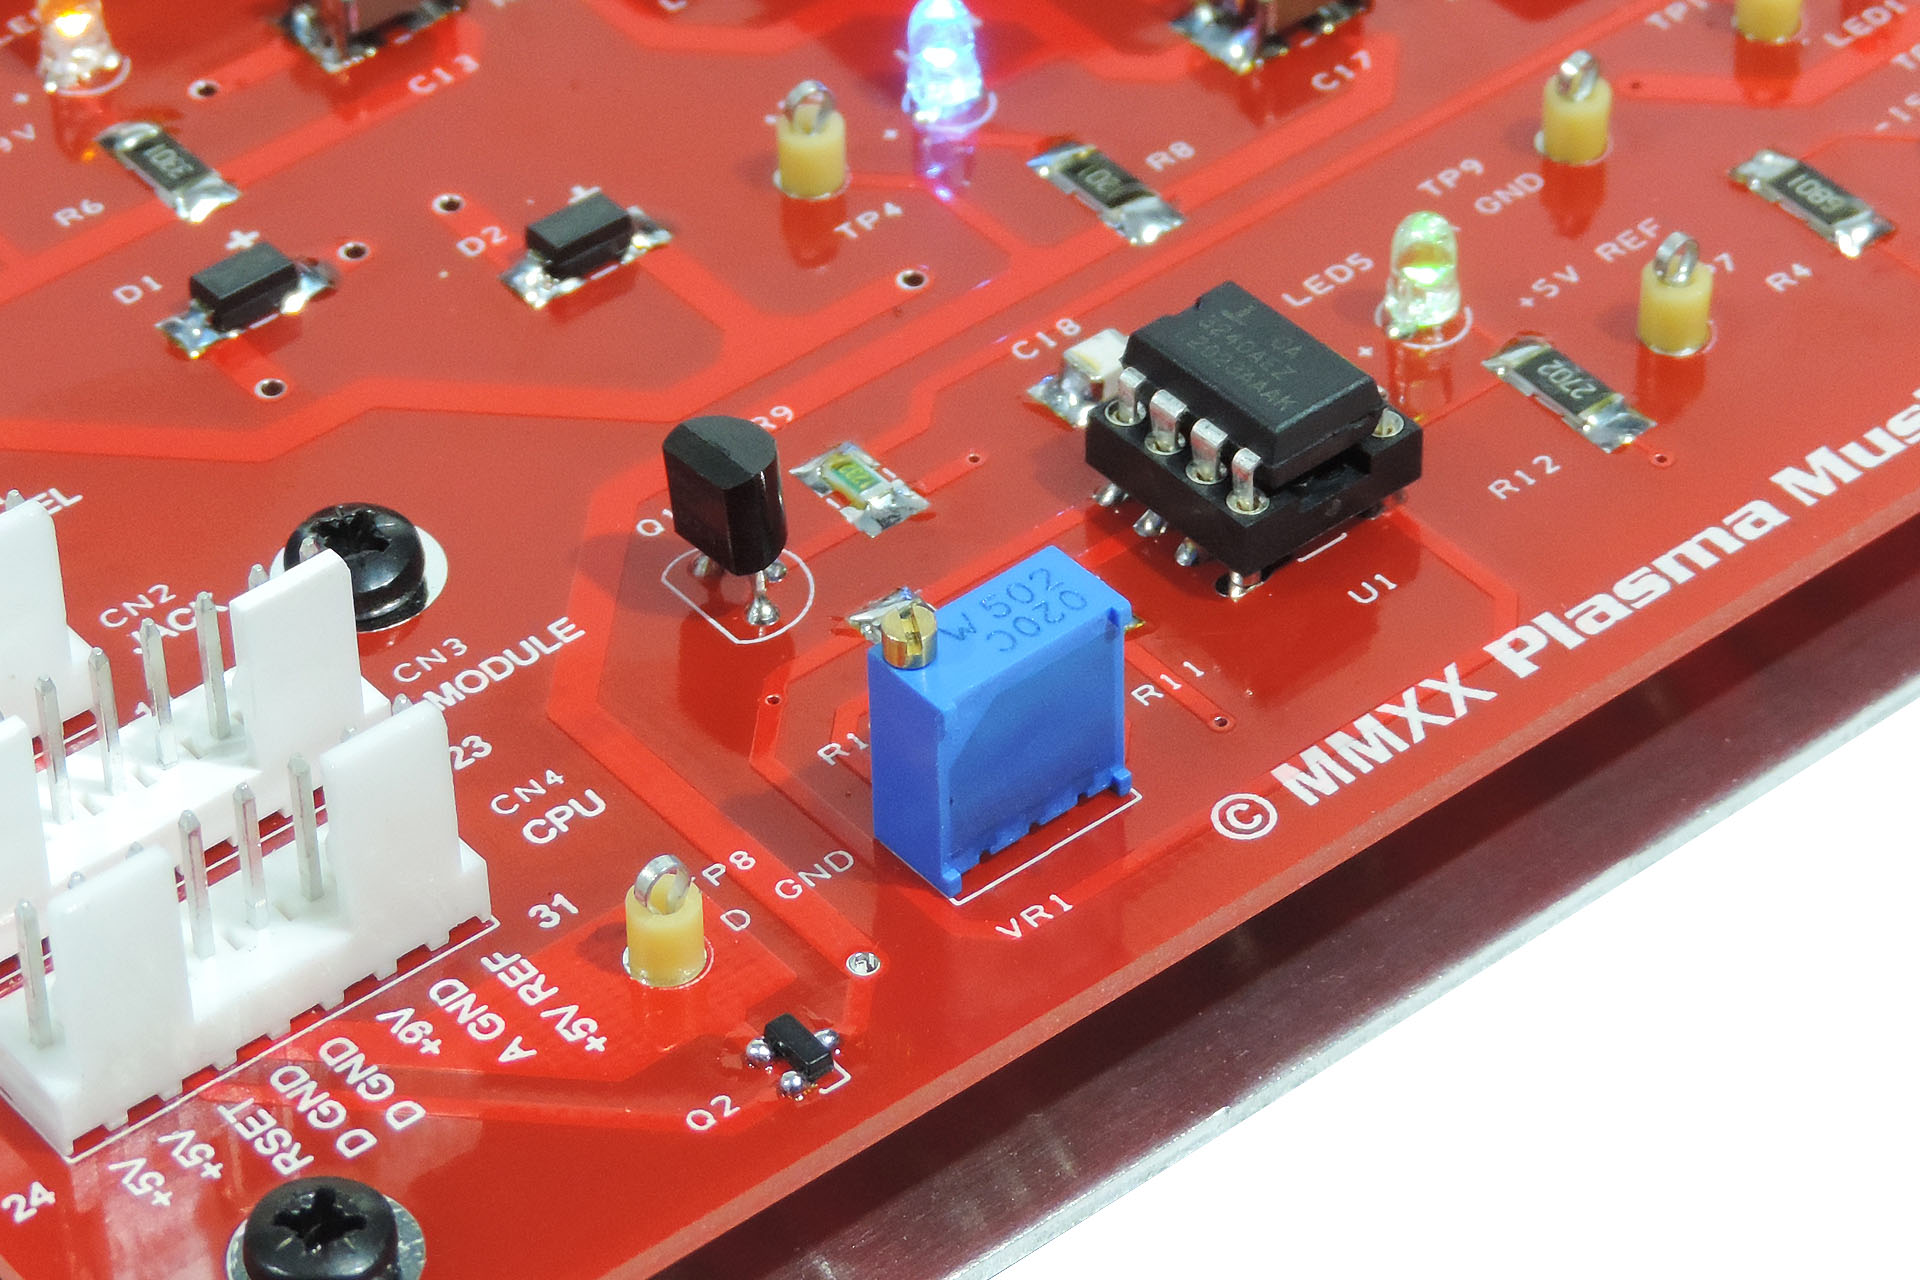
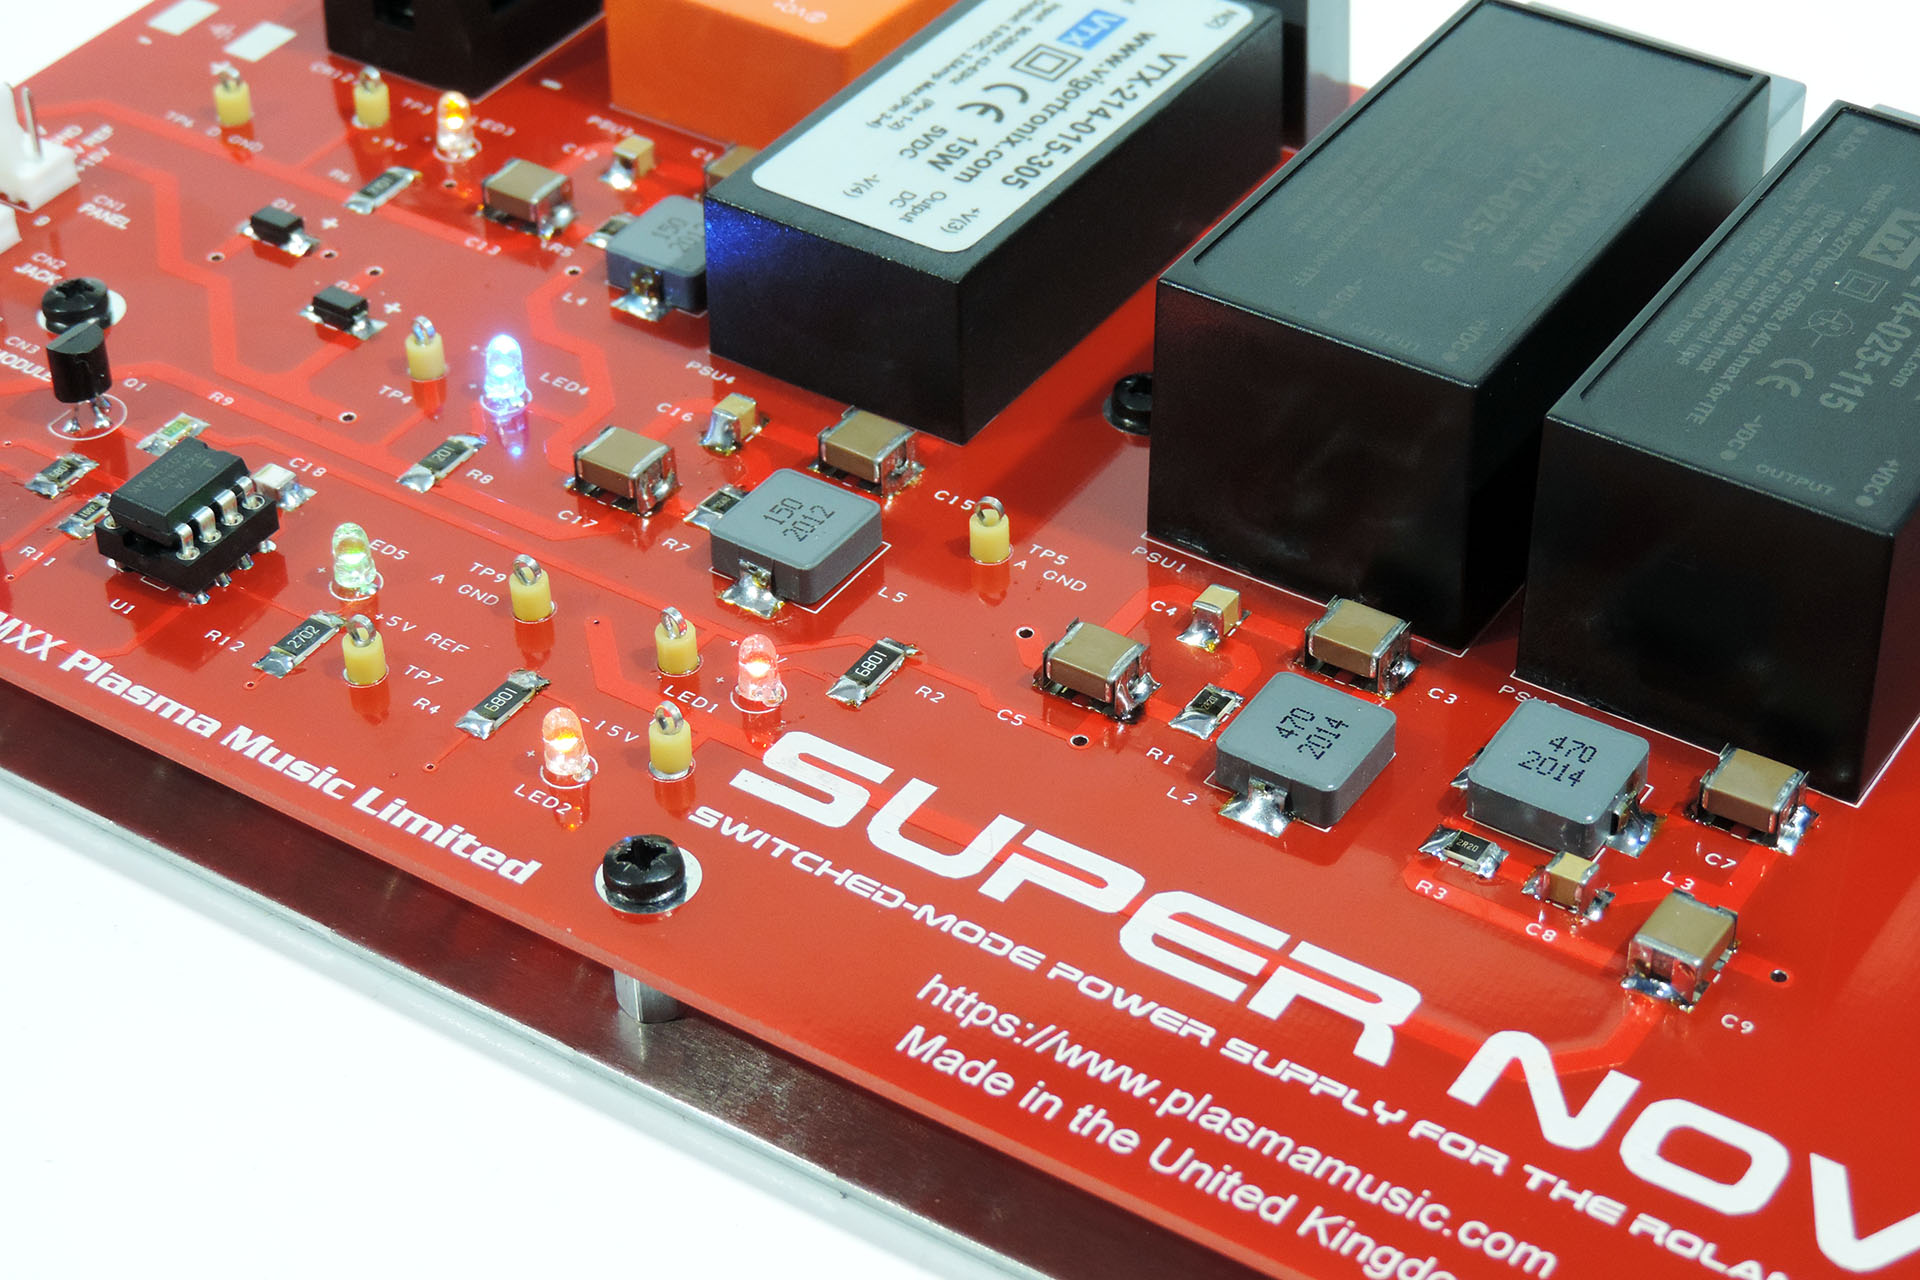
Individually coloured LEDs for each supply including the 5V reference voltage, means that you can very quickly check line status with a glance. If you really want to know what's going on, conveniently located test points make measurements a breeze.
The 5V reference voltage is set when each Supernova is made, using regularly calibrated test equipment. A multi-turn pre-set however, allows for fine adjustment which may be necessary after several years, due to component value drift.
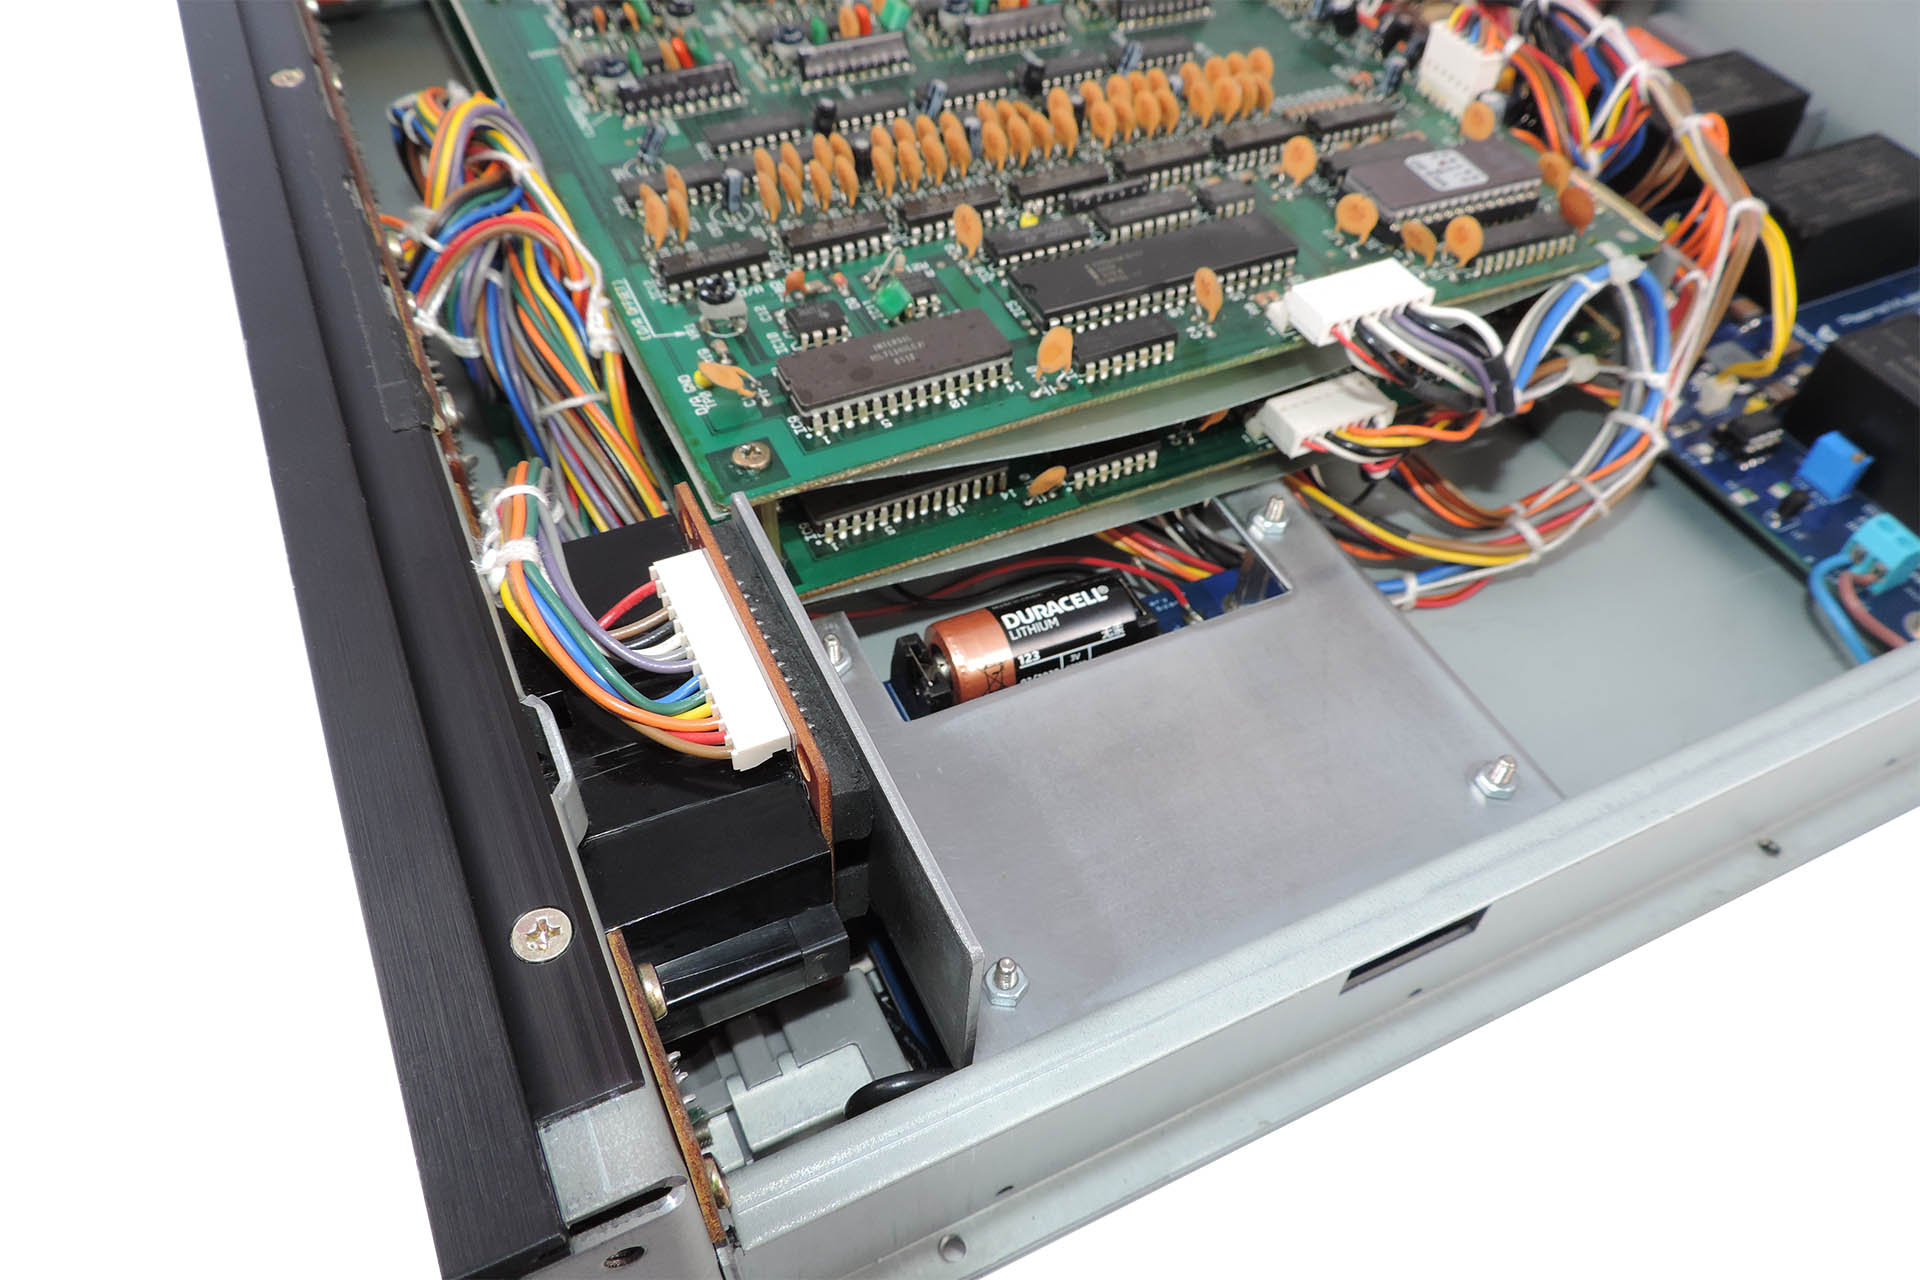
One of my most popular upgrades to many machines I receive from customers, is my Live Forever battery mod’. Supernova is therefore available with an optional provision to replace the memory back-up battery in the Juno-106 and take it off the CPU board. This has several advantages:
- A much larger back-up battery can be installed meaning that you probably won’t have to change it in your lifetime!
- In the unlikely event that the battery leaks, your precious CPU board is safe and won’t be damaged by battery fluids.
- Battery voltage can be easily checked without fuffing around with the CPU board.
- Just in case you do have to change the battery, it’s so much easier and doesn't require any soldering.
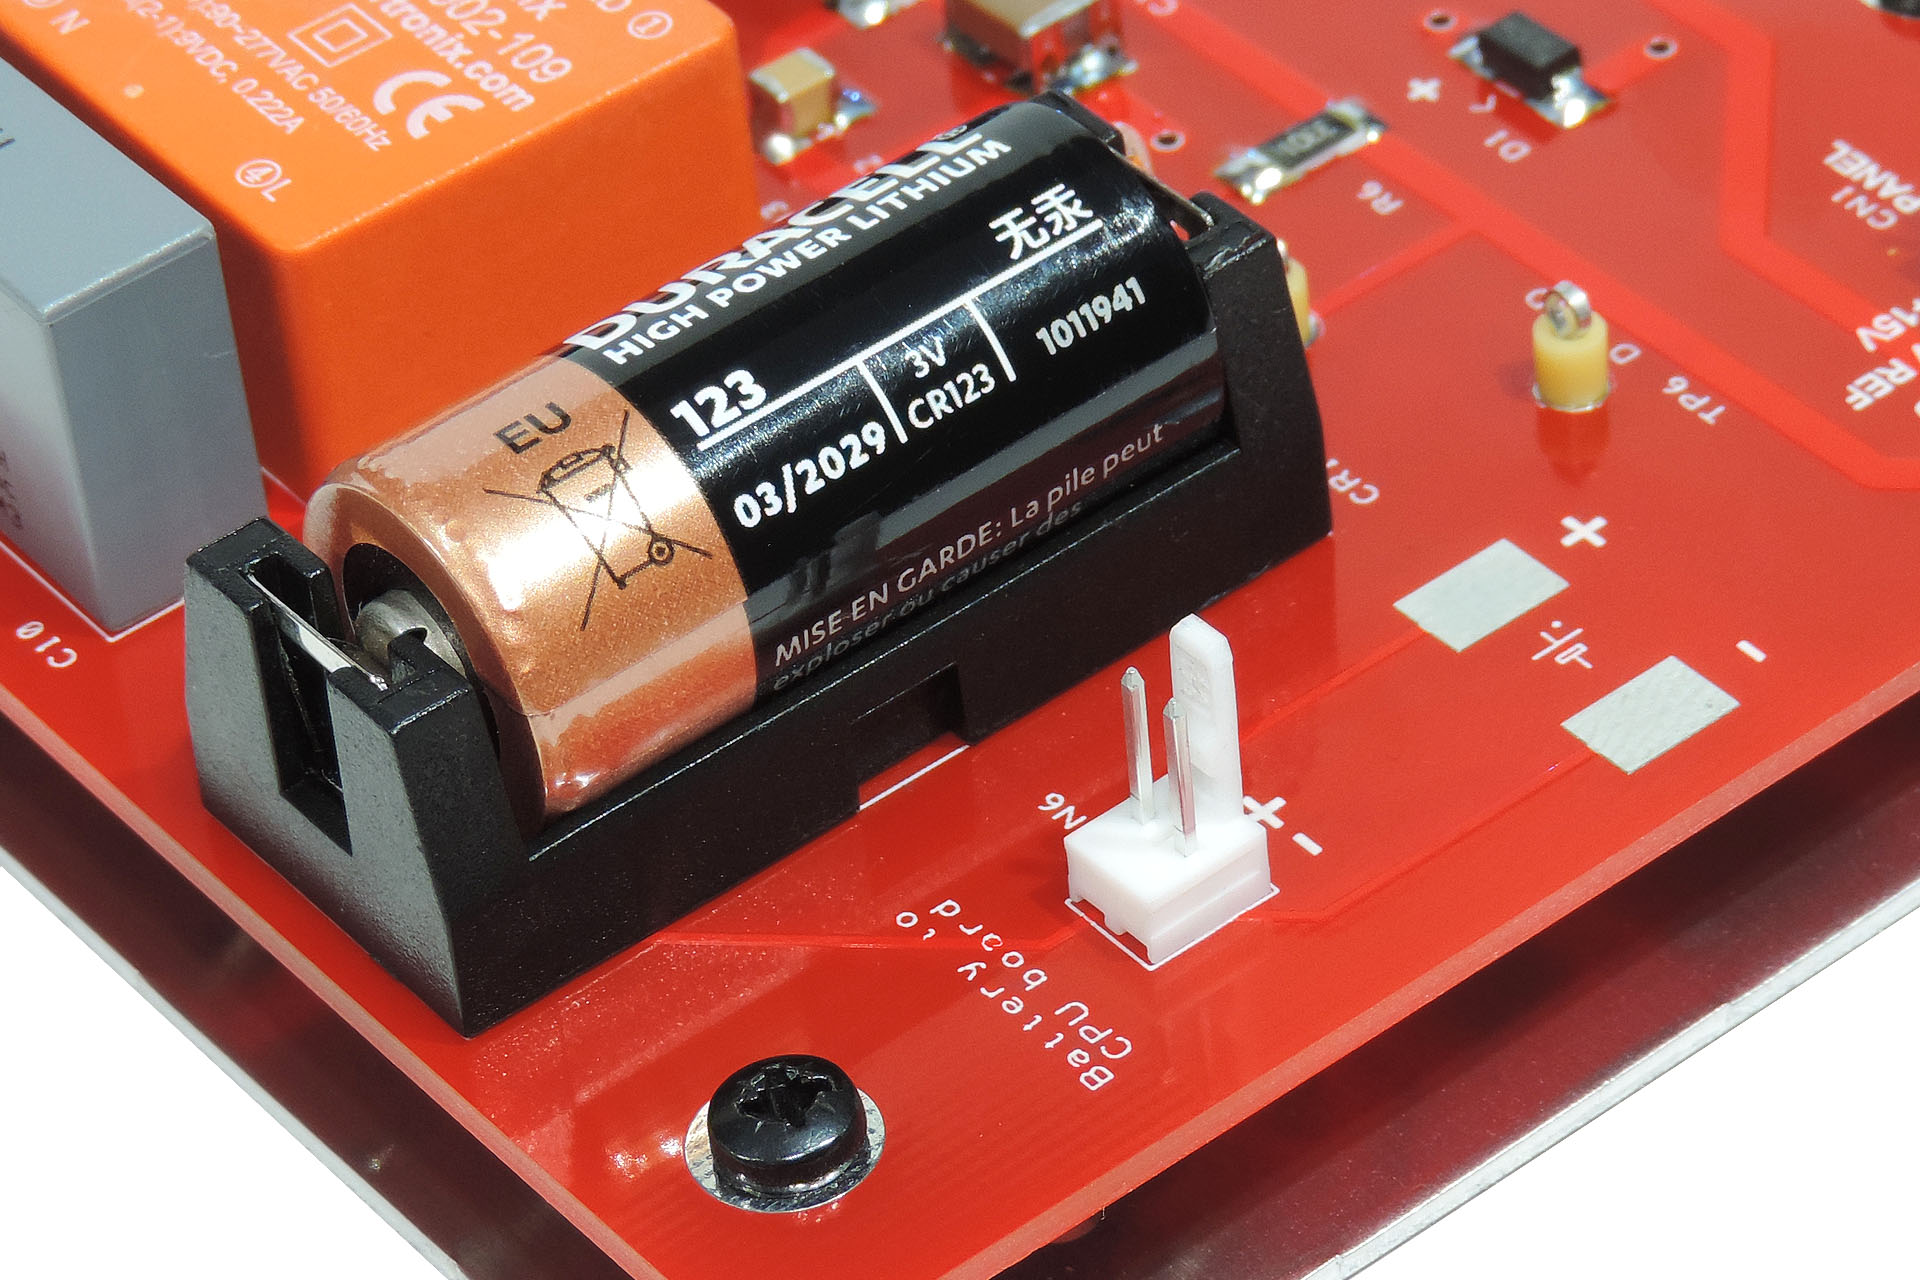
The battery connects directly to the original battery points on the CPU board so all components associated with the back-up battery continue to function as as normal.
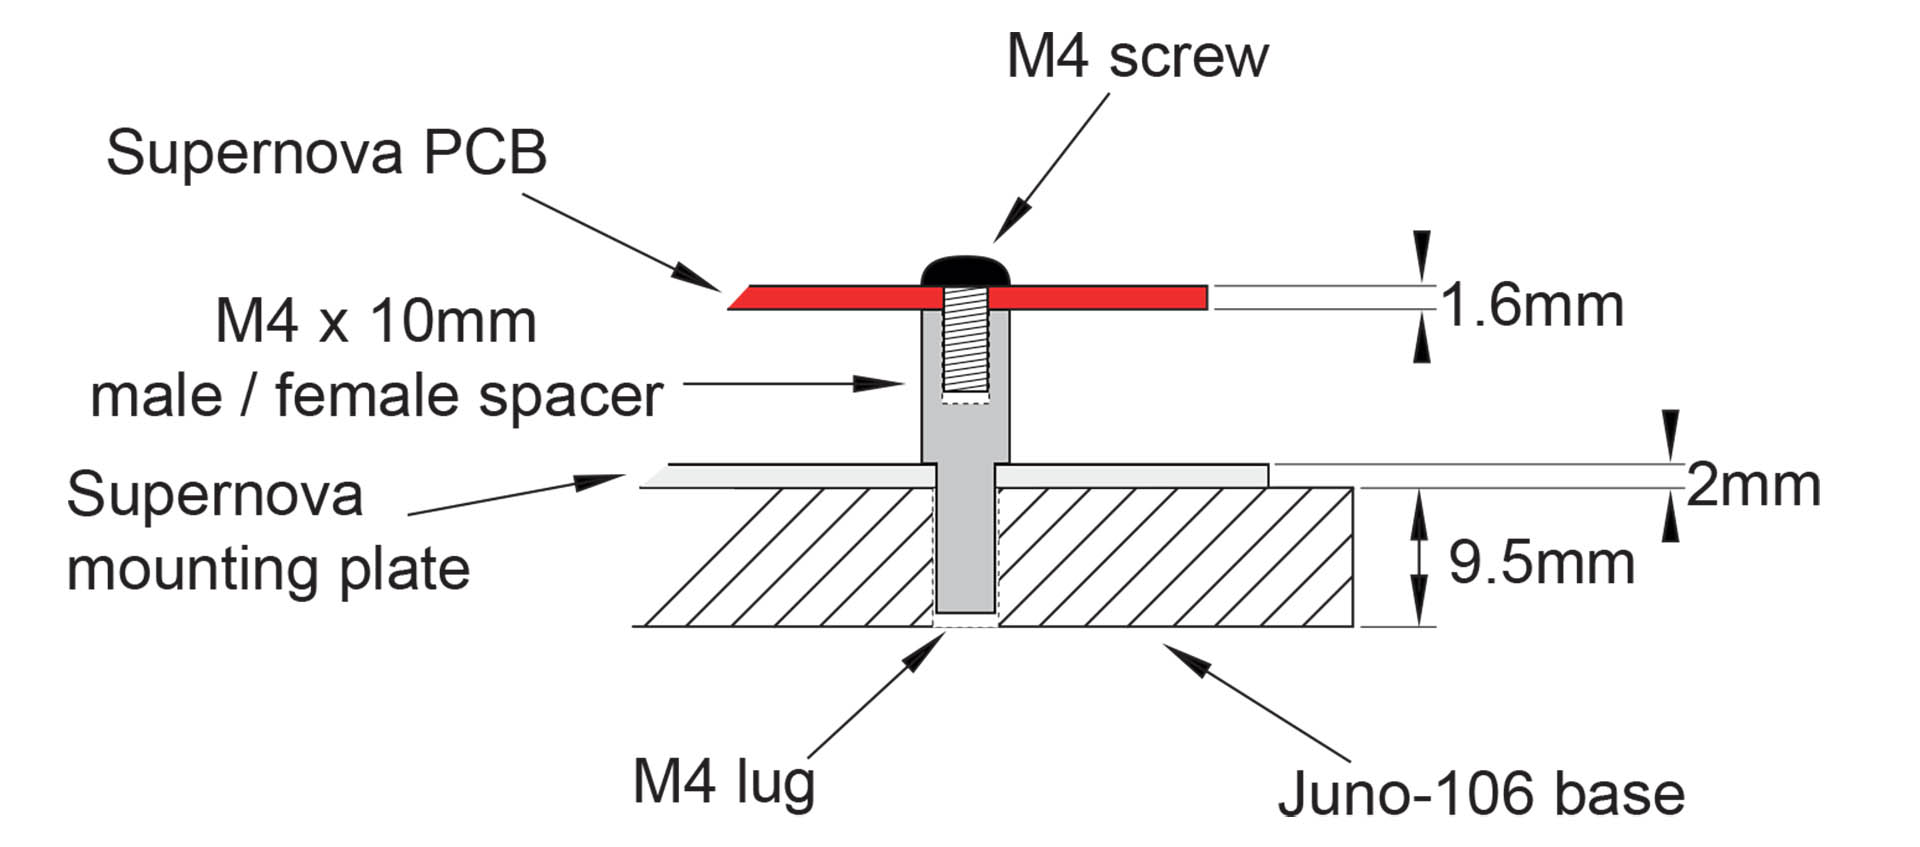
Like several synthesisers of its day, the Roland Juno-106 is built on a plywood base. Heavy items like the keyboard assembly and power transformer, are attached to the base using machine-type screws that secure into corresponding steel lugs which are sunk into the plywood. The much lighter PCBs however, simply use wood screws to secure them (via spacers) to the wooden base. When you consider that the plywood base in less than 10mm thick, that sounds a little risky. On the other hand, there's no history of 'stuff' coming lose!
I wanted Supernova to be super secure so although the PCB could have actually been smaller, I chose to extend it, thereby taking advantage of the otherwise redundant M4 lugs that were previously used to hold down the transformer. Mounted on an aluminium plate, both PCB and plate are very securely anchored to the base of the Juno-106. The plate is further held in place with four wood screws.
Supernova fits perfectly into the Juno-106 and is relatively easy to install by anyone with some technical competence.
It's very efficient, can be plugged into just about any power outlet in the world and has on-board Live-Forever battery mod.
In fact, why don't I just list a few of Supernova's benefits?
-
- No transformer.
- No hum.
- Supports a large range of AC voltage inputs making Supernova useable all over the world.
- Virtually no exposed AC mains on top of the PCB.
- Bleed resistor across LIVE and NEUTRAL inputs for safety.
- No adjustable voltage supplies.
- Highly accurate voltage supplies.
- Individual over-voltage protection of each supply.
- Individual over-current protection of each supply.
- On-board processor RESET as on original Roland PSU.
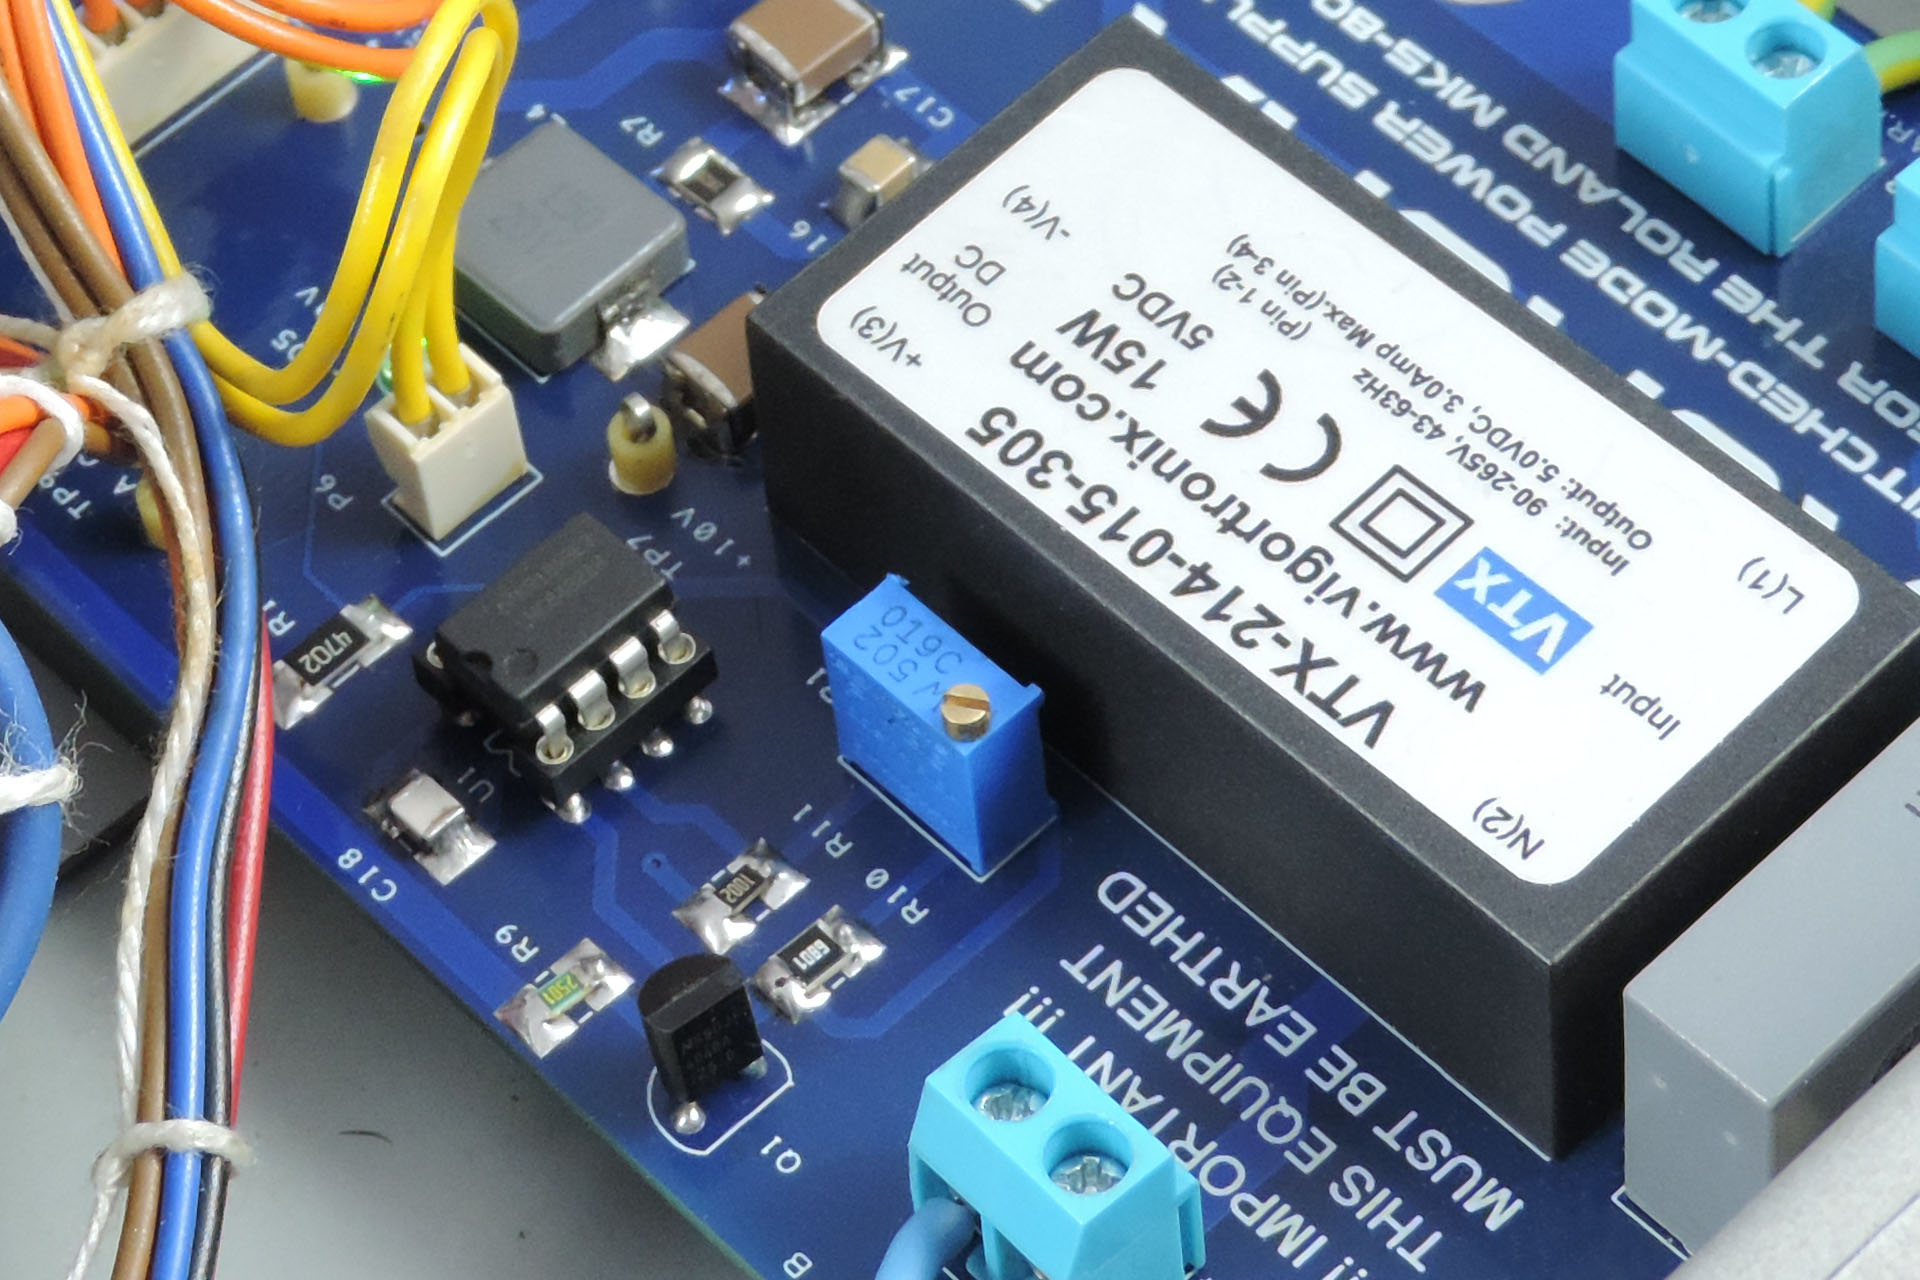
- Using AC / DC converters that are more than 85% efficient, means much less heat inside your Juno-106.
- Carefully designed filters on each supply reduce power supply noise.
- LEDs indicate status of each voltage line.
- Precision 5V reference which still allows for adjustment.
- Conveniently situated test points.
- Optional off-the-board memory back-up battery protects your Juno-106 CPU board in the event of a battery leak.
- Larger capacity CR123 battery means that you won’t have to worry about changing your memory back-up battery for many years.
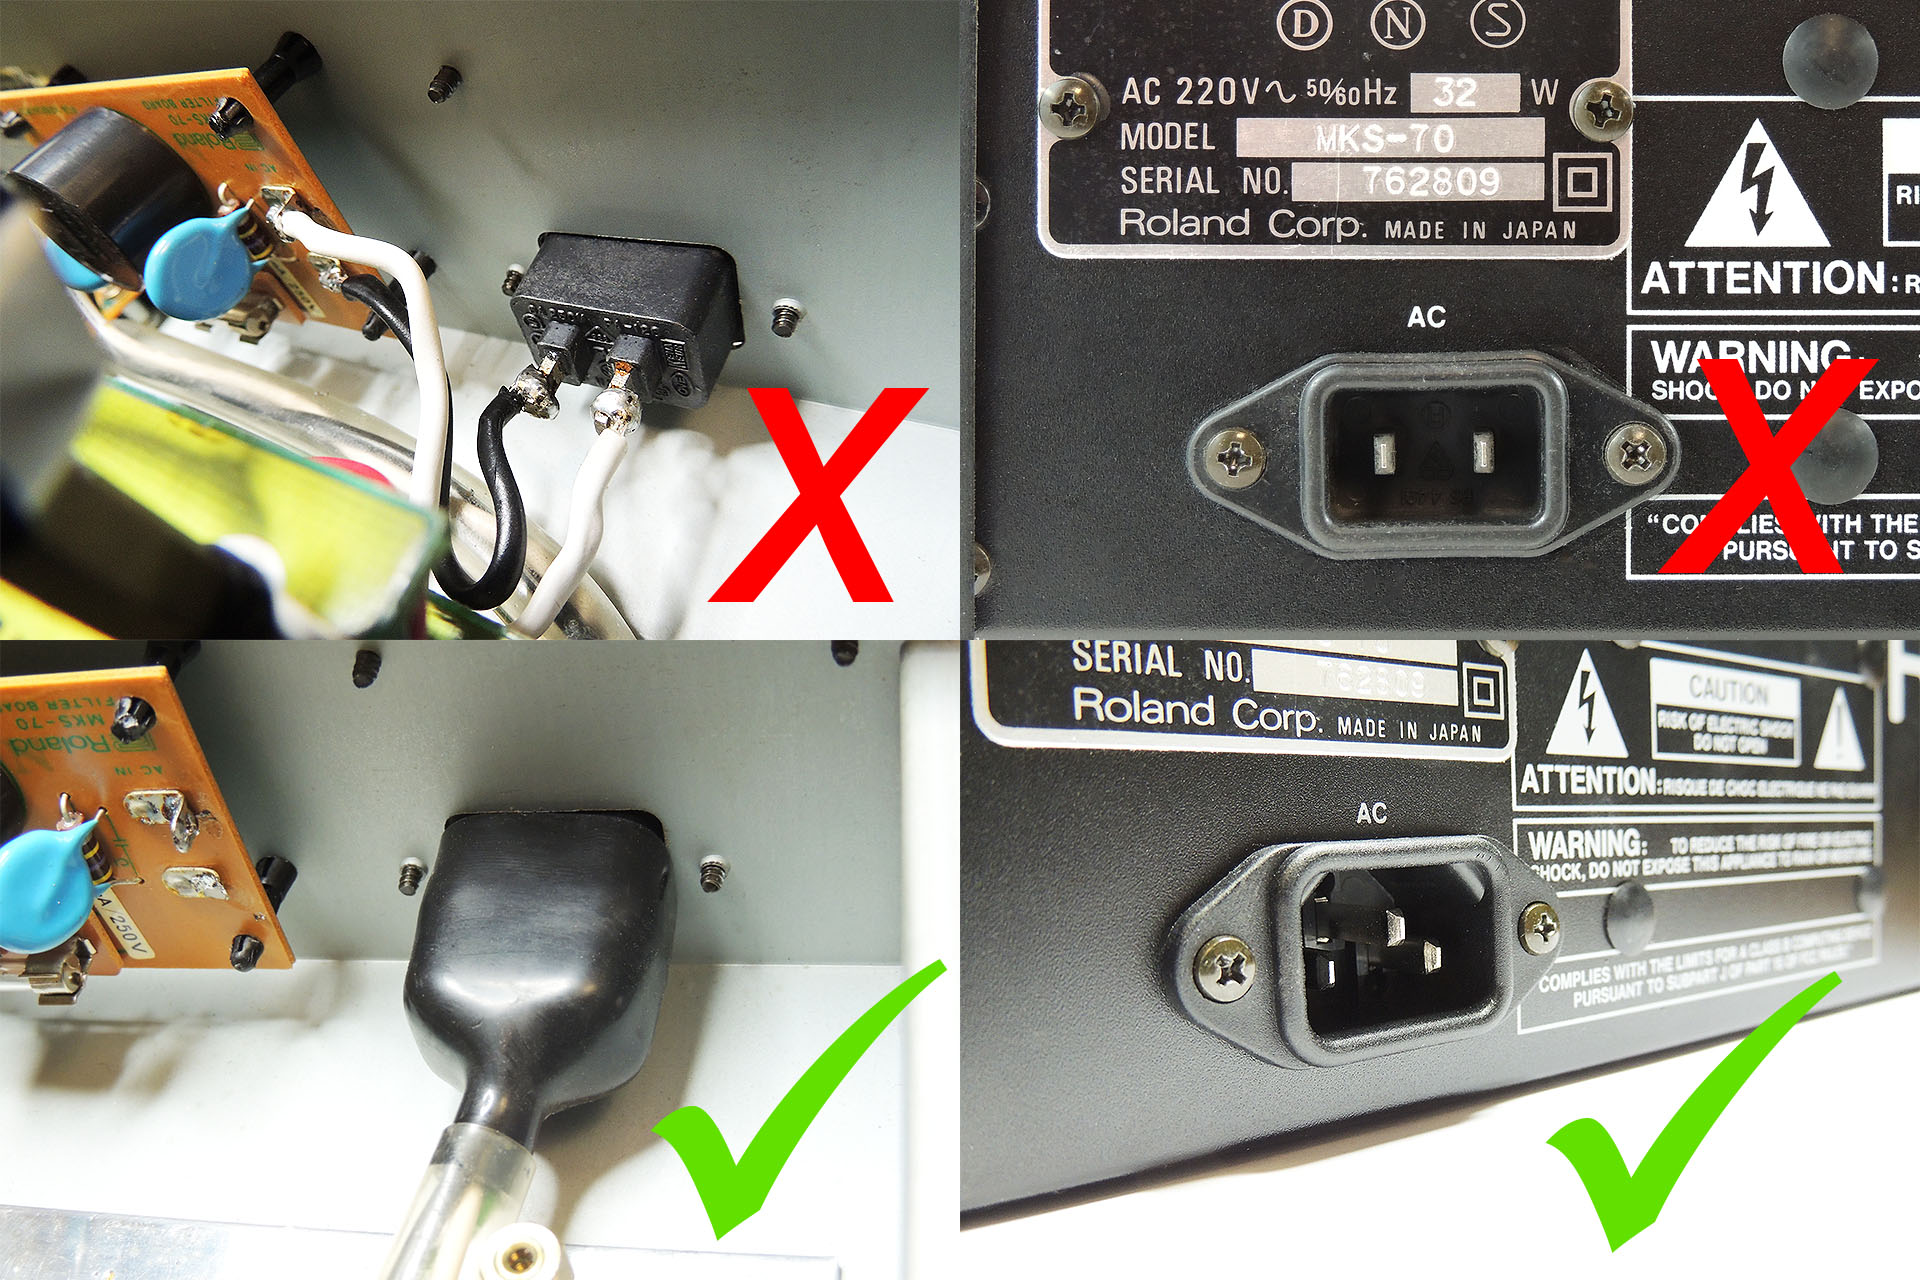
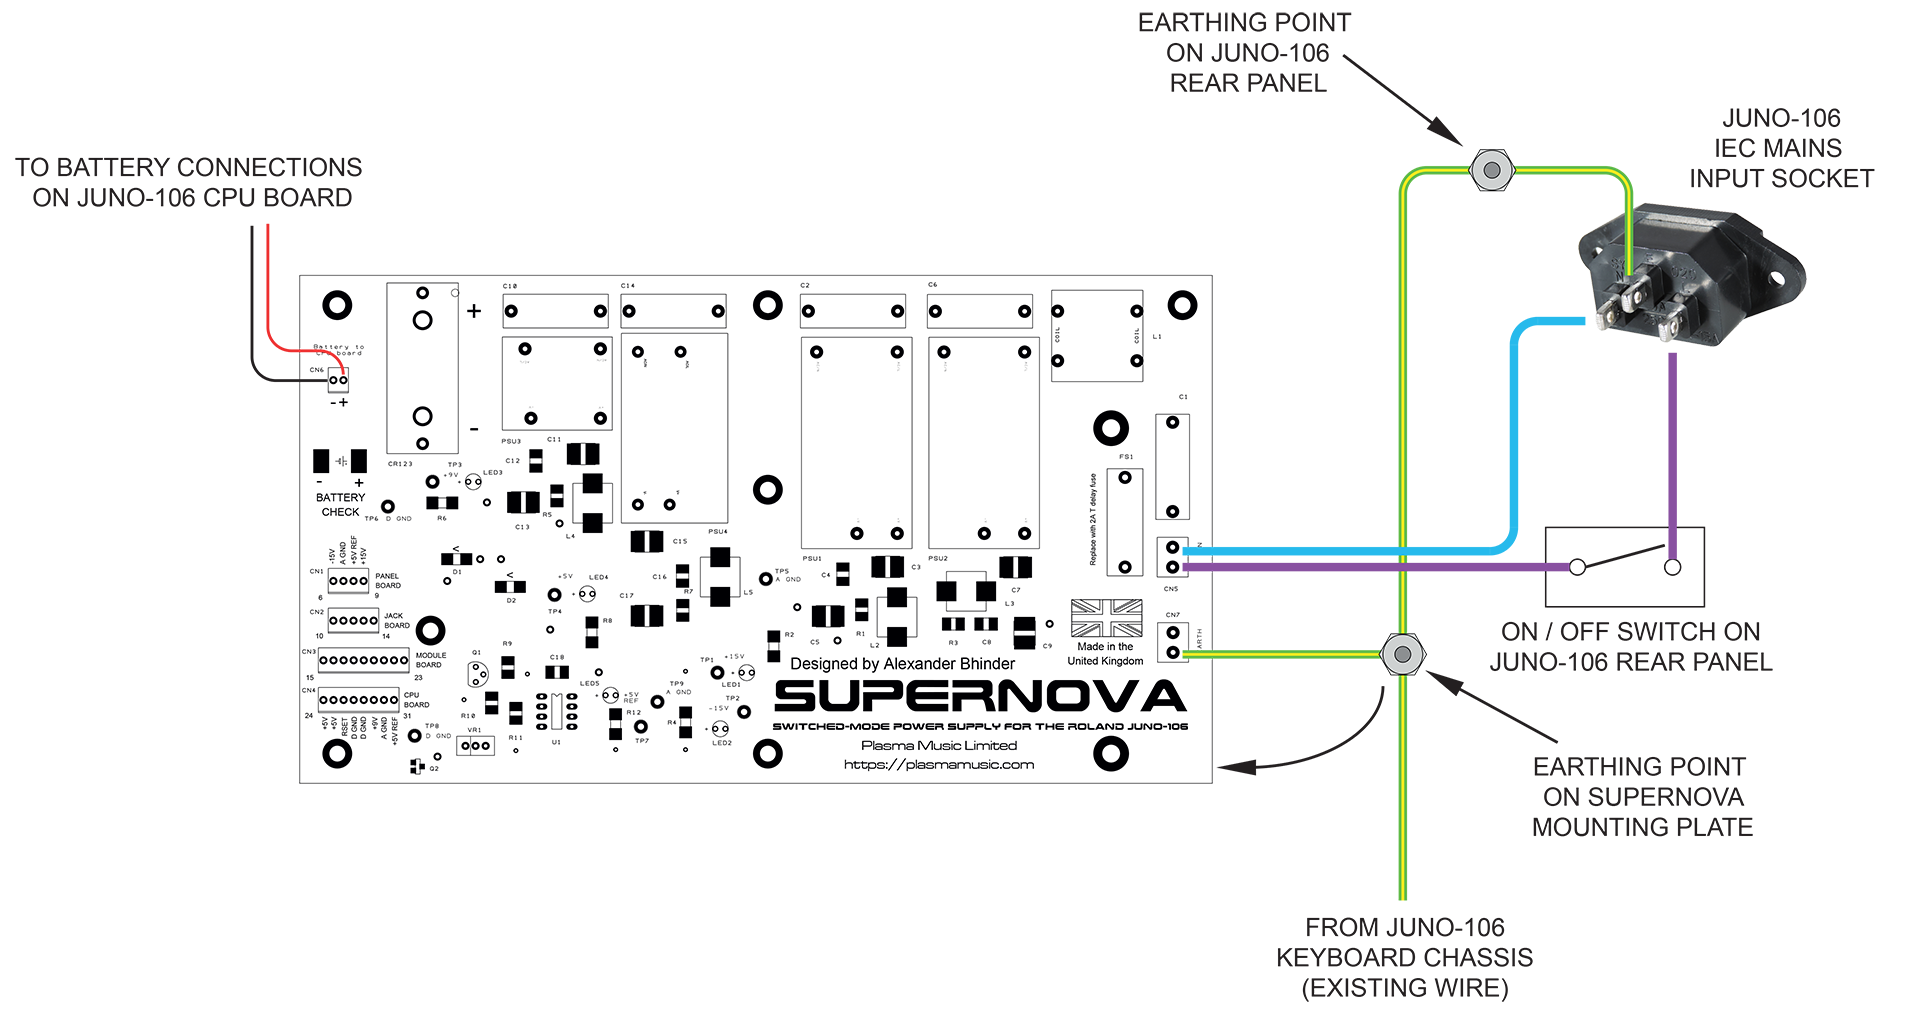
 IMPORTANT: A lot of Roland equipment was shipped with 2-pin IEC C10 power input sockets. Due to the way in which switched-mode power supplies work, it's important that your Juno-106 is properly earthed. If your Juno-106 has a 2-pin IEC C10 power socket, then you will need to replace it with a 3-pin IEC C14 socket. This item comes as part of my earth bonding kit and can be purchased when you buy Supernova.
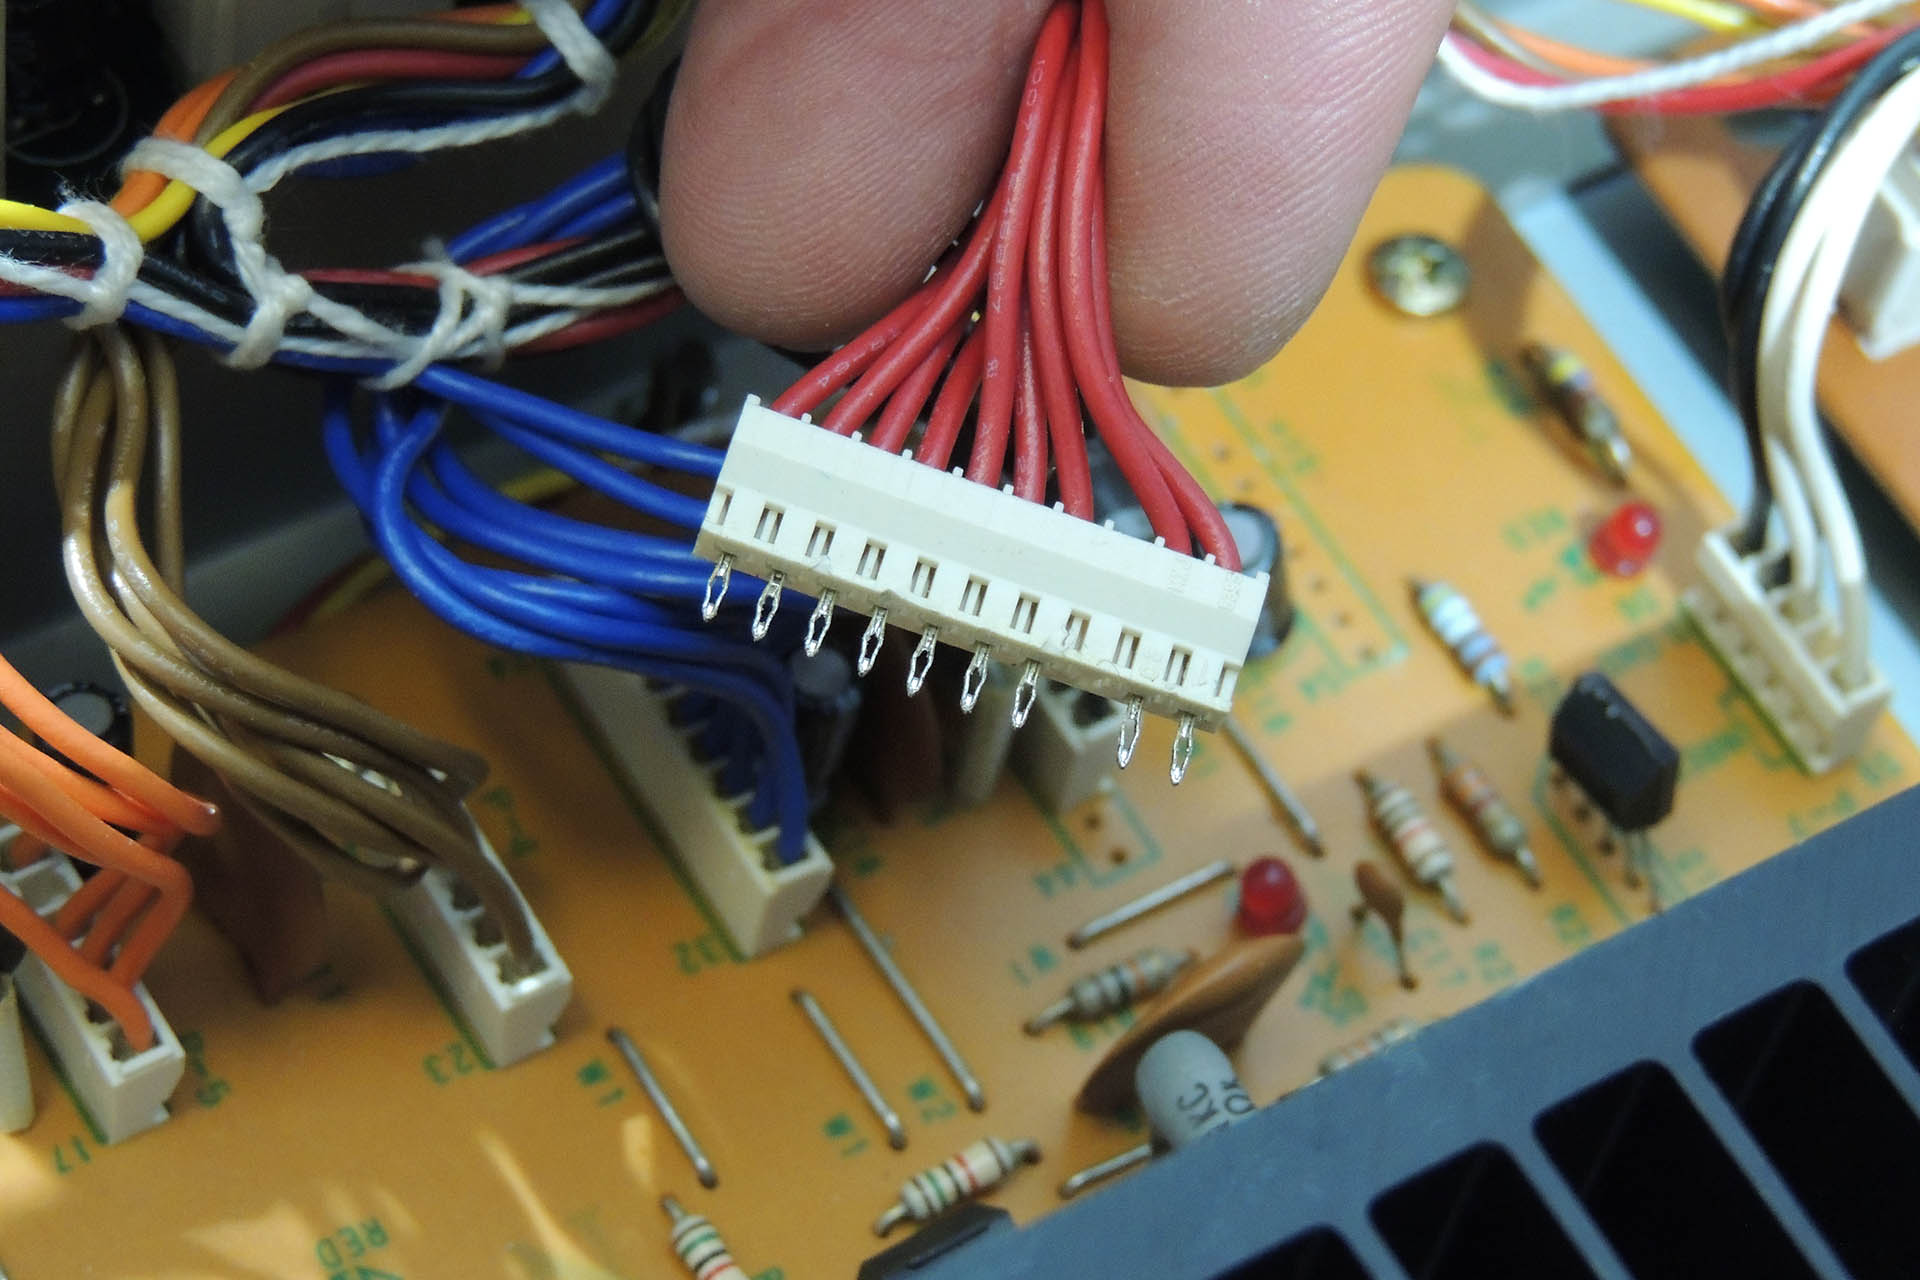
Supernova worked out perfectly. With overrated Vigortronix converters, there's a lot of headroom for the Juno-106 and on top of that, things don't get hot. The carefully designed filters on the back of each converter ensure that Supernova is dead quiet. These are important and you simply won't find them in a commercially available off-the-shelf power supply. Supernova retains a vintage feel with it's through-hole LEDs and fits perfectly into the space left after the original transformer and power supply re removed. No hum, no worries about collapsing supplies, a much lighter Juno-106 and everything's running nice 'n' cool. 😎
UPDATE - 6th January 2021
Supernova has now been fully tested and me and my Juno-106 are lovin' it! I've completed detailed and fully illustrated, step-by-step installation instructions so, if you have a Roland Juno-106 with a bad power supply and are considering a replacement or if you have any questions, please just contact me.
Or you could just...

I'm deeply concerned about the environment and the exploitation of labour and so I always use local manufacturers in preference to the Far East, with the following in mind:
- I can be confident that workers are treated fairly and earn a proper wage.
- I can be confident of the standard of quality of each item that is delivered to me.
- Communication is important and using local manufacturers, all correspondence is quick and understandable.
- I believe in supporting the local economy.
- I can be confident that the disposal of manufacturing waste is managed properly and in accordance with national and EU law.
Supernova was designed by me and every Supernova is hand-built and tested by me, here in Hemel Hempstead, Hertfordshire. The aluminium mounting plate is made by Lenton Engineering which is based just up the road in Watford and the printed circuit boards are manufactured by Minnitron Limited in Ramsgate, Kent.
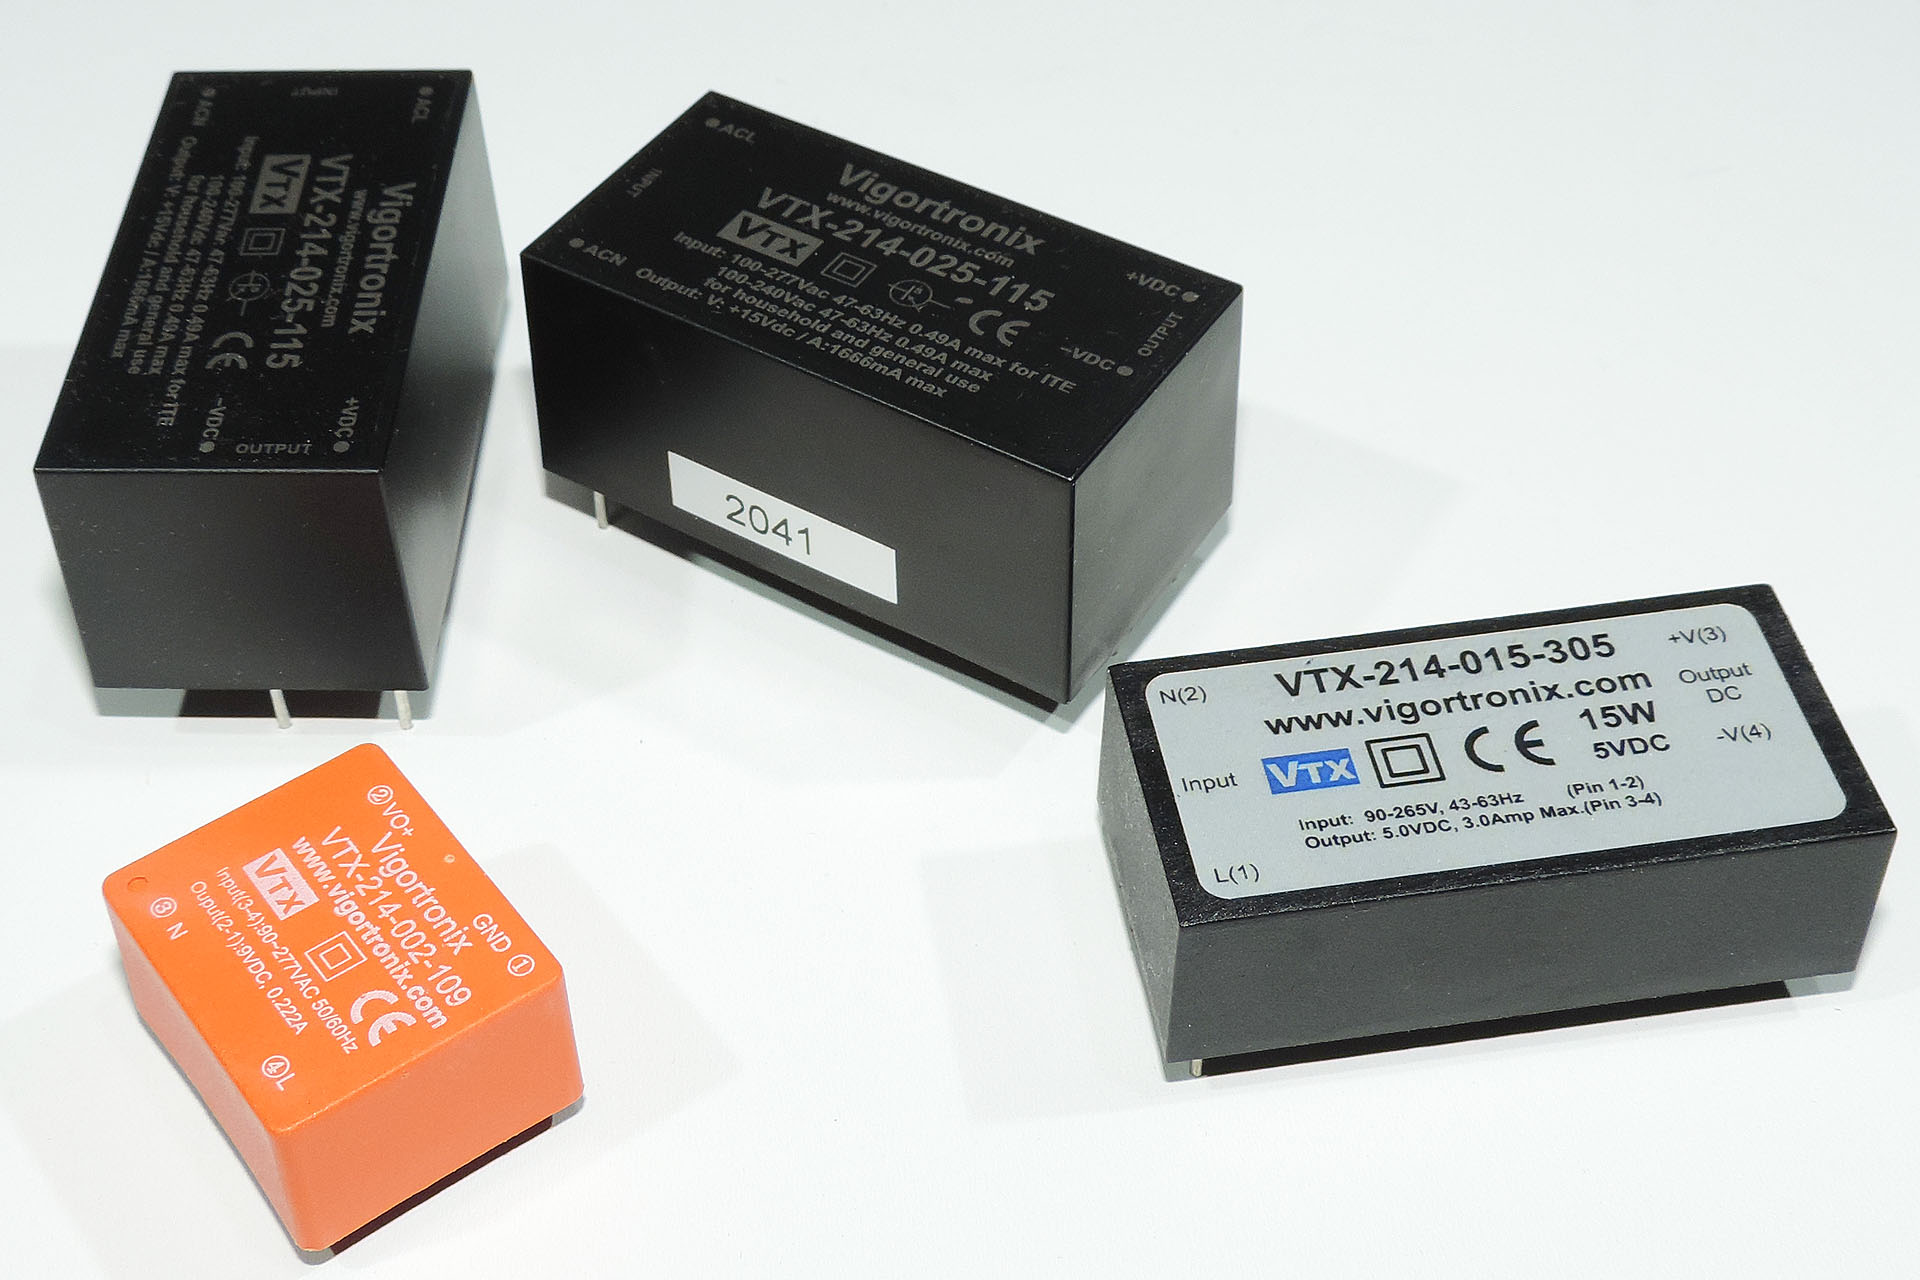
At the heart of Super Nova are four high-performance Vigortronix AC / DC converters which are made in Witney, Oxfordshire.
Using local manufacturers isn’t always the cheapest option but the above points are important to me. I hope that they’re important to you too.
UPDATE – 18th July 2024
People need to know that there are reasons beyond technical excellence, I use Vigortronix converters over those made by other companies.
I recently bought a batch of 9V converters for my Aurora and Supernova builds. The converters I received were outputting roundabout 8.75V. This is only a 2.8% deviation from the specified output but it was more than I’d seen on these converters in the past.
Liaising with Vigortronix, they agreed that the batch be returned.
A couple of weeks later, I received an e-mail reminding me that the devices were operating well within spec’ but that the devices I returned would be tweaked to be even nearer 9V. More importantly, Vigortronix Advised me that the ‘tweak’ would also be made on future devices.
NOW THAT’S WHAT I CALL SERVICE!