After years of searching and trying so many devices, I finally found the actual device that Marshall used to switch power on and off on the Marshall JMP-1 and here it is; the power switch for the Marshall JMP-1.
This is NOT an equivalent component. It's the actual switch! Check it out in the image below as it's pictured next to a faulty switch which I recently pulled from a JMP-1.
This switch is NOT an equivalent. It's the same!
A WORD OF WARNING
The power switch is secured to the inner front chassis with a small bracket. This must be removed and fitted to the new switch as it's NOT supplied with this bracket.
DO NOT DISCARD THIS BRACKET FROM YOUR OLD SWITCH!
Obviously made by Marshall at the factory, this is bracket is effectively a bespoke part so DO NOT THROW AWAY YOUR FAULTY SWITCH until you remove the mounting bracket.
Below shows the bracket (or collar) mounted to the switch. Once the switch has been slipped into the bracket, you just need to carefully bend four posts over the top of the switch.
The switch easily slips in the mounting bracket and is secured by four small posts that need to be bent over the top of the switch.
My friend and graphics designer, Tony Burlinson and I have been meaning to dive into the world of 3D printing for years. This year (2024), the opportunity presented itself, for me to take that dive and Tony was keen to join in. Little did I know that it would be the start of my Creality nightmare!
During 2024, I’d taken on a lot of design projects. Amongst them, was AMEP, my advanced memory expansion pack for the Simmons SDS7. It was a mega-cool product and I wanted to do it justice with some cool packaging. Indeed, AMEP was my fist product to have its own box.
To keep AMEP secure, I knocked up a design for a piece of foam but I was shocked when I received quotes from various manufacturers. At 5.88 GBP per piece in batches of 120, I figured I could print these from plastic, myself! So that was the ‘opportunity’ to dive into 3D printing.
After some research, I bought a Creality K1. The price was very reasonable and Tony and I thought that it would be a good starting point for our us newbies, with potential to grow to perhaps a semi-professional level.
Tony already had a lot of experience with 3D CAD but had never made anything physical. With Tony’s artistic flare and my engineering background, a dynamic team was born. We only had six attempts at the AMEP insert before we got it spot on. Not bad for our first 3D print.
You get a ‘free’ 200g spool of white hyper-PGA with the K1 but once that was used up with practice / protype prints, it was time to change to a 1kg spool of black hyper-PGA.
So here was the first pain; feeding the new filament through both feeders (rear and pre hot-end) wasn’t easy. A couple of YouTube videos later, we found a solution which involved taking a lot of stuff apart. Neither Tony or I were keen to do that so we persevered and in the end, we got the bugger through.
The second issue involved the filament clamp on the hot-end. In the ‘locked’ position, it didn’t seem well, locked. Our next print failed because in fact, the filament lock wasn’t indeed locked. It took a while to sort this out but we weren’t at all 100% sure about our efforts to correct this issue.
Eventually, we managed to print a couple of AMEP inserts in black PLA.
Pictured are the only two successful AMEP inserts that I managed to print on the Creality K1.
Nine prints in, that includes the five prototypes, things went wrong, like BIG time. I’d already had a bad experience leaving the printer unattended. After having bought Creality’s own filament, I was shocked one afternoon, when the print kind of ended up jamming and not completing a print, only to discover that the filament spool had snagged… on itself.
Number 9 however, was the big disaster, my Creality nightmare! It was 2:00 in the morning. I thought that I'd ironed out all the issues and that perhaps things might now be okay (for a pile of shit, that is). I figured I’d print one more insert, go home for an hour, come back and another AMEP would be good to go. When I came back to the lab, I expected to find a perfectly printed AMEP insert. Instead, the K1’s plate was empty. At first, I thought it was another filament snagging problem but as I walked up to the printer, I could see the massive, alien looking, collection of hardened plastic, around the entire hot-end assembly.
This is what I saw when I went to pull my ninth print attempt on my brand new Creality K1.
So it was 3:30 in the morning and I shot an email over to Creality. Well, they wanted to know everything, like serial number, proof of purchase, what my favourite colour was, blah, blah, blah. Once I’d passed their security (?) they apologised for the inconvenience and proceeded to ask for pictures, which I’d already sent them, incidentally. They then sent me instructions on how to repair my printer! Now my Creality nightmare was really beginning.
“Hang on a minute. I’ve only just bought this. It’s done nine (well, seven actually) prints. It’s not even three weeks old and I was on holiday for a week of that.”
Creality insisted that I try to fix things myself and recommended that I use a heat gun (or hair dryer) to remove the plastic around the hot-end. This is what what resulted.
Here's the contents of one of the emails I received from Creality:
Dear customer,
The hotend kit is currently overflowing. So currently you can't get into the filament when you replace the new hotend kit. Please follow the steps below to see if there are other problems besides the hotend kit.
The hotend kit is overflowing, and it can be solved by replacing the hotend kit. You can follow this tutorial to disassemble and clean it, and then see if there are other parts damaged besides the hotend kit, and you can take photos together.
If you can't heat it, do you have a hair dryer or a heat gun at home? You can use these two to heat and clean the filament.
At this stage, I need to make the point that after several email exchanges, with me talking about wanting a replacement printer and Creaility not reading any of that and simply telling me how to repair the printer, I kind of gave up. Or did I?
I needed to get these AMEP inserts done. I was desperate for my customers so I bought another printer, the massive CR-30 3D print mill. Creality didn’t have this in stock but I did find one at the uk-creality-official-store on ebay. That’s ‘UK’ in the ebay name by the way and yet the goods were located in California. Hmm…
I also bought something called a CR-30 extended bracket which is like a roller thing, specifically for that printer.
My Creality nightmare continued as the next day, I received an email from the seller informing me that in the last CR-30 extended bracket they had, items were found to be missing so would I accept a credit.
“No problem” I replied. “Please just put it on back-order.”
The reply to my request said something like they had no idea when they would have stock. A refund seemed the only option.
I then ended up buying a CR-30 extended bracket directly from Creality’s website. The deal cost me an additional 17 GBP as I’d lost the benefit of the Black Friday deal on ebay. Grr…
A couple of days later, the CR-30 turned up but by then I’d decided to try to wake myself up from my Creality nightmare. The rare customer service email responses I received, blatantly reflected Creality’s inability or unwillingness to read the important bits in my emails. Bits like “I want a replacement printer”, etc. I’d decided that ‘resistance is futile’ so here I am, summarising my Creality nightmare for all to read and advising that no one considers buying one of this company’s products… EVER!!!! Hey, Creality is NOT going to honour anything, right? Remember that line, ‘cos in my experience, it’s true.
With no confidence that anything would be done about this, I then boxed up the K1 in readiness to take it down the dump. Creality UK or whatever, can eat shit, for all I care.
Regrettably and very disappointingly, PayPal was unable to assist with my purchases from the Creality website. I then went to return the CR-30. The relevant ebay page displayed the notice ‘This seller does not accept returns for this item’. Well, why should I be surprised? After a little digging, I sought some comfort in the fact that the sale was backed by ebay’s money back guarantee.
It's unbelievable that an 'official' store has this notice on its ebay listings.
After a stinking ebay message and a ton of negative feedback, I did get a response from the seller and an offer was made to send me a returns label.
Not there yet... Of course the returns label had insufficient funds on it so when I took it to the post office, the package was rejected as it was considerably more than the 2kg specified on the returns label. Oh what a surprise! At this stage, I tried to contact ebay for help. Hmm... That's not as easy as it used to be so I messaged Creality offering one more opportunity to sort this all out.
I eventually received a valid return label and took the unopened CR-30 to the post depot.
Yeah, I know lesson or lessons learnt and all that.
“What about that CR-30 extended bracket thing?” I hear you ask. Remember, I bought that directly from what I thought was the Creality store and not ebay. Well, several days later I received a return label to a UK address which was the same as the return address for the CR-30 that I'd bought off ebay. On this occasion however, I had to pay for the return carriage myself. Yes, that's right. It cost me 15.86 GBP to return an item that cost me 119 GBP.
There’s something else to note. I’ve mentioned uk-creality-official-store. There’s also crealityofficial.co.uk. I bought the CR-30 extended bracket from store.creality.com/uk. Support emails apparently go to store.uk@creality.com but some go to CS@creality.com. The truth is, that you don’t know where the hell you are and who the hell you’re dealing with!
My experience suggested to me that Creality UK (or whatever), operates in a way which ignores retail / trading law and legislation of various territories around the world and which simply prioritises the Creality way over the right way. Globalisation makes it extremely difficult for organisations such as Trading Standards here in the UK, to control how companies operate when selling products to for example, the UK market.
Okay, some may consider my stance as slightly prejudice. THIS IS NOT THE CASE. Indeed, here are a couple of examples of far eastern brands which I think are just awesome:
I’m a qualified and fully insured drone pilot and my drone arsenal predominantly comprises DJI drones and we all know where they come from. Both Tony and I use Huion pen monitors which are just awesome. Another example, one perhaps more people can relate to, is that of computers. You can’t buy a computer without the insides being made in the far east! So NO, I’m not prejudice.
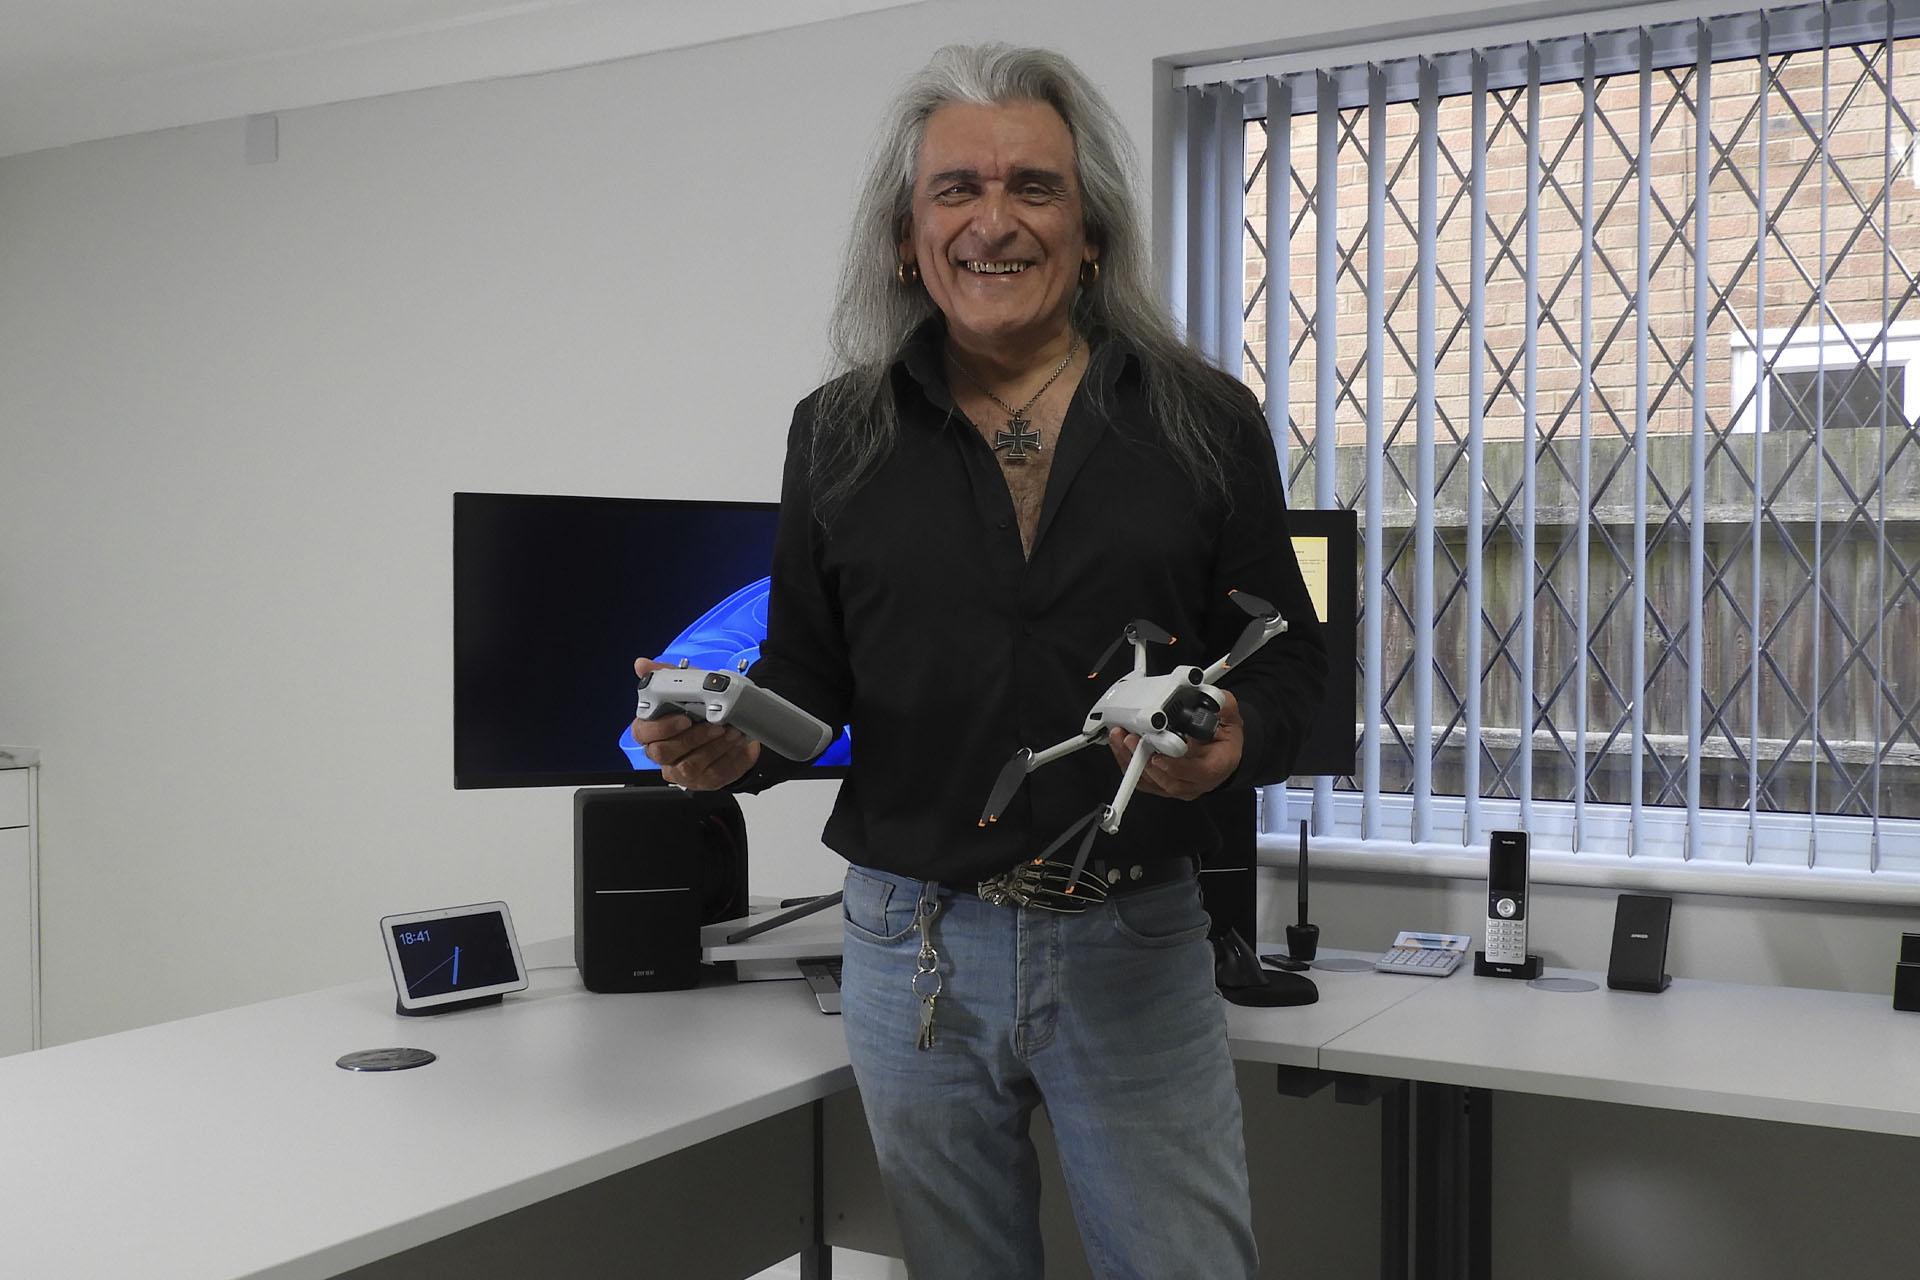
Here's me in July 2022 after having just qualified as a drone pilot. I'm holding one of my favourite DJI drones.
I would urge good companies from the same country (like China, oops!) to put pressure on companies such as Creality, as the latter is giving the good guys a bad name.
Creality is a company that doesn’t give you all the facts in the first place. Its marketing strongly suggests that it’s based in your country and Creality seems to have its own customer support standard which it prioritises over standards which are taken for granted in other parts of the world where consumer protection exists.
In these situations, one needs to be pragmatic and objective. I can’t help feeling that the consumers’ expectations are unrealistically high, when it comes to this market. The Internet is flooded with videos of 3D printers making all sorts of cool things and manufacturers’ specifications on some devices boast astonishing figures of accuracy and resolution, for example. Truth be known however, real commercial 3D printers cost a lot more than a few hundred quid like, you can easily add a zero on the end of the price tag. On the other hand, the manufacturers themselves are generating the stuff we see online and paying influencers to promote their products doesn’t exactly help.
In fact, I can imagine companies like Creality having teams of people working on online marketing, trimming SEOs on various websites and platforms, offering insane deals to influencers and hammering social media. In contrast, their customer support teams appear to be very thin and working to poor guidelines.
With the above in mind, I like to think that while I was very excited at getting into 3D printing, my expectations were reasonably realistic, especially for the entry-level printer I'd just bought. One thing's for sure though, I didn't expect a complete head assembly meltdown!
Anyway, Plasma Music fans and friends will be relieved to hear that I persevered with the whole 3D printer thing. Bambu Lab came to the rescue and woke me up from my Creality nightmare. I ordered a X1 Carbon and yeah, it cost a lot more than the Creality K1 but both the printer and the company have a very different feel about them. It’s called ‘professional’, Mr. Creality. 😊
As I await a pedestal to arrive for the lab, my Bambu Lab X1 Carbon remains in the kitchen!
Okay, so this page is loaded with tags and the SEO has been optimised which means that there's a reasonable chance of potential or existing Creality customers stumbling across it. I feel obliged therefore, to make it clear that this post is based on my experience and I simply felt obliged to tell people about just that; my Creality nightmare. There will be those who will disagree with me. There will be those who perhaps feel that Creality is the best 3D printer brand out there. On the other hand, if I'd come across a page like this, while checking out Creailty and the K1, I might not have wasted a lot of time and money!
I'm sorry but having a deal with a shipping company and a warehouse doesn't make you 'UK' or whatever. You need local service and respect either the consumer law of the territory that you wish to operate in or 'distance selling' law.
UPDATE - 23rd December 2024
A couple of days before Christmas 2024, I confirmed with Creality customer support, that all the spare parts sent to me had been received. Creality is however, continuing not to acknowledge the image that I sent them showing the completely destroyed head assembly. Indeed, the tone of the emails suggests that they're quite puzzled as to why I'm not able to repair the printer. Here's the latest email from Creality:
Dear customer,
So you have received all the accessories, right?
Are you not sure which accessories to replace? You can let us know and we will try our best to guide you.
Not sure which bit of "Can you please just arrange to have the printer returned for a refund" they don't understand.
UPDATE - 27th January 2025
Just gone midnight, I received an email from Creality advising that a refund is in progress.
My Creality K1 cost me 369 GBP. I also bought a nozzle kit and a camera for an additional 27 GBP so I'm expecting 396 GBP back. I paid via PayPal and nothing has shown up in my account yet but to be fair, it's been less than twenty-four hours.
UPDATE - 12th February 2025
No refund. No collection. NOTHING. All I'm getting is videos on how to change the hot-end. Well, not quite. The first link was to some stuff about a completely different item. When I eventually got the right link, the first minute was taken up with adverts.
"Hey, Creality.... You don't put adverts on bloody support videos!"
So I'm now drawing the line. When I get some time, I'm taking this pile of shit down the local dump.
Oh, one more thing... my Bambu Lab X1 Carbon is still going strong! 🙂
It's been a long wait but the AMEP packaging is now sorted and so I'm delighted to announce that AMEP is finally good to go!
Printed upside-down on to a textured plate, gives the AMEP inserts a rather attractive, kind of leatherette finish.
During 2024, I developed several peripherals for the Simmons SDS7, one of which was AMEP, Advanced Memory Expansion Pack.
With a lot of help from my dear friend Guy Wilkinson, a radically new approach compared to previous memory back-up solutions for the Simmons SDS7, AMEP went from concept to pre-production prototype, in just three months. After being hugely disappointed by quotes for foam packaging, I decided to make my own, all be it in plastic. That process took a disproportionately long period, almost two months, as it turned out. The problem was mainly down to the fact that I'd chosen the wrong 3D printer, or rather the wrong 3D printer brand.
My experience of the Creality K1 3D printer and perhaps more so of Creality the company, left a very bitter taste in my mouth. In fact, Creality has got to have the worst after sales service I've ever encountered but that's not the subject of this post. Indeed, I ended up detailing my Creality nightmare, here.
After some research on the company as well as the printers, I ended up buying a Bambu Lab X1 Carbon (or X1C) which is in a totally different league to the Creality stuff I had before.
As I await a pedestal to arrive for the lab, my Bambu Lab X1C remains in the kitchen!
The new printer is just amazing. Many thanks to Tony Burlinson, my graphics guy and friend for his support and his 3D CAD knowledge and experience.
Printing in progress!
The X1C is in a totally different league to the Creality K1. Yes, it's more expensive but this is a classic example of 'you get what you pay for'. After an hour of assembly and set-up, the X1C has delivered several flawless prints. More importantly, I have a feeling (although I might be totally wrong), that Bambu Lab will have my back, if anything goes wrong.
Bambu Lab wasn't just a random choice. As mentioned earlier, I did a bit research and was convinced by posts like these:
SO WHY DID I GO TO ALL THIS TROUBLE?
Unlike interfaces on machines that came much later, the data lines on the SDS7's expansion port are fully exposed and more importantly, completely unprotected. So, to help protect your SDS7 from the possibility of electrostatic discharge (ESD) damage and to offer SDS7 lovers something a little more reliable for a change, AMEP's packaging is made from conductive PLA, thereby reducing the risk of electrostatic accumulation.
Of course, I didn't buy a 3D printer just to make some packaging for AMEP. Tony and I have meaning to dive into this stuff for a long time. AMEP just gave us the perfect excuse to do it now!
The Bambu Studio software looks pretty much like other stuff we've tried but it feels very smooth and slick and has rather cool features that made Tony and me decide to stick with it.
I'm sorry to say that I'm back from my holiday 2024! I had such a great time with family members and old friends, I could easily have stayed for a lot longer.
My eldest daughter Katana, had a few days annual leave left so she kindly booked a short break for my wife Julie and me, in Malta.
I absolutely love what I do but even a workaholic like me, needs a break every once in a while. I've always had a special connection with Malta but I've never actually been so the opportunity to visit the island was something I was busting to take advantage of.
Katana, Julie and I stayed in an AX Odycy hotel located quite close to Valletta, Malta's capital city. The weather was fantastic. For us Brits, a gorgeous 21°C compared to 0°C in the UK was fabulous but many locals were wearing heavy winter clothes.
It was only three days but I was so excited, not just to get away but to meet my friend Josie Catania of TRX Electronics.
Josie and I pre-arranged to meet up for lunch one day. Josie is one of the nicest people I know and his wife Maithese is equally charming. Three hours went by without us even noticing and Katana, Julie and I were sorry to say goodbye.
It all started a few years ago when I tracked down Graham Sopp, the man who designed the transformer for the Marshall JMP-1 MIDI valve pre-amp, with a view to develop a better version of this device. My journey took me to Malta and indeed, TRX Electronics, the same factory that made the original TXMA-00014.
Since then, I've been supplying upgraded replacement transformers for this classic pre-amp and have had the pleasure of dealing with the lovely Josie Catania.
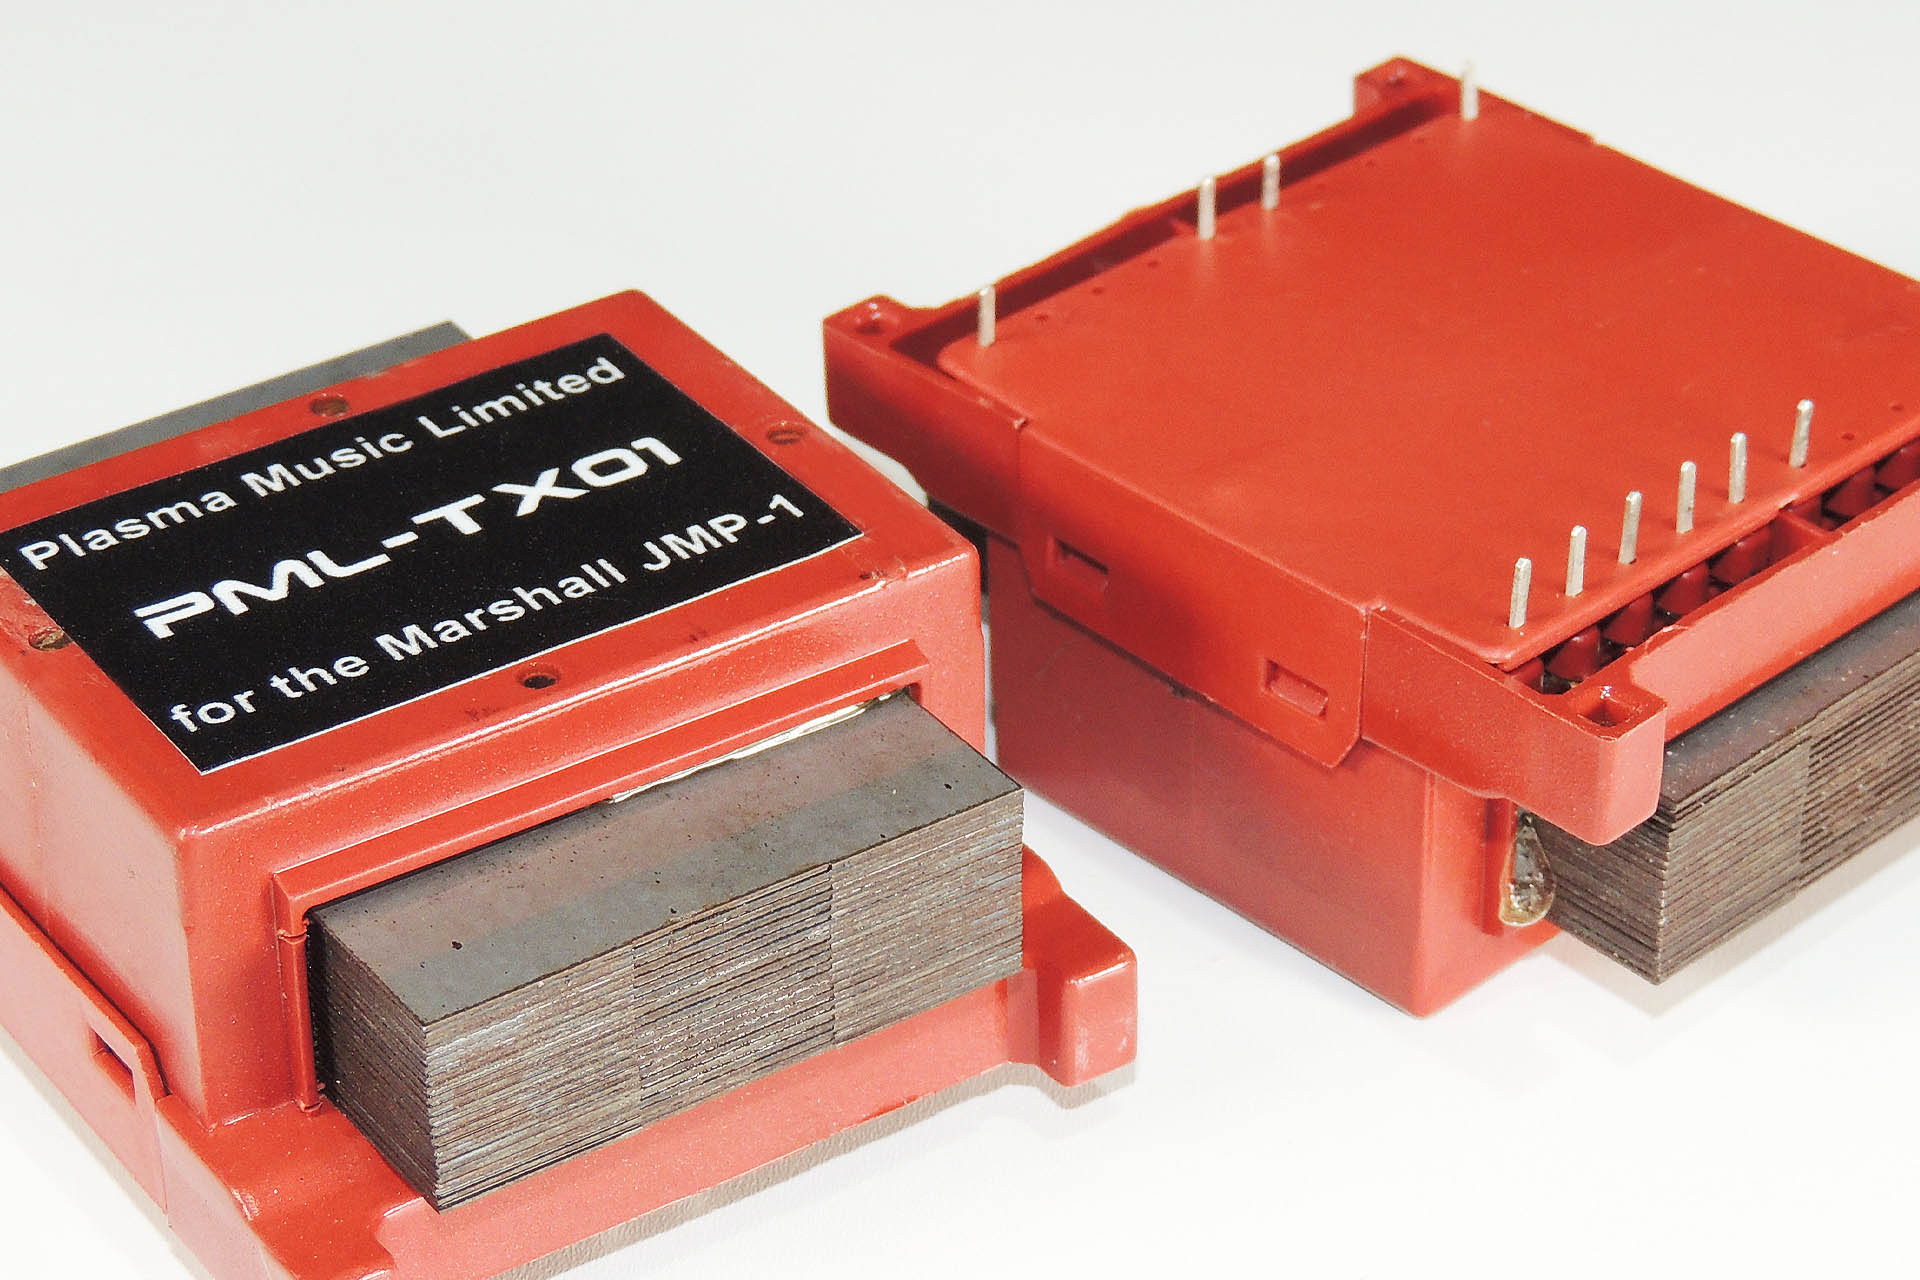
And here it is... my PML TX-01 transformer for the Marshall JMP-1
As I said, a lovely few days but now that I'm back from my holiday 2024, I'm equally excited to get stuck into my work. 🙂
I'm continually receiving requests to install various upgrades into all the instruments featured on my website but in the past few months, I've had to turn my lab into a Roland MKS-70 full upgrade production line, just for this machine!
I'd planned to take August off, this year. No, not for a fancy holiday or even a romantic get-away to somewhere exotic and beautiful with my wife (sorry, Julie). The truth is that I had taken on a lot of R & D projects and I really wanted to get them finished. I was finding it difficult to focus on other things in my life. I couldn't even just relax.
As it turned out, I was quite ill in August as I succumbed to a chest infection. In fact, I ended up in hospital. 🙁 As such, I decided to slow down and August got stretched out to mid-September. My customers were amazing and allowed me to peacefully recover. I felt quite guilty though and so decided to leave my online store, open.
Well, however nice and understanding people are, they can't wait forever and as soon as I felt good to go, I cracked on with a small backlog of customer repairs and upgrades that had built up.
I also finished off my projects, making the executive decision to leave my Nebula-X balanced outputs jack-board for the Roland JX-10 'till Christmas. Hey, the prototype is all built but I still need to fully test it and document the results.
I've managed to build my Nebula-X prototype but I won't have time to test it for another few weeks.
Winter 2023 was a crazy MKS-70 period, one which I never thought would have been repeated. Oh how naïve! Almost a year later and I've had to set up my Roland MKS-70 full upgrade production line again.
I've had a couple of MKS-80s in too. Both had faults which I've had to fix and the owners have also requested Aurora to be to installed.
It looks like things are going to get busy in the studio too. Booked up until February next year, I wasn't really looking to take on anymore recording or production work. A few days ago however, a friend of a friend approached me, asking if I'd consider producing several of his latest songs.
Hmm... I think I might need to get a plan together...
UPDATE - 28th October 2024
Here on the bench, is the last in this run of MKS-70 full upgrades. All the way from beautiful Finland, Nebula was fitted over the weekend and now I only have the front panel switches to change, the GU280 VFD to install and the encoder to swap out. Testing will take a few days so I guess this will be on it's way home by the end of the week. 🙂
Over forty years and a couple of clones later, I'm delighted to announce the all new AMEP Advanced Memory Expansion Pack for the Simmons SDS7.
It can take days, weeks or even months to program a bunch of patches into your Simmons SDS7. After all your hard work, there's only ever been one way to back it all up and that's with a memory cassette via the expansion port. Well, not anymore! 🙂
The original Simmons memory cassette is exceedingly rare, more so than the SDS7 itself and finding one that hasn't been eaten by the batteries is virtually impossible. Unfortunately, the same can be said for the clones that have appeared over the years.
Also using 6116 SRAM chips, the original MEP was very large and just like the memory-board in the SDS7, it had built-in NiCad batteries that required the memory cassette to be regularly plugged into a powered up SDS7, so that the batteries could be recharged.
The original Simmons memory cassette was large, used a NiCad battery that required regular charging and was annoyingly unreliable.
Being a large device, connecting it to the SDS7 via the rear DIN 41612 socket that wasn't really designed to take that kind of thing, caused its own problems. A lot of people kept a box of matches with their memory cassette. Perhaps you can work out why.
Over the years, clones have been developed but strangely, they're all copies of the original Simmons memory cassette. Hence the term 'clone', I guess. Despite huge changes in technology since 1983 however, this means that all the issues associated with the original Simmons memory cassette, have also been copied.
This year, while developing a couple of peripherals for the Simmons SDS7 which were intended to enhance performance and reliability and hopefully extend life span, I realised a need for a 'better' external data storage solution, especially since two of the peripherals I've developed, involve disconnecting the SDS7's memory back-up battery. Of course doing so, will mean losing all the data.
A good starting point for something like this was to define objectives so here's a sneak peak at the design brief I gave myself:
Small and compact design
More memory than the original MEP
Retain the 'Data' Protect' function
Remove dependency associated with rechargeable batteries
Battery should last for ten years minimum
Include a mechanism so that when the battery is changed, data is retained for a minimum of ten minutes
The new device must be affordable.
So all that was great but how was I going to achieve it?
The first thing was to get a concept together and then take a look at the Simmons SDS7 to see if something radical could actually work.
Well, I couldn't do all that by myself, not in any realistic timeframe, anyway. Fortunately, I've got a friend. In fact, I think I can safely say, that Guy Wilkinson is my best friend! 🙂
Guy and I got to know each other back in 2020, through the work he's done on the Roland Super-JX and my first product Aurora, a modular switched-mode power supply for the Roland MKS-80.
In June 2024, Guy and I took a day out and went to the 'Synthesised' exhibition at the National Computer Centre in Cambridge. We arrived early so went for a coffee and it was then that I mentioned my idea of AMEP Advanced Memory Expansion pack for the Simmons SDS7. Guy was surprisingly excited and quite keen to help.
Me and Guy at a coffee shop somewhere in Cambridge, UK.
As has already been pointed out, the original Simmons memory cassette was very large, exerting undue torque on the SDS7's DIN 41612 expansion port. Hence, the box of matches which people would put underneath the cassette! So, not wanting to copy (clone) the original device and using newer, more compact technology instead, my idea was to make AMEP such that the body would sit perpendicularly to deck and parallel to the back panel of the SDS7. Instead of sticking out from the SDS7, it would run up the back of the SDS7. To keep costs down, Guy and I also explored the potential for a 'caseless' design.
To achieve this, AMEP began as a sandwiched, 2-board idea which both Guy and I were really happy with and which allowed us some versatility with regards layout.
Oh and there's one more thing...
When hooked up to the SDS7, the original memory cassette obstructed access to the SDS7's sequencer input 1 jack socket. SERIOUSLY?!?!? It should be straight-forward enough to design AMEP so it doesn't do the same!
When engaged, the original Simmons memory cassette compromised access to sequencer port 1. AMEP does not!
Within a very short period, Guy had knocked up the concept and contacted me to come over and rip apart my test SDS7. I was developing my Dark Matter modular switched-mode power supply for the SDS7 at the time, as well as Pleiades, my lithium battery converter and Tubbutec uniPulse adapter, so I was a bit apprehensive. On the other hand, this had to be done and I really wanted all three products to go out at roughly the same time.
I had some other plans for the new storage device and so we checked out a lot stuff on the SDS7 than we actually needed to. Unfortunately, the 'keep these free for future expansion' lines as referenced on the original SDS7 schematics, didn't go anywhere and my idea of including MIDI for example, went straight out of the window. 🙁
8th September 2024 and we had our first prototype. Guy came over and plugged it in. I performed a bank dump. I removed AMEP, switched off my test SDS7, pulled the battery and then we tried to reload from the AMEP. Well, we were delighted. AMEP seemed to work. We tried this several times, checking the memory protect function and writing / reading from all four banks on the AMEP.
The first AMEP prototype worked straight-away. Well, after I'd remembered how to save to an external device! You also get a glimpse of my Dark Matter prototype in this picture and if you know what you're looking for, you can even catch a bit of Pleiades.
Yes, AMEP prototype 01 looked a bit 'Heath Robinson' but Guy and I didn't know for sure if SDS7 would even talk with our new gadget so knocking up something to see if SDS7 would recognise a friend, was a necessary first step. Anyway, the test results were very encouraging. In fact, we were positively thrilled and so we continued.
The next couple of weeks were busy. Guy poured a considerable number of hours into finalising a pre-production prototype while I focused on further testing, graphics, enclosure and packaging.
You'll notice the very small LR44 type battery on Prototype 01 in the image above. Well, one criteria missing off the original list was that AMEP should use a standard and readily available battery and so the design had to be changed to accommodate a much larger CR2032. An appropriate battery holder has to make battery changing easy but should also be as discrete as possible.
I continued to test AMEP on my studio SDS7, my test SDS7 and a customer unit (thanks, Peter). Initially, AMEP didn't work on the customer's machine and I quickly discovered a problem with the 40-way IDC ribbon cable between the PSU board and the back plane. You need to remember that these cables are forty years old! One new IDC cable later and everything was fine. Hey, I'm not even sure if Simmons tested the SDS7 expansion port during the production process.
After forty years, every SDS7 could benefit from new IDC cables.
One problem that Guy and I have is that we use different electronic design software. This makes exchanging files very difficult and with something as involved as a new data storage device for a forty year old synthesiser, we had to come up with workarounds, which was a headache in itself.
By 24th September 2024, we were ready to submit an order for the first batch of PCBs.
1st October 2024 and AMEP first production PCBs turned up.
Friday 4th October 2024, Guy came over and we made three AMEPs. It was an exciting and fun-packed afternoon. We even had Duran Duran playing in the background. Hey, all three AMEPs worked perfectly! 😮
4th October 2024 and Guy and I are making the first AMEPs. By the way... THANK YOU Ed Rose for the awesome SDSV T-shirt! I can't believe you made this, Dude!!!
WRITE VERIFICATION
There's no mention in the Simmons SDS7 manual about any routine to verify that data has correctly been written to an external data storage device. Guy and I discovered however, that if AMEP's memory protection switch is ON and one attempts to write data to an AMEP memory location that already has that data, then the SDS7 display will flash up 'AC' meaning that everything's fine. We couldn't see any reason why SDS7 would respond differently, with an original Simmons memory cassette as this feature doesn't have anything to do with AMEP. We're definitely not claiming any credit for that one but it's a cool hidden feature.
The left image shows what is displayed on SDS7 when a write command fails. The right image shows what SDS7 displays when a write command is either successful OR with the AMEP memory protect switch ON and attempting to write data to an AMEP location that already has that data (verification).
I couldn't wait to tell my Simmons Vintage Technical Network colleagues the good news. With confidence high, Michael Buckner asked a question which was going to come sooner or later; "Would AMEP Advanced Memory Expansion pack for the Simmons SDS7 also work on the SDS6?"
Well, I couldn't see why it wouldn't but having confirmation would be a big deal so I decided to send Michael Buchner and Ed Rose, AMEP samples and await their response.
At last! Decades after its release, there's now a cost-effective and reliable way to save your valuable SDS7 and indeed, your SDS6 data to an external device.
AMEP is handmade in Hemel Hempstead, Hertfordshire, United Kingdom, only a few miles from St. Albans where Simmons used to be based and where I used to work.
And finally...
I really wanted to do AMEP justice so AMEP is supplied in it's own bespoke tin which has a transparent lid section.
I designed an insert, originally to be made from ESD foam but the quotes I received for this small item were insanely prohibitive. In fact, I figured that I could buy a 3D printer and make something better, myself.
Well, my graphics guy Tony and I have been meaning to get into 3D printing for a long time and we thought this would be a good excuse to make a start. Hence, the insert is 3D printed by me.
Plagued by whole load of things that gave the Simmons SDS7 the unfortunate reputation of being quite unreliable, albeit that virtually all the issues can now be resolved, I wanted SDS7 lovers to have something that they could depend on for a change. That's one reason why the AMEP packaging took a bit longer to sort out than I'd have liked. While AMEP is pretty robust and not particularly vulnerable to electrostatic discharge (ESD) damage, the same can't be said for your SDS7.
Unlike machines that came later, the data lines on the expansion port on the back of the SDS7, are completely exposed and unprotected. THIS IS A BIG DEAL. Whether you have AMEP or not, please do take appropriate precautions when handling your SDS7.
Anyway, I digress slightly. AMEP packaging is made with a conductive PLA, thus reducing the risk of ESD damage, not to AMEP but to your SDS7. 🙂
Bambu Studio is a nice bit of software.
Tony observed that everything about AMEP except the tin, is made by Plasma Music Limited! How cool is that?
If you're keen to keep all your Simmons SDS7 data safe, you can buy AMEP here:
And finally, AMEP advanced memory expansion pack for the Simmons SDS7 would have taken much longer to develop and perhaps might not have happened at all, if it wasn't for the help, support and encouragement I received from my Simmons Vintage Technical Network friends and colleagues. THANK YOU Ed Rose, aka The Simmons Guy, Michael Buchner and Patrice Jacquot.
In particular, special thanks go to my dear friend Guy Wilkinson of Super Synth Projects who poured in hours and hours of work into this one. Guy, THANK YOU for doing so much to get AMEP finished and working. What you did is just brilliant! 🙂
UPDATE - 16th October 2024
Wow! I've already received the big question pertaining to the weird SDS7 Bank Anomaly. Whilst this hasn't got anything to do with AMEP, it's an important question and so I thought I would add my answer to this post.
According to the original owner’s manual, the SDS7 has two banks: HI and LO. The HI bank includes patches 40 to 79 and the LO bank includes patches 01 to 39.
Well, it doesn’t take a rocket scientist to notice that the HI bank has forty patches and the LO bank has thirty-nine patches! 🤔
THE SDS7 BANKS ARE NOT THE SAME SIZE 😡
So how the hell does this work? A good question and I don’t have a working original Simmons memory cassette to test that.
In theory, backing up the HI bank and then writing it to the LO bank will mean that you’ll lose a patch. Going the other way, backing up the LO bank and writing it to the HI bank will mean that you’ll have one patch unaffected (patch 40).
So here’s how it works:
Backing up the HI bank (patches 40 – 79) and writing to LO will result in patch 40 being lost. Patch 41 is written to patch 01 instead and patch 79 is written to patch 39.
Backing up the LO bank (patches 01 – 39) and writing to HI will result in patch 40 not being written to. Patch 01 is written to patch 41 instead and patch 39 is written to patch 79.
Yeah, I know. WTH?!?!?!?
Whilst AMEP is an incredibly cool piece of kit, it’s not ‘intelligent’. AMEP doesn’t have an on-board processor to negotiate the SDS7 bank anomaly. If it did, AMEP would have been prohibitively expensive and physically, much larger. ☹
BUT…. There’s a workaround:
!!! DON’T USE PATCH 40 !!!
Of course, if you save the LO bank and write it to the LO bank and if you save the HI bank and write it to the HI bank, everything will be fine. If however, you want to swap banks, then you'll have to use the workaround. I'd imagine it's the same if you have an original Simmons memory cassette.
UPDATE - 1st November 2024 - AMEP IS NOW ARM'D
Manufacturing tolerances have changed considerably over the past forty years and while AMEP will click in nicely into a brand new female DIN 41612 connector, that's not always the case with the same connector on the back of the SDS7. After four decades, things can feel a little loose.
To cater for a loose fit, AMEP now has an Anti Rock Mechanism (ARM) which securely keeps it in place. Not rocket science, just some PCB spacers added to AMEP's connector end but which work just great.
AMEP now features an Anti Rock Mechanism.
Unlike the original Simmons memory cassette, AMEP is small and light but the new ARM makes things feel even more solid and will hopefully reduce wear of the SDS7 expansion slot, over coming decades.
AMEP's ARM keeps it securely in place and prevents rocking when engaged with the DIN 41612 connector in the back of the SDS7.
The new anti rock mechanism allows AMEP to 'snap' into place. Yes, a simple idea but very worth implementing.
UPDATE - 26th January 2025
Compiling installation manuals and in the case of AMEP, a user guide can often take longer than the technical development of the respective product. Wanting my stuff to be available to the wider vintage music gear community, ideally, I'd like all of my manuals translated into several languages. Realistically that's not going to happen but when someone volunteers to translate at least one manual into one language, I simply have to jump at the chance.
That's exactly what happened while I was having a casual on-line conversation with my Simmons Vintage Technical Network buddy, Michael Buchner, who just asked "Would you like a German version of the user guide?".
My special thanks to Michael Buchner for translating the AMEP user guide into German
One of the guys who kept me motivated during my recent flurry of Simmons related projects, Michael did a great job and delivered a Bedienungsanleitung, within only a few days of our conversation.
Michael, THANK YOU so much for this! 😎
The AMEP user guide is made available after purchase but there's also a QR code on the packaging which will take you to a combined English / German file.
Being ex-Simmons, I guess it was only a matter of time before I'd end up designing peripherals for my favourite electronic drum systems. My Dark Matter replacement power supply for the Simmons SDS7 is the first in a small range of products, specifically for this legendary instrument.
Selling my own SDS7 while I was still at Simmons to help fund the purchase of my first SDX would end up being one of my biggest regrets. Decades later, I was able to buy a SDS7 in lovely condition and you can read all about that here.
Well, I got smitten all over again. Indeed it was like falling in love with an ex-partner who you hadn't seen for decades, LOL. As it transpired, a friend of mine contacted me a couple of months later, informing me of an on-line advert for another SDS7 which was for sale in London. Well, the SDS7 I'd recently purchased was in remarkable condition and keen to develop peripherals for this instrument, I decided to buy yes, another SDS7 but specifically for R & D purposes. I picked up the second machine for a really good price, as it had several issues all highlighted by the seller.
With lots of ideas in mind, Dark Matter replacement power supply for the Simmons SDS7 was going to be my first project.
So why bother?
At the time of writing, the Simmons SDS7 is forty years old. Back in 1983, power supplies were perhaps 15% efficient. Modern power supplies can be nearer 95% efficient, thereby generating far less heat than the old linear supplies. Less heat means less thermal stress on other components.
The Simmons SDS7 can accommodate twelve sound modules. The problem is that loaded with more than say eight, the power supply starts to stress out. The regulators on the +15V and -5V supplies are 78 / 79 series devices which are only rated at 1A. Even the massive 3A rated LM309 Steel regulator on the +5V was seriously pushed. Rated at 75W as opposed to the original 45W power supply, Dark Matter was definitely intended to address this issue.
All power supplies generate noise. The original SDS7 power supply is situated between the rear sockets PCB at the back of the instrument and the so-called back plane. The latter is a vertically mounted PCB that runs the width of the SDS7 chassis and into which, are connected all the (also vertically mounted) voice boards, CPU-board and memory-board. All analogue audio, digital and power are distributed through the back plane so having a power supply nearby isn't ideal and power supply generated noise was readily picked up by the rear sockets PCB, the back plane and an IDC ribbon cable which connected the two.
The PSU-board isn't exactly located in the best place but in 1983, there wasn't much choice.
My initial idea was to see if I could squeeze Dark Matter into the space occupied by the SDS7 power transformer. If I could do that, the power supply would be far away from any audio carrying conductors and would therefore potentially make SDS7 a little less noisy. Well, several layouts into the project and I finally ended up with a paper cut-out that suggested this was feasible.
As was quite common at the time, the original memory back-up battery in the Simmons SDS7 was a Ni-Cd device. This required regular charging. Unfortunately, if not regularly charged, these batteries are prone to leaking and it is a sad fact that today, there are far fewer SDS7s in the world than there should be, simply because they've been forgotten about and damage caused by battery leakage has been too extensive to even consider repair. Check out my post here and you'll appreciate what I'm saying. As such and like my other designs, Dark Matter incorporates a memory back-up battery. It's lithium-based and so, doesn't require charging. It's also located far away from being able to cause any damage!
And there's one more thing... Dark Matter is a modular switched-mode design which means that it can be used on virtually any domestic supply. Wow! No need to change transformer taps or fuses.
On a personal note, like Aurora for the Roland MKS-80, Supernova for the Roland Juno-106, etc, I simply wanted my Dark Matter replacement power supply for the Simmons SDS7, to keep this rather famous instrument reliably powered for at least another forty years. 🙂
So let's have a closer look at Dark matter...
Dark matter doesn't simply comprise a bunch of AC / DC converts. Obscured by the monitor-board are carefully designed filters which reside on the back end of each supply. When designing power supplies for audio applications, noise and hum need to be kept to a minimum and that's exactly what the filters do.
Hidden underneath the monitor-board, are Dark Matter's filters. Each output has its own filter network ensuring quiet operation.
Considering installing Dark Matter into a space other than that occupied by the original power supply was challenging but there was more to come. Indeed my next problem was getting power from Dark Matter to the SDS7.
Dark Matter fits snuggly into the space previously occupied by the SDS7 power transformer.
To start with however, Dark Matter needed to be safe and secure so once I was confident I could fit my new power supply into the original transformer location, I decided to design a robust steel bracket to keep my baby solidly in place. Although weighing considerably less than the old transformer assembly, Dark Matter mounts on to a substantial 2mm thick plate which also offers improved screening.
For those who may not be familiar with the internals of the Simmons SDS7, the transformer assembly is on the right-hand side of the box. This was where ideally, I would have liked Dark Matter to fit.
The plate uses the same holes which secured the old transformer assembly so no drilling or anything like that is required, to get Dark Matter physically in place. Supplied with a full set of M5 fixing hardware, you don't even have to bother negotiating the Imperial stuff that Simmons used back in 1983.
Dark Matter's steel mounting bracket ensures the installation is secure and safe.
I've already mentioned that the original power supply was situated between the rear socket PCB and the back plane. Voltage supplies from the original power supply PCB to the back plane are via four wires, one of which is earth. Those wires are simply soldered to points on the rear of the back plane. If removed however, the solder points reveal four through-hole solder pads. Being designed in 1983, the solder pads adhere to the standard 0.1" spacing of the time. Oh!! That could be convenient.
Experimenting with a couple of connectors, I soon settled on a Molex system that I've used a lot and am quite familiar with. The header / housing system provided a reliable, non-exposed detachable connection between Dark Matter and the SDS7. Perfect! Just what I wanted.
It took a little experimentation but I eventually made a secure and rather elegant, detachable power connection to the SDS7.
Like a lot of Simmons stuff from the eighties, the RESET pulse for the CPU was initiated post rectifier / pre-regulator. The same circuit was used to generate the CE level for the memory. The rising voltage on power-up would be conditioned by a simple R C network, prior to being fed into a quad 2-input NAND gate array. The CE level for the 6116 SRAM chips needs to be active all the time, even when the power to the SDS7 is switched off, otherwise the 6116s will be disabled. This suggests that the back-up battery also supplies this circuit or at least a component in it and that's exactly right!
To get things up and running, I simply copied the original RESET circuitry on to the first Dark Matter prototype. Things worked fine but I was doubtful regarding reliability. Dark Matter is a modular switched-mode design so there's no easy way to access 'pre' converter (AC) power.
So, on my second prototype, I replaced the front end of the circuit that generates the RESET pulse, with a modern type supervisory IC. The entire pulse width of the new circuit was only a little more than just the time constant of the original circuit and so my test SDS7 booted noticeably quicker.
Each gate on the CD4011 quad 2-input NAND is actually configured and used as an inverter. The device has a minimum operating voltage of 3V which is annoying when the important 6116 SRAM chips can run down to 2V. So, to deliver extended battery usage, I eventually replaced the CD4011 with a SN74HC14 hex inverter which can also operate down to 2V.
So what do I mean by extended battery usage?
To me, the term 'extended battery life' suggests that the current demand on the battery has been reduced, thereby allowing the battery to maintain it's desired output voltage for longer.
I've coined the term 'extended battery usage', to mean something different, however. By lowering the minimum voltage at which all battery backed-up devices will operate at, the battery can run down to a much lower voltage, in this case, 2V instead of 3V. I hope that makes sense.
Dark Matter was unique in as much that it was going into a host with variable current demands on each of the voltage supplies; the more sound modules you have in your SDS7, the more will be the current requirements. Anyone with a fully loaded Simmons SDS7 will know that it can struggle with twelve sound modules.
I was confident that Dark Matter would be able to supply sufficient current for any SDS7 but that wasn't what I was worried about. Remember that Dark Matter is in a relatively confined space with restricted air-flow and I had no idea how hot things would get. 🙁
Attaching a thermocouple to the +5V converter and temporarily fitting the top-case back on to my test SDS7, I observed that after half an hour or so, the temperature reached 40°C (104ºF) and that after ninety minutes, things stabilised at 47ºC (117ºF). Three hours later and there was no further rise in temperature.
I switched off and quickly removed the top-case from my test SDS7. The converters were only warm to touch. WOW! 😮 This was seriously good news.
Loaded with eight modules, my test SDS7 eventually reached 47ºC and stayed there for three hours until I got bored. The saying "a watched kettle never boils" came to mind. A classic exponential curve if I ever saw one. Well, what else would you expect?
Thanks to some lovely customers, I was also able to test Dark Matter with a fully loaded SDS7. Running the test again for three hours, the results were similar to my previous test using eight modules but this time, the temperature flatlining a little higher at 55°C (131ºF).
Current and temperature testing Dark Matter on my test SDS7 with twelve modules.
The results were very encouraging but at the same time, the tests had revealed a problem...
My first couple of prototypes had the memory back-up battery mounted on Dark Matter's monitor board but of course while 55°C is fine for Dark Matter, it's not a good idea to have batteries exposed to that kind of temperature. So, I decided that a complete relocation of the battery was necessary. A slight headache and even more cost for yet another batch of prototype PCBs but it actually turned out to be a blessing in disguise and led to a more beneficial configuration.
Prototype version 3 (or was it 4, I can' remember) and Dark Matter's battery-board now mounted on top and to the far left of SDS7's original power supply PCB. Located here and having more space, I was able to accommodate a dual battery holder. Why is that cool? Here's why...
The memory in the ten 6116 SRAM chips in the SDS7 can be retained for several decades with a single AA 3.6V LiSOCI2 battery. Having two battery holders however, means that when the time comes, so long as the battery isn't depleted, dropping in the new battery before removing the old one, means that your SDS7's kits won't be lost. 🙂 How cool is that?!?! 😮
Each battery holder has its own protection diode and resistor so there's no chance of the new battery inadvertently rush-charging the old battery, for the few seconds that the two batteries are in situ.
Dark Matter's battery-board is mounted well out of the way of Dark Matter's PSU-board.
So, the downside of putting the batteries virtually anywhere in a SDS7, is that the top-case needs to be removed when it's time to change them.
But wait... that's not the case with Pleiades! Although you will need a spare module slot to fit Pleiades, being accessible from the front panel means that changing the batteries is much easier and of course, Pleiades conveniently plugs into Dark Matter's monitor-board, in place of Dark Matter's battery-board. Indeed, for battery back-up, you can either use Dark Matter's battery-board or Pleiades.
A cool alternative to Dark Matter's battery board is Pleiades which allows convenient battery monitoring and changing by just removing SDS7's front panel. Pleiades also offers a great platform for the Tubbutec uniPulse MIDI to trigger adapter.
Situated on Dark Matter's monitor-board, are three status LEDs which confirm that a voltage is present on each of the three supplies. Just beneath the LEDs, are conveniently located test terminals so that the supply lines and indeed the SRAM voltage can be measured.
Like all my power supplies, Dark Matter features visual supply line status indicators and test terminals.
Dark Matter gives the Simmons SDS7 a significant performance boost, increases reliability and will ensure that this machine will be around for a long time.
With a detailed and fully illustrated installation manual that's available after purchase, Dark Matter is supplied will all the parts you need for a hassle-free installation.
Dark Matter is supplied with everything you need for a complete installation.
You may have noticed that the AC / DC converters on Dark Matter are British-made Vigortronix. Consistent with all of Dark Matter's components, I want the best.
Dark Matter's installation does require some original components to be removed but no holes need to be drilled, no PCBs need to be cut and there are no other permanent changes that need to be performed, Dark Matter has a fully reversible installation meaning that you can uninstall Dark Matter and return your Simmons SDS7 back to factory at any time. Why you would want to do that, I don't know but the option is always there.
Although quite involved, the installation of Dark Matter isn't particularly difficult, especially if you're patient and prepared to take your time. You should however, be familiar with SDS7's unique and quirky personality.
Simmons was no doubt, an innovator and its products certainly inspired a whole branch of music technology as well as music itself but the company also had its failings. One of them was a severe lack of production engineering and another was an equal lack of quality control. Some aspects of the SDS7 design are seriously frustrating and appreciating an inconsistency in manufacturing and quality, small differences between individual instruments, can be really annoying.
So, if you're considering Dark Matter, then please be warned. This is an installation for experienced Simmons techs only!
Delivering classic eighties electronic drum sounds, the Simmons SDS7 is also uniquely quirky.
At the beginning of this post, I mentioned that Dark Matter is one of several peripherals that I've developed for the Simmons SDS7 so I rather hope that you're asking "what are the others?" Okay, here you go:
Pleiades is a lithium battery adapter but it's also a convenient mount for the Tubbutec uniPulse MIDI to trigger converter. Featuring a special clip-in secondary PCB, Pleiades makes MIDI triggering for the Simmons SDS7 a breeze. Pleiades is fully compatible with Dark Matter and there's more about that later.
AMEP or Advanced Memory Expansion Pack is a modern replacement of the original Simmons memory expansion pack. With no way to back up SDS7's memory, installing either Dark Matter or Pleiades and hence, removing your SDS7's battery, would mean losing your patches! I didn't see the point of copying the original Simmons MEP, like those who developed clones for example and so AMEP is a truly radical design. AMEP is reliable, it doesn't need to be charged, it's a fraction of the size of the Simmons MEP and subsequent clones, it features four times the memory of anything previous and has a facility whereby changing the battery won't wipe the data! I have no idea why no one has made one of these as it's so desperately needed. Anyway, AMEP gives you the option to back up your SDS7 prior to doing anything heavy that'll involve disconnecting the battery on SDS7's memory-board.
NC-7 Noise Cancelling Mod for the Simmons SDS7 is for the few SDS7s that didn't have this mod factory fitted.
RESET-7 replaces the CD4011 quad 2-input NAND gate in the SDS7's power-on-reset circuit, with a modern hex inverter with Schmitt trigger inputs. The replacement chip has a minimum supply voltage of 2V. This has the effect of extending battery usage.
Simmons SDS7 Program Chart is an editable pdf which allowing you a written record of a single patch with all the parameters of up to twelve modules.
I've tried to synchronise the launch of Pleiades, Dark Matter and AMEP as they can all work together and with each other. That in itself, has been a challenge and has made summer 2024 particularly busy for me.
Dark Matter is handmade in Hemel Hempstead, Hertfordshire, United Kingdom, only a few miles from St. Albans where Simmons used to be based and where I used to work.
And finally, Dark matter would have taken much longer to develop, if it wasn't for the help, support and encouragement of my Simmons Vintage Technical Network friends and colleagues. THANK YOU Ed Rose, aka The Simmons Guy, Michael Buchner and Patrice Jacquot.
There's also one other person that I need to thank and that's my good friend Guy Wilkinson of Super Synth Projects. Guy popped over one afternoon and I just happened to have my first Dark Matter prototype on the bench. I had a really annoying problem and Guy was quick to point out something that really wasn't right. It was one of those "Seriously?" moments! Thanks, Guy. 🙂
My Pleiades lithium battery conversion for the Simmons SDS7 was initially designed to address a common problem with this legendary instrument.
Like so many instruments of its time, the Simmons SDS7 memory was maintained by a Ni-Cd battery. This type of battery requires regular charging. Unfortunately, if not regularly charged and left for a couple of years, these batteries leak and can cause irreparable damage. It saddens me deeply that there are far fewer Simmons SD7s in the world, simply due to the fact that they got forgotten about and bad batteries did their thing.
A 2-in-1 solution, as well as making lithium battery conversion simple and straight-forward, Pleiades also provides a convenient platform for anyone considering a Simmons SDS7 MIDI conversion.
Pleiades offers easy conversion of the SDS7 memory back-up from Ni-Cd to lithium but is also a perfect platform for the Tubbutec uniPulse (not supplied) allowing your Simmons SDS7 to become a MIDI Simmons SDS7!
Making provisions for a piggyback mounting of a third-party board isn't a particularly big deal. The real secret of how Pleiades makes Simmons SDS7 MIDI conversion so easy however, is a tiny snap-in board, that well, snaps in where SDS7's sequencer signals come on to the back plane. Fortunately, this connection is easily accessible. Connection between the daughterboard and the Pleiades main board is via a 26-way IDC cable. Power and MIDI also come on to the Pleiades daughterboard so everything's really easy.
Part of the Pleiades kit, is this cool little board which snaps into the DIP header on the SDS7 back plane making trigger connections from the uniPulse solderless. Simmons SDS7 MIDI couldn't be simpler.
BUT THERE'S A CATCH...
SDS7's sequencer input jacks short to ground when no plugs are connected. The idea was to keep things under control and a short to ground on unused inputs reduces the likelihood of anything unwanted appearing and thus, going through the system. More than forty years on however, this now becomes a problem when we want to MIDI up a SDS7 internally. Why? Well, the trigger part of the MIDI to trigger process is injected via SDS7's sequencer inputs. If they're shorted to ground, then they're not going to work!
The twelve sequencer lines join the back plane (the main PCB that runs the width of the SDS7 and into which all cards connect), via a 14-pin IDC header and socket. The socket is located between the CPU and memory boards. The Pleiades snap-in plugs into this socket after the header has been removed. "Simple but brilliant Mr. Bond" but it does mean that when using Pleiades and uniPulse, the IDC cable needs to be completely removed as it's quite redundant. Plugging it into the socket on the Pleiades daughterboard will connect the shorted sequencer jacks to the trigger outputs of the uniPulse and so no triggers from the uniPulse will reach their intended targets.
Those familiar with the inside of the SDS7, will notice an absence of the 14-way IDC cable that carries the sequencer input signals to the back plane. Plugging it into the Pleiades daughterboard will sink the trigger signals from uniPulse to earth and so MIDI won't work. Hence, the cable is completely removed from the SDS7 when installing Pleiades with uniPulse.
Occupying a spare voice module slot (preferably slot 12) in your SDS7, all you need to do is remove the SDS7's main front panel to access Pleiades. This makes battery monitoring and changing simple. Pleiades also has switches and an LED which, if you have uniPulse installed, provide full access to some cool uniPulse functions.
Pleiades offers easy access to voltage monitoring and uniPulse functions.
Like all my upgrades and modifications, Pleiades doesn't require any holes to be drilled into your SDS7. You won't have to cut any PCBs or carry out any 'hacks' that will permanently change your SDS7. In fact, Pleiades can be easily removed thereby returning your Simmons SDS7 to factory. MIDI access for example, is via the pad trigger input of the voice module that's occupied by the Pleiades board. A XLR to 5-way DIN cable is included with the Pleiades kit. As I said... no holes need to be drilled! Cool, eh? 🙂
You'll have noticed that Pleiades has two AA battery holders. This configuration is designed to make future battery changing possible WITHOUT having to back up your SDS7 memory or having your SDS7 powered on.
Pleiades has two AA battery holders connected in parallel which means that you won't have to worry about losing your SDS7 memory when you change batteries.
After several months of testing, it would seem that my original calculations may have been correct and that a single Li-SOCl2 3.6V AA battery would retain the SDS7's memory for close to 150 years! Of course, the battery itself would not last that long but the point I'm making is that you'll only need a single battery in Pleiades to keep your SD7 happy.
My prototype Pleiades was fitted with a single SAFT 14500 battery. Five months later and things look great! The terminals on Pleiades allowing voltage to be measured, are post protection diode / resistor so what you'll be seeing is the actual voltage that's going to the SRAM. The voltage on the battery is about 0.26volts higher than what's read. Of course when SDS7 is switched on, this will jump to 5V.
Changing your battery regularly, say every five years or so, will naturally mean that your SDS7 memory will be intact when that time comes. So simply dropping in your new battery into the unoccupied battery holder and then removing the old battery is all you'll have to do. Now, isn't that just so easy?!?!?
Additionally, each battery holder has its own (independent) diode / resistor protection circuitry. This arrangement ensures that the new battery won't rush-charge your old battery while you perform the swap. And YES, it also means that should be really (REALLY) want to use two batteries, then the same will apply; independent protection diode / resistor networks will mean that any micro voltage differences between the two batteries won't make one battery inadvertently charge the other.
Independent diodes and resistors on the back of each battery holder ensure full protection of the battery and SDS7.
Excluding the Tubbutec uniPulse, Pleiades is supplied with everything you need for a smooth install and a fully illustrated and detailed installation manual is available after purchase.
Pleiades is supplied with everything you need for your SDS7 lithium battery and uniPulse MIDI adapter conversion.
IMPORTANT: If you require a Tubbutec uniPulse, please order here, specifying that you require the Pleiades Simmons SDS7 kit.
!!!! WARNING !!!!
There's a post that's been on the Internet for a while in which some guy slaps a lithium battery into his SDS7, wires it up to the memory board and claims that it works. PLEASE DO NOT DO THIS.
When powered up, the SDS7 will try to charge the battery. This will not be good and could even lead to a fire. Pleiades has been designed to do the job properly. Yes, it requires a small modification to the memory board but Pleiades won't destroy your SDS7 and definitely won't catch fire.
I joined Simmons a couple of years after the SDS7 was launched but next to the SDX, it's always been my favourite kit. I know that many favour the iconic SDSV analogue drum system but the SDS7 was just so much more 'me' at the time.
The SDS7 I bought while working for the company was sold to fund the purchase of my first SDX. It was a decision I always regretted but last December, a SDS7 came up on a well-known second-hand music gear site and I just had to have it. You can read all about that here.
And finally, my Pleiades lithium battery conversion for the Simmons SDS7 would have taken much longer to develop and might not have even happened at all, if it wasn't for the help, support and encouragement that I received from my Simmons Technical Network friends and colleagues and my good friend, Guy Wilkinson. THANK YOU Ed Rose, aka The Simmons Guy, Michael Buchner and Patrice Jacquot.
Guy, many thanks for cracking on with and contributing so much to the Advanced Memory Expansion Pack (AMEP) for the Simmons SDS7.
Pleiades features extensive uniPulse integration and being a firm believer in partnerships, I'm very proud to mention the special relationship between Tobias of Tubbutec and myself. I see too many people now-a-days thinking that they can do everything themselves... and failing!
I first got to know Tobias while developing SDSM, my uniPulse adapter for the Simmons SDSV. Both Ed Rose and I had a couple of ideas for uniPulse and Tobias kindly updated the uniPulse firmware, implementing those ideas. AWSOME!
Pleiades is built to order and handmade in Hemel Hempstead, Hertfordshire, United Kingdom, only a few miles from St. Albans where Simmons used to based and where I used to work.
Pleiades is available to purchase here:
UPDATE - 20th March 2025
The SDS7 memory comprises ten 6116 SRAM chips. These have a minimum memory retention voltage of only 2V so it would seem logical to assume that, so long as the back-up battery voltage is greater than 2V, SDS7's memory will be just fine.
In theory, that's true but there's something else going on...
IC1 (awkwardly located on the power supply PCB) is a CD4011 quad 2-input NAND gate. Used to buffer, invert and interface the Power-On-Reset (POR) circuitry, it's a crucial component in starting up and shutting down SDS7. It's permanently kept alive so just like the memory, when SDS7 is powered off, this device switches over to battery power.
The CD4011 in the SDS7 is annoyingly difficult to access.
Unfortunately, the CD4011 has a minimum operating voltage of 3V which means that the memory back-up battery has to be above this value. If it's not, then IC1 won't function, the result being that SDS7 won't boot properly, if at all. As mentioned, so long as the battery voltage is above 2V, your SDS7's memory should in theory, remain intact. In practice however, this is NOT the case and without an adequate 'chip enable' (CE) voltage applied to the 6116s, the memory will corrupt.
Of course I considered replacing IC1 but there's no pin-for-pin equivalent to the CD4011 which has a minimum operating voltage of 2V. The SN74HC00N will operate down to 2V but unfortunately gates B and D are oppositely orientated to those on the CD4011. 😡
Developed at the same time as Pleiades, Dark Matter ended up being more than just a replacement power supply for the Simmons SDS7. I took the opportunity to address the short-comings of the original SDS7 POR circuit and so completely revised the design. Not wanting to stress out my test SDS7 by presenting it with something totally alien, my revised POR circuit included a SN74HC14AN which is actually a hex Schmitt trigger inverter. The 74HC14 has a crucial benefit over the original CD4011. Yes, you guessed it, this device has a minimum operating voltage of 2V. Exactly what I was looking for.
So, that's great if you buy Dark Matter. Hey, Dark Matter was even designed to seamlessly integrate with Pleiades. The Dark Matter installation however, is very involved and won't be for everyone so I searched for an alternative solution and quickly came up with something I've called 'RESET7'.
UPDATE - 7th May 2025
Mounted to the rear PCB, RESET-7 is very secure and connects easily to the IC1 socket.
REST-7 is now available and is offered as an option extra when you buy Pleiades.
Programming the Simmons SDS7 is a laborious task and to get a collection of patches or kits, can take days, weeks or even months. Hey, it might be an idea if you had a record of all your hard work, right? Well, here's something to help you with that. My Simmons SDS7 program chart is an easy way to make sure that all your SDS7 patch data is safely recorded.
There are several reasons why a record of your patch data may come in useful. When you tweak settings for example, you may need to refer to a reference, you may accidentally overwrite one of your favourite snares, or you may just want to create something new and a set starting point would certainly help.
Designed to reside on your computer, you don't need any special software to fill in these charts. Adobe Acrobat Reader on Mac or Windows will work just fine. If you'd prefer a hard copy, then just print them out.
My Simmons SDS7 program chart allows you to record the following information:
Date
Patch (kit) number
Your own notes
Sample name of each module for up to twelve modules (limited to nine characters)
All module parameters for up to twelve modules (numbers between 0 and 255 only, go figure)
Here's a closer look.
All you need to do is enter your information, parameter values and save. It's printable too, just in case you'd prefer a hardcopy.
You can try out my Simmons SDS7 program chart online here or just download it here.
Having a written record of your SDS7 patches is one thing but what if you want to store your patches somewhere safe, somewhere other than your SDS7's memory? Well, now you can! AMEP or Advanced Memory Expansion Pack for the Simmons SD7, will do just that.
With four times the memory capacity of the original Simmons memory cassette, 20 - 25 year battery life, an on-board super-capacitor meaning that you won't lose your data when you do change your battery and a fraction of the size of the old memory cassette, AMEP is the ultimate memory back-up system for the Simmons SDS7.
Oh yeah and AMEP also works on the Simmons SDS6! 😎 In fact, you can save both SDS6 and SDS7 data on to a single AMEP. How cool is that?
Today is a BIG day. Today, my test Simmons SDS7 is back in one piece! SDS7 serial number 70320 was finally put back together after several months of doing exactly what I bought it for… to host the development of a small range of peripherals for one of my favourite electronic drum systems. 😊
Back in December last year, I found a really nice SDS7 up for sale and having wanted one of these ever since I sold mine back in 1987 to help fund the purchase of my first SDX, I just wanted to get another one.
My early Christmas present to myself got me all smitten again and I had ideas to design stuff that would help keep this legendary instrument going for another forty something years. The only problem was that I didn't really want to develop stuff on the SDS7 I'd just bought, as it was immaculate.
Then in May 2024, a friend pointed me in the direction of a SDS7 that was up for sale relatively locally (London). It had some faults but having a few ideas of what might be causing the problems, I grabbed it for a really good price.
Subsequently, SDS7 #70320 became the platform on which I developed Pleiades lithium battery conversion and uniPulse MIDI to trigger platform, Dark Matter modular switched-mode power supply, AMEP advanced memory expansion pack and NC-7 noise cancelling snap-in, all of which will be launching very soon. Indeed, I’m delighted to announce that SDS7 #70320 is actually running Pleiades, Dark Matter and NC-7. AMEP will be here very shortly. In fact, the pre-production PCBs should arrive today.
After my initial designs, I used paper cut-outs, to make sure that Dark Matter would fit snuggly into the transformer cavity of SDS7.
You may have noticed that the top-case of my test SDS7 looks very 'black' and seems to have an acute absence of age-related scratches, dents and rust. Well, that's because I got it sand blasted and then re-powder-coated. I actually had a customer's SDS7 in at the same time so I got both top-cases done together.
I was absolutely delighted with the results of sand blasting and powder coating this old Simmons SDS7 top case. The guys even managed to reproduce that original eighties leatherette texture.
It's been a heavy few months and there were a couple of points during that period when I thought I’d been a bit too ambitious. Ed Rose (aka The Simmons Guy), Michael Buchner, Patrice Jacquot and my close friend Guy Wilkinson (of Super Synth Projects) were however, so incredibly supportive. Without their help and encouragement, things would have taken so much longer and perhaps, might not even have happened.
Finally and at long last however, my test Simmons SDS7 is back in one piece and #70320 looks and sounds amazing. I’m just so pleased that it all worked out. Pleiades, Dark Matter and AMEP will be launched at the same time and very soon, like within the next couple of weeks, hopefully so stay tuned. 🙂
UPDATE - 16:00, 1st October 2024
This is my very first post update that has the same date as the post itself! Yes, something happened a few hours after I published this post. My prototype AMEP PCBs arrived. 😮
Oh! Look what just turned up! AMEP pre-production prototype PCBs. Oh WOW!!
Looks like I'm going to be busy for a few days.
UPDATE - 7th December 2024
All the peripherals that I've designed this year for the Simmons SDS7 are now available in my online store. In fact, I've made a category just for them.
Pleiades lithium battery conversion and uniPulse MIDI adapter kit.
Dark Matter 75W modular switched-mode power supply.