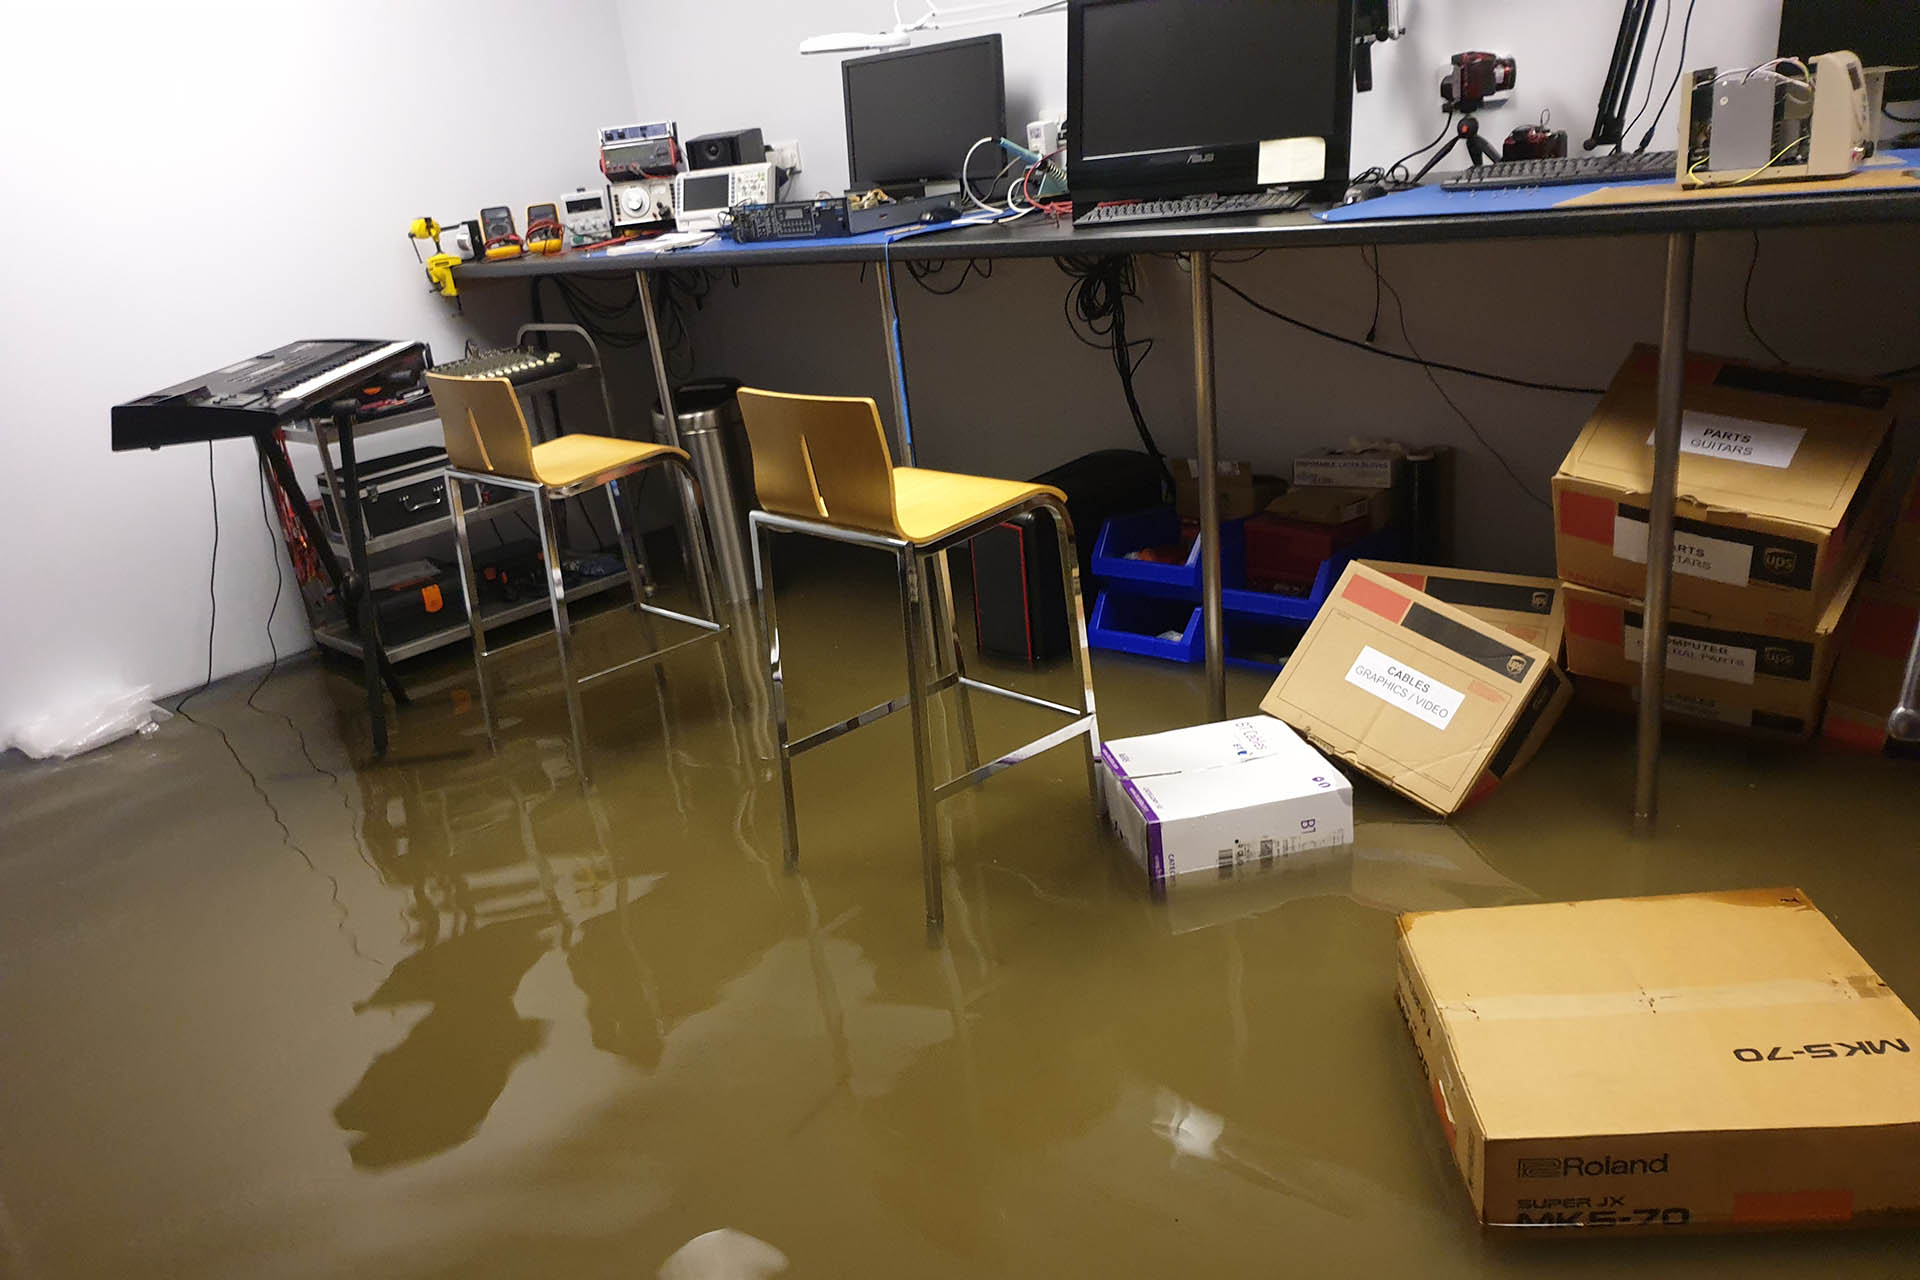
12th August 2020 and if the COVID-19 pandemic wasn’t bad enough, my studio flooded. A torrential downpour overwhelmed the badly maintained drainage system in the road leading to my studio and within ten minutes, the basement was under 25cm of dirty road-water. You can read all about that here. A devastating experience, I was in no state of mind to begin looking for new premises for Plasma Music.
The road drainage system is of course, not the responsibility of my landlords, so despite having been at my previous premises for ten years, I was concerned that the same thing might happen again and reluctantly, made the decision to leave.
20th November 2020 was my last day. On the evening of the 19th, my wife Julie and my good friend Tony, made one last trip to the old studio. It was a little emotional, to say the least. As I said, we'd been there for almost ten years. All three of us took a sigh and were very aware of what we were individually feeling. I designed the whole place and Tony paid for a lot of the build. ‘Area 51’ had a lot of good memories, not just for us but many friends and customers. A final goodbye, Tony and Julie reminded me that it was time to move on.
Since then, my wife and I have been carefully negotiating the huge stacks of equipment that accommodate every corner of our home. Of course I haven’t been able to do anything music-wise but I have tried to carry on with repairs, service and design and manufacturing. It’s been a real struggle.
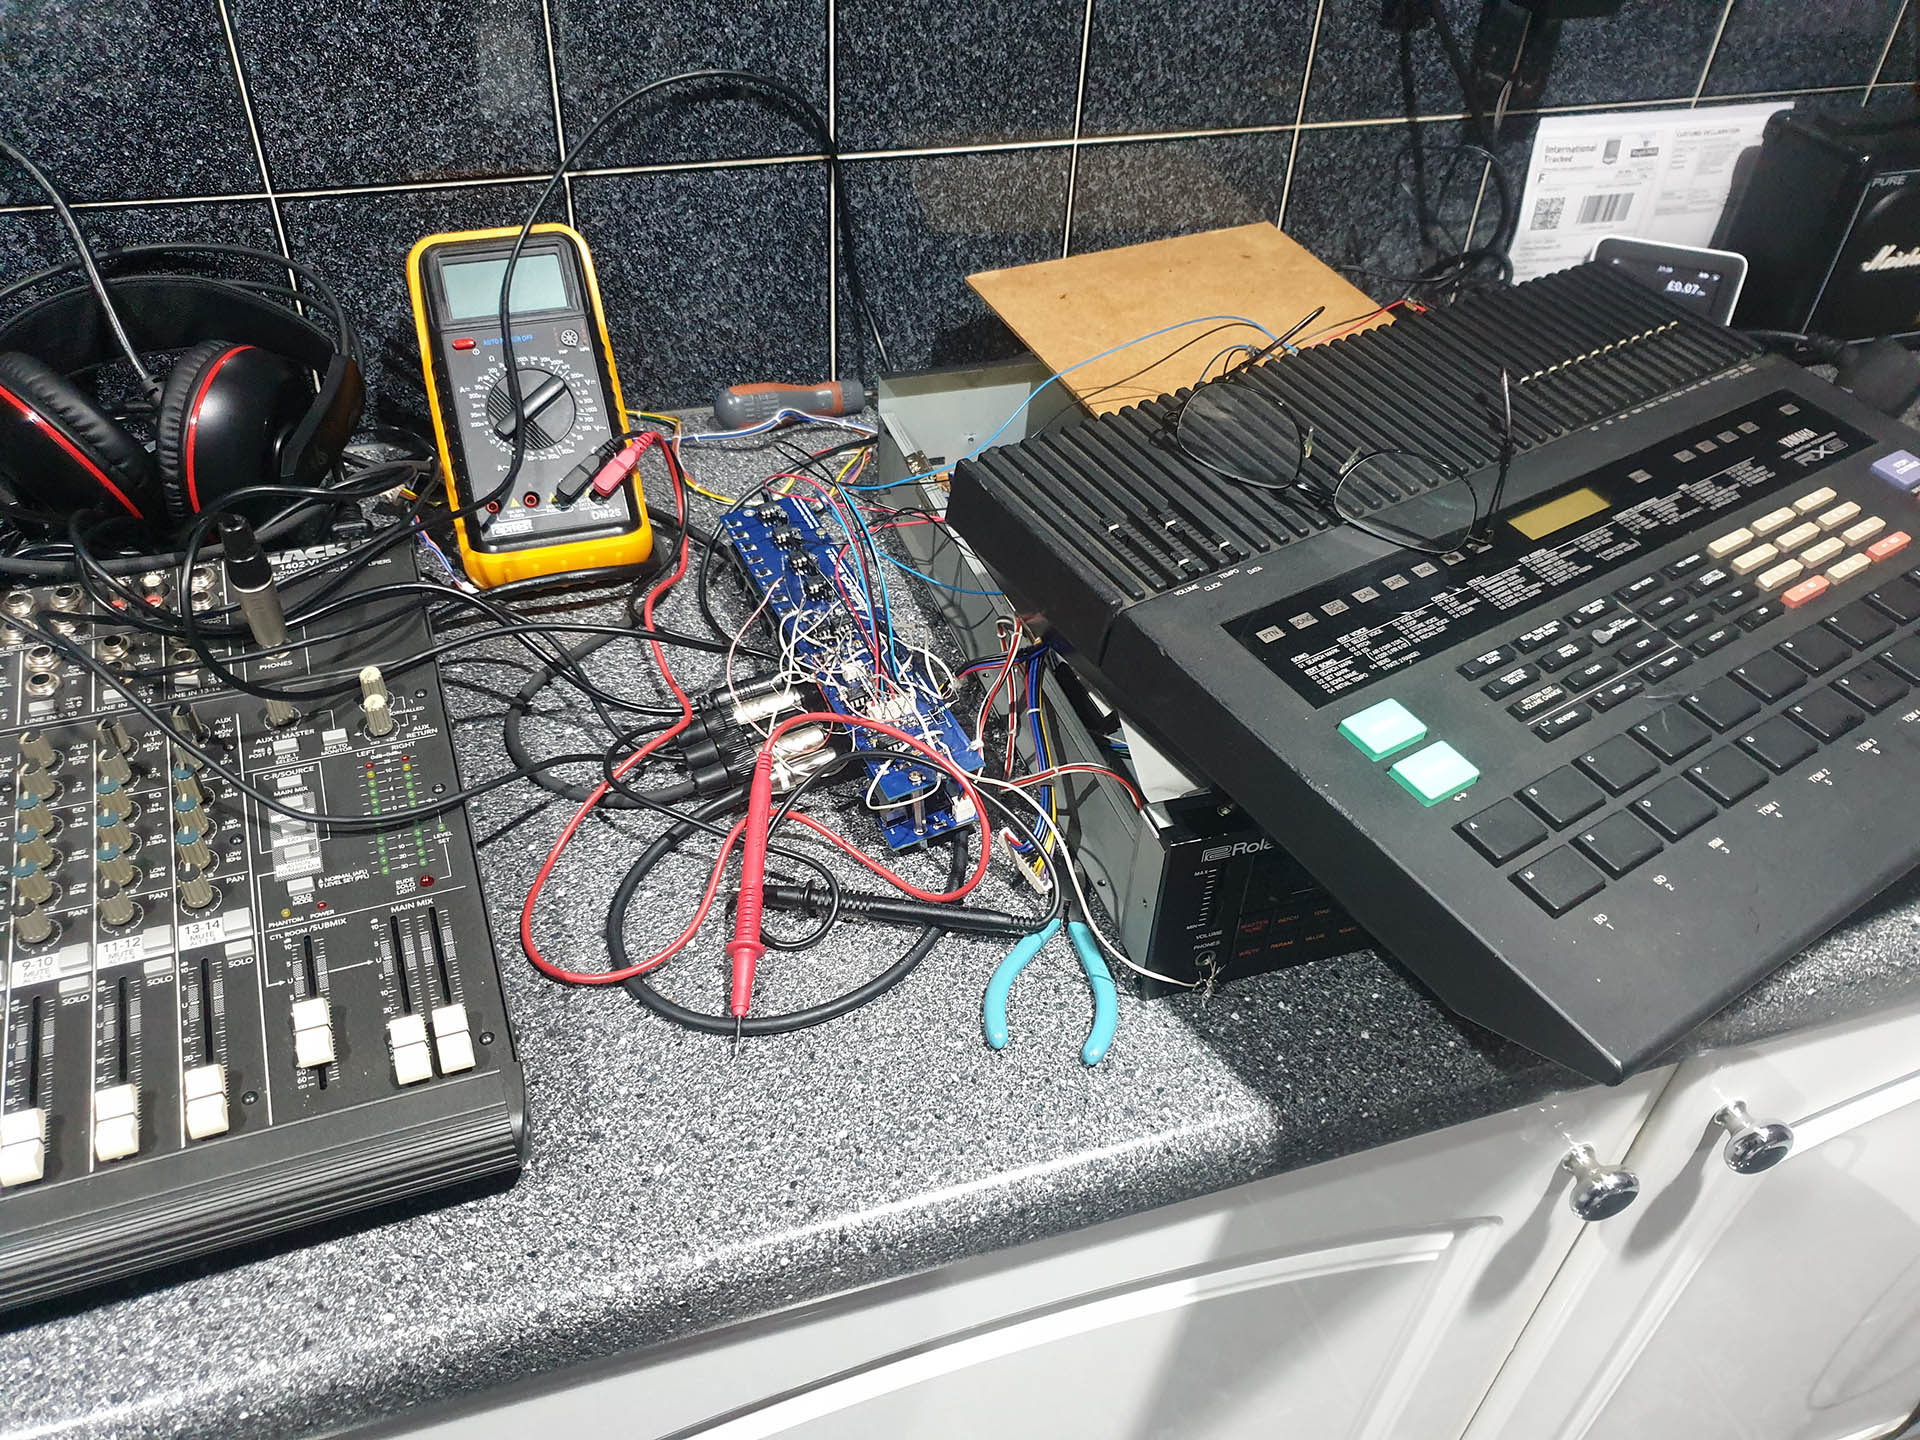
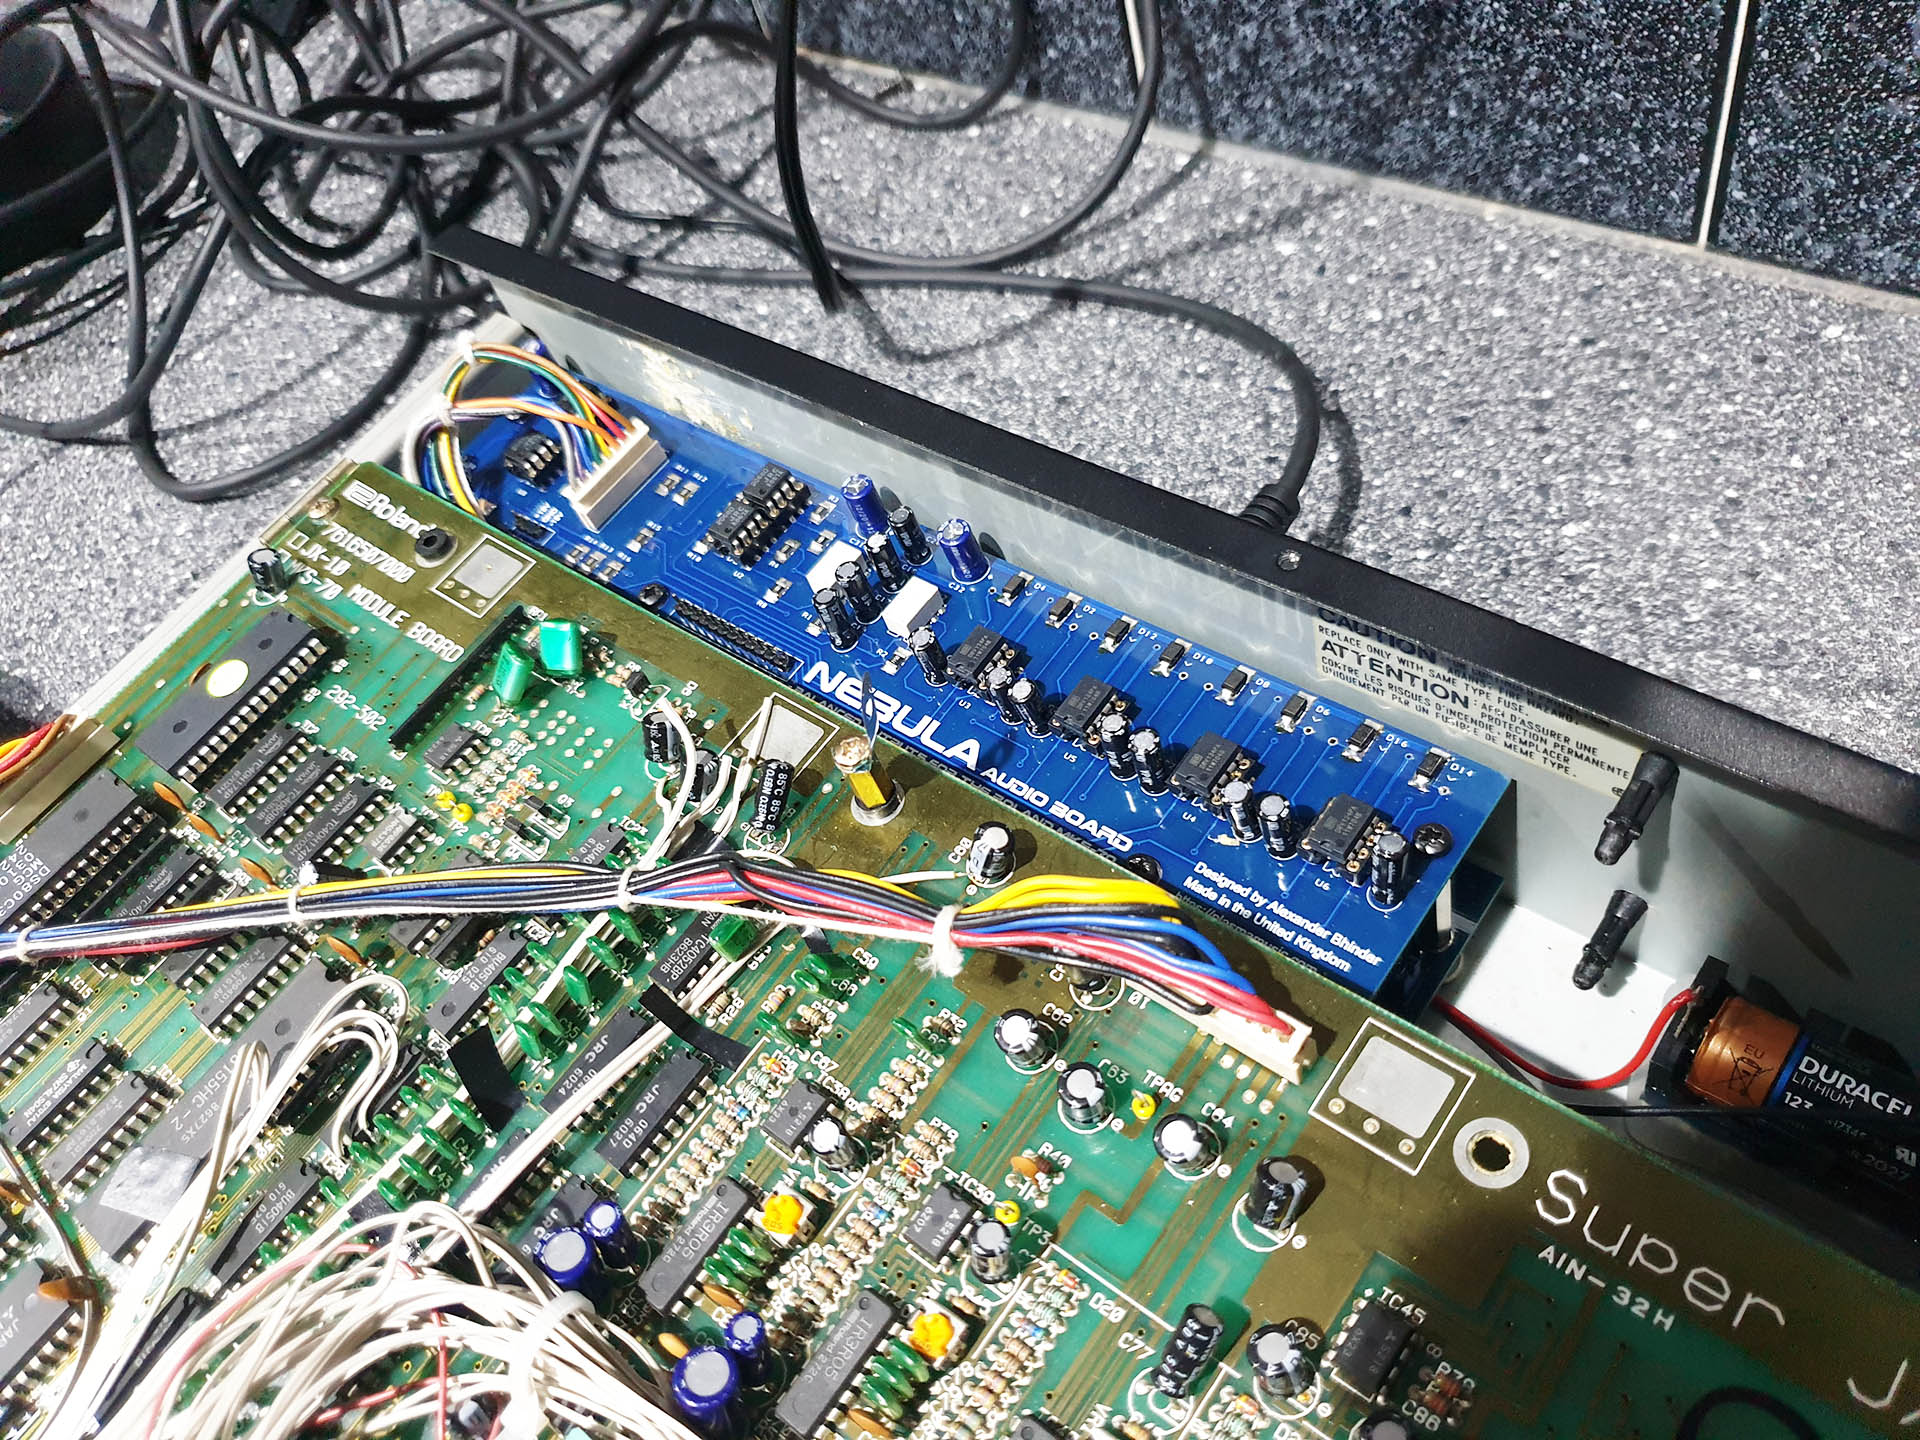
It was really tough designing and testing peripherals for vintage synthesisers in my kitchen. Here's a Nebula prototype having its output mode selector being tested.But I persevered and despite the challenging conditions, Nebula ended up being just awesome.
Trying to dig out tools, equipment and parts has sometimes been like looking for a needle in a haystack.
People comment on how my stuff looks like I bought it yesterday. That's because I look after it! Stuff had to be stacked and stored carefully and properly. I also had a lot of customer repairs in progress. Their status needed to logged, parts kept in place and of course, looked after like my own gear.
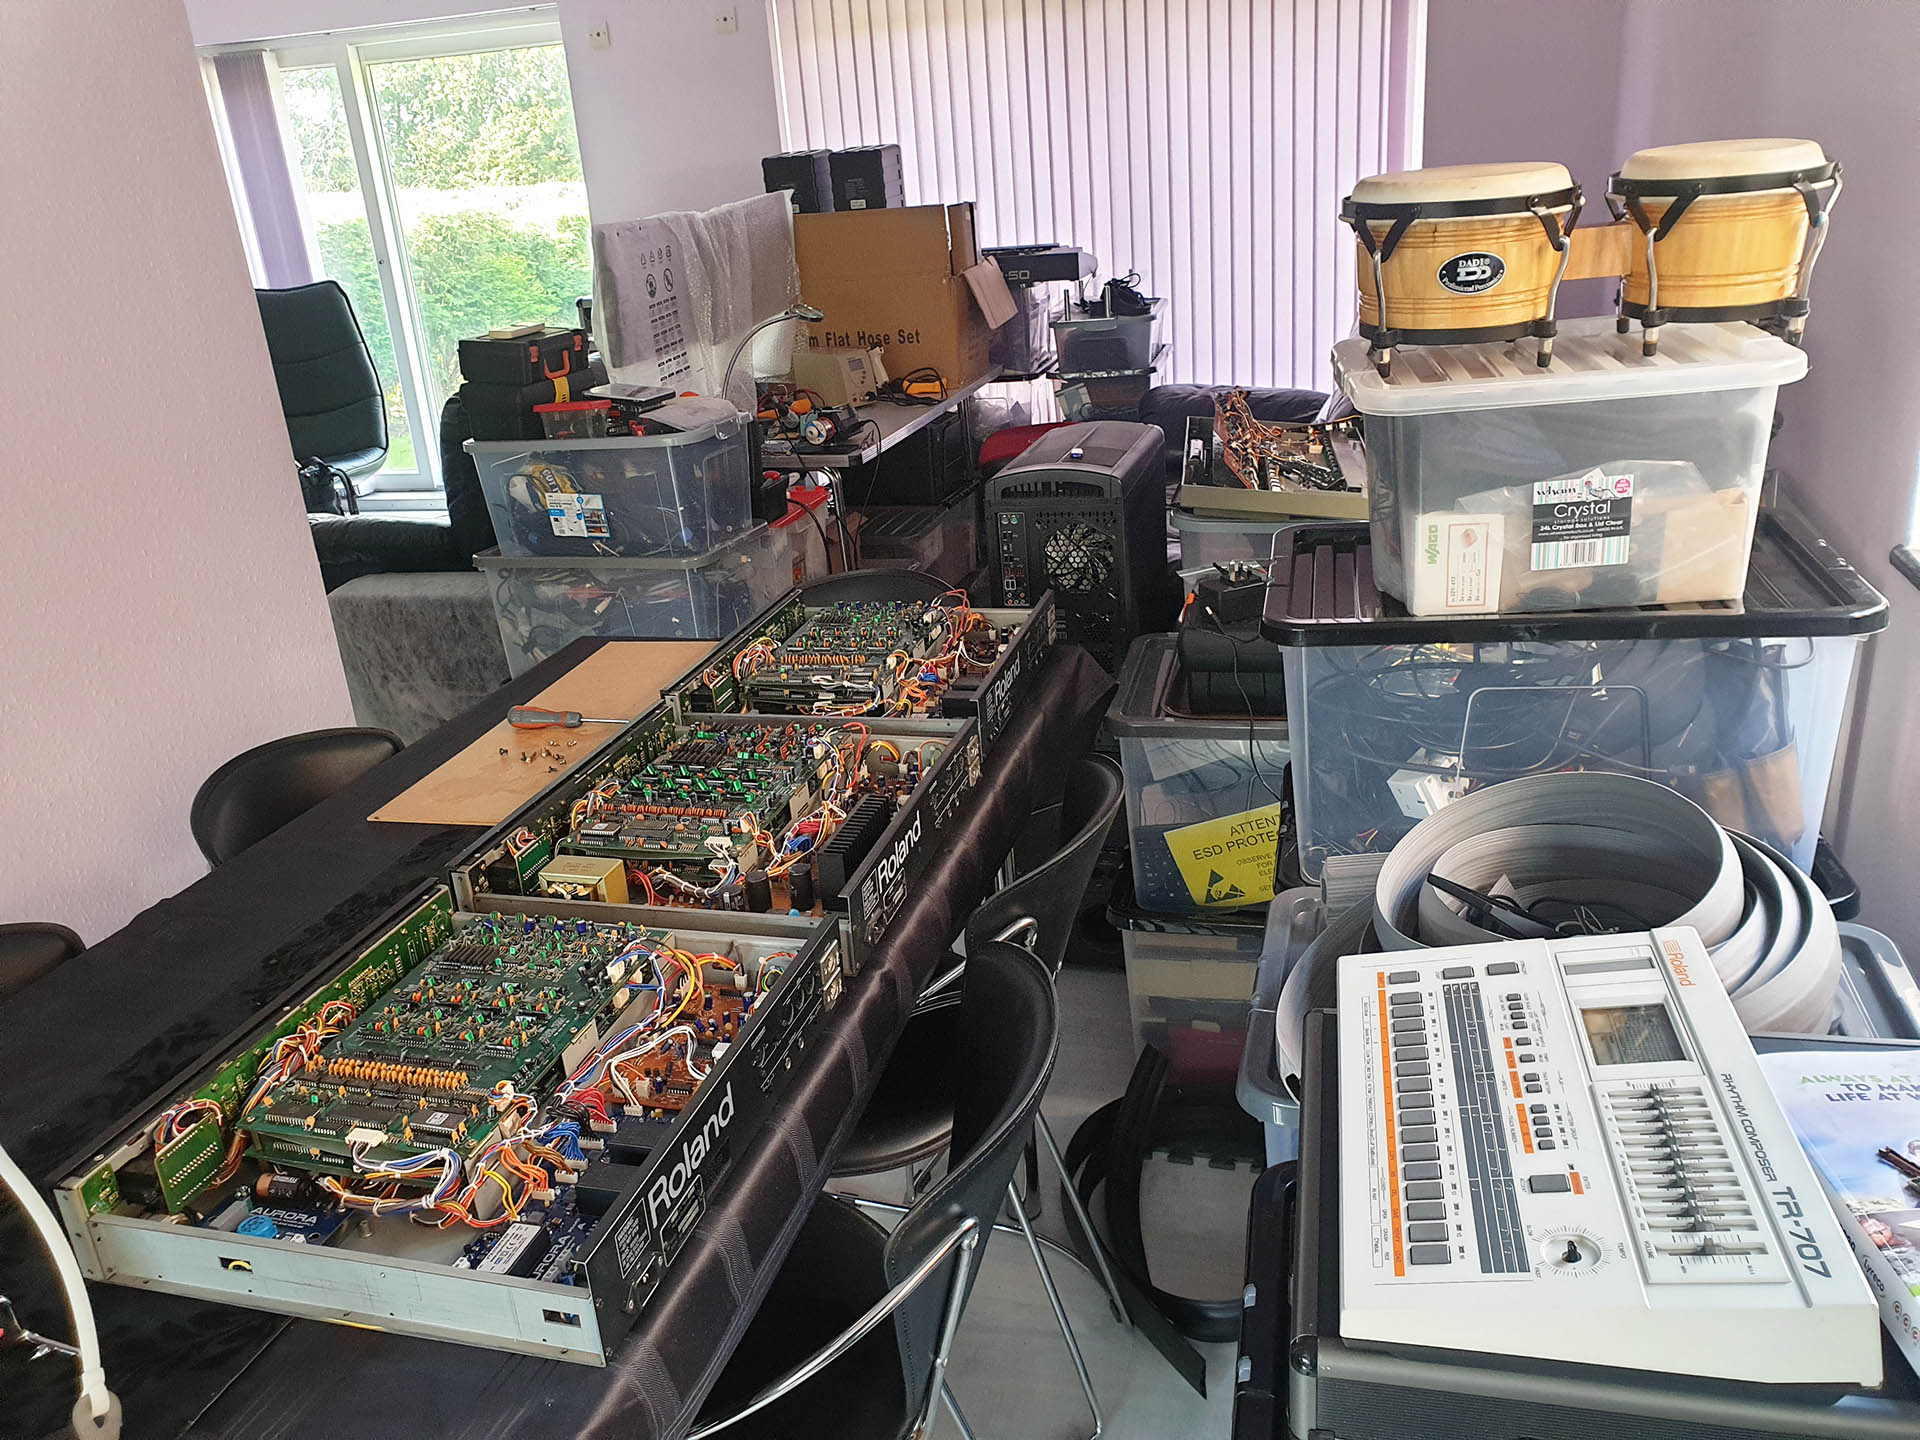
Gear everywhere. This is just my dining table and some of my lounge. Not really a reflection of my minimalistic lifestyle.
Anyway, seven months later and it seems that I have new premises for Plasma Music. It’s a large detached house which is going to need a lot of work before I even consider moving my stuff in. Last week I ripped out the kitchen which is going to be replaced with something a little scaled down.
Last week I ripped out the old kitchen. The new kitchen is going to be very scaled down, more like a galley style and my 'office' will occupy what was the dining area which will put it in between the kitchen and the front door.
Upstairs isn’t too bad and basically just needs redecorating. Apart from the kitchen, downstairs also needs a lot of the flooring replaced and a little damp sorting out.
You can probably tell that I'm not a natural!
I’d just like to take this opportunity to say THANK YOU to my lovely family, my awesome friends and my kind neighbours. My youngest daughter, Tsunami was actually responsible to motivate me (kick my arse) to make a start. She’s just graduated with a 1st but has put her dad first, too!
My wife Julie, has been incredibly patient over the past few months, what with our home seemingly disappearing under a deluge of amplifiers, keyboards, mixing desks, guitars and a lot more. Julie has also been helping with stripping wallpaper and organising skips, etc.
Then there’s my neighbour Mike Graves who pulled up the damaged flooring and has already made a start on preparing for the new galley-style kitchen. Mike knows a lot more than I do about building and has been so helpful sorting out lots of bits ‘n’ pieces.
I don't really have the patience for this kind of stuff.
While focusing on the inside of the house, another neighbour, Joe Scibetta, has done an awesome job on the gardens. Joe worked tirelessly to get the lawns into a half decent state. He ripped down the old shed and removed a tree that was growing out of control. He even put up a new fence panel which apart from looking awesome, has improved security from the front aspect of the property.
I reckon it’s going to take a few months before I consider moving stuff over but I quite honestly, can’ wait.
I've been building these things for years and after so many customers suggested that I should release my TCIs commercially, I decided to take the plunge. So here's my Transformer Coupled Interface Type 1 which is a 2-channel, passive, unbalanced to balanced converter.
After having made possibly hundreds of these over the years, my Transformer Coupled Interface Type 1 is now available to everyone.
TCI started as a problem solver in my own studio. Before long, friends asked me to build TCIs for them and then they got the attention of musicians, engineers, producers and even audiophiles, further afield. With a proven track record, there are already hundreds of these boxes all around the world, some of which may be over twenty years old! Out of all the things I've built over the years, people seem to love my humble TCI.
Making a commercial product is a great opportunity to offer a truly high-specification device, to a wider audience and I'm very proud to have squeezed all of this in:
NUMBER OF CHANNELS
2
FREQUENCY RESPONSE
30Hz – 30kHz
INPUT IMPEDANCE
6.4kΩ - 6.5kΩ
OUTPUT IMPEDANCE
<600Ω
INPUT CONNECTIONS
2 x ¼” (6.35mm) 2-pole jack socket
OUTPUT CONNECTIONS
2 x 3-pin male XLR socket (pin 2 is in-phase)
DIMENSIONS
(L) 80mm x (W) 80mm x (H) 47mm inc. feet
WEIGHT
<350g
The title says it all and you've just read the specifications but there's even more information about my Transformer Coupled Interface Type 1 unbalanced to balanced converter in my post, here.
Yes, I know; what about the 'Type 2'. Well, the Type 2 is (you guessed it) a passive 2-channel balanced to unbalanced converter. Indeed I've also built a few of these. I receive so few enquires about doing things the other way around that for the time being, a Type 2 isn't in my plans.
UPDATE - 13th August 2021
Out of the first sixteen TCIs sold, thirteen went to audiophiles, something I really didn’t expect but which I can relate to.
Of course, now-a-days, many powered hi-fi speaker systems, have balanced inputs, especially sub-bass speakers and headphone amps. You’ll be hard pushed however, to find a high-end pre-amp with balanced outputs. Luckily, most have low output impedances and offer very high signal levels, making them ideal for connecting to the balanced inputs of powered speakers, via a passive unbalanced to balanced converter like the TCI Type 1.
The rear of this Sonodyne SLF-350 sub-bass system only has balanced inputs.
TCI Type 1 was designed for studio applications and so has ¼” jack input sockets and not RCA phono sockets, normally found on hi-fi equipment. Short RCA phono to ¼” jack cables are however, easily available and if you really get stuck, I’d be more than happy to make a pair.
The outputs of one customer's pre-amp were on 4-way DIN sockets and again, please just contact me if you need custom cables made.
My TCI Type I unbalanced to balanced converter, is an amazing little problem solver and is now available to buy here...
I'm very proud to probably have the best customers in the world! Every once in a while though, I get an email which just makes me feel like what I do is so worthwhile. BUT...
Then I get an email which is truly humbling.
This evening I received an email from a customer who bought a TCI Type 1.
"Hi Alexander,
I have got the TCI today.
Thank you very much, the sound is perfect.
I made the music video on YouTube. You can check the sound quality and your device in video. Also I wrote about Plasma Music in description of video."
After 3:28 minutes in the video below, you can see the TCI Type 1 that my customer is using. The stunning sound you're hearing is passing through it. No... don't listen to this through your phone. Play it back on something proper!!!!
I had no idea of the situation in which my little TCI Type 1 was going to be used but definitely didn't imagine that it would be interfacing the likes of DAC and Concert Fidelity equipment. How incredibly amazing to see my TCI Type 1 amongst such giants. How incredibly humbling and how lovely of my customer to get back to me and let me know.
Like all my stuff, TCI is designed and made by me, here in Hemel Hempstead, UK. I do however, use sub-contractors for making enclosures, PCBs, etc. Unlike many, I only use local companies and here's why...
I'm deeply concerned about the environment and the exploitation of labour and so I always use local manufacturers in preference to the Far East, with the following in mind:
I can be confident that workers are treated fairly and earn a proper wage.
I can be confident of the standard of quality of each item that is delivered to me.
Communication is important and using local manufacturers, all correspondence is quick and understandable.
I believe in supporting the local economy.
I can be confident that the disposal of manufacturing waste is managed properly and in accordance with national and EU law.
Using local manufacturers isn’t the cheapest option but the above points are important to me. I hope that they’re important to you too.
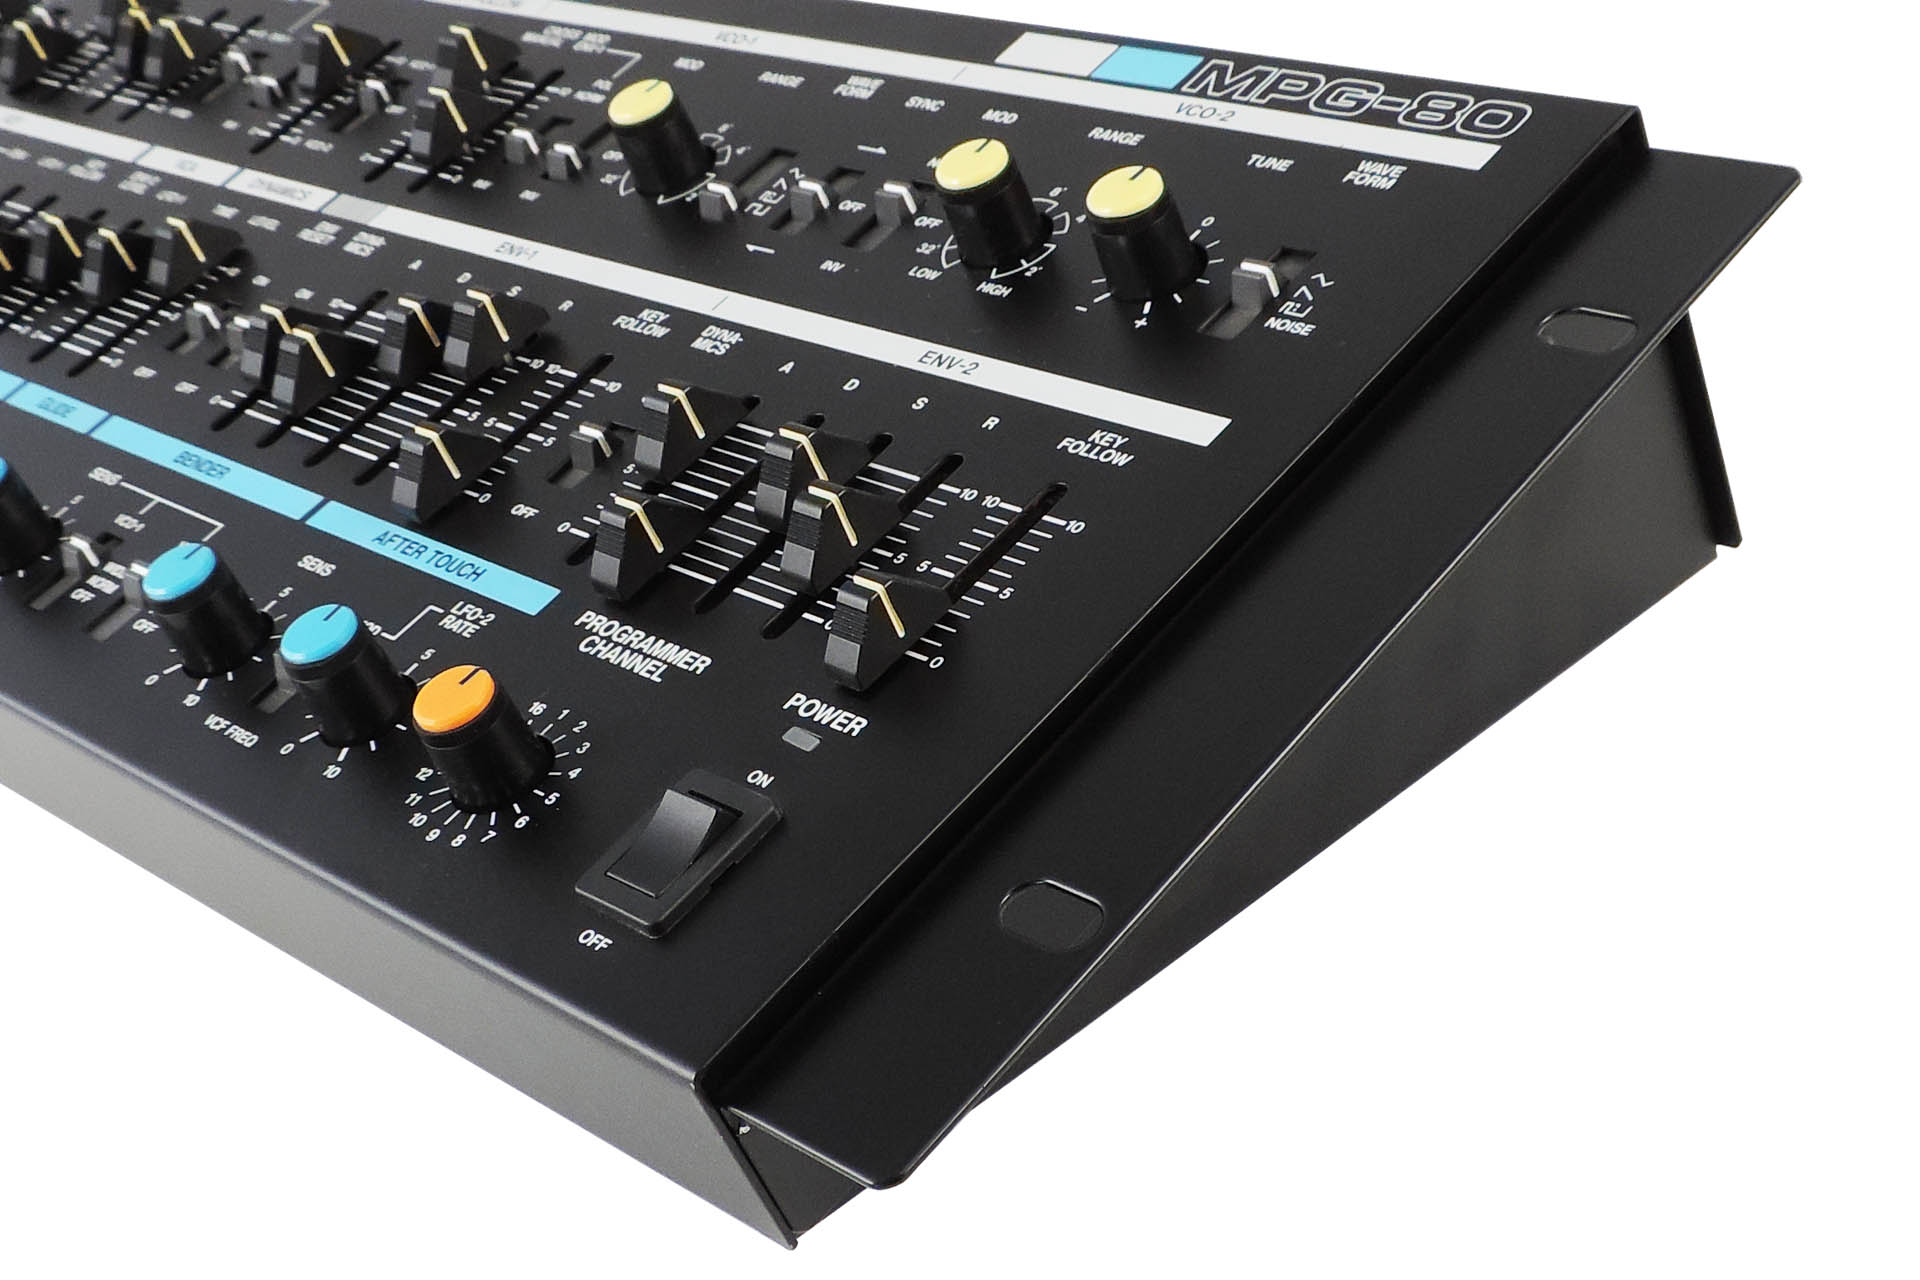
This has been a long and frustrating wait as ever since I launched my RE-MKS-70 and RE-MKS-80 replacement rack ears, I’ve had enquiries to make similar kits for other products, so I’m pleased to announce my RE-MPG-80 rack ears for the Roland MPG-80.
RE-MPG-80 replacement rack ears for the Roland MPG-80, mounted to my new machine!
I bought my MKS-80 off my employer, Roland (UK), in 1989. Even with staff discount, this thing was quite expensive and when you consider that I’m actually a guitarist, the purchase was even more questionable. Ah well…
I'm really happy with these replacement rack ears. They look stunning.
Prior to computer editors, let alone third-party controllers like the Retroaktiv MPG-8X, why on earth then, didn’t I also purchase a MPG-80 at the same time? Sex, drugs and rock ‘n’ roll? Who knows?
So, thirty-two years later, a lovely customer of mine who recently acquired a Retroaktiv MPG-8X, put up his Roland MPG-80 for sale. I made Dan an offer which he conditionally accepted, the condition being that I service his latest acquisition; a Roland SH-101. Well, I said I'd have to think about it... for like five seconds, LOL and then we shook hands. 🙂 You can read all about Dan's SH-101 service, here.
Dan’s MPG-80 was pristine and had been serviced before he bought it. Hence my keenness to grab this particular example. I now have a hardware controller for my beloved MKS-80 but… more importantly, I have rack ears! YAY!!!! I can now design a pair of rack ears for this box and keep some of my customers happy.
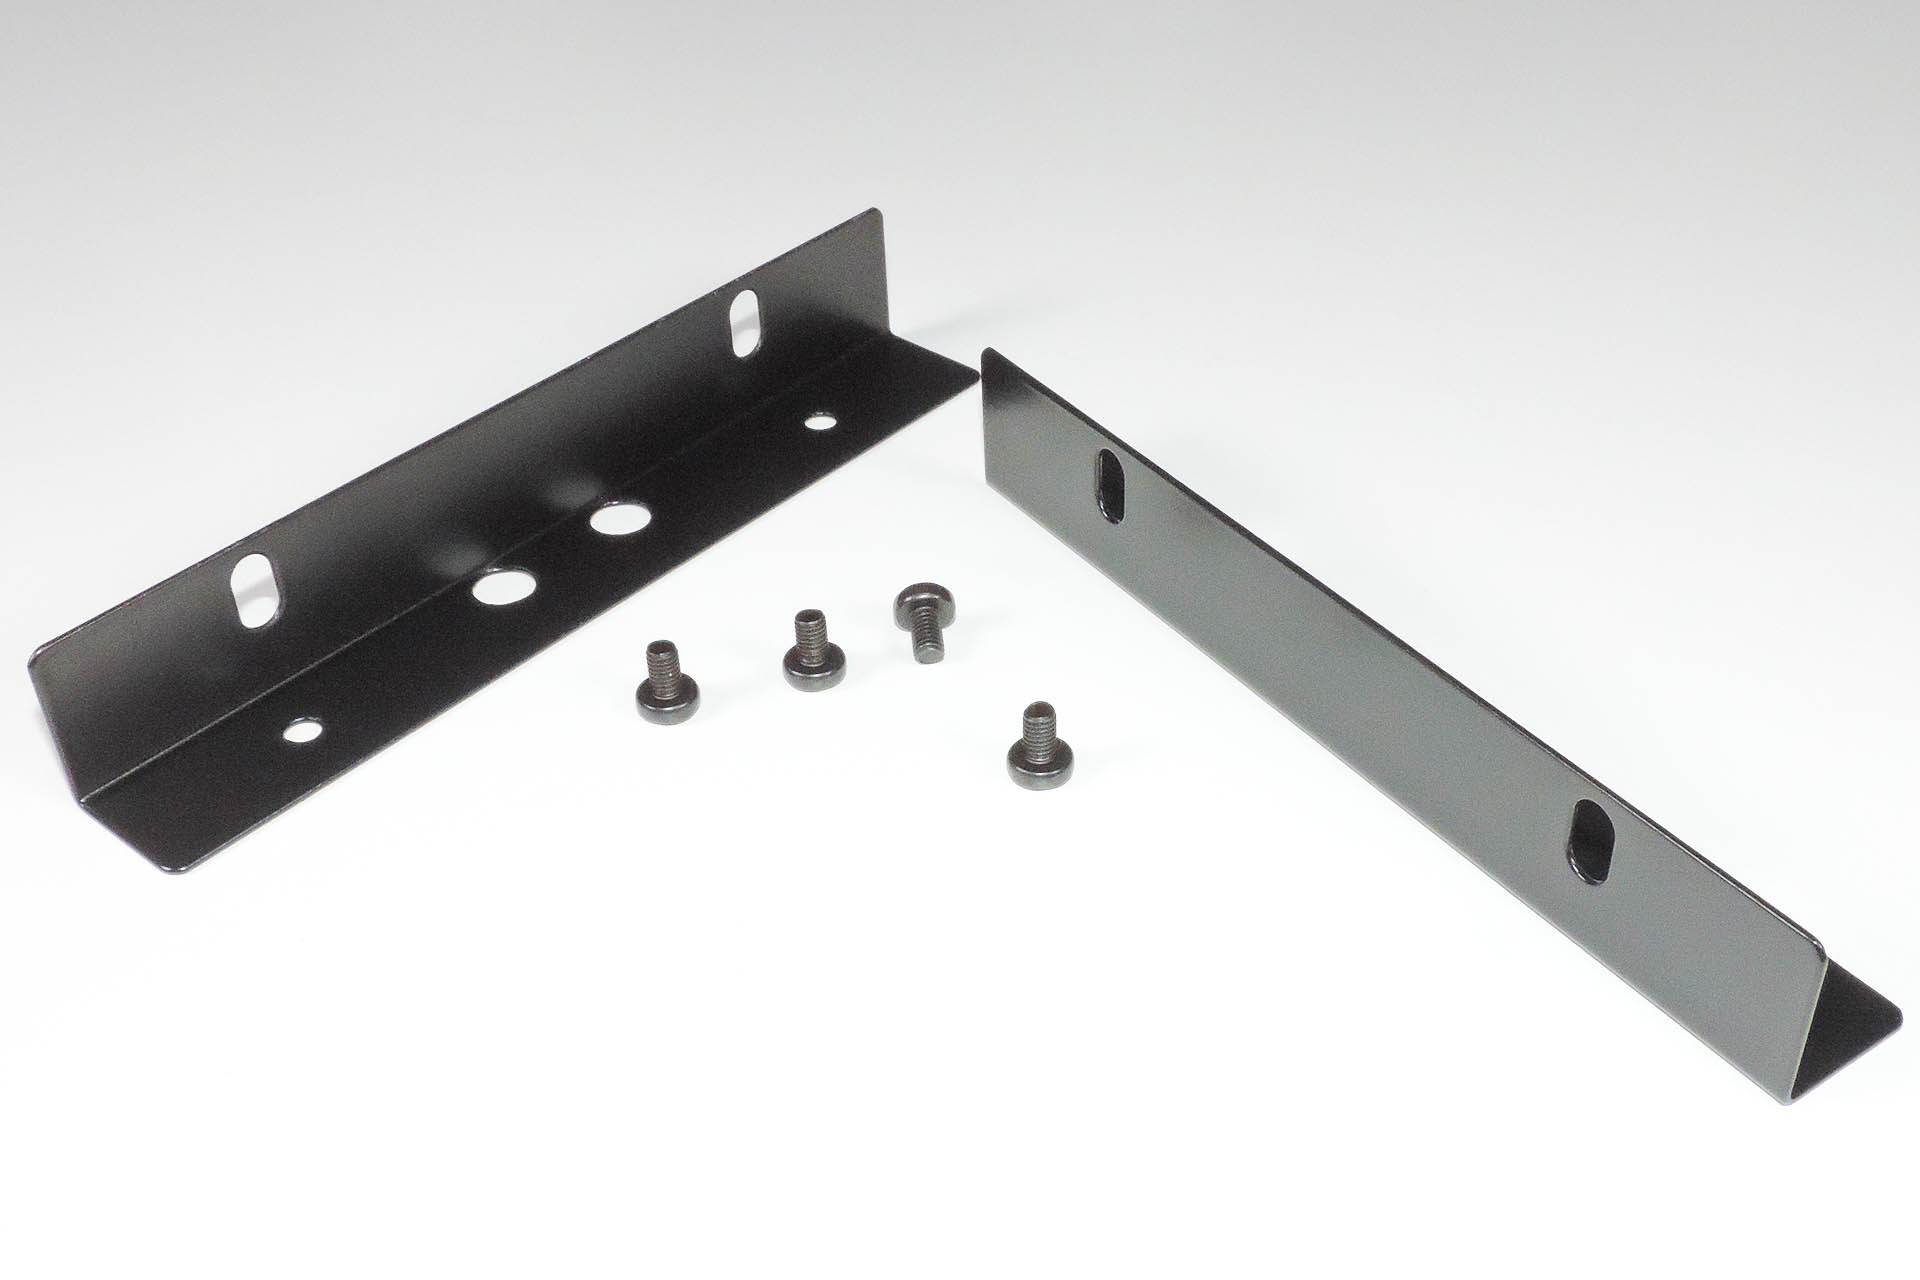
Just like the originals, my RE-MPG-80 rack ears for the Roland MPG-80, are made of 2mm mild steel and are powder coated with a lush, matt black finish. They fit perfectly and look great. I’m really happy with what Lenton Engineering has produced.
A perfect fit and the finish is just great!
Supplied with black M5 machine screws, all you need is a pozidrive screwdriver, to get these fitted to your own MPG-80 in a couple of minutes.
Of course, you get the rack ears but also included are four fixing screws that seem much 'blacker' than the originals.
The number of MPG-80s and indeed MKS-80s, on the planet is shrinking, so the market for custom replacement parts and upgrades is inclined to follow a similar path. I therefore only get things like the RE-MPG-80 rack ears, made in small batches.
I'm deeply concerned about the environment and the exploitation of labour and so I always use local manufacturers in preference to the Far East, with the following in mind:
I can be confident that workers are treated fairly and earn a proper wage.
I can be confident of the standard of quality of each item that is delivered to me.
Communication is important and using local manufacturers, all correspondence is quick and understandable.
I believe in supporting the local economy.
I can be confident that the disposal of manufacturing waste is managed properly and in accordance with national and EU law.
Using local manufacturers isn’t the cheapest option but the above points are important to me. I hope that they’re important to you too.
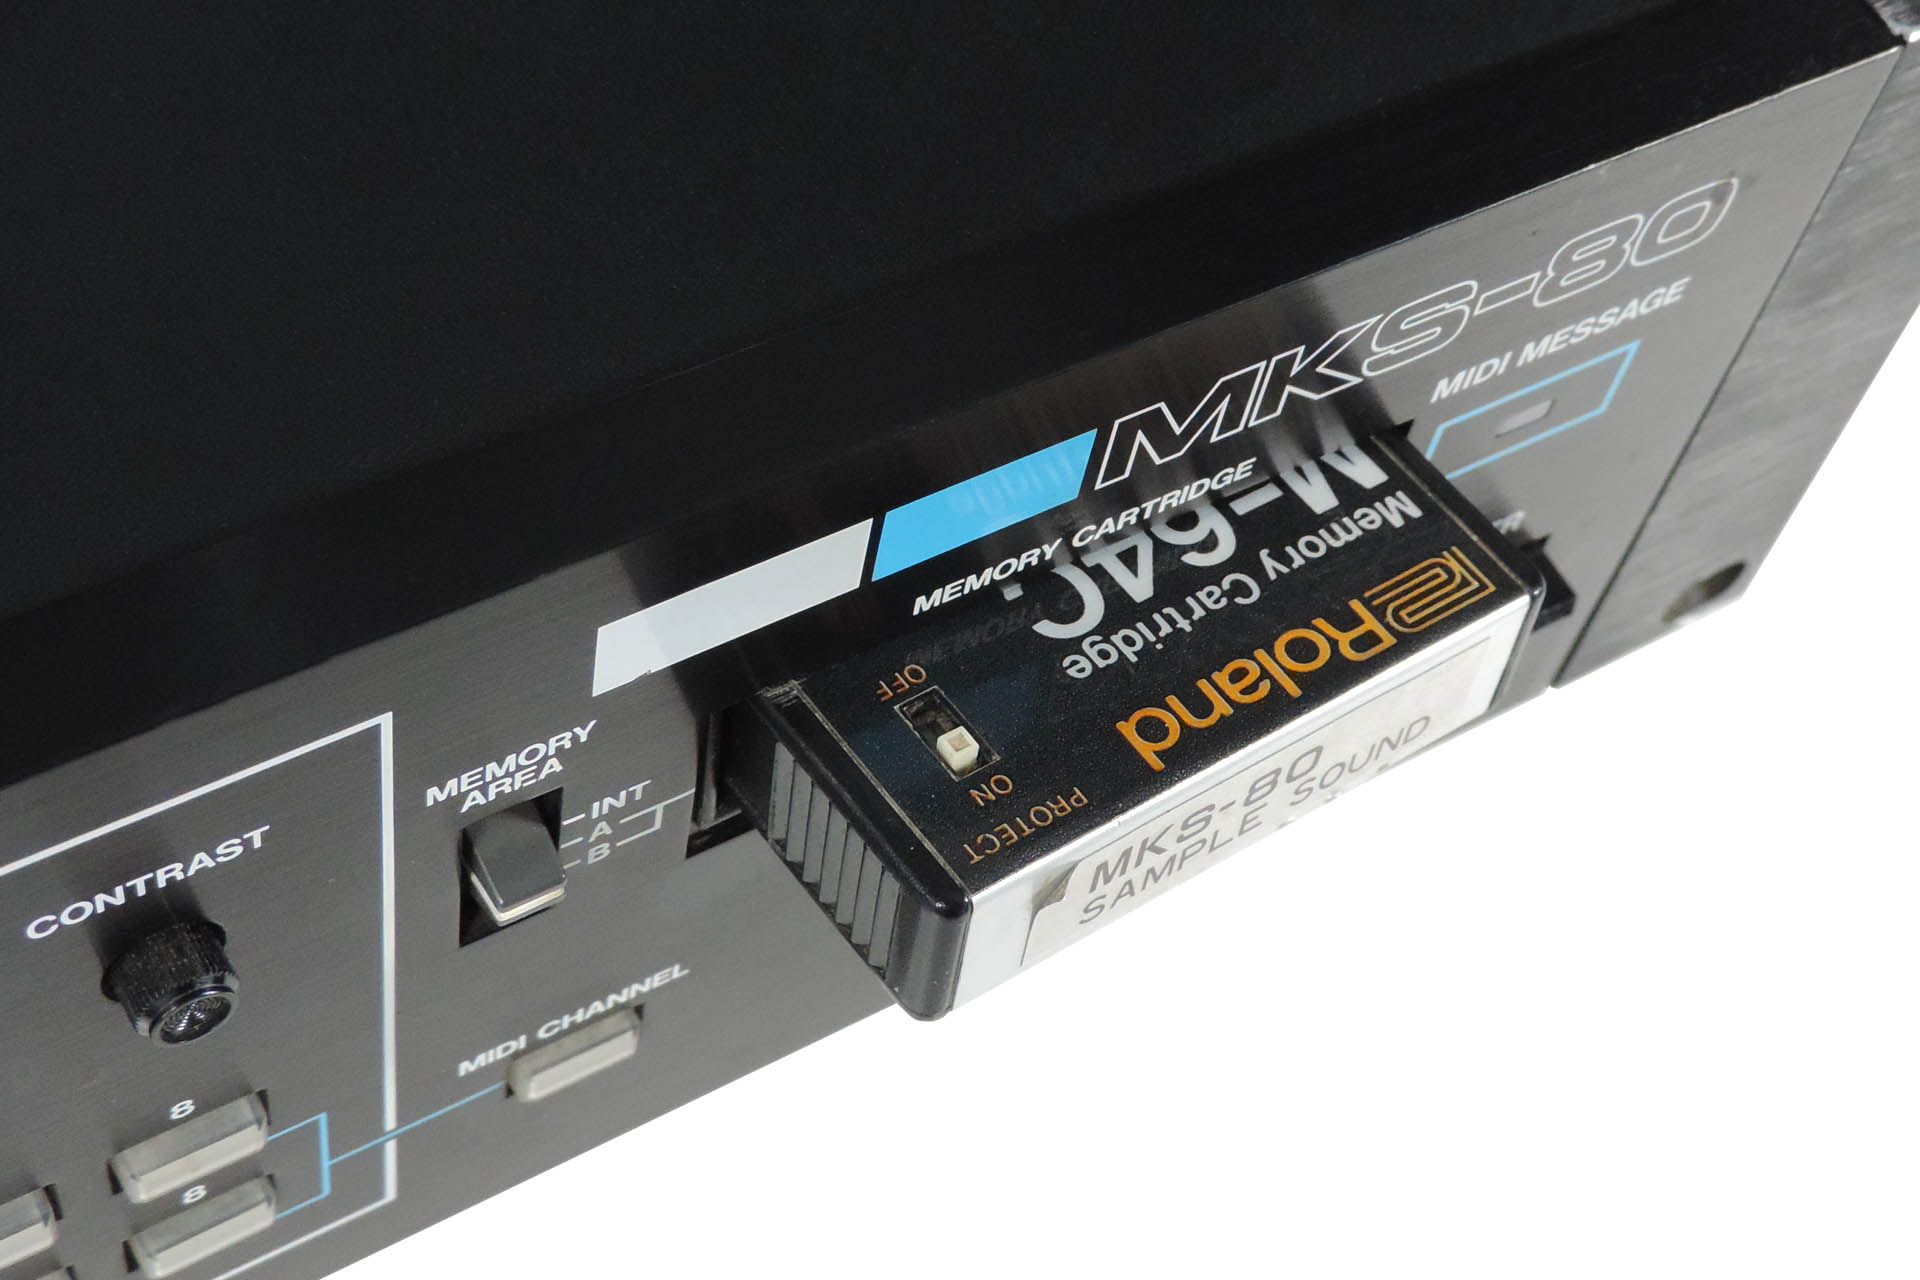
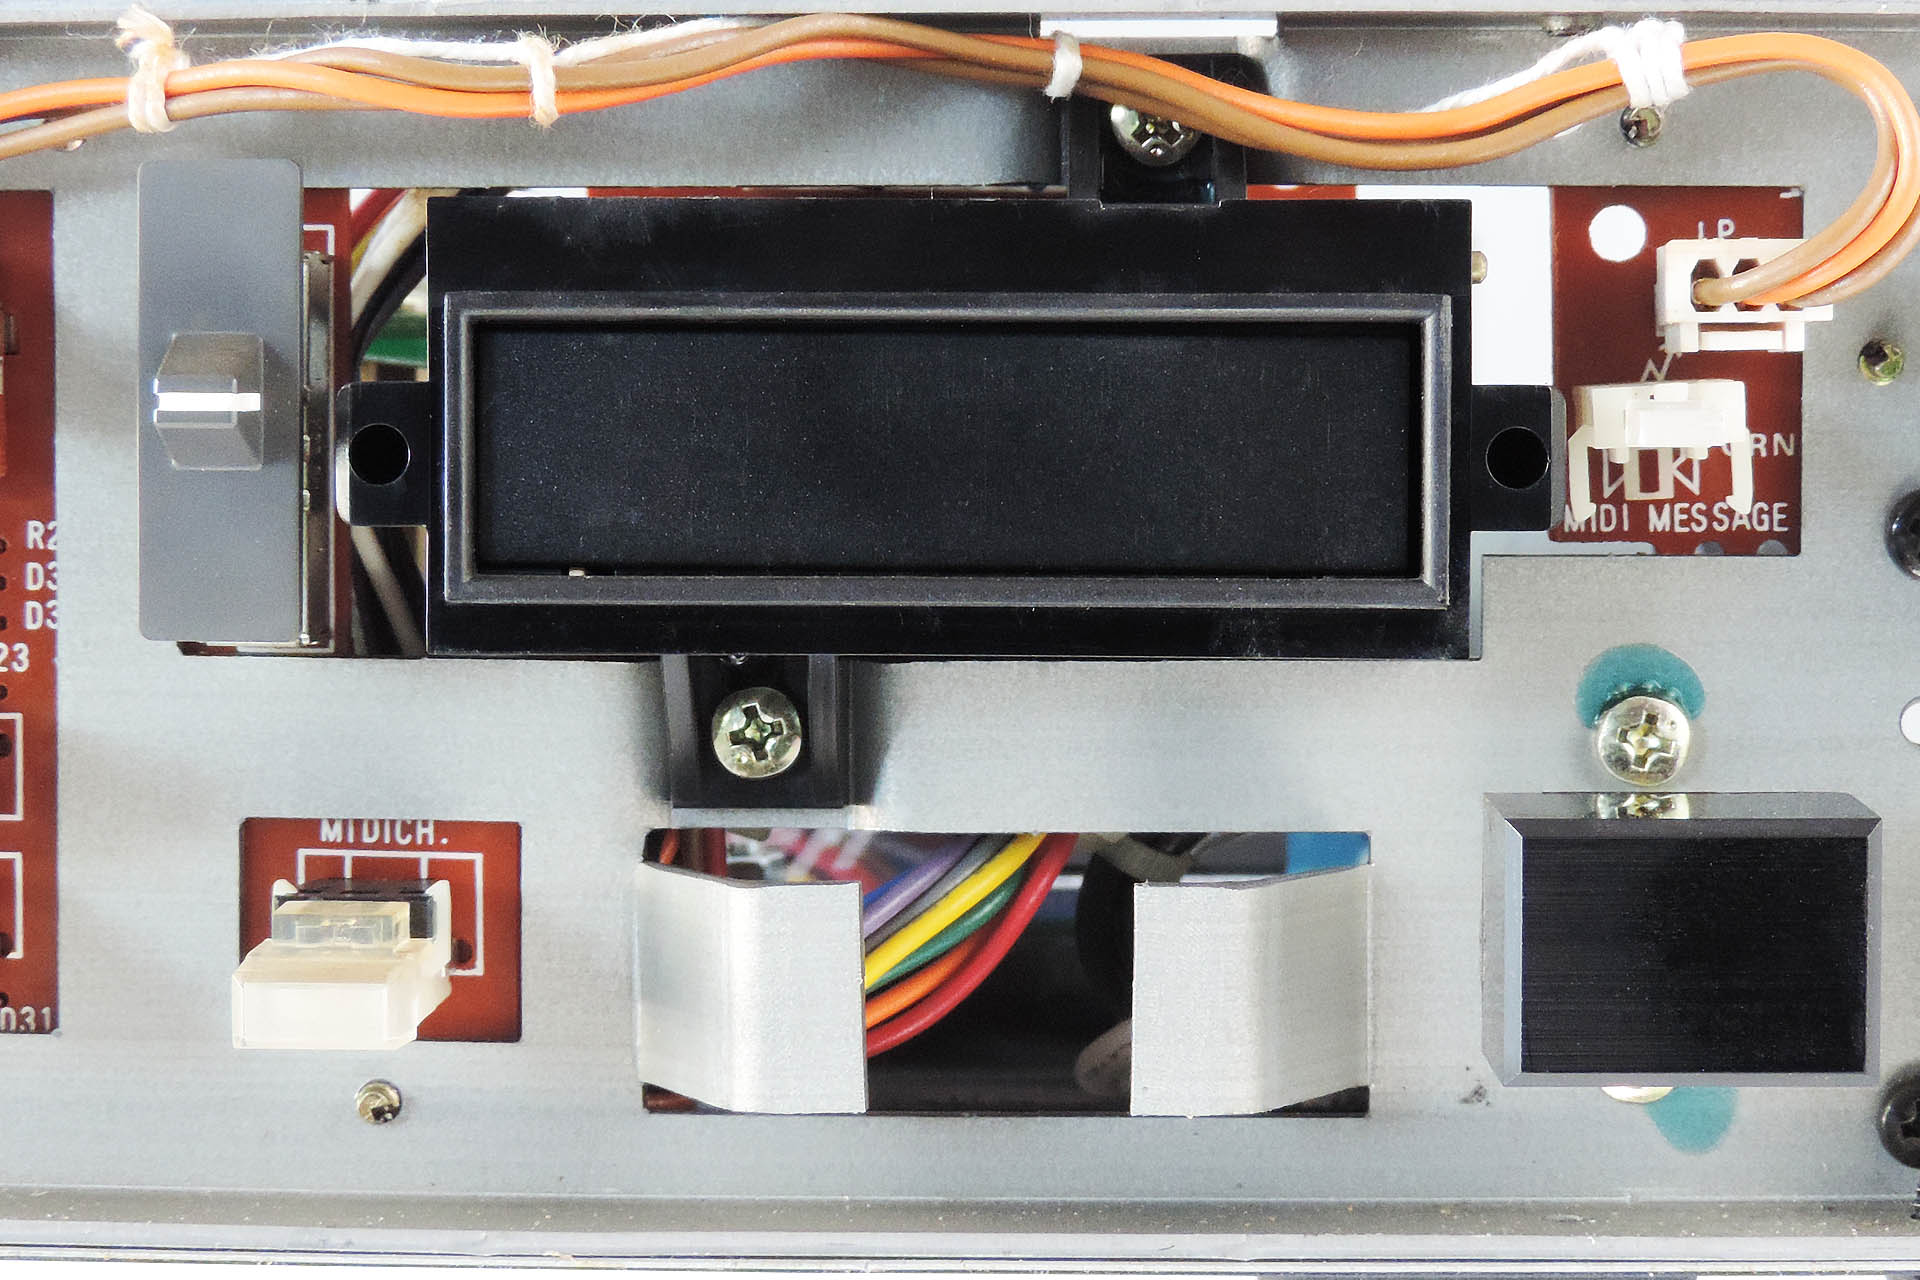
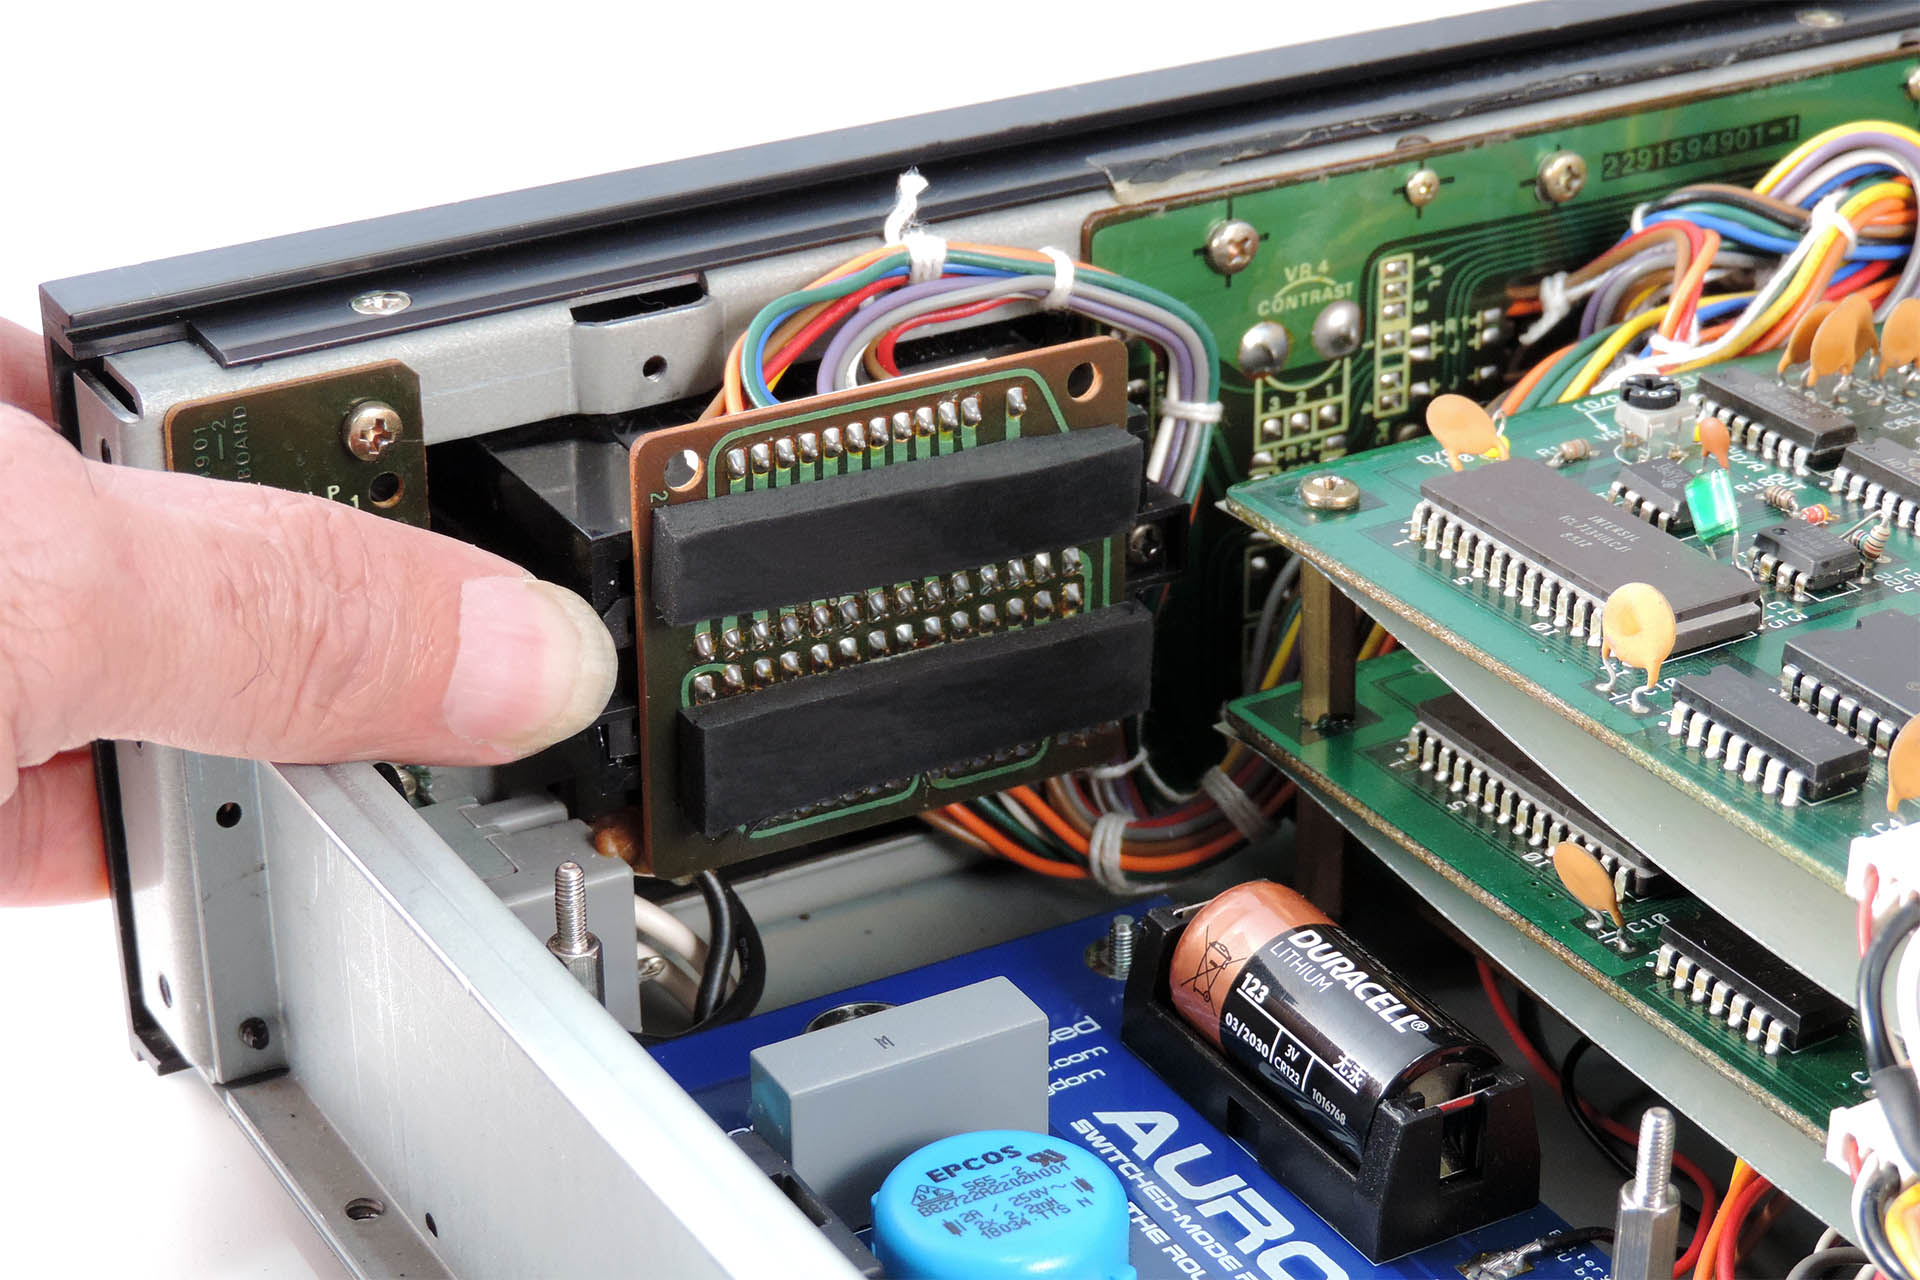
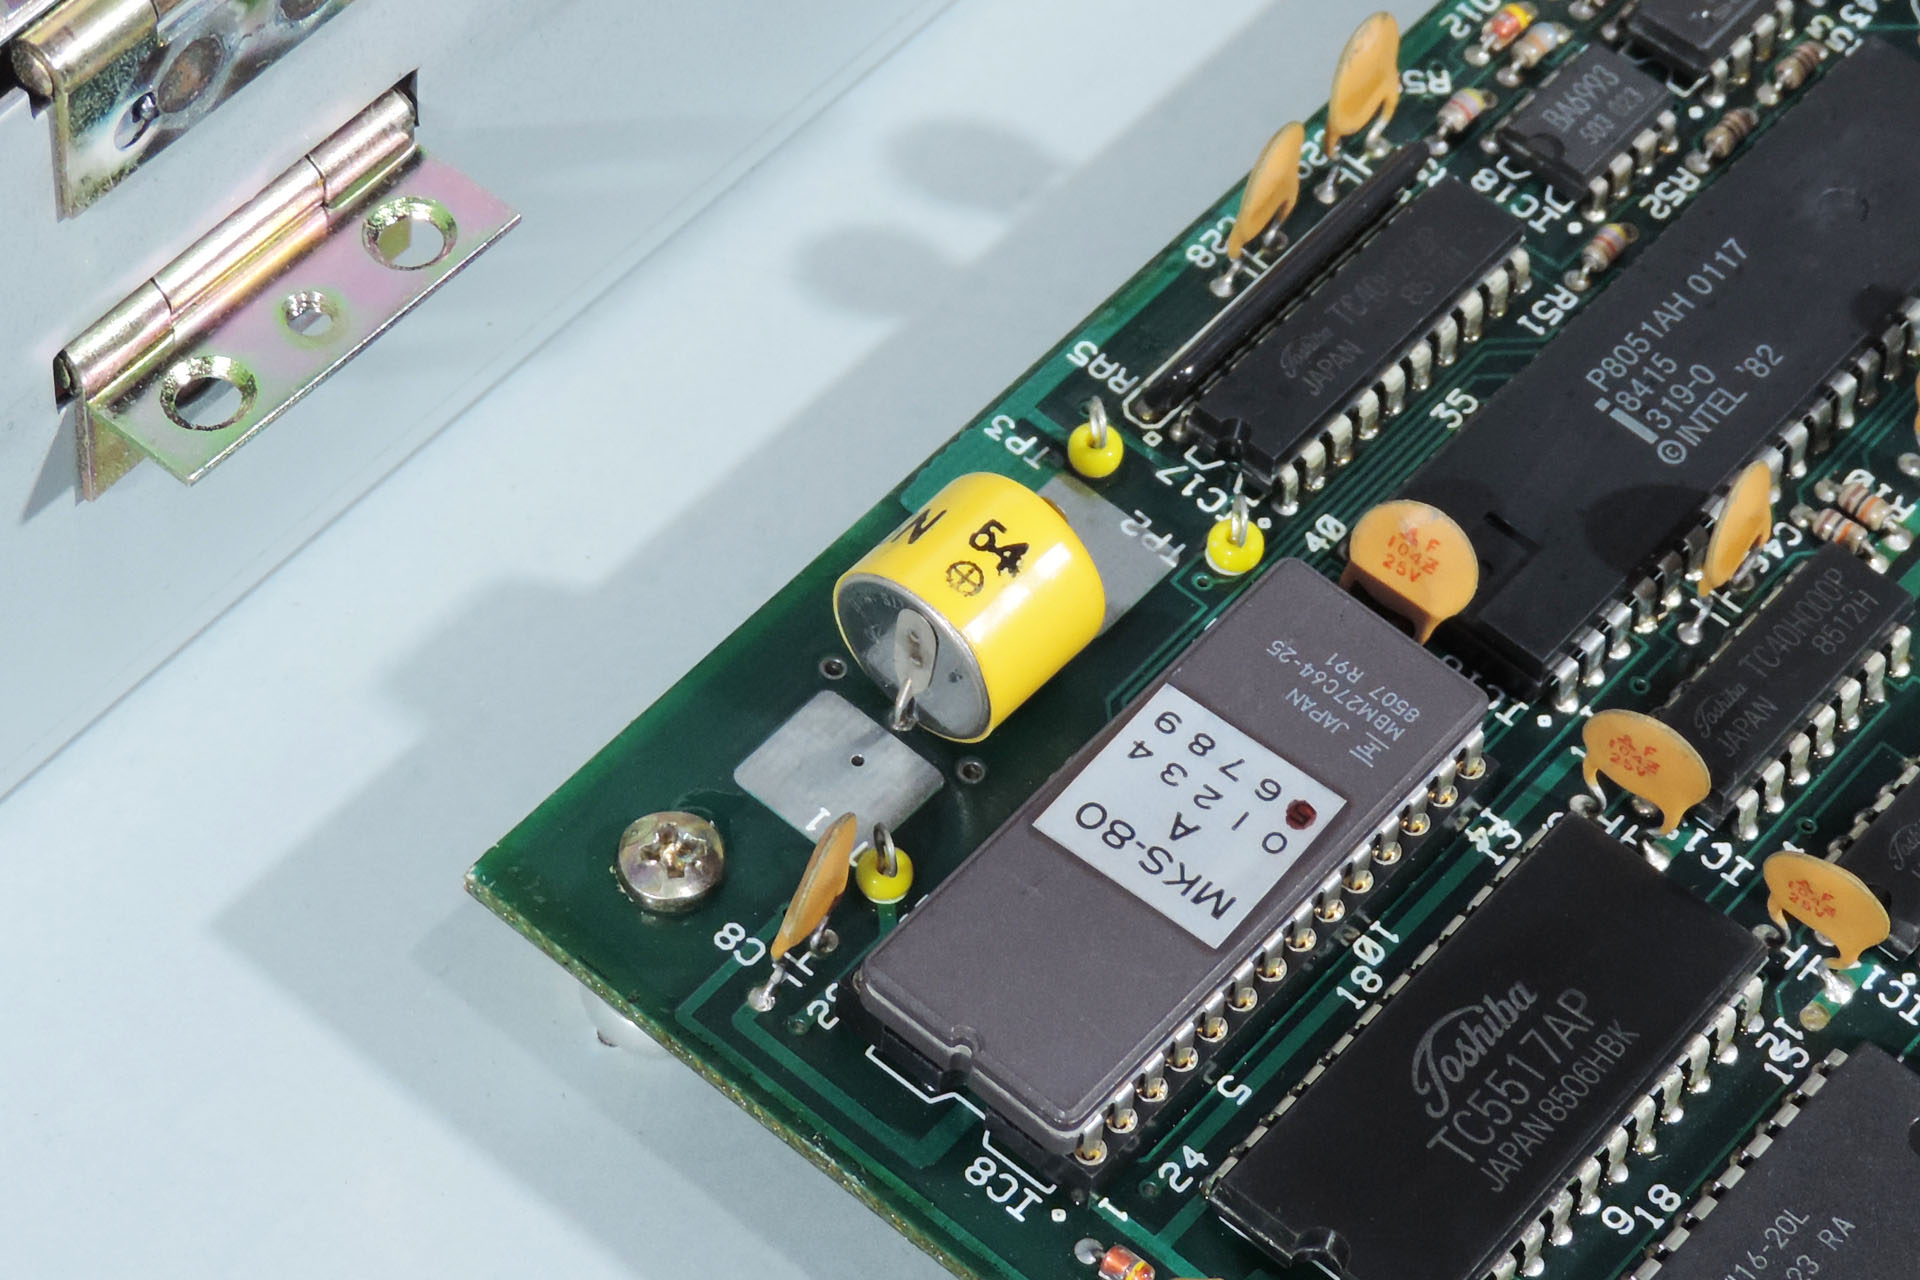
You might just be able to make out that the M-64C data cartridge is kind of just hanging in there. It isn't sitting squarely in the data cartridge slot.
Over recent years, I’ve seen quite a few Roland MKS-80s and many have a broken data cartridge slot. At last, there’s a solution; my V06 Roland MKS-80 Broken Data Cartridge slot fix!
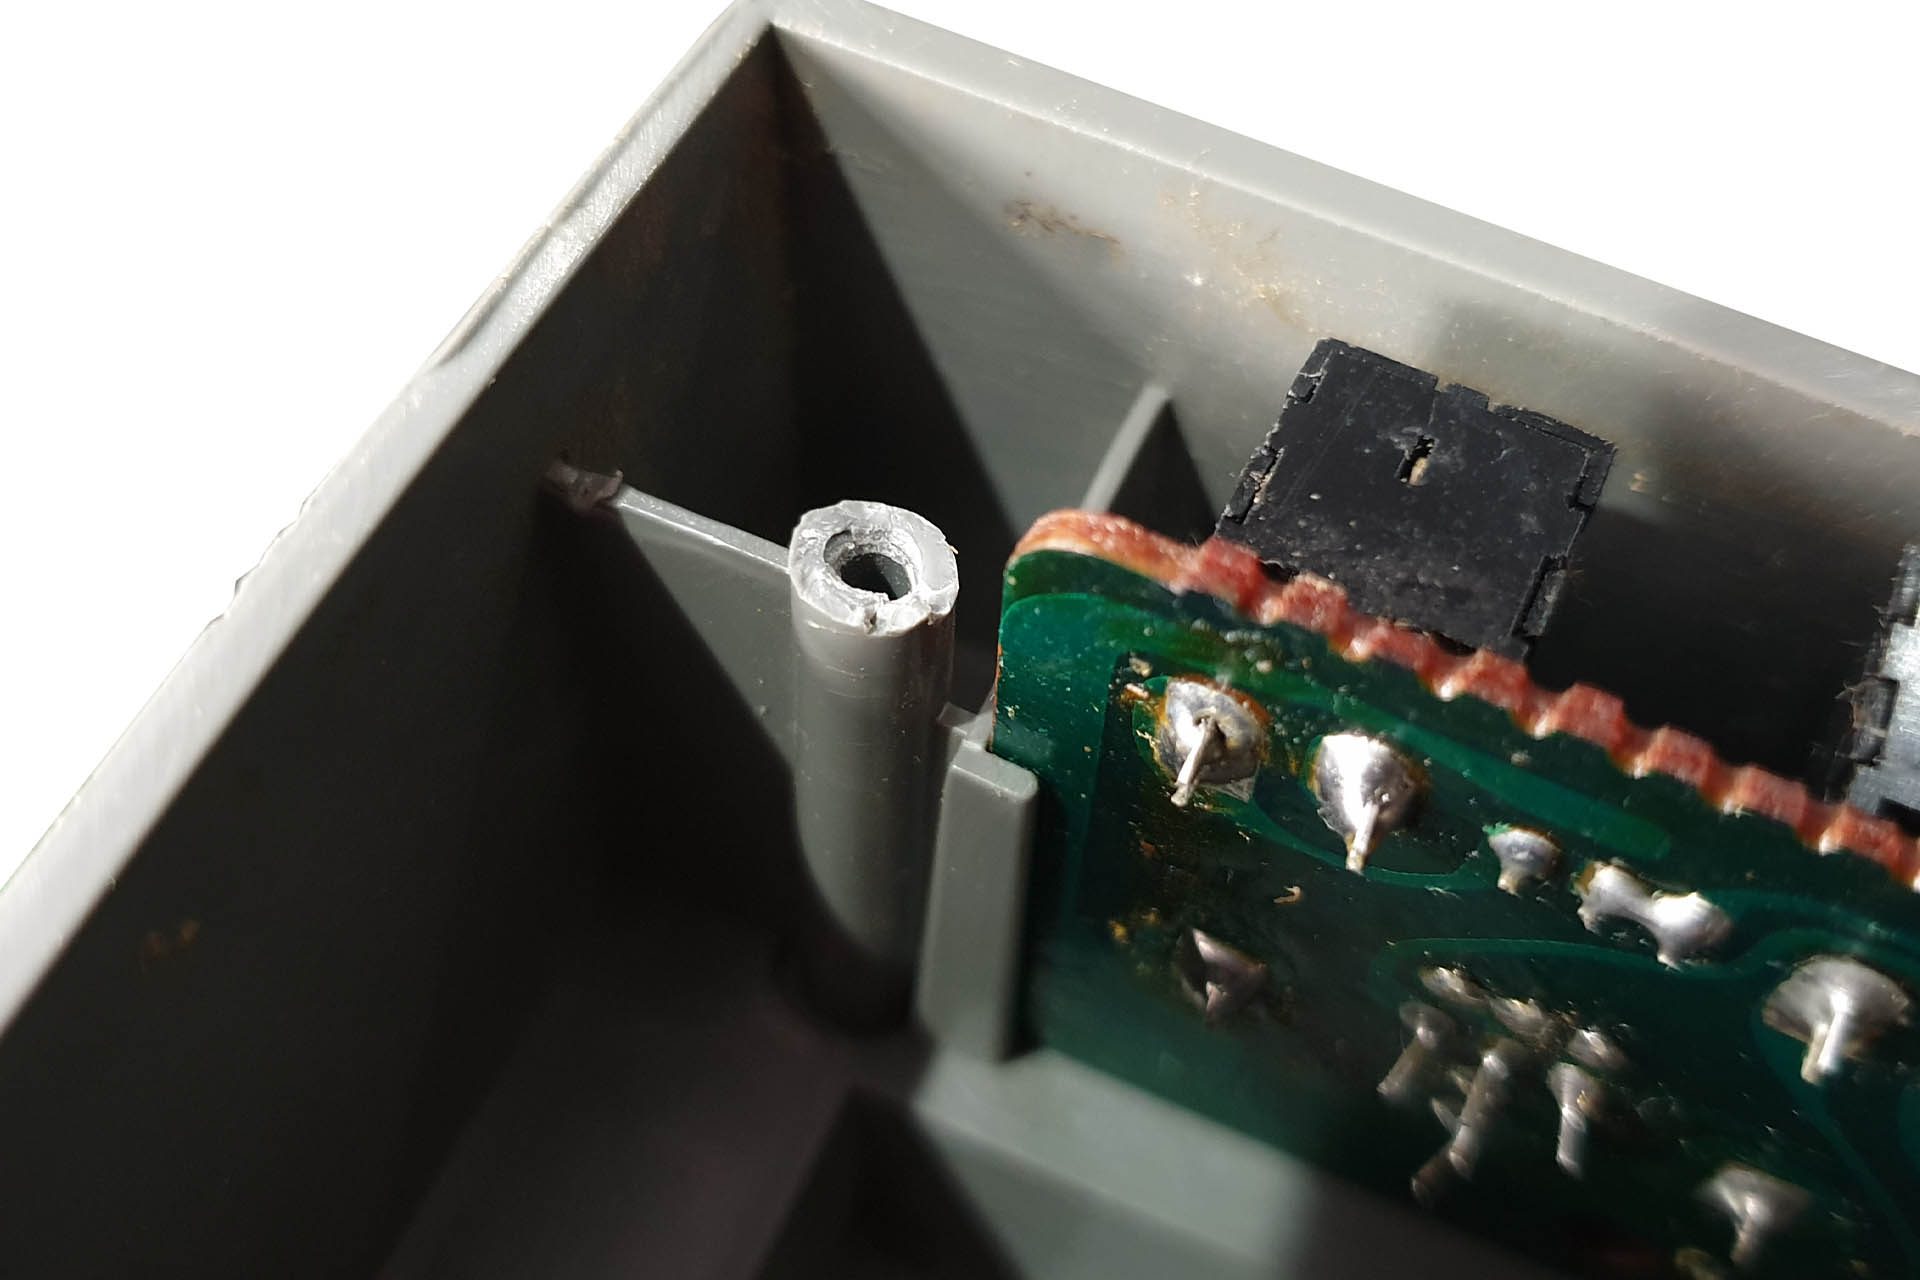
After more than three decades, the hard plastic from which the enclosure is made, has become very brittle and it doesn’t take much to break the screw pillars that secure the enclosure to the front metal chassis.
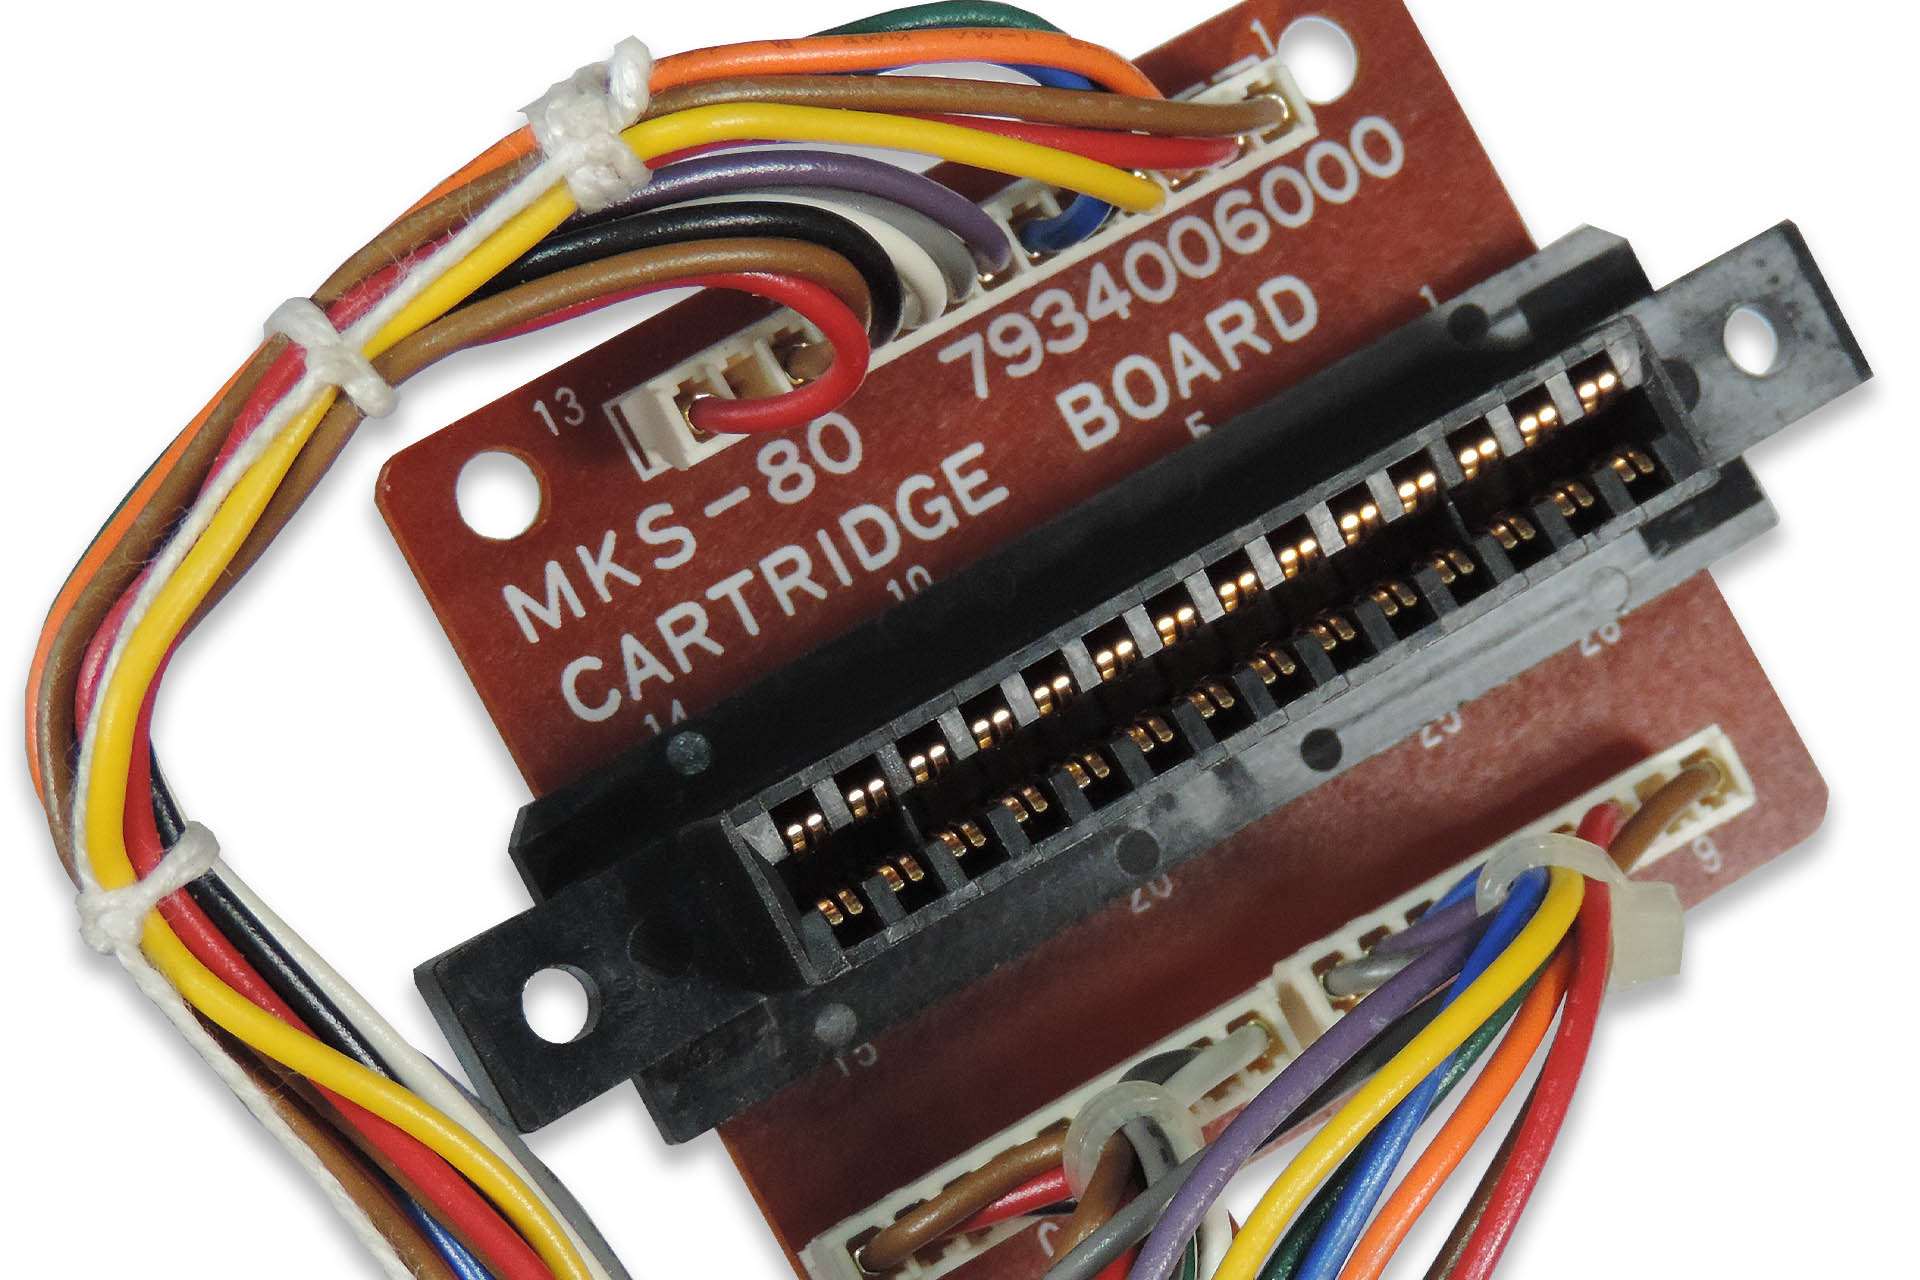
The data cartridge slot assembly comprises two halves. The back half has a female contact strip which mates with the male contract strip in the cartridge. It’s soldered to a small PCB. Long screws attach this section to the front half which has the flap.
MKS-80 data cartridge slot rear assembly.
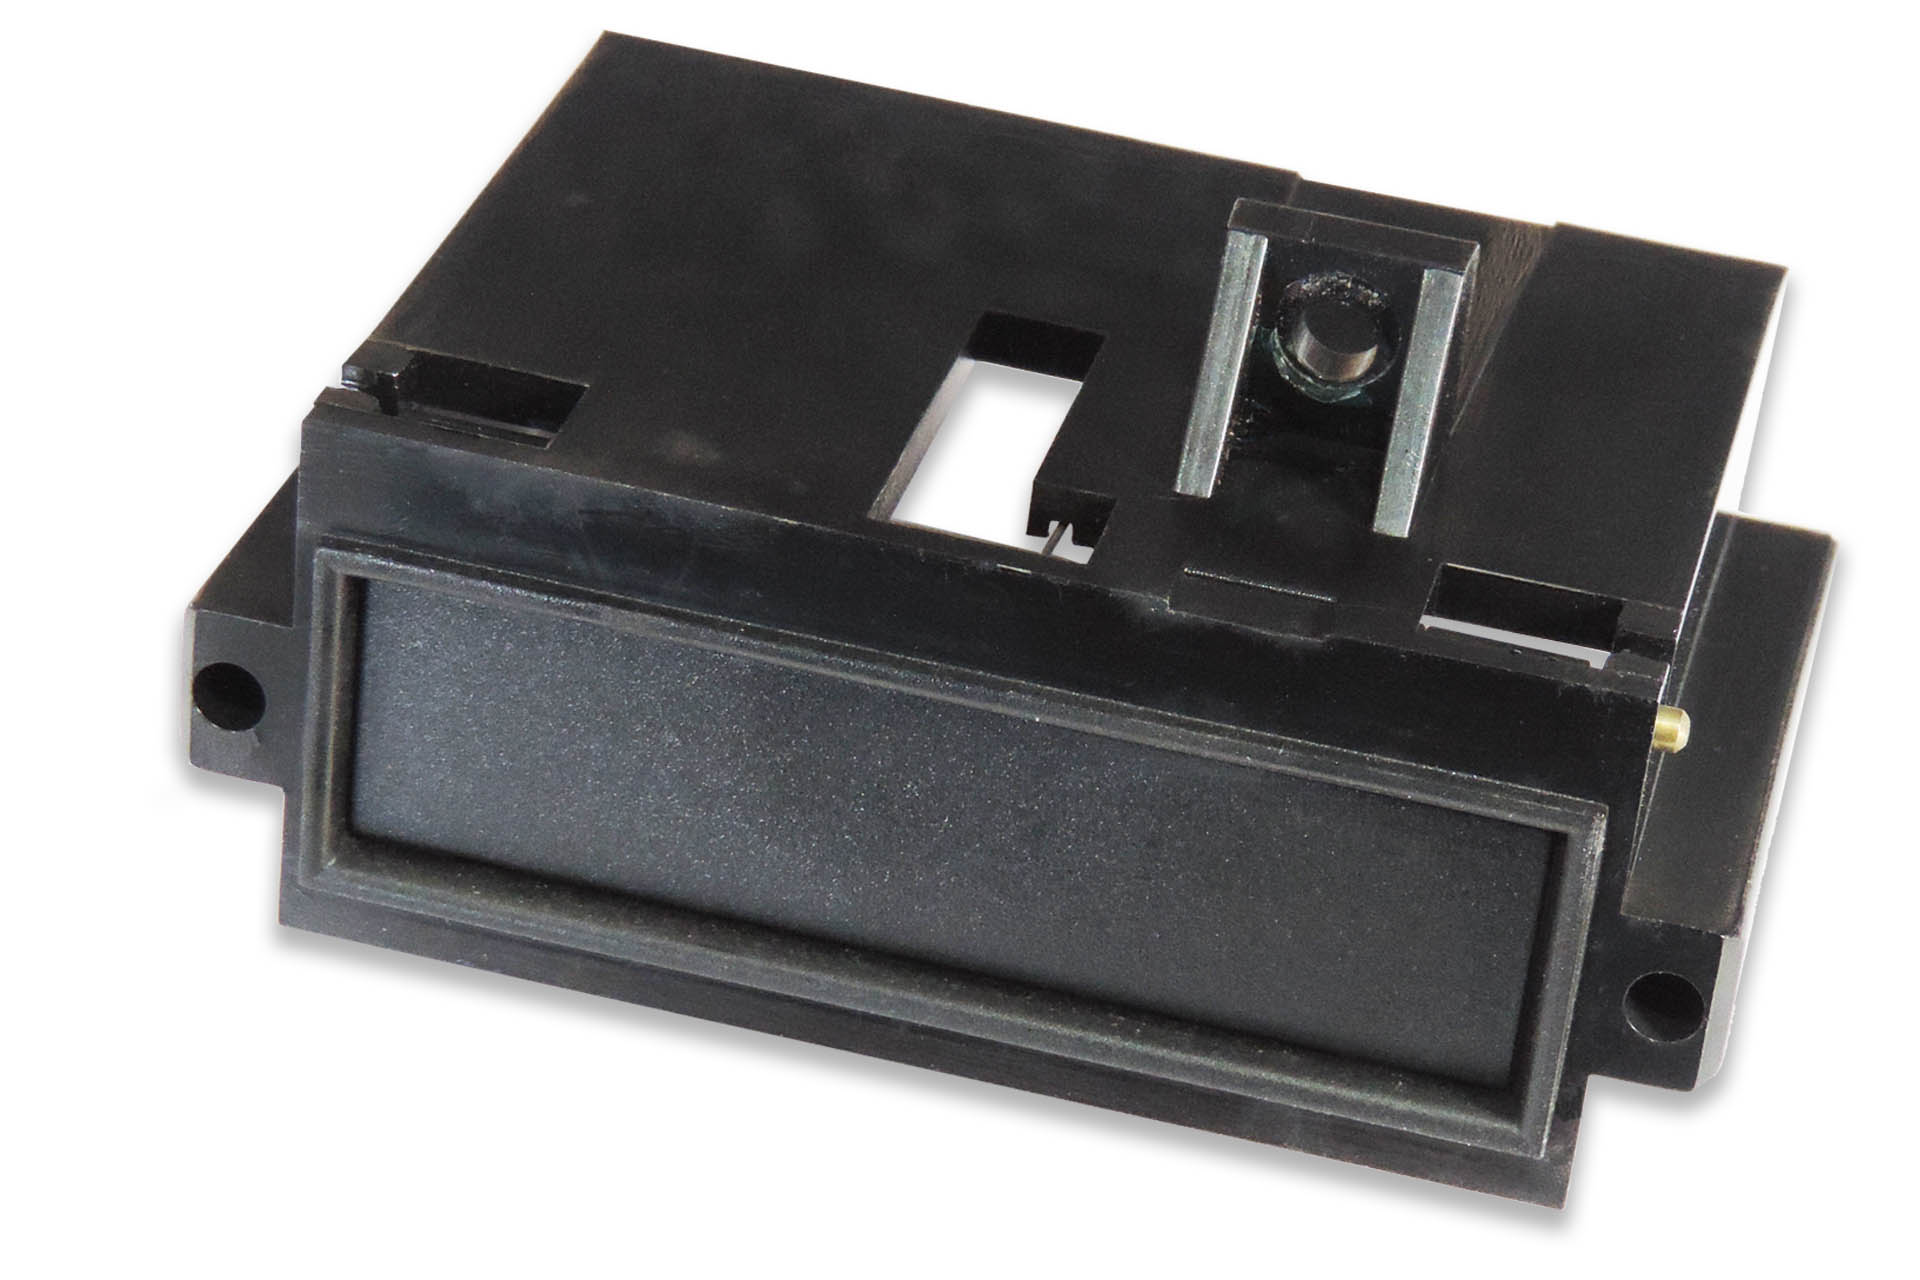
The front half in turn, is secured to the metal front chassis via two M3 screws (one on top right and one at bottom left) that go through two small plastic flanges which are part of the front cartridge slot assembly.
MKS-80 data cartridge slot front assembly showing intact top screw flange.MKS-80 data cartridge slot front assembly is attached to the front metal chassis (under the front panel), via two M3 screws.
The problem is that when inserting a data cartridge, you’re pushing the cartridge slot away from the front chassis and the small plastic flanges through which the screws pass that secure the front half of the slot assembly to the front panel, are stressed.
The most obvious fix is to use a type of cyanoacrylate (super-glue) or epoxy adhesive to repair the broken flanges. Only thing is, those flanges often break into several pieces. It’s a nightmare! If your data cartridge slot is intact, then you really (REALLY) want to avoid this ever happening.
Back in 1984, Roland should have designed the assembly such that it is properly supported from the rear.
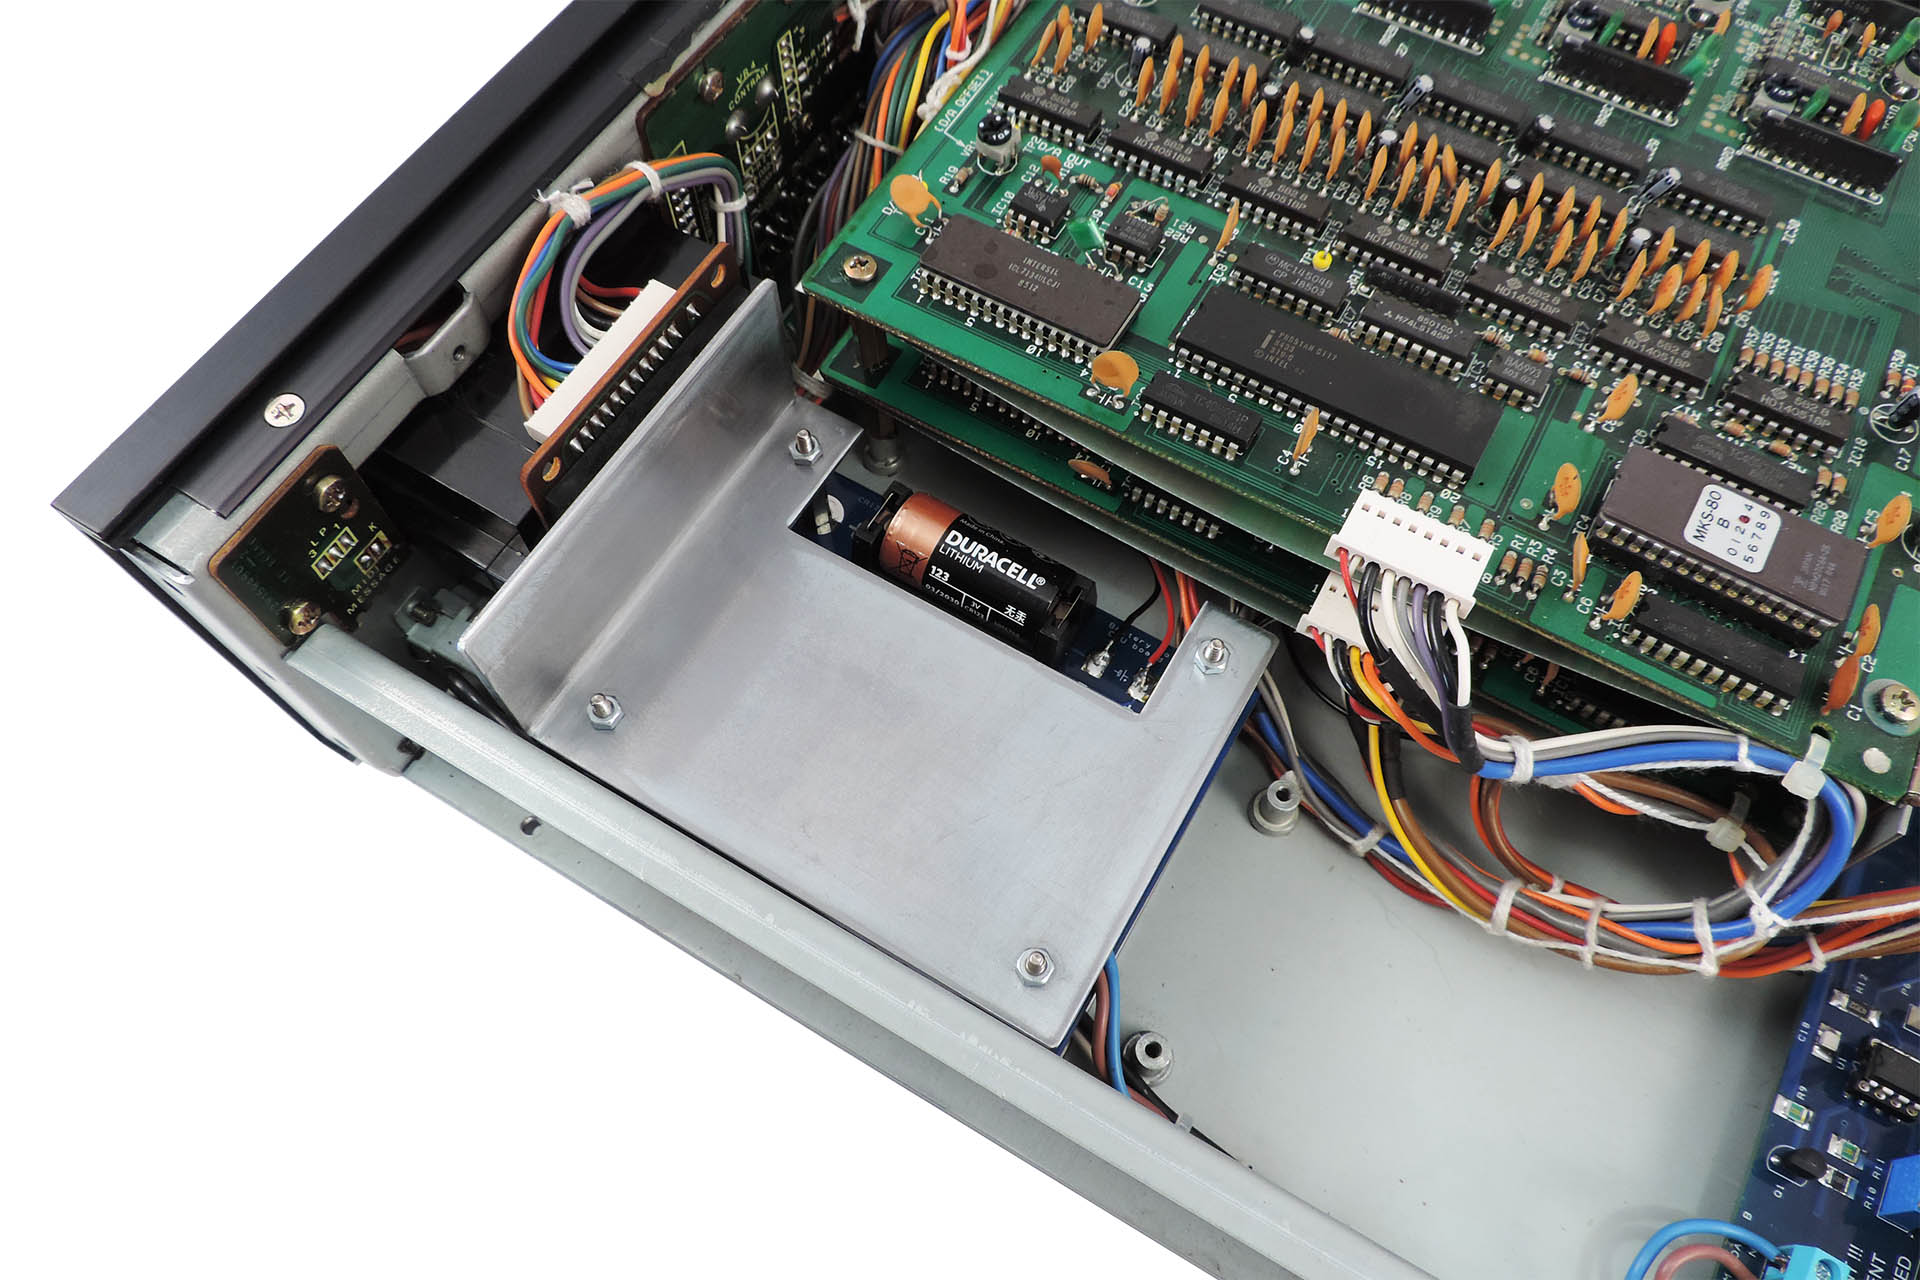
Well, my V06 bracket continues where Roland left off and does just that! Designed to sit neatly on top of my Aurora Board B (or Board Bx), the V06 provides a physical resistance behind the data cartridge slot, thereby reducing the force on the front slot assembly screw flanges, the only things that are holding the whole data cartridge slot in place.
A simple but elegant solution, the V06 Bracket sits on top of the Aurora Board B (or Board Bx) and is a great fix for a broken data cartridge slot on a Roland MKS-80.
The very front of the data cartridge assembly, is designed such that it 'rests' on the MKS-80 front panel slot cut-out. This means that so long as there's something solid behind the assembly (like the V06), it's not going to move from side-to-side, let alone backwards and forwards.
If the data cartridge slot in your MKS-80 is just fine and you’re interested in Aurora, then you really should consider fitting the V06 bracket. Instead of relying solely on the enclosure’s two screws and the integrity of the screw flanges, the V06 will provide substantial protection against breakage.
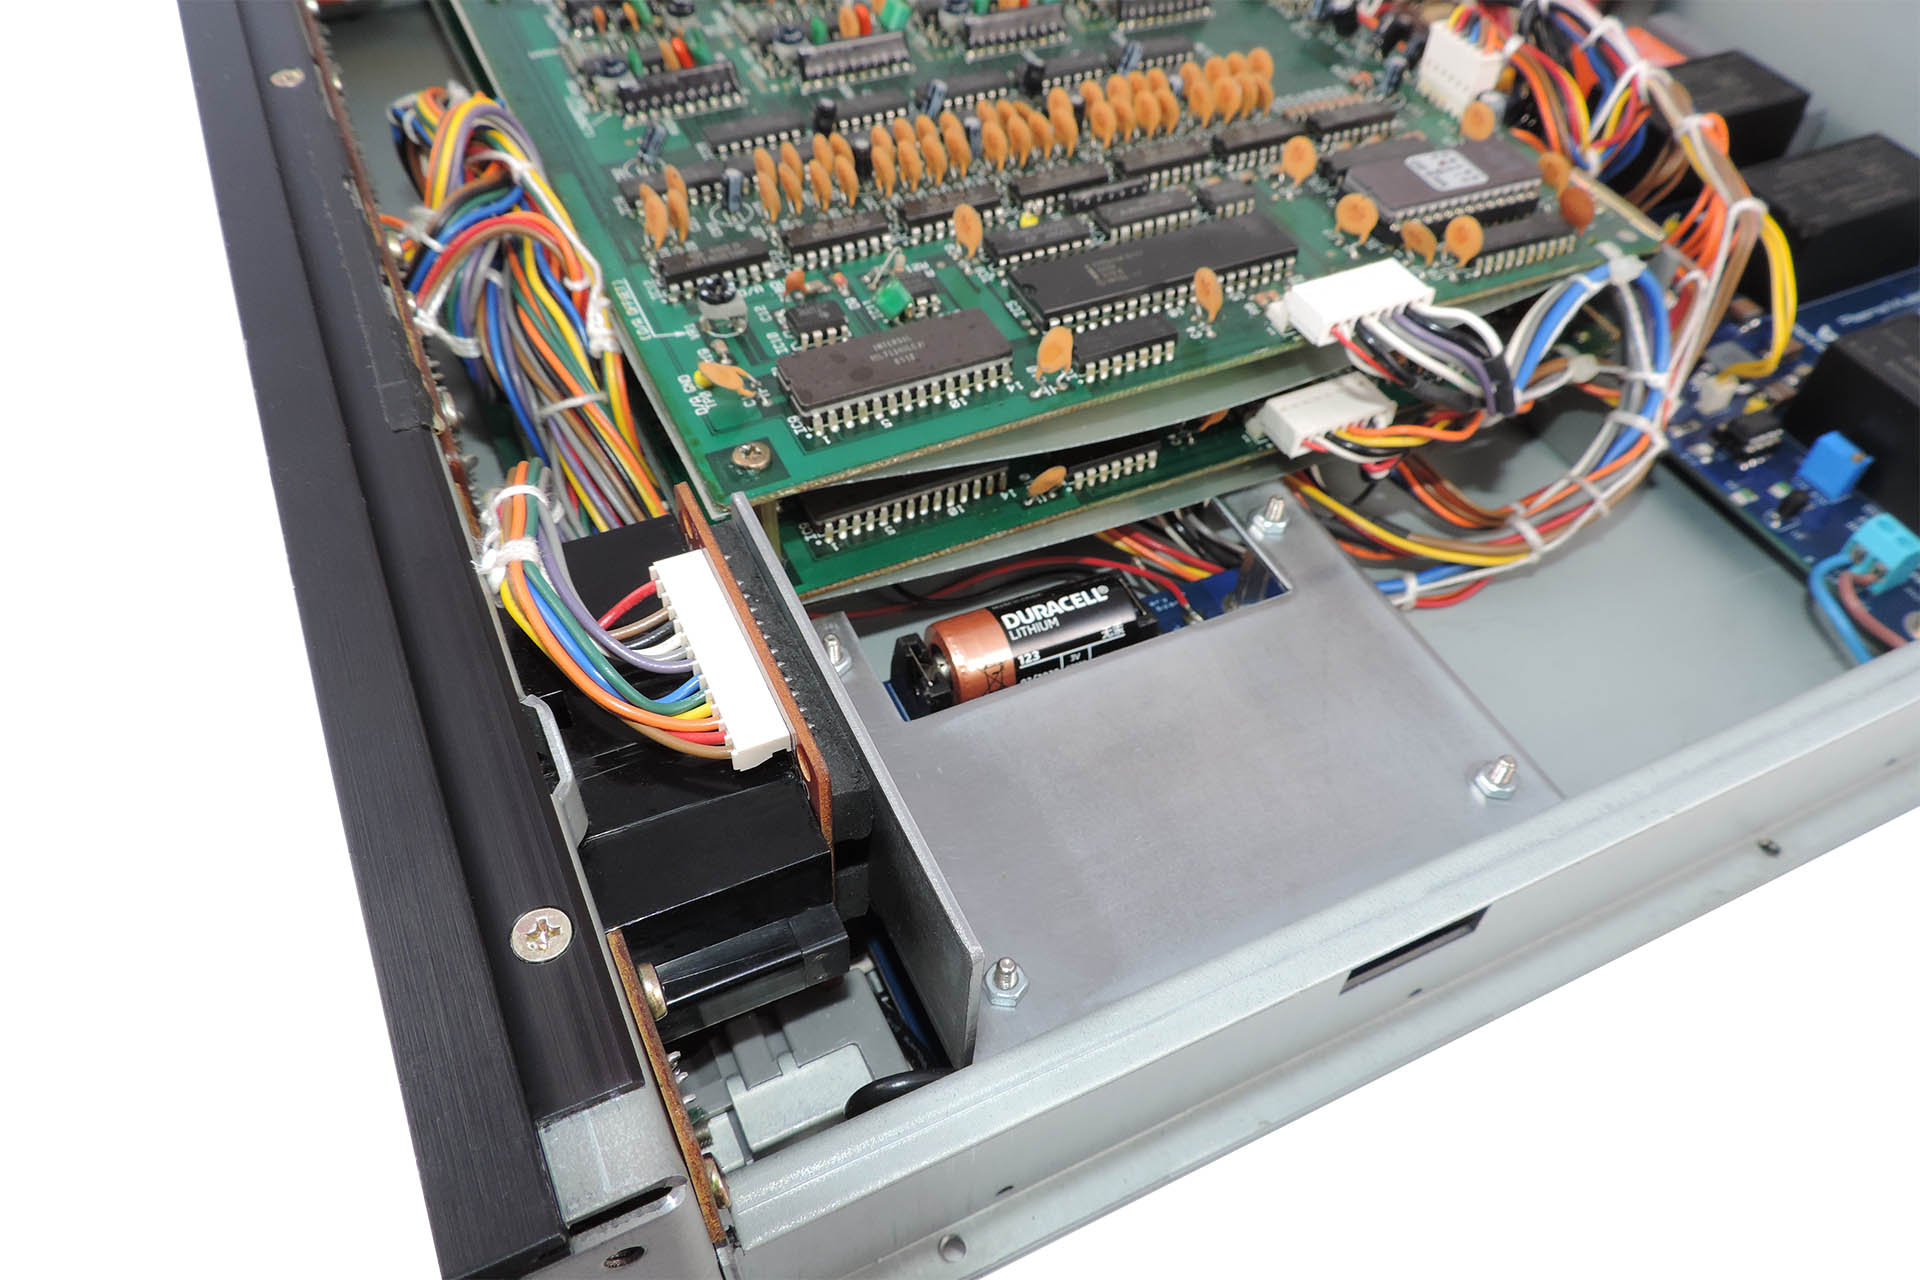
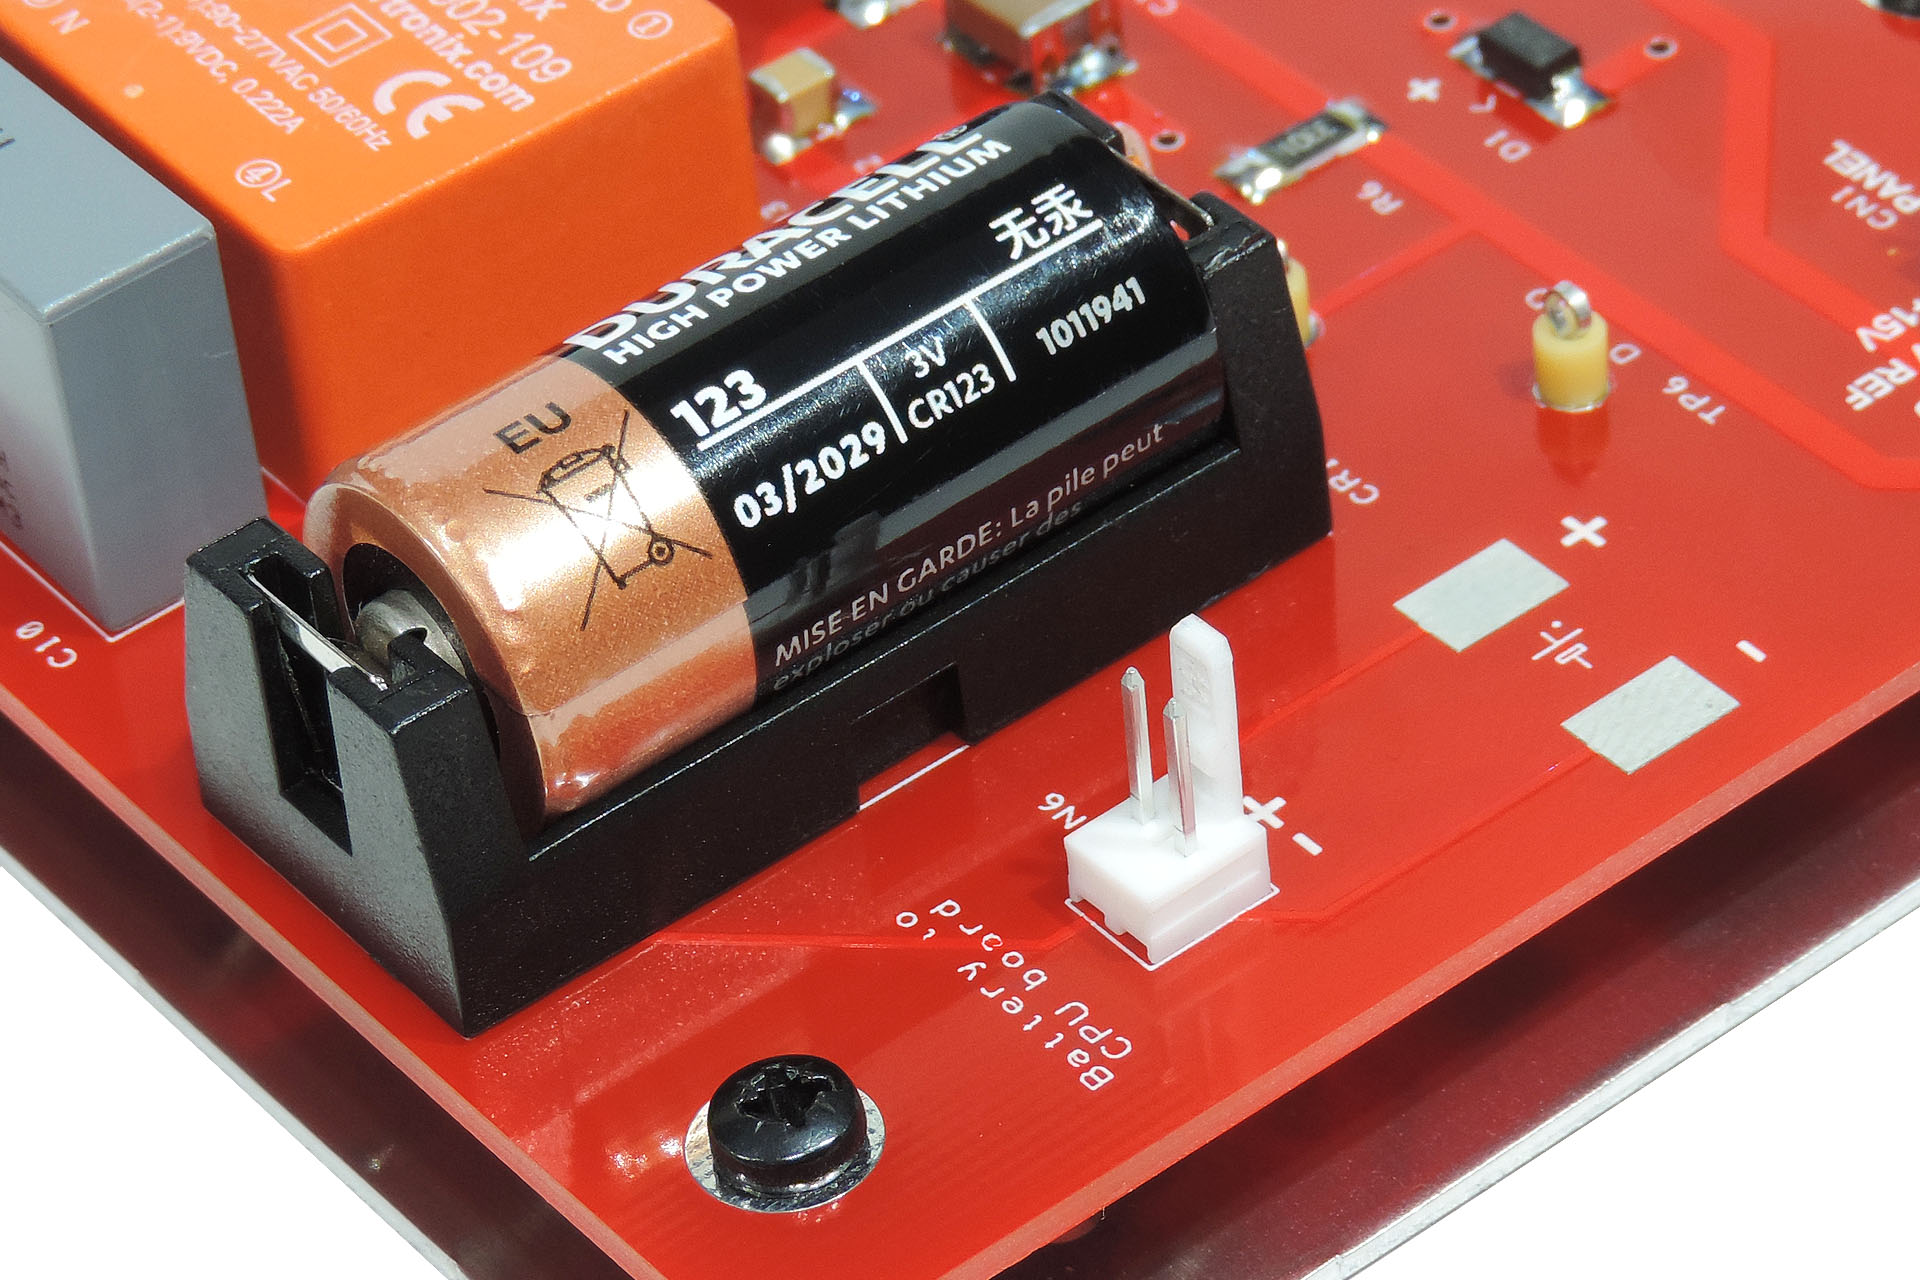
The V06 bracket has a convenient cut-out which allows access to the voltage measuring pads for the Aurora Board Bx’s on-board Live Forever battery. That’s right, you don’t have to remove the V06 to check the battery voltage on the Aurora Board Bx! Hey, you don’t even have to remove the V06 if you need to ever change the Aurora Board Bx’s CR123! How cool is that?
V06 showing convenient cut-out for access and measurement of CR123 Live Forever battery on Aurora Board Bx.
I wish I thought of the V06 when I designed Aurora but all this stuff is kind of an evolutionary process. The Aurora Board Bx for example, didn’t happen until several months after Aurora was released. The two power supplies I’ve subsequently designed for other vintage synths however, both included my on-board Live Forever battery mod, from conception.
When I did come up with the idea of V06, I wanted something that could be retrofitted, a solution which existing Aurora customers could purchase and easily install themselves.
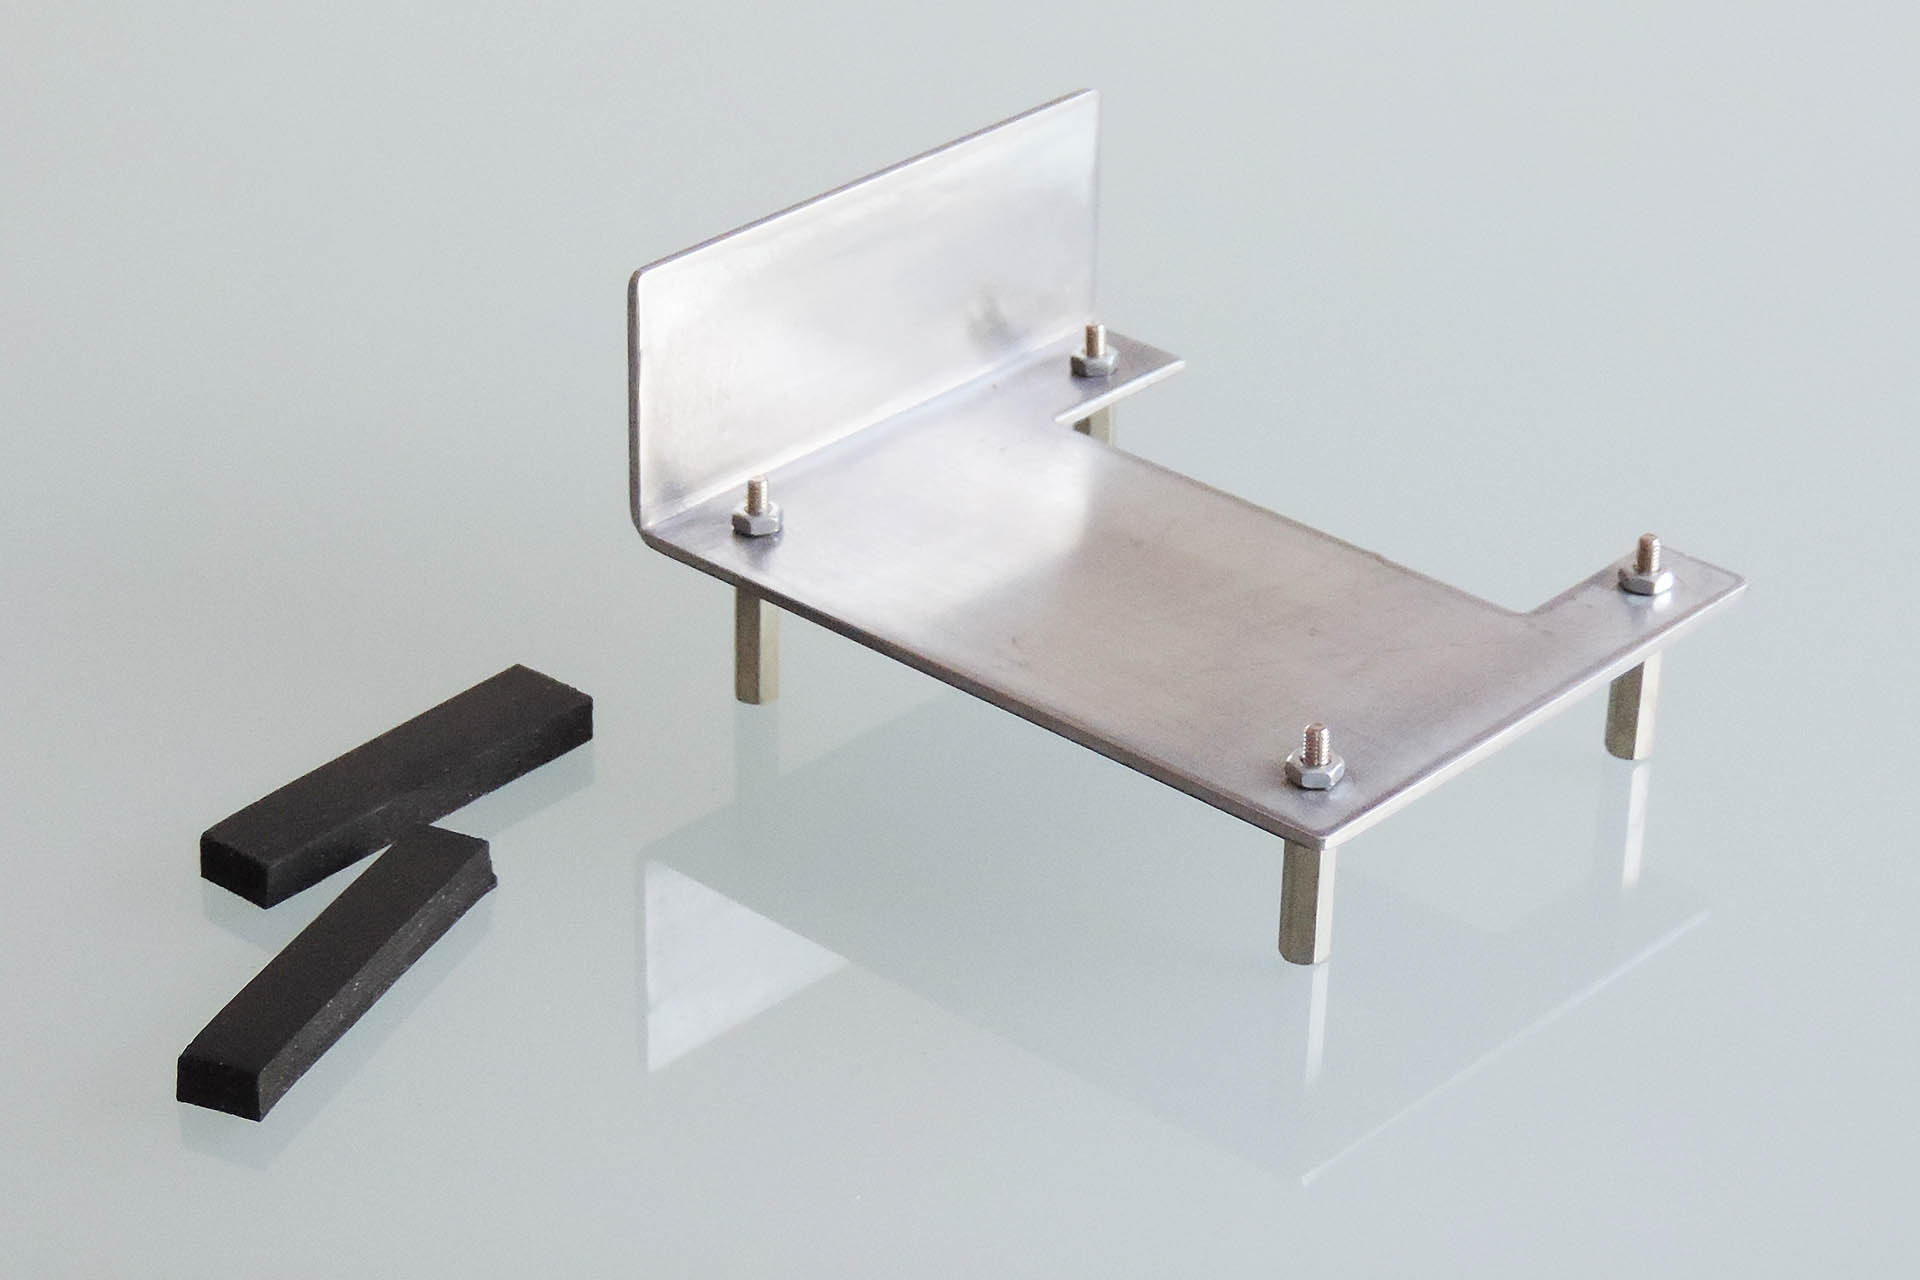
V06 is just so easy to fit:
Just peel off the sticky tape protectors and attach the two rubber strips to the back of your data cartridge slot PCB (as shown below), in the two areas free of solder joints.
Replace the four M3 nuts that secure Aurora Board B or Board Bx, with the 20mm M3 stand-offs supplied with the V06.
With one hand, line up the data cartridge slot with the slot in the MKS-80 front panel and then with the other hand, slide the V06 plate on to the four stand-offs.
Push the V06 plate forwards towards the data cartridge slot and use the M3 nuts you just removed, to secure the plate.
Job done!
With just a M3 (5.5mm) nut-runner and no disconnecting of internal headers or soldering, once your MKS-80 is open, V06 can be installed in a couple of minutes.
6mm high-density neoprene rubber, provides excellent shock absorbency between the data cartridge slot's rear PCB and the V06 bracket.
So now, Aurora offers the following long-term solutions for the Roland MKS-80:
Reliable, smooth, quiet power supply.
Live Forever memory back-up battery.
V06 Roland MKS-80 broken data cartridge slot fix.
Now that’s cool! 😀
NOTE:
V06 can only be installed into a Roland MKS-80 that’s fitted with Aurora.
V06 is supplied with all fixing hardware. All you need is a M3 (5.5mm) nut-runner.
The V06 is supplied with four 20mm M3 stand-offs and two 6mm neoprene rubber pads with double-sided adhesive tape..
If you have already bought Aurora and would like a V06, please just get in touch.
UPDATE - 4th May 2021
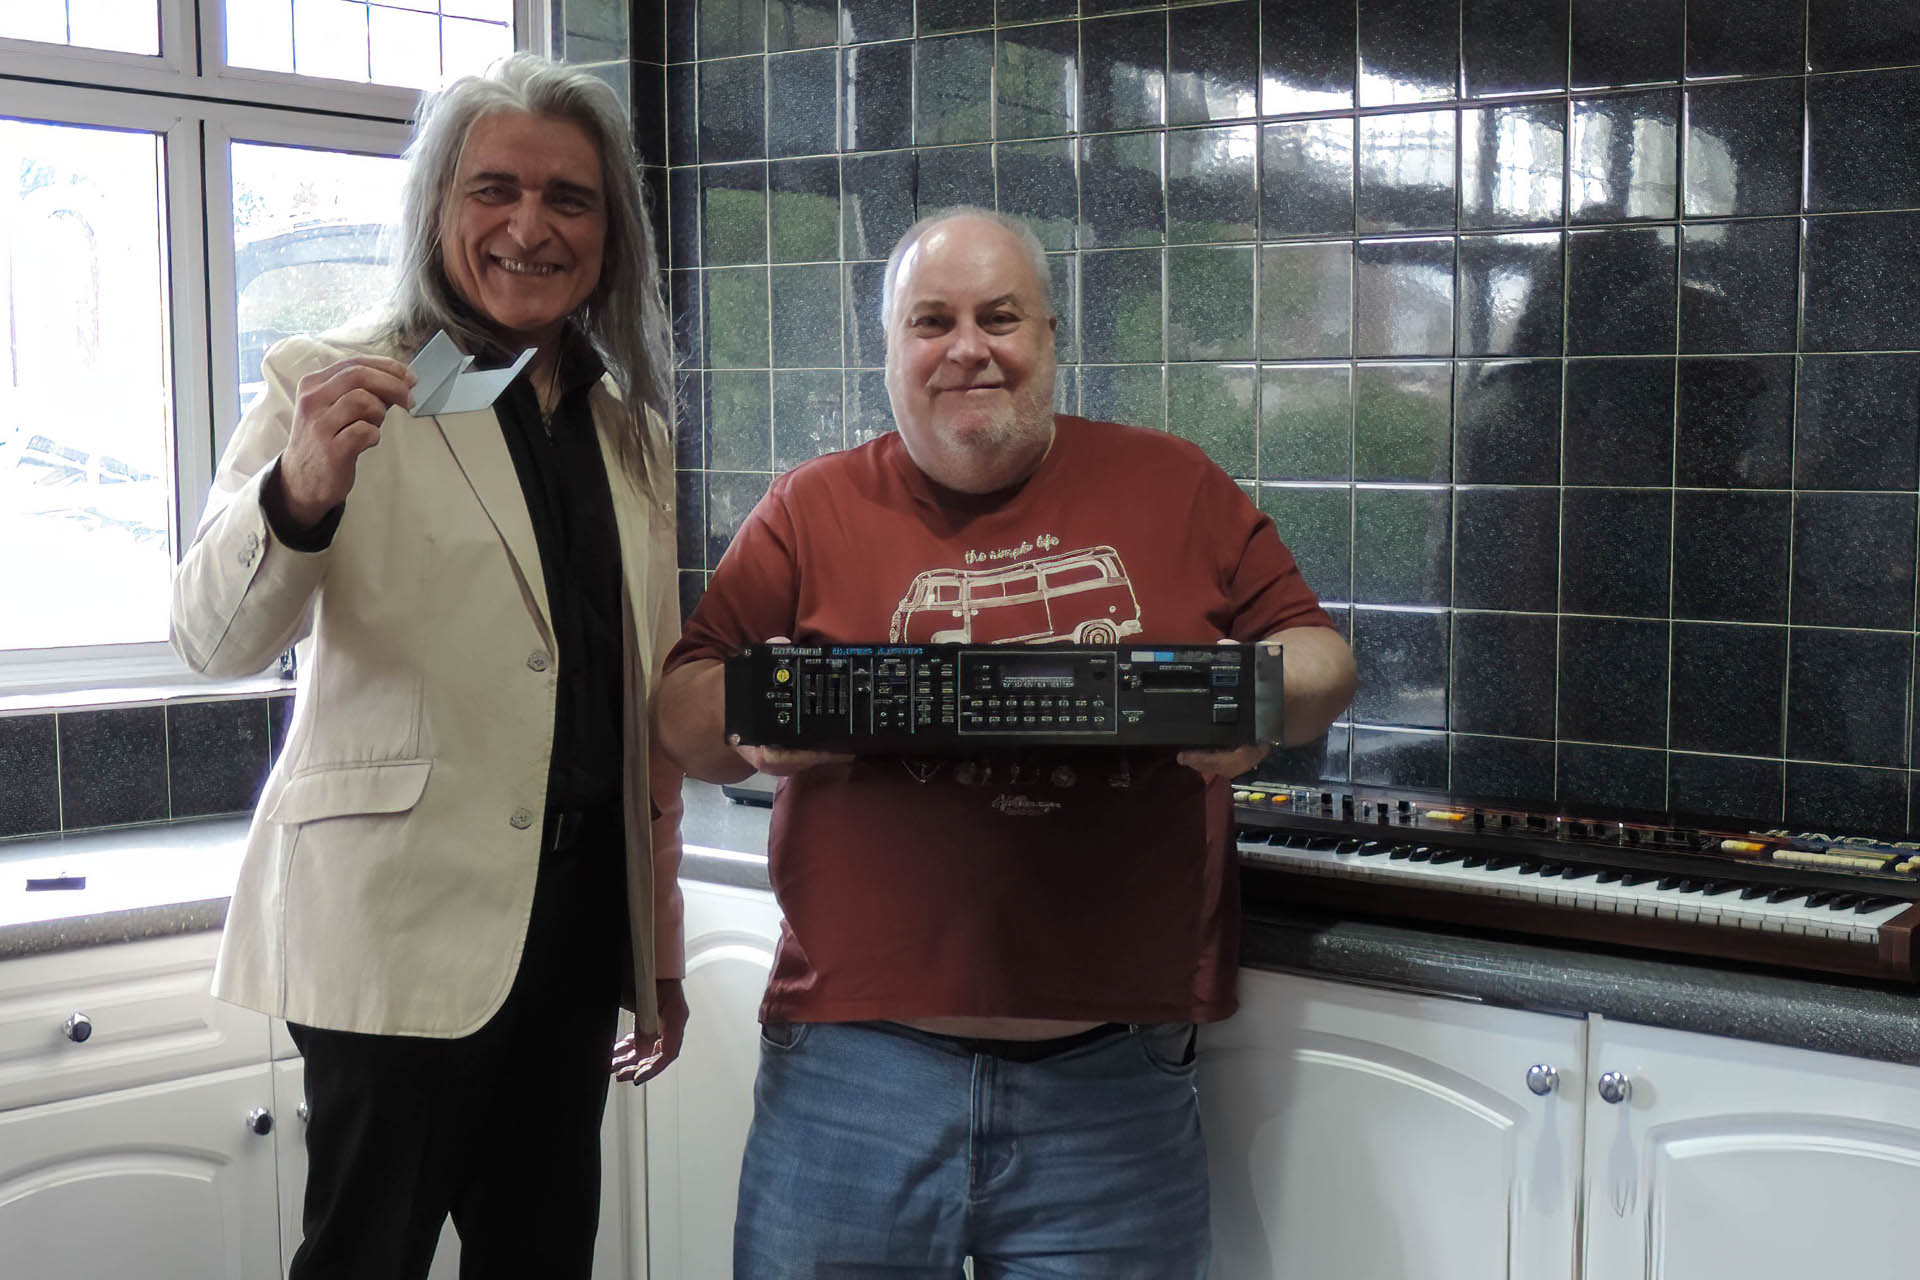
Jed Allen collecting his Roland MKS-80 now Aurora powered and with the very first V06 bracket.
Back in the eighties, Jed Allen and I used to work together at Roland (UK), so imagine my surprise when he called asking if I could fit an Aurora into his MKS-80!
Jed's machine was in really good condition apart from the data cartridge slot which was very broken. In fact Jed told me that it had been bust for decades and that no one could fix it. Hmm... So while I was installing his Aurora, a little deep thought and I came up with the idea of the V06 bracket.
Jed kindly agreed to me keeping his machine for a few more days while I designed and had made the V06 (hey, what are friends for) and of course he became my very first V06 customer.
Apart from the pictures of the intact data cartridge slot assembly, all the other pictures are of Jed's MKS-80 and the V06 that went into it. And YES, that's Jed's Roland Juno-60 in the background, which I serviced at the same time. 🙂
If you already have an Aurora board fitted and would like to protect the data cartridge slot assembly in your MKS-80, you can buy V06 now...
Recently, one of my regular customers put his Roland MPG-80 up for sale, having acquired a Retrtoaktiv MPG-8X. I’ve always, always wanted a MPG-80 to (obviously) go with my MKS-80 but I’ve never seen one in the kind of condition I’d like. Dan’s MPG-80 however, was pristine so I made him an offer which he conditionally accepted, the condition being that I provide him with a Roland SH-101 service.
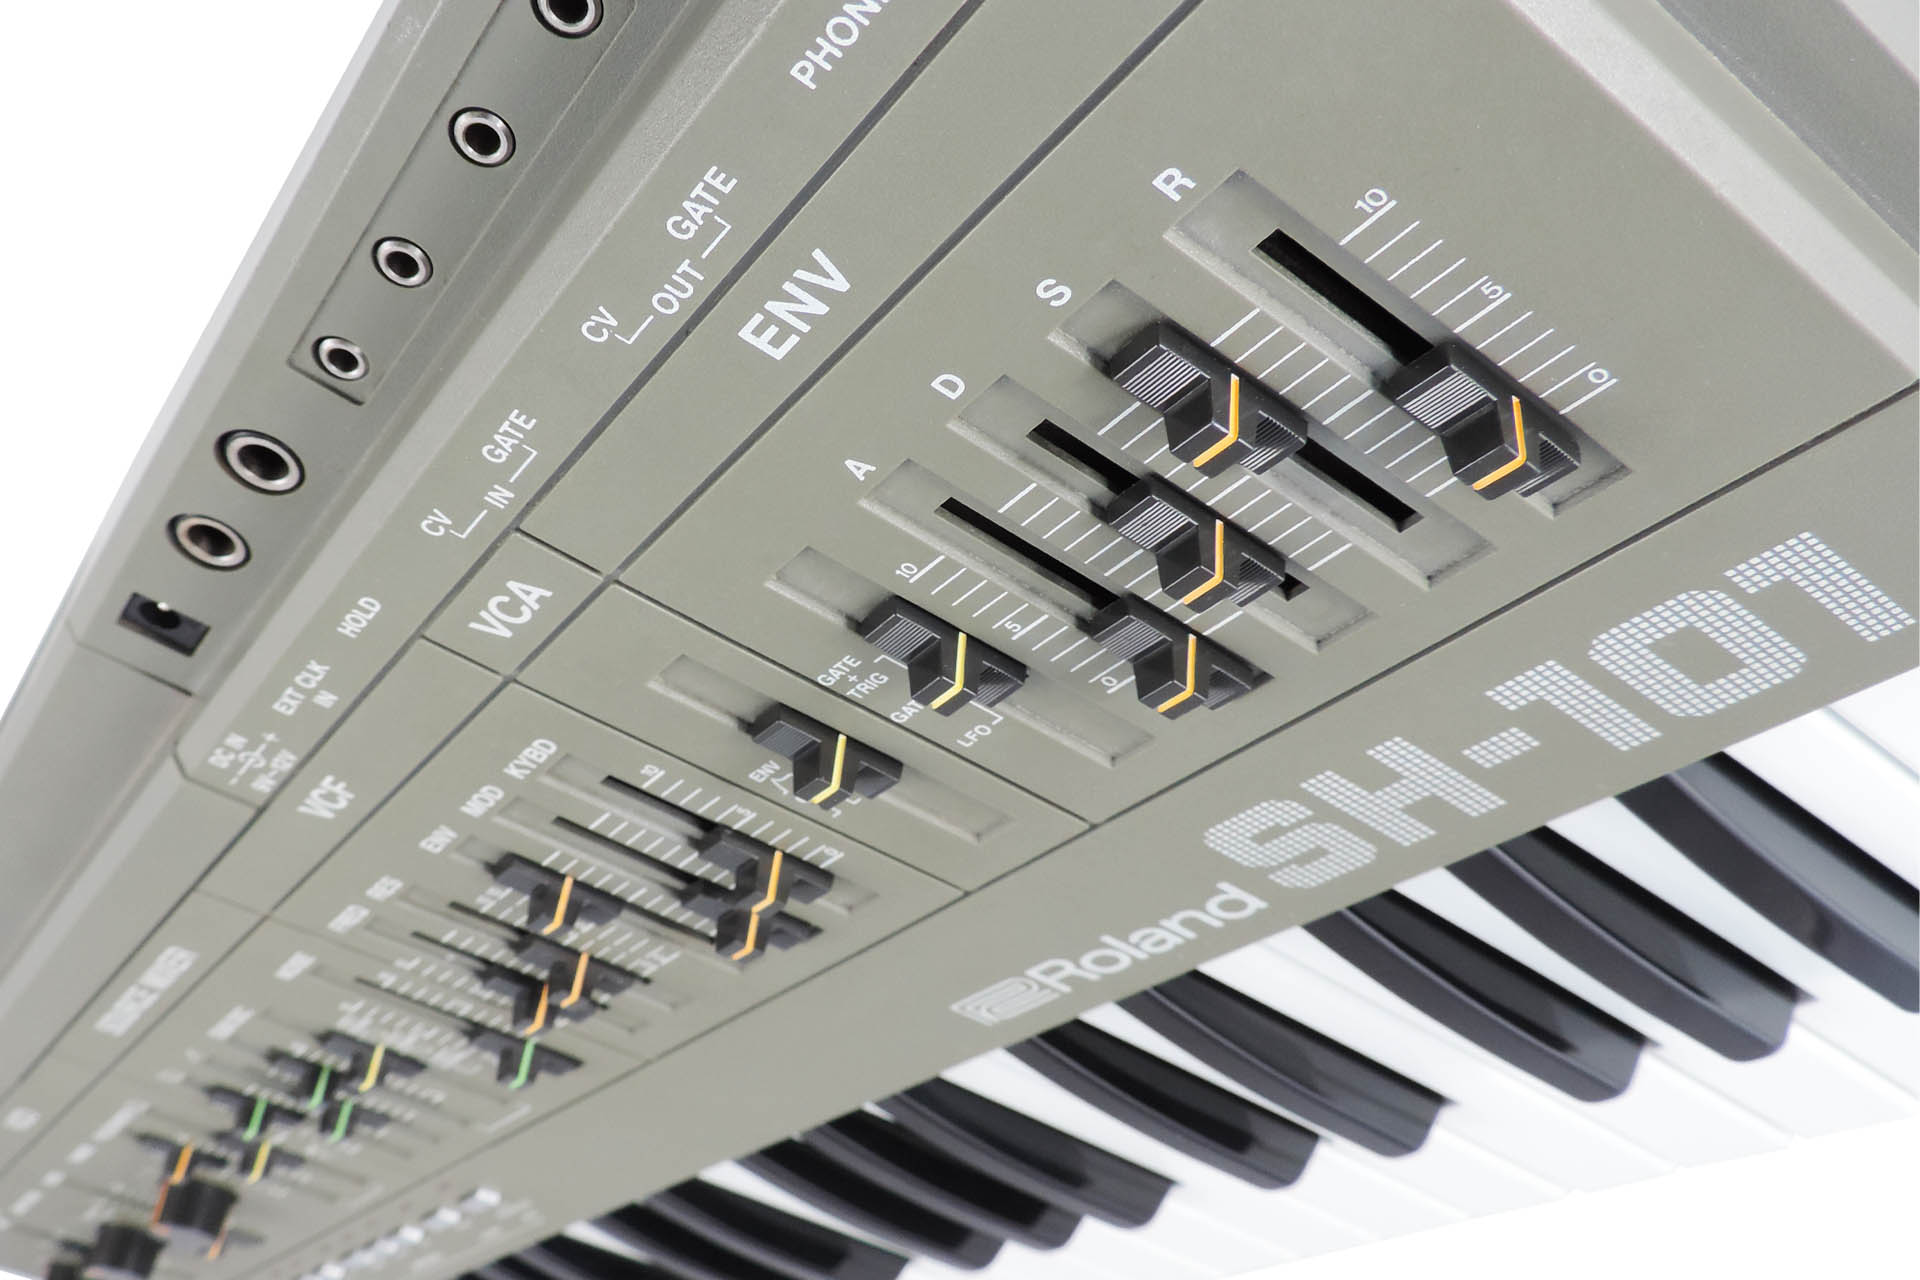
Dan told me that he’d picked it up at a knock-down price but although cosmetically things seemed okay, some sliders weren’t working properly, some keys were intermittent as well as similar problems with power. Hmm… Okay, let’s have a look.
Well, when I took this thing apart, I was shocked to see the dust and grime within. On top of that, it had sustained fluid damage and from what I could tell, twice!
This SH-101 was completely full of crap! It was clear that this poor ol’ gal had been kept in a smoker’s environment. The pads that cover the switches, just crumbled. That’s right. Tobacco smoke doesn’t just discolour, it reacts with certain materials, making them stiff and brittle.
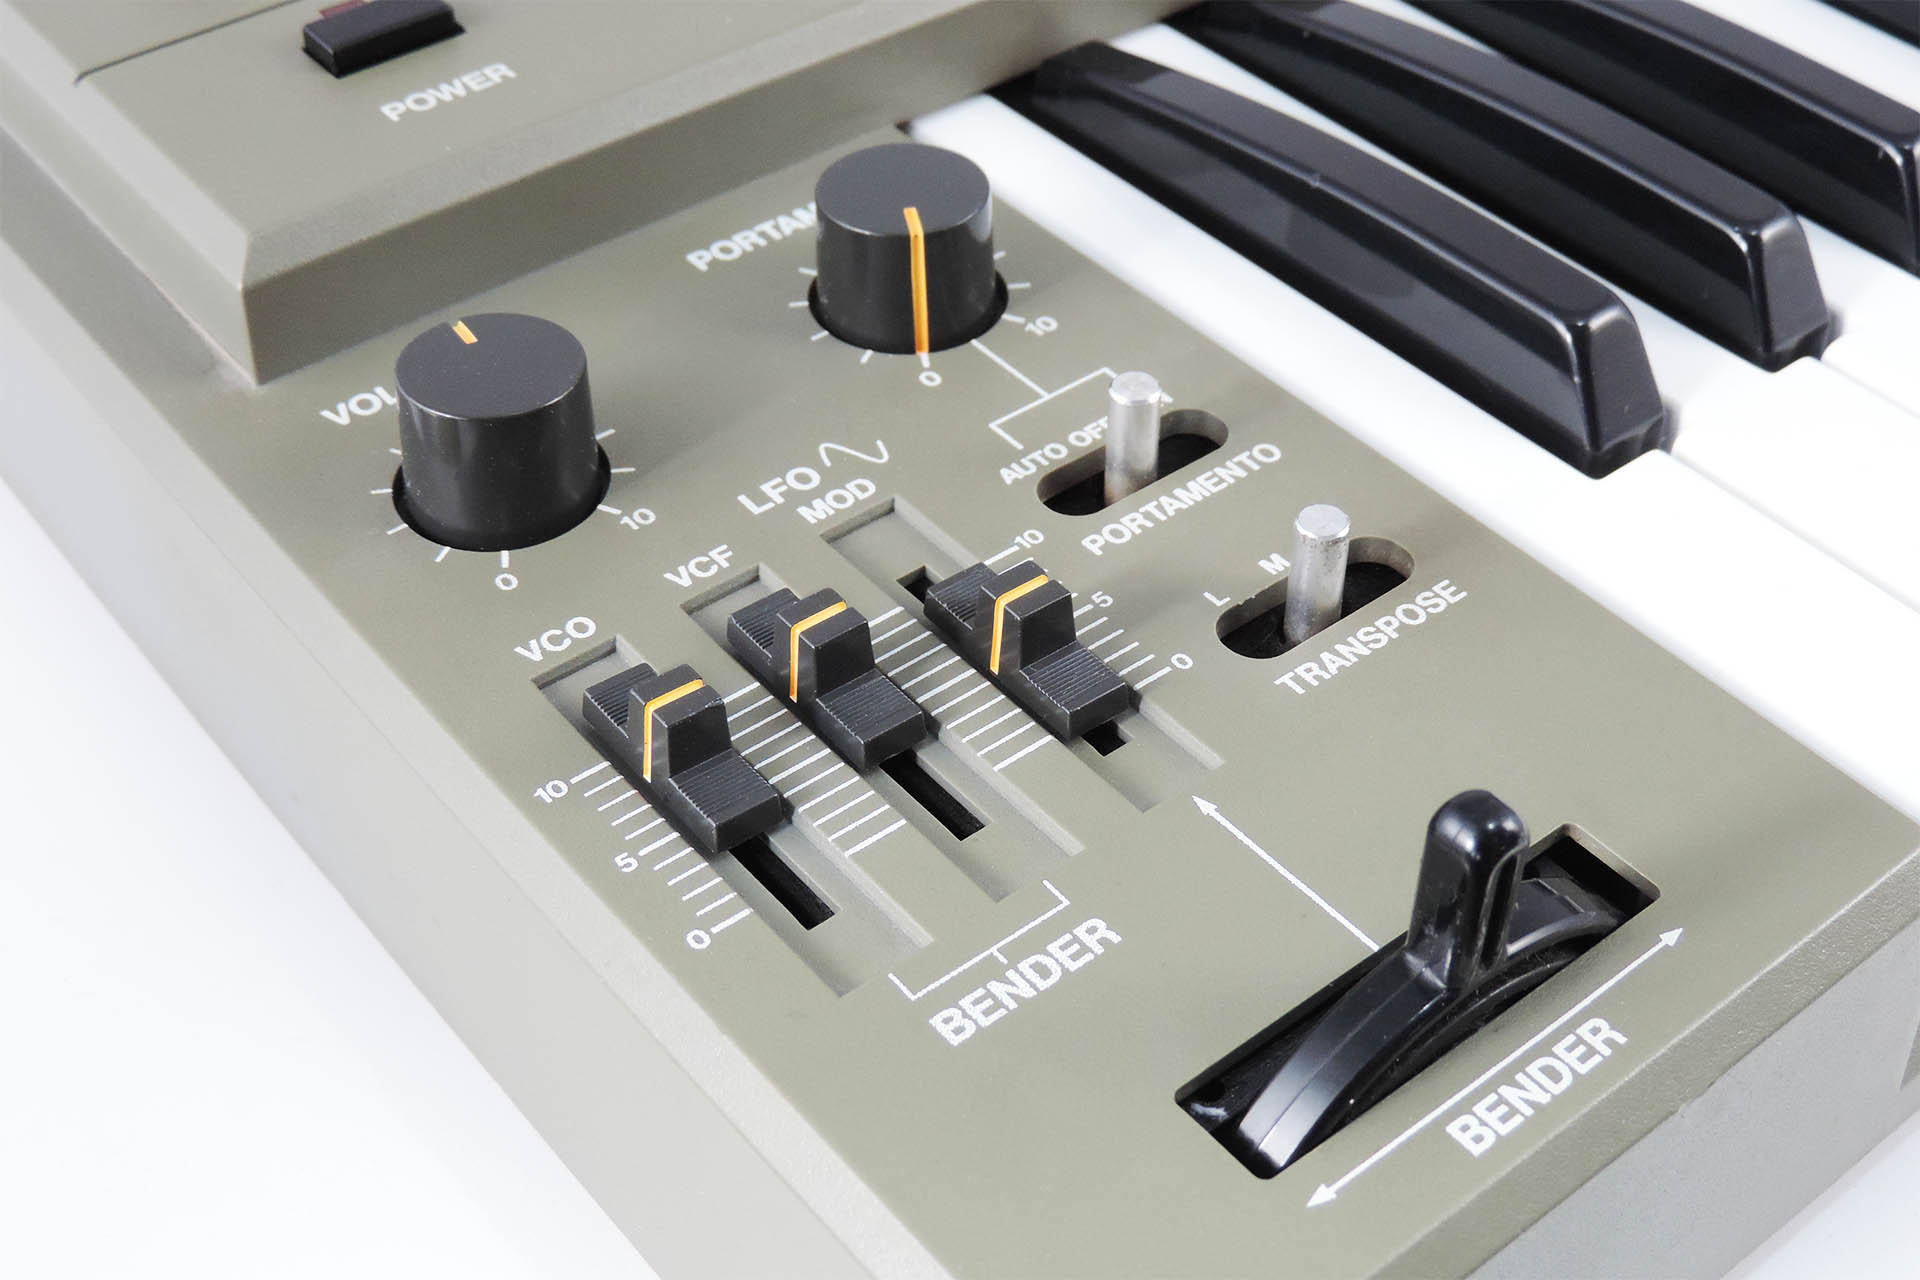
The dust covers underneath the Portamento and transpose switch levers, just crumbled. Difficult to see in this picture but I managed to replace them with some of my black magic thingy!!!
It was no surprise then, to suss out why some keys were intermittent and why some sliders had quite poor performance. Dan, this is a little more than a standard Roland SH-101 service, mate!
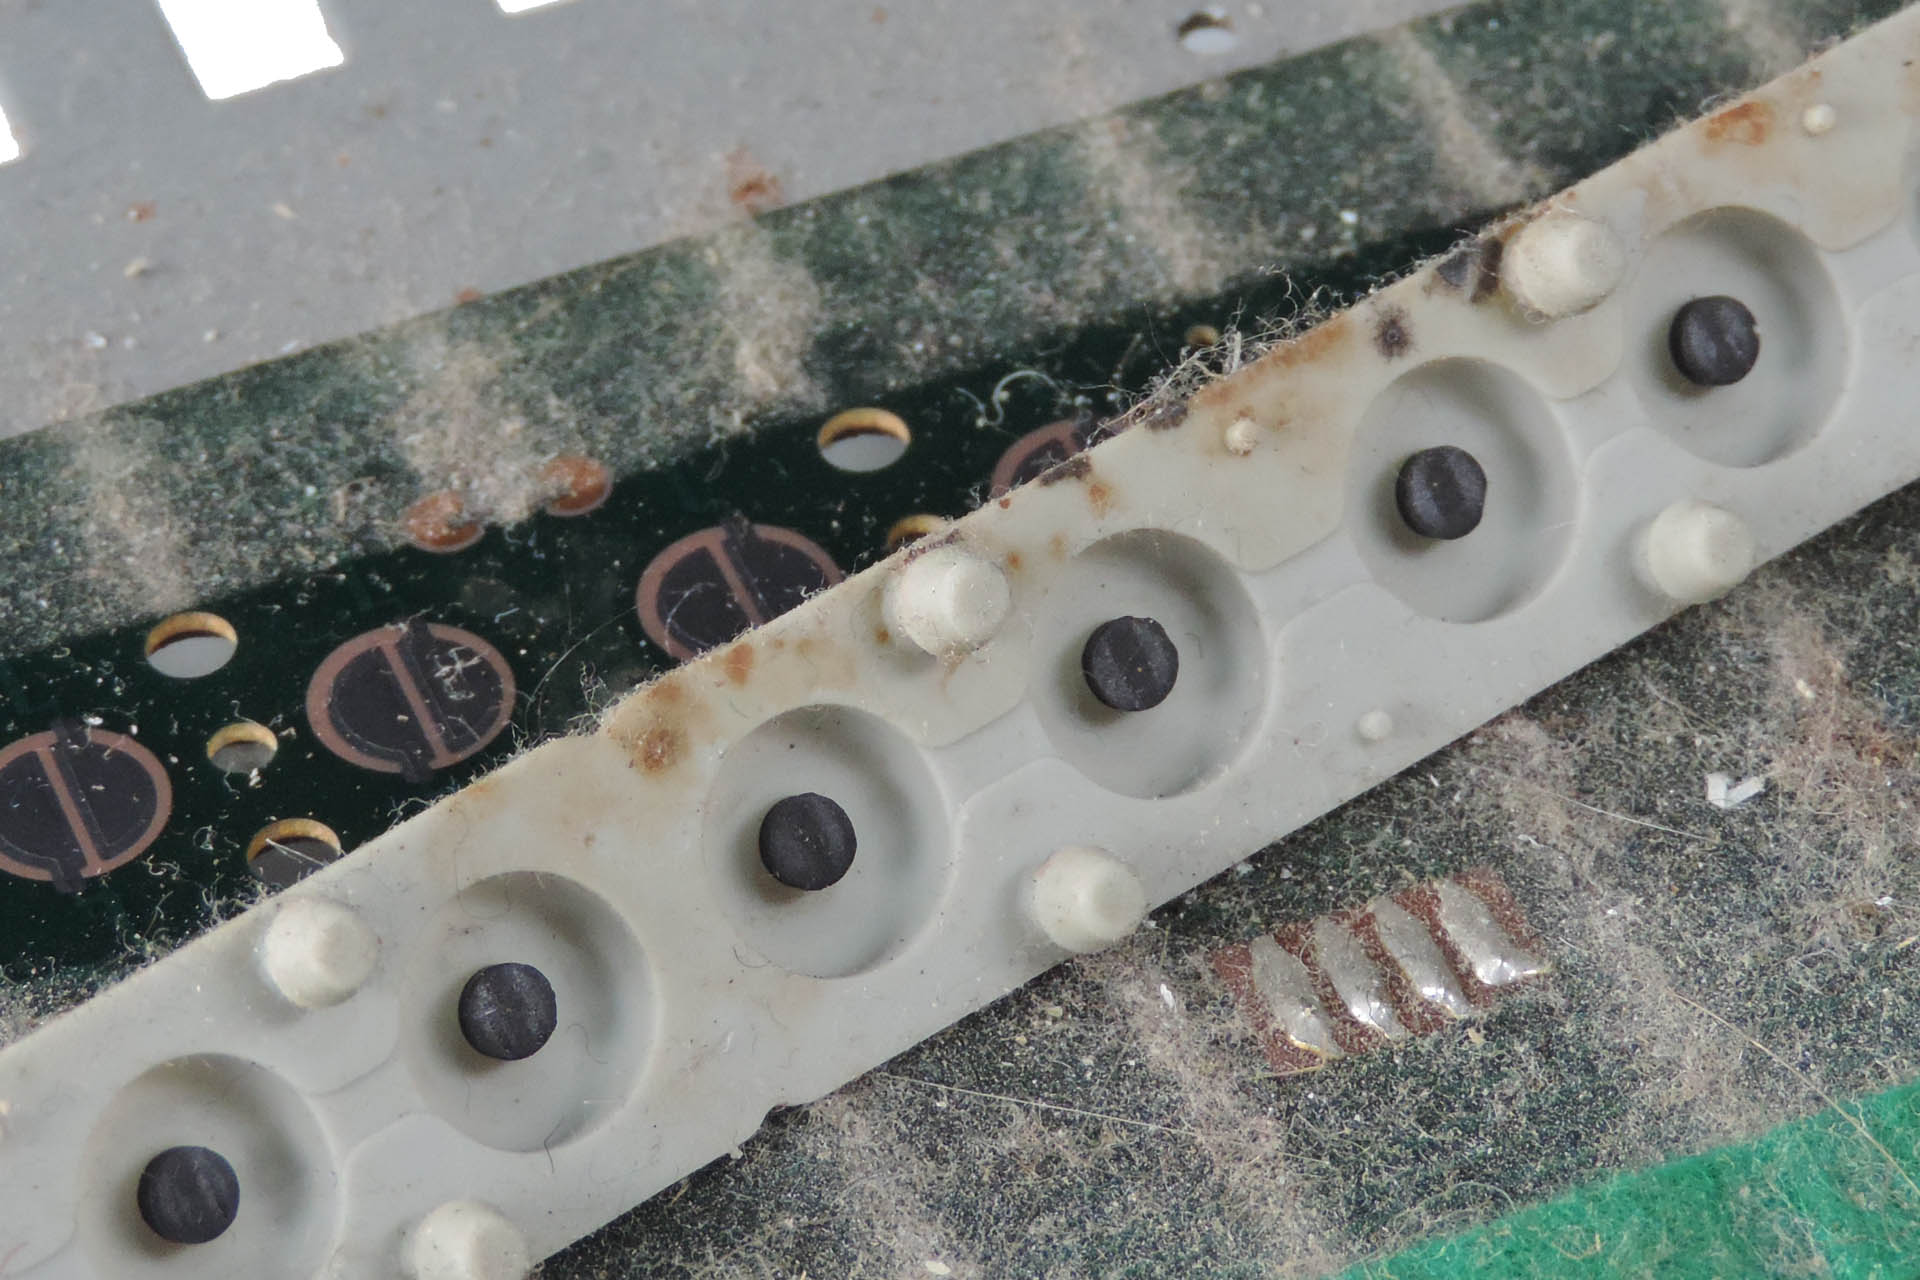
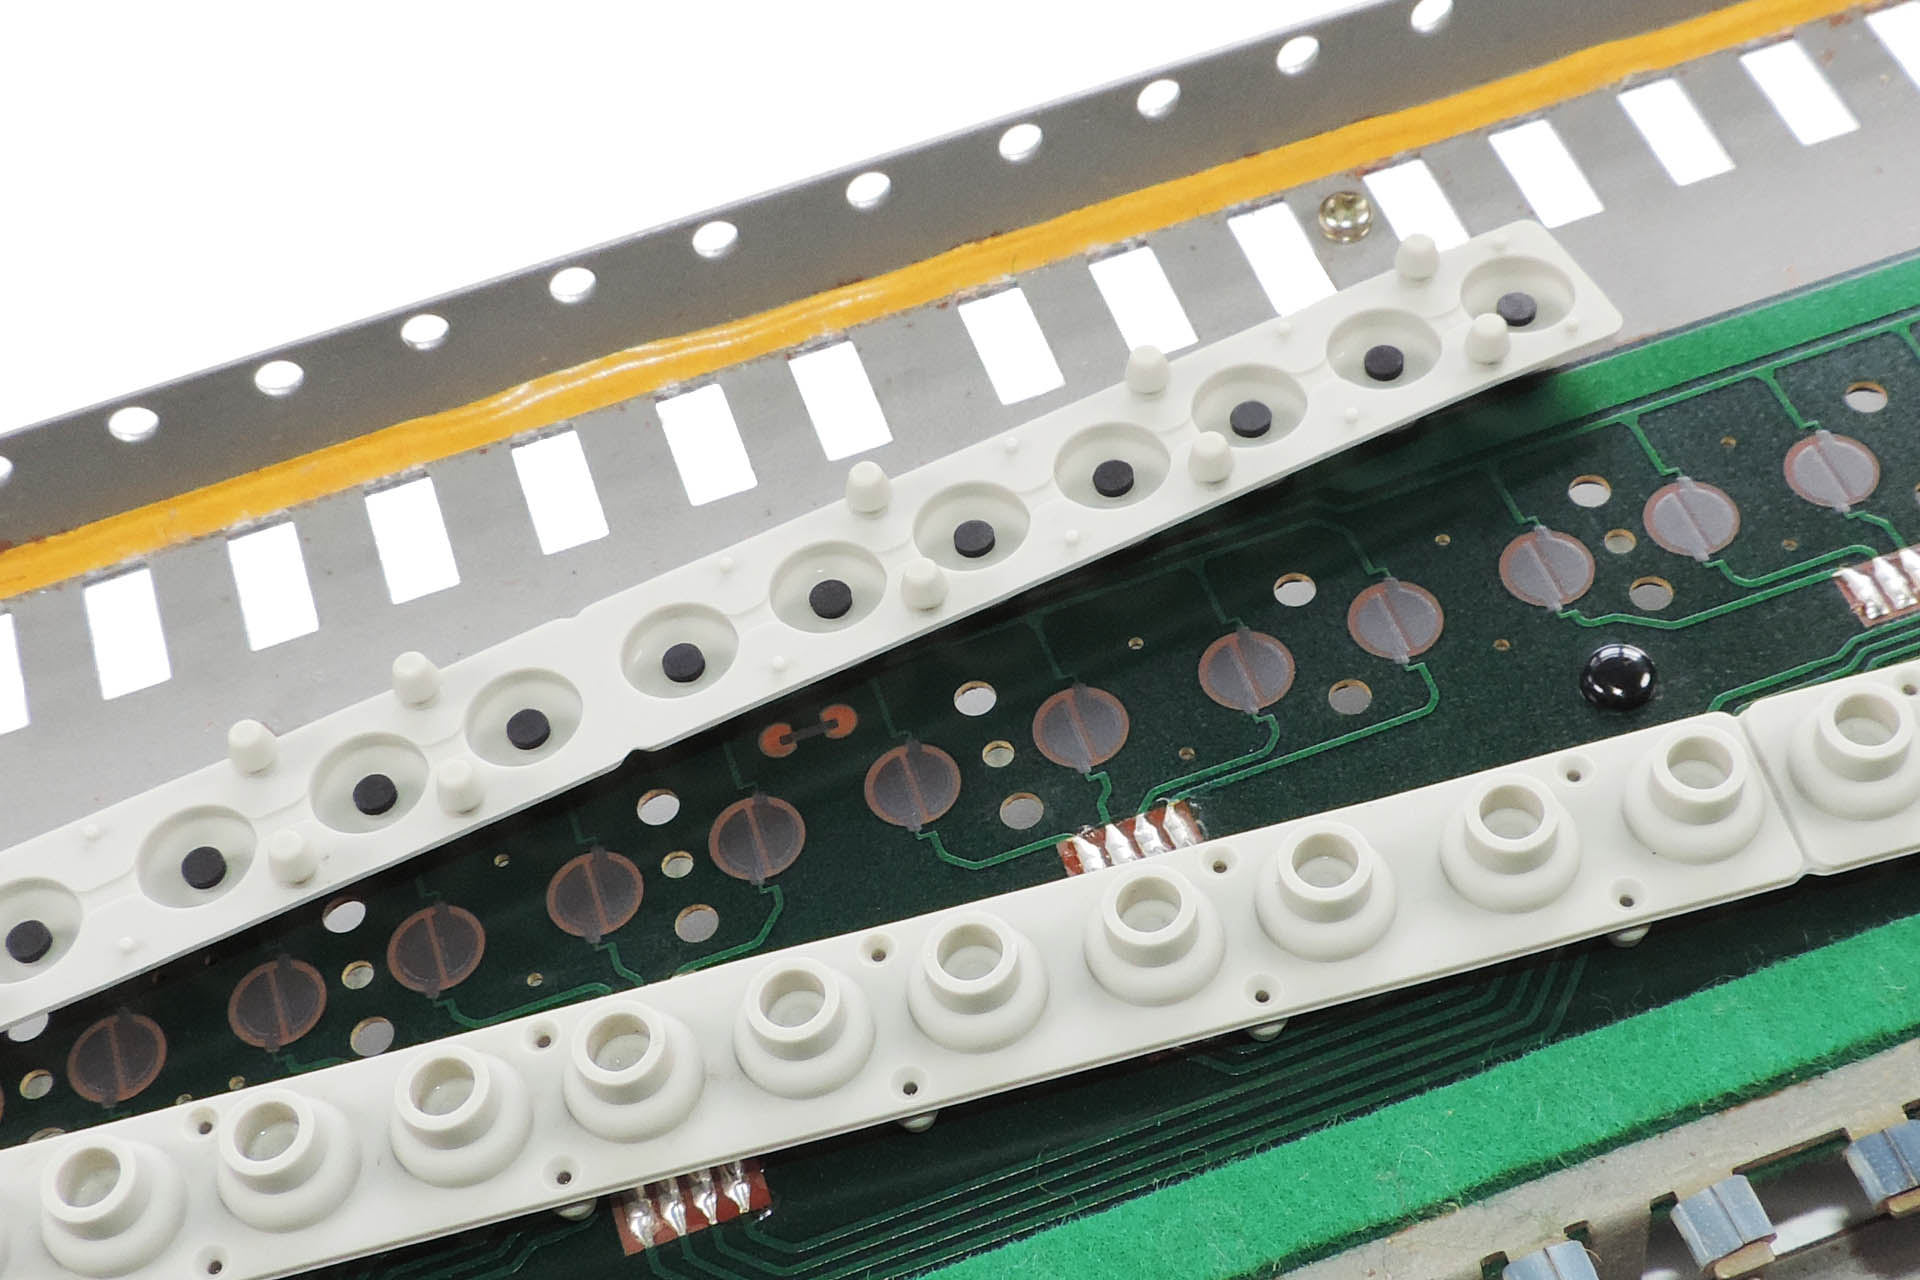
I stripped the whole machine so as to wash the knobs, buttons, slider caps, keys and even the plastic top-case. With the afore mentioned exposure to smoke, I was very concerned that the keyboard contact strips would break as I removed them but I got lucky.
Roland SH-101 keyboard bed after decades of neglect and being kept in a smoker's environment.Same with the keyboard contact strip. Looks absolutely awful.Before and... after. I got lucky with this one. After such a long time (and especially after long-term exposure to tobacco smoke), it's quite common for the contact strips to tear when removing them from the keyboard bed.
There were a few dry joints which were to be expected and some of the sliders couldn’t be cleaned and therefore required replacement.
While I was at, I also cleaned the sockets hoping that they would be okay. Dan supplied me with a power switch which I fitted but I also changed the DC input jack as the original seemed lose and let’s face it, after thirty-something years, why not?
After a gruelling seven hours, Dan’s SH-101 was back together again, so time to fire up. The machine switched on first time. Playing around the the DC input, power now was stable. Although I had sound, the HOLD function was stuck on. This is a relatively common problem and is often caused by the HOLD jack socket being stuck open. I’d already checked the sockets and quickly traced the source of the issue to a dry-joint that I had missed.
After an extensive testing of all functions, it was time to flip the machine over and recalibrate. As it turned out, things were quite good and I ended up not doing too much at all.
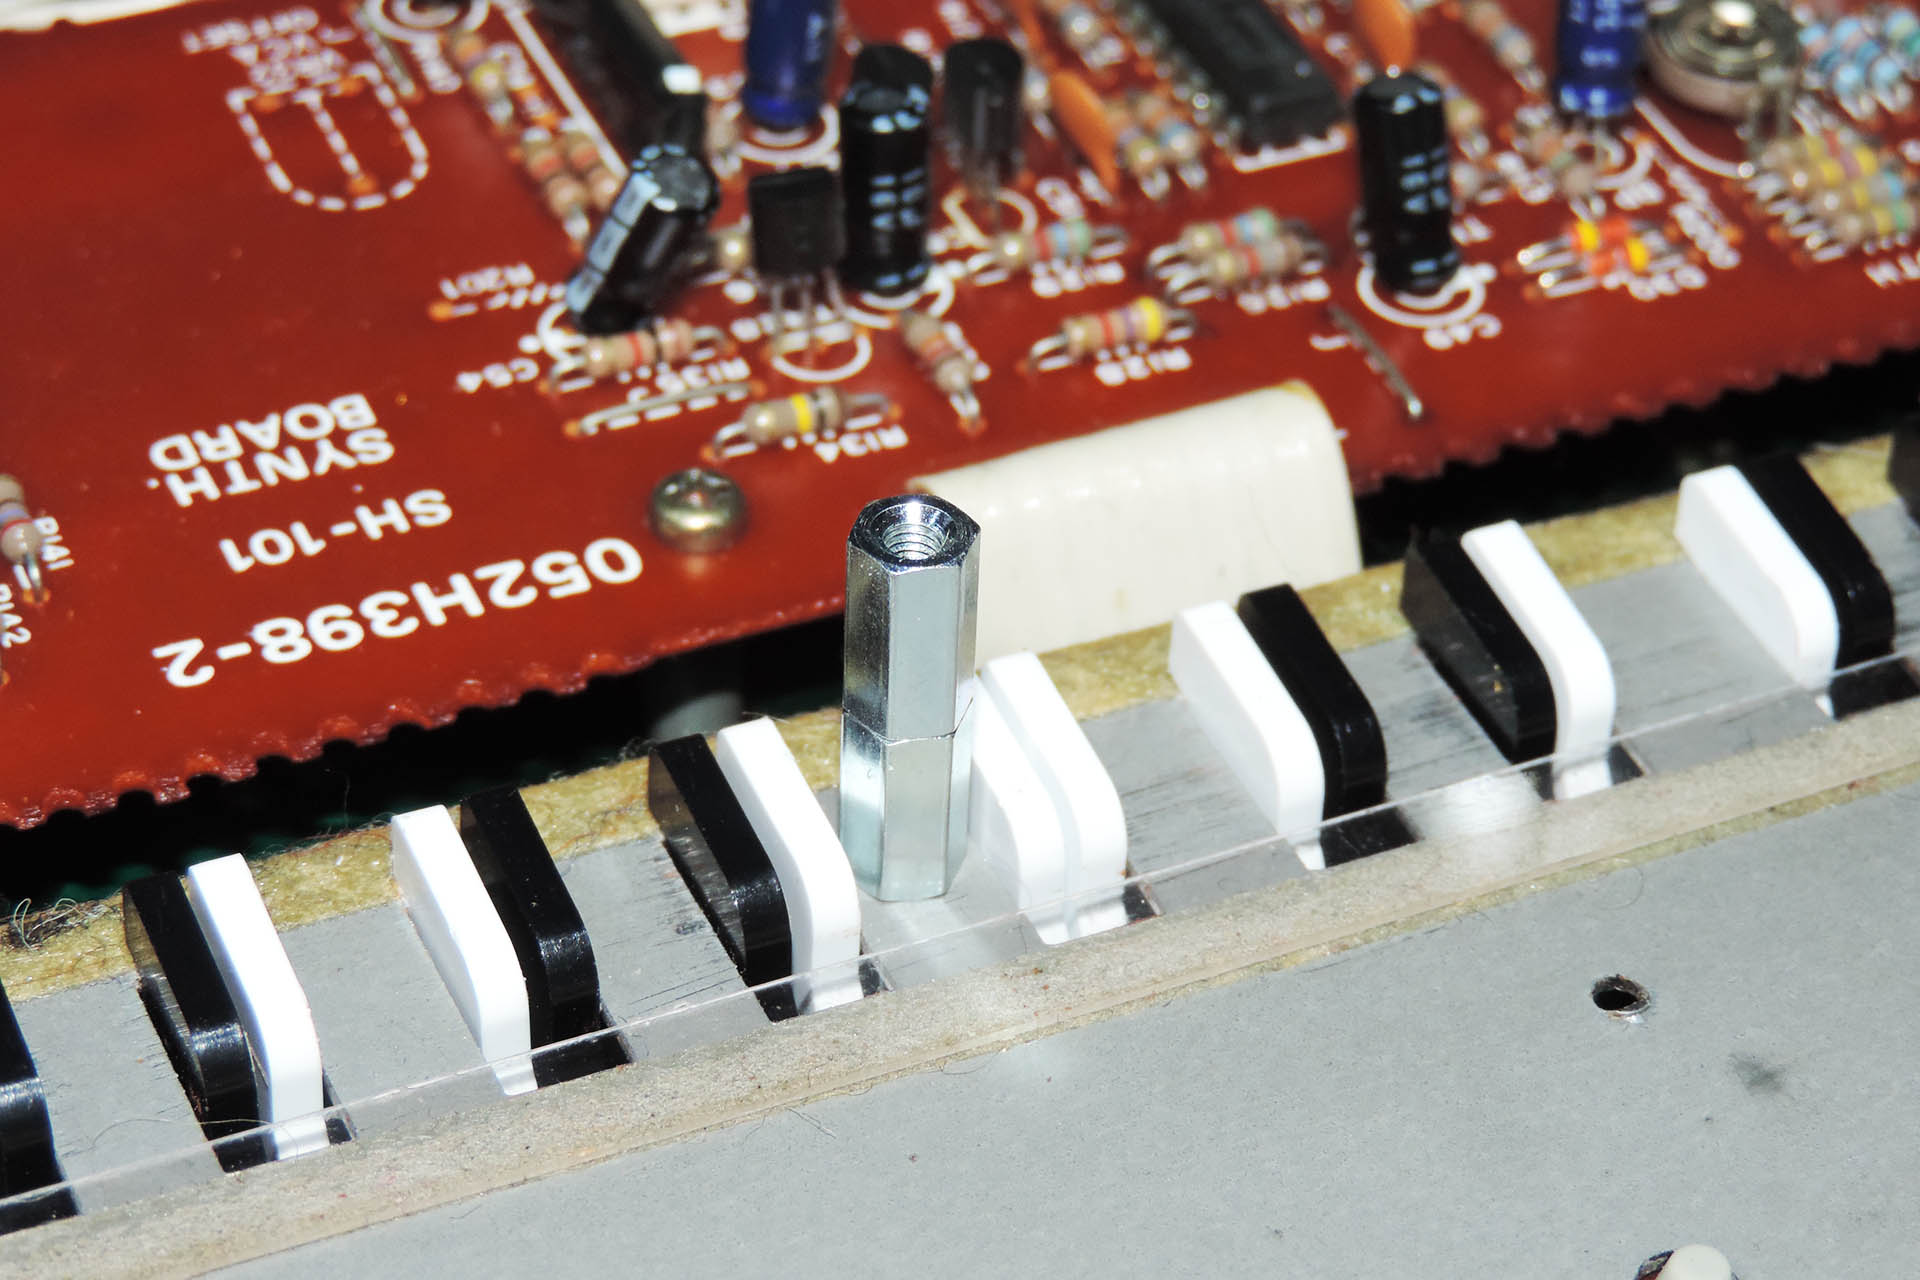
It’s unfortunate that the plastic pillars used to secure the metal bottom-case to the top-case, are so fragile. During my thirty years of fixing SH-101s, I haven’t yet found a way to cost-effectively and reliably repair these. Fortunately, so long the majority of them are intact, it’s not too much of a problem.
A sadly familiar sight to many Roland SH-101 owners - a broken screw post.
One of the pillars that secures the metal bottom case to the keyboard chassis was missing and the other had an incorrect self-tapping screw rammed into it at some point in its life, which has completely ruined it. The original pillars are very hard to come by and with a couple of the internal plastic pillars broken, it was important to ensure that the bottom-case is properly secured. I therefore fitted brand new M3 PCB spacers to the keyboard chassis, in place of the original pillars. Of course, I also had to dig out a couple of nice, shiny black M3 machine screws. It all ended up very secure and looking very tidy.
Here's one of the two replacement M3 support pillars that I fitted on to the keyboard chassis. Two non-self-tapping screws, pass through the metal bottom-case and into these pillars.
Kept near a heat source at some time, the battery compartment cover had warped slightly. The deformation was subtle but resulted in the cover sitting ever so slightly proud of the top of the top-case. Not too big a deal, in fact it’s hardly noticeable. I was tempted to gently heat the cover to see if I could make it straight again but these things are so fragile, I decided against it.
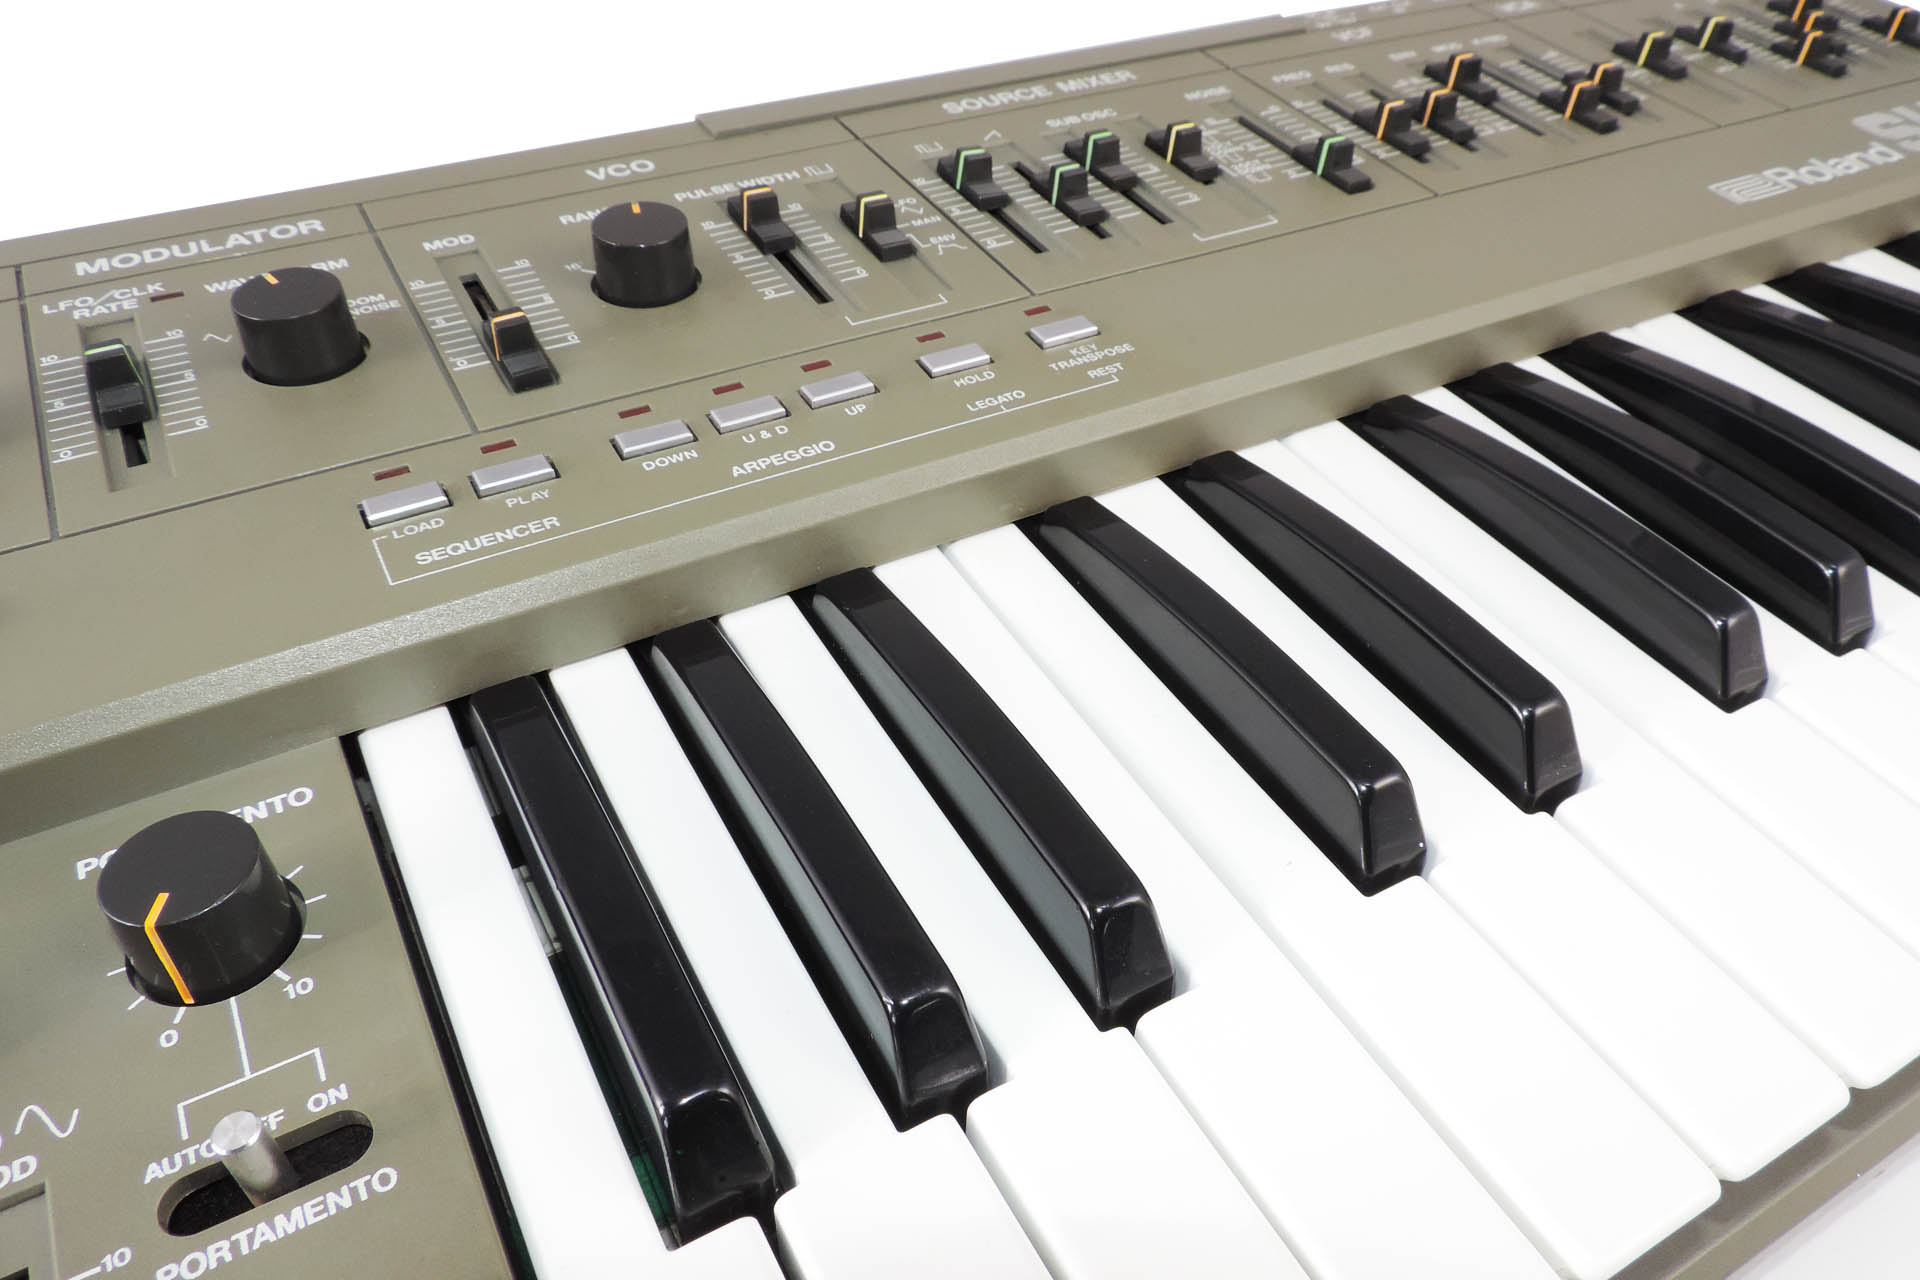
Dan's Roland SH-101 almost looking like new again and definitely feeling and sounding a lot better than when it came in.
There’s a lot of talk on-line about the infamous Roland SH-101 discolouring. The SH-101 was released in three colours; red, blue and grey. ALL versions discolour and no one really knows why. Exposure to ultraviolet (sun) light seems to be the most common opinion but my own SH-101 has been kept in an artificially lit, smoke-free environment for most of its life and is now more pink than red! I can understand why people blame UV, however. Removing the battery compartment cover reveals the ‘original’ colour of your SH-101 suggesting that everywhere else which is of course exposed, will be discoloured by ambient UV. Oh well, just one of those weird mysteries of life, eh!
WOW! Nice shiny looking and smooth feeling keys.
Another slightly annoying issue with the SH-101 is that it's very GROOVY!!!!! Yes, that's right. Those nicely aesthetic lines cut into the top-case add to the SH-101's cool look but they also gather all sorts of dust and crap over the years. Even if kept in a nice, clean environment, the grooves in the SH-101's top case do get dirty and getting it out can make a Roland SH-101 service a little longer than anticipated. 🙁
The brittle plastic, the weird decolourisation and the dirt gathering grooves in the top case don't of course detract from the SH-101's attributes. That classic analogue, mono-synth sound and the pure ease with which it can be manipulated, are what the SH-101 is really all about and perhaps decades after its launch, the niggles now simply add to its cute character.
Anyway, at long last, this Roland SH-101 now looks, feels and sounds fantastic. Nice and shiny, smooth and responsive controls and a solid keyboard, it's almost like new! It's always really exciting for me, when customers come over to collect their gear and I know Dan's busting to check out his refurbished Roland SH-101. 🙂
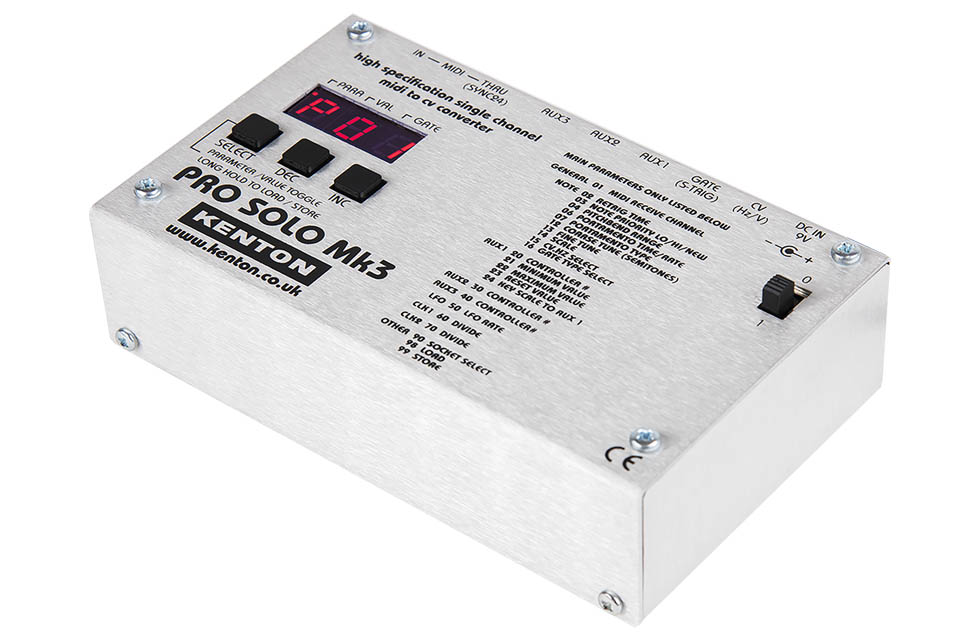
Launched in 1983, the humble but amazingly well-known and popular Roland SH-101 is pre-MIDI not that many seem to care! Being equipped with CV however, means that the SH-101 can be controlled by another source and as many of my customers will know, my favourite MIDI gadget / upgrade manufacturer, Kenton Electronics, offers a couple of options to to get your SH-101 controllable via MIDI. The SH-101 MIDI CV kit for example, is installed into your SH-101 and although requiring holes to be cut into the case for MIDI sockets, it does mean that you won't have another box floating around.
One of several gadgets made by Kenton Electronics that'll get your Roland SH-101 connected to your MIDI studio, the Pro Solo Mk 3 stand-alone MIDI / CV converter, is fast and accurate.
Kenton also makes a range of stand-alone CV / MIDI converters like the USB Solo, Pro Solo Mk 3 and Pro 2000 Mk 2. These gadgets are very fast and accurate and don't require any modifications to your synth's case. I've already mentioned that I've always been a big fan of Kenton's products, so if you do want to get your SH-101 connected, then I strongly suggest you check out their MIDI / CV converters, here.
As well as owning a SH-101 myself, I've worked on hundreds of them over the years and know this Roland classic, inside-out, so if you've got one that's in need of a service or if it just needs a little TLC, please don't hesitate to get in touch. 🙂
"Hang on a minute. What happened to the MPG-80?" I hear you ask. Well I'm lovin' it but... I now had a template for my RE-MPG-80 replacement rack ears. YAY!!!! You can read about them here.
My RE-MPG-80 replacement rack ears for the Roland MPG-80, mounted to my new MPG-80!
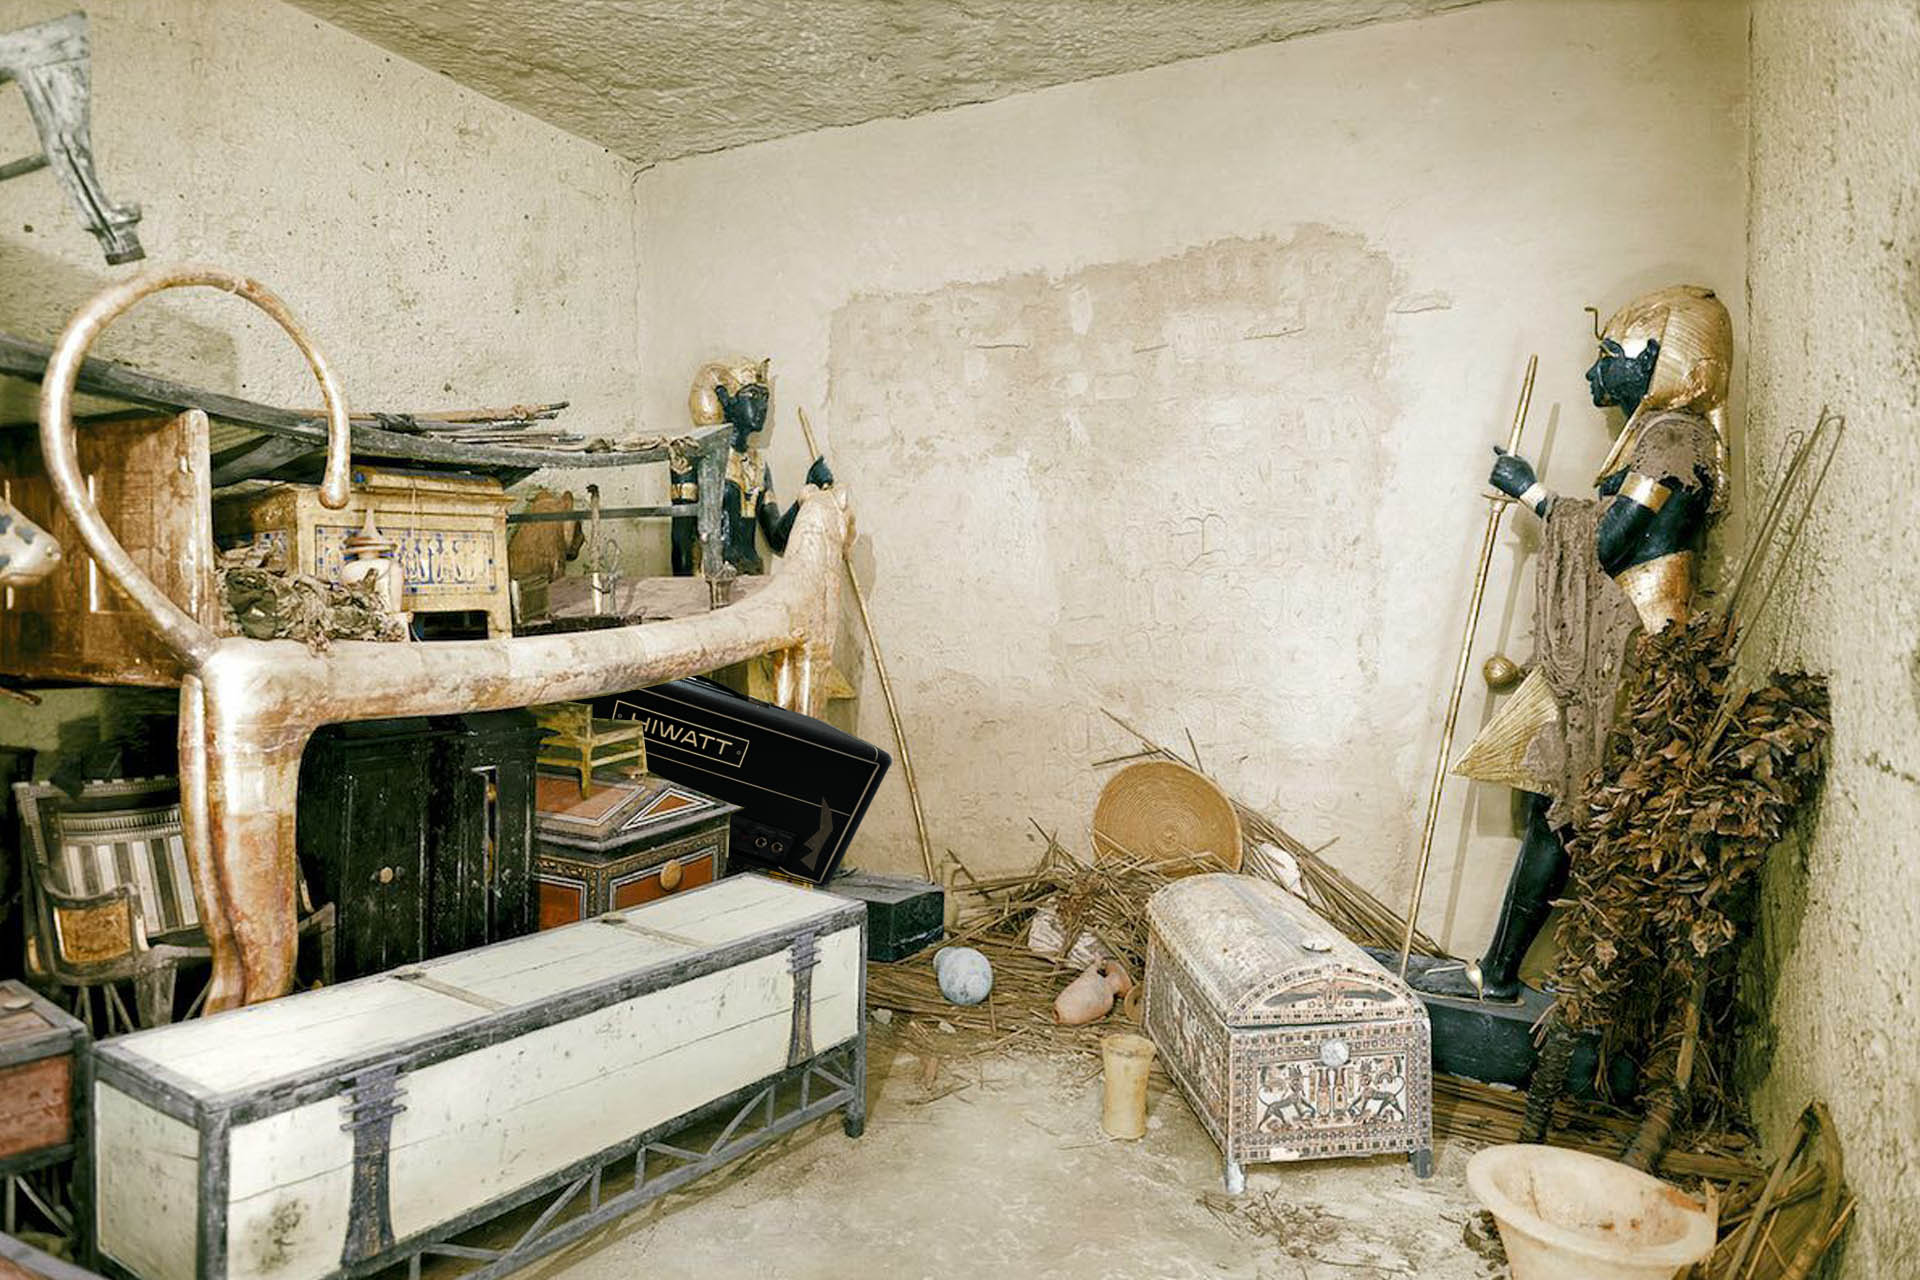
A truly remarkable find - Rokatiti tomb, chamber 3C showing Hiwatt DR-103 amp, tucked in round the back.
A couple of months ago, one of my regular customers called me in a blinding panic telling me all about these Hiwatt amps that had been found in a pyramid excavation and how he’d acquired them. For a civilisation that didn’t invent the nail, this was truly a remarkable find.
And this is chamber 21F. Check out the Hiwatt DR-103 at the back.
Adrian explained that the tomb in which the amps were found, was that of the previously unknown Pharaoh Rokatiti. Having been targeted by tomb raiders at some point, archaeologists believe that the amps remained untouched for the simple reason that no one knew what they were.
The amps in question were DR-103s and Adrian couldn’t think of anyone better qualified and experienced to have a look at them, before they were switched on.
We arranged a COVID friendly drop-off and a couple of weeks later, after making some space in my schedule, I was able to check out these beautiful amps.
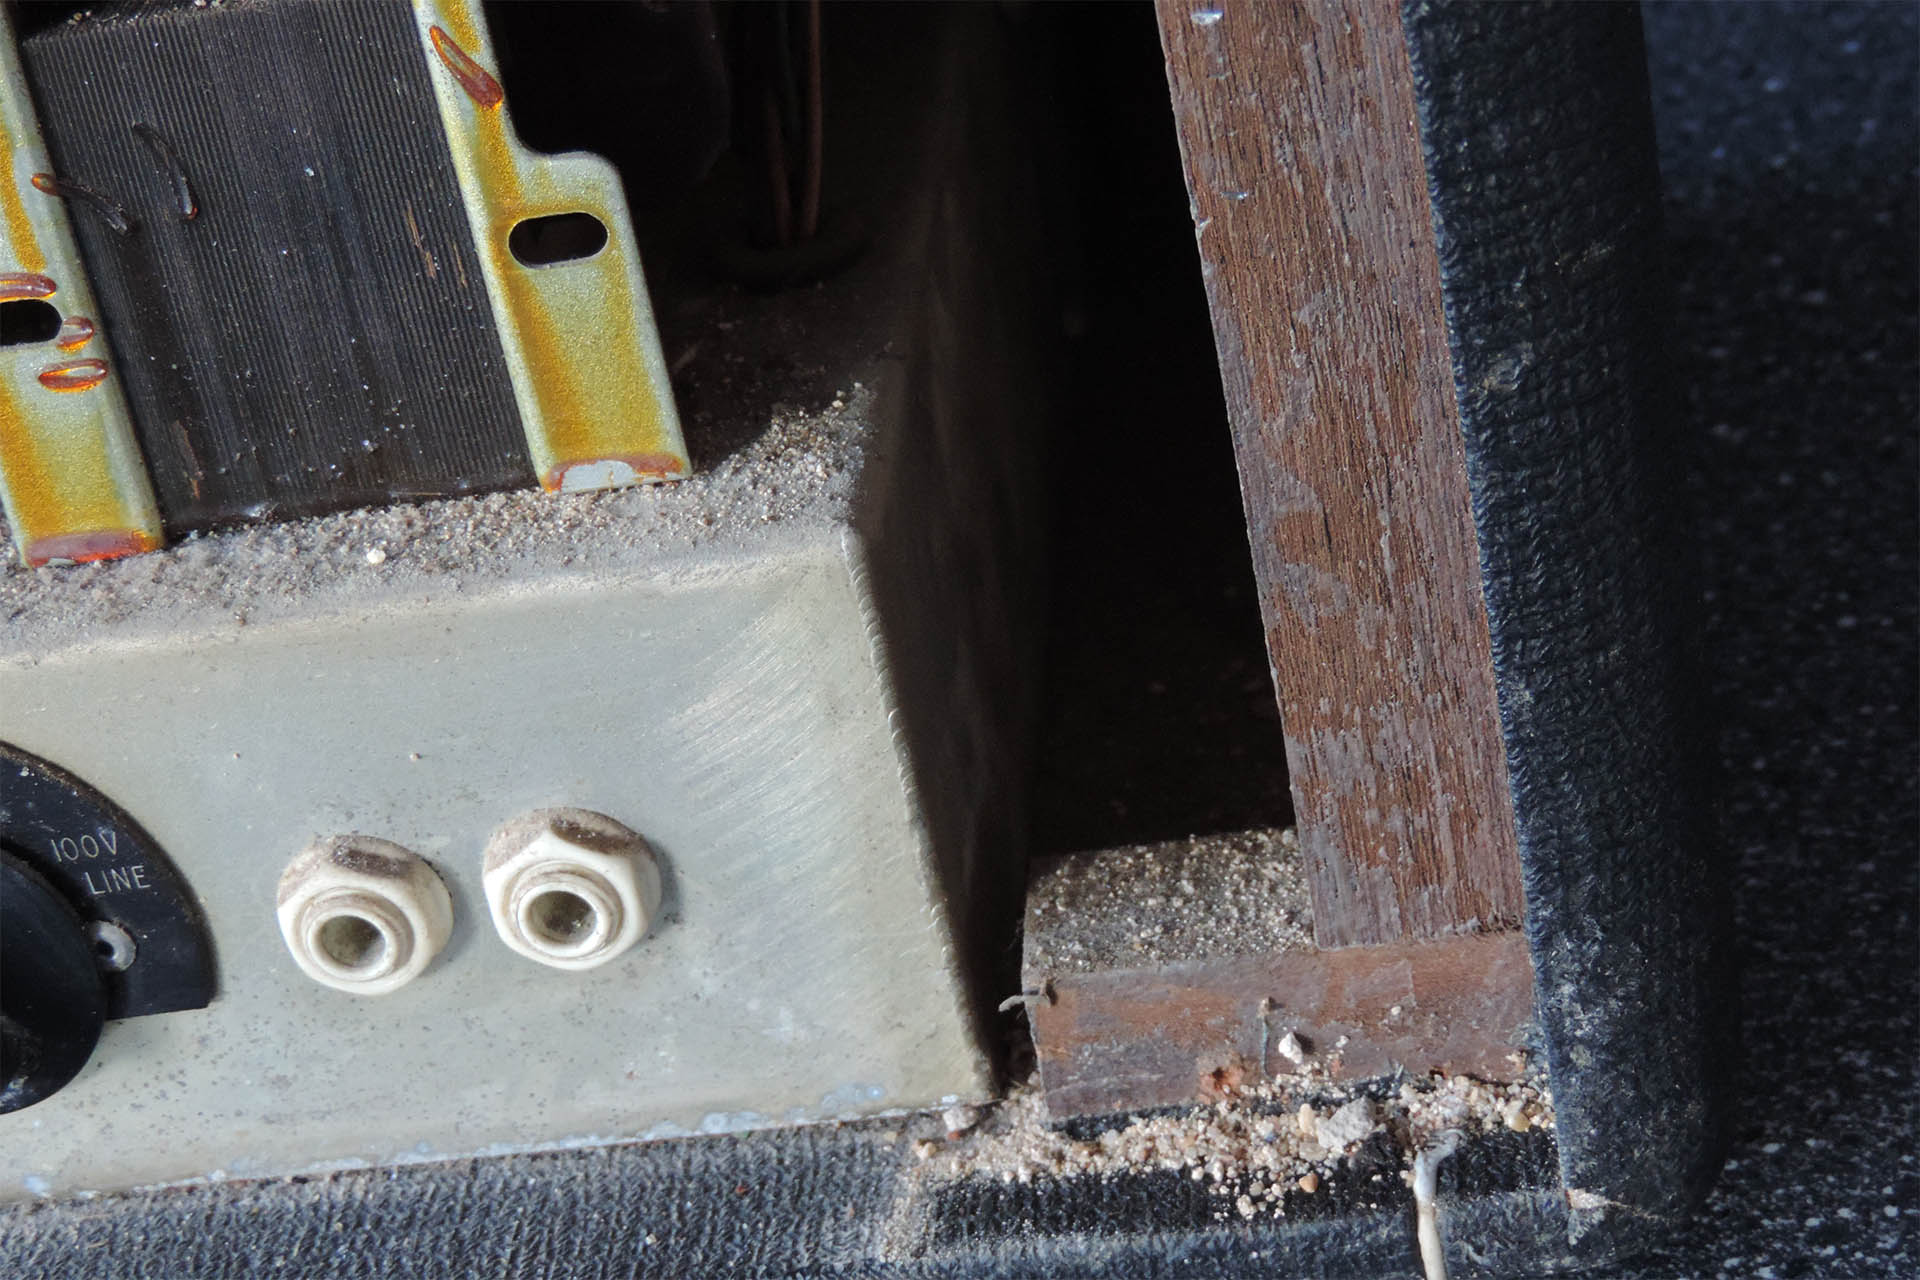
Ancient Egyptian sand and rubble inside this Hiwatt DR-103.
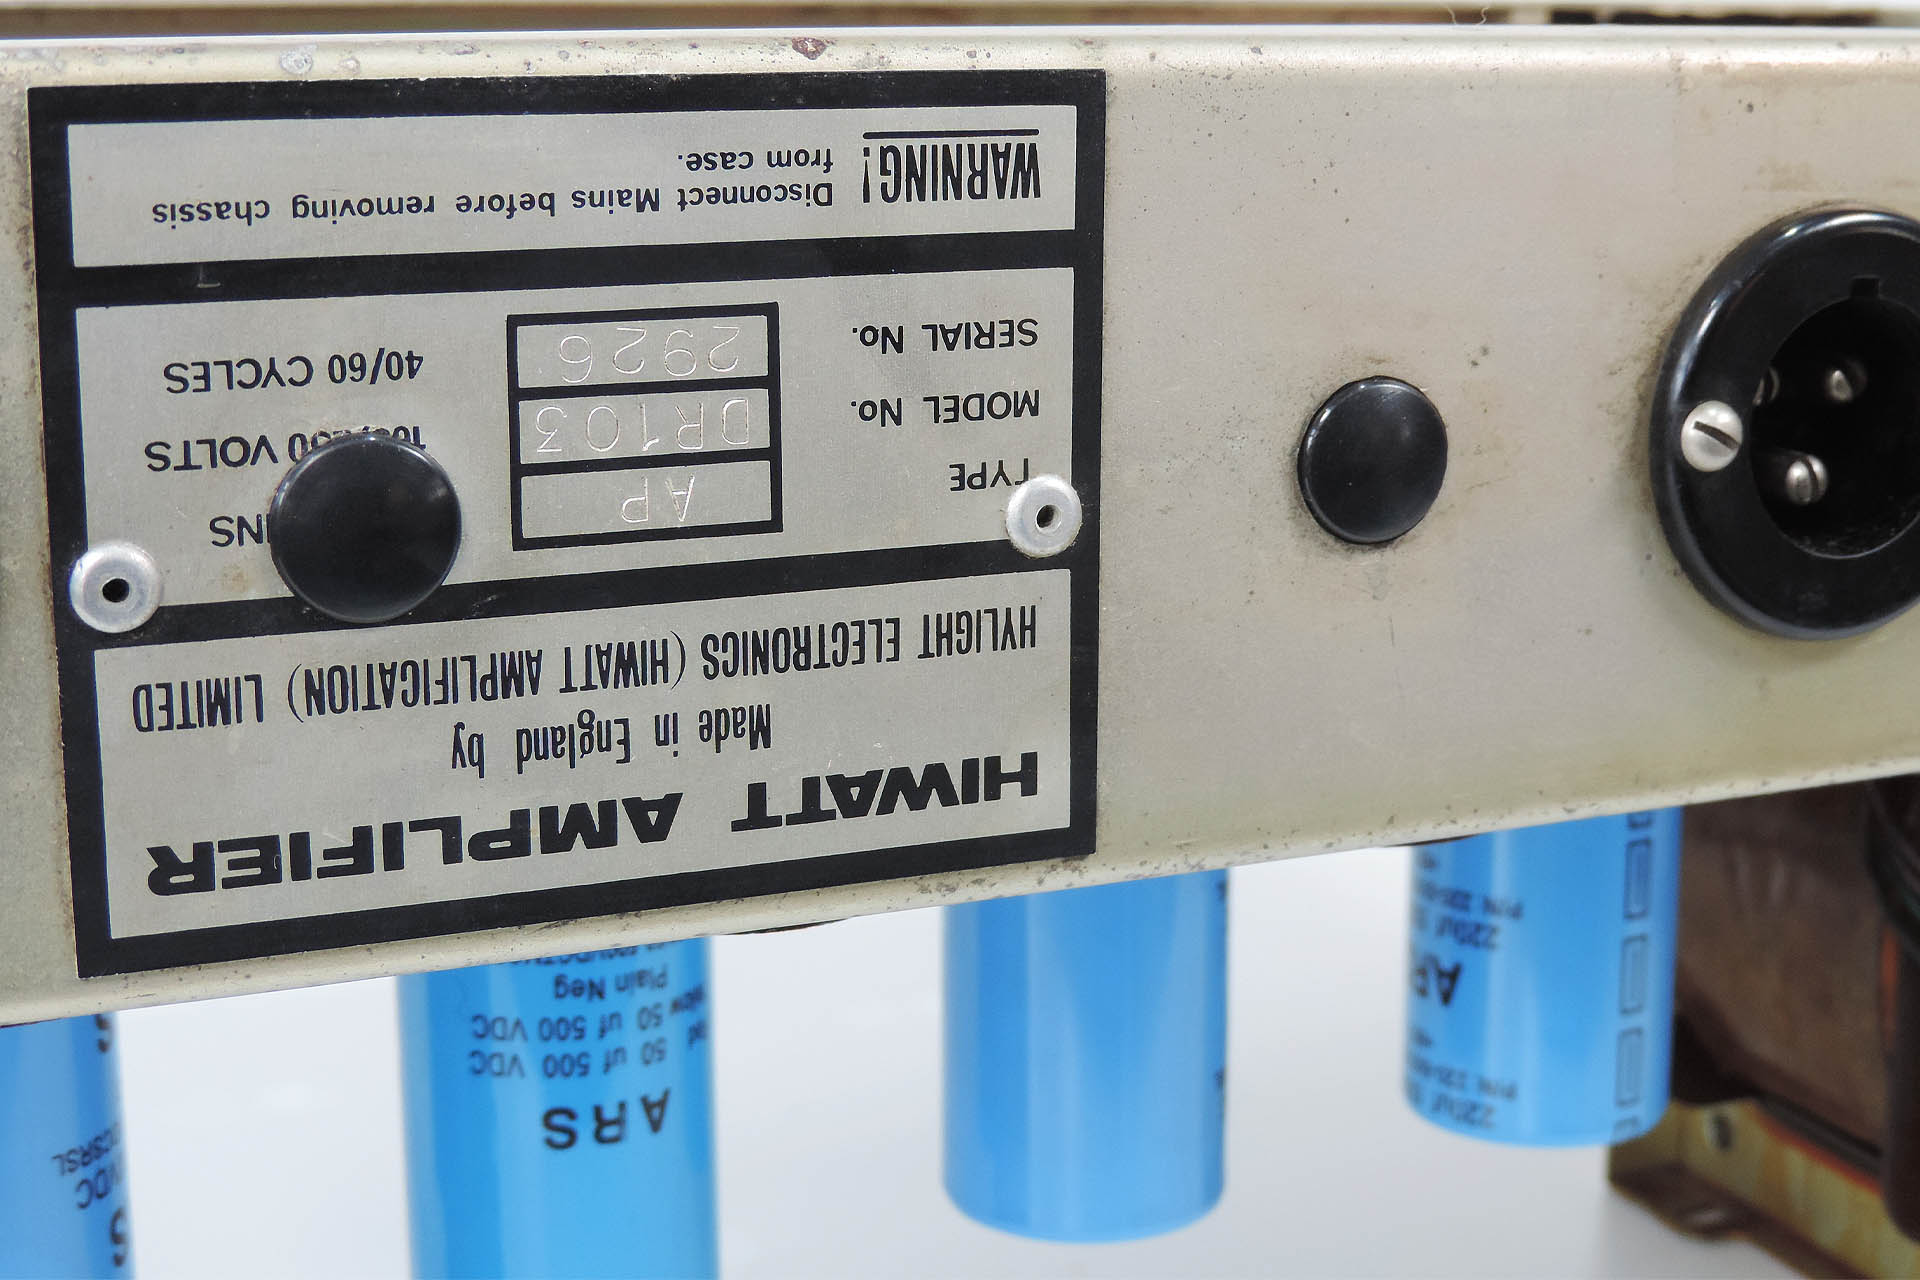
As expected, both of them were full of sand, like SERIOUSLY FULL OF SAND. One had been modified and had holes drilled in the front panel and in the serial number plate on the rear panel. Most unfortunate but there didn’t seem to be too much wrong with either of them, at least not on initial inspection.
These amps needed serious cleaning before I can do anything else.
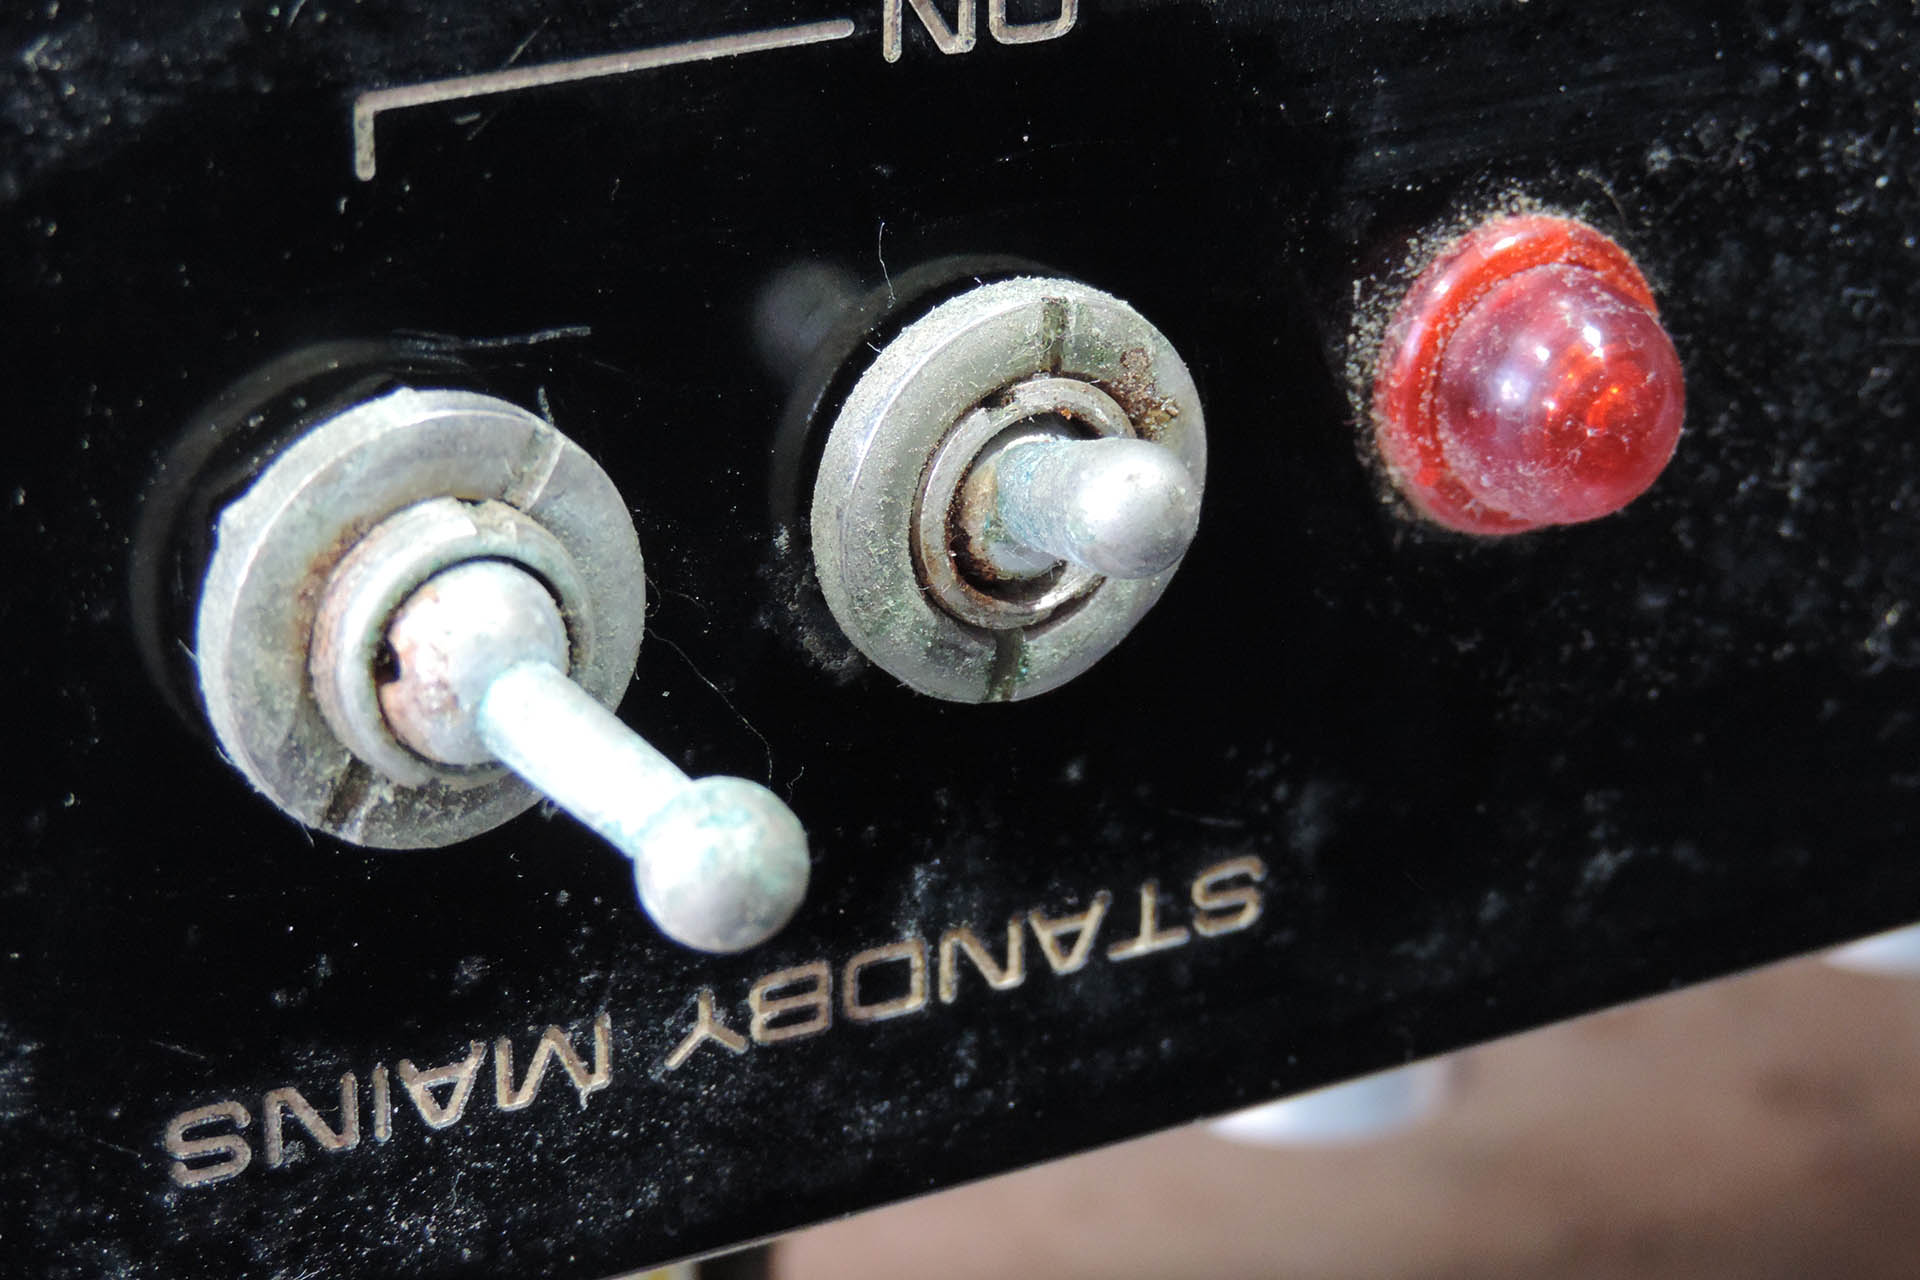
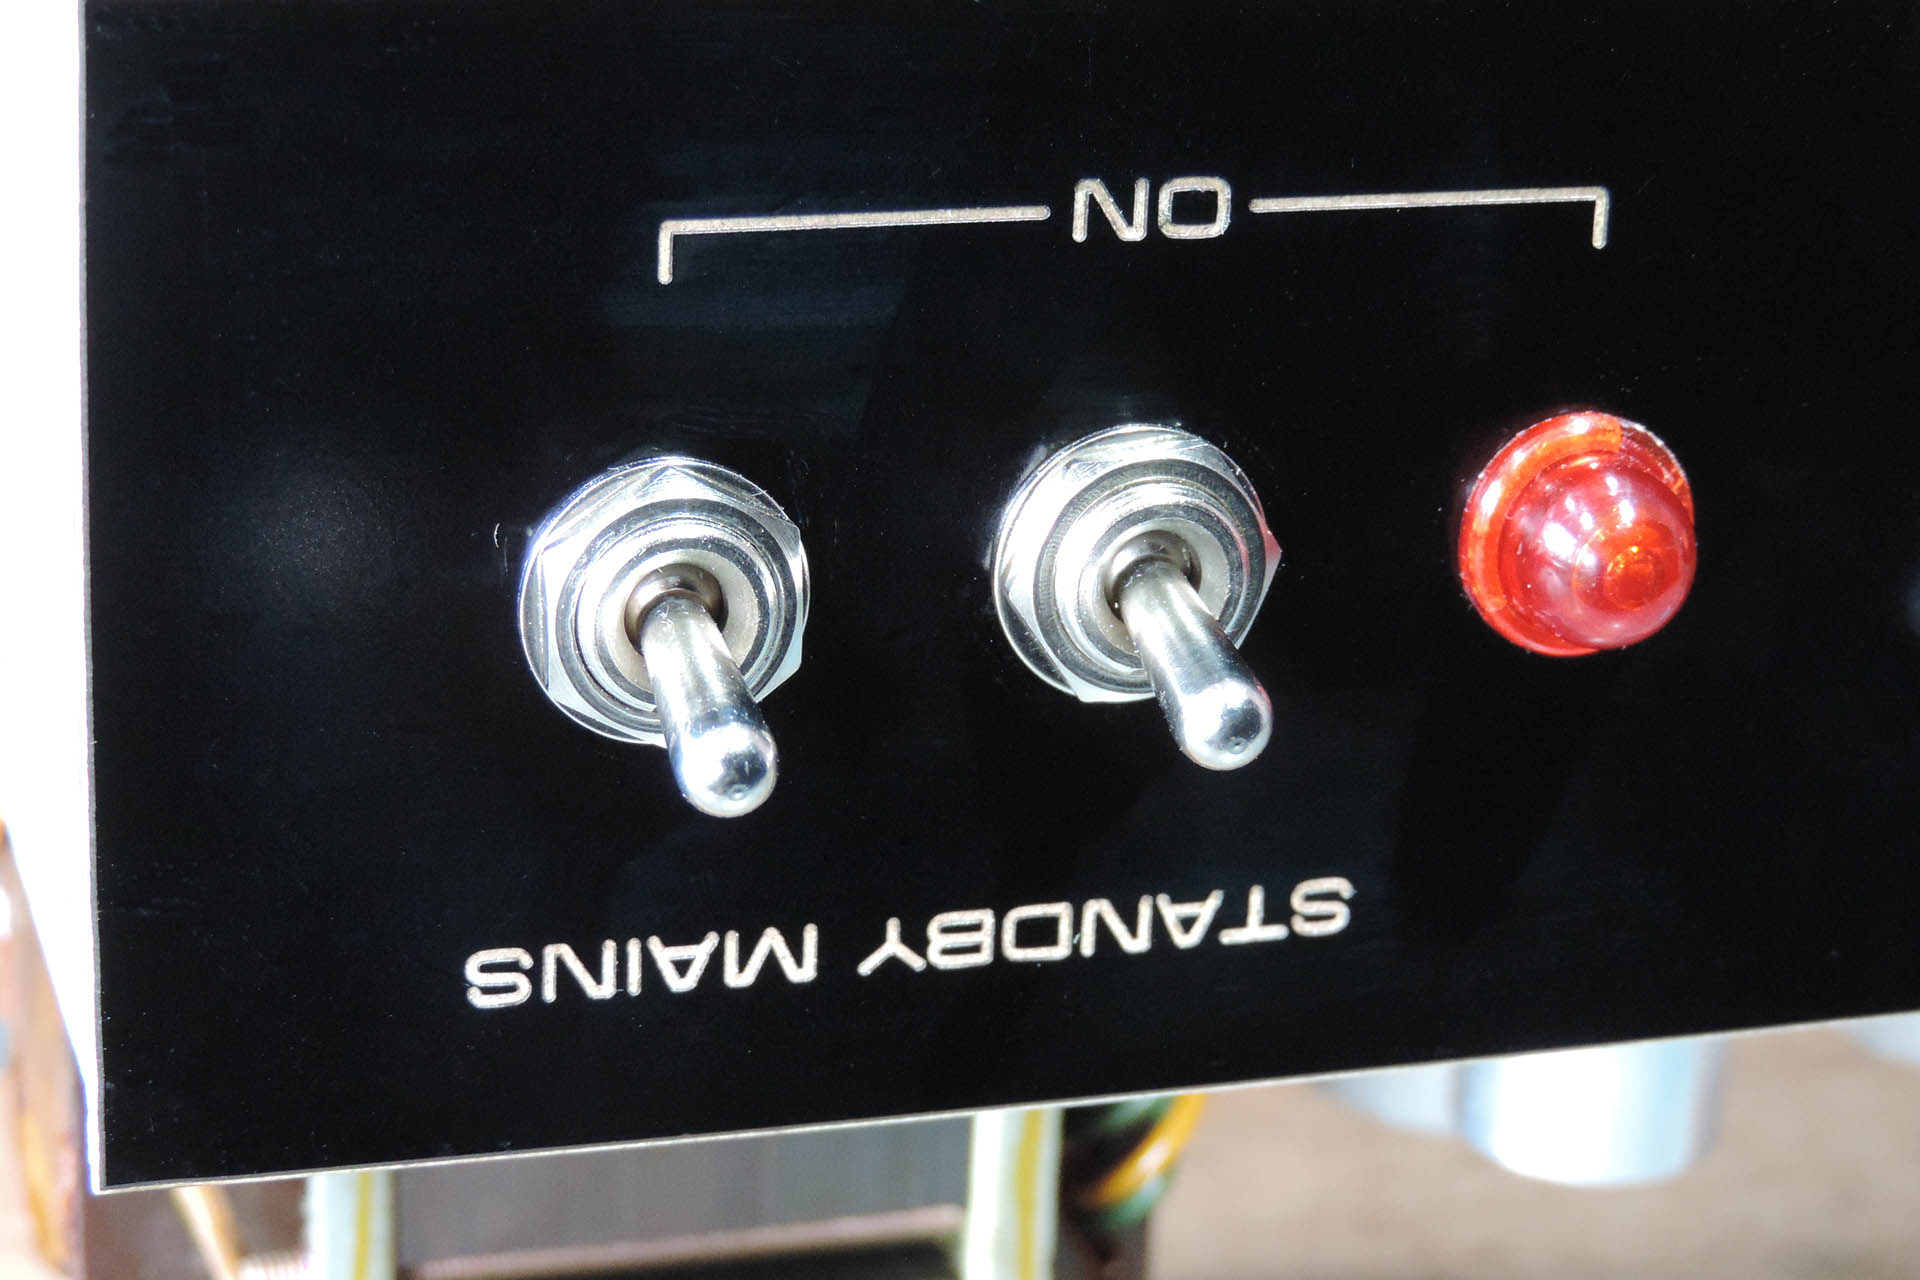
Having been dormant for almost three thousand years, the first thing I did after cleaning them up, was to check the ON / OFF and STANDBY switches. The switches on one of the amps looked particularly bad and although I wanted to keep things as original as possible, I also wanted these amps to actually work... and safely.
Quite unsafe, these switches on the second DR-103 really didn't look too healthy. In fact, at some point, one of them had already been changed.
As I proceeded, some hardware just crumbed and I had to replace a lot of screws, all of which were understandably but annoyingly imperial and not metric.
Satisfying the two objectives of keeping things as original as possible and making these amps sing again, was a challenge but for the sake of safety, I decided to fit new switches on the second amp.
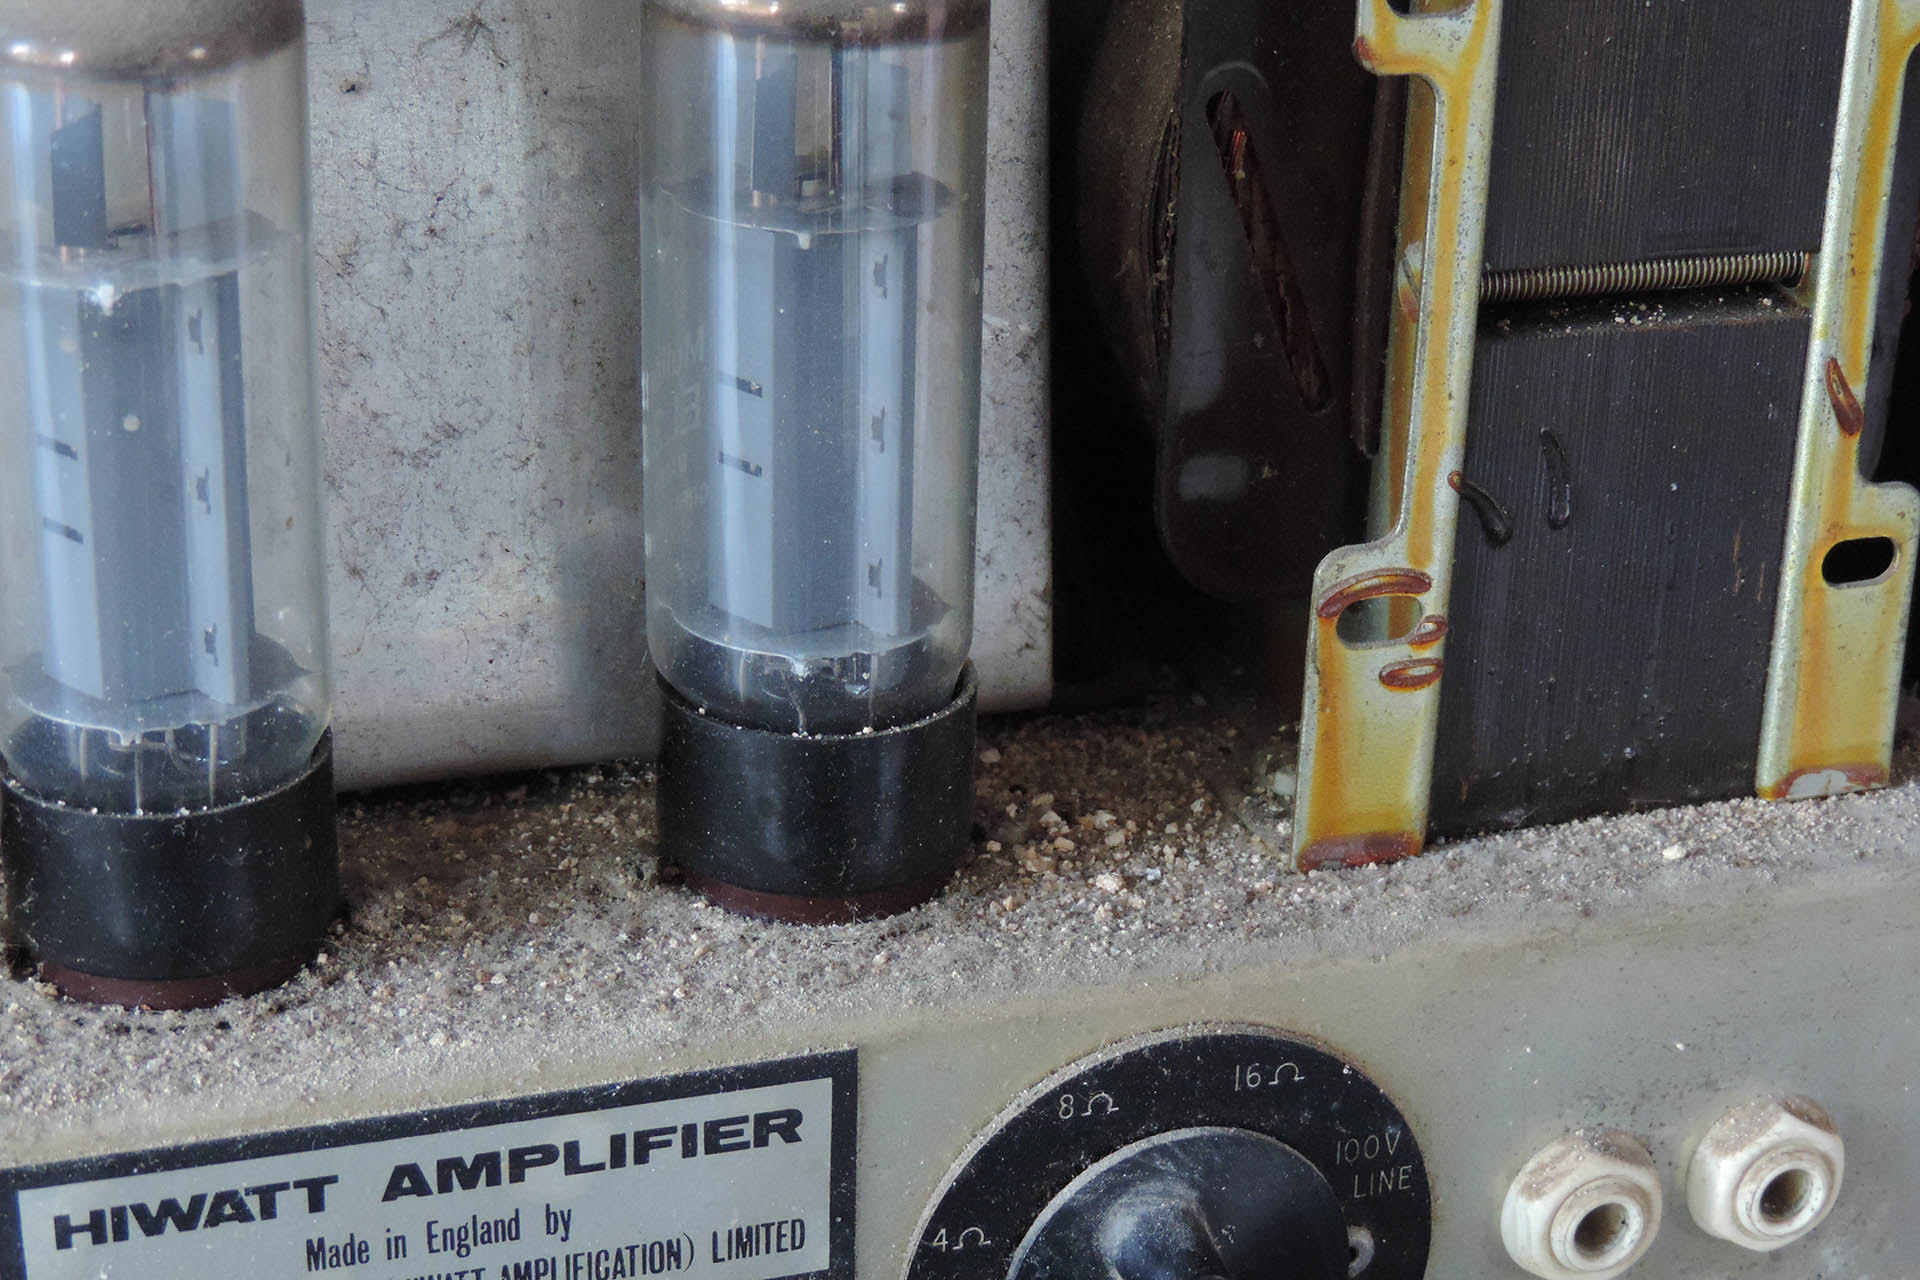
The fuses in both amps were intact suggesting that things were okay last time they were used. My main concern was the output transformers. People underestimate their contribution to the sound of a valve amp and while I'd be able to find modern replacements, they just wouldn't be the same.
A couple of resistors had to be replaced as they either broke or crumbled, too. That led me to check other components, just for integrity. I also ripped out the bad mods on the ‘second’ amp.
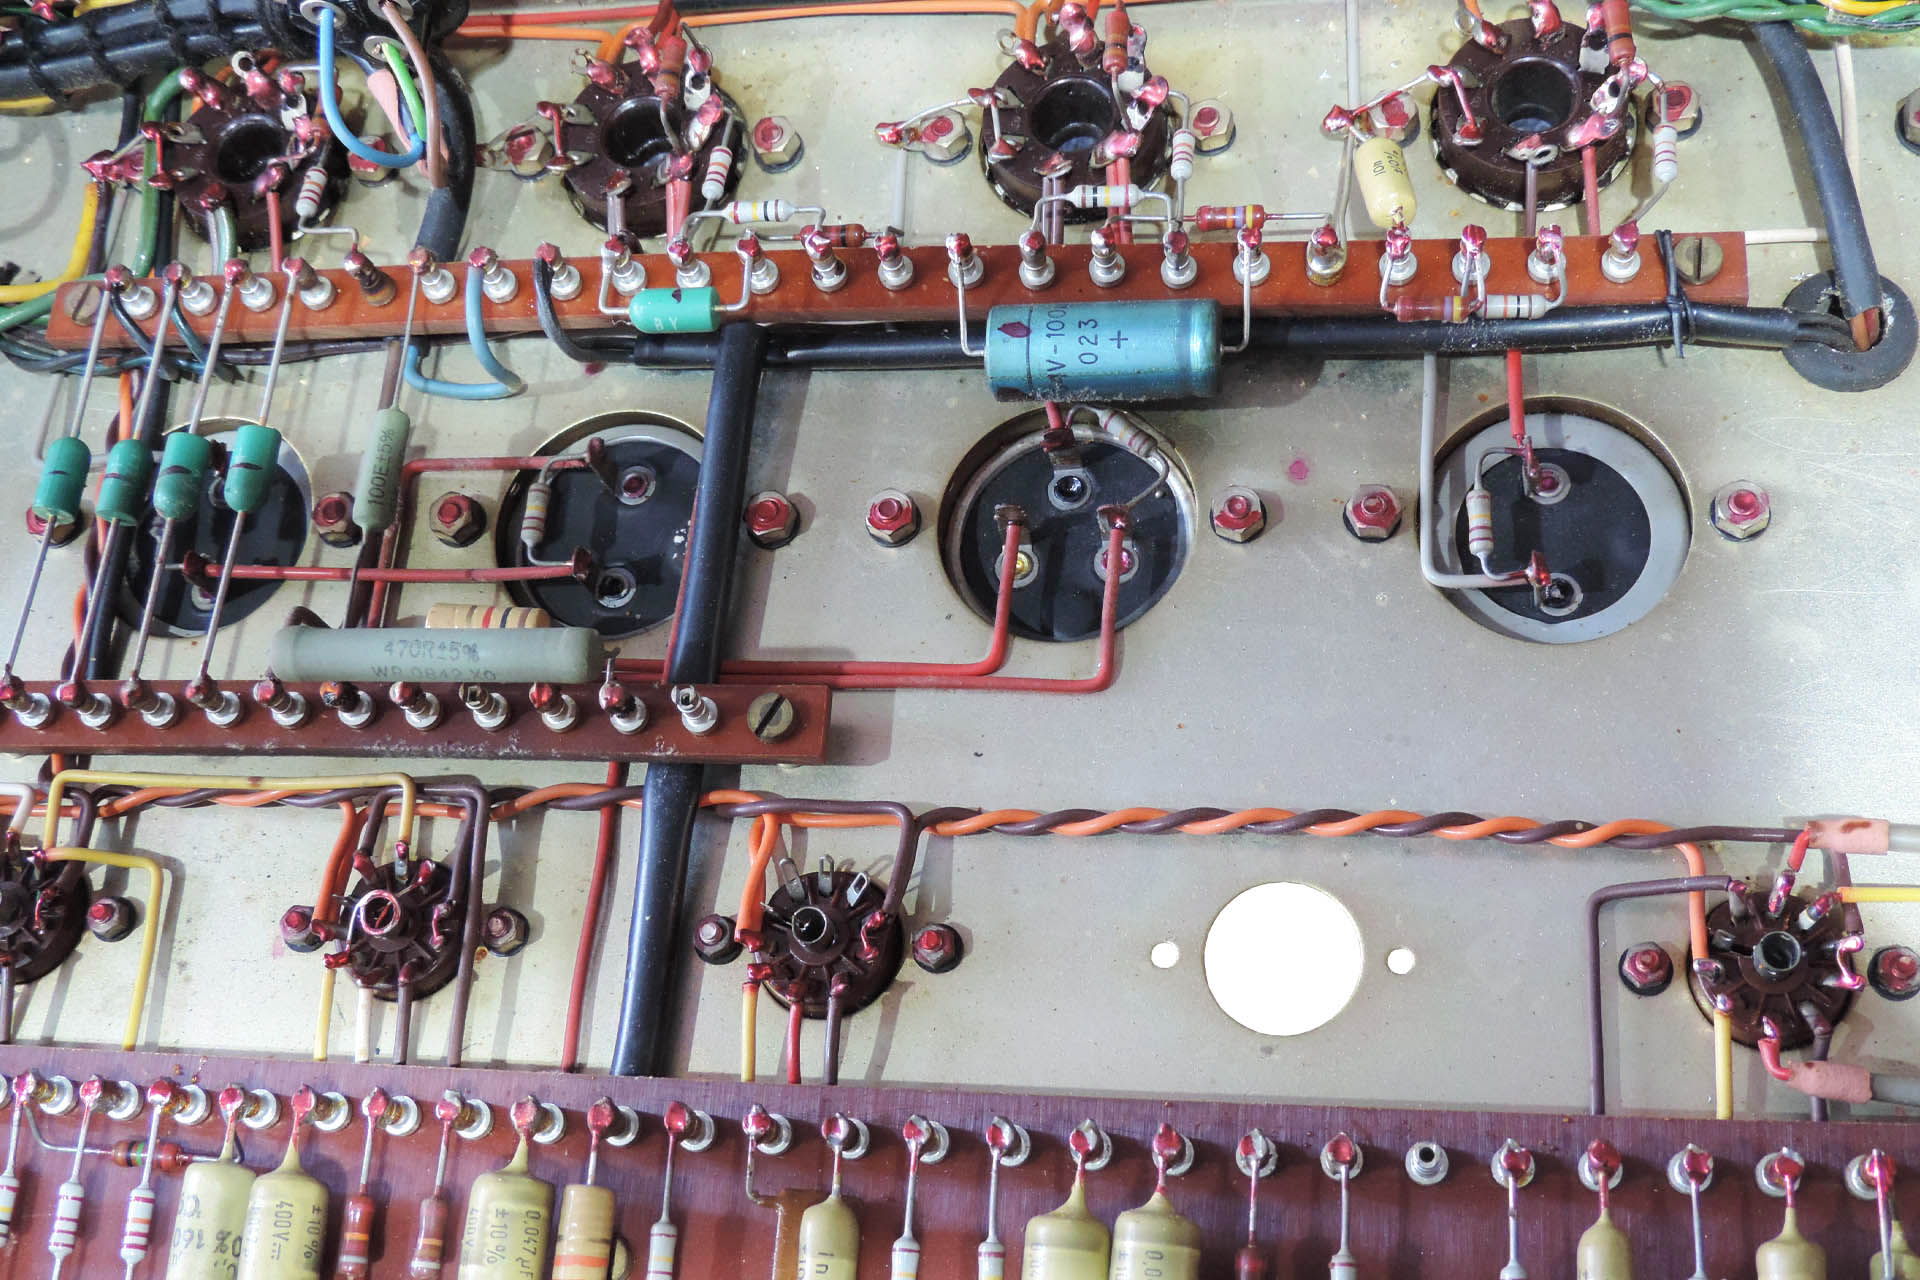
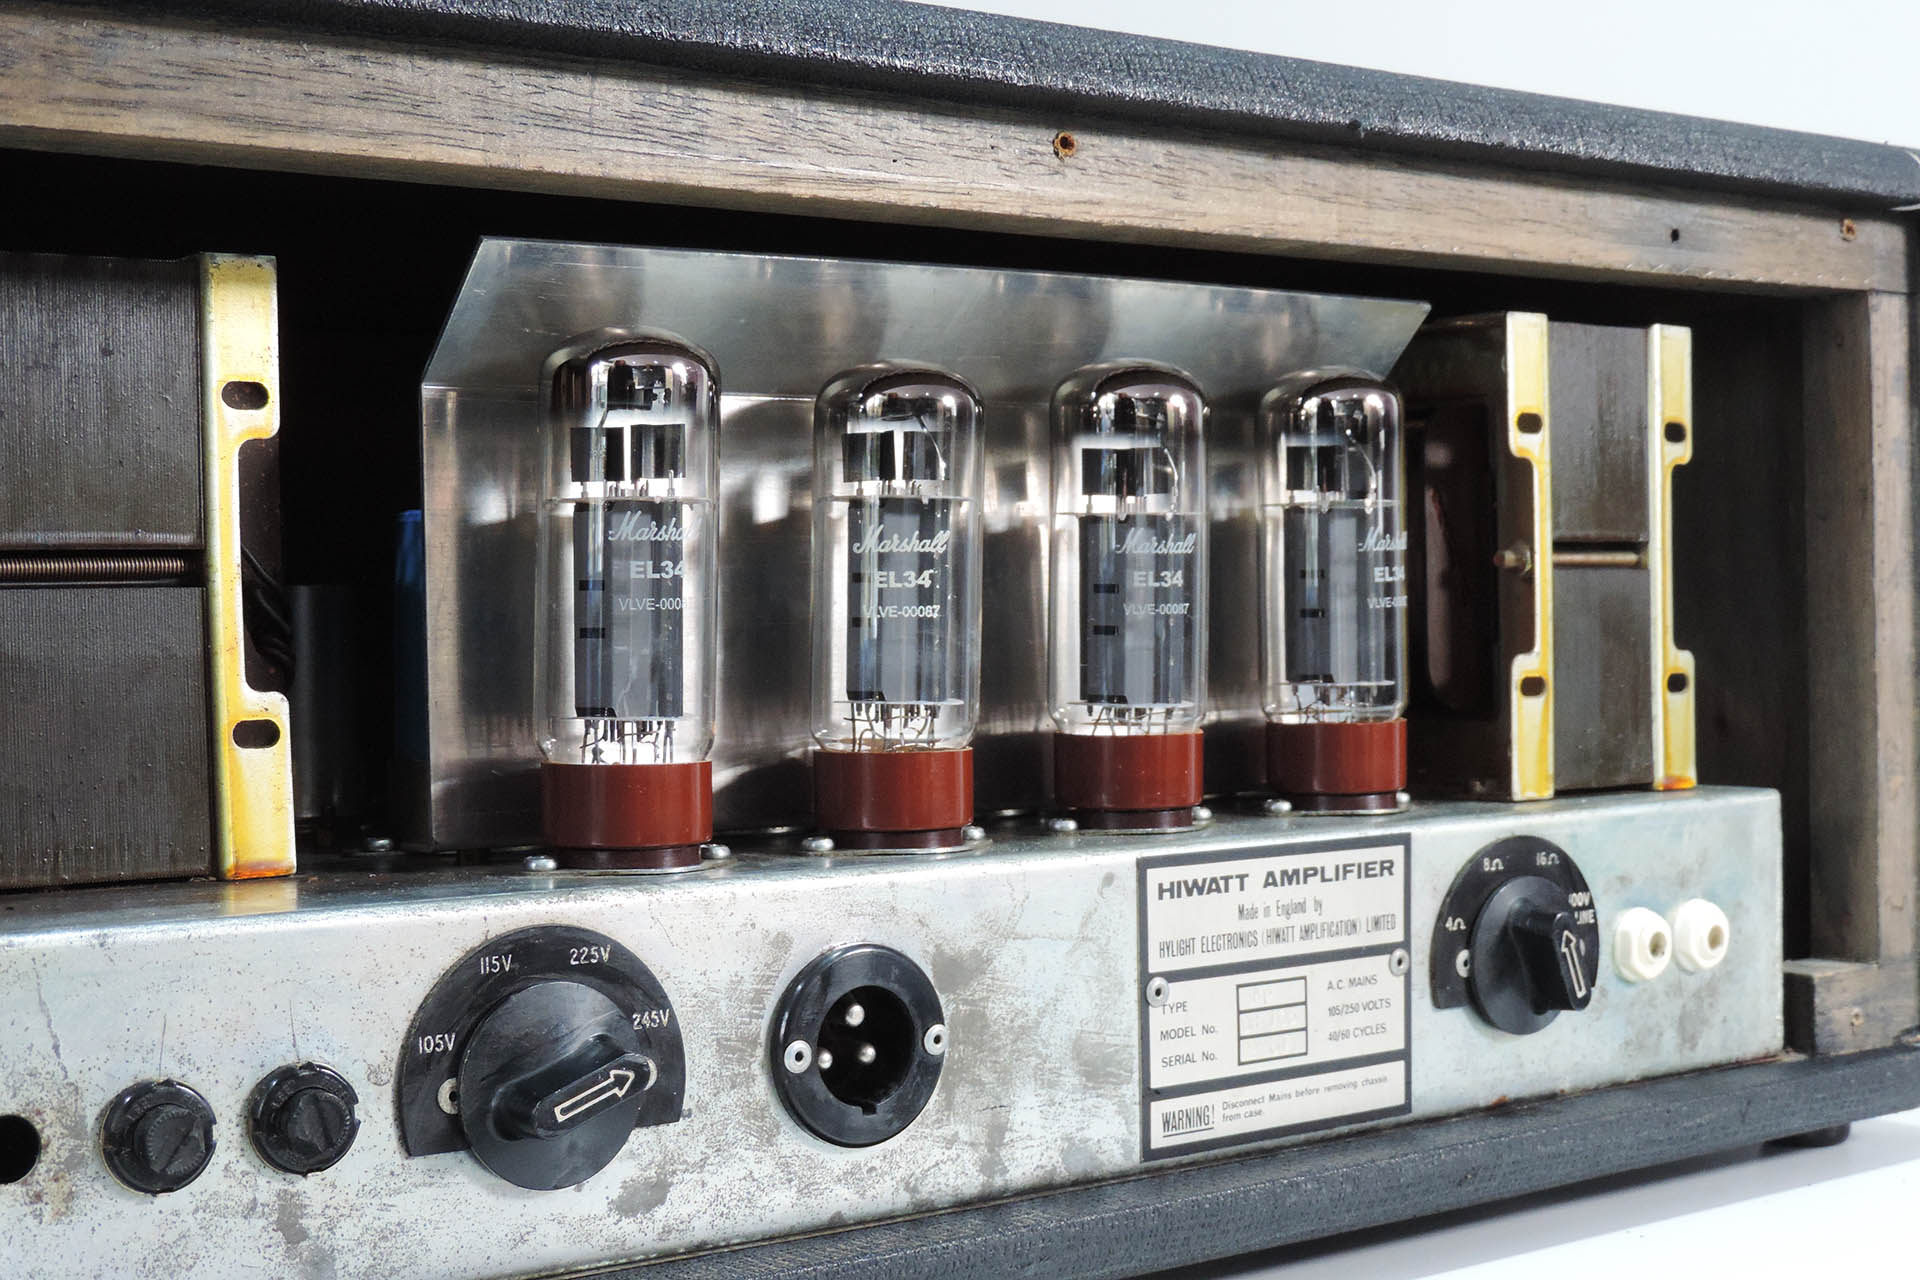
Check out that wiring! No wonder these Hiwatts were often referred to as "posh Marshalls".
Famously, the wiring of Hiwatts is an engineer’s dream and these amps typify the attention to detail with which Hiwatt did things. Everything looks so precise. Everything looks just so tidy. Compared to a Marshall, a Fender or even a Mesa Boogie, these things are just beautiful inside. This kind of precision arrangement surely contributed towards the well-known, superior signal-to-noise ratio associated with those old Hiwatt amps.
Remains of several shark-fin guitars were also found with the amps and in other chambers, prompting expedition artist Tony Burlinson to knock up an impression showing Pharaoh Rokatiti doing his thing in the desert.
Archaeologists didn't find any evidence of a band and speculate that Rokatiti was a solo act. Perhaps he was ahead of his time. Perhaps like the nail, ancient Egyptians didn't conceive the idea of a rock band. Perhaps we'll never know...
Undoubtedly the loudest 100W amps ever, Pharaoh Rokatiti could be heard jamming with his Hiwatt, for miles.
Anyway, once the chassis had been cleaned and I had checked the amps were safe, I moved on to the cabinets and spent several days getting the boxes to look like they might have, a couple of thousand years ago.
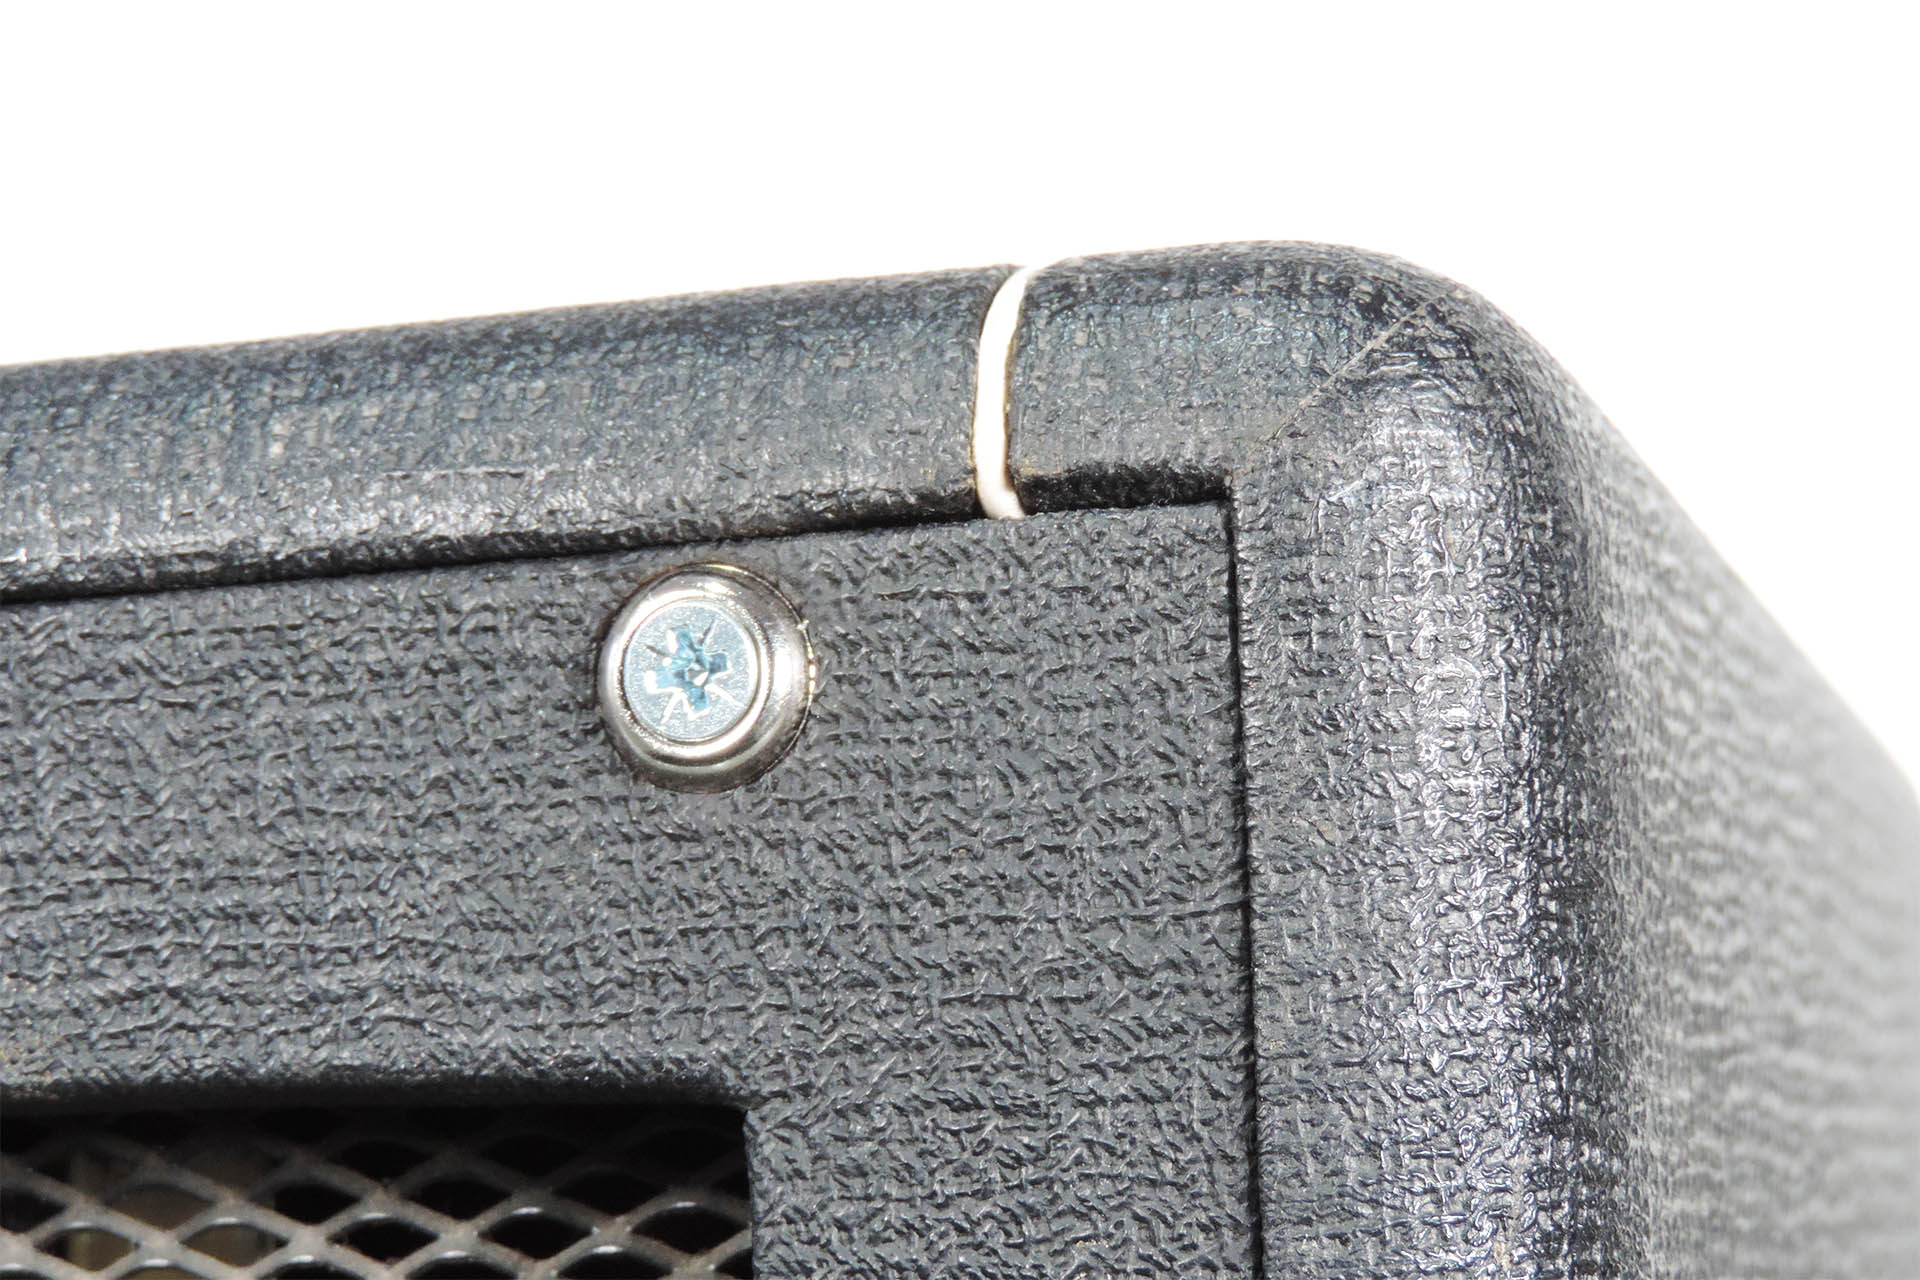
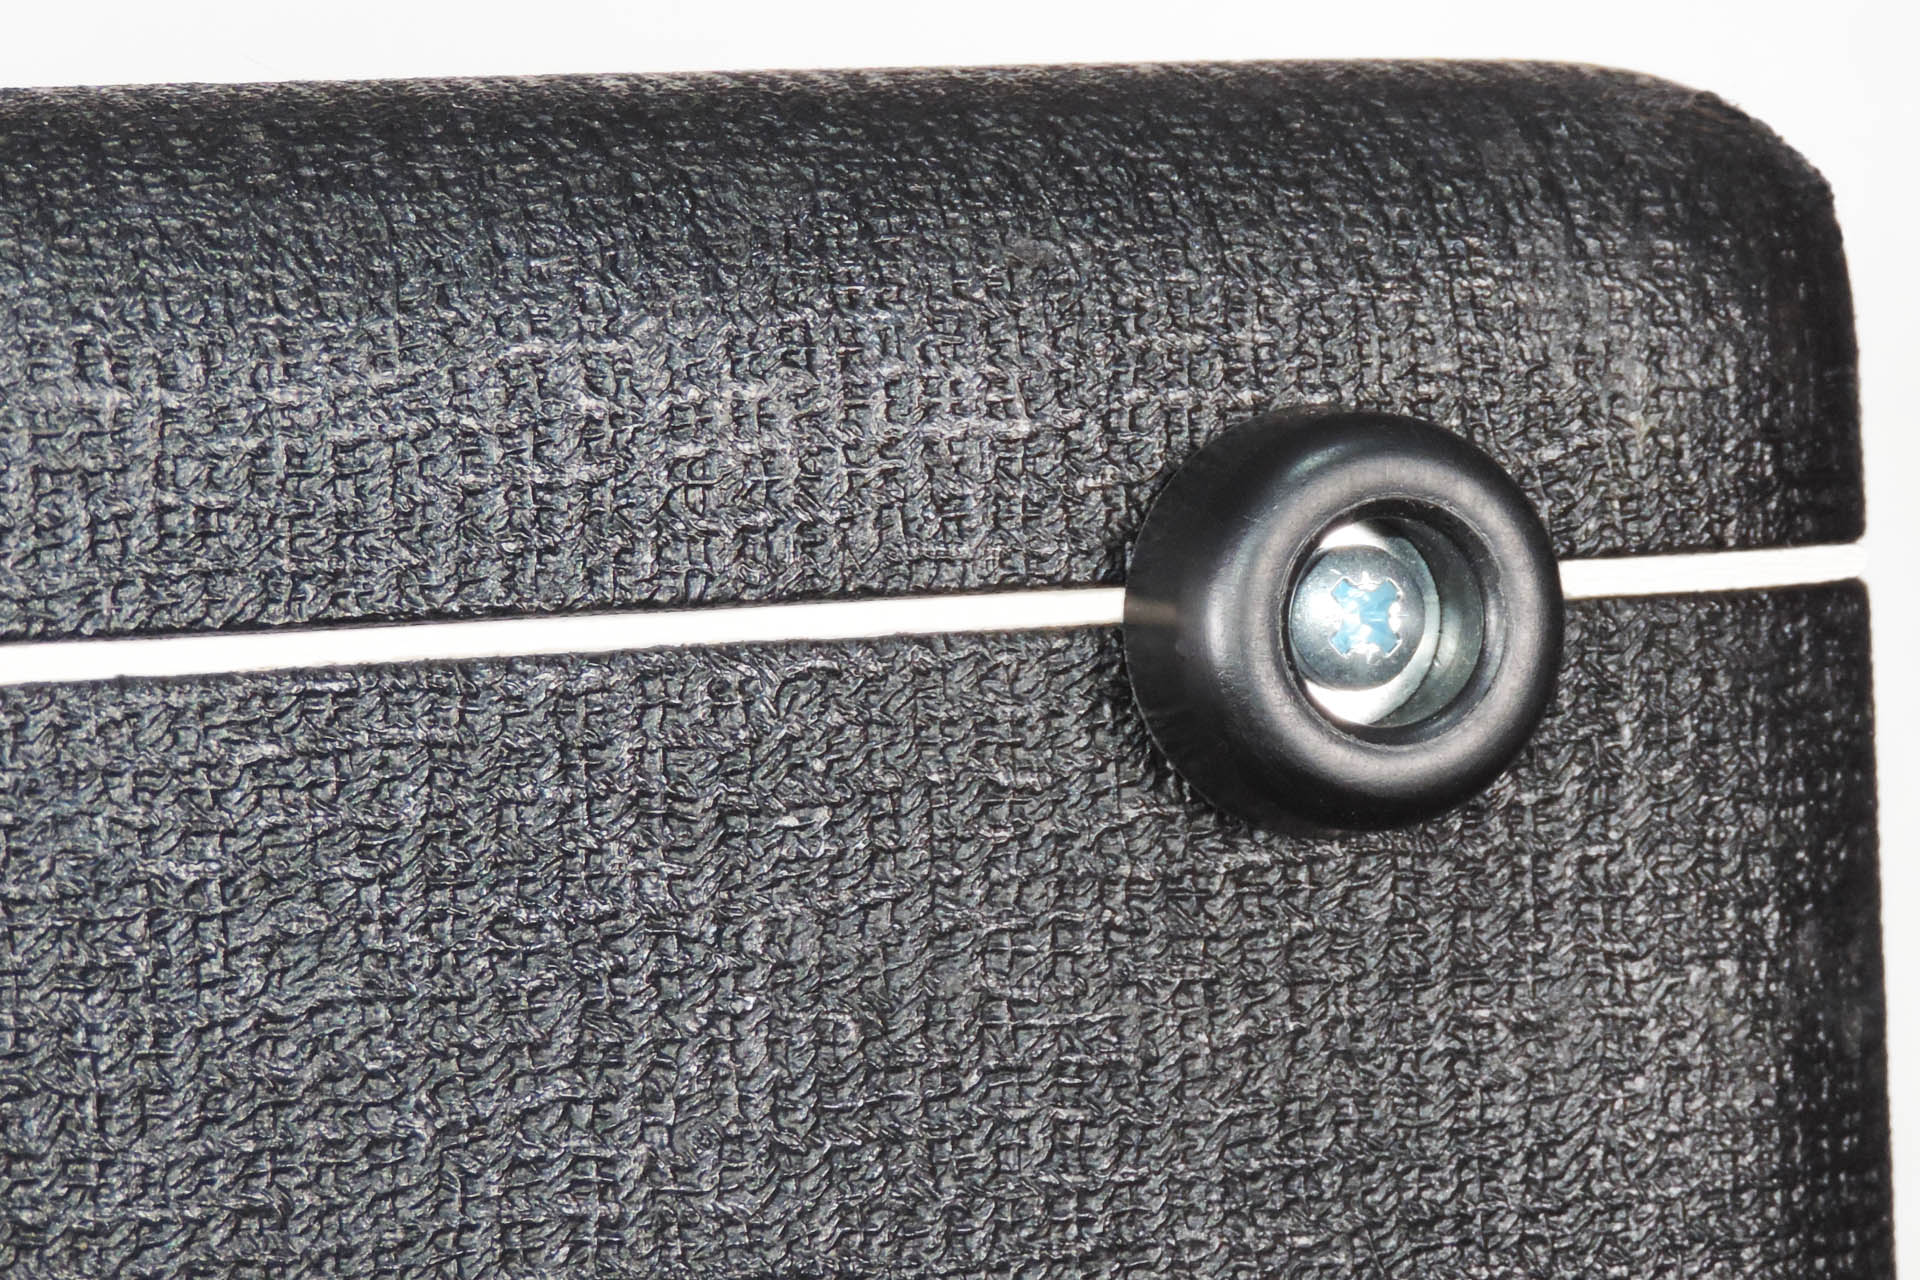
New screws and screw-cups where appropriate, made a big difference.Having disintegrated to a few millimetres in height, the original feet were at the point of crumbing into dust and so I fitted new ones.
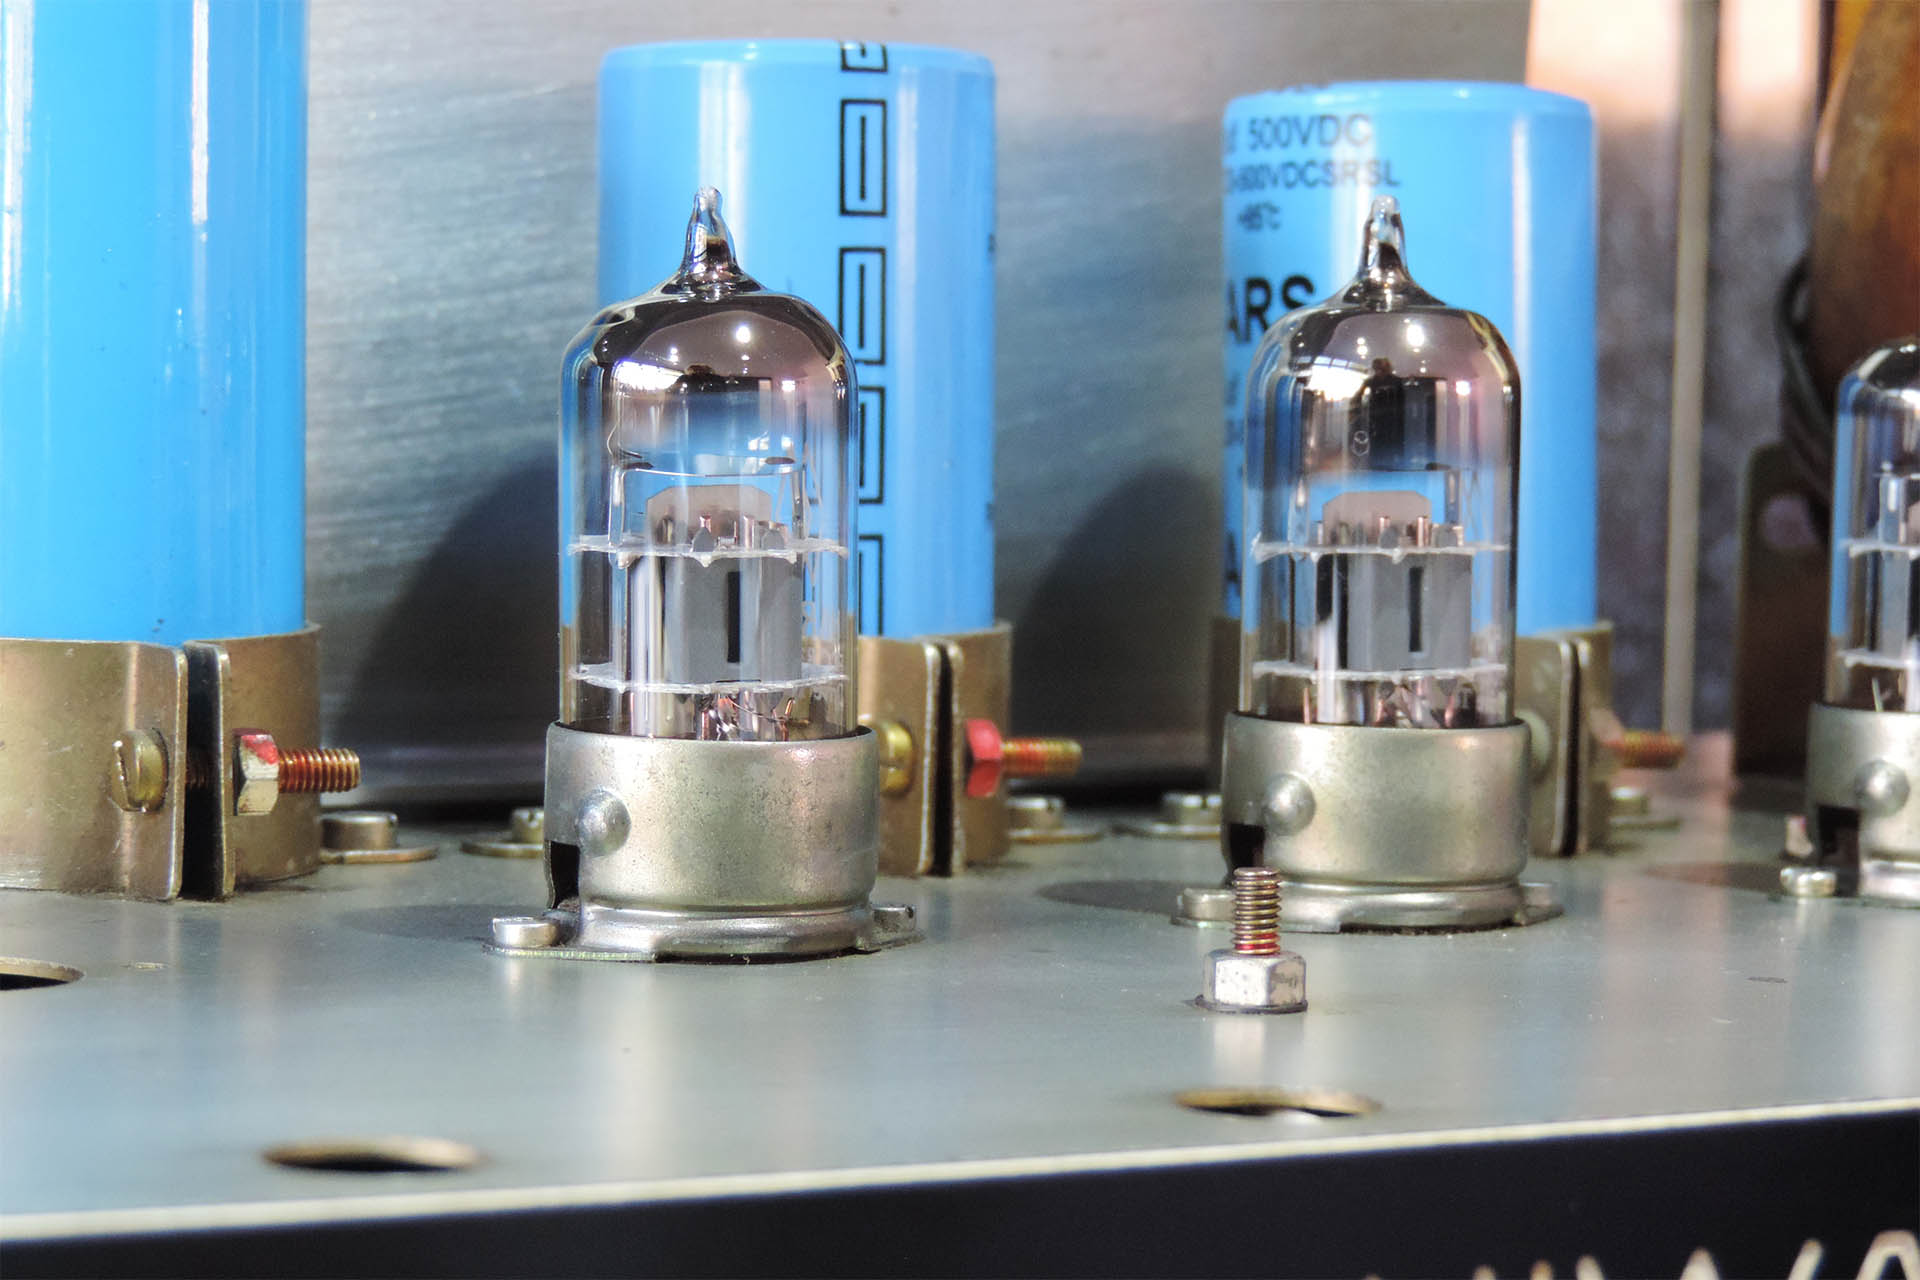
While I was doing that, I ordered valves and capacitors from my good friend, Derek Rocco at Watford Valves. Derek has been supplying me with valves and caps for decades and I've had the privilege of seeing his digital test / calibration equipment in action. My customers expect the best, so I simply won't source these vital components from anywhere else.
I decided to use Shugaung manufactured EL34Bs in these Hiwatt DR-103s. Derek passes on the great deal he gets from Marshalls, on to his customers. Hey, check out that heatshield at the back and err... no sand!
Co-designed by Marshall and the Shugaung factory in China, the EL34B is an evolution of the famous ‘Winged C’ EL34 which, by 2007, Svetlana was having problems supplying.
Today the Shugaung EL34B is used by all the big valve amp manufacturers including Hiwatt. Here's what Derek Rocco says: "What I have found with the EL34B, is that in clean mode the valve remains cleaner at higher volume but when driven, it breaks up easily with plenty of rich harmonics."
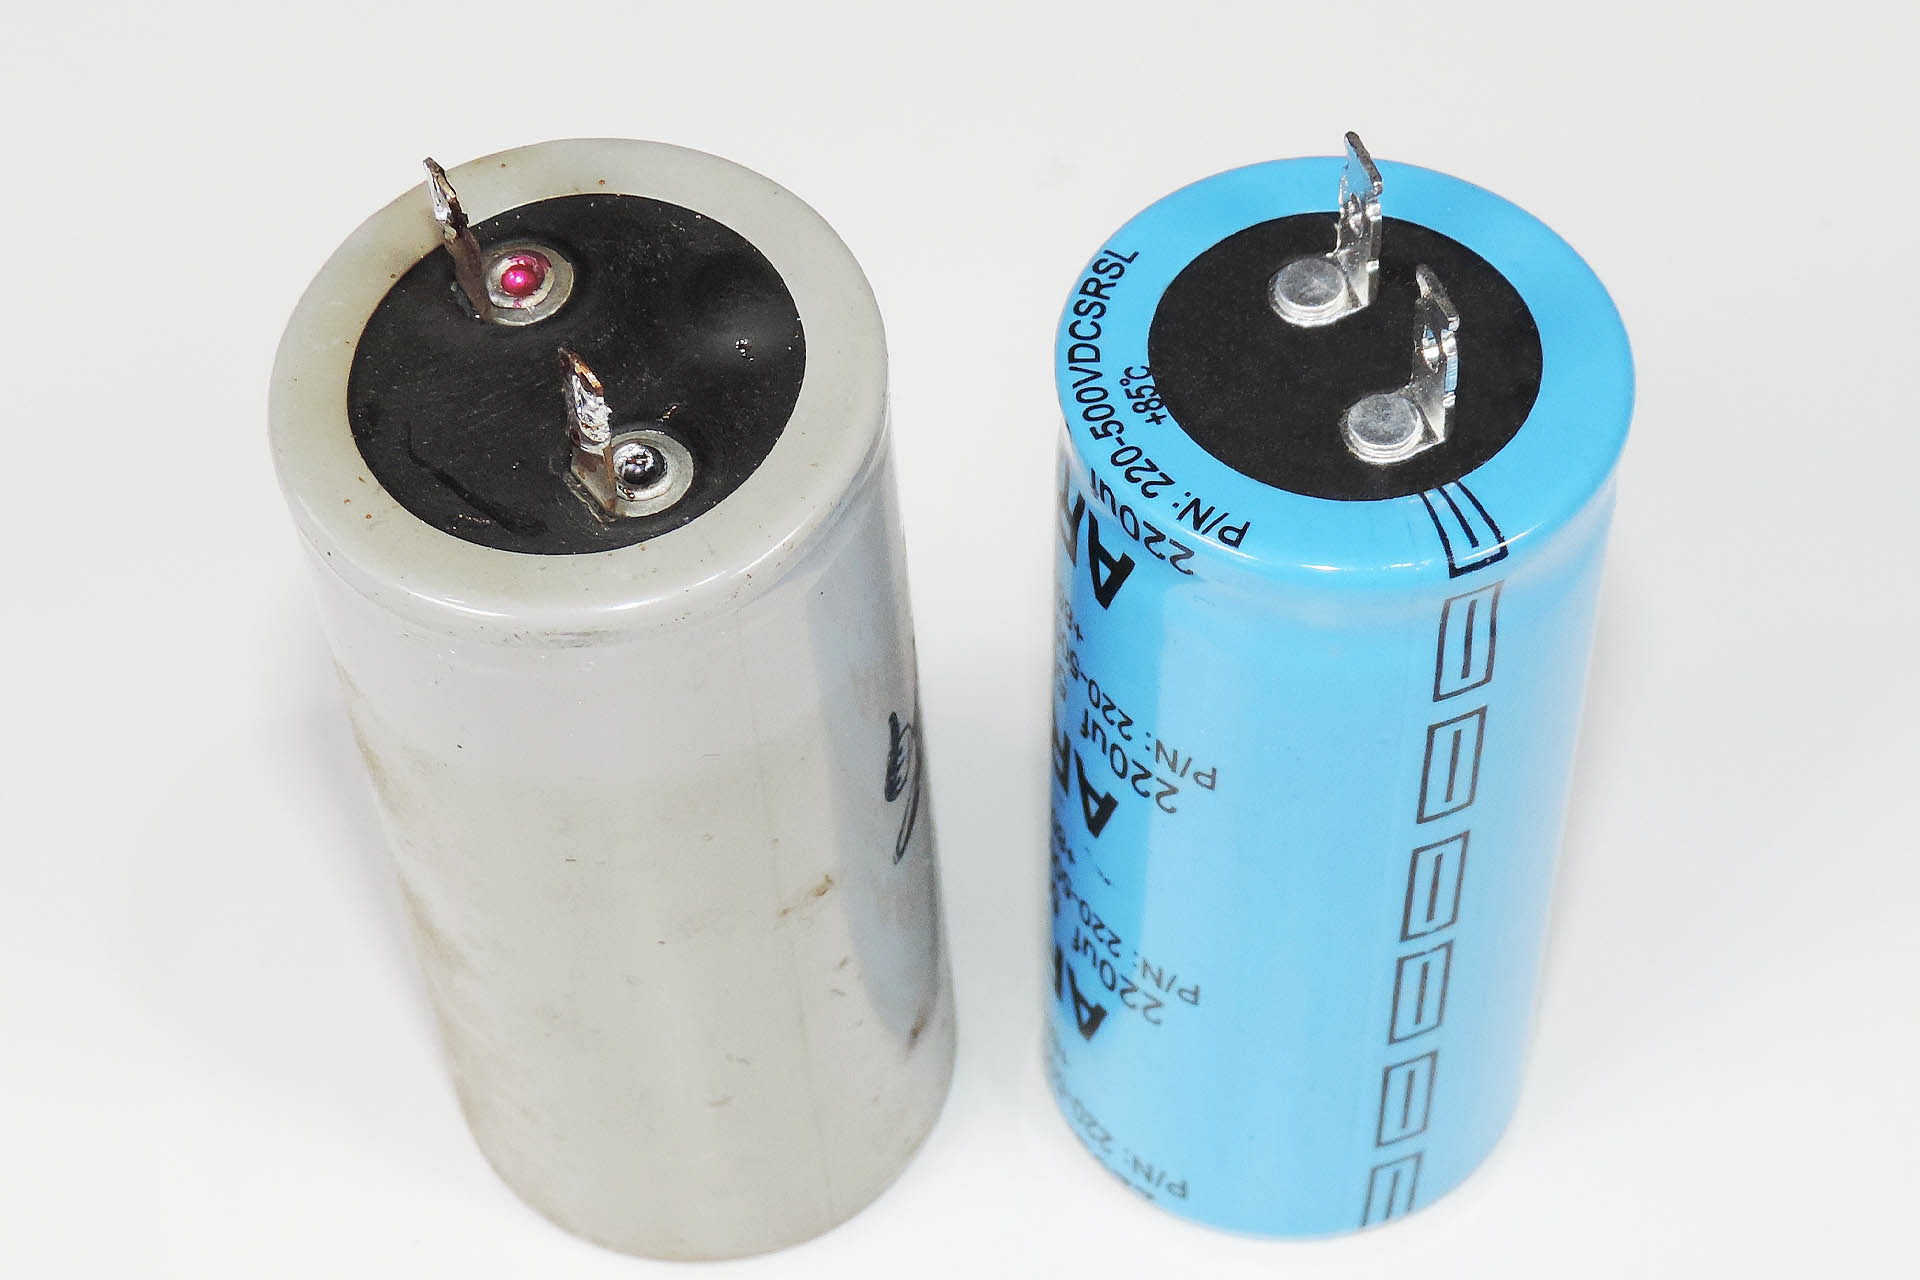
Replacing the valves was straight-forward enough but the large power supply capacitors were going to be a bit more challenging. It would have been easy enough to rip out the old caps and drop in the new ones but I wanted to retain that lovely Hiwatt wiring.
The difference in terminal orientation and pitch between the original capacitor on the left and the new capacitor on the right, isn't normally an issue. On this occasion however, I was keen to retain the famous, tidy Hiwatt wiring which made the power capacitor transplant really quite challenging.
Although roughly the same size, the terminals on the new capacitors were orientated differently and they had a different pitch, to the originals. The difference was enough to make things a bit tricky, even after I'd carefully disconnected the old caps. It took a while and a lot of patience and careful thought to get the arrangement right. In fact I treated the replacement of each of the five capacitors, as a separate operation... and of course after having done one amp, I had to do it all over again.
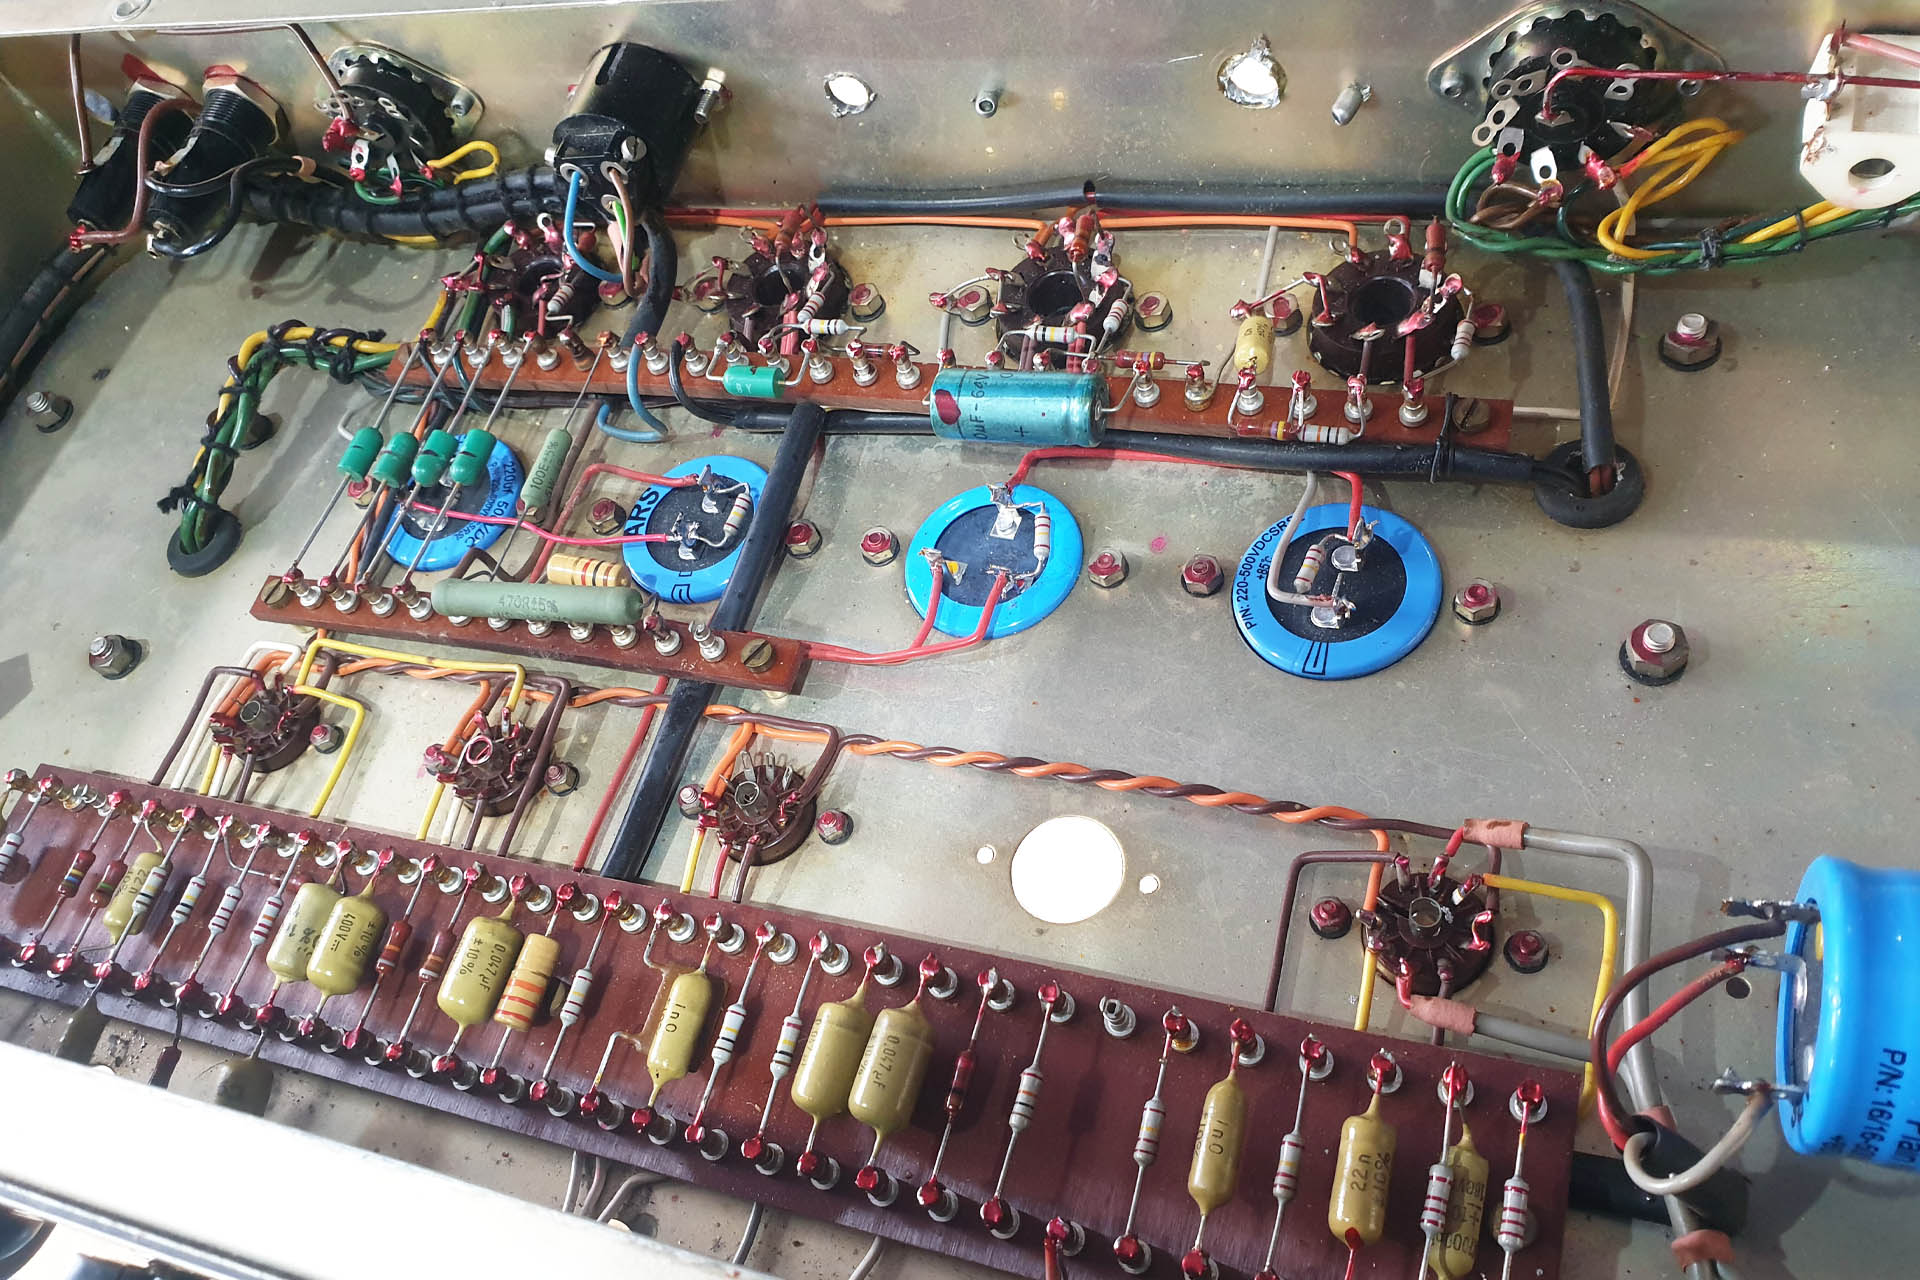
Here's the second amp with new power capacitors. Notice the holes in the rear of the chassis which were part of the mods and which I didn't hesitate to remove. I later cleaned these up and then plugged them.
As mentioned, amp 2 had three mods; one provided a feed off the speaker outputs which was poorly buffered. Another provided a feed off the master volume and the third, which had been partially disconnected, looked like a line input, bypassing the first couple of valve stages. Perhaps Rokatiti wanted to connect his amps somehow. Hmm... If that was the case, I would have expected to see similar mods on the other amp. Anyway, wanting to put these amps as close to factory as possible, I ripped out all the mod stuff.
It was unfortunate that the second amp had holes drilled in the chassis. I did my best to cover these up as tastefully as possible.
I'd run out of plastic 11mm hole plugs so I had a couple of frustrating days' wait until my reorder arrived in the post.
One of the holes in the rear panel, had been drilled straight through the serial number plate and although the serial number itself was still quite legible, it just seems such a shame. I did try to contact Hiwatt asking if I could get a replacement serial number plate but disappointingly, I'm still waiting for a response. 🙁
You can get away with a couple of holes on the rear panel but straight through the serial number plate? SERIOUSLY?!?!?!
After a couple of days, the job was done and I plugged in the first amp into my custom-built dummy load which has a feed that allows convenient connection to my oscilloscope.
Power on... No big bang, just that gentle hum that we associate with valves amps. Wait a minute for the valves to warm up and then.. Standby, off...
Harma ECC83 pre-amp valves from my friend, Derek Rocco at Watford Valves.
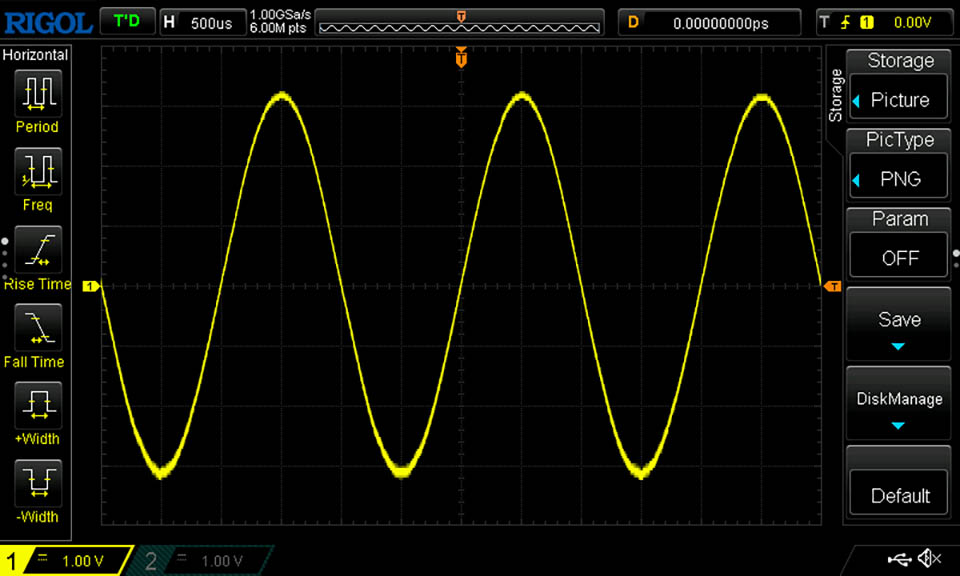
I set my signal generator to chuck out 1kHz at -20dBm and slowly wound up the input gain on the Normal channel. Then I inched up the master volume. Yes, that's right. The DR-103 was a master volume amp and was a little ahead of it's competitors.
The oscilloscope displayed a perfect sinewave. Well that's a good start. I tested the amp at several frequencies allowing me to check the functionality of the tone controls. Wow! Very smooth, no drop-outs or sudden bursts.
It was always felt that the only way to get an overdriven sound out of a Hiwatt, was with an overdrive or distortion pedal. Indeed the headroom on the inputs and the power amp is considerable.
Okay, now I need to plug this into a cab and check it out with a guitar. I chose not to use a power soak and was prepared to crank this. Following the flood at my studio last August, I'm still working from home, so this all happened in my kitchen!
Boy, is this thing loud! I was so taken back that I forgot all about the fact that the amp actually worked. I played for about half-an-hour, loving every second and everything remained solid. The second amp was next and performed exactly the same as the first. Amazing. After a couple of thousand years, these things still frigin' rock!!!! 🙂
"Hiwatt Amps Found In Pyramid" Well, not quite but it is April fools' day, LOL. 😀 For those interested, the serial numbers on Adrian's amps indicated that one was made in 1971 and the other in 1972.
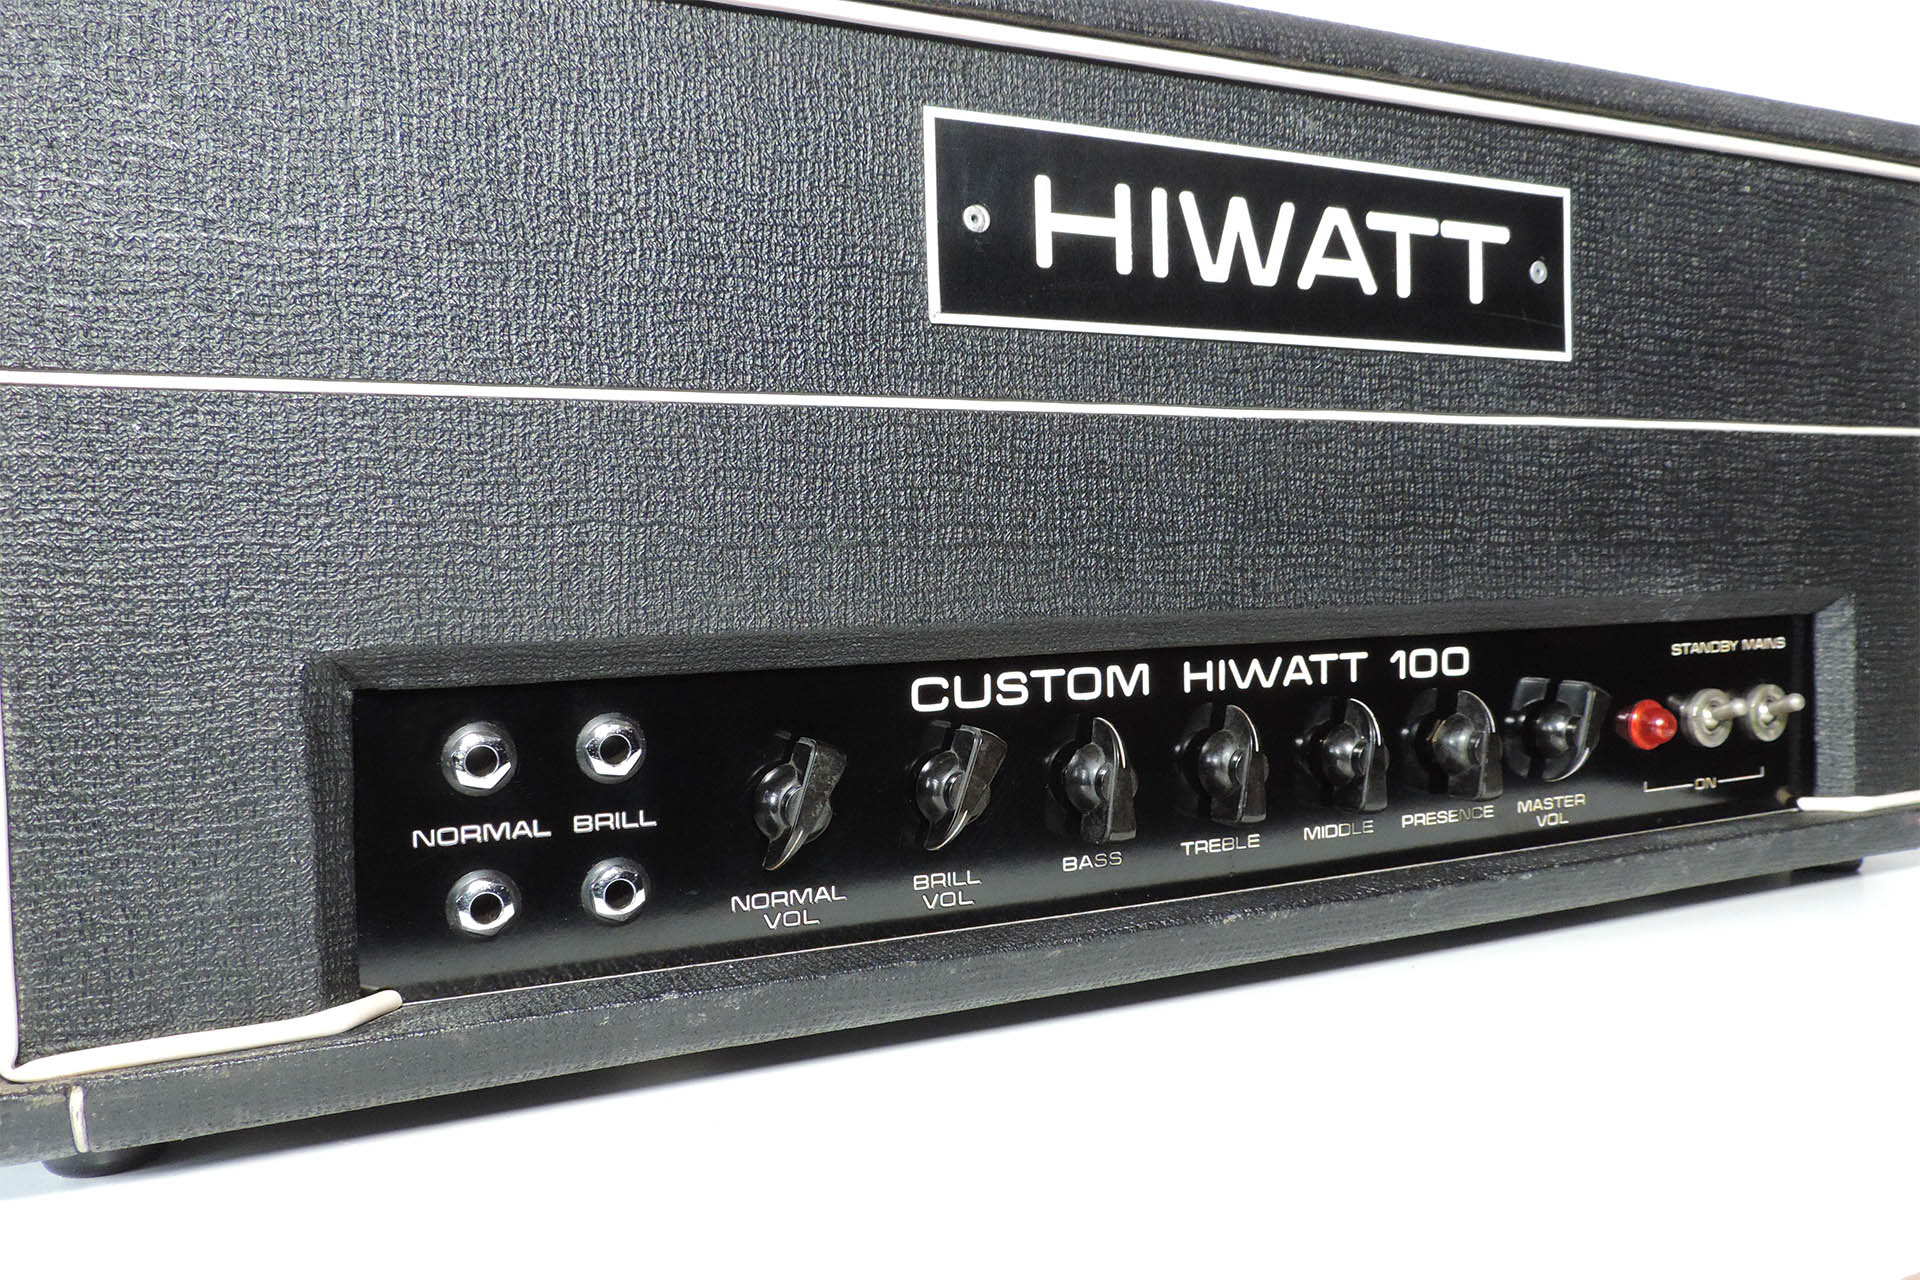
Although a challenge, restoring these Custom Hiwatt 100s has been a real pleasure. Showing their age but after a full refurb, they're actually in remarkably good condition and despite a couple of new fittings, are pretty original, too. More importantly, they just sound amazing!
Hiwatt amps found in pyramid looking like new and sounding BIG! Hey, Alex, is that one of Pharaoh Rokatiti's Shark-Fins???.
If you're lucky enough to have found a couple of Hiwatt amps in a pyramid, or perhaps at the back of your attic, please do contact me. I'd love to know about them!
These Hiwatt DR-103 amplifiers are a unique link to a bygone age. I’m not talking about a time when thermionic valves ruled, or Pete Townsend of The Who or Dave Gilmour of Pink Floyd, were household names. I’m talking about a time when the likes of Jim Marshall and David Reeves (founder of Hiwatt Amplification), actually cared about their products, the craftsmen who made them and their customers.
I was and always have been a Marshall man but the truth is Marshall, Hiwatt, Fender, it didn’t matter. As a budding rock star, owning one of these amps made you feel like you’d just joined an elite club and that stardom was now somehow, guaranteed. That big black box wasn't just an amp. It was a thing of magic. In fact, back in 1980, when I got my very first Marshall, it sat on my parents’ dining room table for a couple of days, with me err... just staring at it.
I fondly recall the front cover of the Electric Warrior album by T. Rex which pictured a silhouette type image of Mark Bolan playing his famous Les Paul, in front of one of those old stacks. Oh wow! That image was just so inspiring and now I was the owner of a real Marshall amp and there was suddenly a connection between me and Mark Bolan. I felt like someone special and I just knew that all I needed to do now was to record that hit song.
Simple but iconic, the album artwork on Electric Warrior by T. Rex. When I saw this awe-inspiring image, I just knew what I wanted to do for the rest of my life.
Well, none of that ever happened but I was definitely sold the dream!
Indeed, the dream-maker package disappeared a long time ago. Digital processing, modelling and IR technology means that you can now dial up a patch to sound ‘like’ whatever or even whoever.
Rock was the sound of anarchy and loud, overdriven, low-slung electric guitar, was the symbol of a non-conformist youth. I remember bunking off school to play guitar. Today kids go to school to learn to play rock. Seriously?!?!!?
"Well now-a-days, it's all about the music." I hear people say. Hmm... I remember a time when it was (all) about a whole "lotta" love, I mean more...
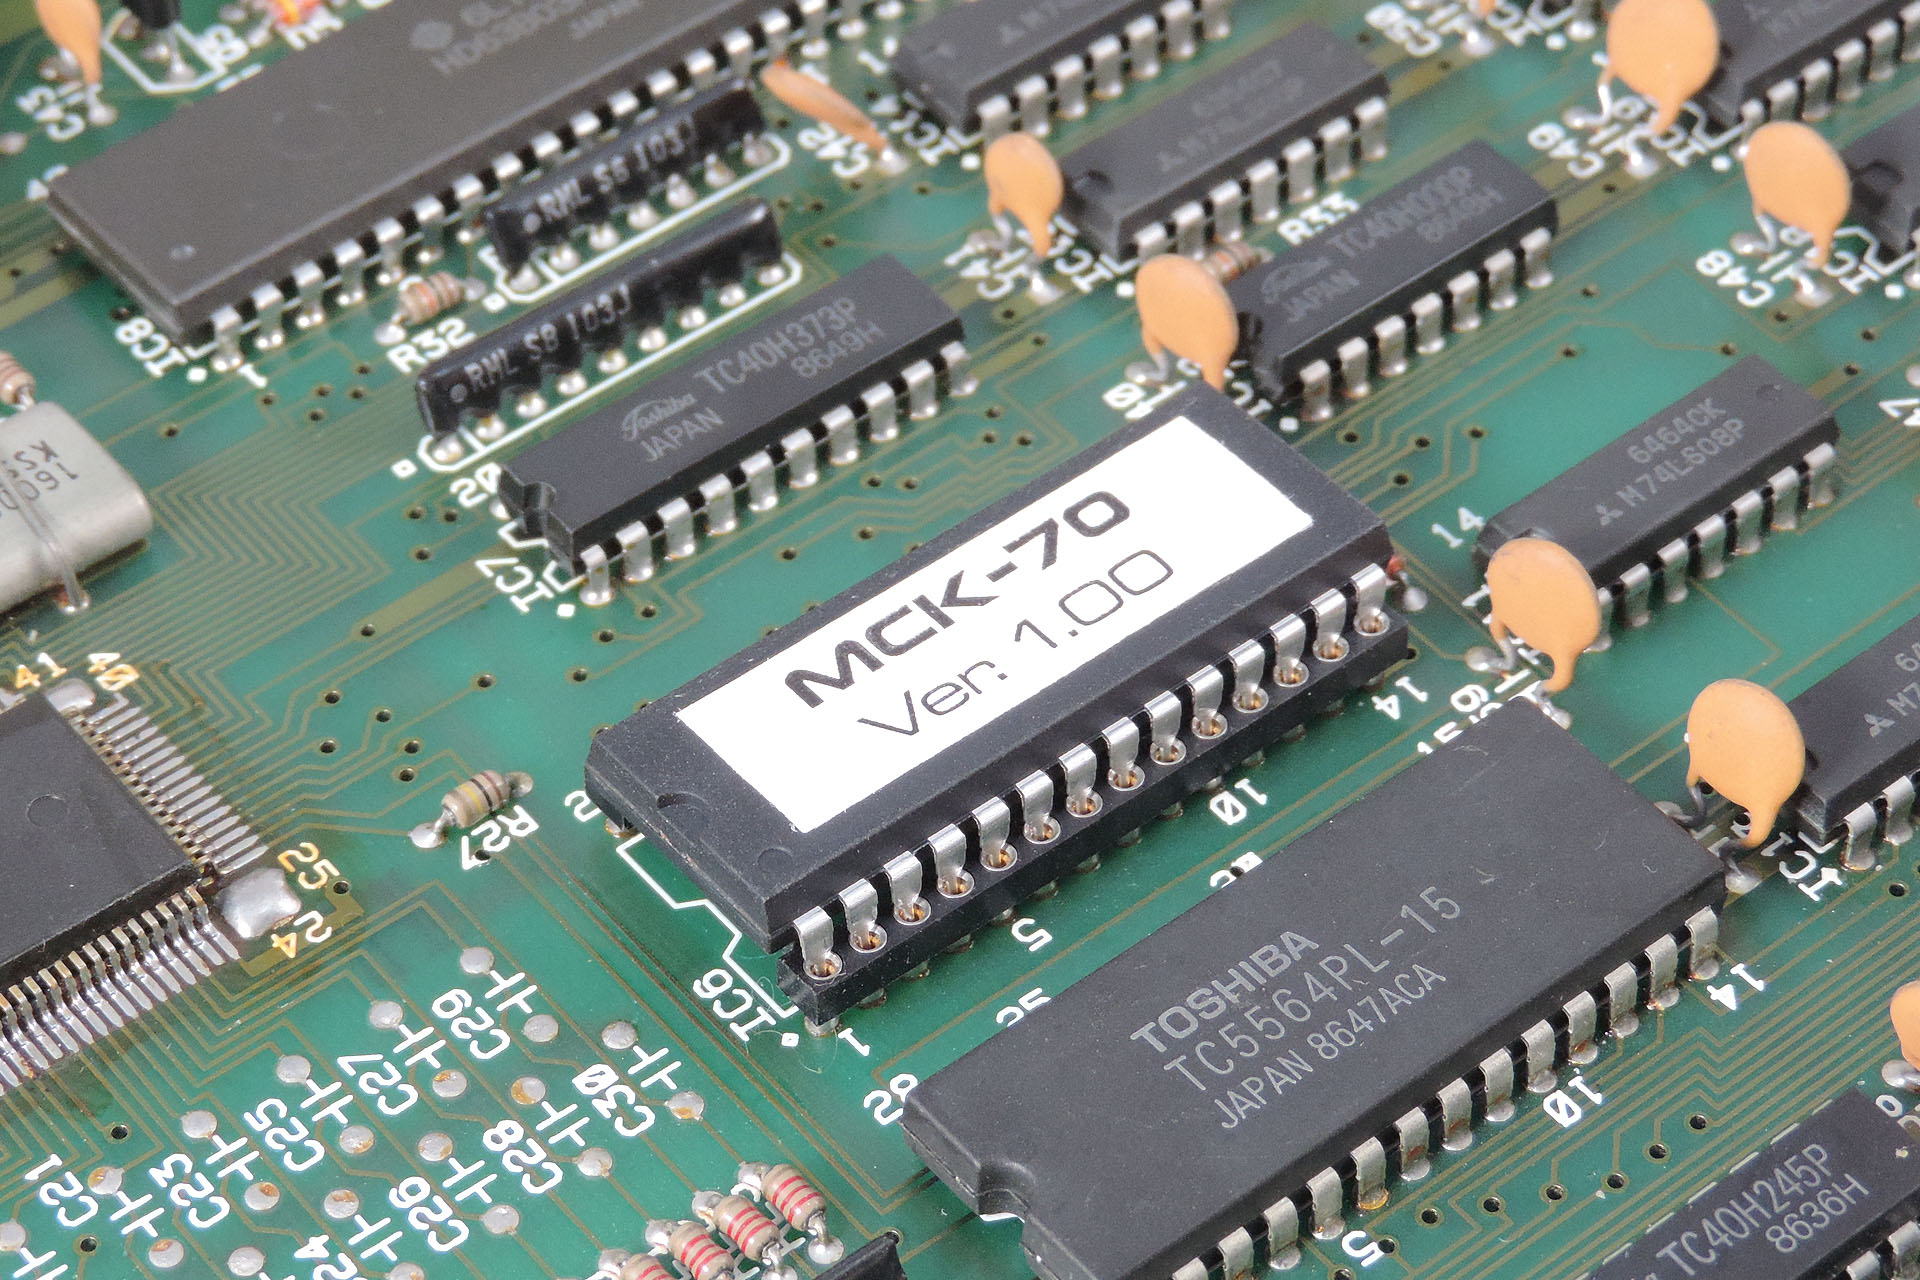
Introducing a fantastic utility, MCK-70 is a memory checker for the Roland MKS-70 and JX-10, developed by non-other than Guy Wilkinson.
A few weeks ago, I received a Roland MKS-70 from a customer in Canada. He’d just had it upgraded with Guy Wilkinson’s fabulous VFD module and Fred Vecoven’s PWM mod but then weird things started to happen. This machine was then sent a couple of thousand miles across the Atlantic to see what I could do with it.
The first thing was to fix the power supply. It was totally shot. Signs of heat damage and all regulated outputs showing zero volts except the -15V line which was reading -21.5V, wasn’t a good start. Oh dear. Anyway, I got that going temporarily as the customer agreed to have Guy Wilkinson’s P0004 switched-mode power supply installed.
The next issue was that some voices weren’t playing. After going over the voice-boards and confirming that they were both okay, I decided to look at the assigner (CPU) board.
To keep things simple, I disconnected the Vecoven PWM mod and I also installed the original Roland firmware. This meant that I had to have the voice-boards connected which is a bit of a pain.
After a lot of testing, chatting with Fred Vecoven and Guy Wilkinson, it seemed clear that the machine had a memory issue.
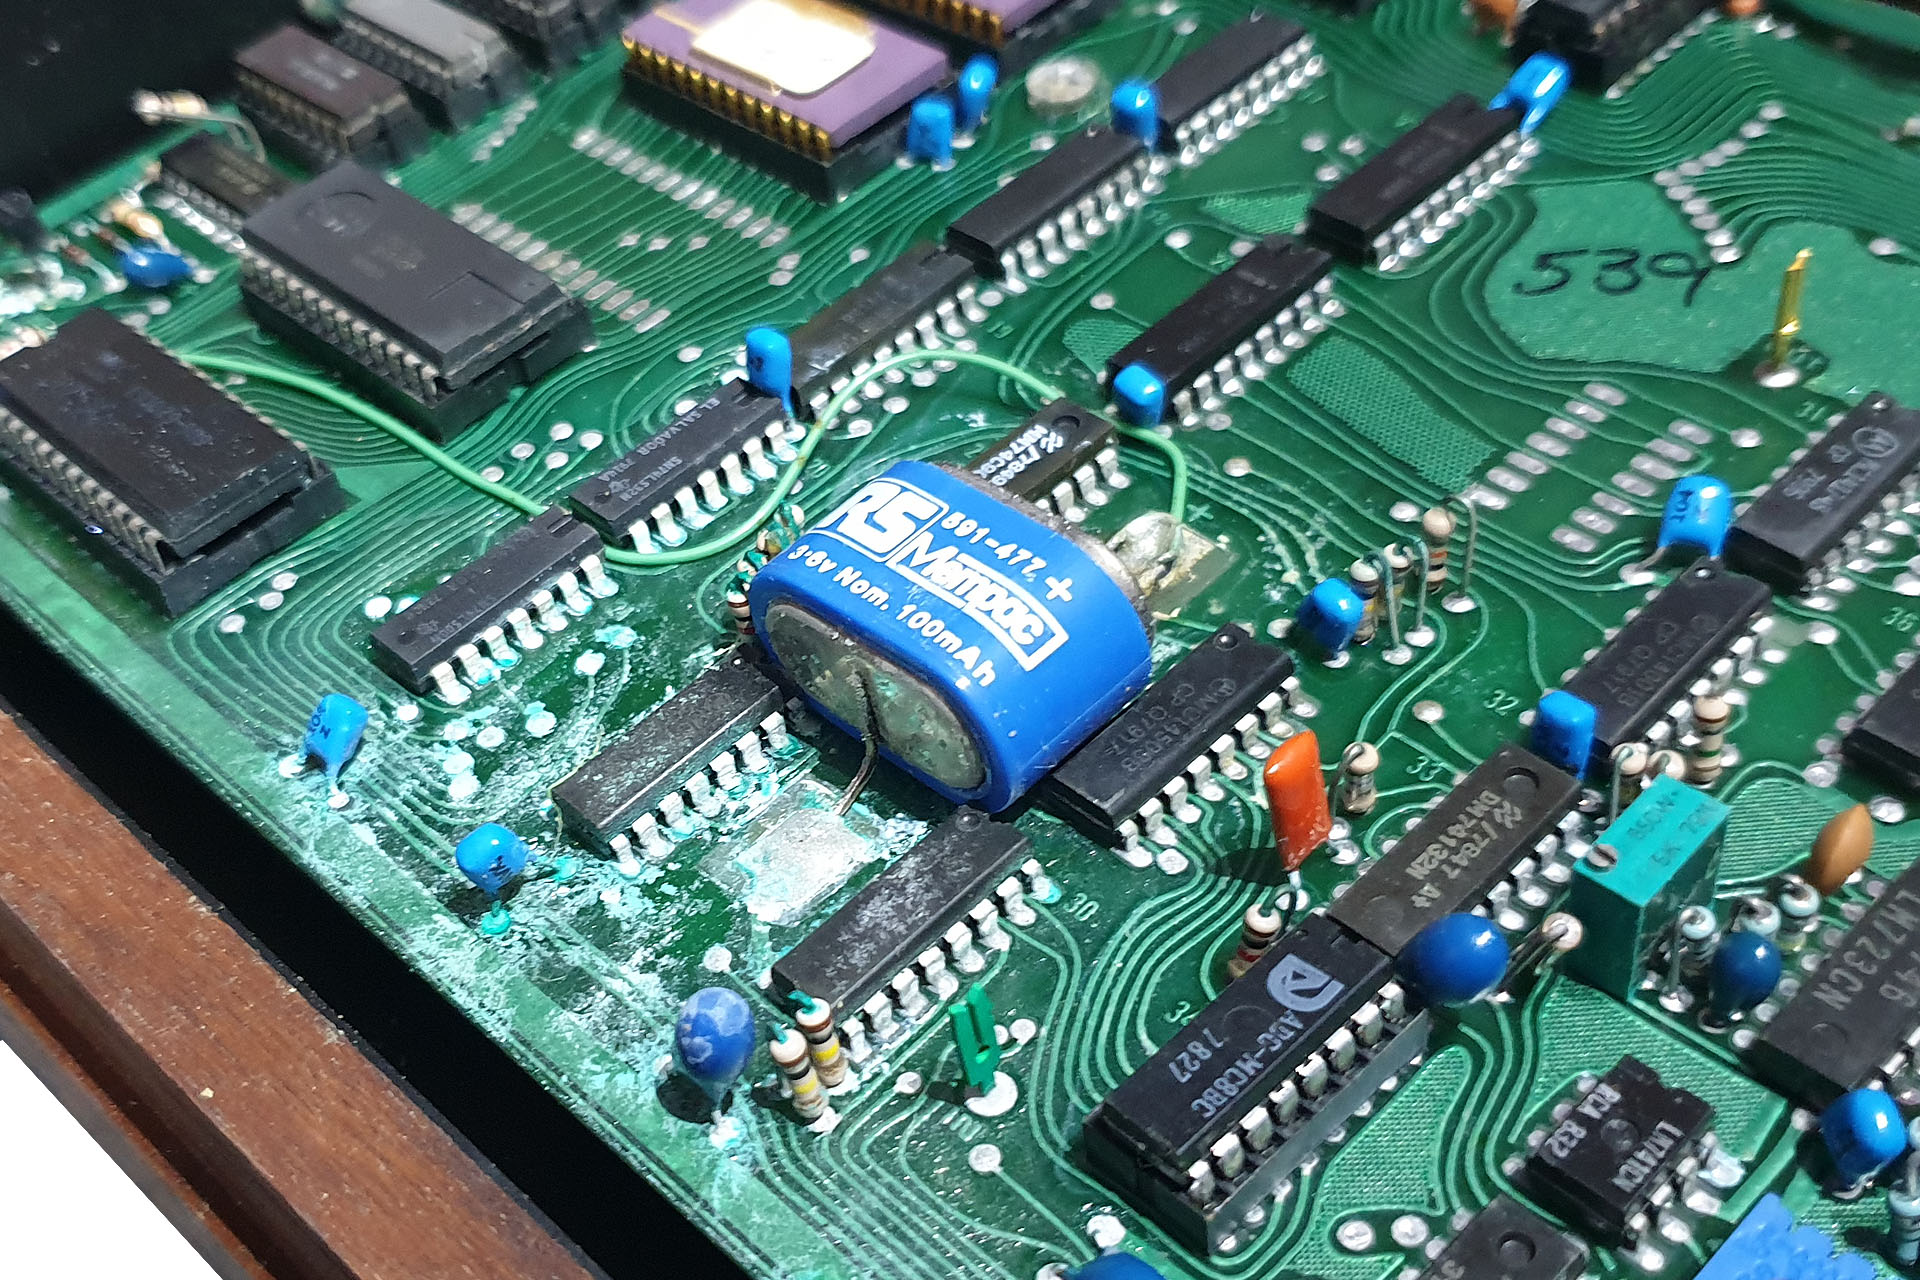
Guy told me that he’d developed a little bit of software to test the RAM in the Super-JX and we agreed that this would be a perfect opportunity to actually check it out.
Guy e-mailed me the bin file, I promptly burnt a ROM, installed it into the MKS-70’s Assigner-board and switched on. Oh wow! This is so cool!
Running in the processor's on-board memory and thereby leaving all other memory free, MCK-70 systematically checks not only the main RAM but also the gate-array RAM, writing all zeros as it sweeps. After a few seconds, you end up with an ultra-clean slate, a Super-JX that's cleaner than factory!
I then loaded some factory stuff into the MKS-70. Wow! All looking good so far. Programming a very simple tone and patch confirmed that everything was working and that the issues that were present before, were all gone. Guy, you’re a genius! THANK YOU, my friend. 🙂
MCK-70 will work on the Roland JX-10 as well as the MKS-70.
It was obvious that MCK-70 would be really useful to others and so Guy and I decided to make MCK-70 Memory Checker for the Roland MKS-70 and JX-10, available to purchase in my on-line store.
A great tool for anyone who may have similar MKS-70 or indeed JX-10 memory corruption problems, MCK-70 will save you a lot of hassle and money. Removing the TC5564 RAM chip requires removal of the assigner-board and unlike the voice-boards, the assigner-board has a couple of delicate membrane cables connecting it to the display board and the cartridge board. You really want to avoid disturbing these, if you can.
On top of that, the TC5564PL-15 isn’t at all easy to get hold of and hey, why on earth would you want to change the RAM chip in your Super-JX if you could know that all that’s happened, is that the memory’s got a little… well, bent?
IMPORTANT
When purchasing, you can select your preferred format; a downloadable .bin file or a physical ROM. If you buy the former, you'll need a ROM burner to put the program on to a 27C256 ROM. If you buy the physical ROM version, that'll be sent out to you.
This will totally delete the memory in your machine. Don't mess with it unless you actually have an issue or your machine's memory is backed up.
Although I've used a real case study involving a customer's MKS-70, MCK-70 will work in the Roland JX-10!
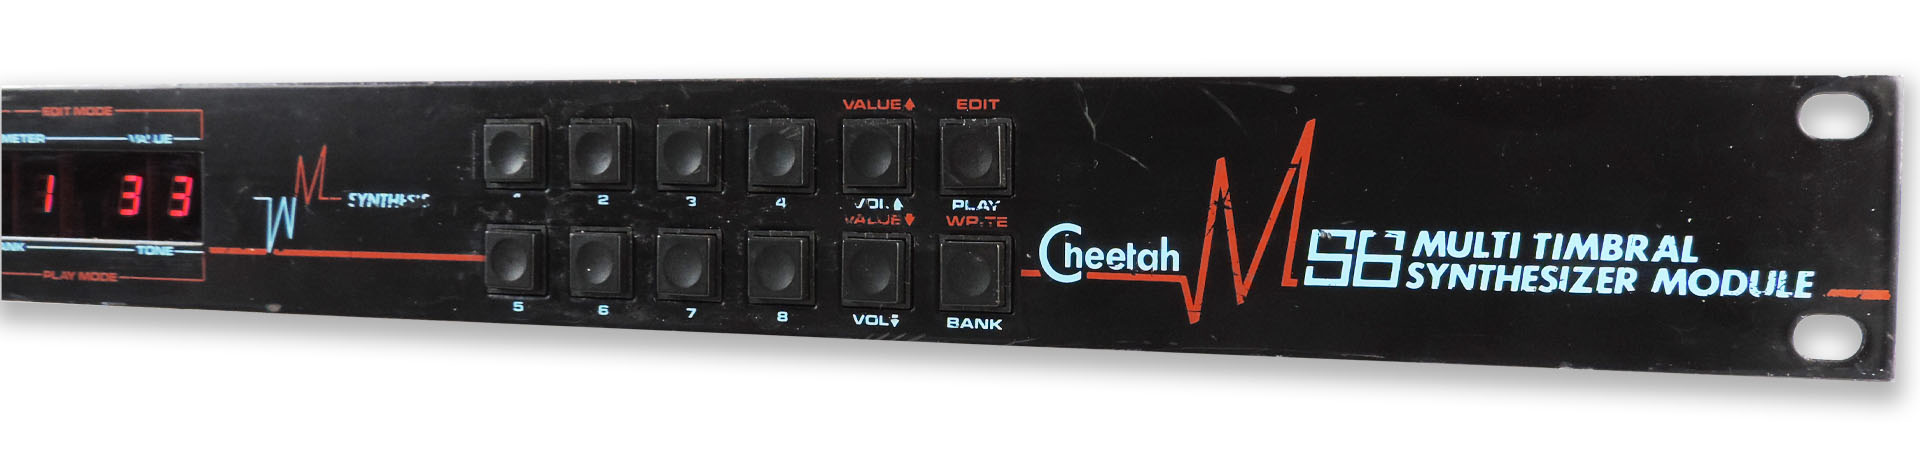
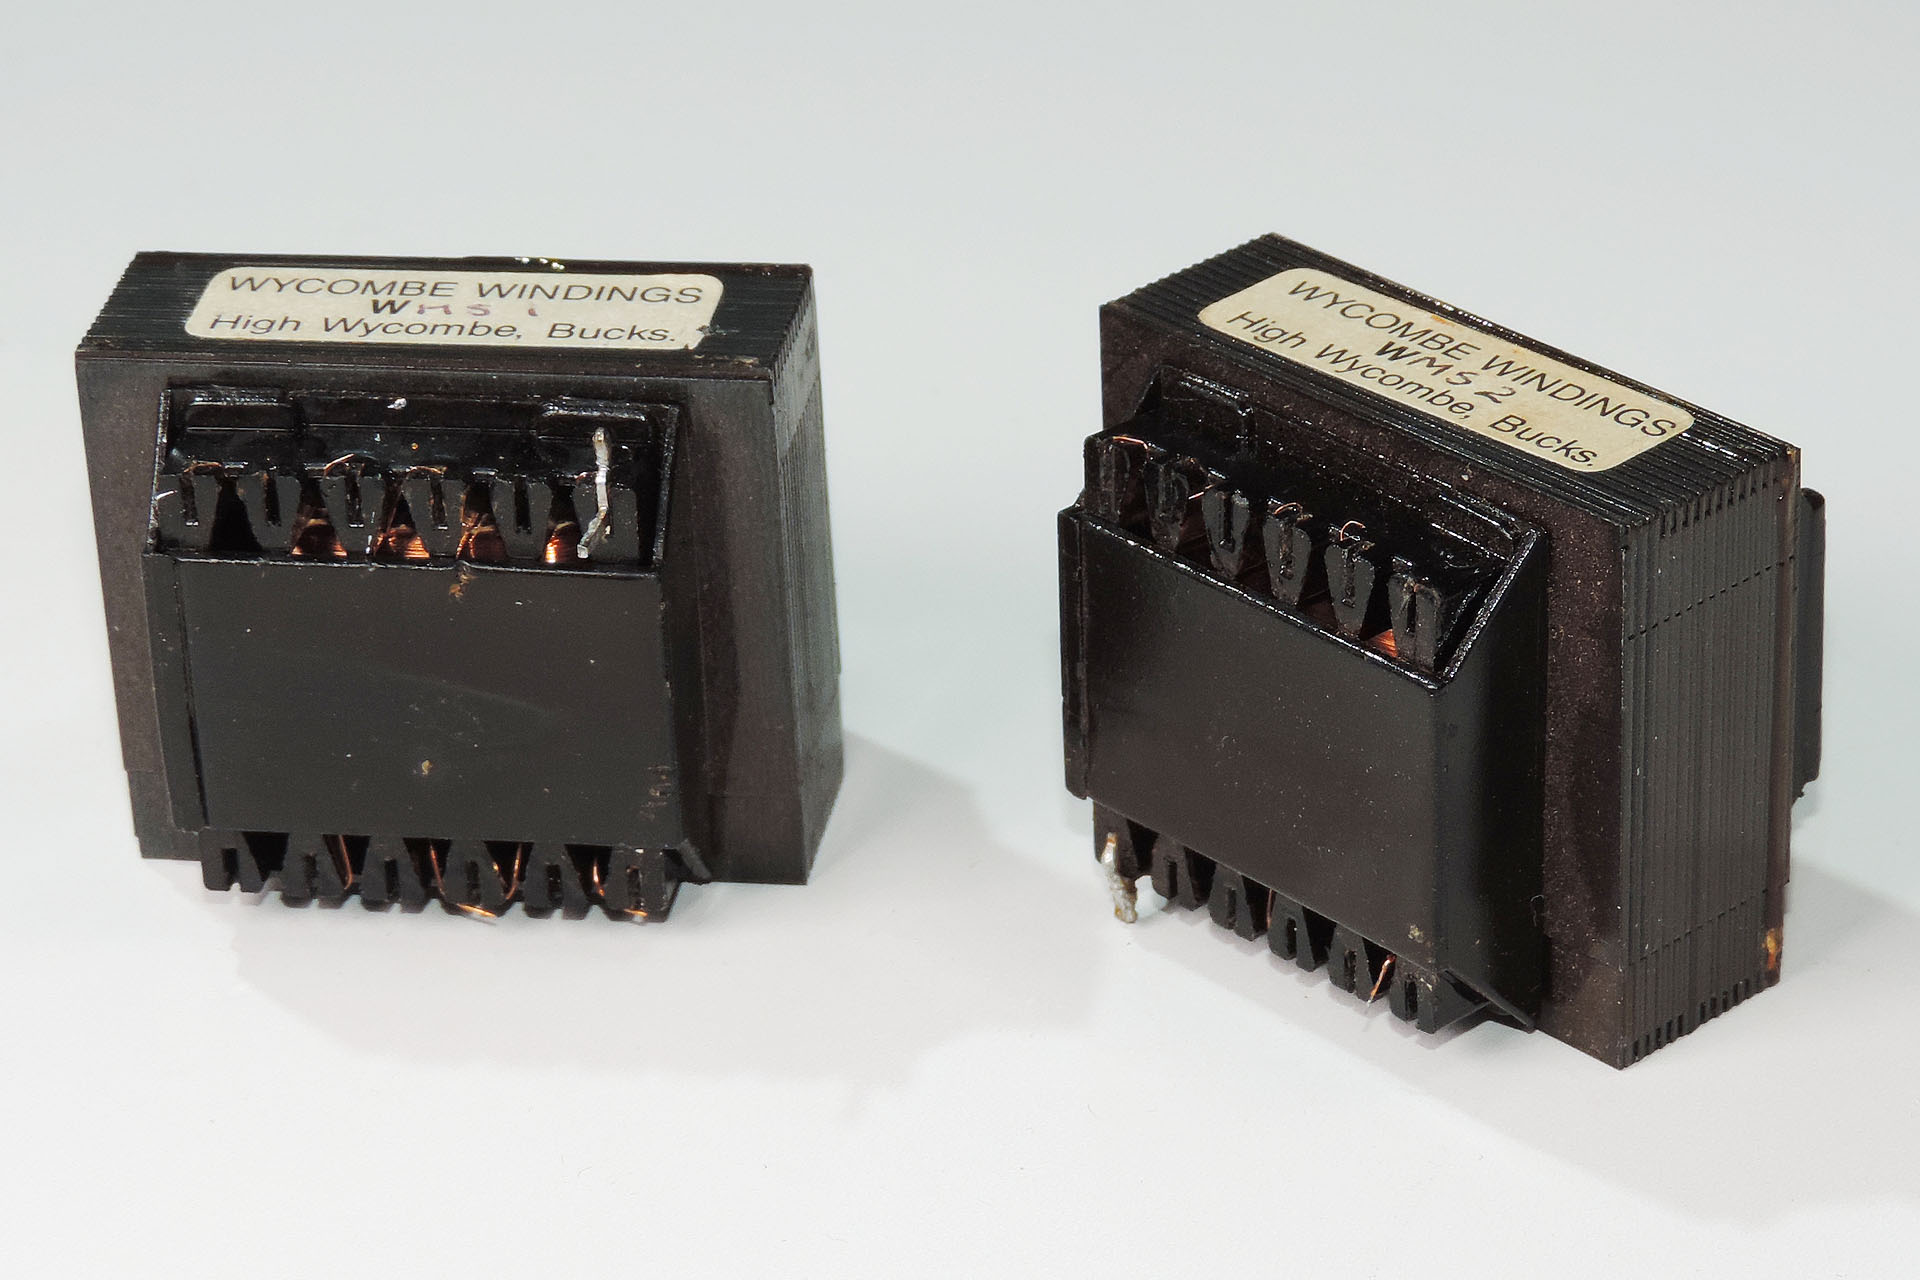
Just before Christmas 2020, I received a SoundLab SST-19 guitar pre-amp and a Cheetah MS6 synth module. Both needed power supplies. The SST-19 was immaculate and the customer was confident that it was working (when it had a working power supply, of course). You can read all about that here soon. The MS6 however, was a different story all together. The customer told me that one day it just went bang. In fact, it tripped the electricity supply of his house! After a brief conversation via e-mails, he sent me his machine requesting a complete Cheetah MS6 power supply build.
This customer's blown Cheetah MS6 has definitely seen better days!
I was told that the machine was working prior to the bang but a fault big enough to trip a domestic electricity supply might also have damaged the MS6. It was a gamble and there weren't too many resources available for this thing, either. Here’s a list of useful stuff that I did find:
Readable schematics were also thin on the ground and when I did find a copy that looked reasonably okay, that’s all it was, a schematic with very little other technical reference.
SIDE NOTE
To speed things up in the long run, I periodically spend a little time cleaning up, redrawing and organising the MS6 schematics. Hoping that my efforts will be helpful to someone else and being my small contribution to the Cheetah MS6 community, my redrawn and reorganised schematics can be downloaded here. Please note that this is an on-going project. Correcting typos and mistakes is one thing but the font that Cheetah used was shocking awful for technical drawings of this nature. The numbers '6' and '8' can easily be confused as can the letters 'A' and 'R', for example. As I said, this is an on-going project and I try to work on the schematics when I can so please be patient.
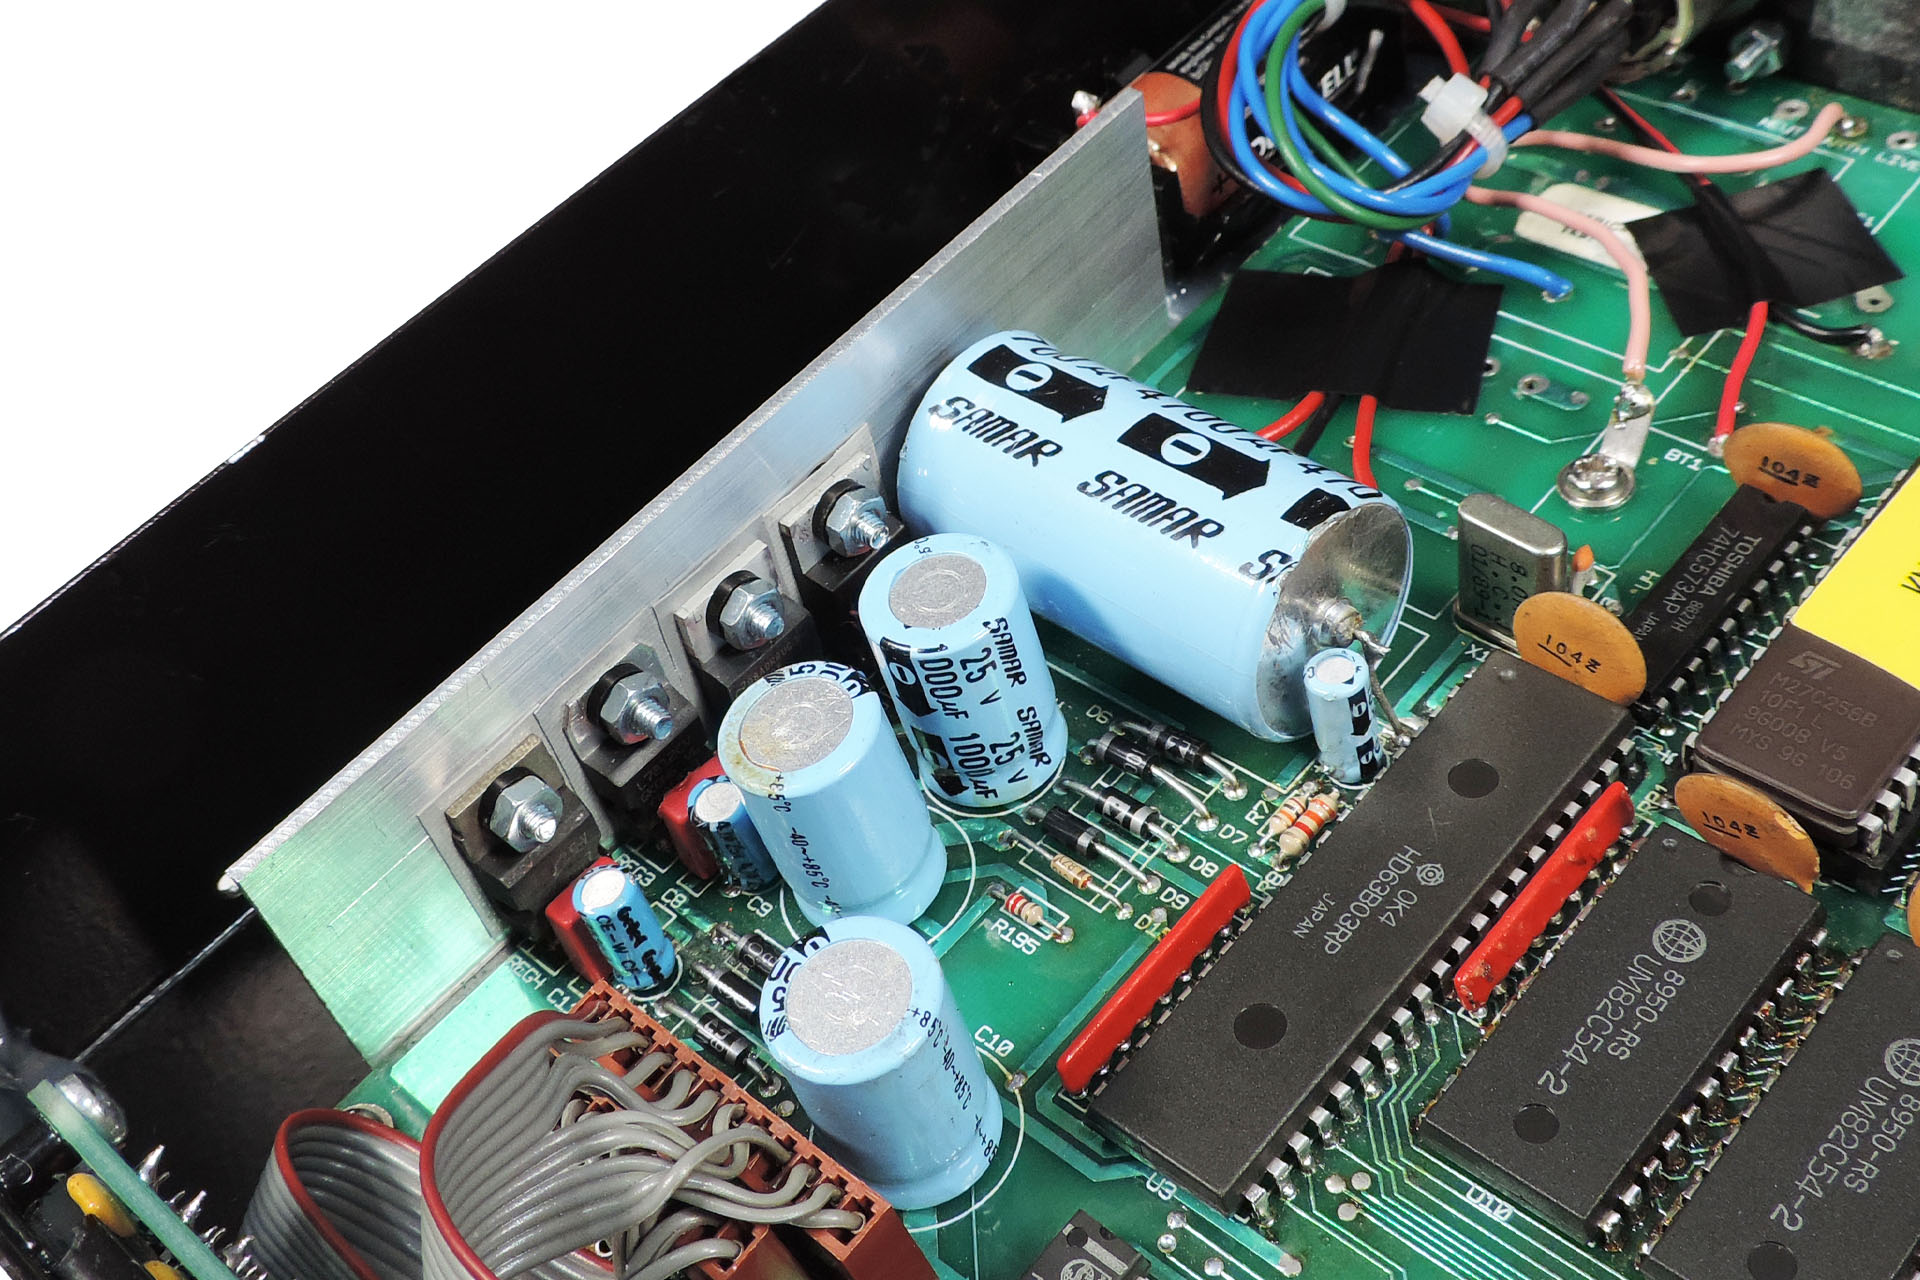
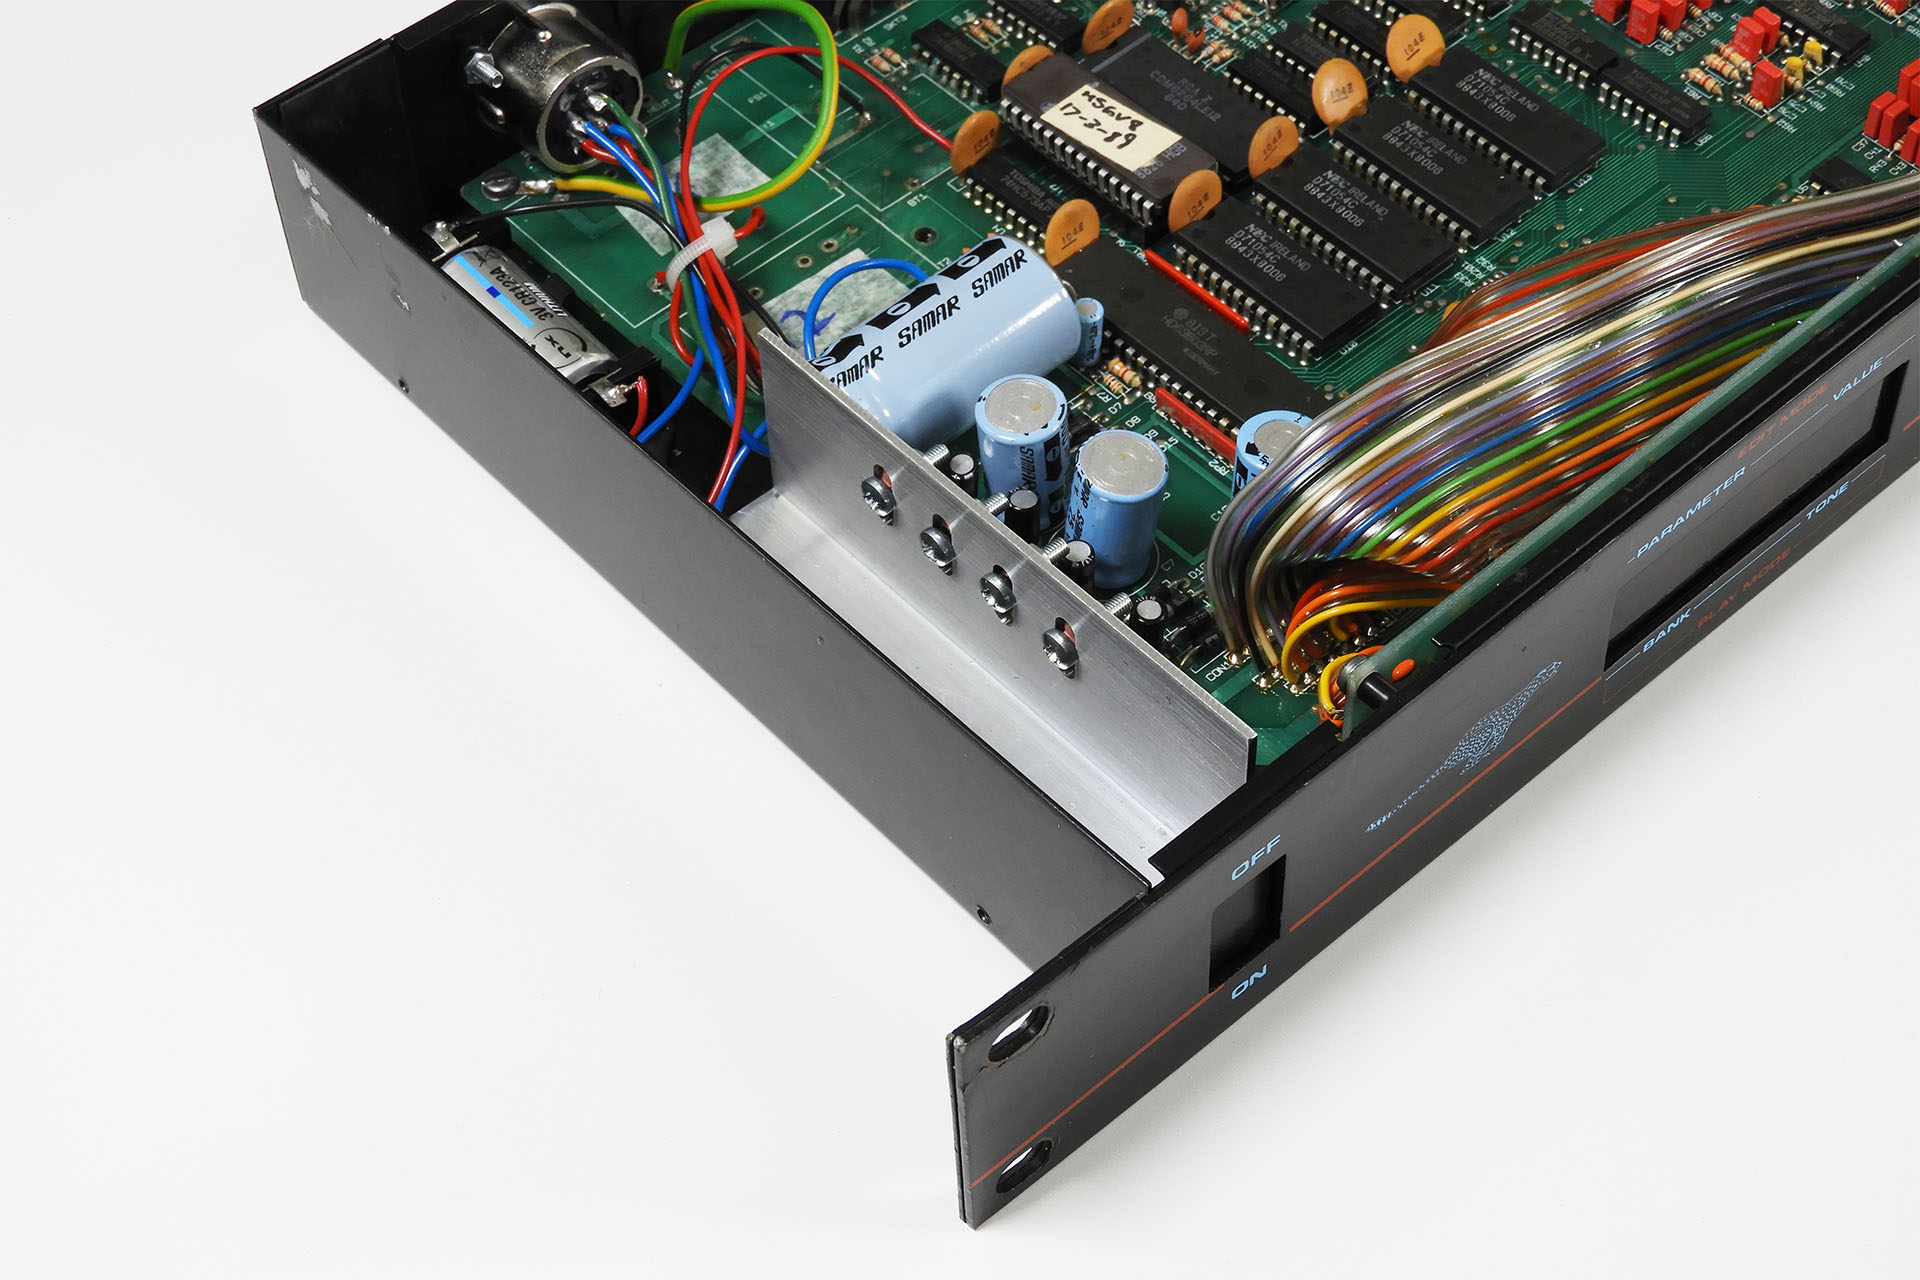
So, where were we? Oh yeah... The unit turned up and I took off the lid. Ah! So, someone’s been in here before. Three of the four regulators had been replaced. Factory attached to a thin aluminium strip which had then been glued to the inside of the case, the soldering on the replacement regulators was just atrocious!
After taking the board out, it was obvious that this box had sustained fluid damage at some point in its life. Hmm… looked like I had my work cut out. Oh and the original firmware had been swapped out for the custom Maad KM 1.3 which actually, was a good thing. Indeed, I've only heard good things about this new code. 🙂
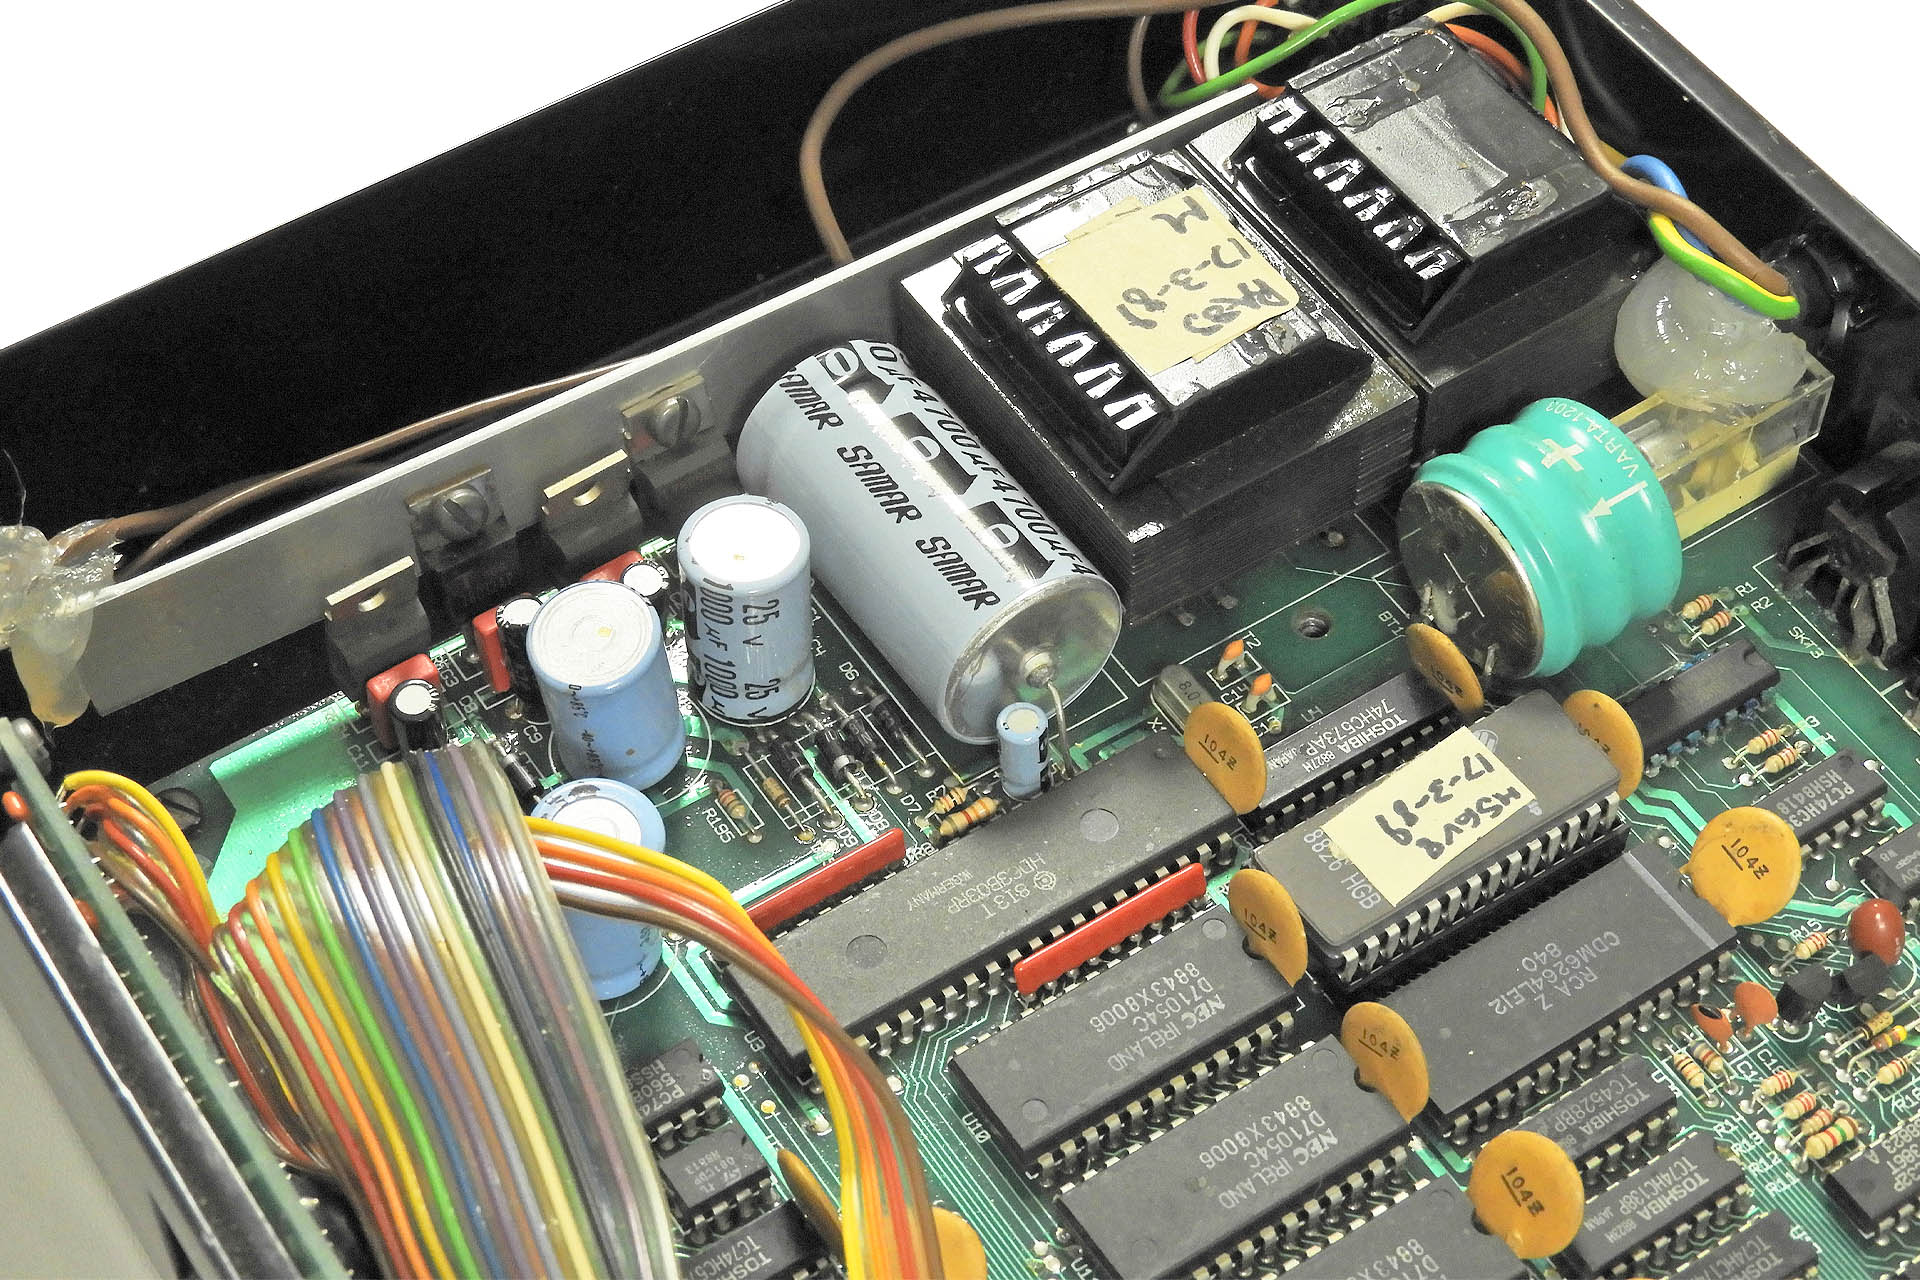
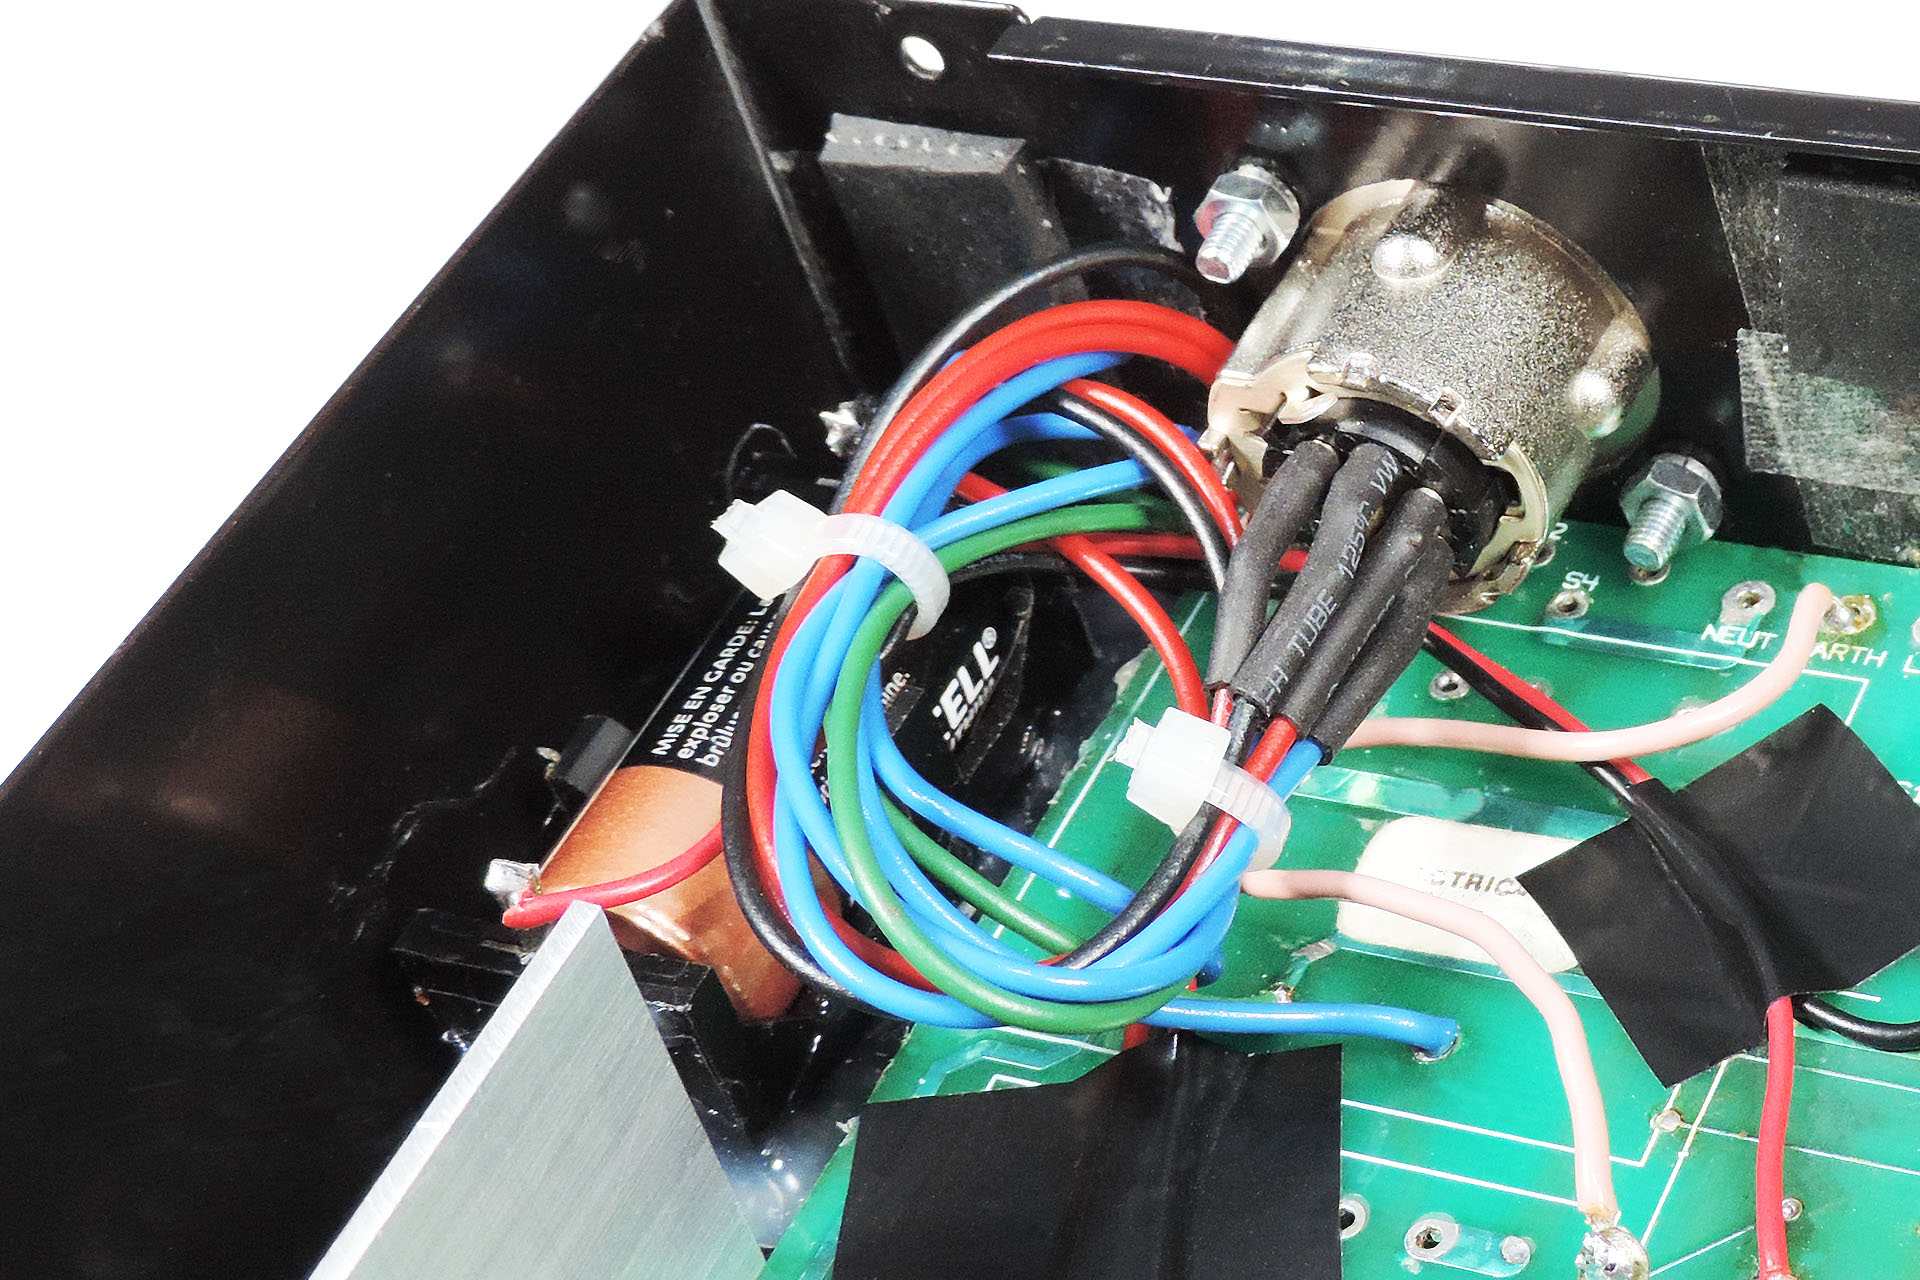
Anyone who’s familiar with the Cheetah MS6 will be aware that the power supply is well, bloody awful. It’s not uncommon for example, for the case to go live. Yes, you read correctly. On top of that, the transformers (yes, there two) are underrated making them quite unreliable and the original heatsinking for the voltage regulators (that thin aluminium strip I mentioned earlier) is in my opinion, quite inadequate. In fact in the image below, you'll notice that only two of the four regulators are actually attached to the heatsink. That's factory, by the way. It's just such an incredibly bad design and such a shame for a cool little analogue synth.
18th March 2022 - Here's a picture of an original power supply in a unit that was recently brought to me. This MS6 was in working and reasonable cosmetic condition. The customer wanted to keep it like that, so he brought it to me. Anyway, as you can see, things are very cramped. In particular, the two transformers being mounted so closely together, looks well dodgy. In fact, the whole thing looks a mess! It's very weird because there's enough space behind that heatsink to do it all properly. One wonders why Cheetah didn't!
My initial approach to the project was to build an external box which would house two uprated transformers and then provide a suitable connection from the box to the MS6. The latter part would require a hole or two to be drilled into the rear case of the MS6 but I've done this kind of thing before on other machines like the Line 6 Pro racks (Echo Pro, Mod Pro and Filter Pro).
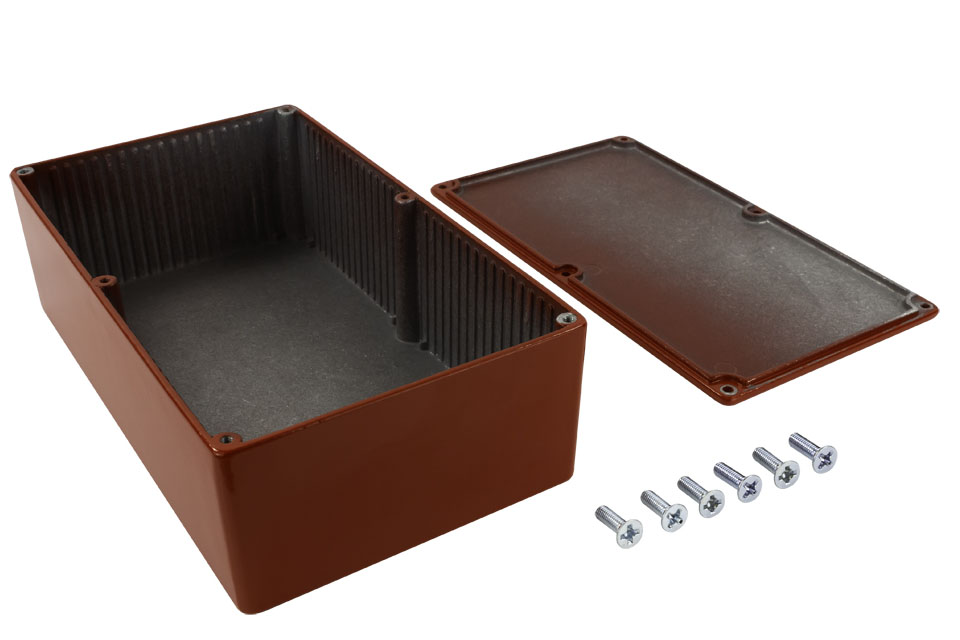
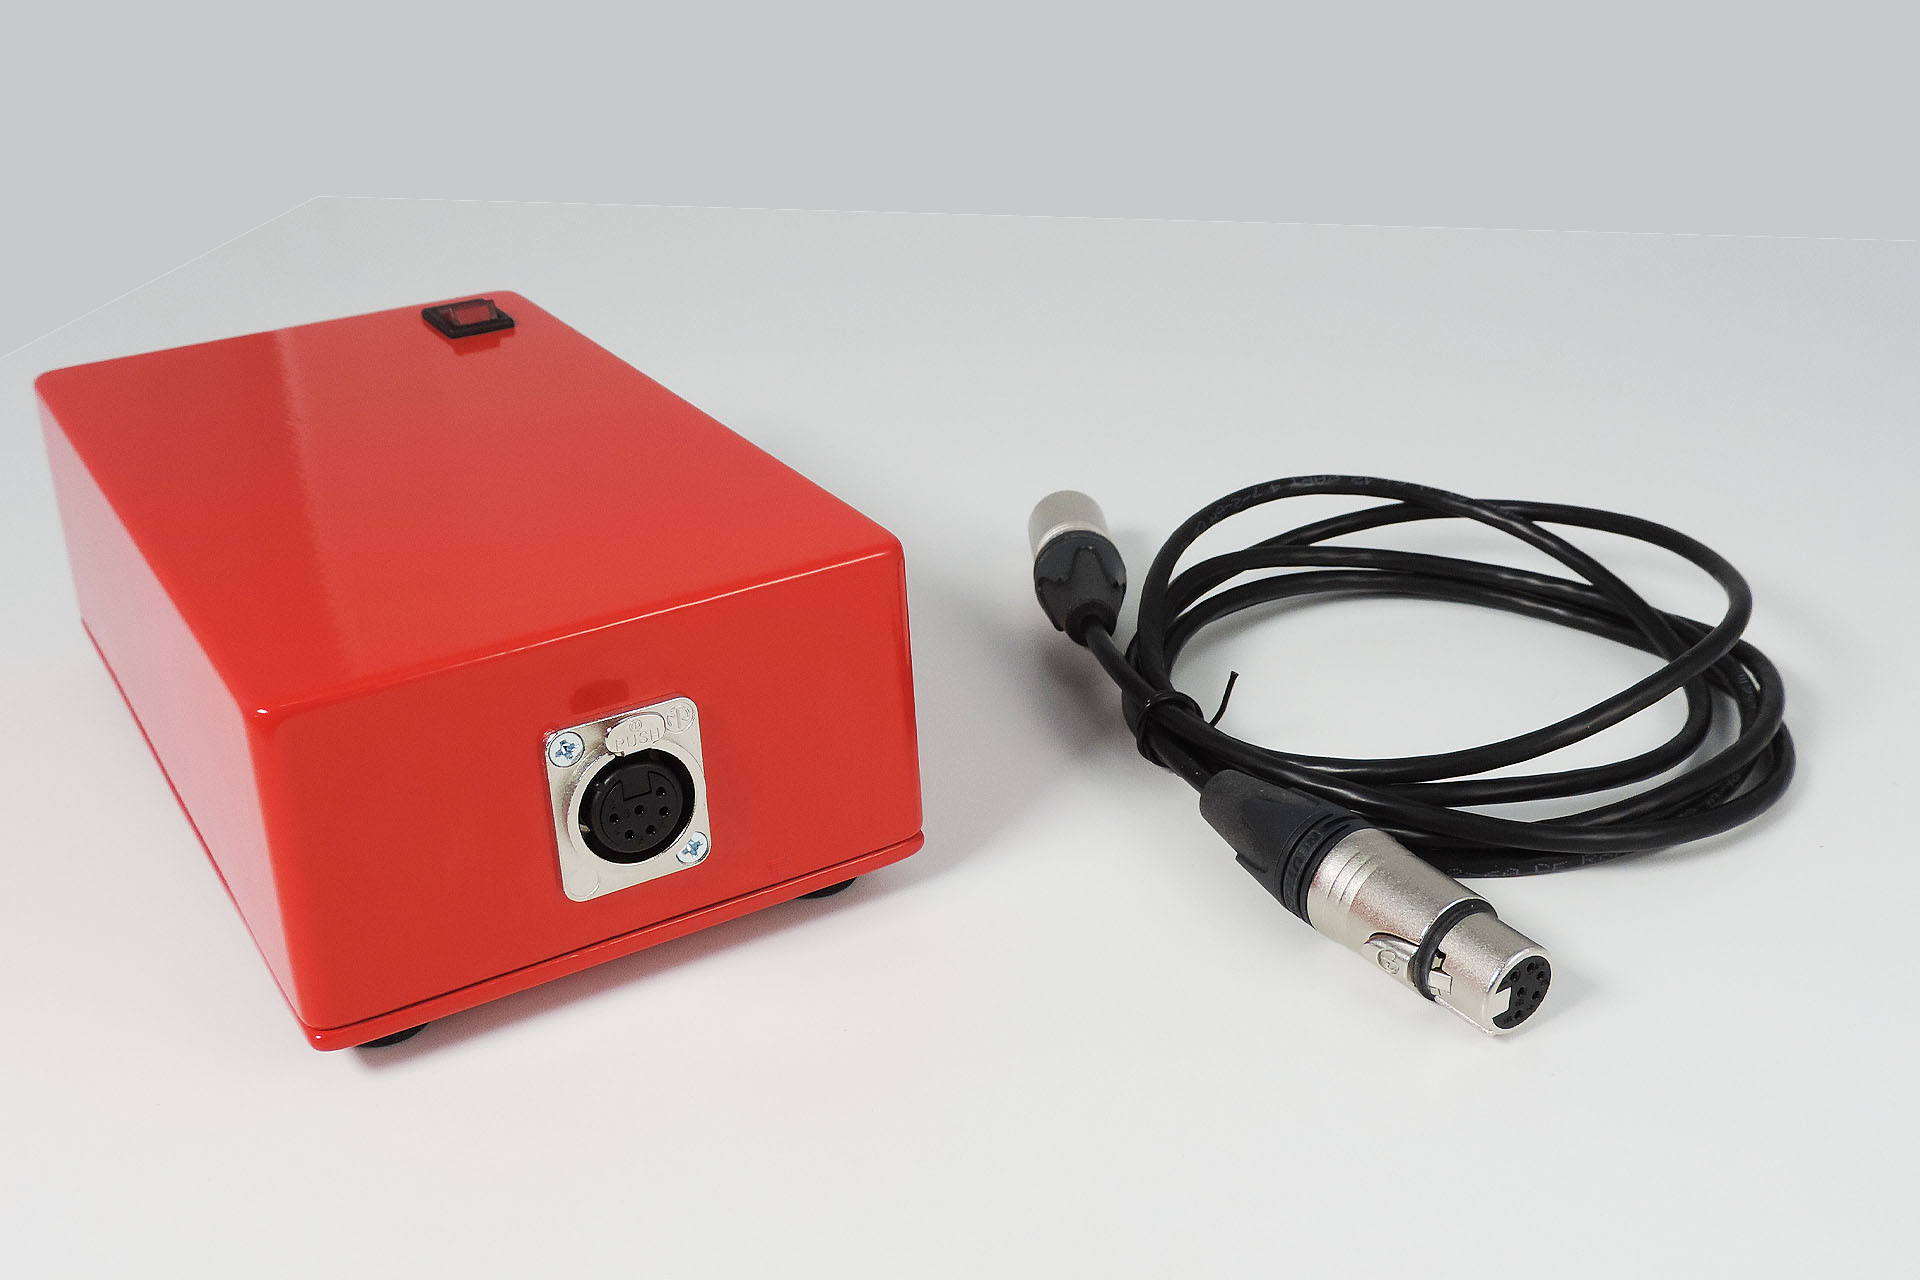
For the external enclosure, I chose one of my favourite, 'go-to' boxes; the Camdenboss RTM5006/16. Earthing this very substantial diecast steel enclosure would create a Faraday cage and hence, provide excellent screening ; perfect for housing the uprated transformers.
A British made, steel enclosure of excellent quality, was chosen to house the power supply as it would not only be safe but would also provide the best screening, thereby significantly reducing any potential for interference with other equipment... something you just don't see now-a-days.
There are four regulators in the MS6, supplying +/-5V and +/-12V. Removing the original transformers was a bit tricky but once they were out, my idea was to drop in connections from the power socket which would be fitted, to the main PCB where the secondaries of those transformers connect to the board. Complimentary (balanced) voltage rails, meant there was a centre-tap for the AC feeding each pair of supplies so a minimum of a 6-core cable was needed.
The blown transformers that I removed from this MS6. I'm afraid that these will go BANG sooner or later.
While that was going on, I cleaned up the PCB, getting rid of as much sign of the fluid damage as I could.
Next was the post transformer part of the power supply which as I’ve already mentioned, was a real mess. The PCB seemed quite fragile around the rectifier diodes, capacitors, etc so I had to be careful. While I was in design mode, I knocked up a drawing for a 'proper' heatsink.
Well, I took the stripped-out case, the enclosure for the external power supply and my drawings to Lenton Engineering in Watford and a couple of weeks later, I got the call informing me that everything was ready to collect.
The transformers, switches and connectors all fitted perfectly into my cool steel external enclosure, so if nothing else, I would end up with a groovy dual-voltage AC power supply. 🙂
Here's my prototype of the external power supply enclosure showing the connector and cable that interfaces with the MS6.
The heatsink also fitted perfectly which was a relief as when I was designing it, the regulators on the MS6 I had, were a bit all over the place. It took me a minute to realise that the distance between the TO-220 mounting holes was an imperial half-inch and NOT metric.
This custom heatsink that I made for this sick Cheetah MS6 is considerably more substantial than what was in there originally. Unlike the original heatsink, my design rests on the bottom case and is not supported by the regulators themselves or glued to the inside of the MS6 case. In use, it only gets slightly warm.
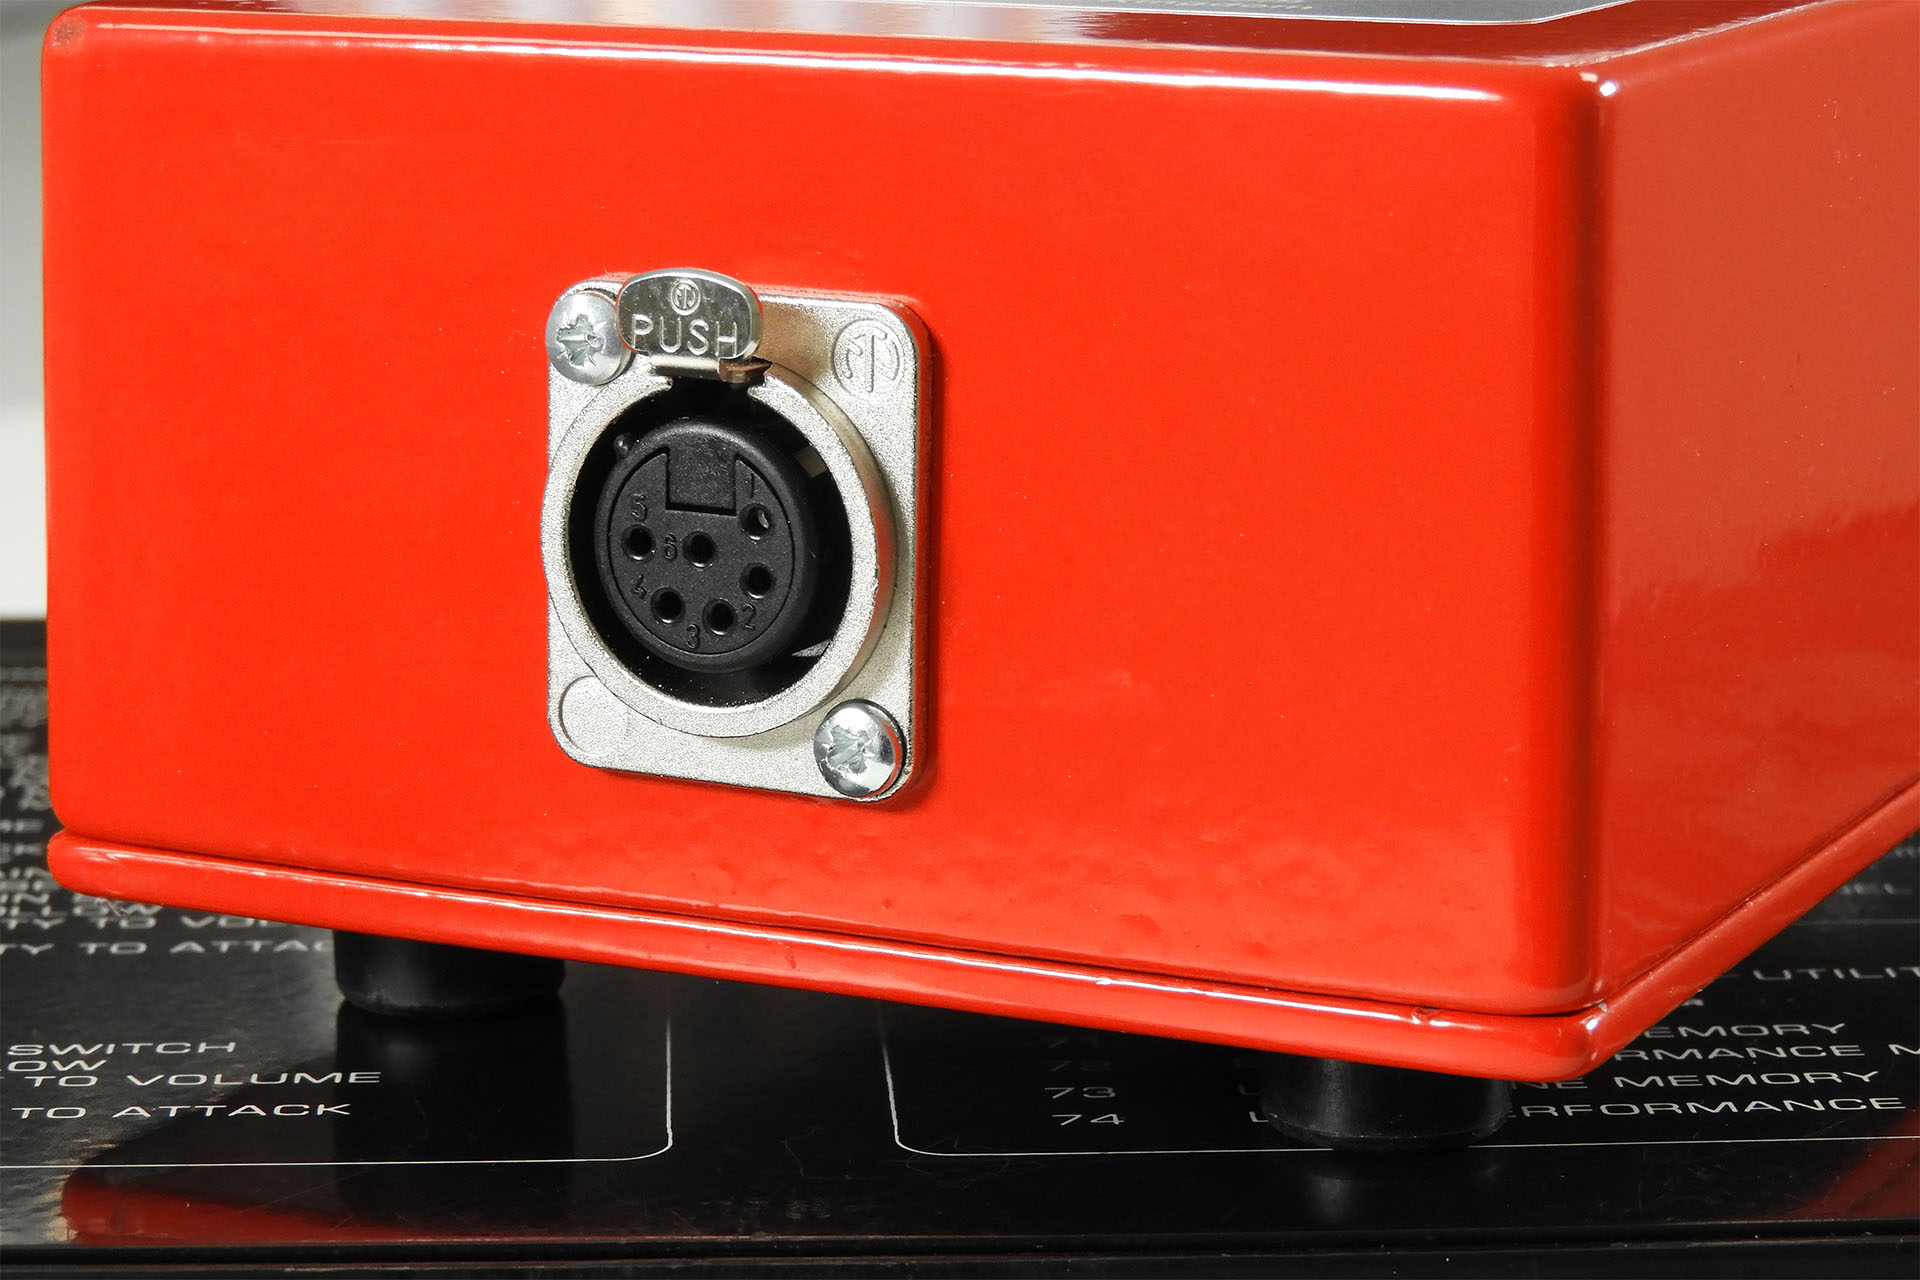
By now, I'd made the cable that would connect the external box to the MS6 so all that was left to do was to screw the connector socket to the rear of the MS6 chassis and then wire it to the main PCB.
Here's the power output on the power supply that connects to the MS6.And here's the connection on the back of the MS6 that comes from the power supply. I really just wanted to have a single cable.
So, all was done pretty quickly and it was test time. As usual, I cleared a big space, just in case it all went bang... again. Well, it didn’t. In fact, nothing happened at all for a few seconds. While the unit was still on, I quickly measured voltages and all looked good; +/-5V and +/-12V. Then characters appeared in the display but not as expected. All that was shown was ‘FE’ which was flashing and every now-and-then, some random stuff.
I'm aware that when the memory is empty, the Cheetah MS6 loads factory pre-sets from ROM and doesn't require re-initialisation as such, or loading of factory patches via some fancy button hold-down routine. Since I'd already removed the original battery (because it had leaked), automatic re-initialisation is exactly what the machine was trying to do. There was another issue however; the buttons on the front-panel were totally unresponsive.
After a few minutes of power, I noticed that one of the multiplexers was seriously hot, so I immediately switched off. I replaced the cooking 74138 and tried again. Wow! This time it all fired up perfectly! It still displayed 'FE' but this time successfully went into its initialisation sequence and of course, the front panel buttons were now working. No doubt, the 74138 was a victim of the power fault which broke the instrument in the first place.
I hooked up a MIDI keyboard and attached the output to my mixer. Hey, I’ve got sound. More than that, all the voices are working. This was all quite a relief.
So what about the memory back-up battery? Well, I decided to implement my Live Forever battery mod.
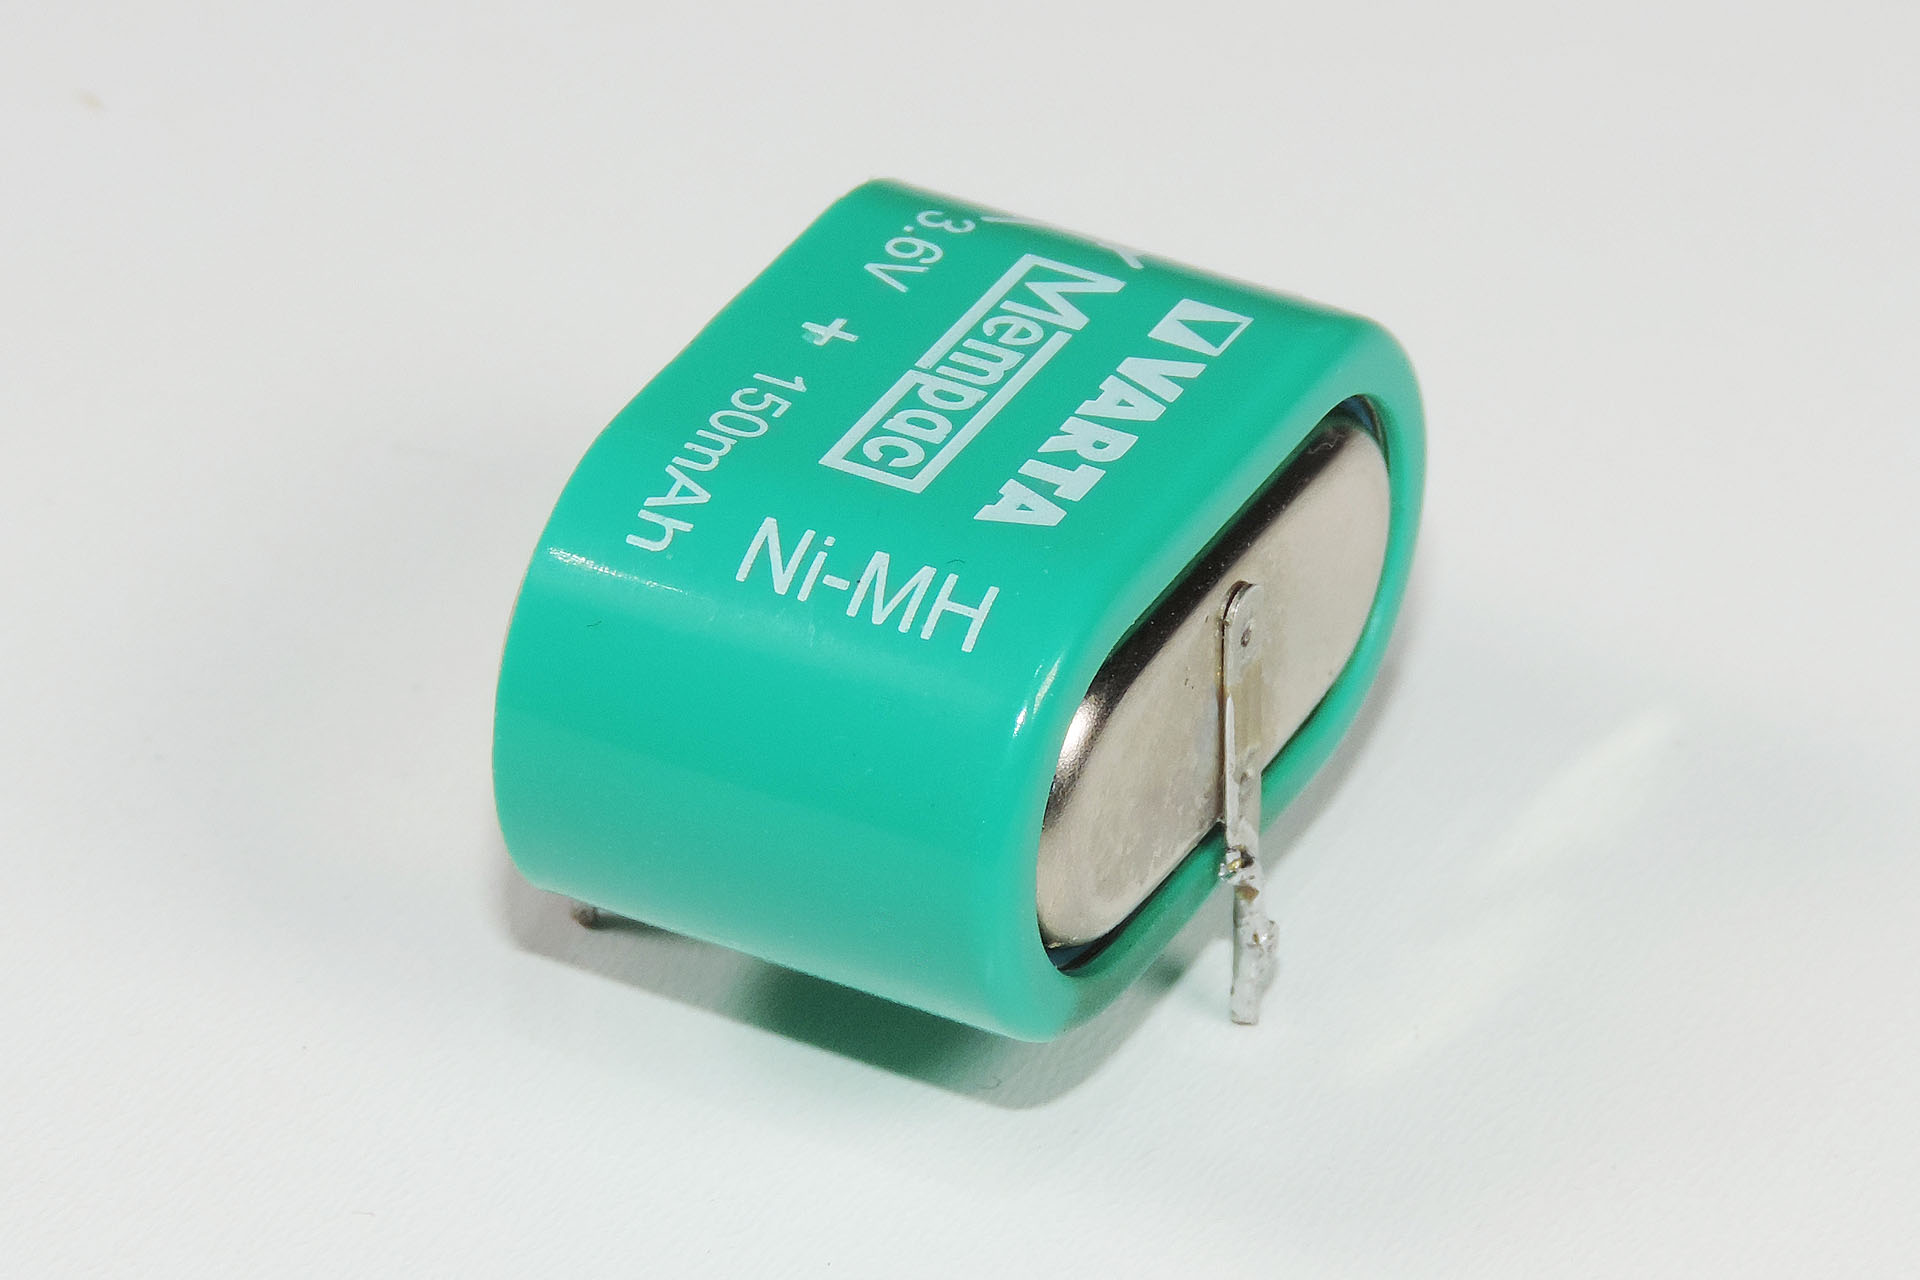
The original battery in the Cheetah MS6 is a Ni MH type. This should be changed.
This required a slight modification to the battery back-up circuitry as the original battery was a rechargeable Ni-MH type. I was dropping in a lithium battery which I really didn’t want the MS6 to charge, when it was powered on!
Tucked away in the corner, is my Live Forever memory back-up battery mod. Some modification to the original back-up battery circuit is required .
Once that was done, I tried again. You know what? This thing doesn’t sound too bad. Of course there's better but you have to bear in mind the price bracket of this box when it first came out, about 300 GBP.
The power supply in these machines is notoriously bad. In fact, I’ll go so far as to say “it’s not a matter of if but when it'll blow”. On top of that and as has been proved by the customer of this unit, they don't need to fail 'quietly'. This is a real shame as the synth is actually really quite good with six analogue voices and even multitimbrality. It’s also a shame that the MS6 has an old-style Ni-MH battery. If not charged regularly, there’s a significant chance of this leaking… all over your main PCB!
So, if you have a Cheetah MS6 that you love dearly, please don’t hesitate to contact me regarding
an external power supply,
my Live Forever memory back-up battery mod
And finally... There's one aspect of the Cheetah MS6 that I haven't mentioned yet and that is the low-level of earth induced hum. Well, you'll be delighted to know that with the installation of my external power supply, this is KILLED! 😊
UPDATE - 10th May 2022
I've now built quite a few of these power supplies for customers who just love their Cheetah MS6. As such, I've also managed to work out a price. The following is everything I did to get to a reliable and safe solution and for which I do NOT charge:
Reverse engineering the original MS6 internal power supply.
Reverse engineering the MS6 battery back-up facility and adapting it to take a lithium cell.
Designing the external enclosure for the new power supply.
Designing the cut-out required in the MS6 chassis.
Designing a proper heatsink for the regulators.
Selecting reliable components for the new power supply and the battery back-up circuitry.
A considerable amount of testing! 🙂
When working on your MS6, here's what I do and what I charge for:
Preliminary check of your MS6.
Taking apart and dismantling the entire unit.
Removing redundant power supply components.
Removing back-up battery and associated components.
Preparing and delivering metalwork of external enclosure and MS6 chassis for drilling.
Building external power supply into steel enclosure and custom power cable.
Installing custom heatsink.
Modifying the battery back-up circuit and installing the new lithium battery.
And of course, reassembling and then testing the unit.
To do the whole job (excluding metal work, of course), easily takes a couple of days and I simply can’t charge for all of that. If I did, the cost of this MS6 power supply would exceed the value of the MS6 itself!
So, prices for my Cheetah MS6 power supply, now start from 590 GBP. Yes, I know it's expensive but there's a lot of metalwork involved and this is done by another company which I've been using for forty years and do excellent work for me.
UPDATE - AUGUST 2023
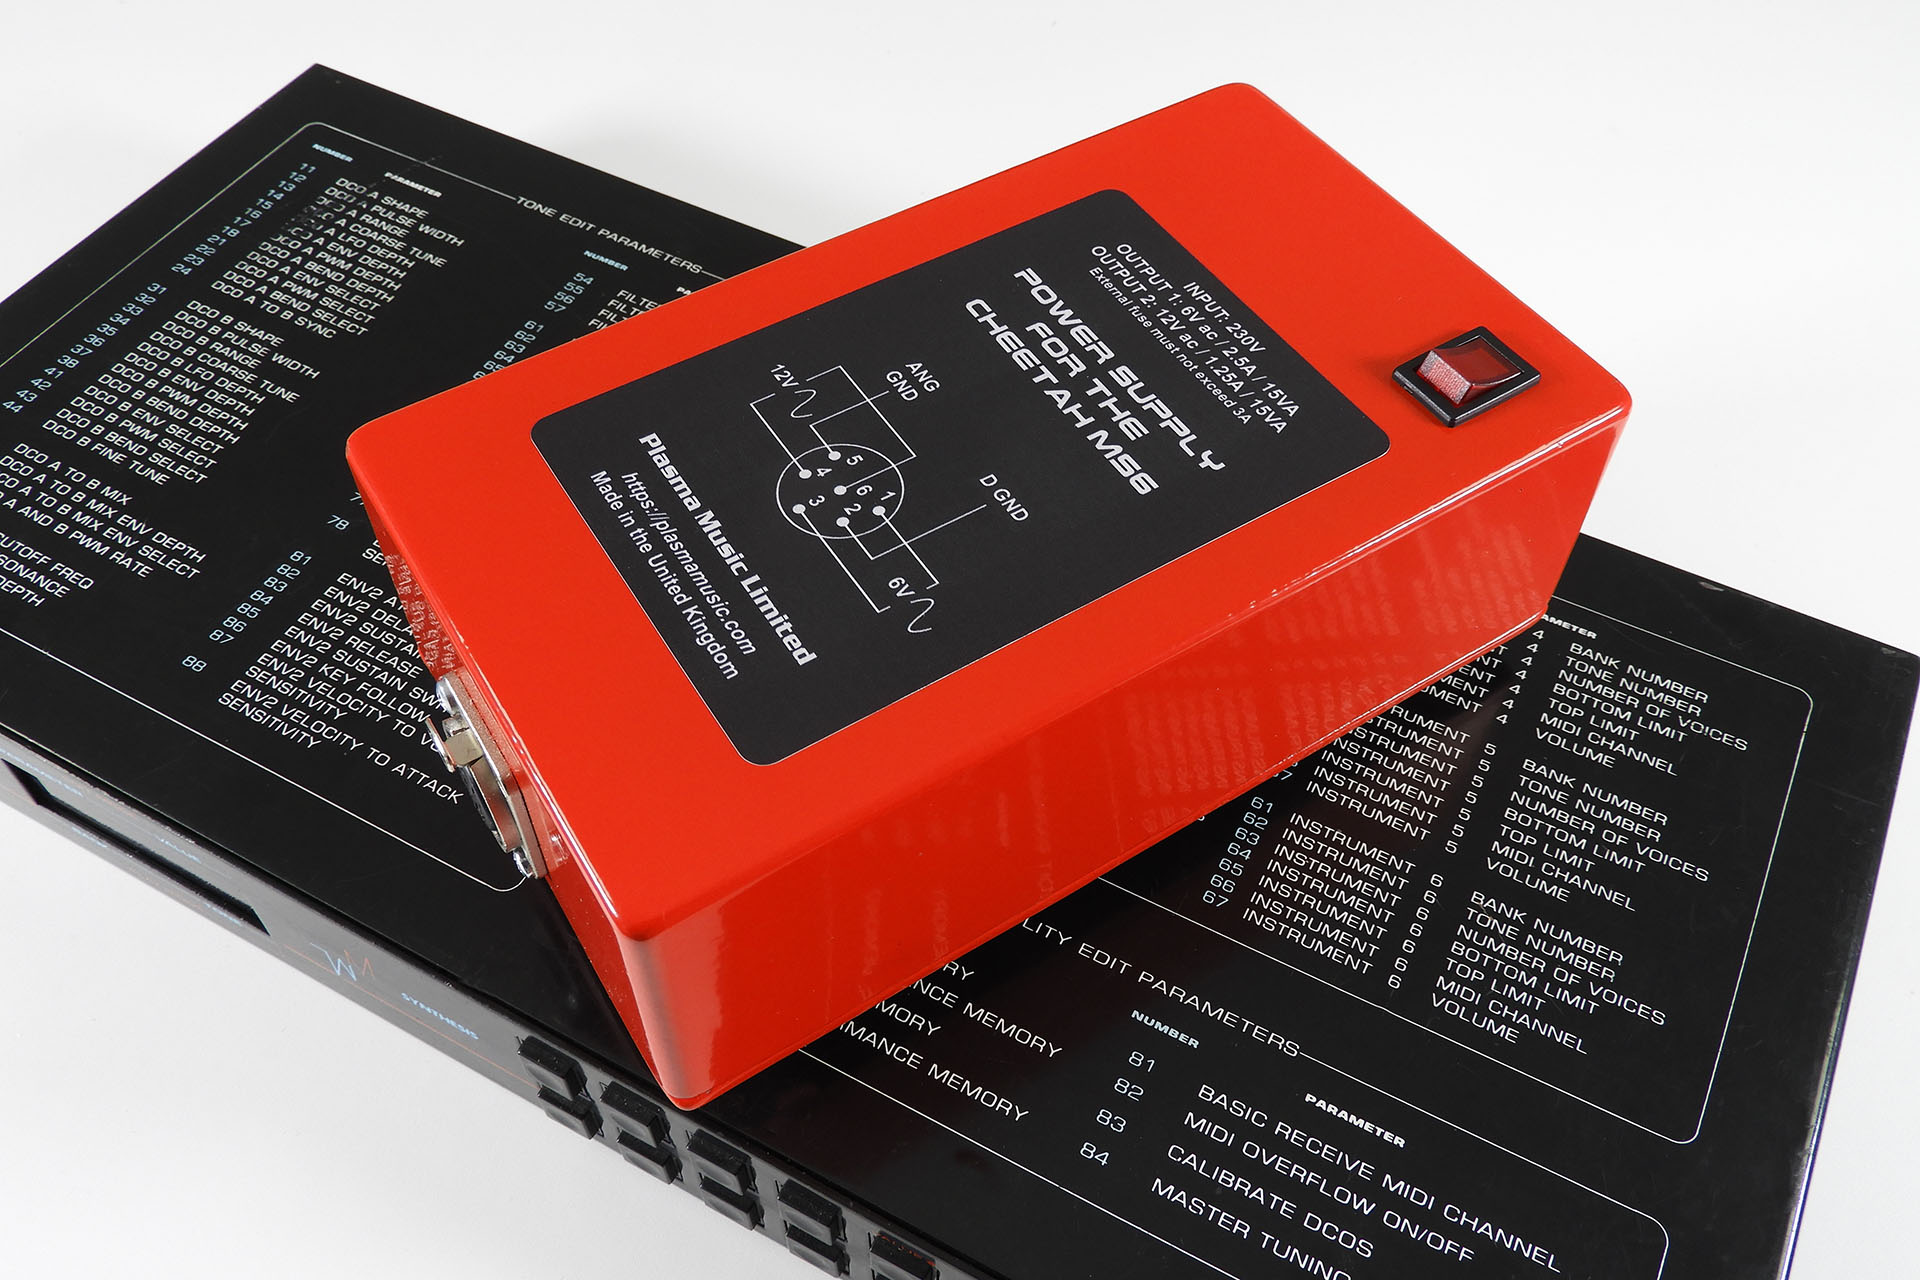
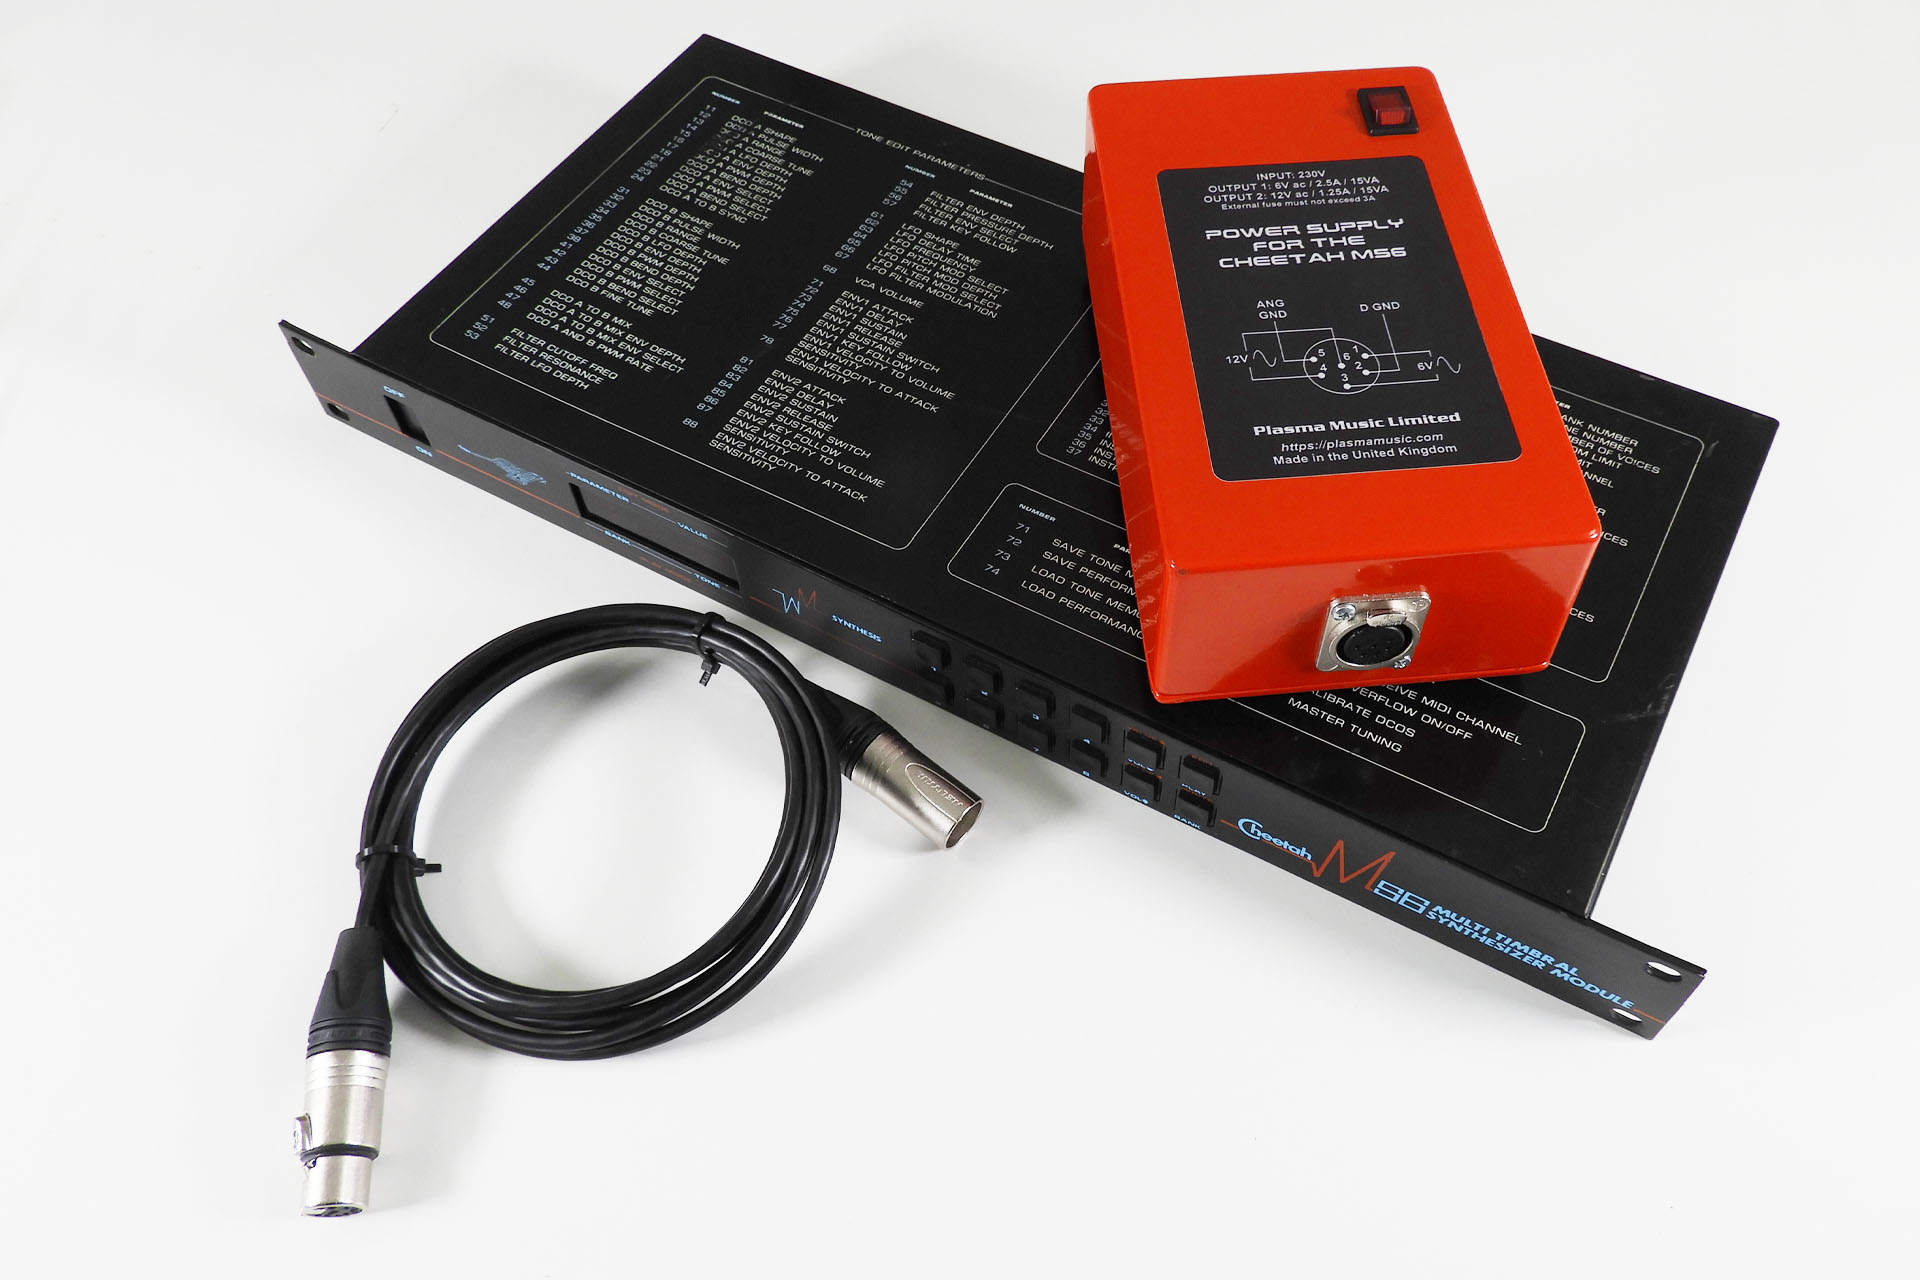
Since posting this article however, I'm truly humbled by the number of enquiries I've received and how many of those enquiries have turned into customers trusting me with their units. In fact, after having done two or three, I decided to design a label for the power supply.
After having built a few of these now, I recently knocked up a label for this box... just in case you forget what it is!
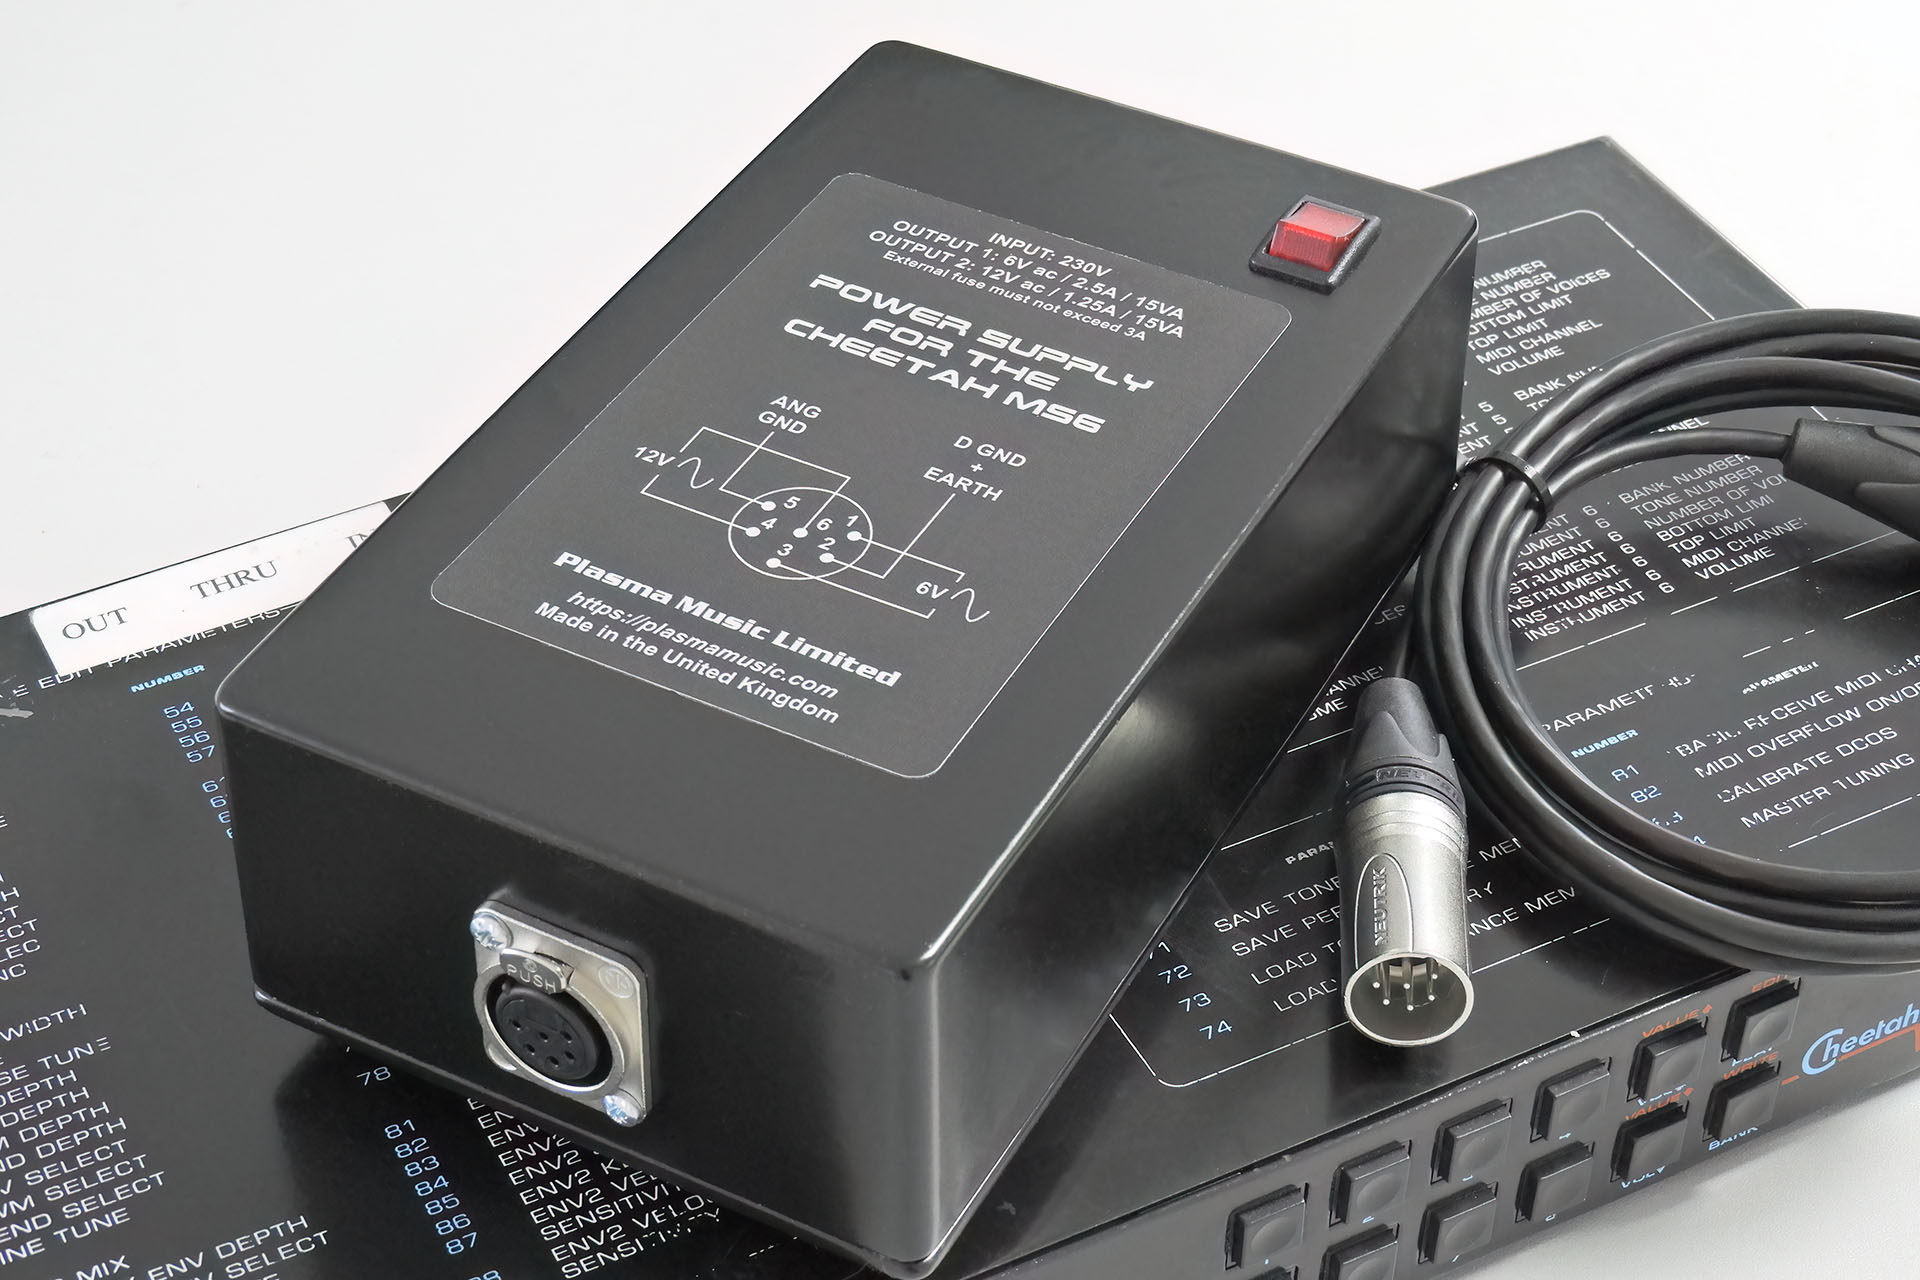
I used the term 'start' in the previous update because the price of the red diecast enclosure has gone up by 66% since I started building these. To save you a little money, I'm now offering exactly the same power supply in a black version of the steel diecast box that I used to use and still keep the price at 590 GBP. I can still do the red case but it's an additional 30.00 GBP now! 🙁
External power supply for Cheetah MS6 in black steel diecast enclosure.
The price of the Neutrik connectors that I use, has also gone up but I'm absorbing that cost. 🙁
Please remember that Plasma Music Limited is VAT registered so VAT at 20% needs to be added to builds purchased within the UK.
Today, I've received another MS6 with the customer wanting the works. This prompted me to update this post.
I'm continuing to install my own replacement heatsink when I get a MS6 in for upgrade because it's just better!
I'm delighted that MS6 owners are finding this page and responding to my advice to do something before it's too late. These are really lovely machines with a classic eighties sound. Don't let them die!
Quite simply, my power supply and battery conversion for the Cheetah MS6, will ensure that your synth will operate properly and reliably for many years to come.
UPDATE - 13th October 2022
Working by myself on things like valve amps and dodgy old synth modules like err... the Cheetah MS6, is sometimes concerning as I often run the risk of electric shock and of course, there's no one with me to assist, if things go badly wrong.
I've currently got three MS6s with a forth due in shortly. The owner of tonight's machine didn't want my external power supply and after the repair, while doing the final tests, I got hit... the big ZING. Ouch! Straight off the case, no less. Yes, you read correctly; off the case. As many Cheetah MS6 owners may be aware, this is an annoying and potentially lethal MS6 issue.
It took a while to isolate things and make the machine safe but guys, I can't emphasise just how bad the power supply is, in these machines. PLEASE GET IT SORTED!!!!!
UPDATE - 24th October 2022
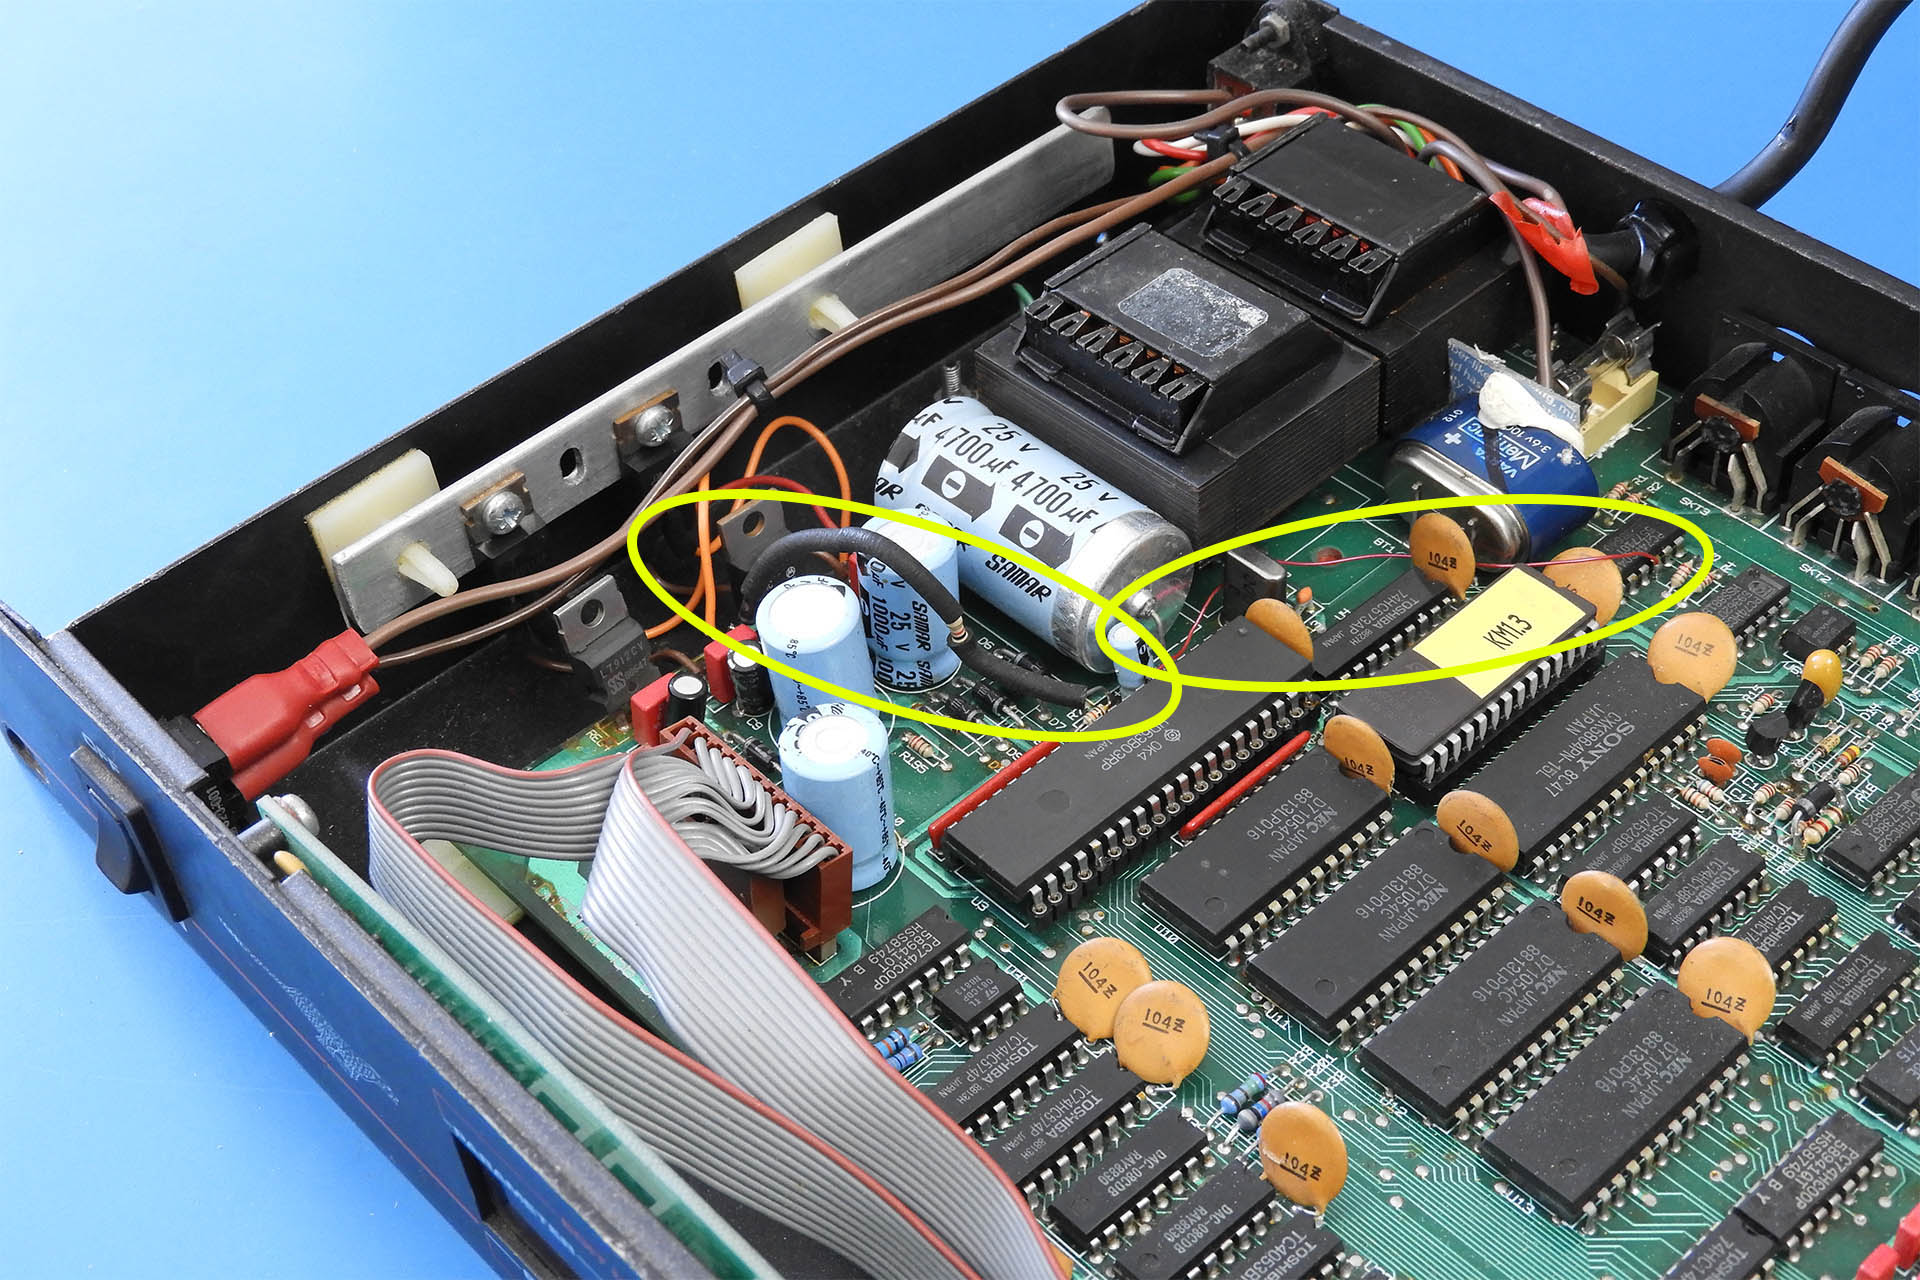
Below is a picture of another of the three MS6s I have in, prior to any work being carried out. The PCB is quite different to others I've seen and I believe this one to be either a prototype or a very early version.
I've never seen this version of MS6 PCB before. Apart from being shorter in depth (front to back), it has a bunch of wires flying around the place, some of which I've highlighted in yellow.
In common with all MS6s, it has the badly mounted regulators, only two of which are mounted to a thin aluminium strip (the heatsink). I've highlighted the reset line and the diode connection between +12V and the processor's STBY, NMI and IAQ1 ports.
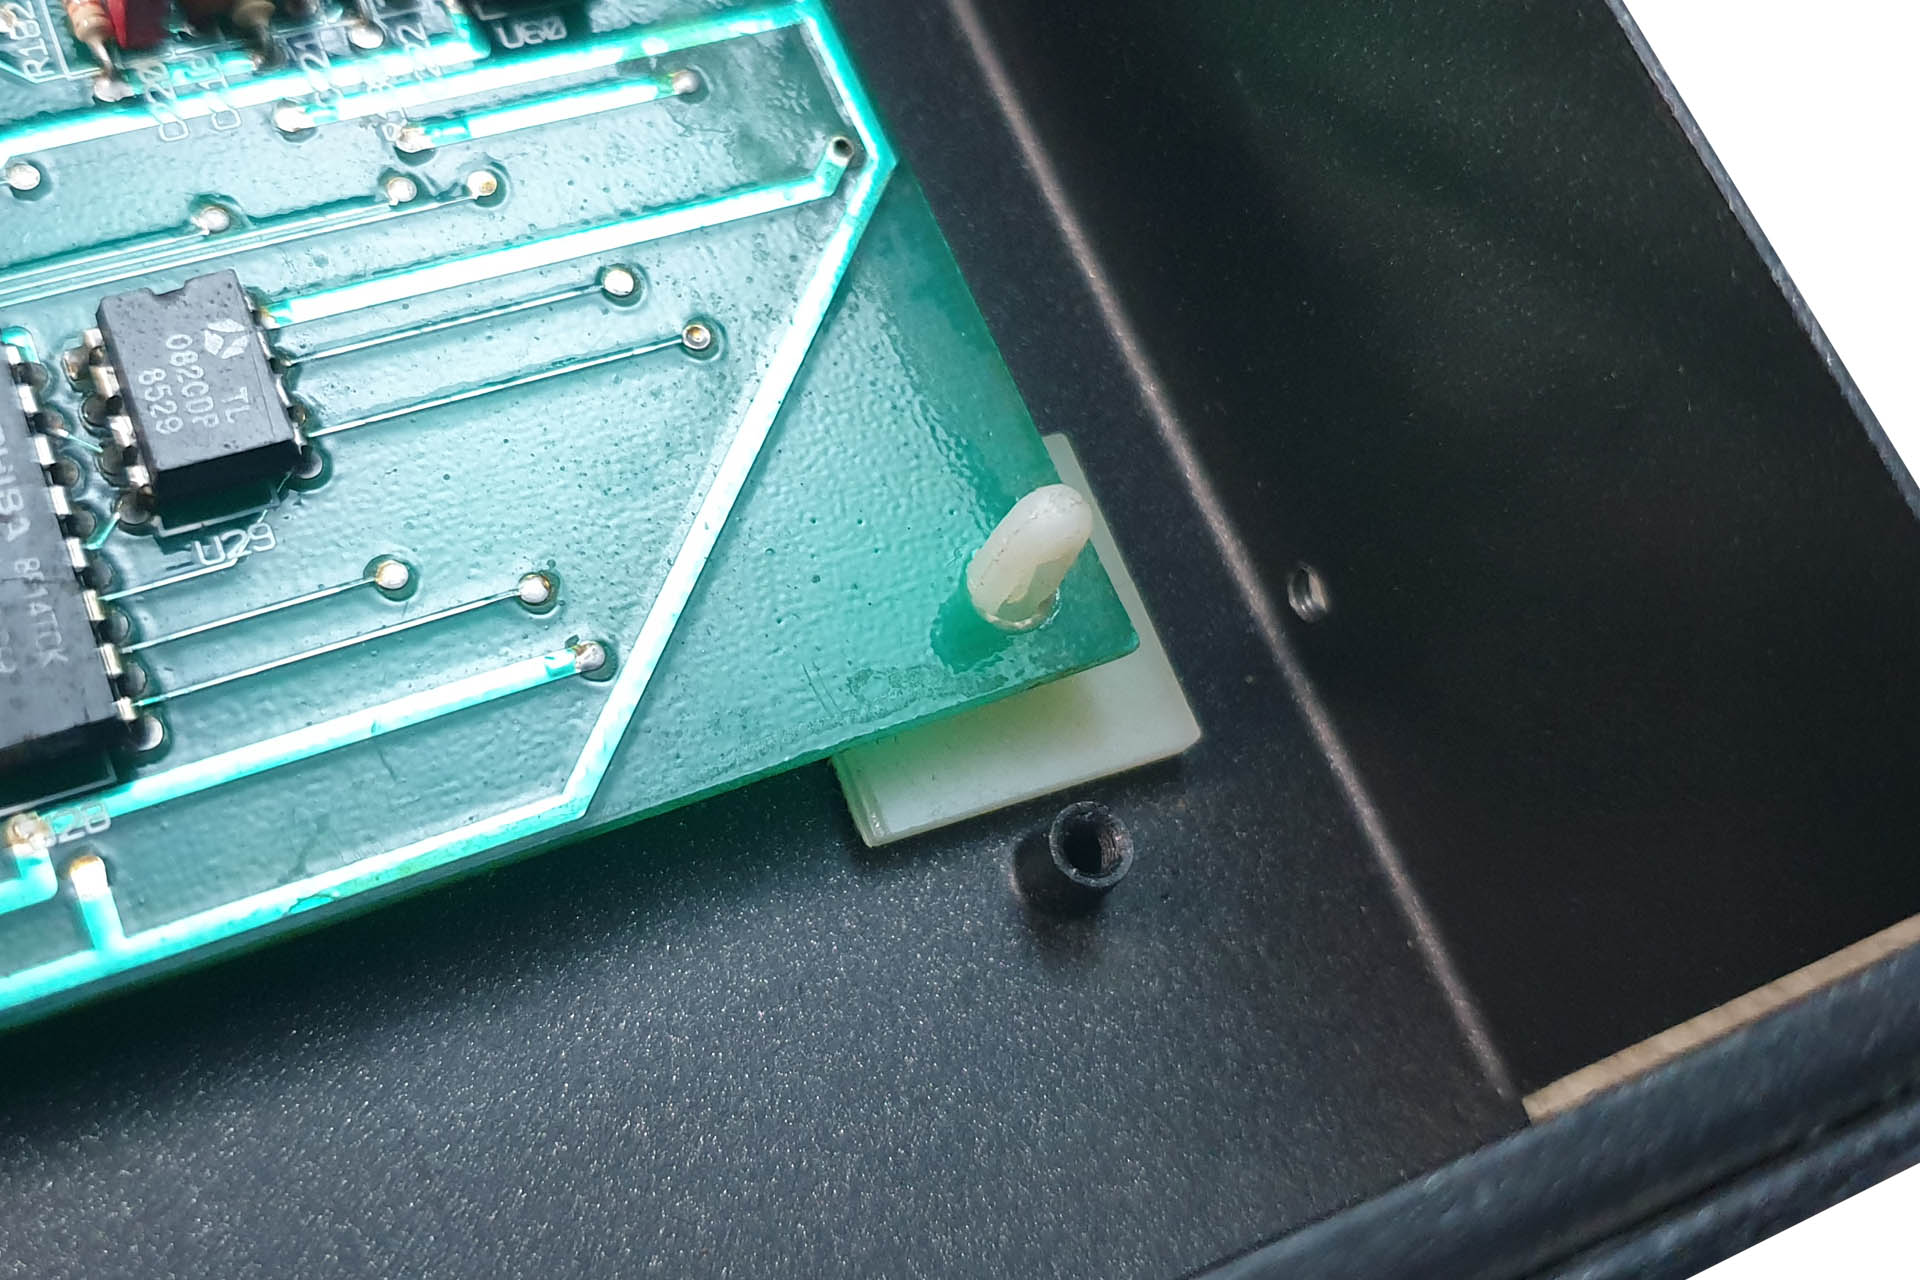
The PCB is shorter than others. So much so in fact, that the front of the PCB sits on self-adhesive stand-offs as it doesn't reach the studs on the inside of the case!
This machine was a challenge and after building the external power supply, modifying the rear of the case, making one of my custom heatsinks, implementing my Live-Forever battery mod', the bloody thing wouldn't boot. 🙁
I was really careful to make sure that the flying wires were in the right place. I double checked my work and although the unit would power up, it wouldn't boot. That led me to believe it was a processor reset kind of issue.
After a bit of hunting around, I sussed out that the +12V regulator was duff. Although the digital circuitry is running at +5V, as mentioned above, processor STBY, NMI and IAQ1 are derived from the +12V line.
I swapped out the 7812 and voila, another rescued Cheetah MS6 that's going to be around for many years to come.
UPDATE - 1st November 2023
Weirdly and three years later, the first MS6 I received and which is featured at the beginning of this post, found its way back to me... from another customer and without the power supply that I built for it. Read the whole story here. 🙂
UPDATE - 13th December 2023
My Cheetah MS6 power supply has proved to be a lot more popular than I imagined. I've therefore decided to include it in my on-line store:
UPDATE - 12th February 2025
My external power supply for the Cheetah MS6 addresses the main issue with this underrated, classic vintage synthesiser module, the original (internal) power supply. After having built a lot of these since I launched this upgrade, way too many to count, I have a confession to make; I’ve never been 100% happy with it!
By definition, an upgrade enhances the original product. Unlike my other upgrades however, the external power supply module for the MS6 requires modifications to the original MS6 case. This is in stark contrast to my prime objective of keeping the appearance of the host unit as original as possible.
Well, the customer of the last MS6 I had in, allowed me to consider a different approach. For a start, although quite inoperative, I decided to keep the original ON / OFF switch on the front panel and the voltage selector switch on the rear panel, in place.
The front power switch and rear voltage selector switch are no longer removed, thus retaining original external appearance.
Now the important bit... instead of fitting a Neutrik 6-way connector on the rear, I changed the cable that I used so as to allow me to access the inside of the MS6 via the original cable entry. The hole cut-out here was incorrect for the original cable gland and so I used something considerably more secure; a proper, industrial cable gland!
The new approach is tidy, safe, secure, doesn't affect the appearance of the MS6 and helps me keep costs down.
The net result is a safe and very secure feed from the external power supply to the MS6 but… with no holes drilled into the MS6 chassis and nothing removed, thereby preserving the original appearance of the unit.
With ever increasing prices, keeping the cost of my external power supply for the Cheetah MS6 down, has been particularly challenging. That’s because I don’t do the metalwork myself and sub-contract it to another company. If the other company’s costs go up, then so do mine! 🙁
One advantage of the new approach is that I don’t need to strip the MS6 chassis, tape it up and give it over to be drilled out. This gives me and of course my customers, a substantial cost saving.
So, as of immediate effect, all my Cheetah MS6 power supplies will be offered with the new integrated power supply cable which connects to the external unit as before.
AND NOW FOR THE BIG SURPRISE....
My power supply for the Cheetah MS6 is now available with a cool optional extra! 😮
Guys, I've designed a balanced output stage for the MS6. It's actually more than that as I wanted to kill two birds with one stone and do things properly.
On the left is the miniature +/-15V power supply and on the right is the output stage of Rigel balanced output for the Chetah MS6.
Let me explain... Most consumer audio stuff runs at -10dBm which is about ¼V. Professional audio equipment however, runs at +4dBm which is about 1¼V. The problem is, that to deliver +4dBm requires the analogue audio to be driven from a minimum of +/-15V. Unfortunately, the power supply in the Cheetah MS6 only provides +/-12V for analogue. "Hmm... So how are you going to get around that, Alex?"
Yeah, you guessed it, I sneaked in another power supply, specifically to drive Rigel! This could only be achieved because I chose slightly higher rated power transformers in my external PSU.
"Where did you sneak in the other power supply?" I hear you ask. Well, I added a couple of M3 hex PCB stand-offs to my ultra-cool heatsink so Rigel's +/-15V PSU sits neatly in the MS6's power supply section with all the other regulators, etc. Well out of the way of any analogue electronics, Rigel's power supply won't pose a source of noise and interference.
I cunningly sneaked the required +/-15V power supply for Rigel on to my bespoke heatsink!
Anyway, Rigel now gives the Cheetah MS6 a fully balanced, +4dBm output ensuring full signal compatibility with any professional recording environment. WOW!!! 😮😮😮
And here's Rigel's balanced output stage installed in a Cheetah MS6.
IMPORTANT - Rigel is only available when purchasing my external power supply for the Cheetah MS6. Rigel is NOT available separately. That’s because my power supply is slightly overrated and is able to deliver the AC voltage necessary to produce the +/-15V required for a +4dBm signal.
UPDATE - 24th September 2025
I didn't realise how popular this thing would be. I definitely didn't realise that there were so many MS6s out there and MS6 diehards! 😎 Always wanting to do a little better, I managed to make a deal directly with the manufacturer of the enclosure and decided to buy a few, all with a view to reduce the price of my external power supply for the Cheetah MS6.
I'm now delighted to announce that the enclosure is only available in red but the price of the whole kit has actually come down! Yes, that's correct. No expensive option for the red case and the price is actually lower. I think that calls for another 😎
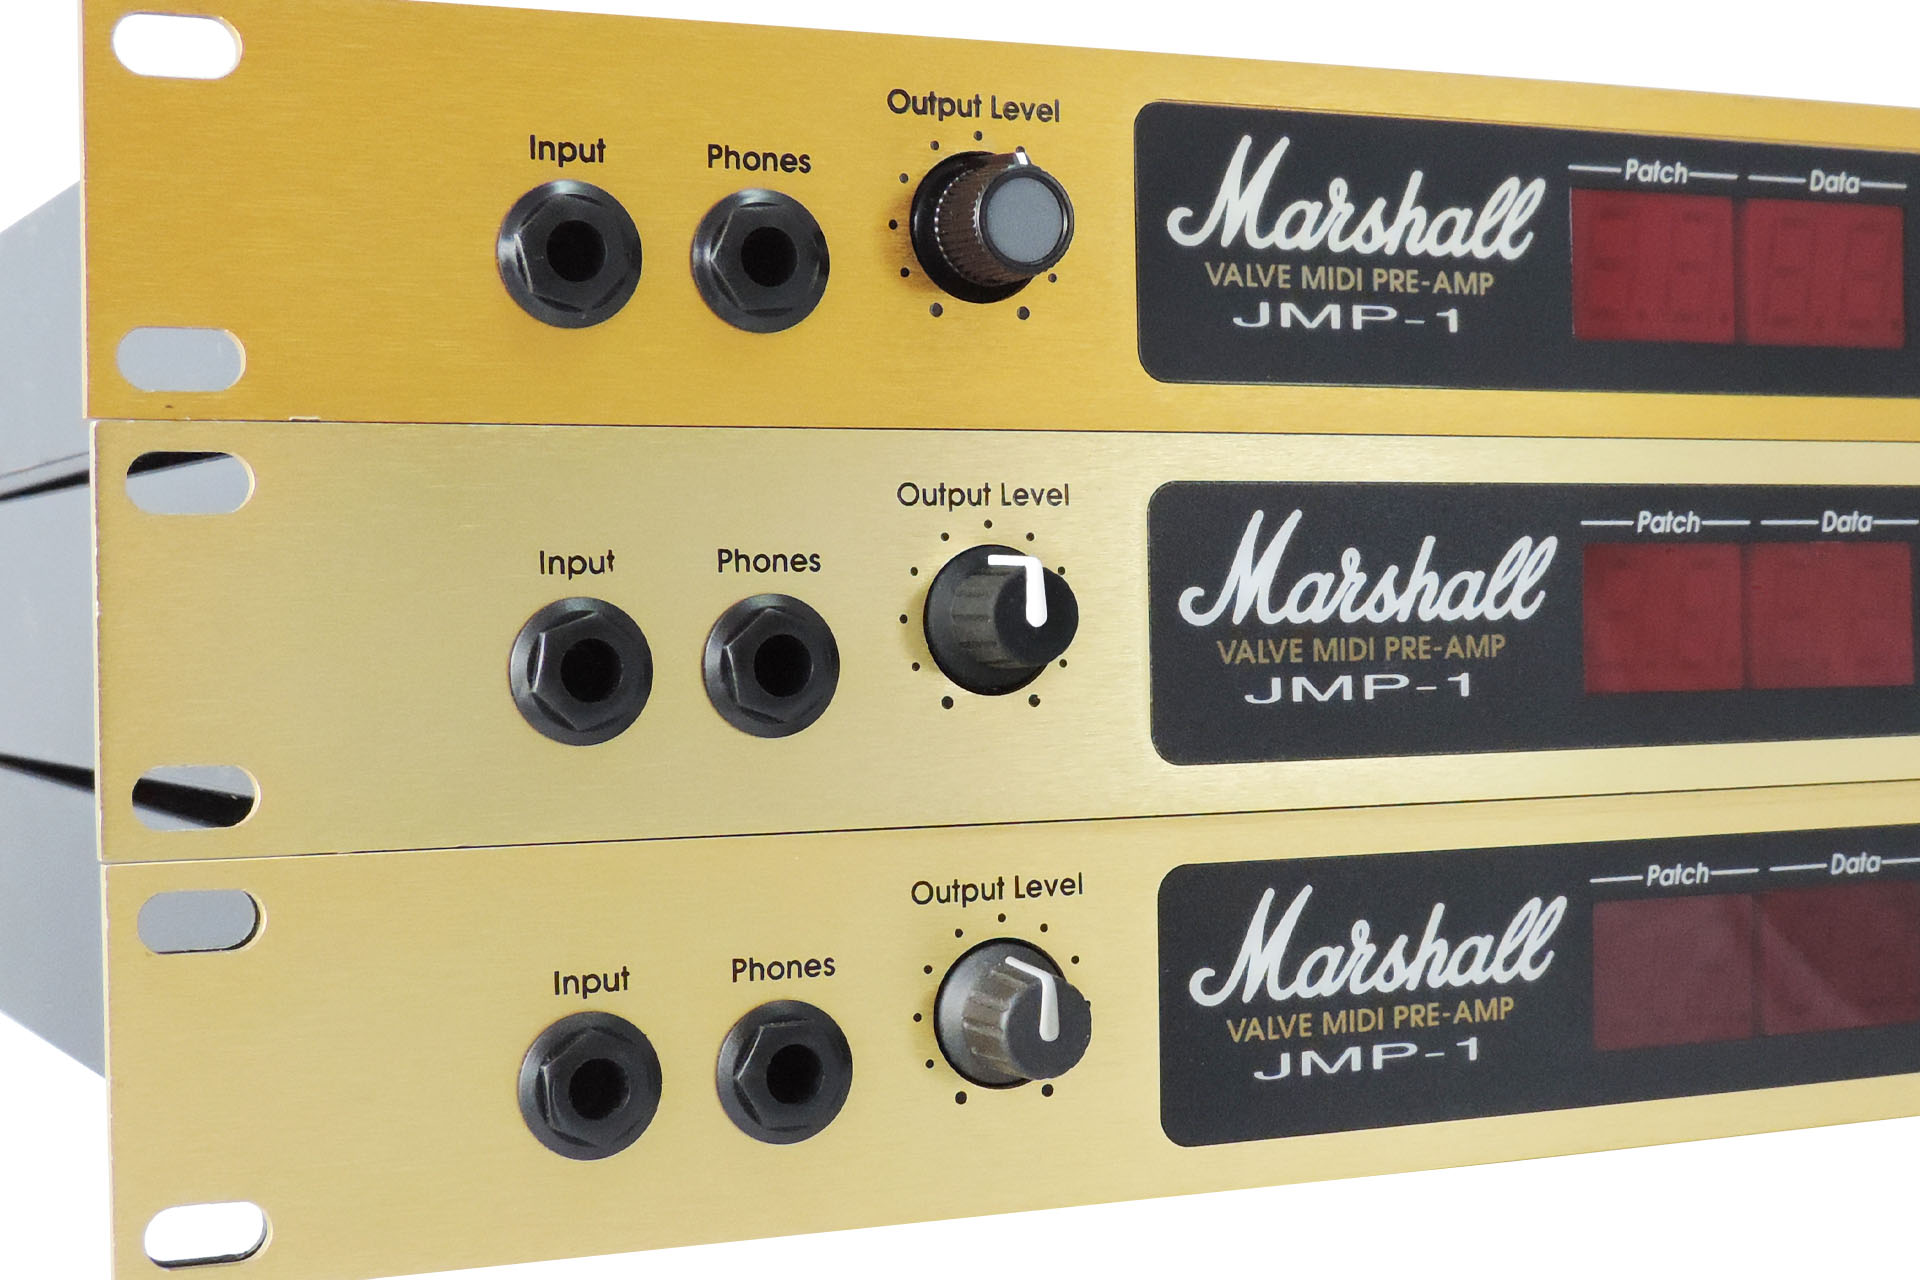
At the bottom is a JMP-1 with factory knobs, bezels and nuts. The JMP-1 in the middle, is fitted with my PERFORMACE set of knobs, bezels and nuts. The top JMP-1 is fitted with my STUDIO set.
At the moment I have three of my favourite MIDI valve pre-amps in for service and two of the customers have asked if I offer replacements for Marshall JMP-1 knobs, nuts and bezels.
Well too be honest, it wasn't easy. You see the knobs although cosmetically the same, have different shaft fittings. The volume pot knob for example fits a 6mm spline shaft and the data encoder knob fits a ¼-inch D-shaft. Trying to find a knob that has the same diameter as the original, preferably a similar height and colour-wise would look good on the front panel of a JMP-1 is a tall order. Of course if that knob isn't available in versions that fit the two types of shaft, it's useless.
Anyway, I persevered and came up to a couple of options. Having said that, one of them needs to be modified so as to fit the data encoder shaft.
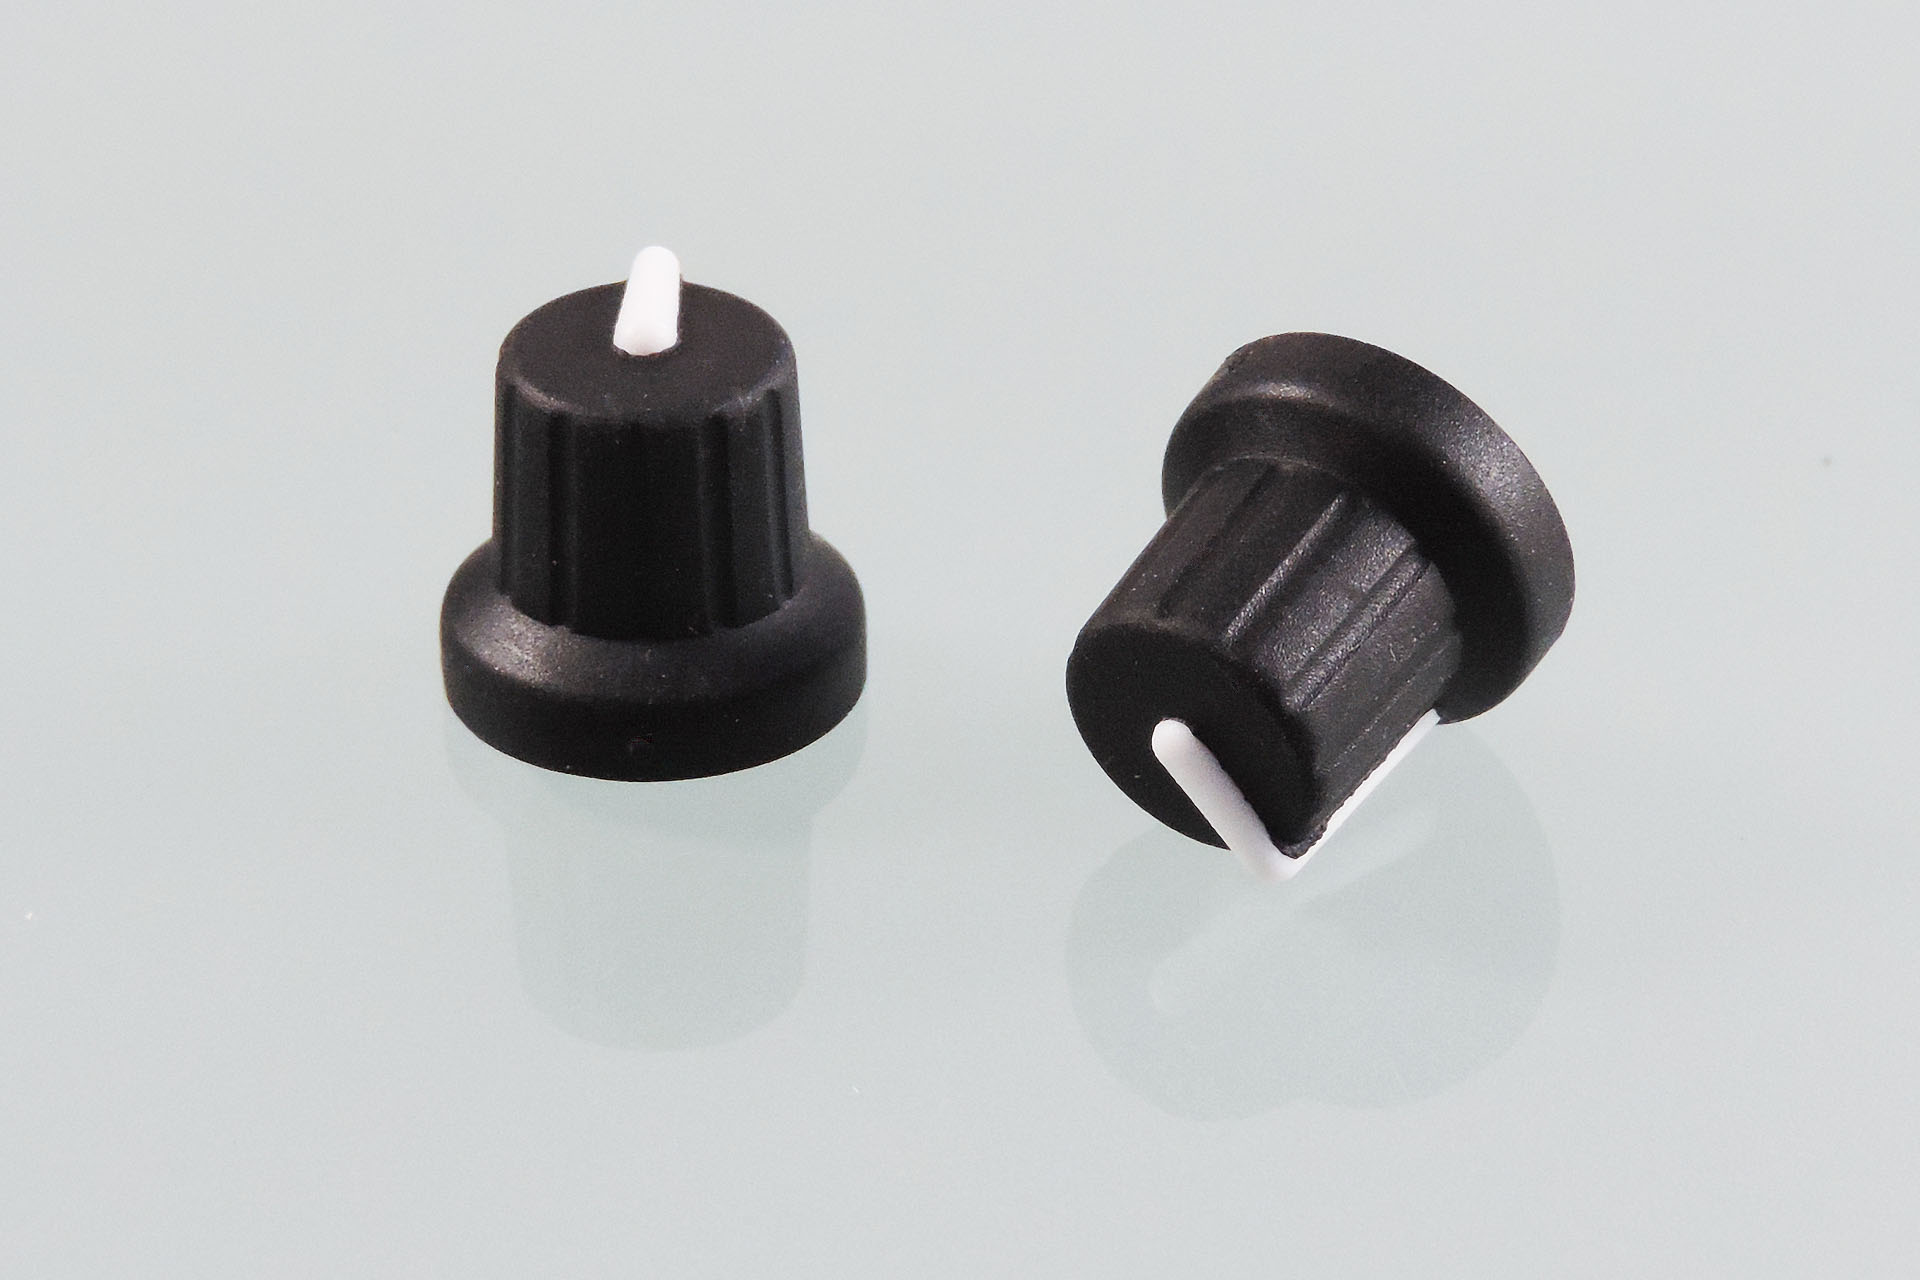
The PERFORMACE knob set looks very similar to the original and also has a similar rubber feel. It has a white position indicator instead of the grey line on the original. I personally think it's just easier to see.
Performance replacement knobs for the Marshall JMP-1
The STUDIO knob set is a little more posh and resembles knobs found on equipment like high-end mixing desks. It too has a white position indicator. Not as wide as that on the Performance knobs, the white position indicator on the Studio knobs, is a little more subtle.
Made of hard plastic, it's got quite a different, clean feel when compared to the original. Unlike the Performance knobs, it's not a simple push-fit but requires securing via a recessed allen screw. Very posh, indeed! 🙂
These are my STUDIO replacement knobs. I personally think they look stunning and so I've got them on my own JMP-1, LOL.
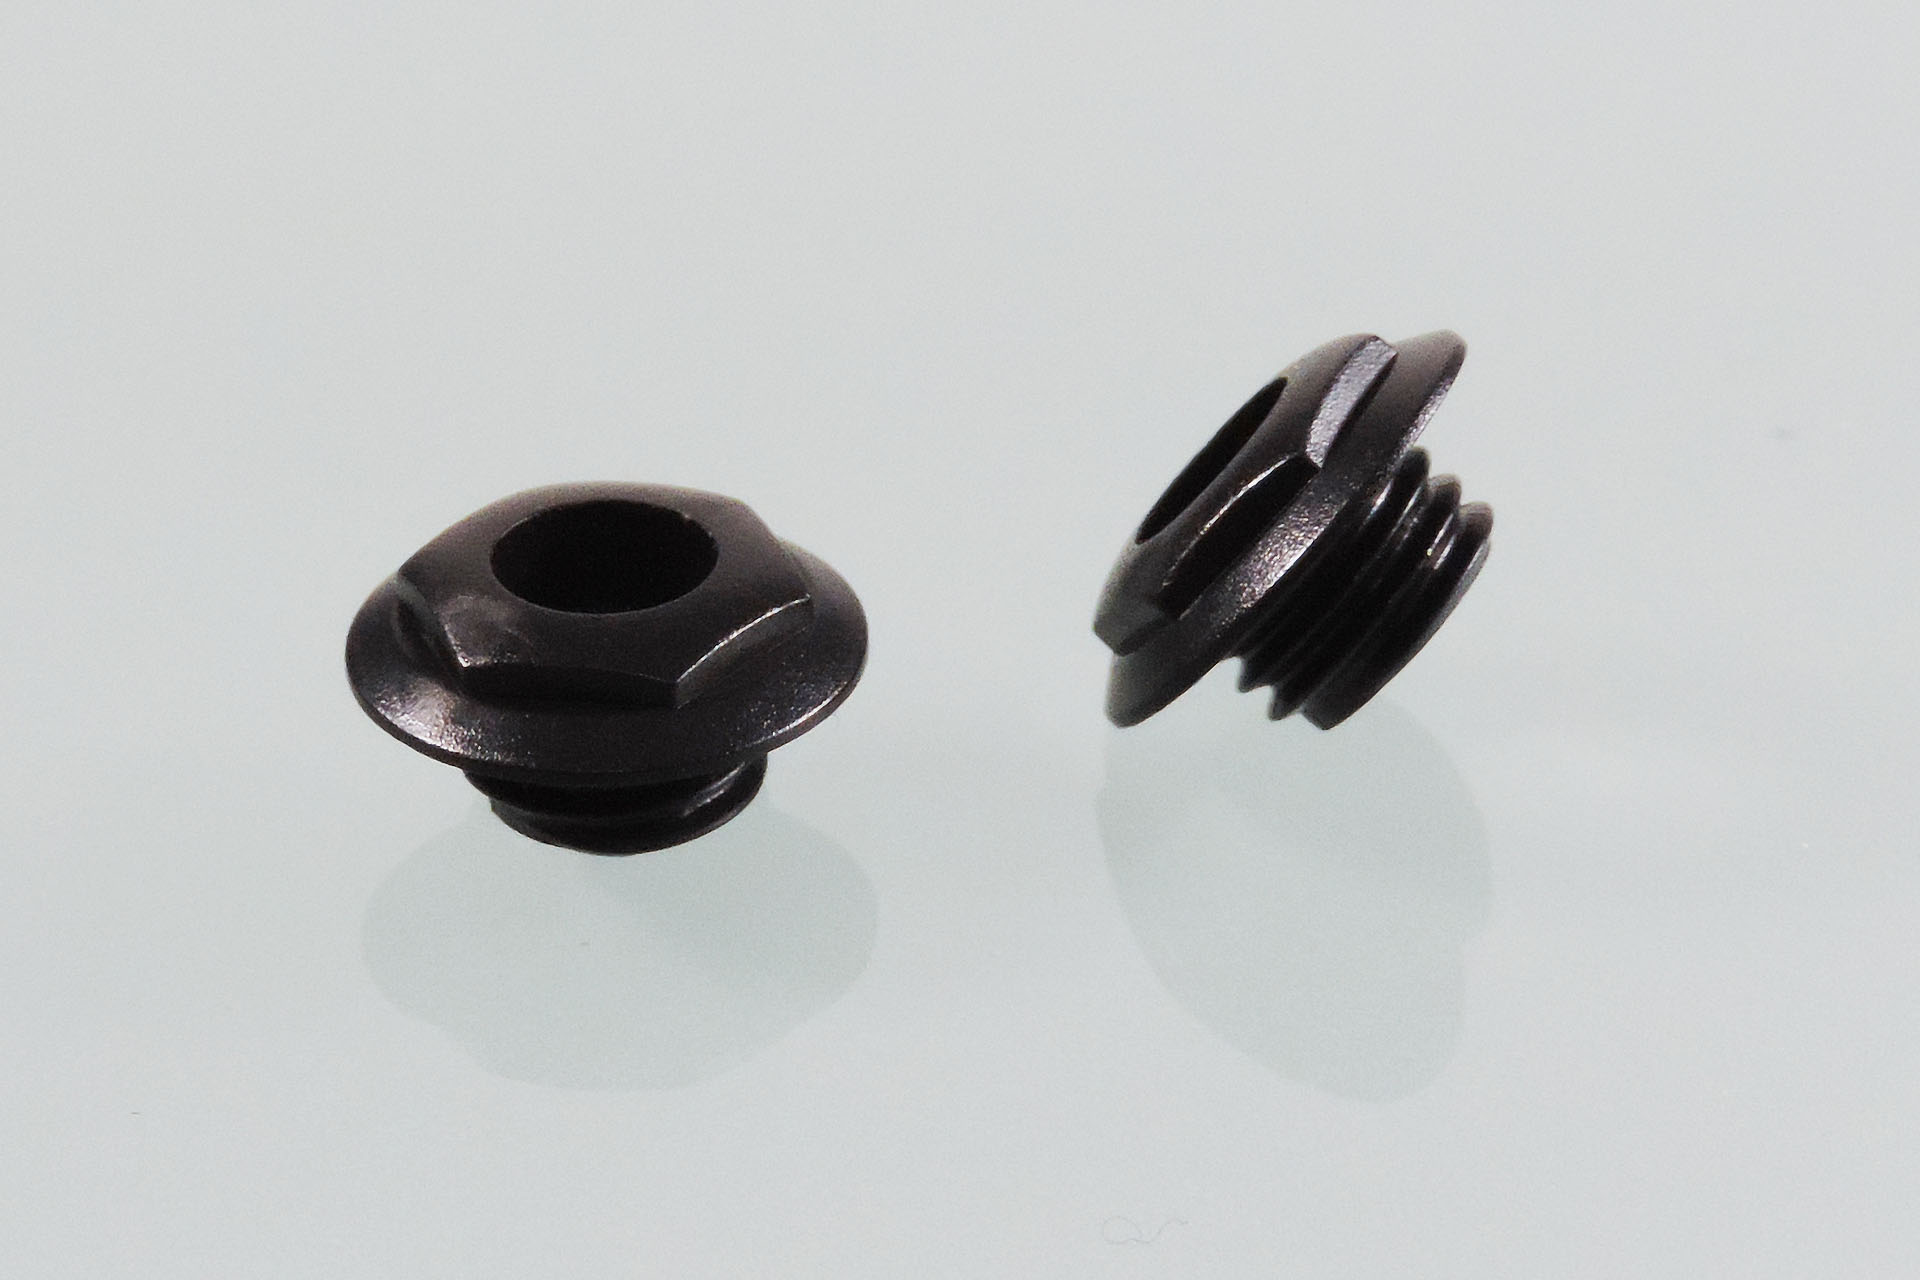
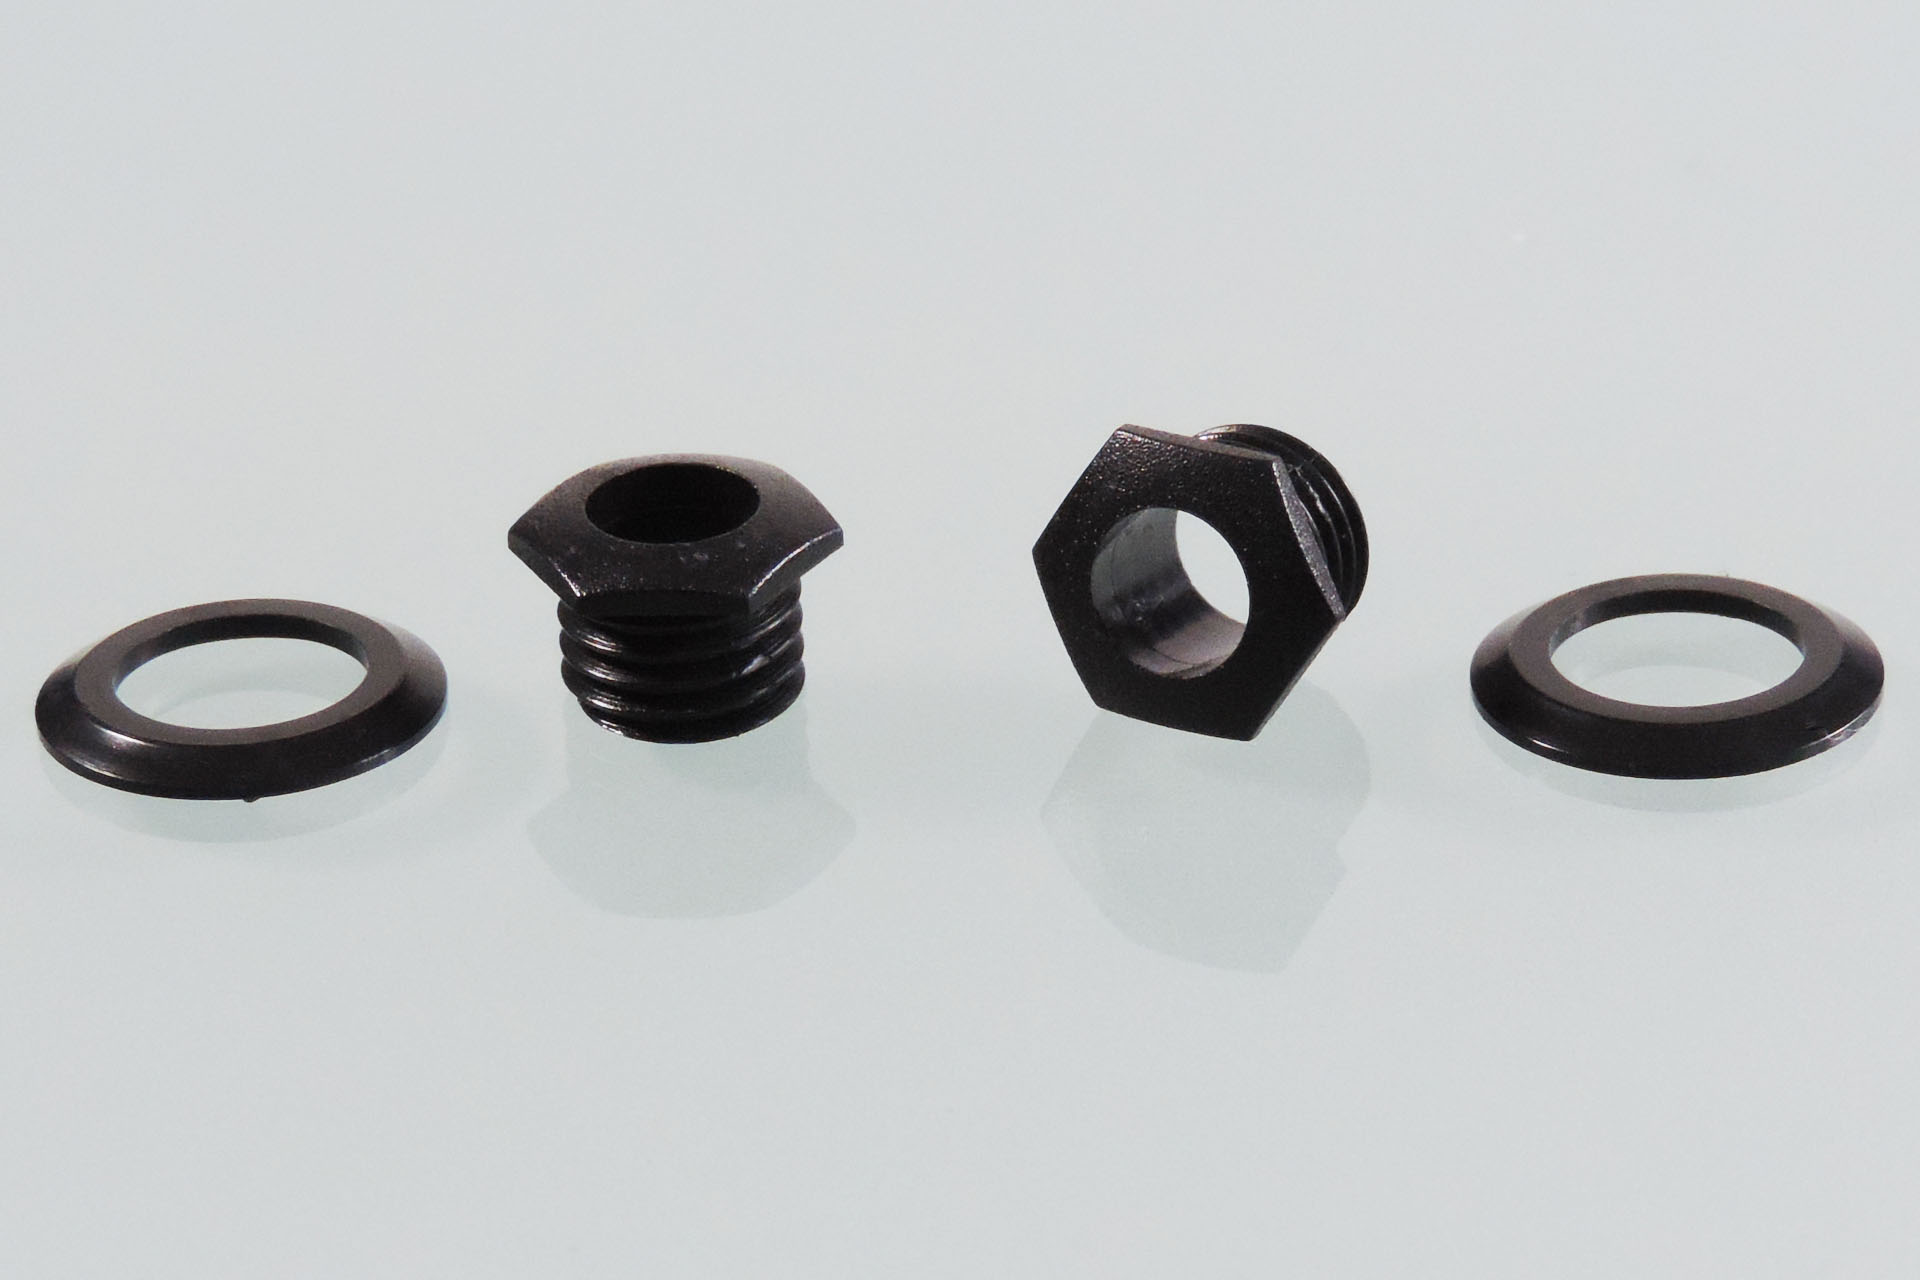
In 1992, Marshall used a slightly non-standard input socket and headphone output socket on the front panel of the JMP-1. When I say 'non-standard', of course they're both ¼-inch but the threading at the front isn't quite the same as many other similar style ¼-inch jack sockets and so 'normal' nuts don't fit properly. How annoying!
Again, I have managed to precure a bunch of these things. Available in two options, the first is a single high-quality moulding, in which the bezel is integral with the nut. Two of these are included in my Performance set.
Replacement single-piece PERFORMANCE nut and bezel for the Marshall JMP-1.
The second option has a separate bezel and nut. While the nut has a matt finish, the bezel is very slightly glossy. The combination looks pretty cool, in my humble opinion. These nuts and bezels are included in my Studio set.
My Studio package includes a pair of nuts and bezels as separate components. The slight difference in finish between the nuts and the bezels is an eye-catcher.
So if your JMP-1 is looking a bit sad 🙁 , please do check out my on-line store for my Performance and Studio replacement Marshall JMP-1 knobs, nuts and bezels.
Update - 22nd January 2021
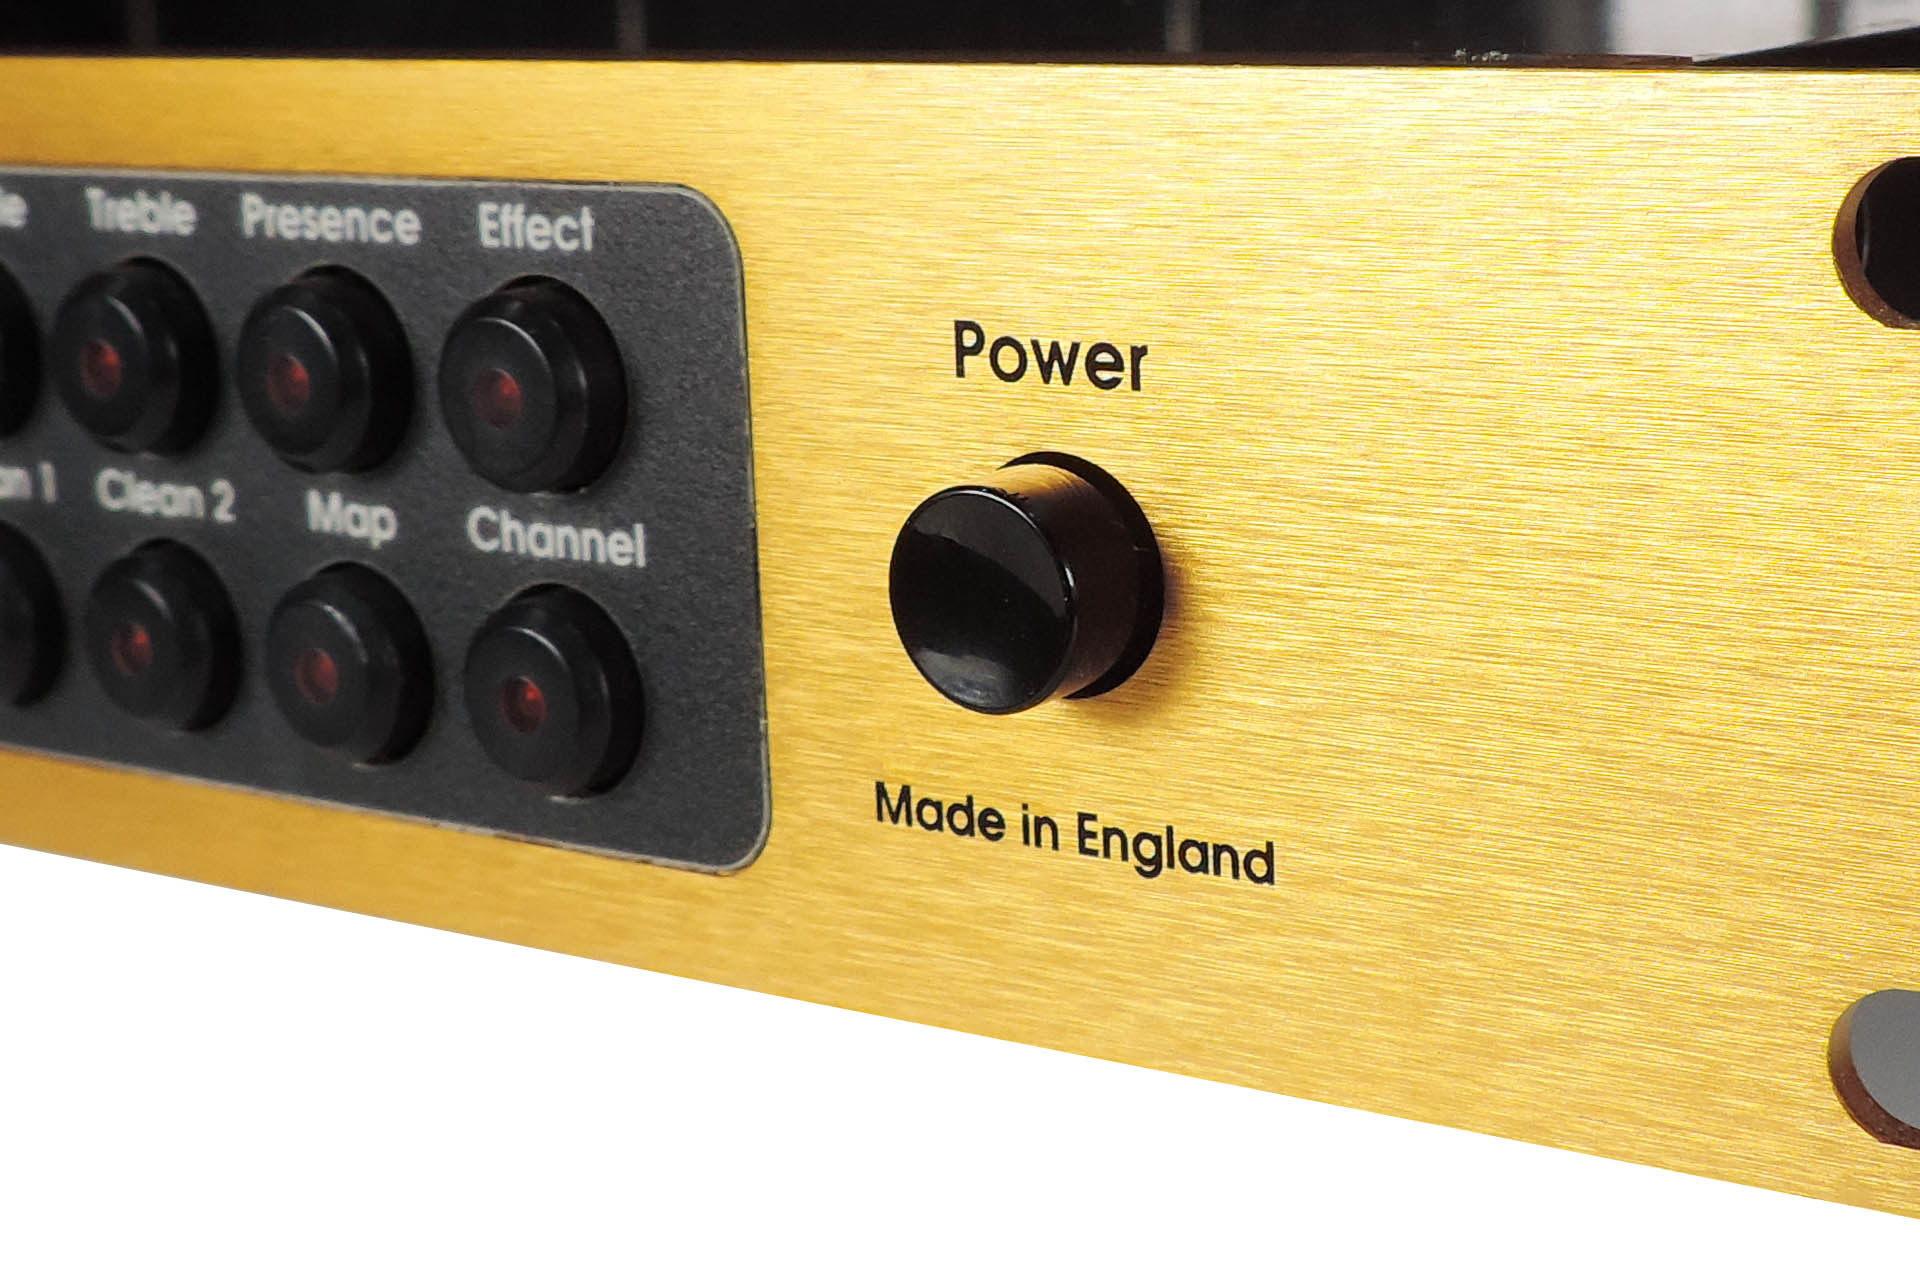
Wow! I've only just put up this post and I've already received e-mails from visitors asking why the top JMP-1 in the picture at the top of this post, is a different shade of gold, to the other two.
Not a trick of the light, it is indeed much darker, perhaps a golden gold as opposed to a white gold. This unit is much older than the other two and I'm guessing that Marshall changed the company that did the plating on the facias, some time after the first few production runs. Pure speculation but what else can I say? Looks good, though!
UPDATE - 17th October 2021
YES, YES, YES!!!!!! 😀 After many requests, I'm delighted to announce that I have finally found what I believe to be a suitable replacement for the Marshall JMP-1 power switch button. This item is now included in both the Performance and Studio kits.
Replacement power switch button for the Marshall JMP-1 is now included in both of my replacement knob and bezel kits.
On the back of the button is a square receptacle that mates with the front of the ON / OFF switch. To fit, all you have to do is line up the orientation of the button so that the receptacle is square to the JMP-1's front panel and then gently push, clicking the button on to the switch.
UPDATE - 9th February 2024
With so many bits 'n' pieces available for the JMP-1 and always thinking of new stuff to make for our favourite MIDI valve pre-map, I decided to make a category just for the Marshall JMP-1 in my on-line store. You can check it out here.
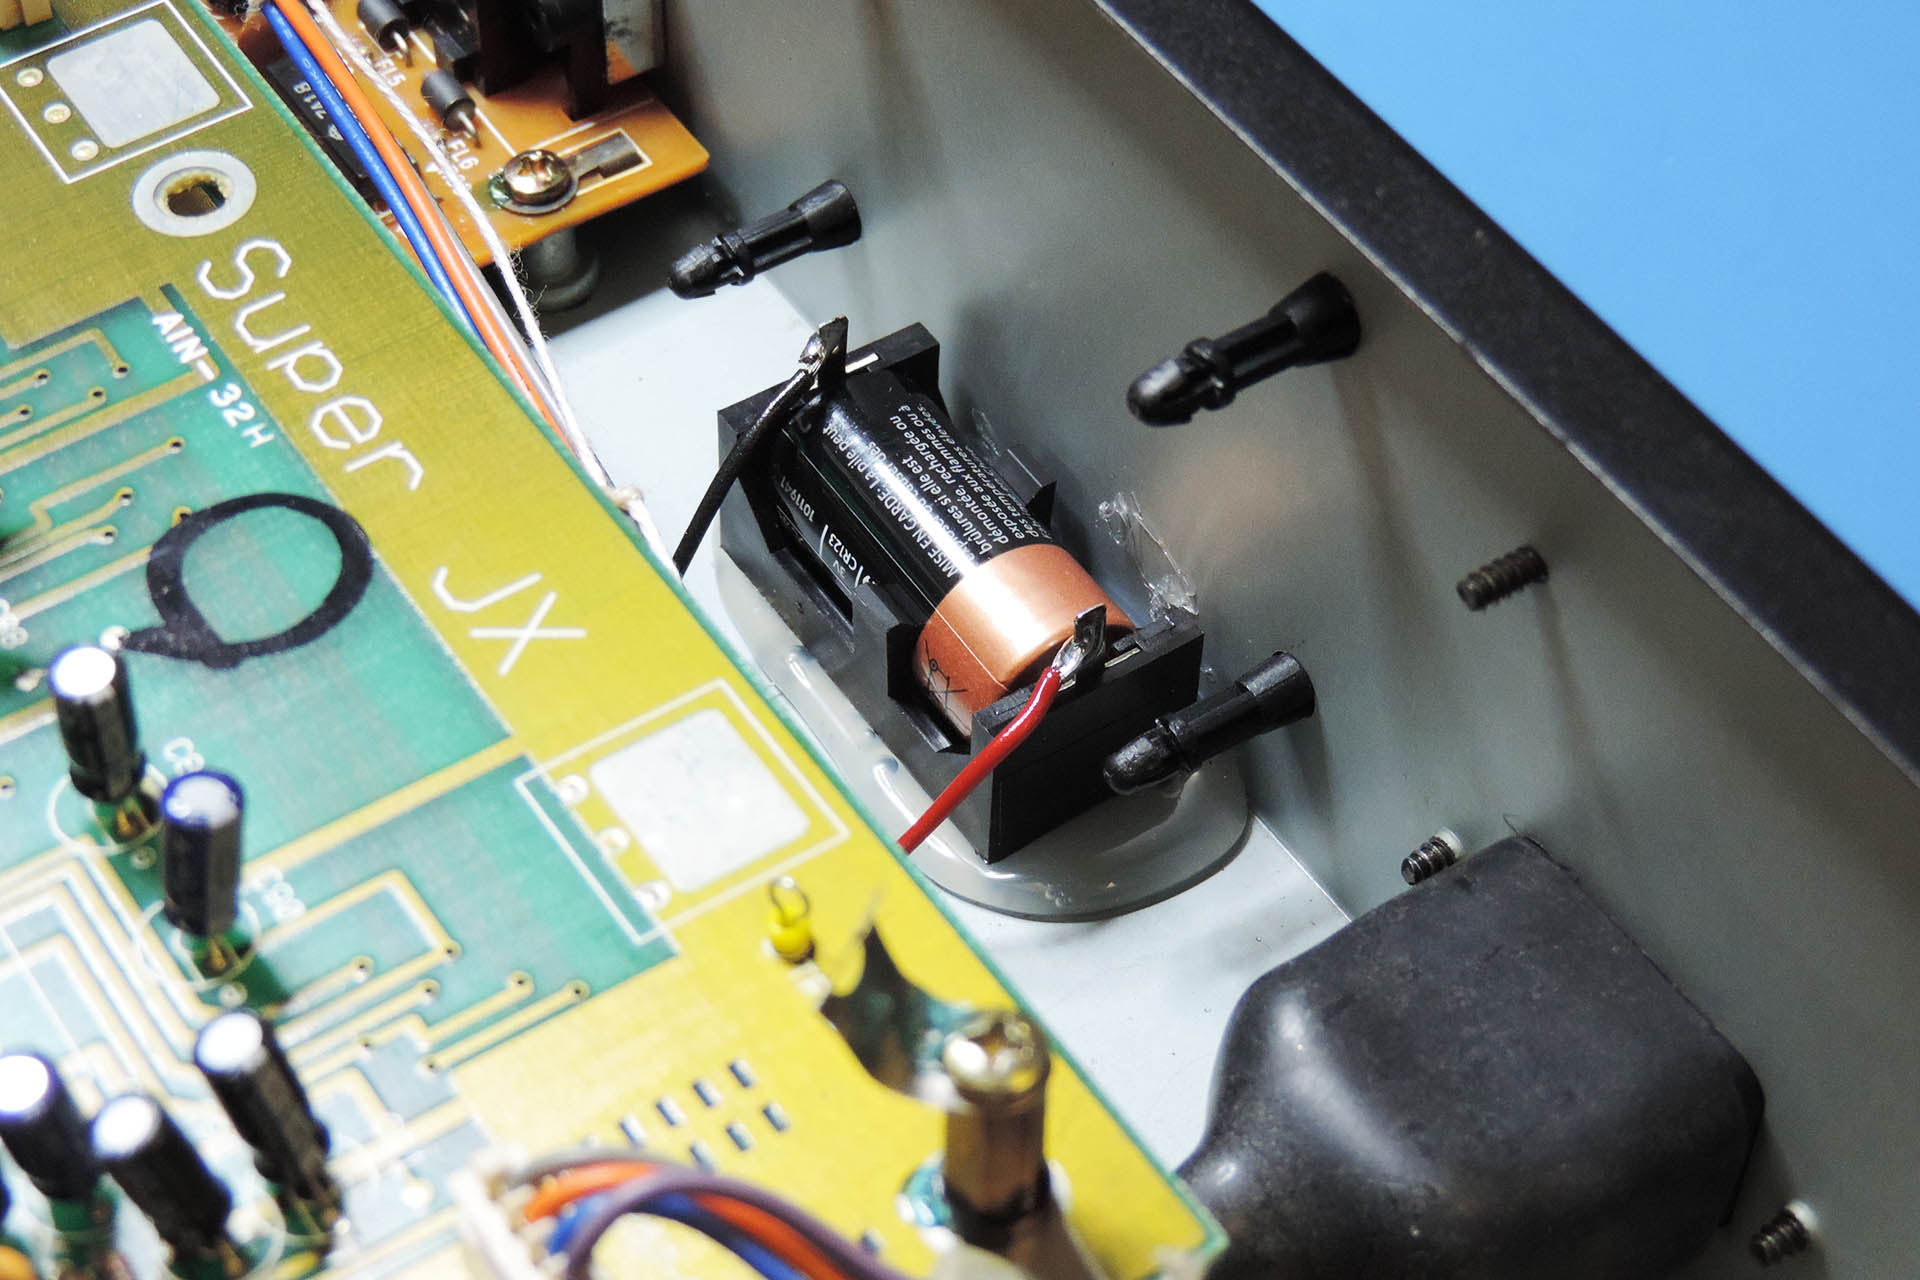
Large capacity CR123A battery mounted off-board in a Roland MKS-70.
My Live Forever back-up battery mod does more than just extend memory back-up battery life. It's not rocket science. It's not even particularly clever but an incredibly simple upgrade to many synthesisers, sound modules and effects processors, this upgrade offers the following advantages:
Reduced risk of battery leakage.
Reduced risk of damage to sensitive electronics as a result of battery leakage.
Easier replacement of memory back-up battery.
Easier measurement of memory back-up battery voltage.
Higher capacity battery means that it'll probably outlive you!
So just about all digital equipment has some sort of mechanism to provide memory retention. Your equipment has patches, right? So those patches are 'remembered' by your gear after power is removed, with the use of a memory back-up battery.
Newer equipment doesn't always have a memory back-up battery. Instead, memory is held within what is known as non-volatile RAM.
Anyway, older stuff does have a memory back-up battery and if left unchecked, the consequences can be devastating. I recently did a post on a gorgeous Sequential Circuits Prophet 5 Rev 2 that hadn't been touched for over thirty years. During that time, the back-up battery had degraded and had in fact leaked all over the CPU board. It's going to take me months to sort out the mess and that's going to be expensive!
After thirty years, this battery in a Sequential Circuits Prophet 5 is more than just flat!
My Live Forever battery mod doesn't just involved replacing the original battery with a larger type. If possible, I try to mount the holder for the new battery, usually a lithium CR123, directly on to the chassis and off any PCB. In the event that the battery does leak, then it won't damage any circuitry.
Of course mounting the new battery on to the chassis isn't always possible. The Marshall JMP-1 is a good example. There are two versions of the JMP-1. One has a case with a little room to allow for a CR123 battery holder to be mounted to the metal. The other and more popular version doesn't. In situations where the battery can't be mounted off-PCB, I simply have to find the best place to put it.
MEMORY BACK-UP BATTERY TYPES
Most vintage equipment that uses a memory back-up battery does so with something like a CR2030, CR2032 or similar type 'coin' battery that's soldered to a PCB and located close to the RAM (memory chip). This isn't always the case, though. The Roland MKS-80 for example, used a CR-1/3N battery as pictured below.
My Live Forever battery mod involves replacing the original battery with a much higher capacity CR123 type cell which is also small enough to fit into many situations.
My Supernova replacement switched-mode power supply for the Roland Juno-106 comes with my Live-Forever memory back-up battery mod on-board.
The default battery chemistry is lithium or rather lithium manganese dioxide (LiMnO2). They're cheap, readily available and very reliable.
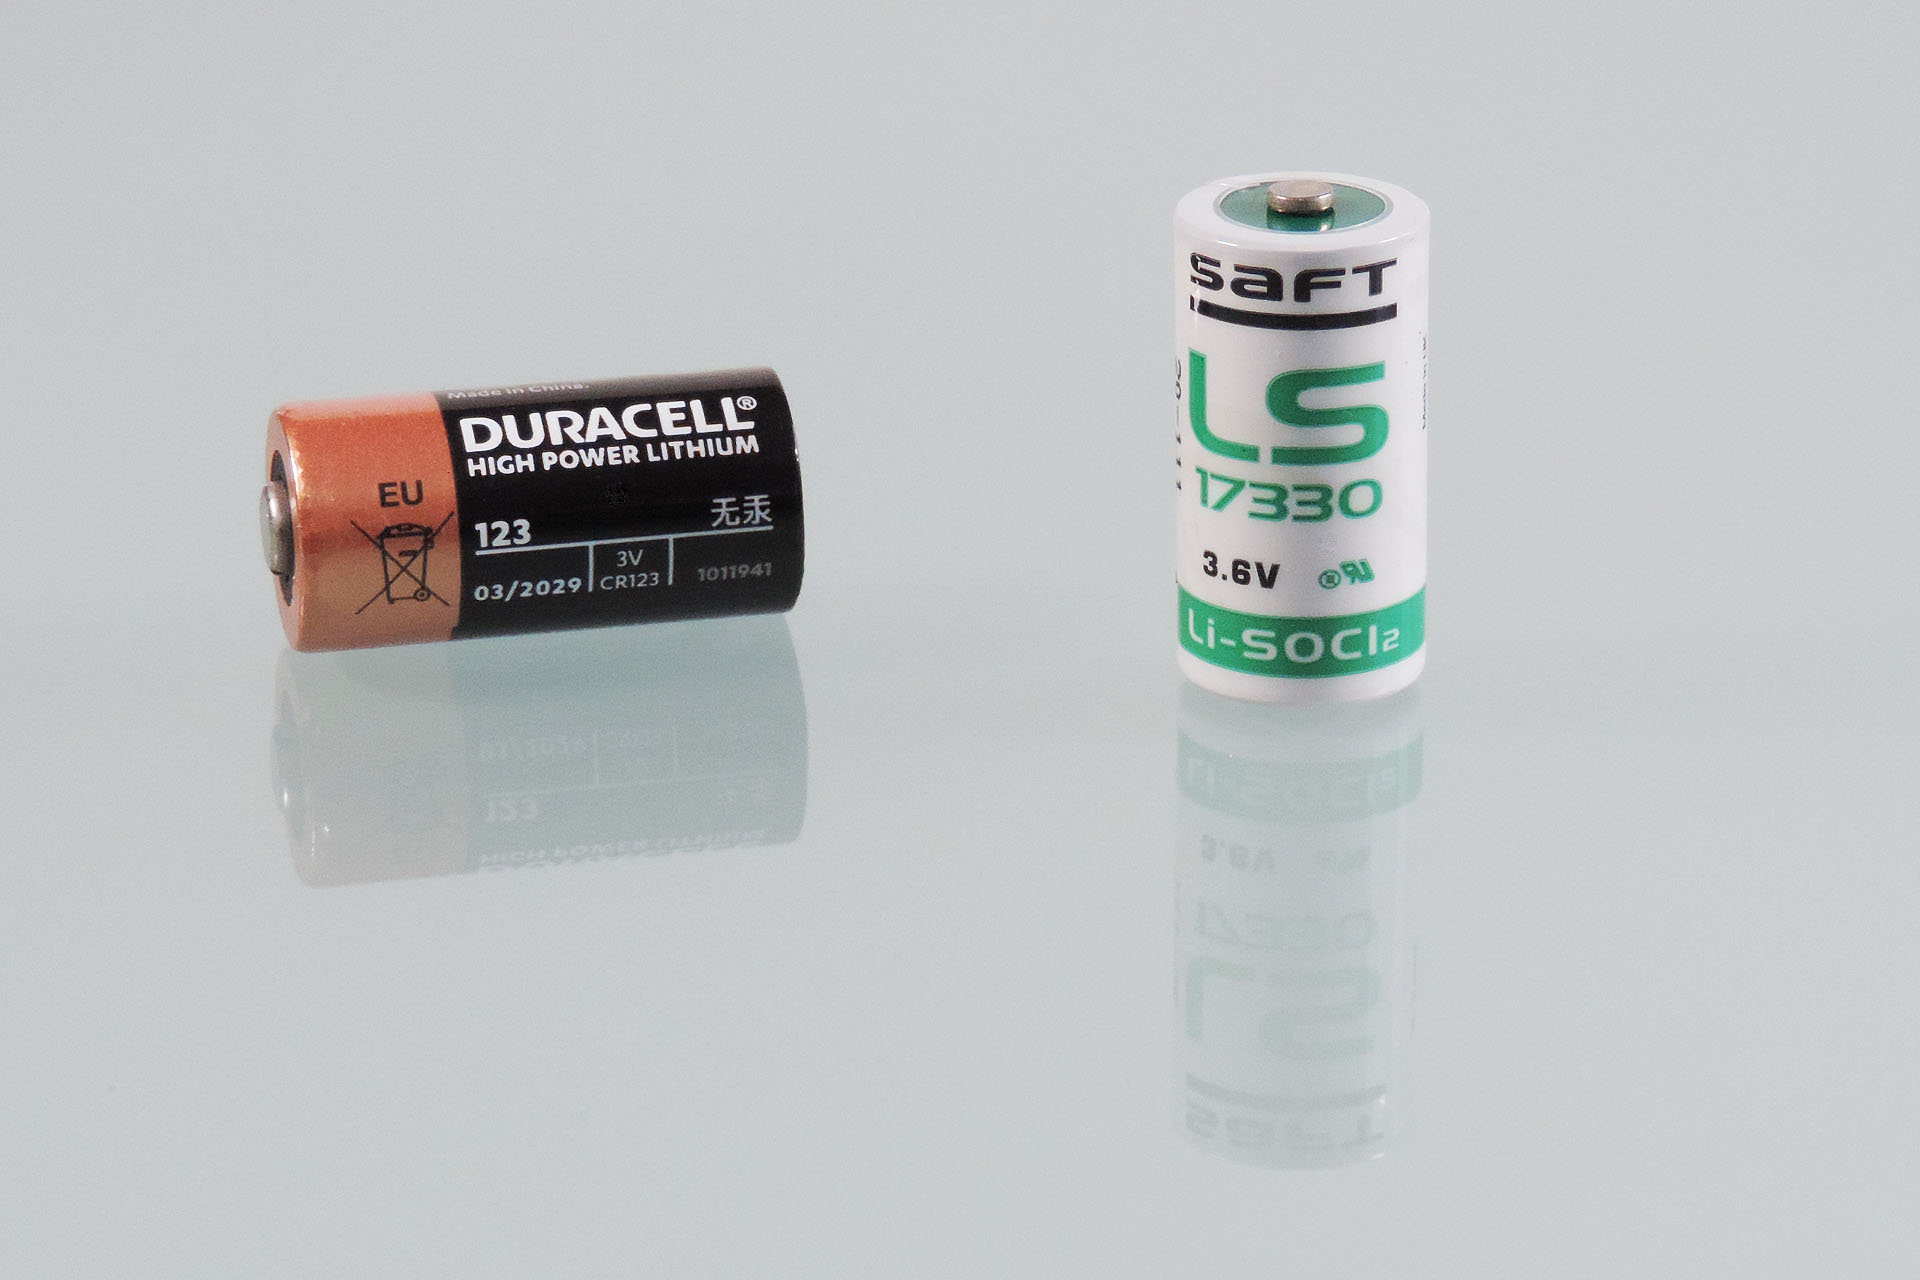
Lithium CR123s however, aren't the only option that can be used for replacing the original memory back-up battery. While sticking with the CR123 form-factor, I'm a big fan of Lithium thionyl chloride batteries (LiSOCl2), for example. Designed specifically for very low-current, very long-life applications, they're ideal for the job. They are however, more expensive and more difficult to procure.
On the left is a standard Duracell manganese dioxide (LiMnO2) CR123 battery. On the right is the super performance Saft Lithium thionyl chloride batteries (LiSOCl2) CR123 battery.
Finally, a long time ago, I experimented with clip-on retainers that fit over the CR123 battery holder, thereby offering more physical security to the actual battery.
Well, apart from having installed my Live Forever battery mod into countless machines over the years, all of my own gear is fitted with my mod. In over thirty years, I have NEVER experienced a battery being dislodged from the battery holder and feel that any impact that would be strong enough to do that, would most likely seriously damage the machine that it's fitted to!
The main reason I don't supply the retention clip however, is that they have a very (VERY) tight fit. I'm concerned that if the battery ever does need to be removed, damage to the unit may occur while simply trying to remove the clip! 🙁
Anyway, my Live Forever memory back-up battery mod is available for just about any synthesiser, sound module or effects processor so don't hesitate to contact me if you have any questions. Don't forget, it does more than just extend the memory back-up battery life in your favourite vintage gear. It'll give you peace of mind too!
In the meantime, if you'd like to learn more about lithium manganese dioxide and Lithium thionyl chloride batteries, please check out these links:
I often get asked about the memory back-up battery in the Marshall JMP-1 and with soldered batteries not really being in fashion anymore, replacements are difficult to get hold of. I therefore decided to knock up a small PCB that mounts into the original battery location but which has a CR2032 clip. This allows for easy battery changing with a standard (you guessed it) CR2032. Measuring the voltage on the battery is a little easier, too. 🙂